This lab will step through the key elements in setting up a DevOps pipeline for Azure using the DevOps tools for Azure - Visual Studio Team Services (VSTS).
Background information
- Preparing for the lab
- Creating the project
- Continuous Integration
- Create an Azure Web App
- Continuous Deployment
- Infrastructure as Code
- Automated Testing with Selenium
- Monitoring with Application Insights
For this lab you will require:
- A Visual Studio Team Services (VSTS) account (free)
- An Azure subscription (your own or a free trial)
- Visual Studio 2017 installed (optional)
Use the same account (login/email and password) for both VSTS and Visual Studio.
VSTS supports any app and doesn't require the use of Visual Studio, .NET or other Microsoft languages. At the bottom of this page there are links to labs that work through implementing DevOps with Node, Java, Eclipse, IntelliJ and Docker.
If you are a student you can create an Azure Student account by completing the forms at these links:
If you don't have one, create a VSTS account. Guidance on creating an account
- Open a browser and navigate to your VSTS account https://youraccountname.visualstudio.com.
- In your VSTS account select New Project.


You now have a VSTS team project. The next step is to create a web application.
-
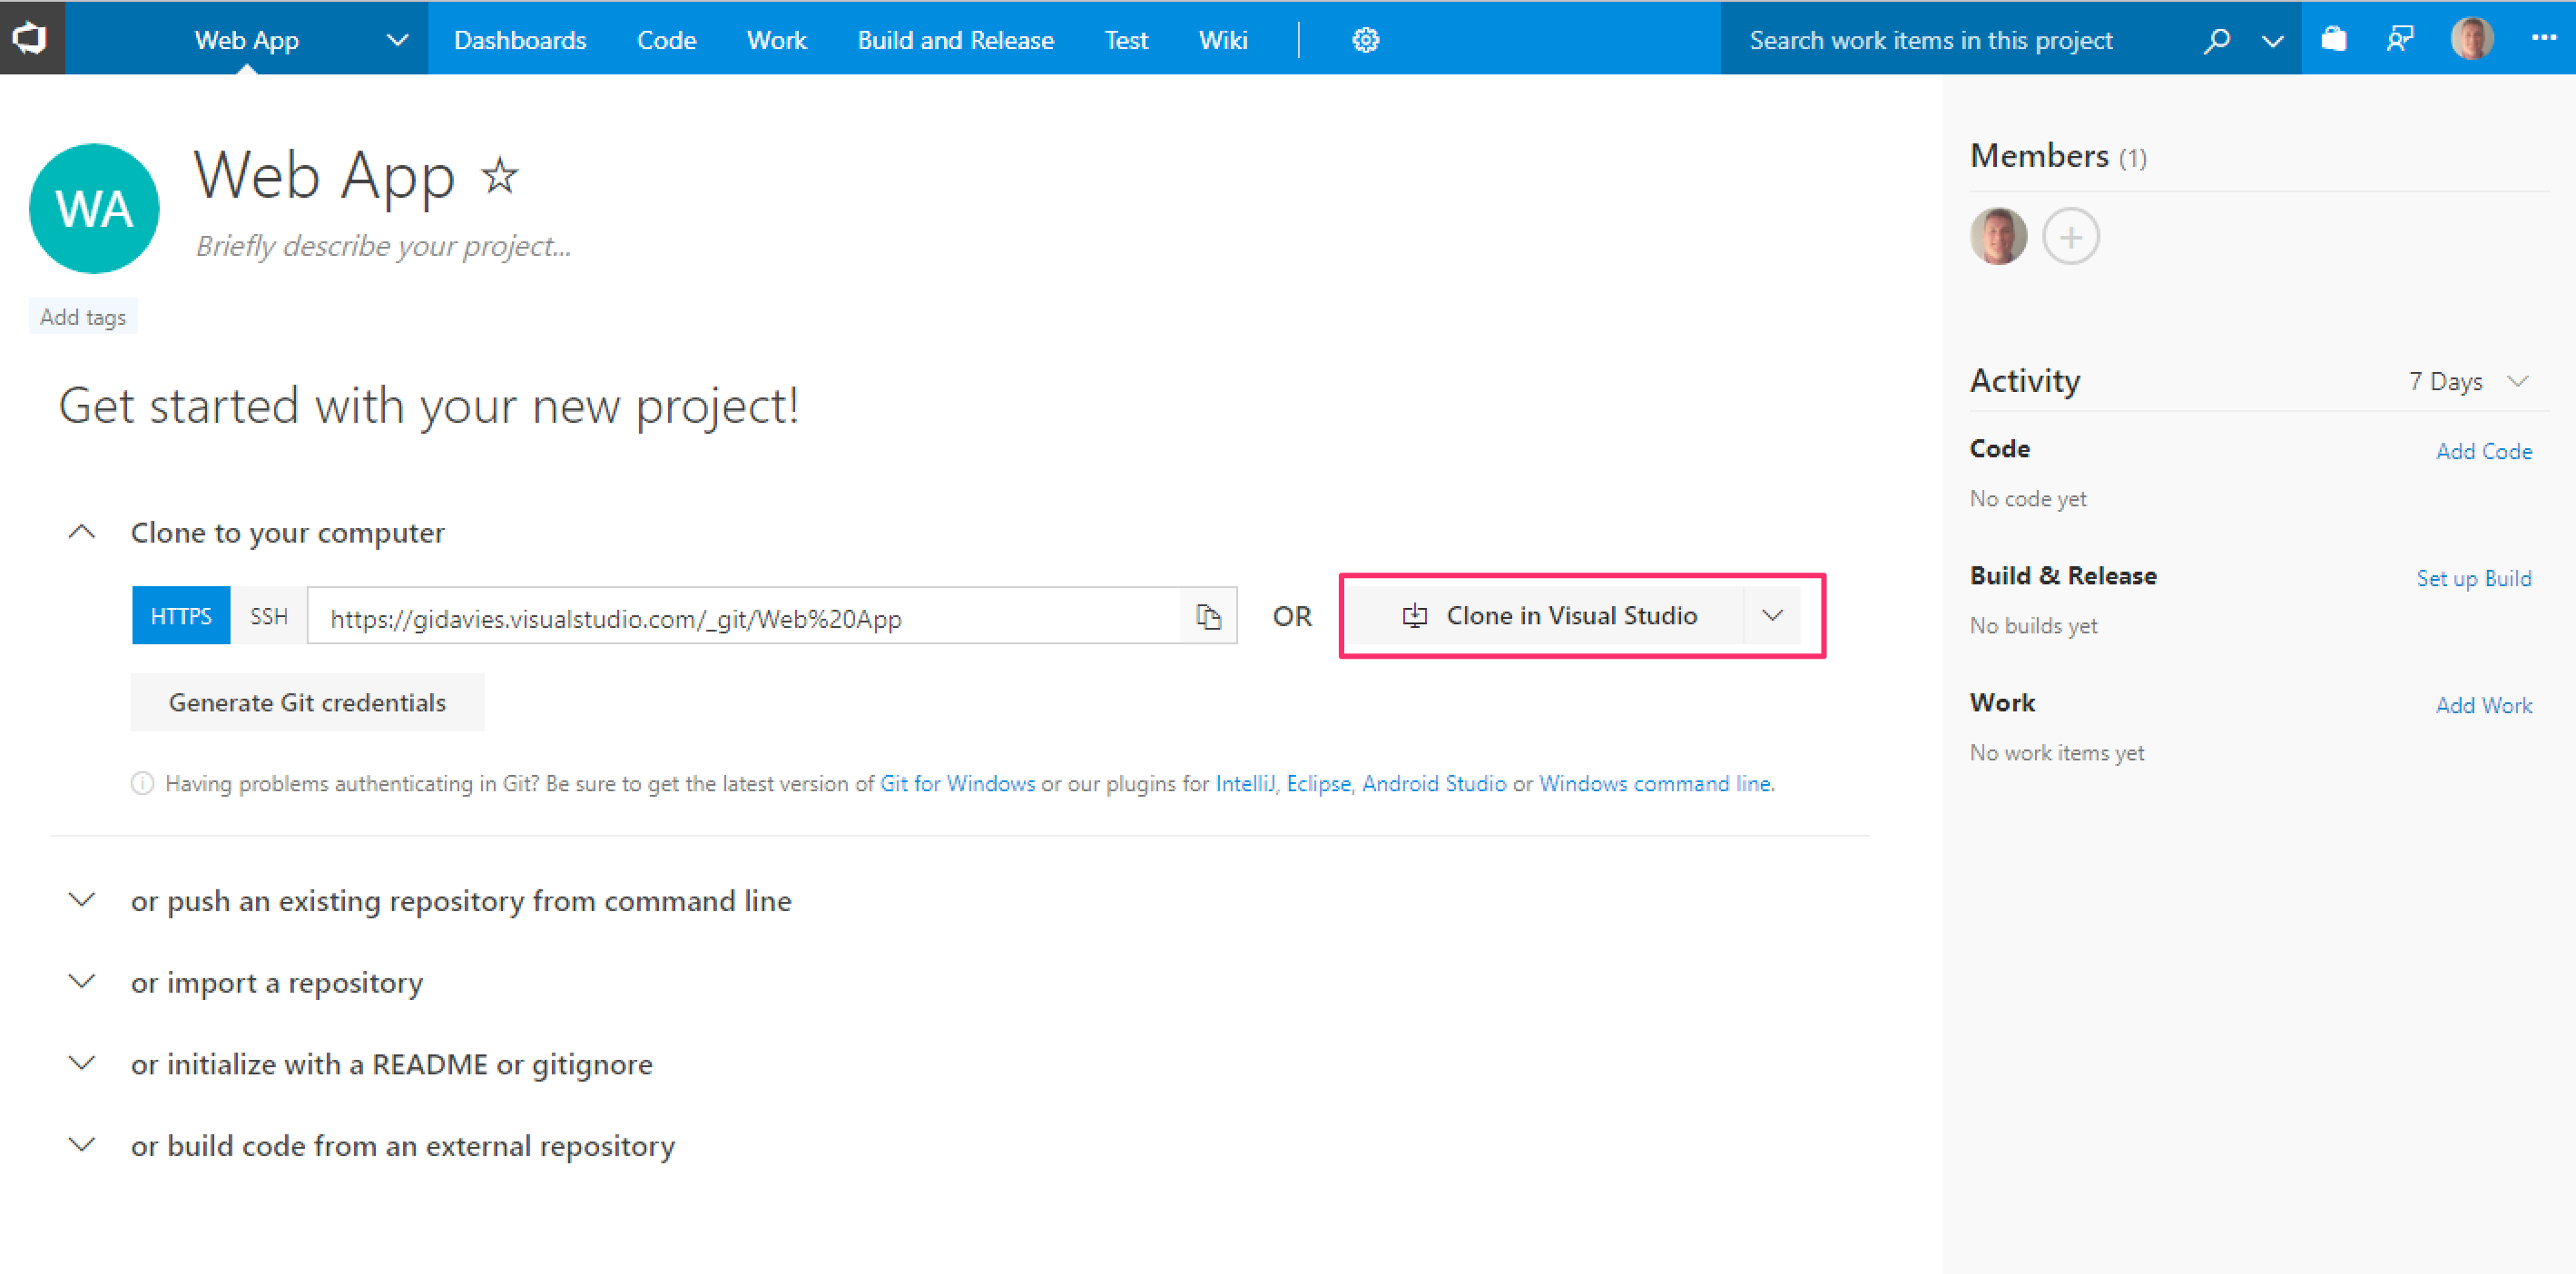
To clone the (empty) Git repository into Visual Studio there are two main options - cloning from within the browser or from within Visual Studio.
- Click on the Clone in Visual Studio button.
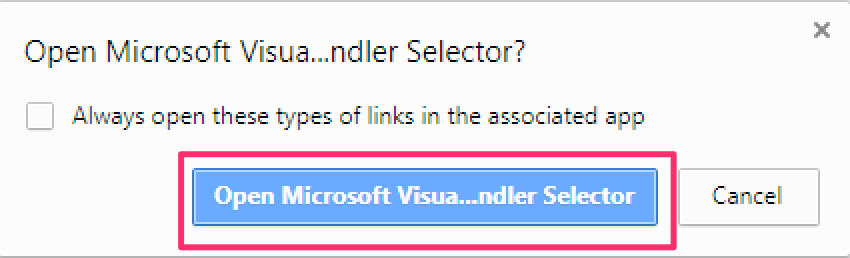
- You may be prompted to confirm that you want to open Visual Studio (exact look and feel will depend on the browser you're using). If so, agree to open Visual Studio.
- Visual Studio will then prompt to clone the VSTS remote Git repo to your local machine. Change the local path as required and then click Clone.
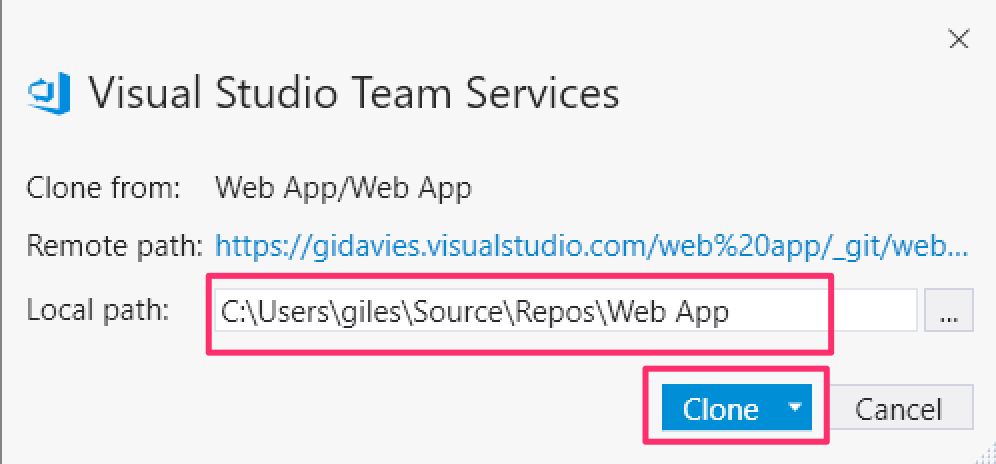
If this doesn't work then follow the Cloning from within Visual Studio steps.
- Open the Team Explorer view (bottom left hand side next to the Solution Explorer). Then select Manage Connections and Connect to Project.
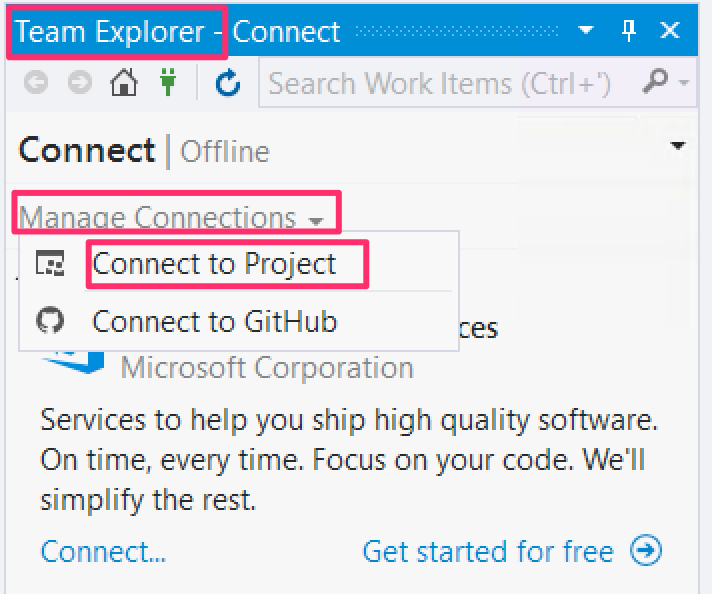
- Select the Web App project (you may only have one project listed) expand it to show the Web App repository and then click Clone.
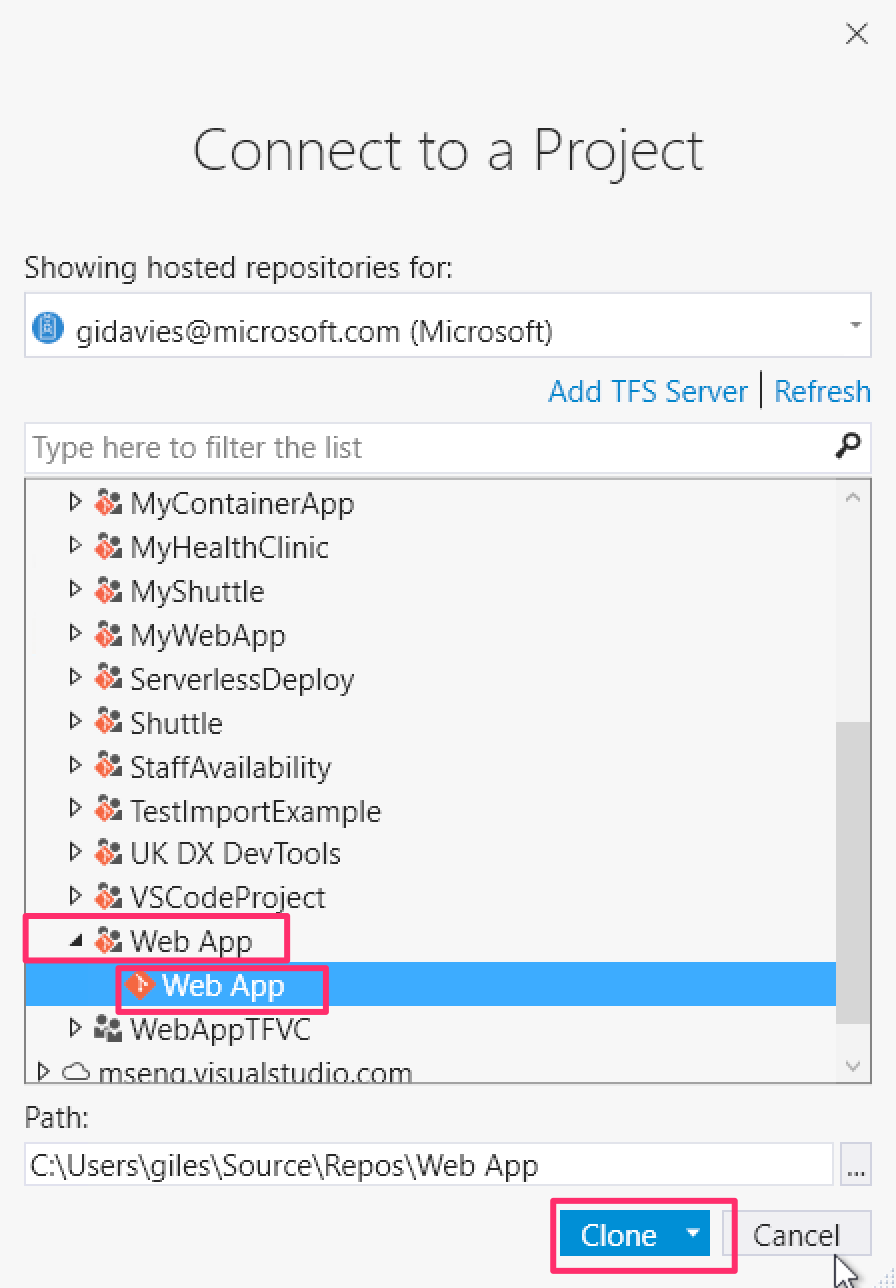
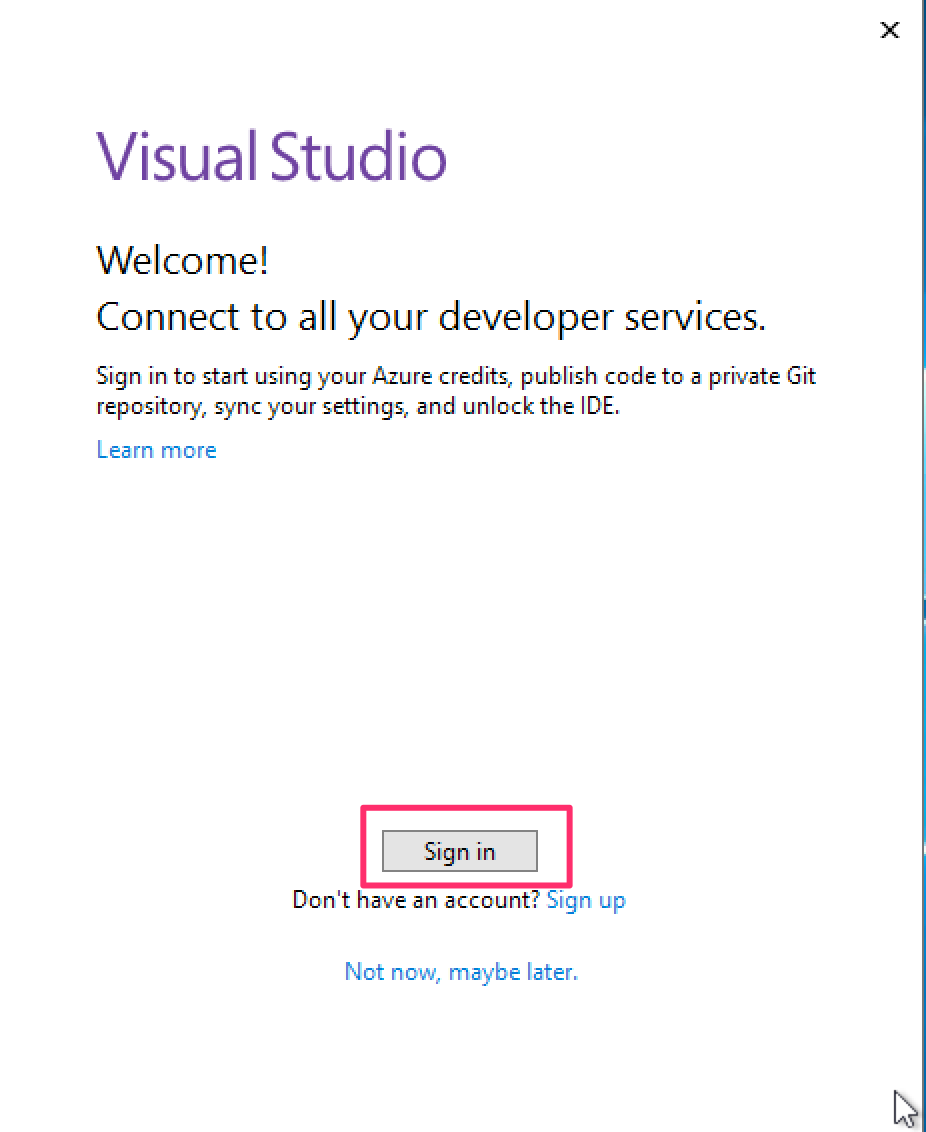
If you haven't used Visual Studio on the machine before you will be prompted to sign in when Visual Studio starts. Sign in with the account that you are using for VSTS.
-
If you now open the Team Explorer (bottom right hand corner) you will see that the repository has been cloned succesfully.


You now have a web application. The next step is to add the application to Git so that it is under source control.
- In the Visual Studio Team Explorer, select Changes.


You now have a web application, committed to source control in VSTS. The next step is to add Continuous Integration to the VSTS project.
Optional: Create a new Dashboard in VSTS:
- In your VSTS project, select Dashboard and then New:
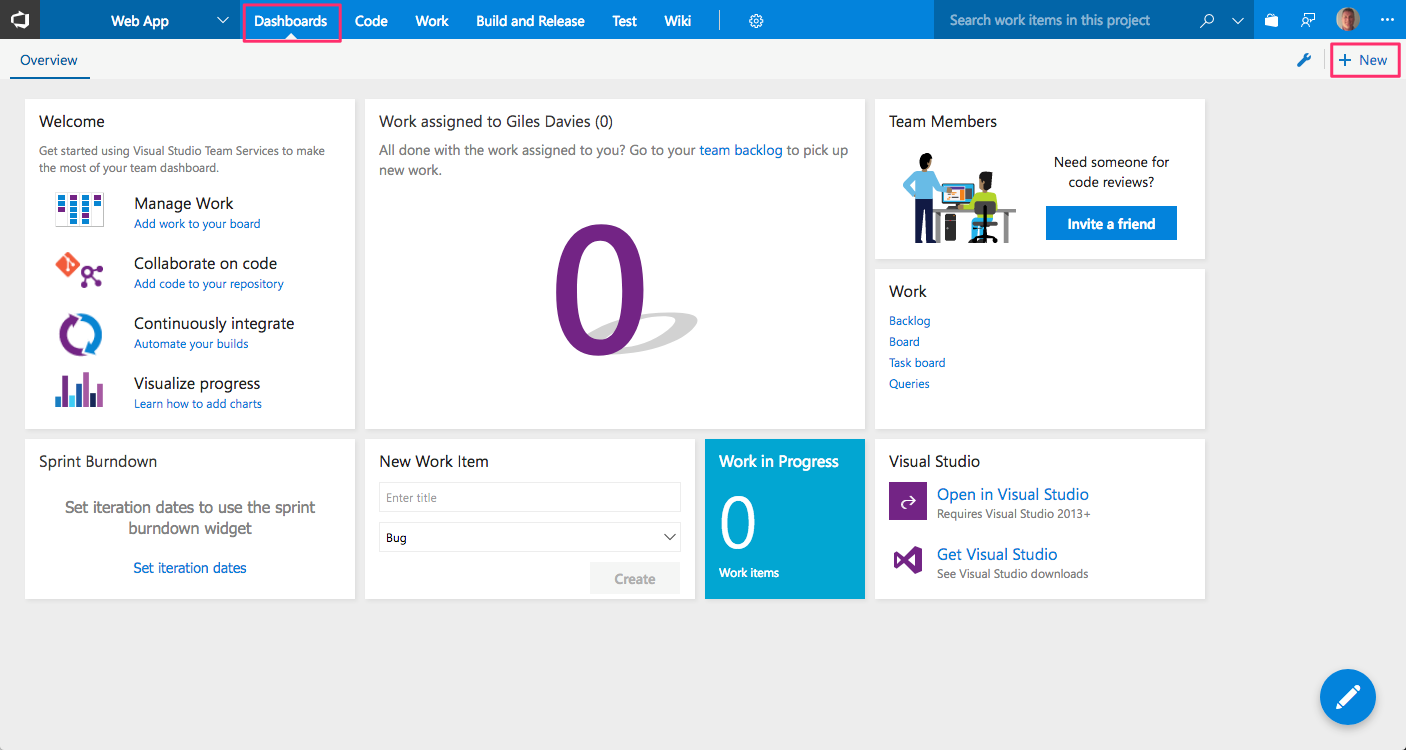

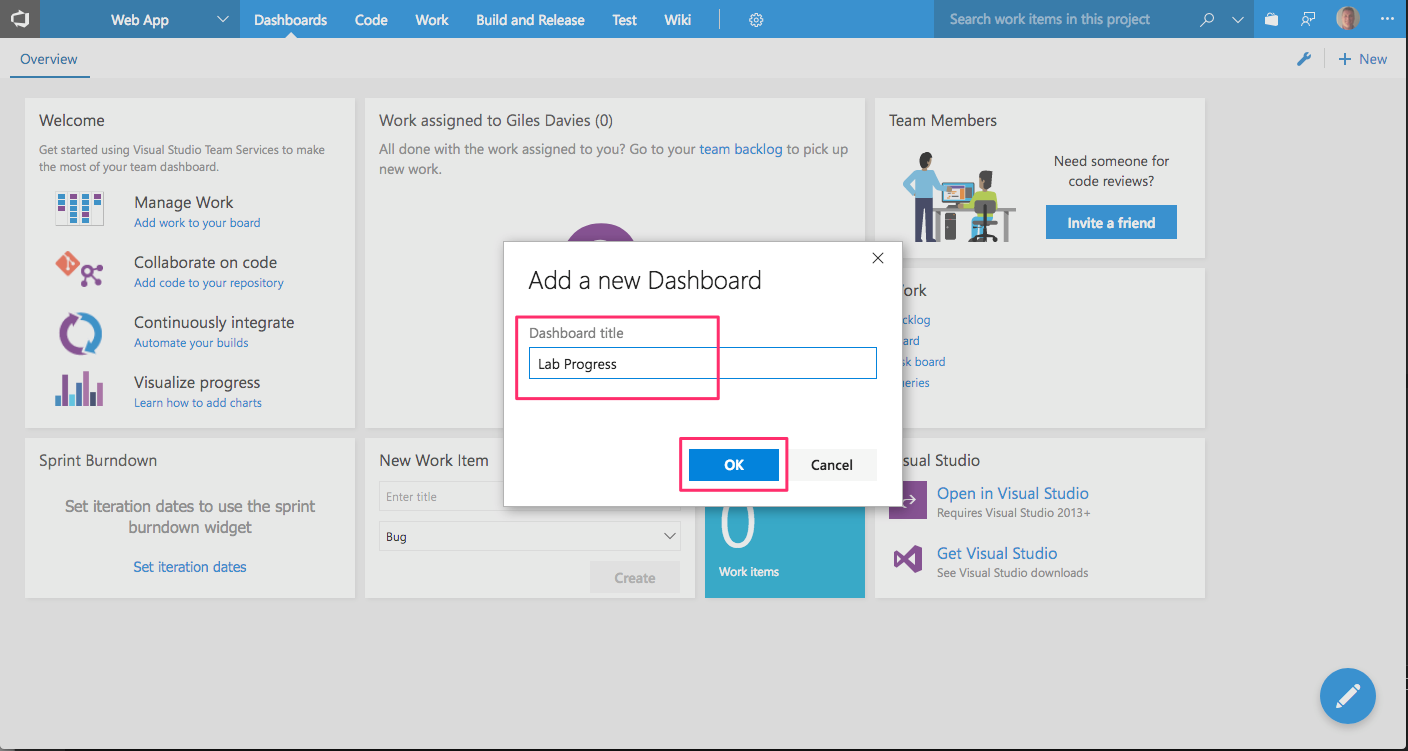
- Name the new Dashboard Lab Progress:

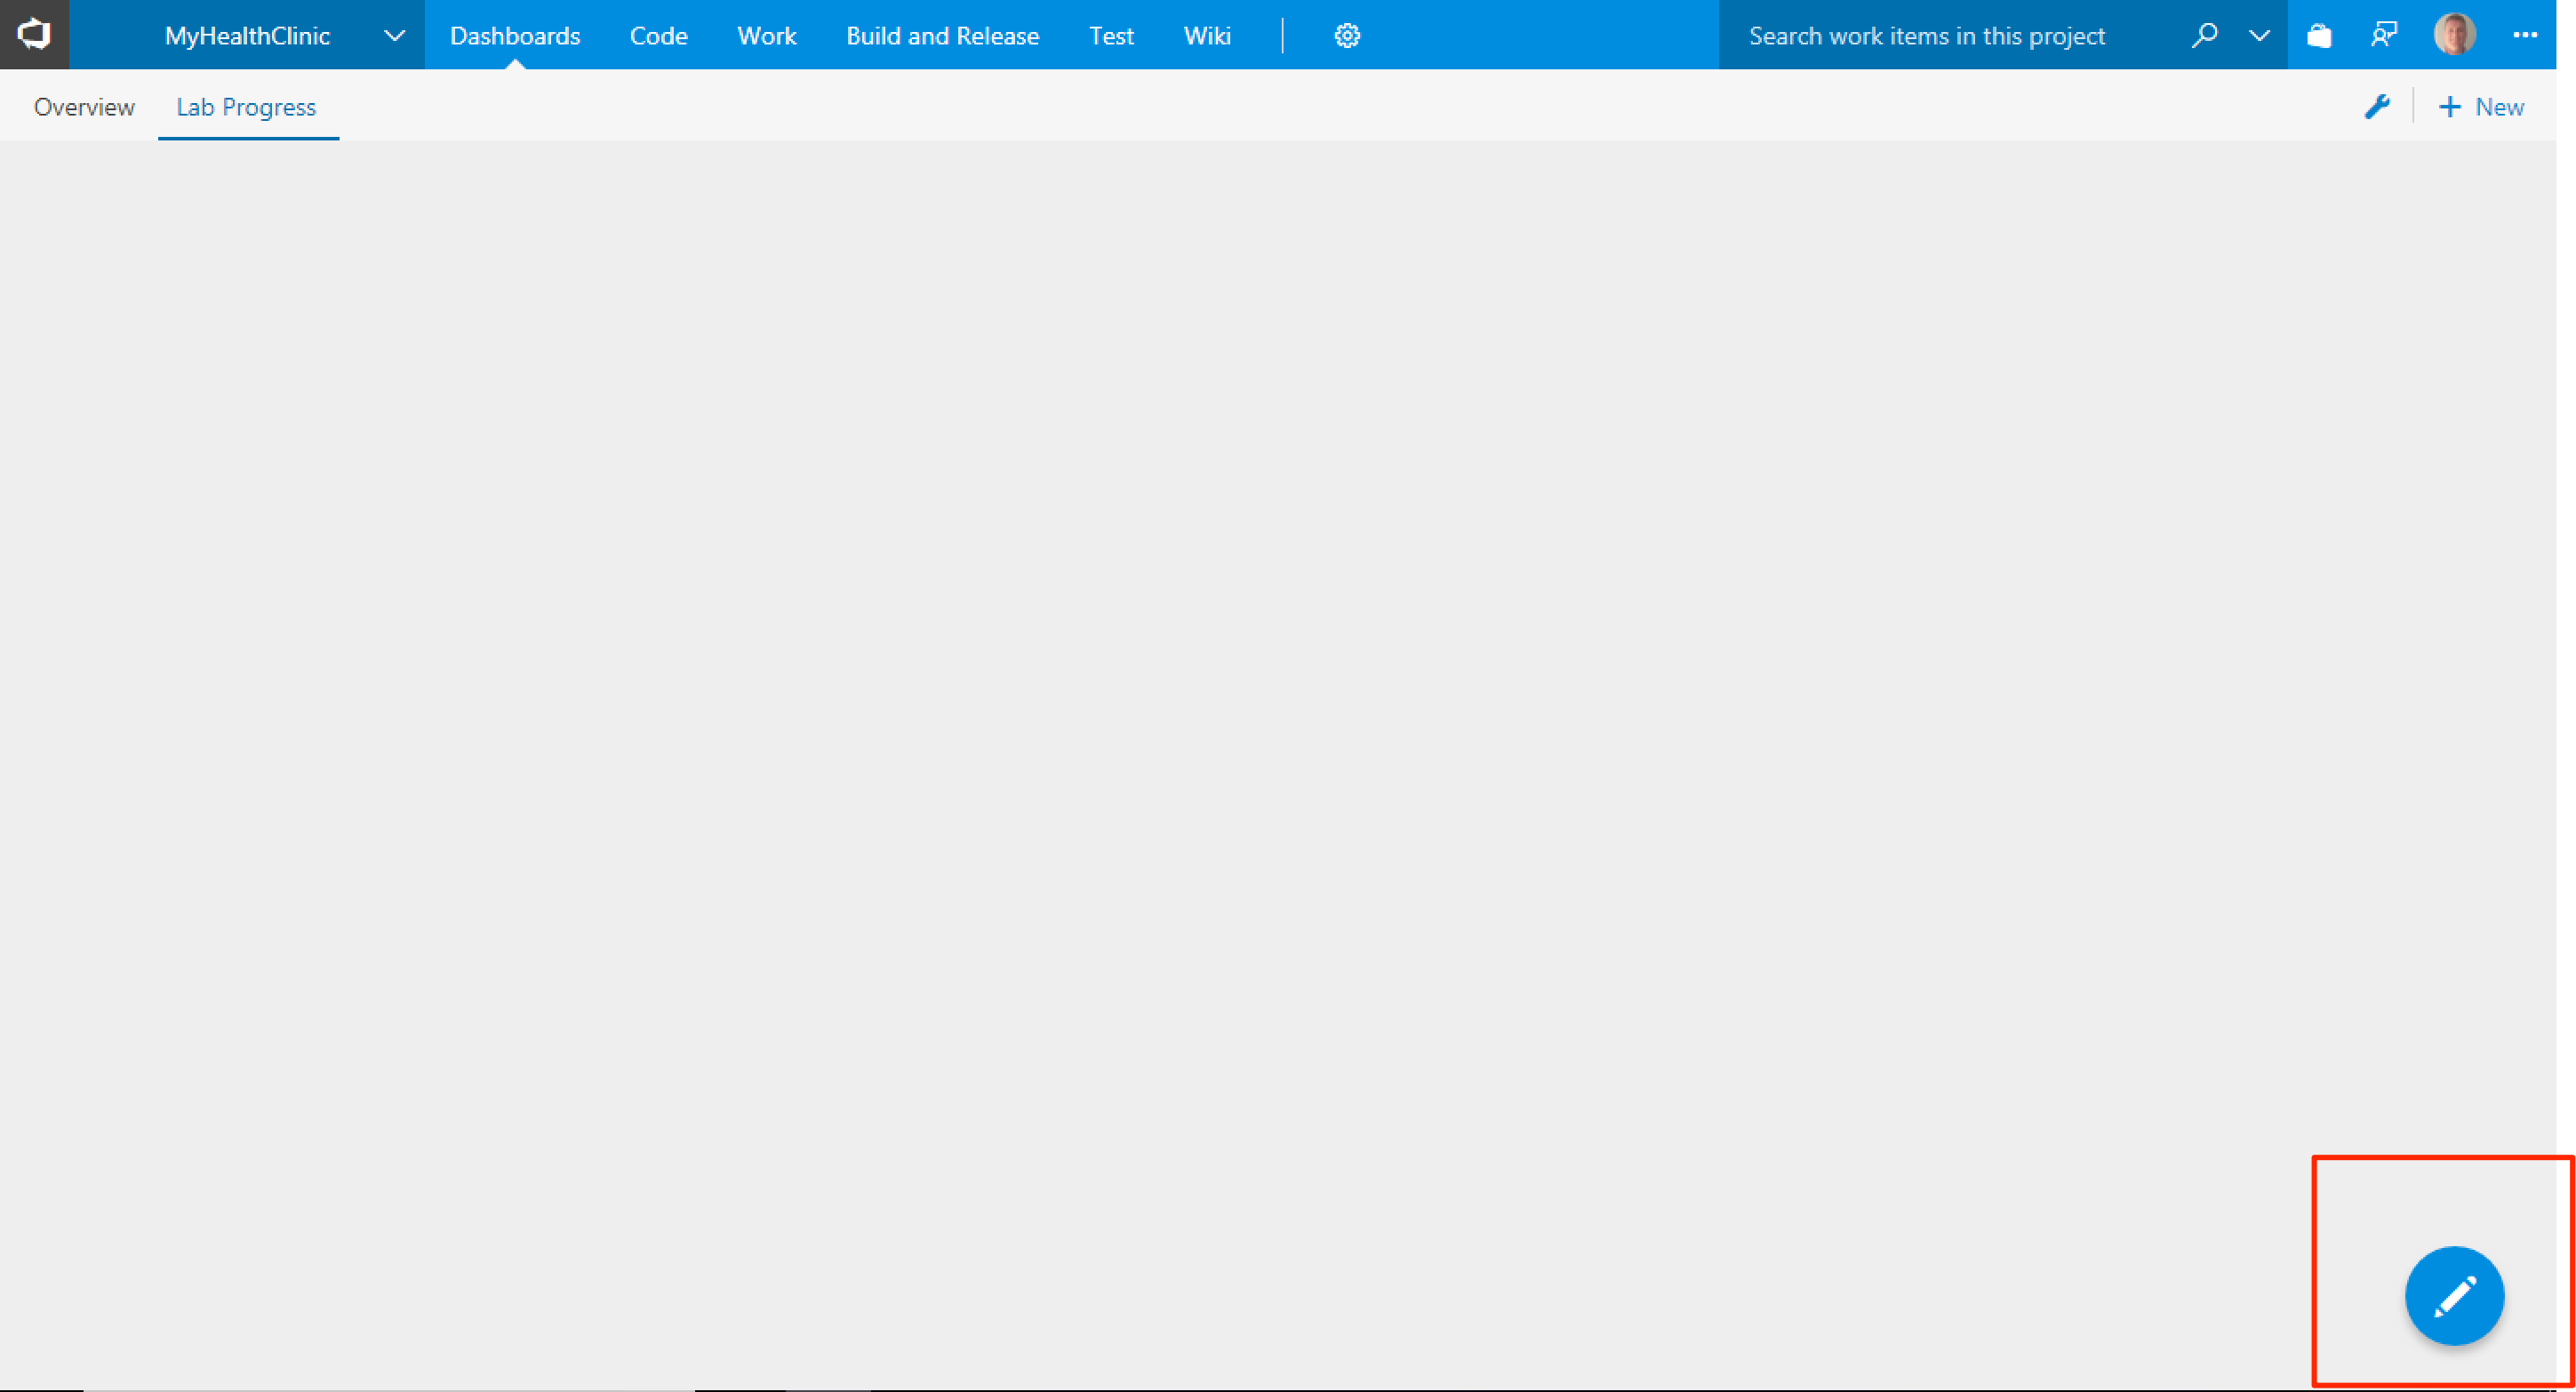
- Select the pencil icon in the bottom left, followed by the plus button:

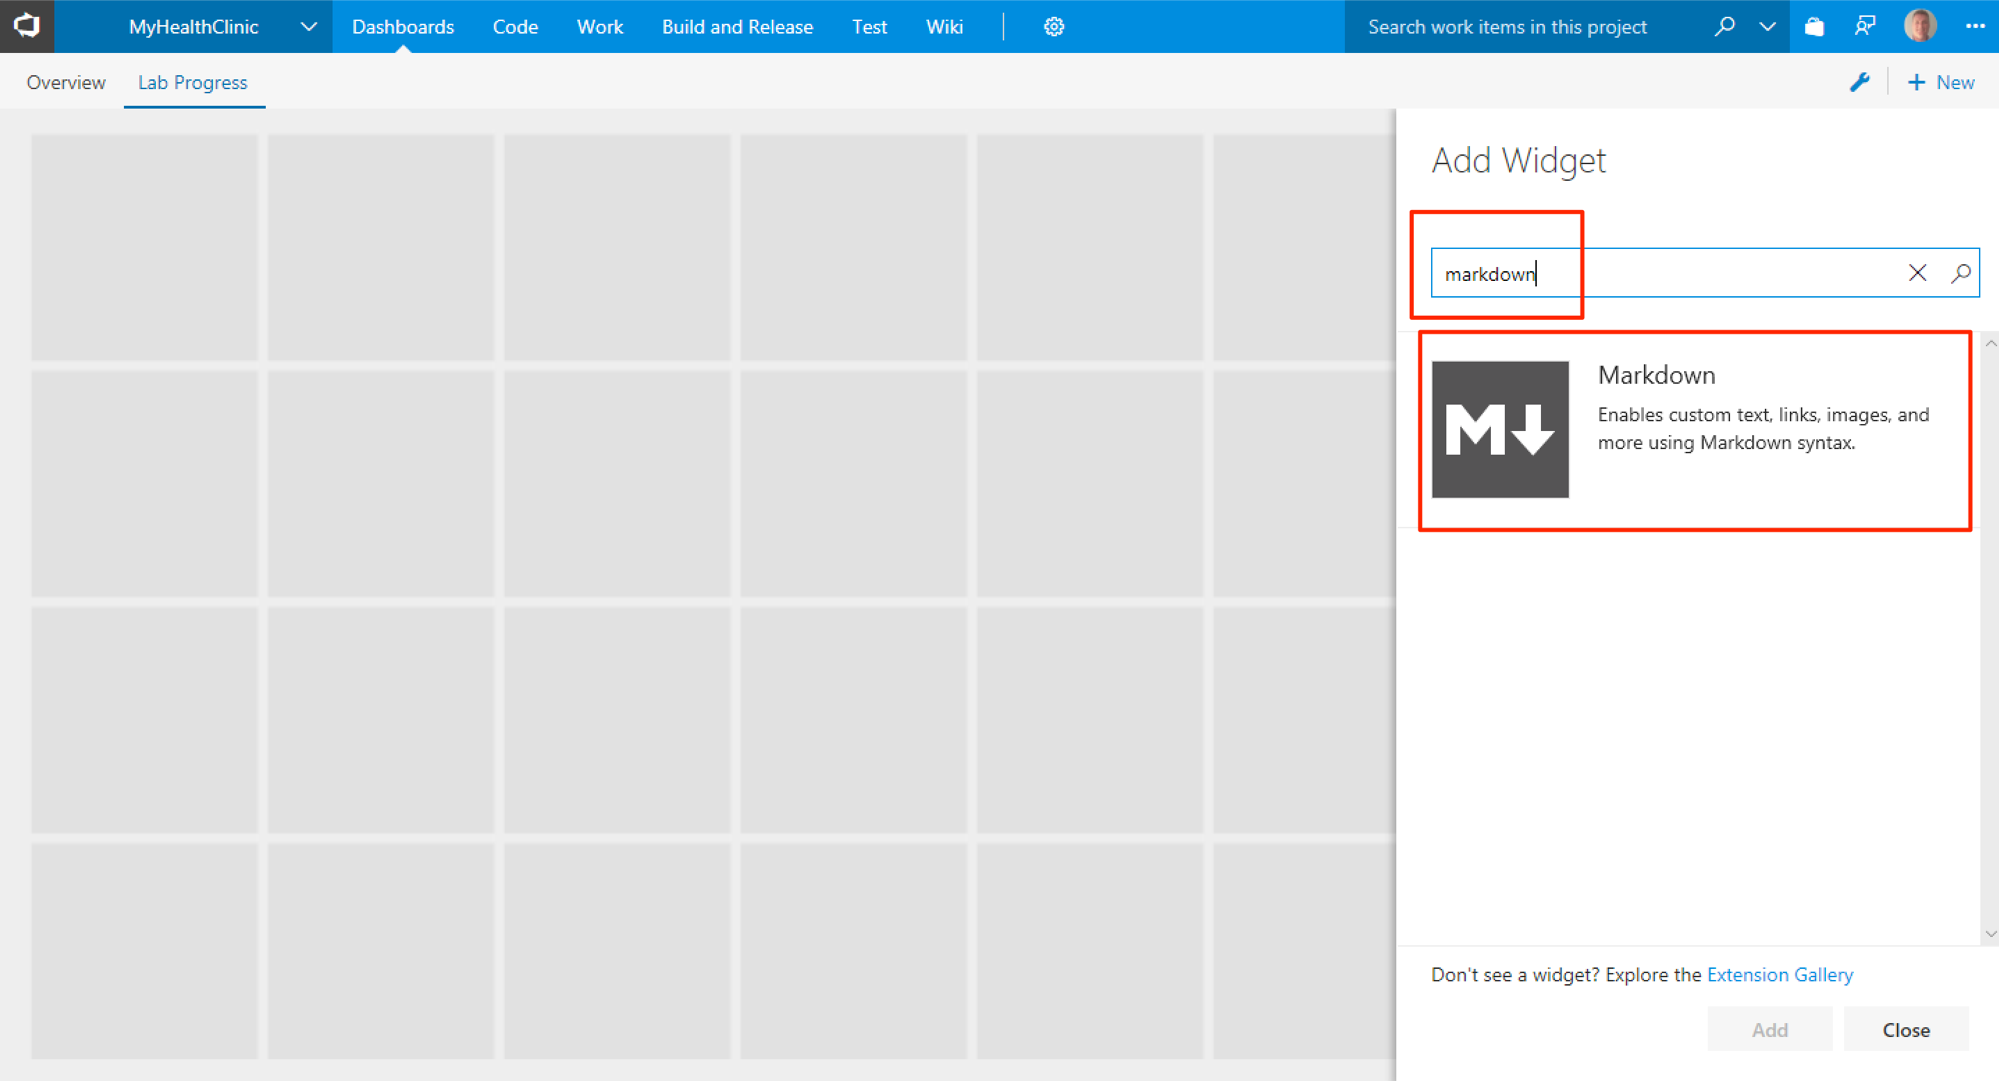
- Search for and select the Markdown widget:

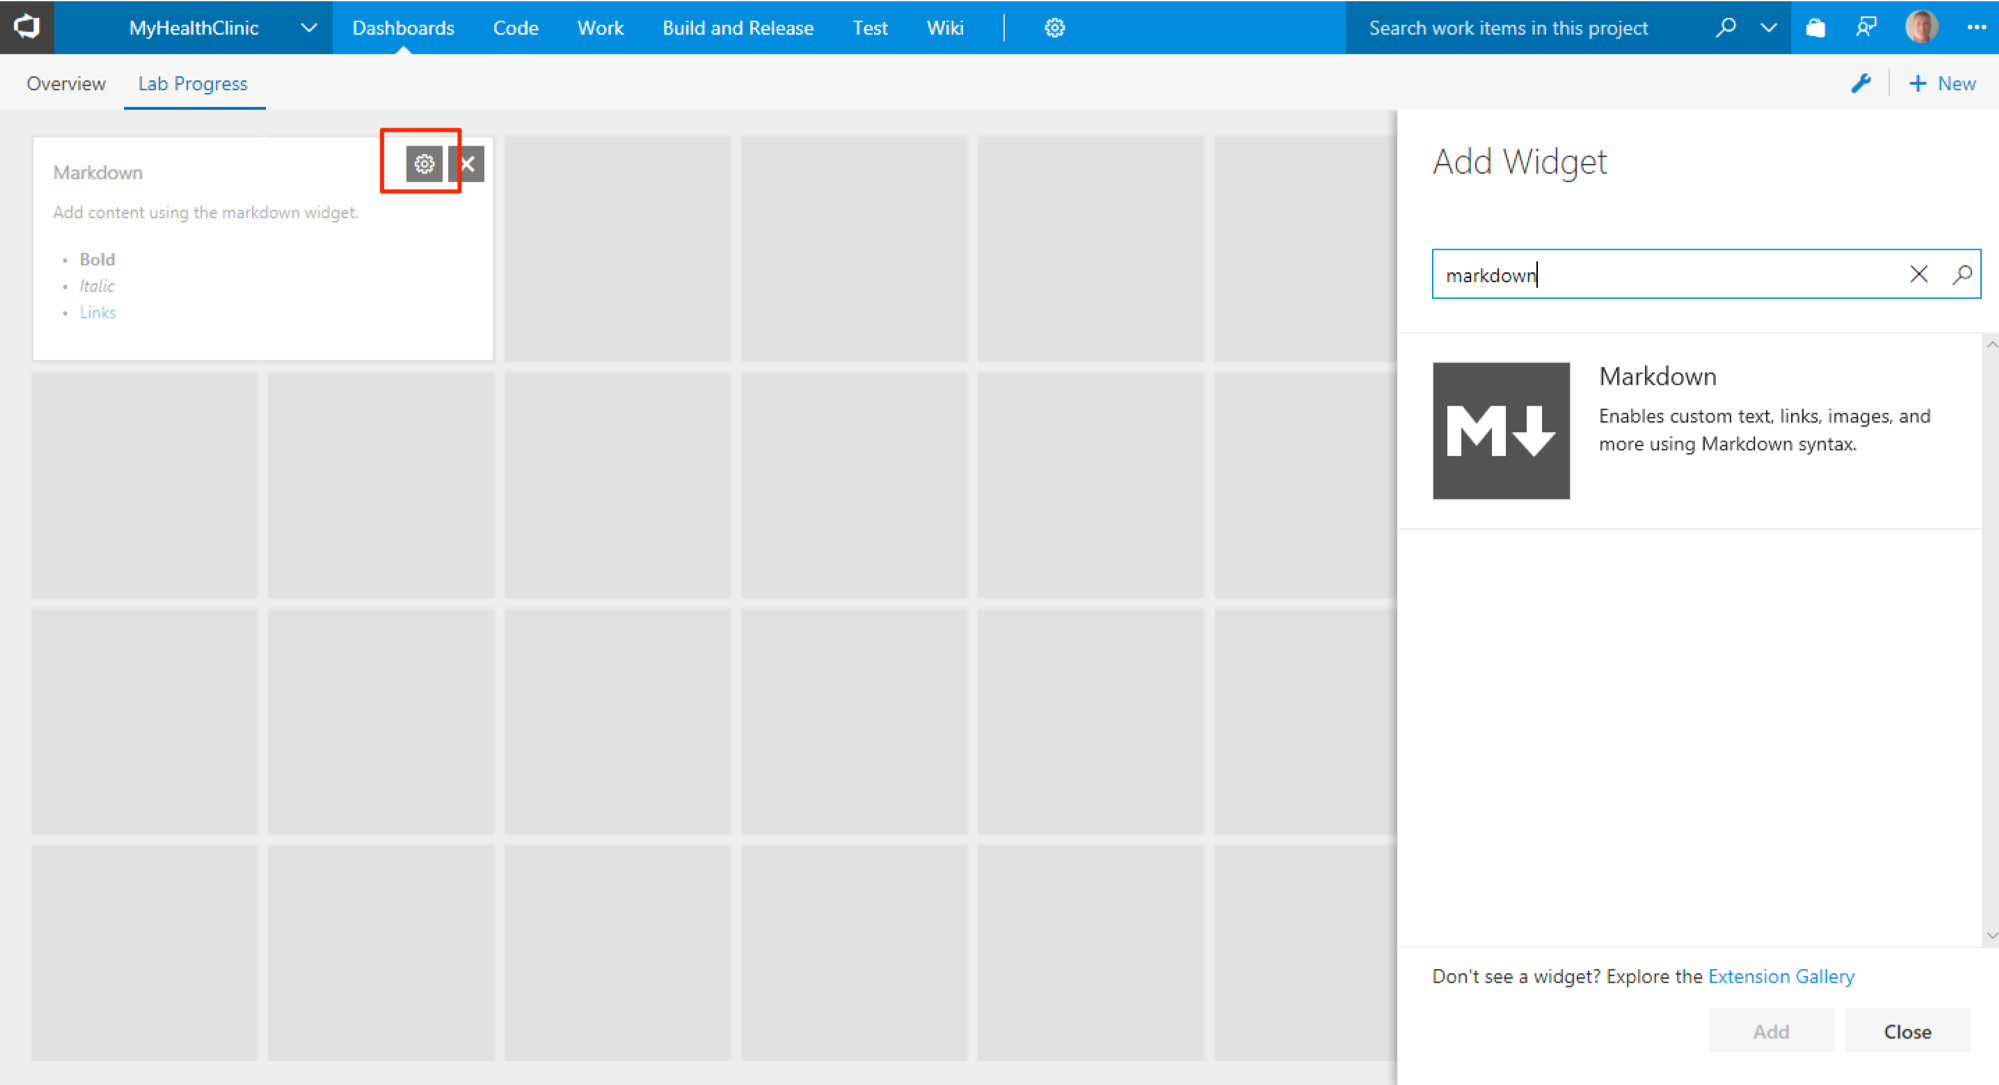
- Configure the Markdown widget and add the names of your team, project vision and/or any other info that might be useful:

- Save the changes, close the widget gallery and save the dashboard by clicking on the blue edit button in the bottom right hand corner.
Continuous Integration is a key DevOps practice to build, test and create the software to later deploy.
- Navigate to the VSTS project Code hub, and select Set up build.


You now have a working build definition for the web application. The next step is to set it up with a Continuous Integration trigger and test it.
- Hover your mouse over the build definition and you will see three dots. Click on the dots and select Edit.


You now have a build triggered whenever you make a change to the code and push that change to Git in VSTS - Continuous Integration is in place for the project.
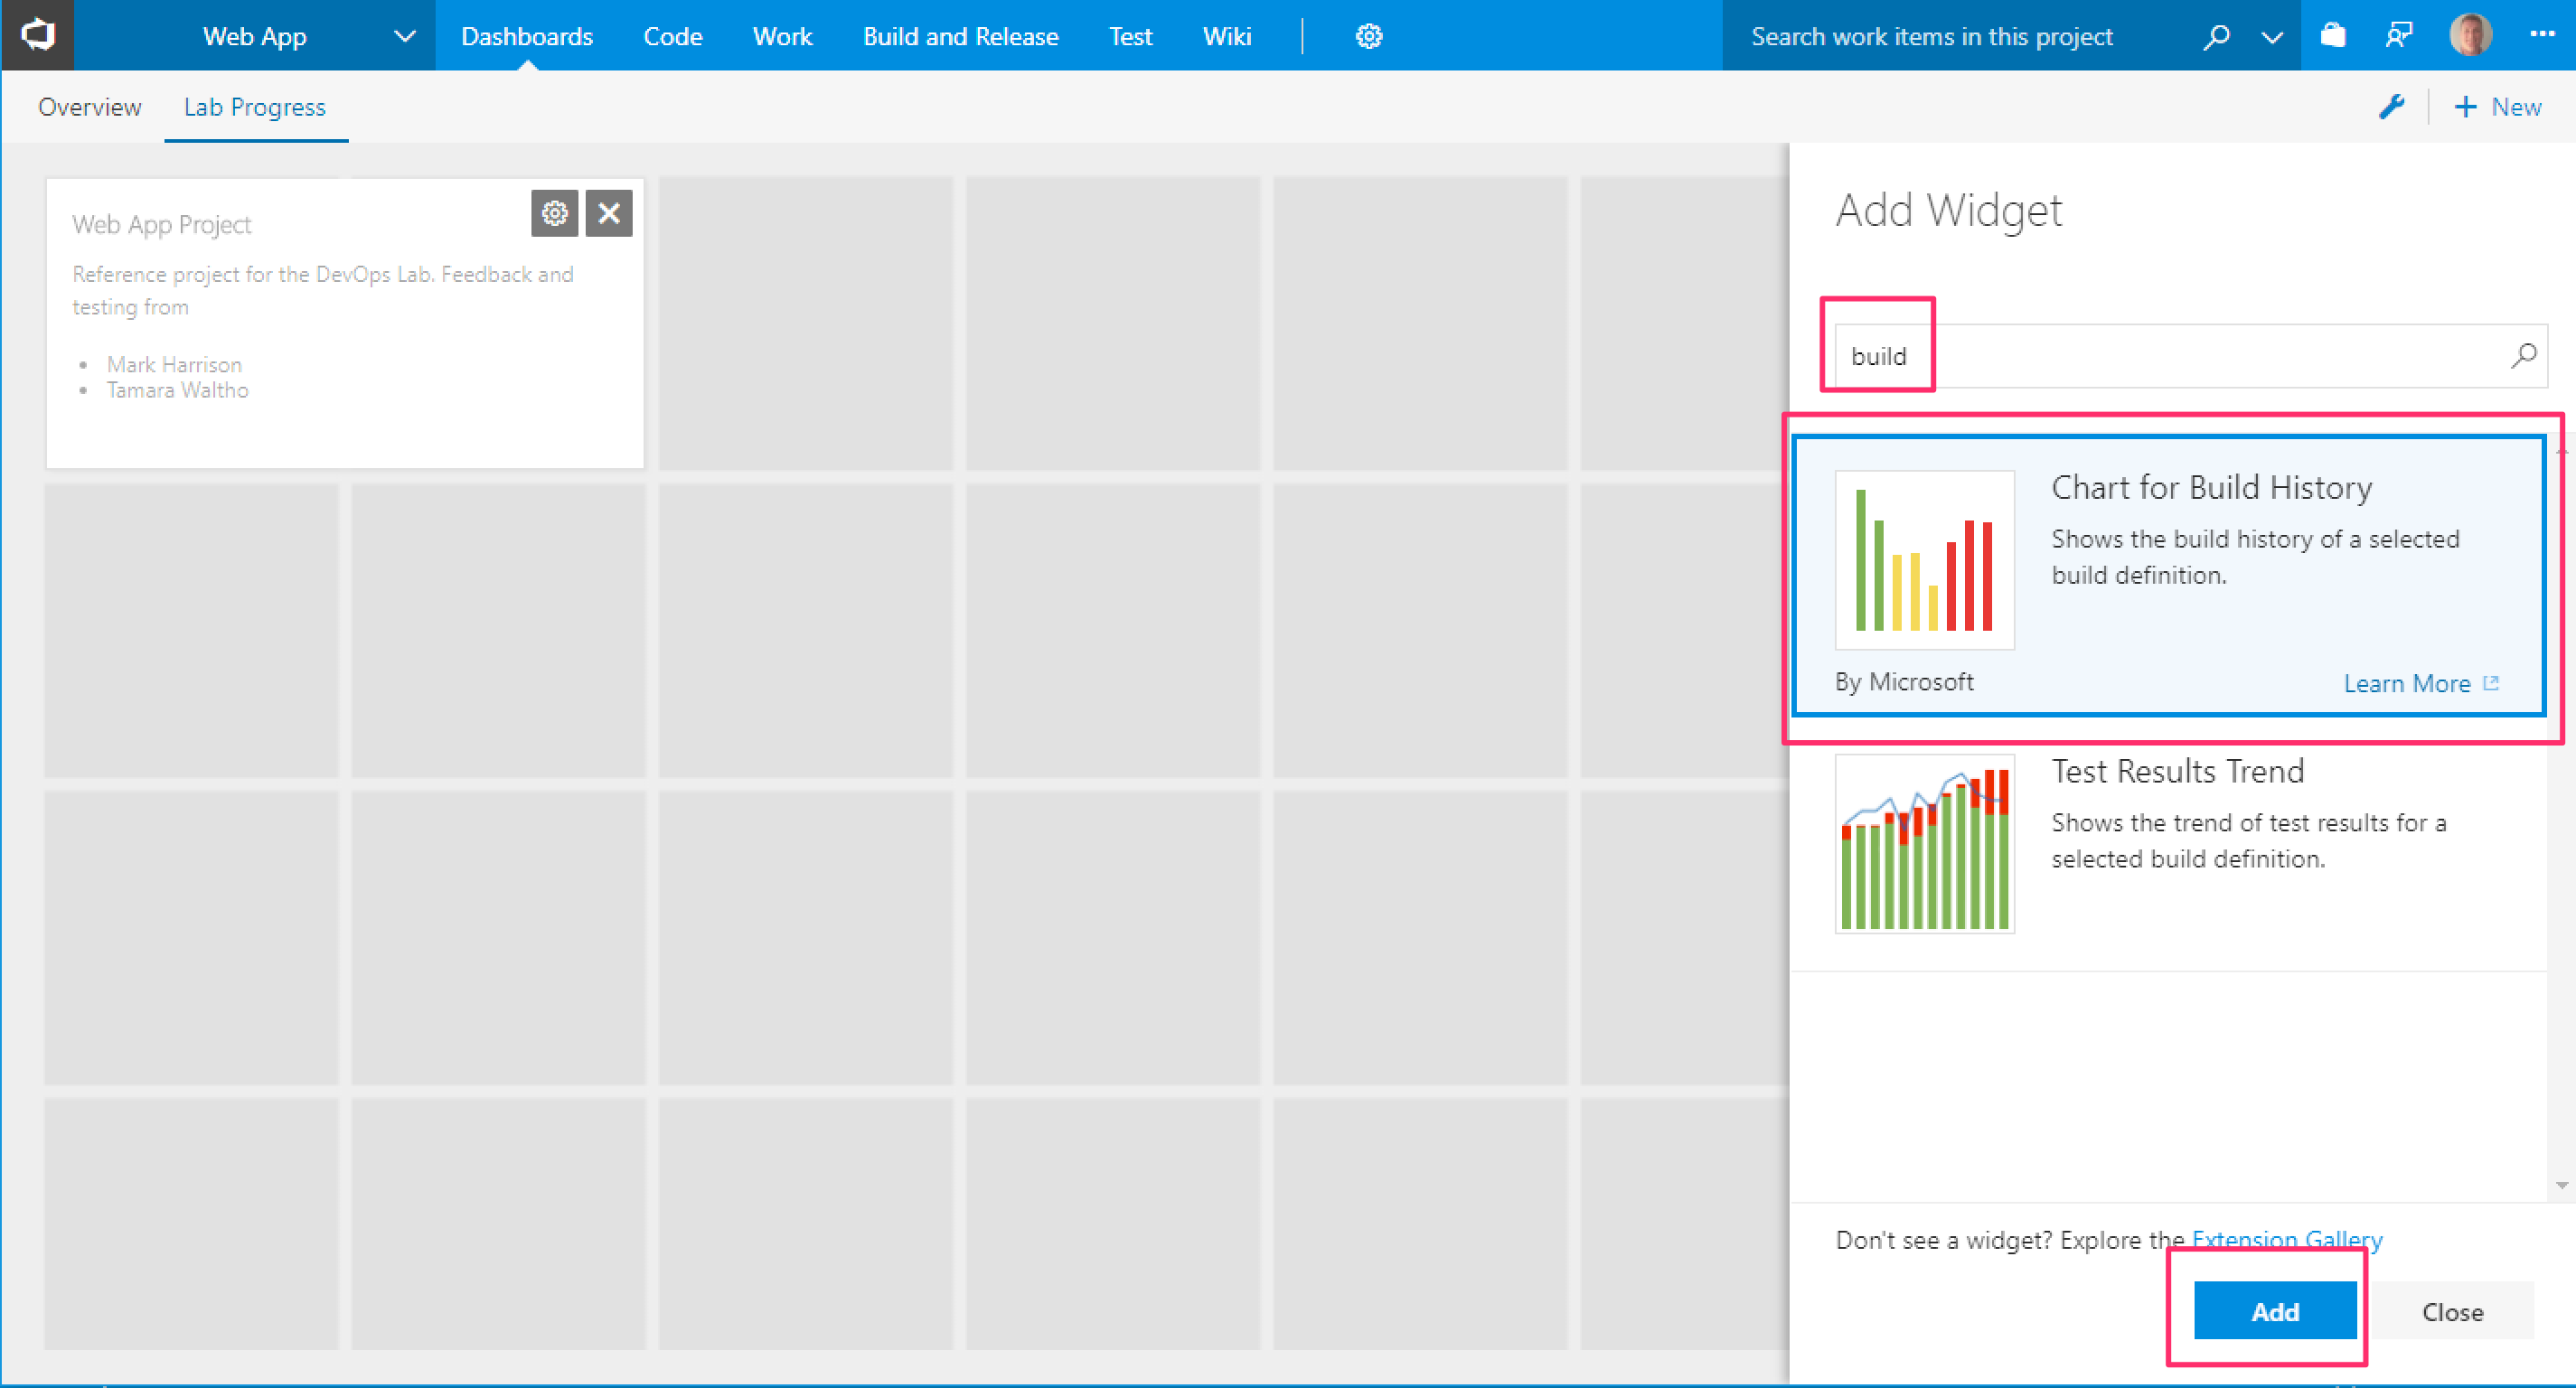
Optional: Add a Build History widget to the Lab Progress dashboard by:
- Searching for and adding the build history widget:

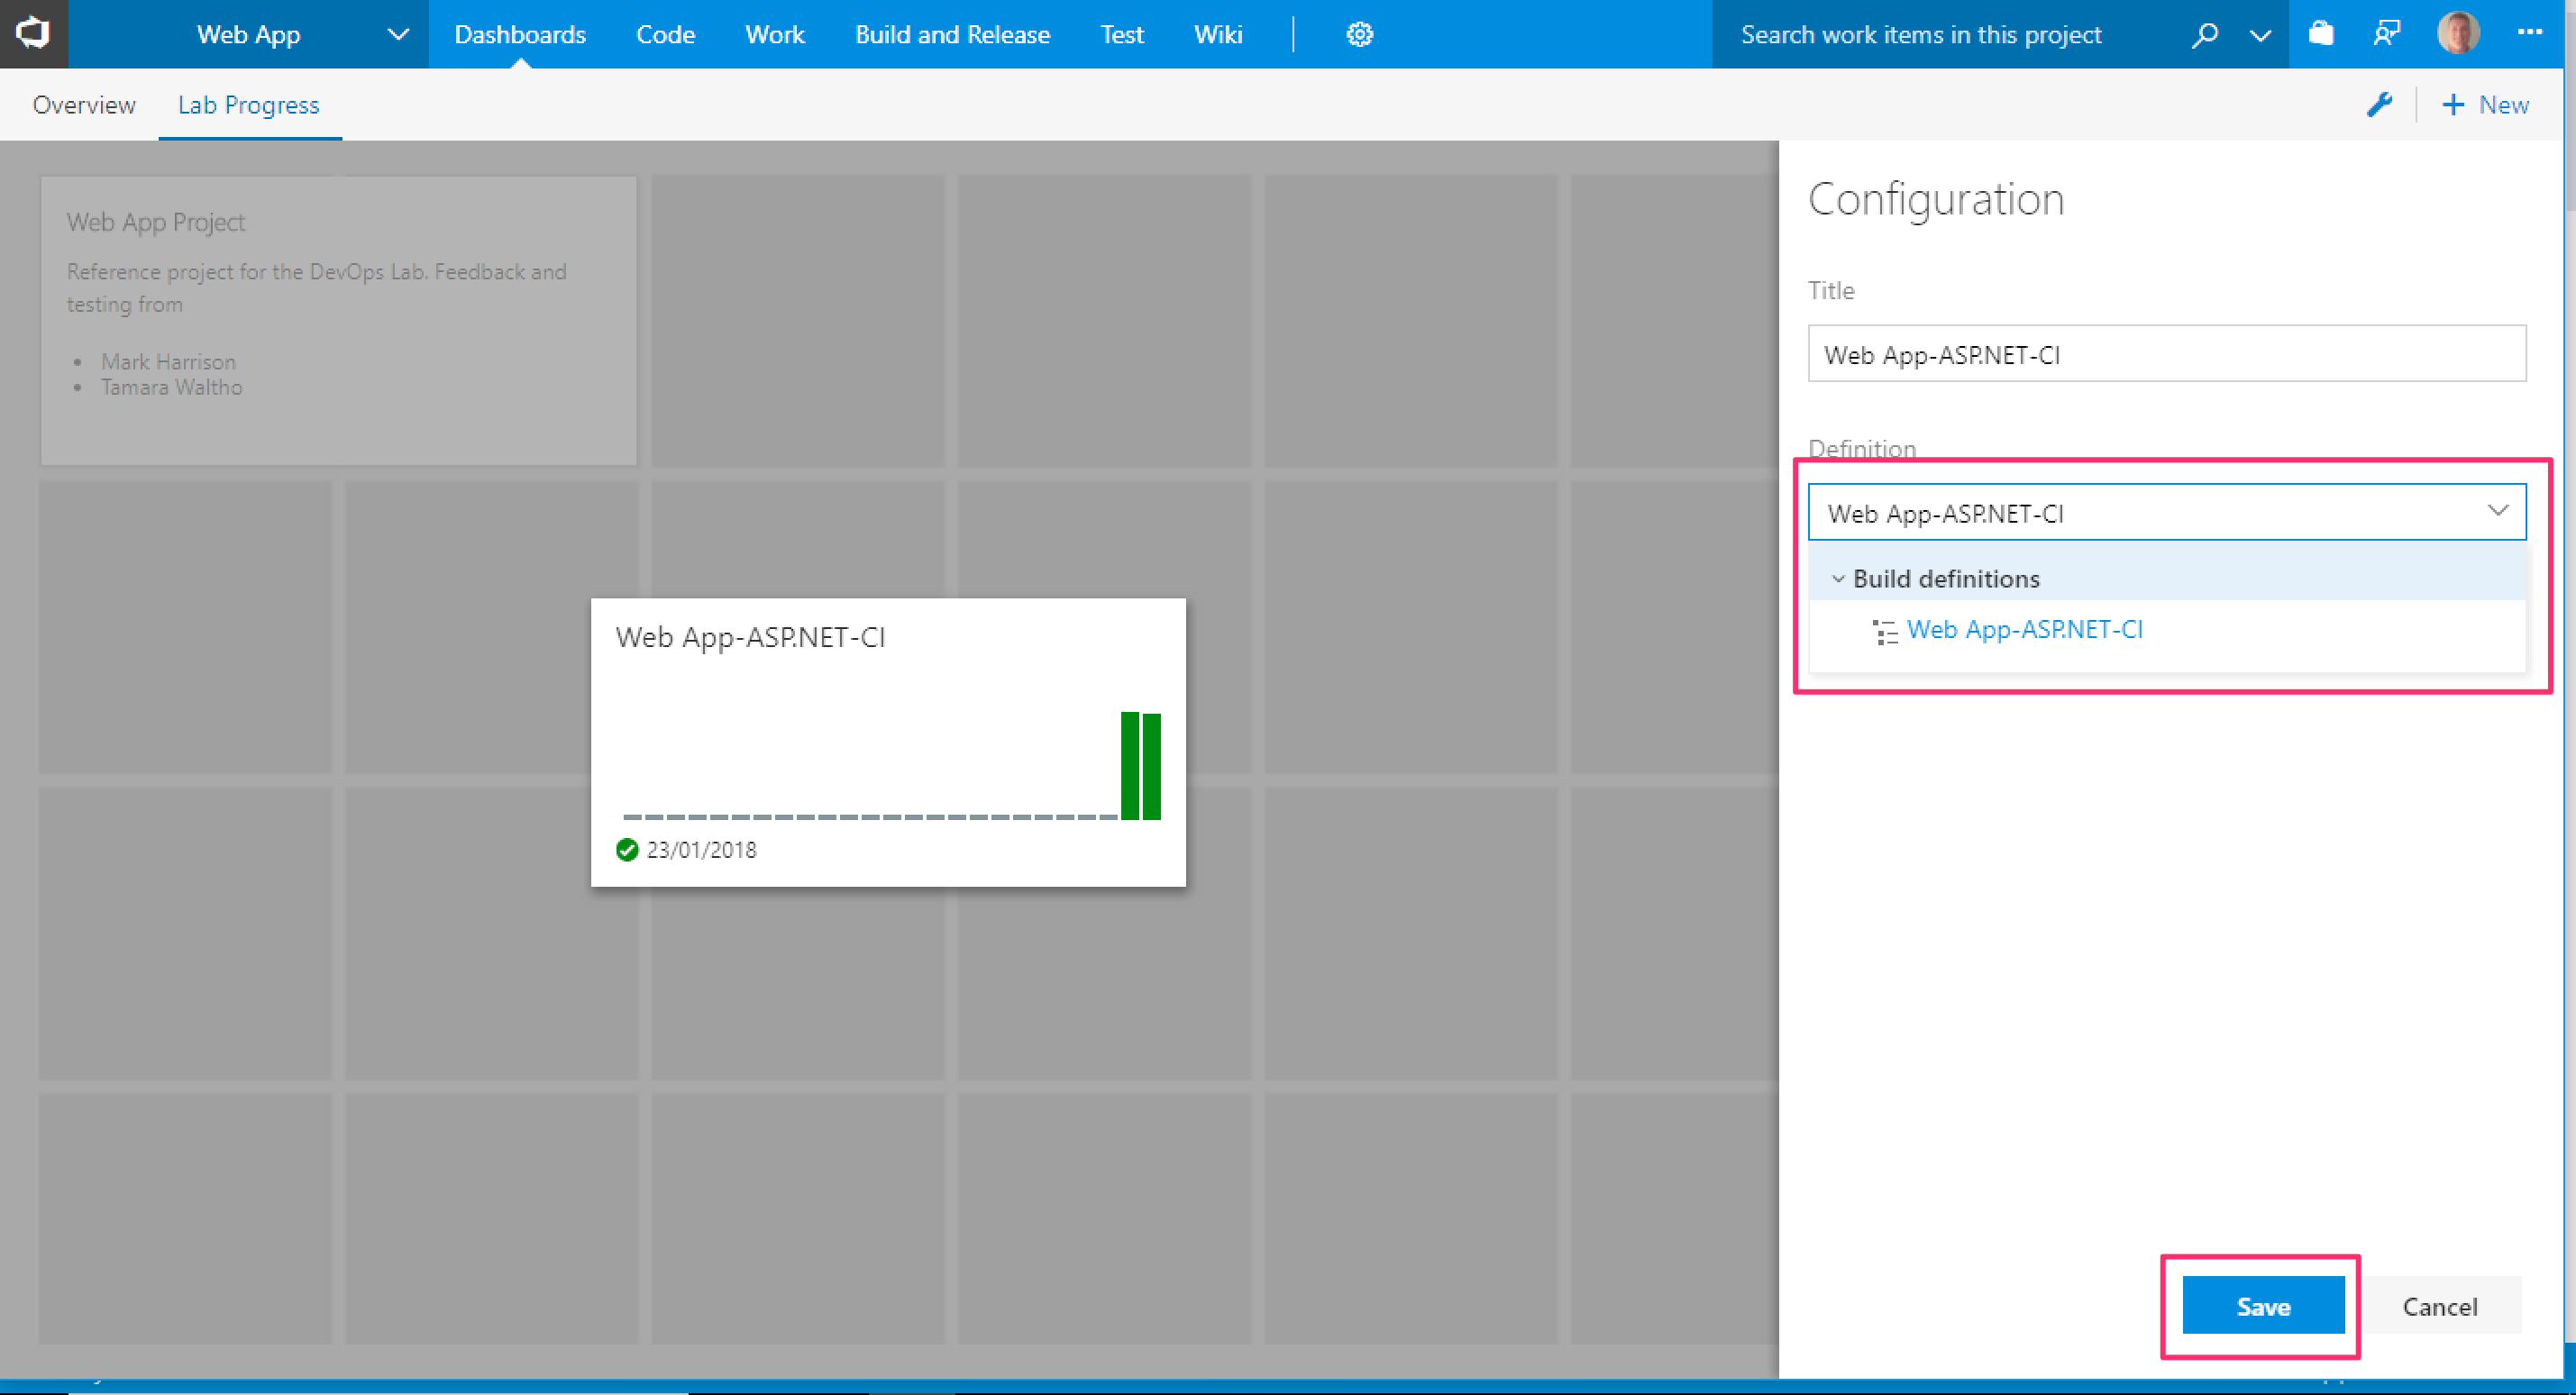
- Ensuring that it is configured to the build definition created in the preceding steps:

- Save the changes, close the widget gallery and save the dashboard by clicking on the blue edit button in the bottom right hand corner.
Azure Web Apps is an Azure service for hosting web applications. In this lab you'll create the Azure Web App into which you will later deploy the web application using Continuous Deployment.
-
In a browser go to the Azure Portal at http://portal.azure.com.
-
Select Create a resource and enter web app into the search field:

- Press enter and select Web App from the list:

- Click Create:

- Complete the highlighted fields as follows:
-
App name: Choose a unique name that will be the URL for the web application such as WebApp plus your initials
-
Subscription: If you have more than one subscription, ensure that you choose the correct one for this lab
-
Resource Group: Create a new resource group for your web app
-
OS: Leave this as the default of Windows.
-
App Service Plan/Location: Click on this to create a new App Service Plan. Complete these fields:
- App Service plan: Enter a name, such as WebAppPlan
- Location: Select an Azure region close to you
- Pricing tier: Click on this, and select the F1 Free tier

-
Click OK to save the App Service Plan.
-
Click Create to save and create the Web App.
-
After a short time (approx. 1-2 mins) you should see a notification that the Web App has been successfully created. You may want to pin the web app to your Azure dashboard for easy location later on:

-
Confirm that your Web App is created by selecting Go to resource.
-
Click on the URL:

- Your Web App should open in the browser and you will see something like this:

The exact page details will change over time but this now confirms that you have created a Web App in Azure. In the next lab we will deploy the web application into the newly created Azure Web App.
Optional: Add an Embedded Webpage widget to the Lab Progress dashboard by:
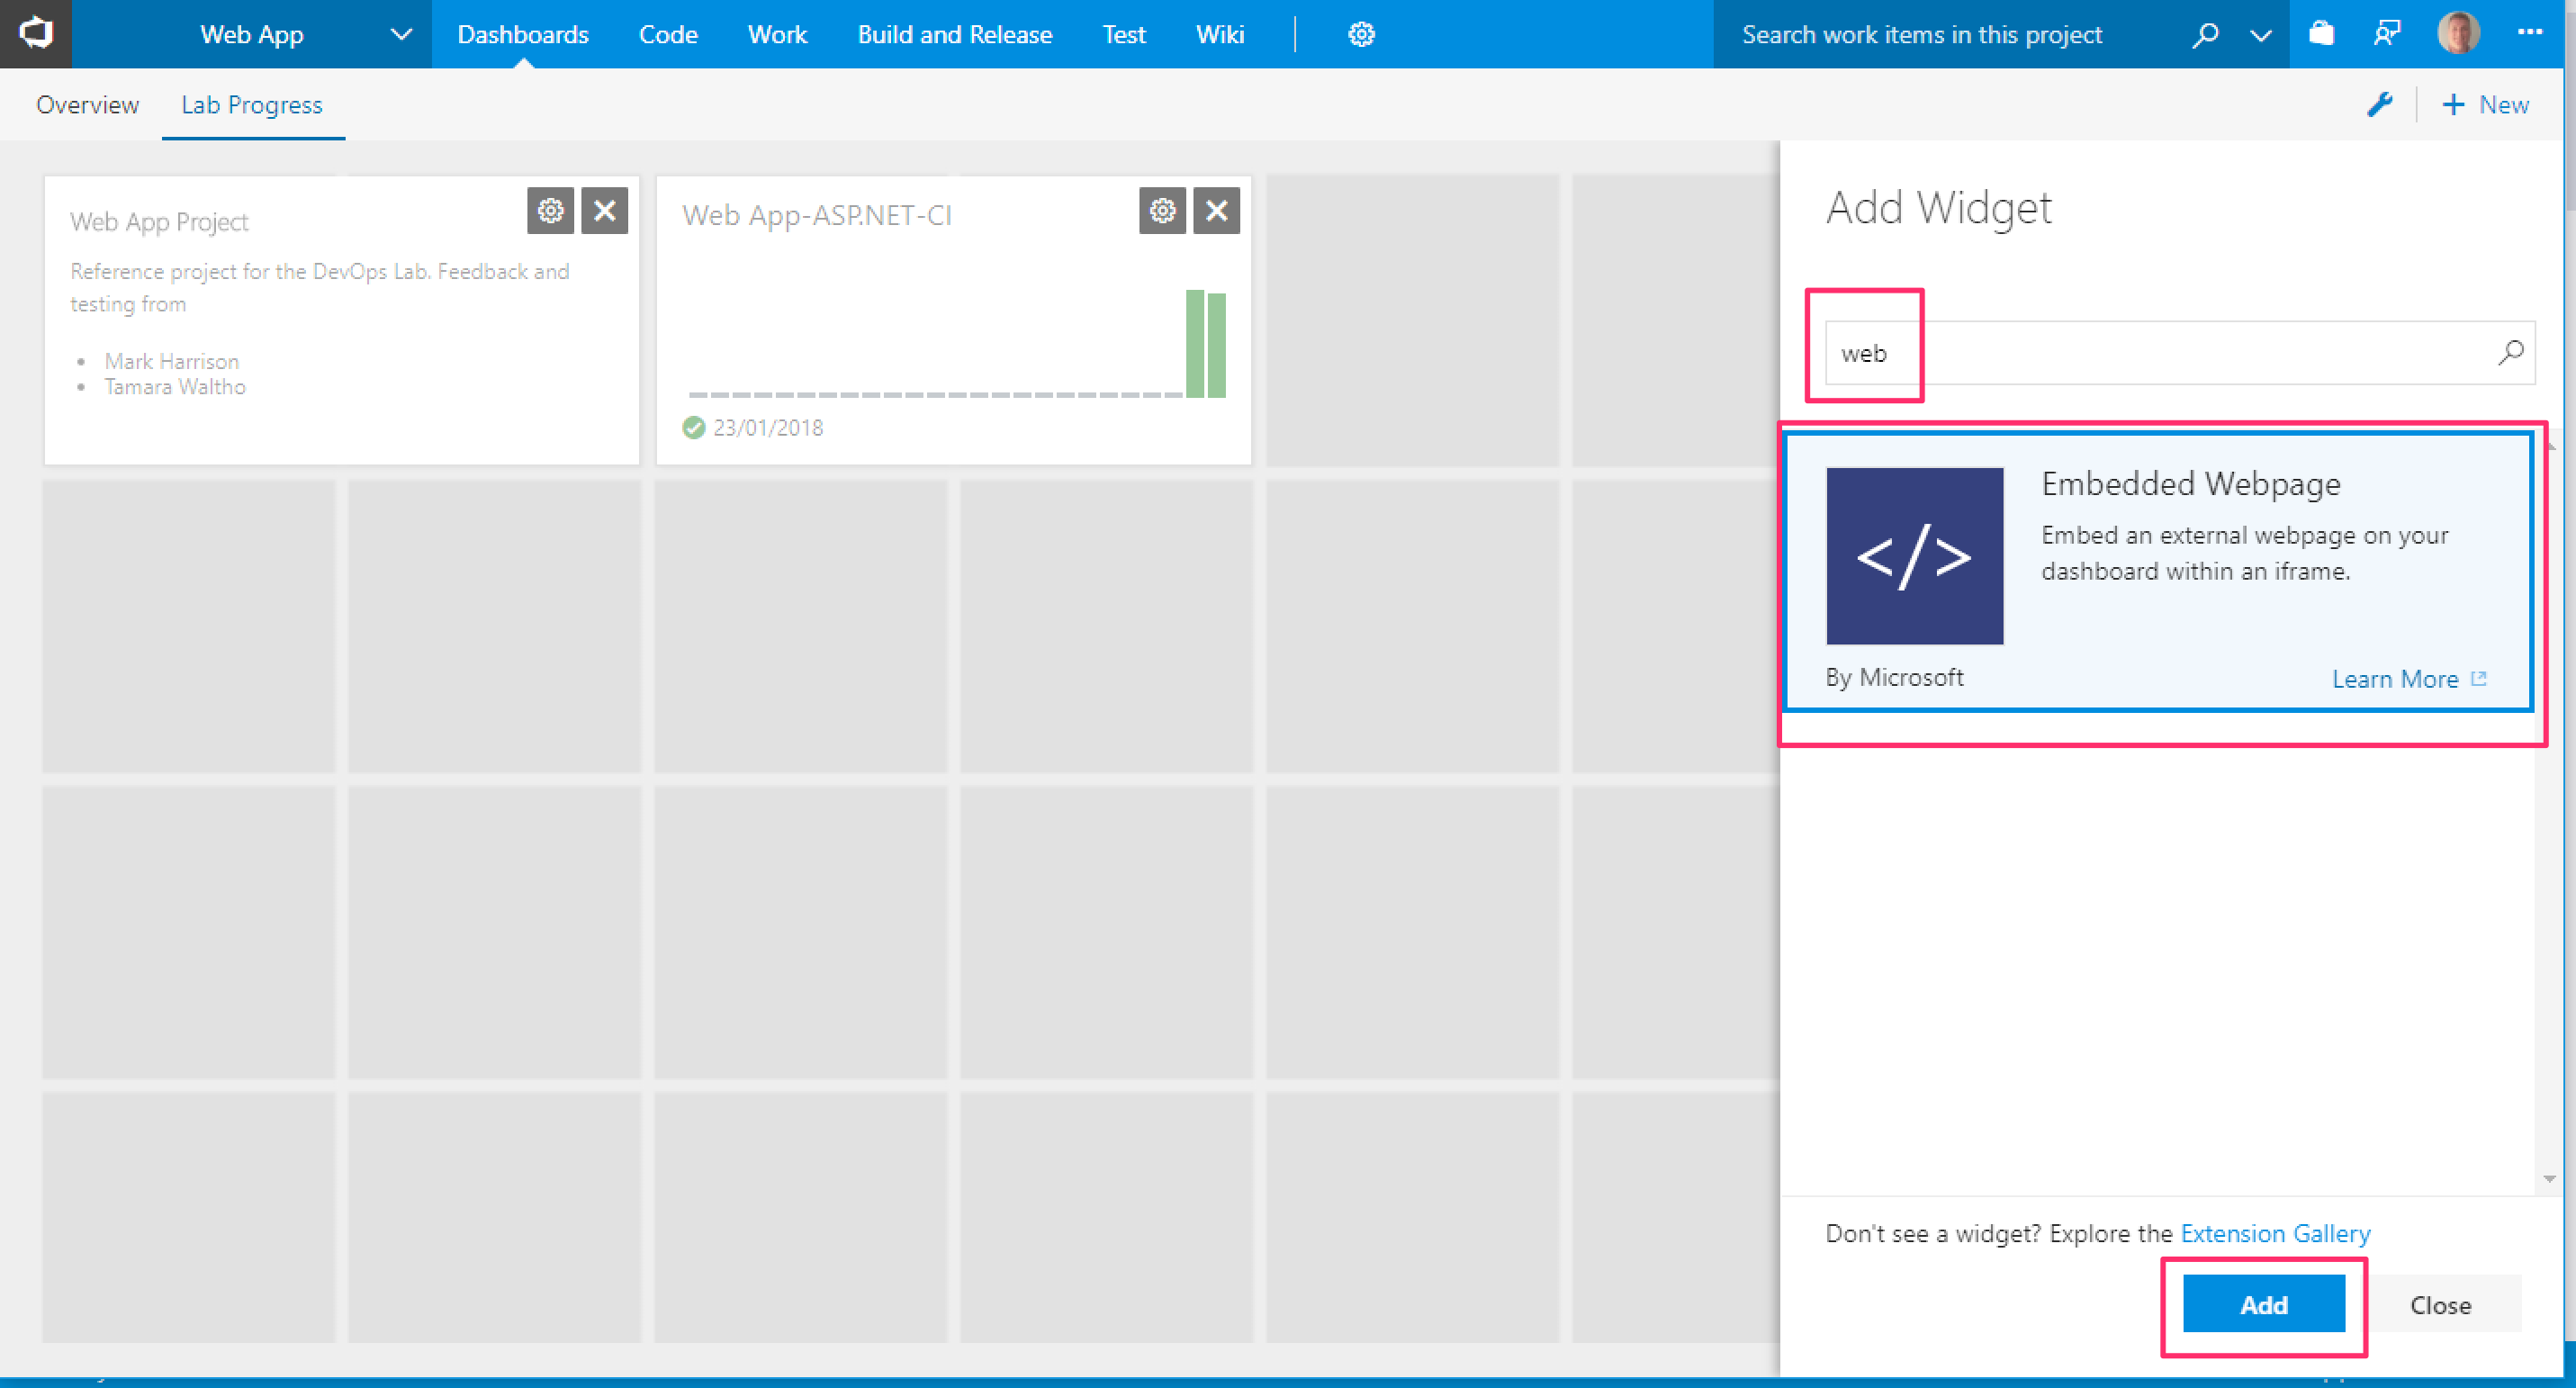
- Searching for and adding the Embedded Webpage widget:

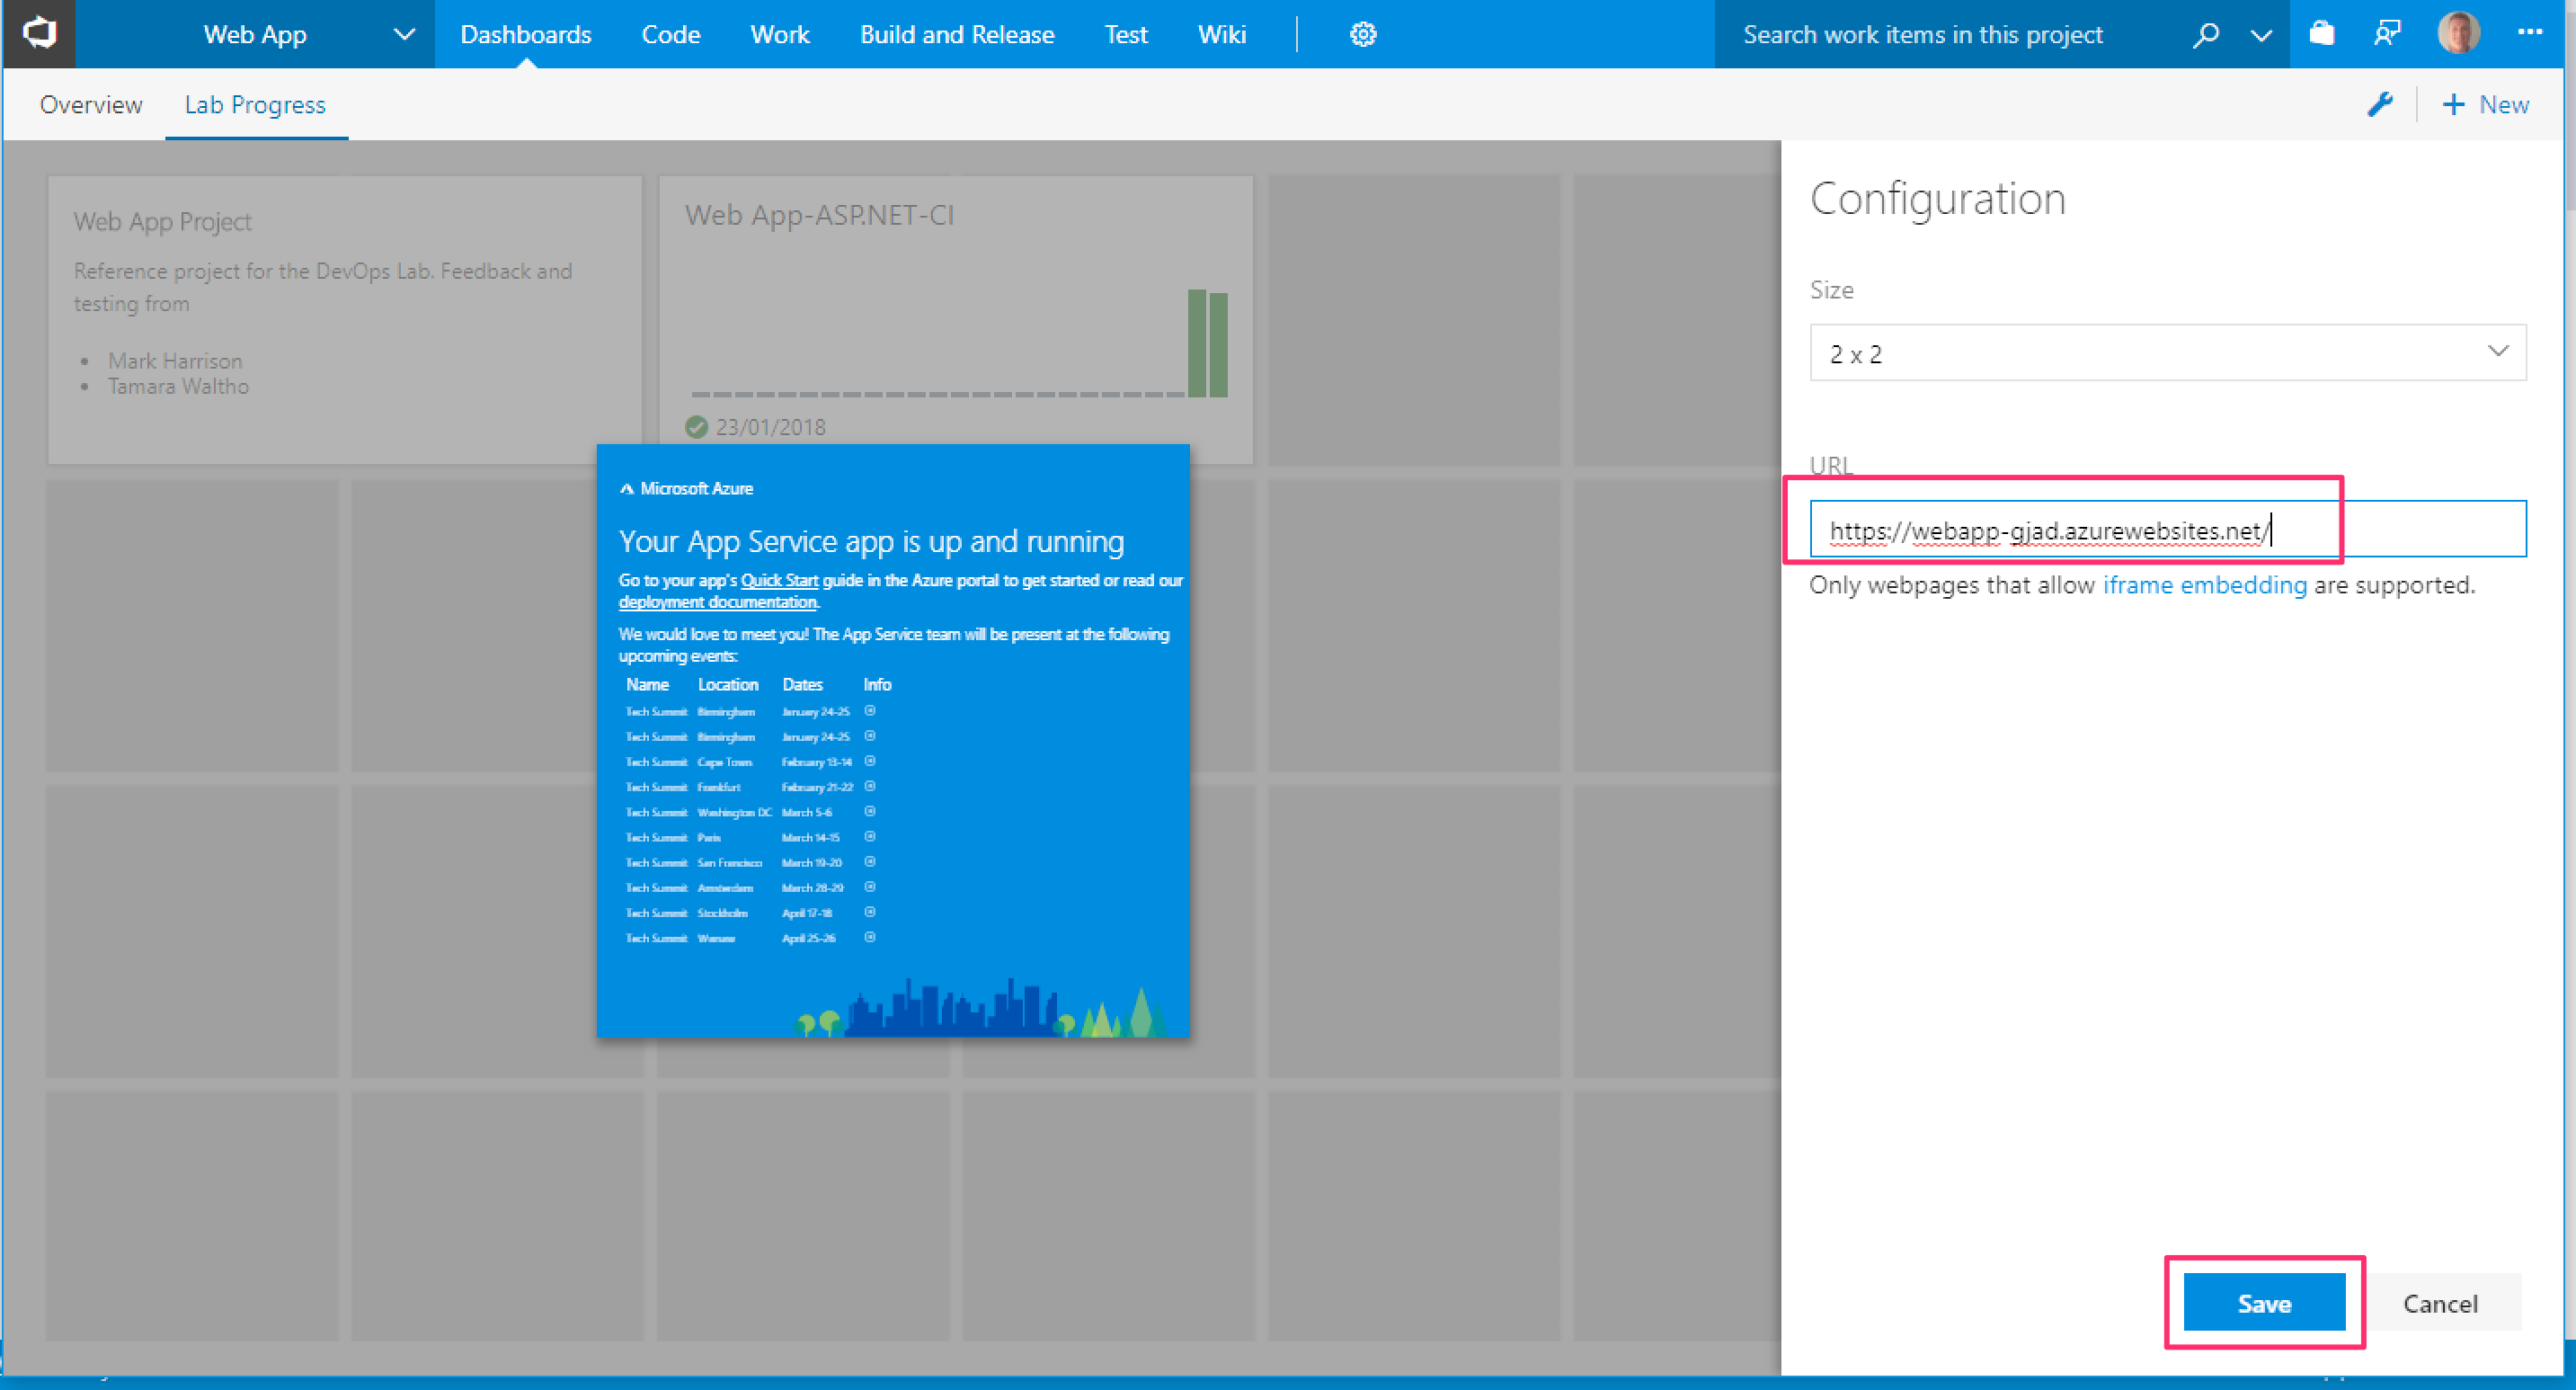
- Add the URL for your web app created in the preceding steps:

- Save the changes, close the widget gallery and save the dashboard by clicking on the blue edit button in the bottom right hand corner.
Continuous Deployment is another key practice within DevOps to enable the continuous delivery of value (in this example the web application) to end users.
- Open the last build log in VSTS by navigating to Build and Release, then Builds and click on the latest build number. Then click on Release above the build summary.

- A new release pipeline is created, and you can apply a template to it. If you scroll through the list you'll see that there are many templates. As we are going to deploy a web application into an Azure App Service, select the Azure App Service Deployment template.

- A release pipeline may have many environments. For now we will just have one, and the first environment to deploy to is typically a shared development environment, so call it Dev or similar. Click the close button.

- Notice that there is already an Artifact to deploy. This has been setup for us after clicking Release in the build log. Click on the Artifact to see the details.

- This shows that the Artifact is the latest version of the output of the CI build that was created earlier. That output includes the zip file, which is the web application to be deployed. Close the window.

- Click on the Artifact Continuous deployment trigger.

- This is where you can enable or disable Continuous Deployment - i.e. whenever a new build is created, this release pipeline is triggered. Notice that it should already be set to Enabled (set it if not). Close the window.

- Now click on the phase and tasks in the Dev environment. This is where we will configure how to do the deployment into Azure.

- The first areas to address in the environment are Azure settings.

- In the Azure subscriptions list, choose the relevant subscription and click Authorize. This is to create an authorised connection to Azure using that subscription.

- Having authorised the subscription you should be able to see and select the Web App that you created in the preceding step. This is the target Web App that we will deploy to.

- Click the Run on agent step and confirm that the agent is set to the same as the build - the Hosted VS2017 agent.

- Click Deploy Azure App Service task. You shouldn't need to change anything here but note that this uses the Azure subscription to deploy to the App Service, and the package to be deployed is a zip file, as created in the CI build. Click Save.

You have now created a Release Pipeline, configured to Continuously Deploy whenever there is a new build. The next step is to test the overall flow.
- Test the release pipeline by returning to Visual Studio and making a change. For example open the WebApp/Views/Home/Index.cshtml again and make another change such as changing the heading for the home page. Save the changes.
- In the Team Explorer, return to the Changes hub to see the files you've changed, and add a comment and select Commit All and Push.
- In VSTS, navigate to the Builds (Build & Release | Builds) and you should now see a build in progress. Click on the build number to watch the build.
- When the build has completed, open the build log summary (Build and Release | Builds | click the ... by the build and View build results) and on the right hand side scroll down to see the Deployments area. You should see that a release to Dev is in progress and therefore Continuous Deployment has been triggered.

- Click on the Dev link in Deployments to see the release logs. Note that the zip file (artifact) is downloaded from the build (not rebuilt) and then deployed to Azure.

- Go to the web app URL (as per Lab 3 Step 10 above) and load your newly deployed web application.

You have now deployed a web application into a live Azure site using a DevOps release pipeline triggered by committing a code change. If you want, make one or more other changes in the code, commit and push and see those changes built and deployed into your web application.
Optional: Add a Release Definition Overview widget to the Lab Progress dashboard by:
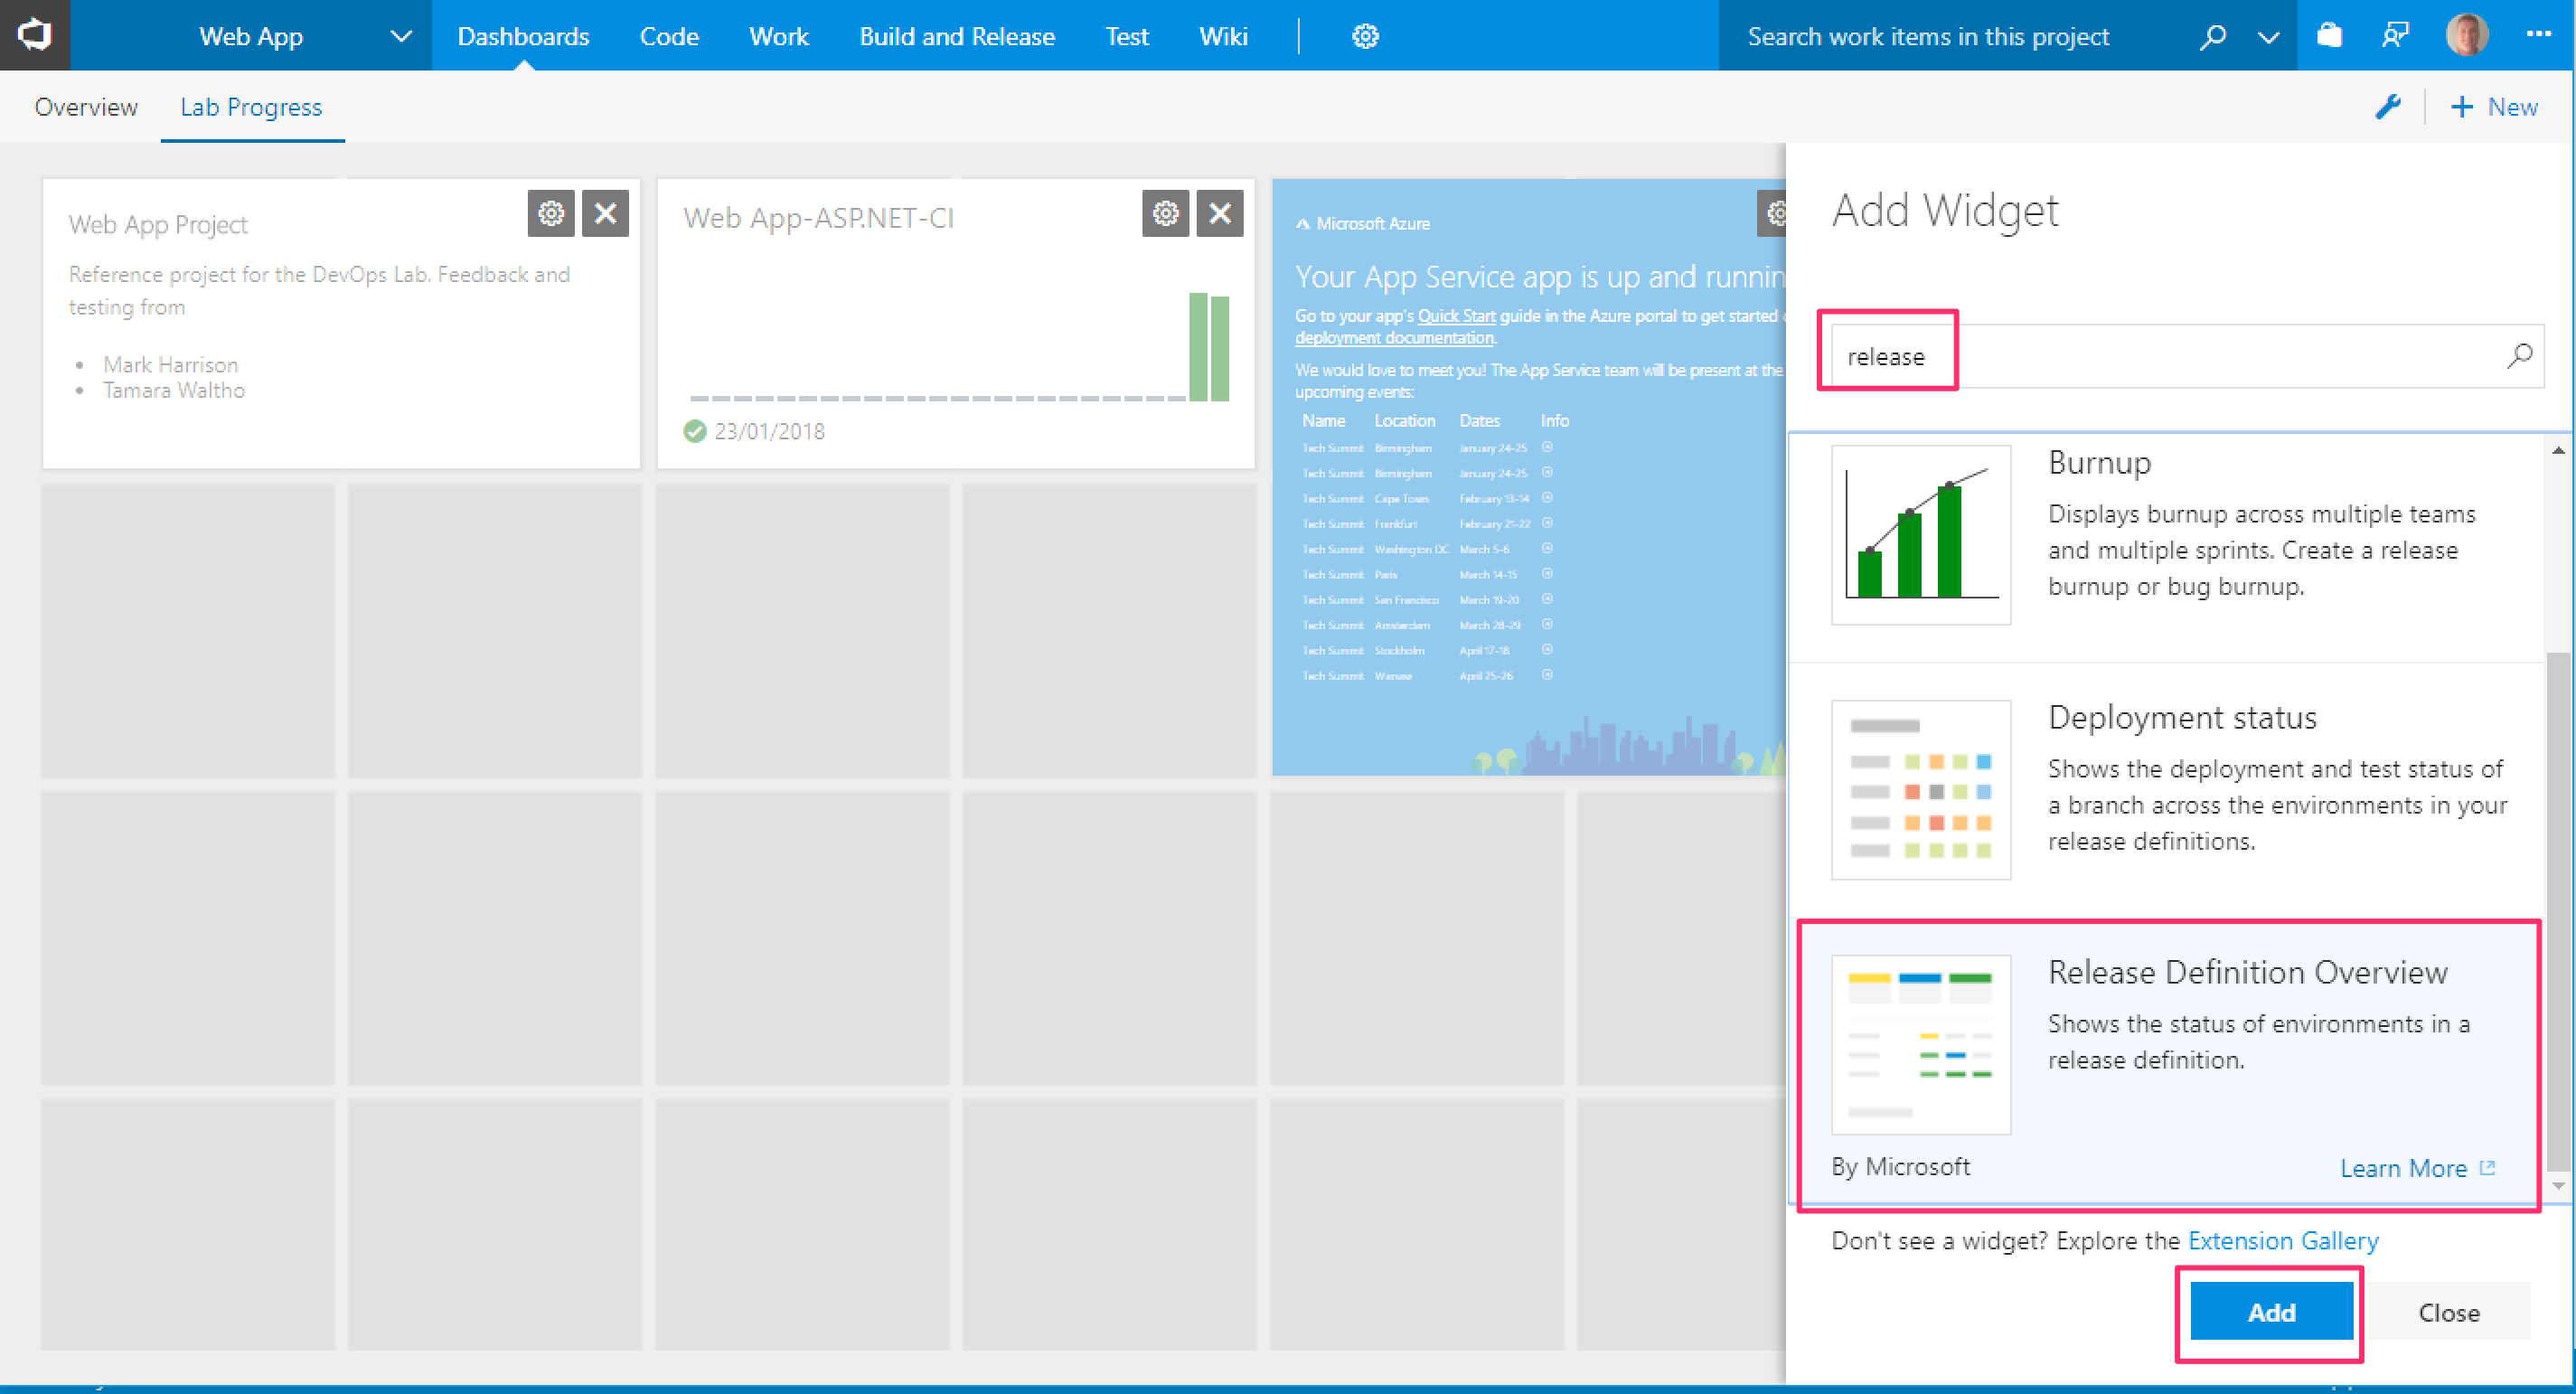
- Searching for and adding the Release Definition Overview widget:

- Set the Release Definition to the release created in the lab above:
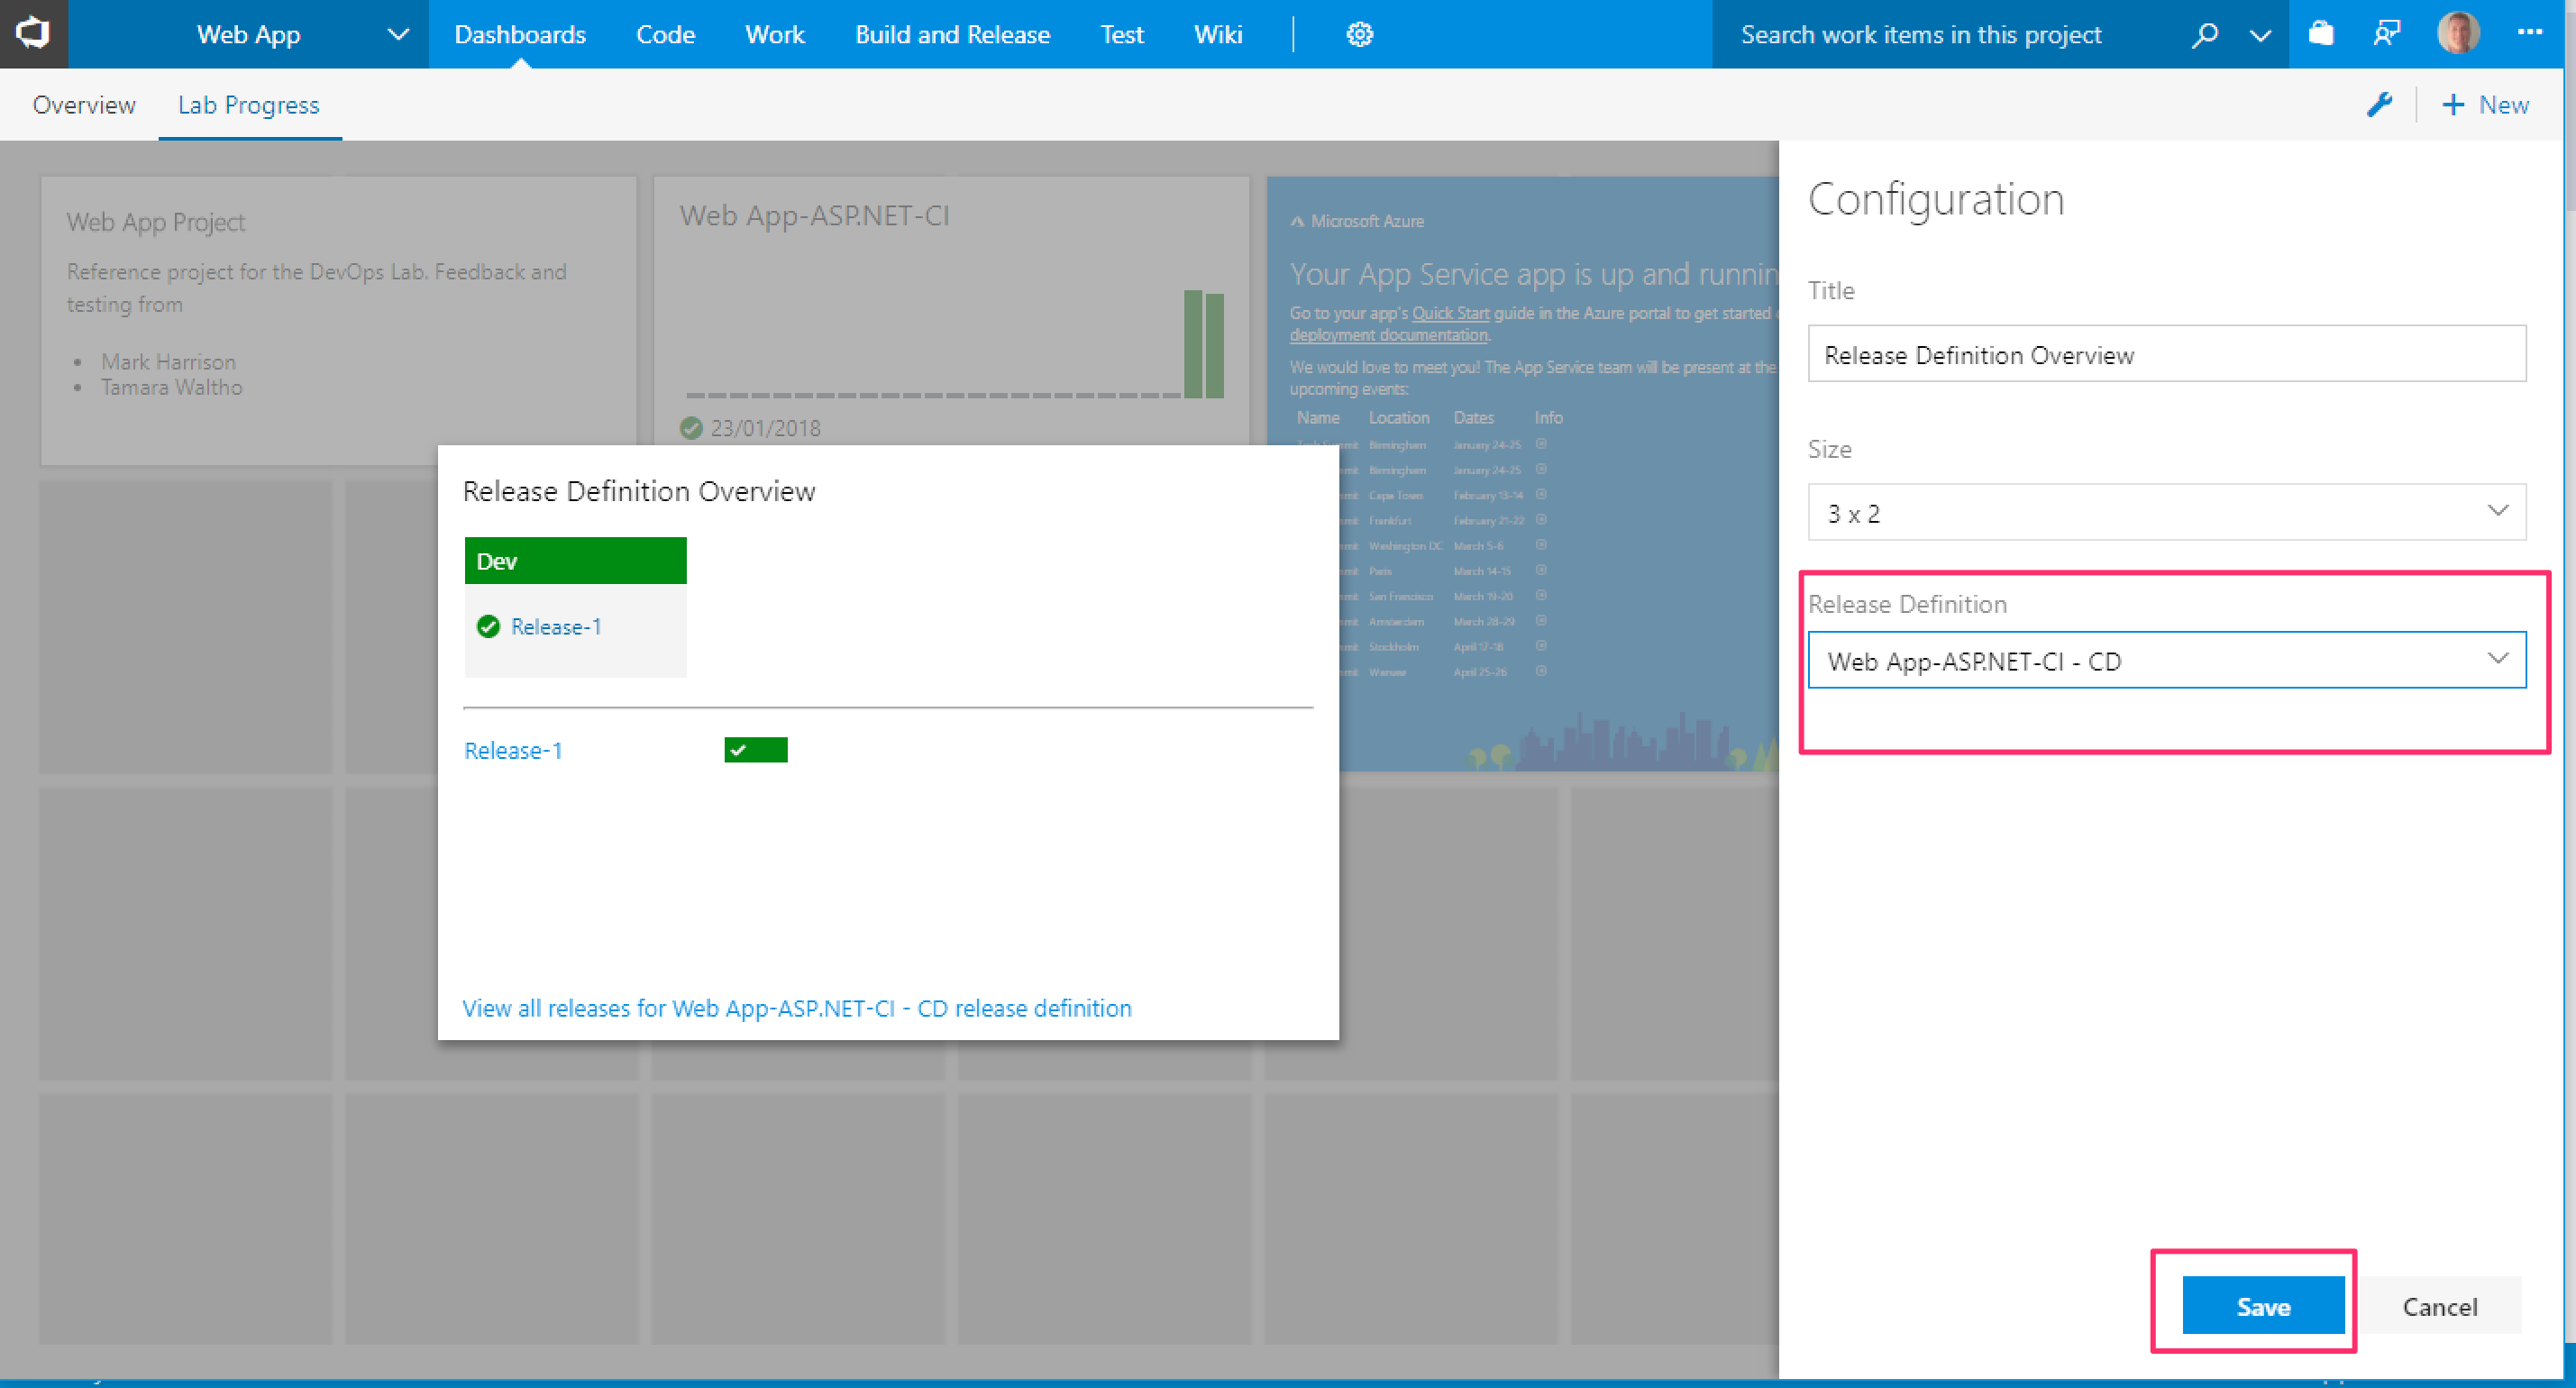

- Save the changes, close the widget gallery and save the dashboard by clicking on the blue edit button in the bottom right hand corner.
The ability to treat infrastructure (machines, networks, configuration) in the same way as code brings many benefits, but in particular allows you to create infrastructure on demand and include that in your DevOps pipeline.
Azure Resource Manager (ARM) templates are the native approach and this lab adds using ARM into the flow. The example here will allow you to create an environment in Azure on demand as part of the flow.
This lab will create a new test environment in Azure without needing to manually create it (via the Portal or the Command line etc.).
- In Visual Studio, with the Web App solution open in Solution Explorer, right click the solution and select Add | New Project.

- Select Cloud | Azure Resource Group and name the project e.g. WebApp.ARM.

- There are a range of ARM templates to create a wide variety or resources in Azure. In this case from the Visual Studio Templates select Blank Template and click OK.

- You now have a project in your solution containing a blank ARM template (azuredeploy.json) and a blank parameters file (azuredeploy.parameters.json).

- Now replace the content of the files created in the previous step with pre-prepared content:
- View (or download) this azuredeploy.json file, select all the contents of the file, and then copy and paste over the content of the azuredeploy.json file in Visual Studio.
- Do the same with this azuredeploy.parameters.json file.
- Save the files in Visual Studio.
- In Visual Studio, select the Team Explorer | Changes. Add a commit comment and select Commit All and Push. Save if prompted.
The ARM template is now added to source control, although there is no need for it to be in the same repository as the code, this is just for convenience in this lab. Note that adding the new files to source control will trigger a build and release in the background. You could temporarily turn off the CI trigger but just let it run in the background while completing the next task.
- In VSTS select Build and Release | Releases | your release definition and Edit.

- Add a new artifact to the release pipeline. This means the release will get the application from the build (as a zip file) and the ARM templates directly from source control (as they don't need to be compiled or packaged).

- Set the Source type to Git, the Project and Source (repository) to the Web App project, the Default branch to master and the default version to Latest from default branch. Then click Add (you may need to scroll down).

- In the Pipeline view hover over the Dev environment and select Clone.

-
Select the cloned environment Copy of Dev and change the name to QA and close the Environment window.
 .
. -
Select the QA environment (by clicking on the "1 phase, 1 task" link inside the QA environment) and in Tasks click the plus sign and then search for the Azure Resource Group Deployment task. Select Add.


- Set the Azure Details. Select the Azure subscription set up previously, Ensure that the Action is Create or update resource group, Enter a new resource group name for the QA environment e.g. WebAppQA-RG and set the location.

- In the Template section set the Template (using the ... button) to Web App (Git) WebApp.ARM/azuredeploy.json and click OK.

- Set the Template parameters field (using the ... button) to WebApp (Git) WebApp.ARM/azuredeploy.parameters.json and click OK.

- Set the Override Template parameters field (using the ... button) to WebAppQAPlan, the webSiteName to the same as the Dev website but with QA appended (e.g. WebApp-GJAD-QA)and click OK.

-
Move the Azure Deployment: Create or Update Resource Group task to be before the Deploy Azure App Service task by dragging and dropping the task.
-
In the QA deployment process settings set the App service name to the name you used in step 10 above. Save your changes.

- Test the changes by making another code change (e.g. changing the heading again), committing and pushing, and observe the build and release. After a few minutes you should see that both the Dev and QA environments have been successfully deployed to.

- Explore the Azure portal to find the resource group WebApp-QA-RG and the web app provisioned using ARM in the QA environment. Confirm that the App service has been deployed and open it using the URL in the App service overview.

You have now created a DevOps pipeline that deploys to multiple environments, and provisions the QA environment on demand without a manual process.
Integrating automated tests into your DevOps pipeline can help drive quality whilst deploying more frequently. This lab integrates Selenium, a popular testing framework, into your pipeline. Selenium allows you to automate the testing of your web application using all the main browsers, reducing the manual testing required.
- In Visual Studio, Solution Explorer, select the solution and Add | New Project. Then select the Test category and Unit Test Project. Give the project a name and click OK.

- The Selenium libraries need to be added to the project. Right-click on the test project and select Manage NuGet Packages.

- Select Browse, search for Selenium and install Selenium.WebDriver


-
Close the NuGet page.
-
Replace the contents of UnitTest1.cs with the following:
using System;
using Microsoft.VisualStudio.TestTools.UnitTesting;
using OpenQA.Selenium.Remote;
using OpenQA.Selenium.PhantomJS;

namespace WebApp.UITest
{
    [TestClass]
    public class UITests
    {
        private static RemoteWebDriver _webDriver = null;
        private static string _webAppBaseURL;

        [ClassInitialize()]
        public static void ClassInit(TestContext context)
        {
            _webDriver = new PhantomJSDriver();

            // Allow for web app compilation and startup post deployment
            _webDriver.Manage().Timeouts().ImplicitWait = TimeSpan.FromSeconds(15);

            _webAppBaseURL = "https://<yourwebapp>.azurewebsites.net/";
        }

        [ClassCleanup()]
        public static void Cleanup()
        {
            if (_webDriver != null)
            {
                _webDriver.Quit();
            }
        }

        [TestMethod]
        [TestCategory("UI")]
        [TestCategory("Selenium")]
        [TestCategory("PhantomJS")]
        public void HomePageFoundTest()
        {
            _webDriver.Url = _webAppBaseURL;

            string actualPageTitle = _webDriver.Title;
            string expectedPageTitle = "Home Page - My ASP.NET Application";

            Assert.AreEqual(expectedPageTitle, actualPageTitle);
        }

        [TestMethod]
        [TestCategory("UI")]
        [TestCategory("Selenium")]
        [TestCategory("PhantomJS")]
        public void AboutPageFoundTest()
        {
            _webDriver.Url = _webAppBaseURL + "/Home/About";

            string actualPageTitle = _webDriver.Title;
            string expectedPageTitle = "About - My ASP.NET Application";

            Assert.AreEqual(expectedPageTitle, actualPageTitle);
        }

        [TestMethod]
        [TestCategory("UI")]
        [TestCategory("Selenium")]
        [TestCategory("PhantomJS")]
        public void ContactPageFoundTest()
        {
            _webDriver.Url = _webAppBaseURL + "/Home/Contact";

            string actualPageTitle = _webDriver.Title;
            string expectedPageTitle = "Contact - My ASP.NET Application";

            Assert.AreEqual(expectedPageTitle, actualPageTitle);
        }

        [TestMethod]
        [TestCategory("UI")]
        [TestCategory("Selenium")]
        [TestCategory("PhantomJS")]
        public void SupportEmailAddressChromeTest()
        {
            string supportEmailAddress = "Support@example.com";

            _webDriver.Url = _webAppBaseURL + "/Home/Contact";
            RemoteWebElement supportEmailElement = (RemoteWebElement)_webDriver.FindElementByLinkText(supportEmailAddress);

            Assert.AreEqual(supportEmailAddress, supportEmailElement.Text);
        }

        [TestMethod]
        [TestCategory("UI")]
        [TestCategory("Selenium")]
        [TestCategory("PhantomJS")]
        public void MarketingEmailAddressTest()
        {
            string marketingEmailAddress = "Marketing@example.com";

            _webDriver.Url = _webAppBaseURL + "/Home/Contact";
            RemoteWebElement marketingEmailElement = (RemoteWebElement)_webDriver.FindElementByLinkText(marketingEmailAddress);

            Assert.AreEqual(marketingEmailAddress, marketingEmailElement.Text);
        }

        [TestMethod]
        [TestCategory("UI")]
        [TestCategory("Selenium")]
        [TestCategory("PhantomJS")]
        public void IndexTitleTest()
        {
            string expectedTitle = "Another New Title";

            _webDriver.Url = _webAppBaseURL + "/Home/Index";
            RemoteWebElement titleElement = (RemoteWebElement)_webDriver.FindElementByTagName("H1");

            Assert.AreEqual(expectedTitle, titleElement.Text);
        }
    }
}-
This code contains six tests that will be executed against the web application using the Selenium PhantomJS driver. The tests check that pages and content on those pages exist. Note:
- You need to add your QA web app url into line 22 (the one you can find as per the last step in Lab 5 above):
_webAppBaseURL = "https://<yourwebapp>.azurewebsites.net/";
- The final test (IndexTitleTest) checks the heading on the home page that you have been changing in the previous labs. Make sure that the expected value is correct for your web app (line 110).
string expectedTitle = "Another New Title";
- The [TestCategory] properties which will be used later.
-
Save all files.
You now have some Selenium tests in the project. Before committing these to source control the next step is to amend the VSTS CI build and CD release to incorporate the tests into the flow.
-
First the build definition needs to ensure that the tests are available in the build output, so that they can be run in the release. Open the build definition (Build and Release | Builds | Edit).
-
In Phase 1, click + select the Utility tab and select the Copy Files task. This task will ensure that the tests are avaiable in the build output to be used in the release.

- Set the following values in the Copy Files task:
- Source Folder: $(build.sourcesdirectory)
- Contents: **\bin\$(BuildConfiguration)\**
- Target Folder: $(build.artifactstagingdirectory)
- The Display name will update as you make changes.

-
Move the Copy Files task to be after the Build solution task. The tests will now be available in the build output the next time the build runs.
-
In this example we want the CI build to continue to only run unit tests and not the new Selenium tests. Therefore update the Test Assemblies task and add TestCategory!=PhantomJS in the Test filter criteria field. This uses the TestCategories in the test code to filter the tests to be run.

-
Save (but not queue) the build.
-
The next step is to execute the tests as part of the release. Open the Release definition (Build and Release | Releases | Edit) and click on the tasks for the QA environment. Click the + button, select the Test tab and select the Visual Studio Test task. The Selenium tests are within a unit test so this task can execute them.

- Select the test task. In the Test filter criteria field add TestCategory=PhantomJS. This will only execute tests that have the matching [TestCategory] property in the code and provides control over which tests to run. In this example we have decided not to run the Selenium tests in the CI build but want to run them in the QA environment.

-
Ensure the test task is the last task and save the release.
-
Now return to Visual Studio and the Team Explorer. You may need to click the back arrow or home button in Team Explorer. Then commit and push the changes. This will trigger the CI build, which will now include the tests in the output, and then trigger the CD release, which will execute the tests found in the build output. Wait for the build and release into QA to complete and then open the release summary. You should see that there are tests in the QA environment and that they have passed.

- Click on the 100% pass link for the QA environment and you will see the individual test results. By default the view is filtered to only show failed tests, select All outcomes to see the tests.

You now have automated UI tests being executed everytime a new version of your application is deployed.
Optional: You might want to see what happens when a test fails. You could change the heading for the web app again, but not update the tests, and commit the change. You should then see a successful CI build (as the UI Tests aren't run in the build), a successful release to Dev but a failed release to QA (as that's the environment we chose to run the UI Tests in).
Optional: Add a Deployment status widget showing test results to the Lab Progress dashboard by:
- Searching for and adding the Deployment status widget:
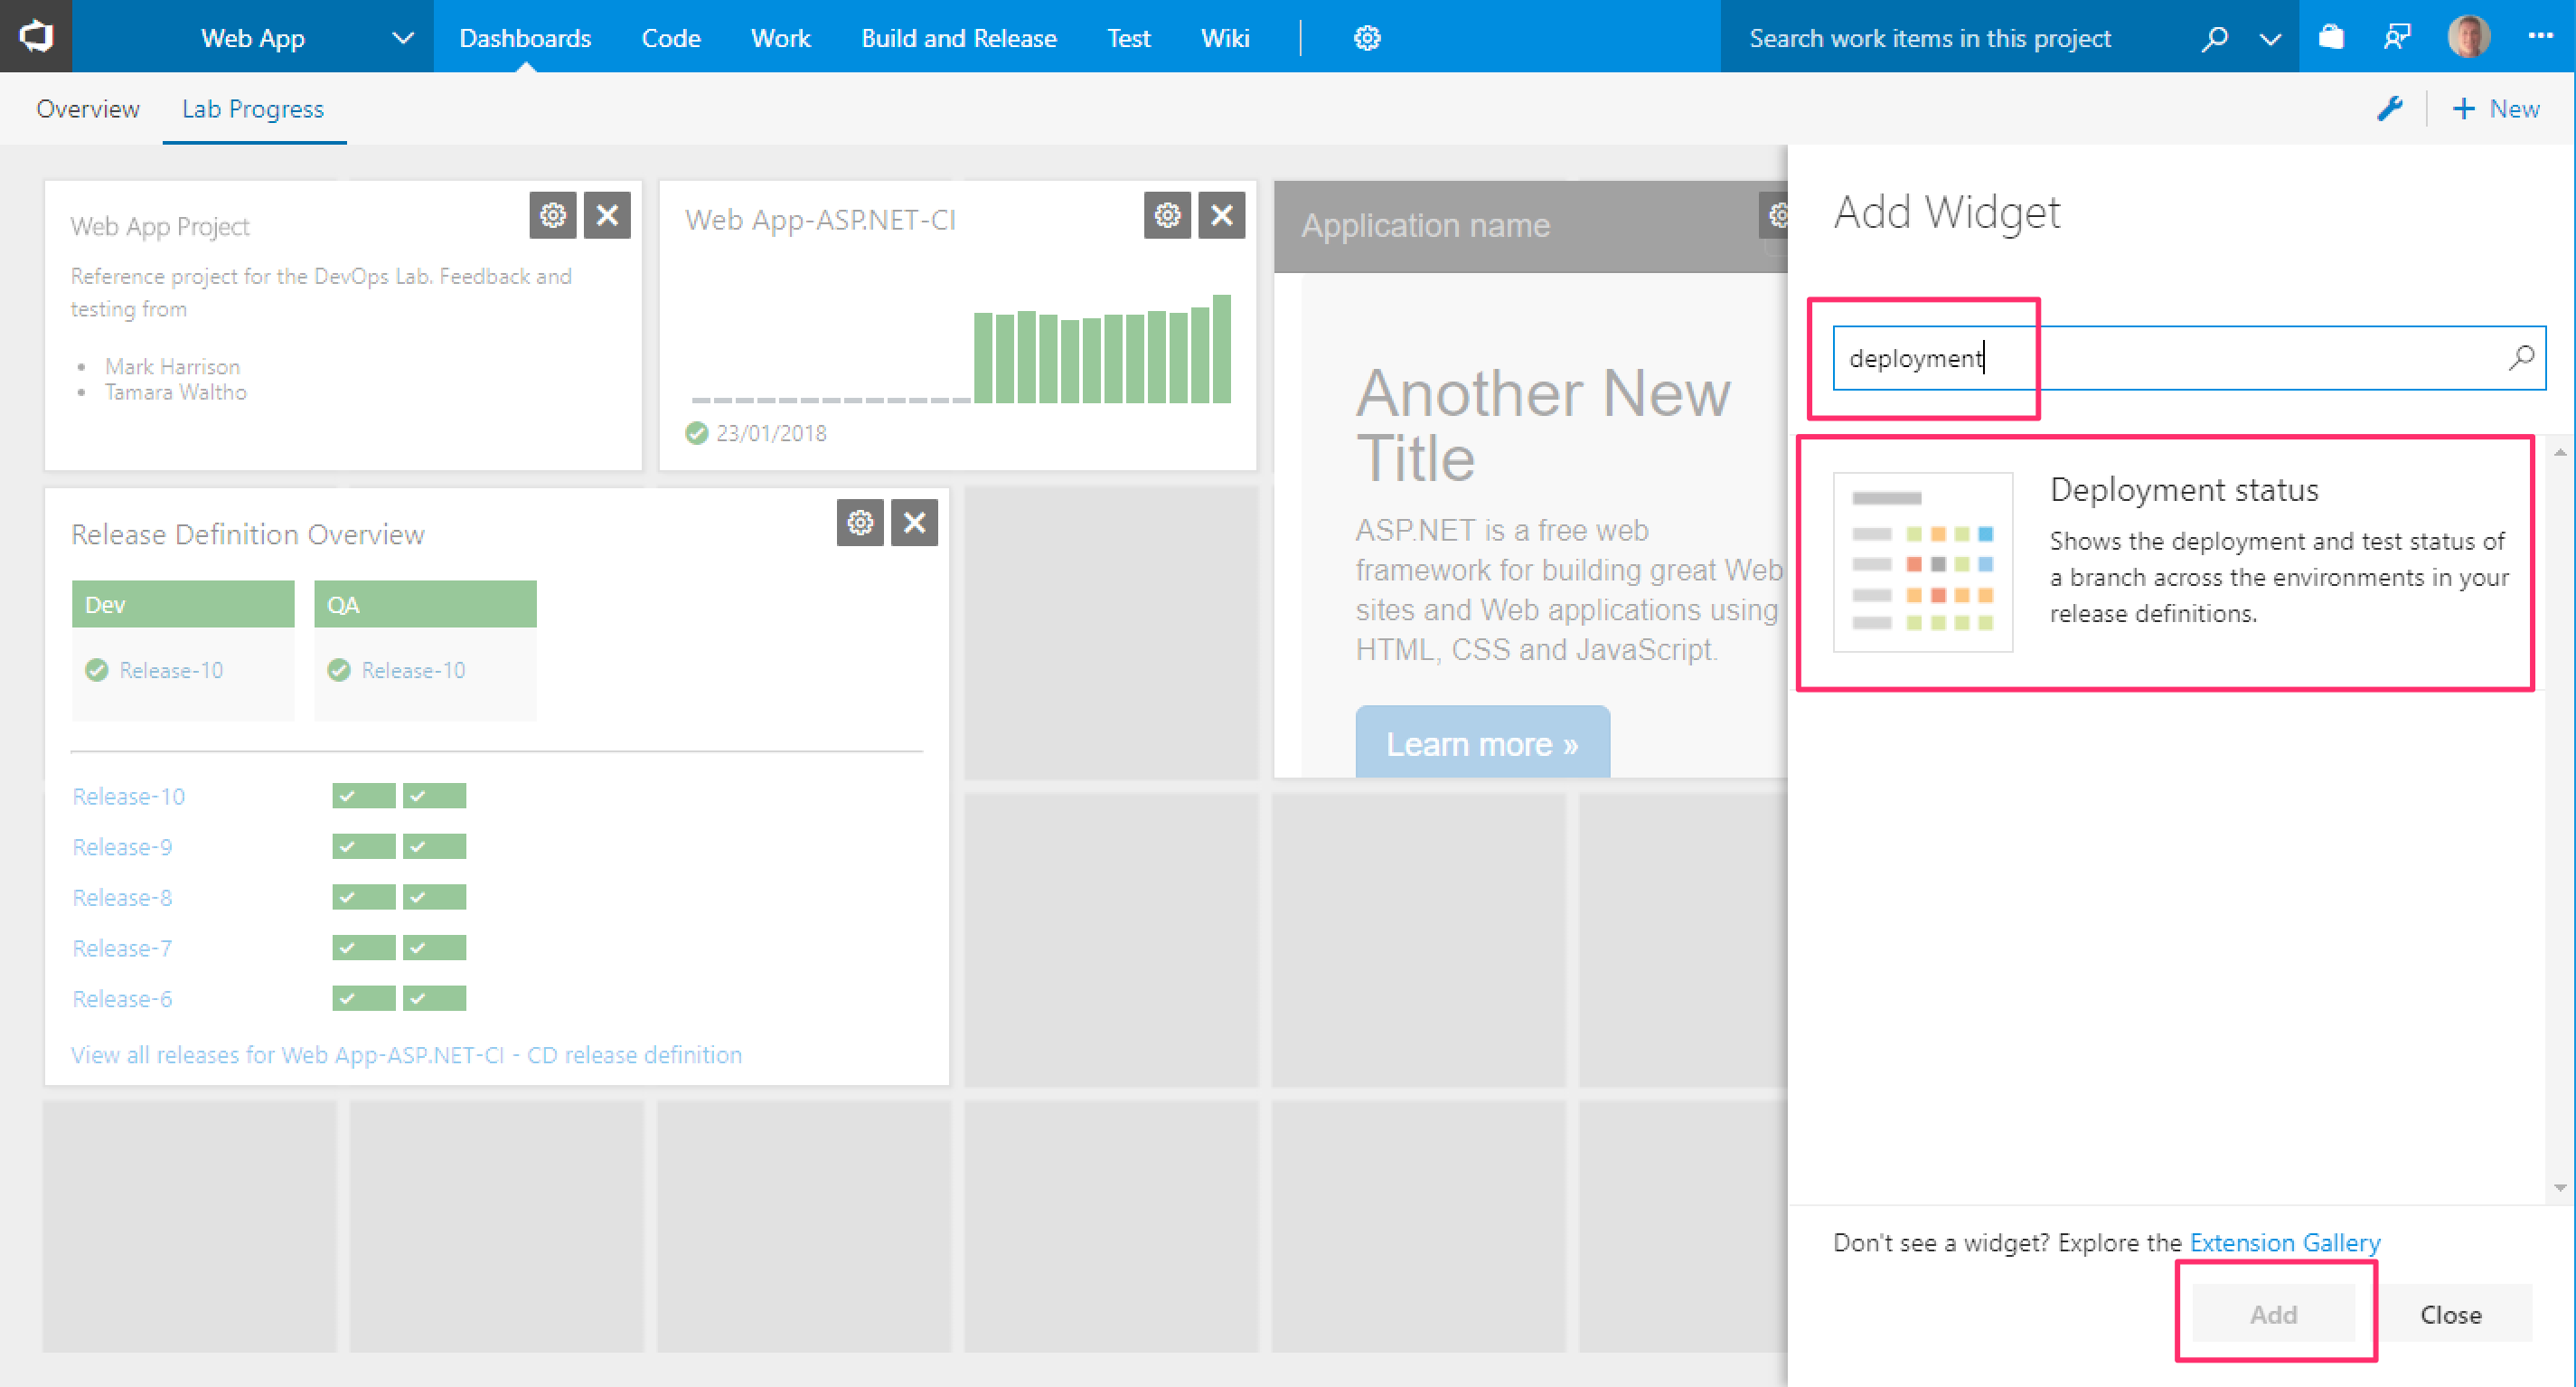

- Set the Build definition and Linked release definition including all environments:
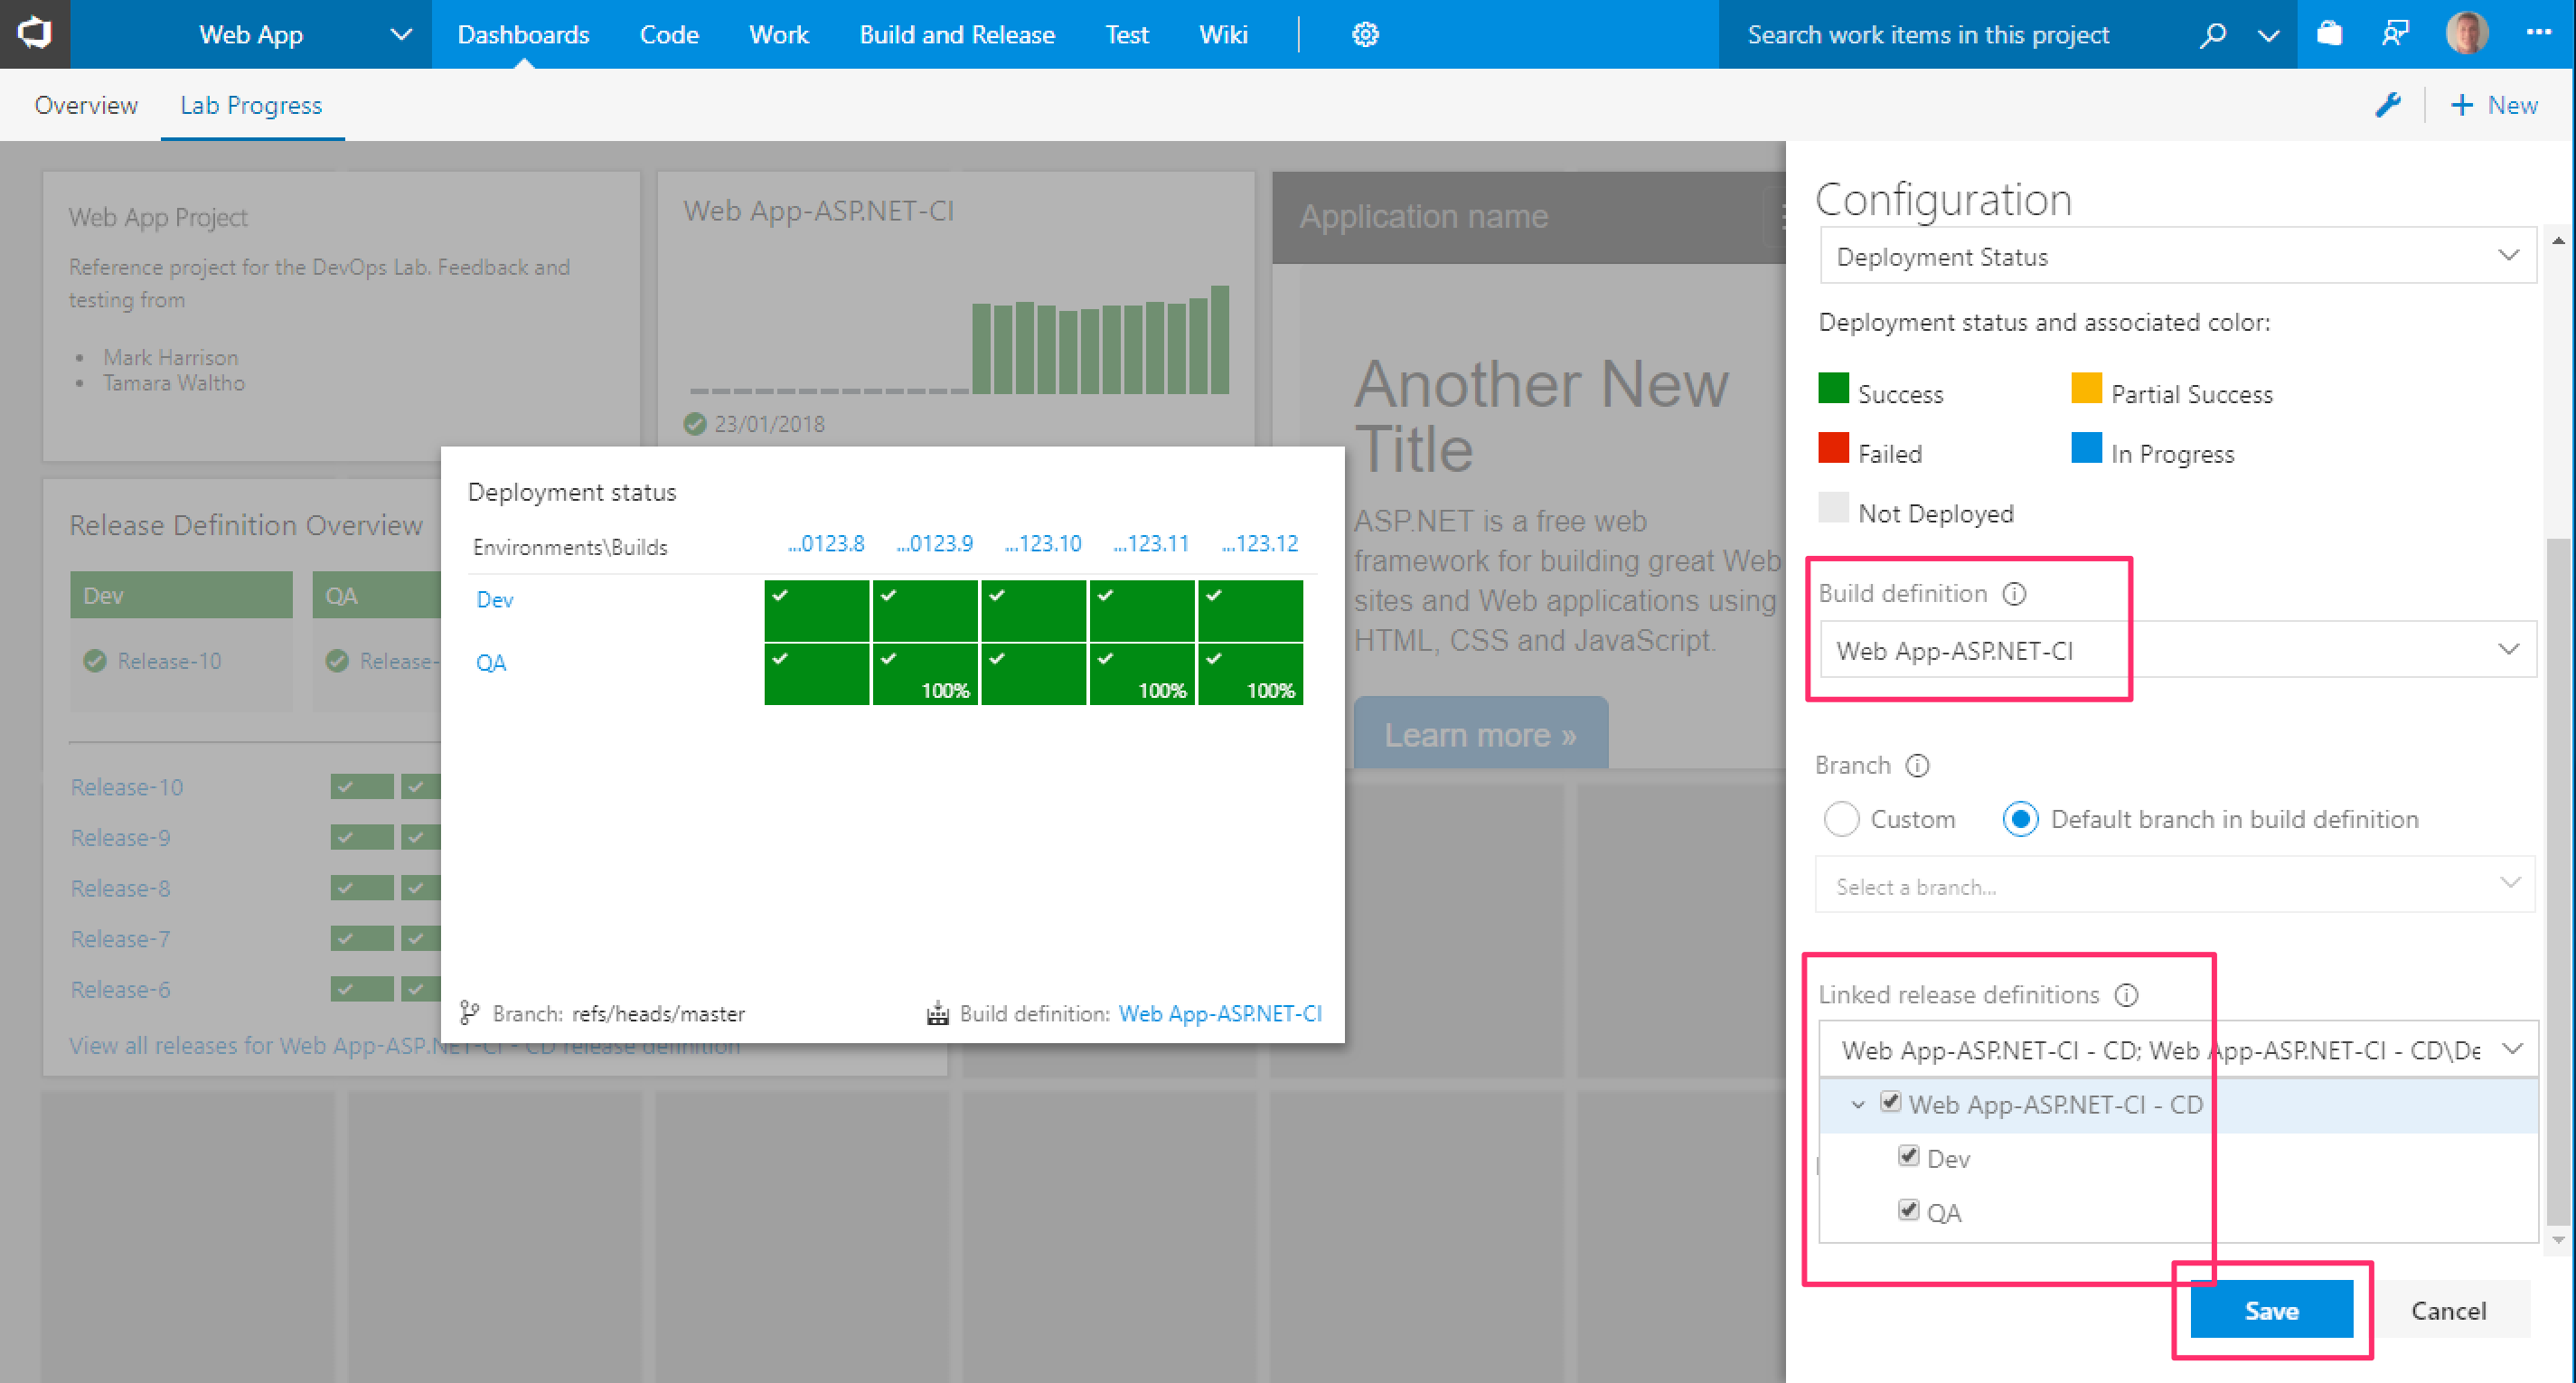

- Save the changes, close the widget gallery and save the dashboard by clicking on the blue edit button in the bottom right hand corner.
DevOps doesn't stop at deployment into production. Monitoring and understanding your application provides valuble insight.
- In Visual Studio right-click on the WebApp project | Application Insights | Configure Application Insights

- Update the SDK, if needed, and click Start Free.

- Set the correct account, subscription and resource - for resource that will probably be a New resource. Also decide whether you want Application Insights to be capped at the free tier or allow it to exceed the free tier limits. If in doubt select to halt collection at the free limits.

- Commit and push the changes. This will trigger another build and release.

- When the release to QA has completed go to the Azure portal select the Application Insights service for the Web App (it may take a little while for data to show). Click on the Live Stream button.

- Give it a few seconds for some baseline data to show.

- Go to your deployed app and click on the Home, About and Contact pages, then return to the Live Stream to see the data showing.

- Close the Live Stream and click on the Page View Load Time graph.

-
Take a look at data on page response time
 .
. -
Close the Page response time blade and select Analytics.


- Try some of the queries such as the Users query


This is just a tiny sample of what can be done with Application Insights, you can read more here
Optional: Add an Application Insights widget showing test results to the Lab Progress dashboard by:
- Find and install the Application Insights widget in the marketplace
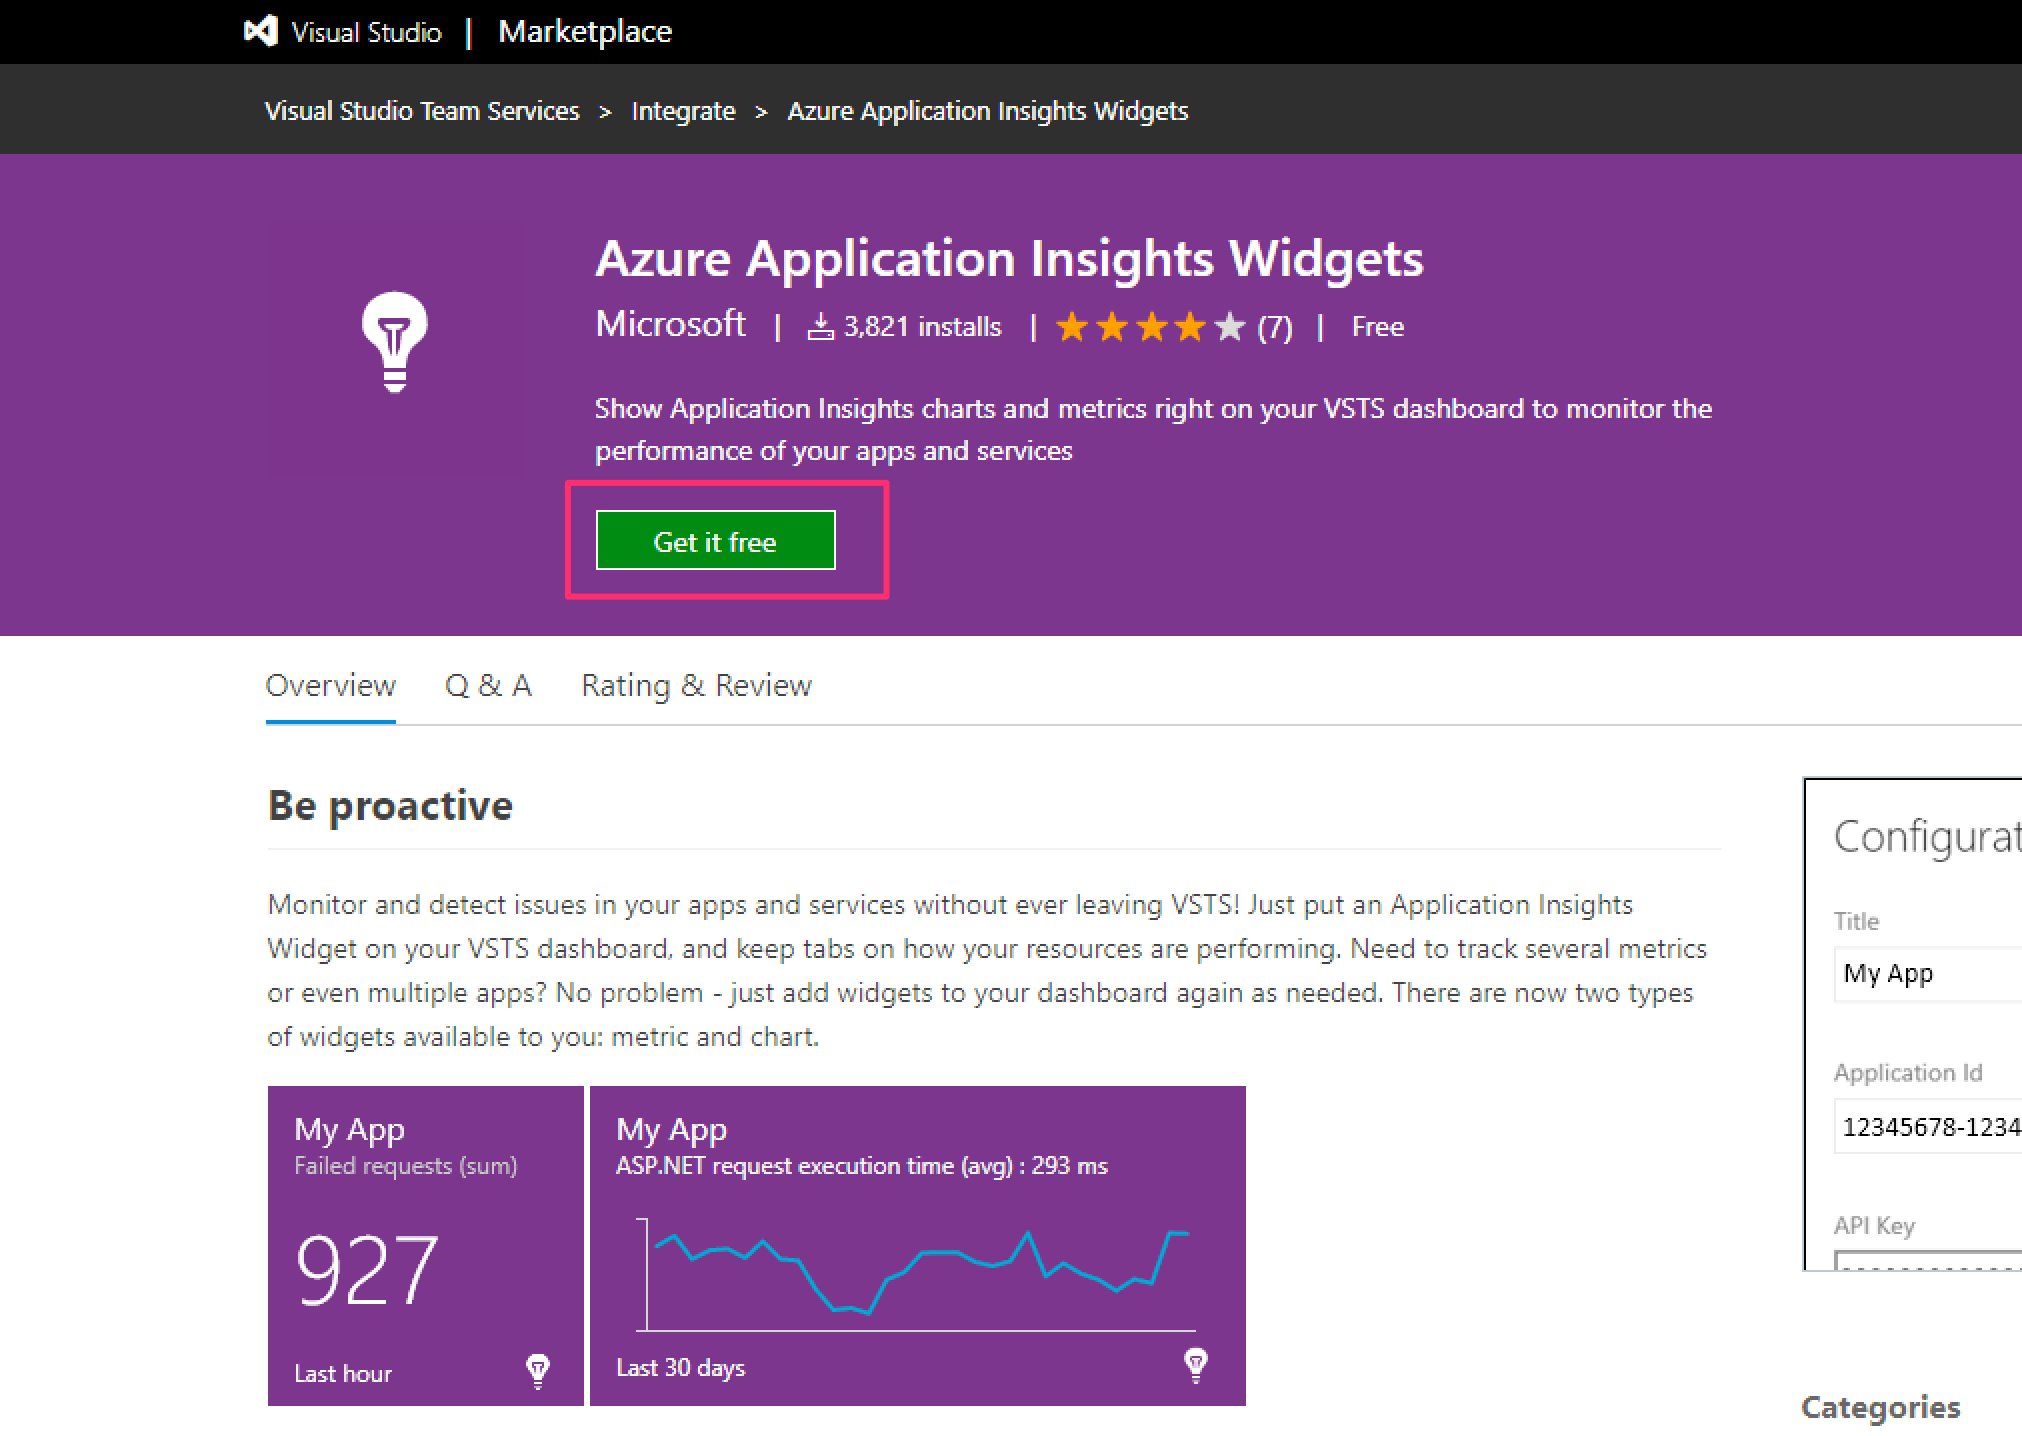

- Searching for and adding the Application Insights Chart (and/or Metrics) widget:
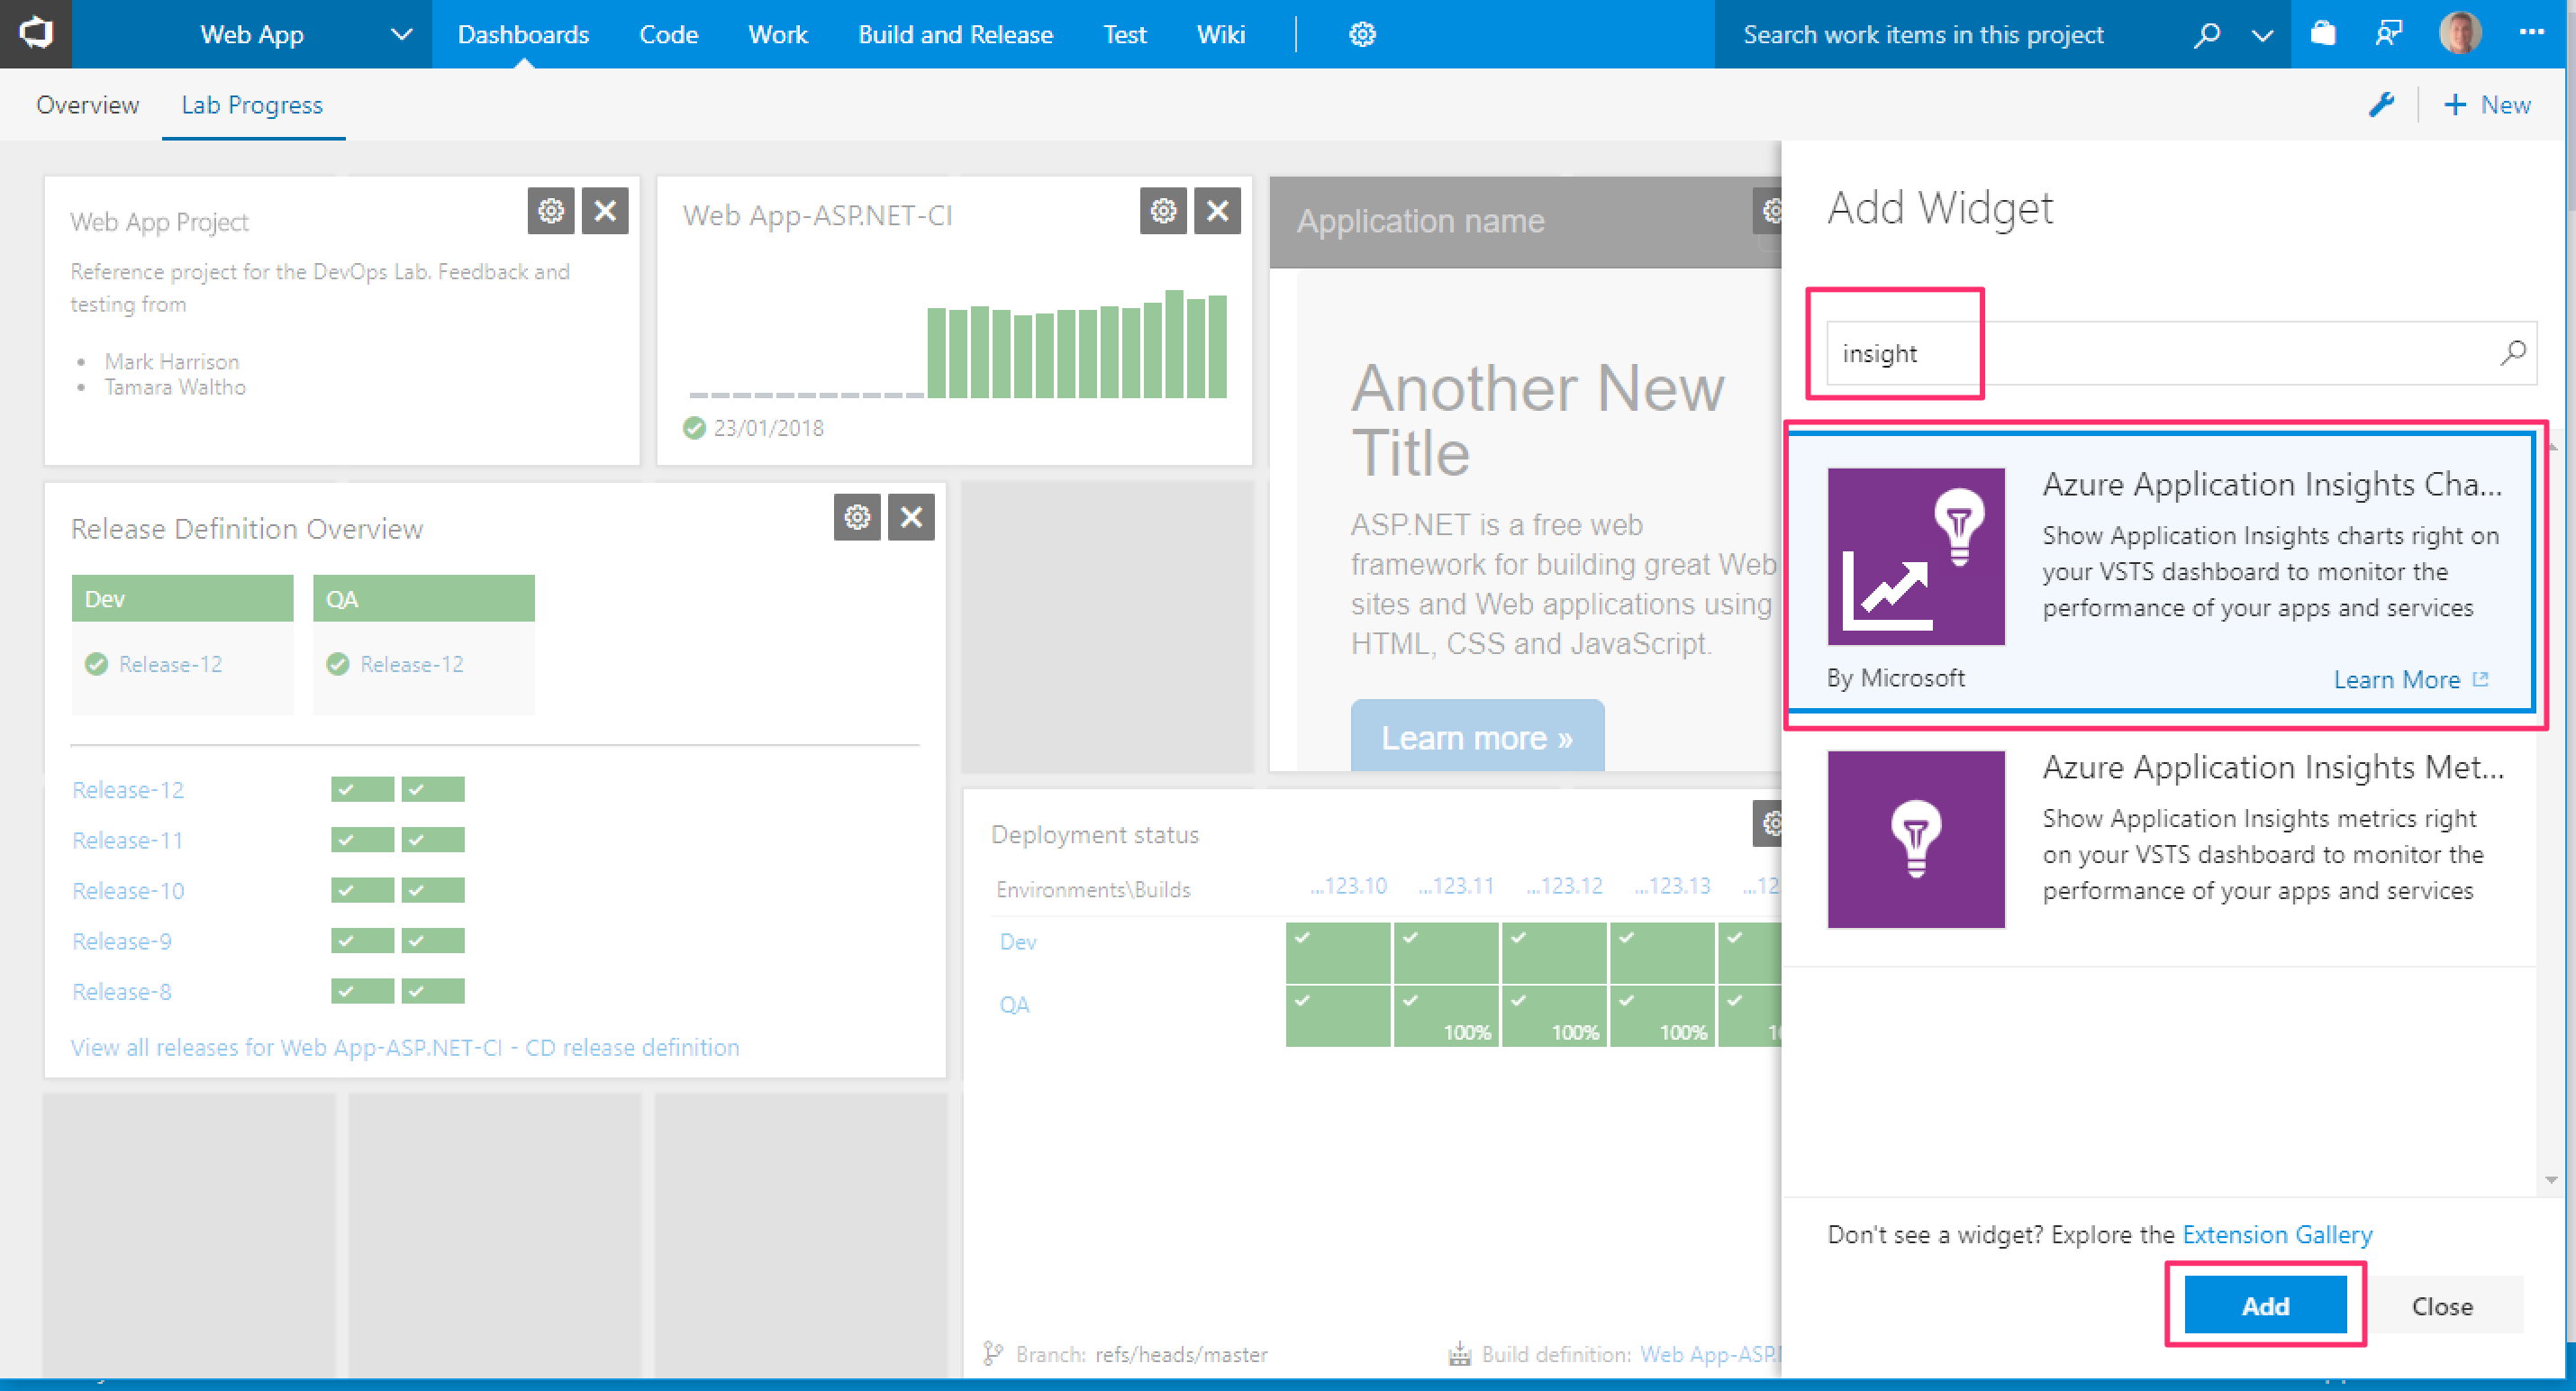

- Configure the widget following these instructions
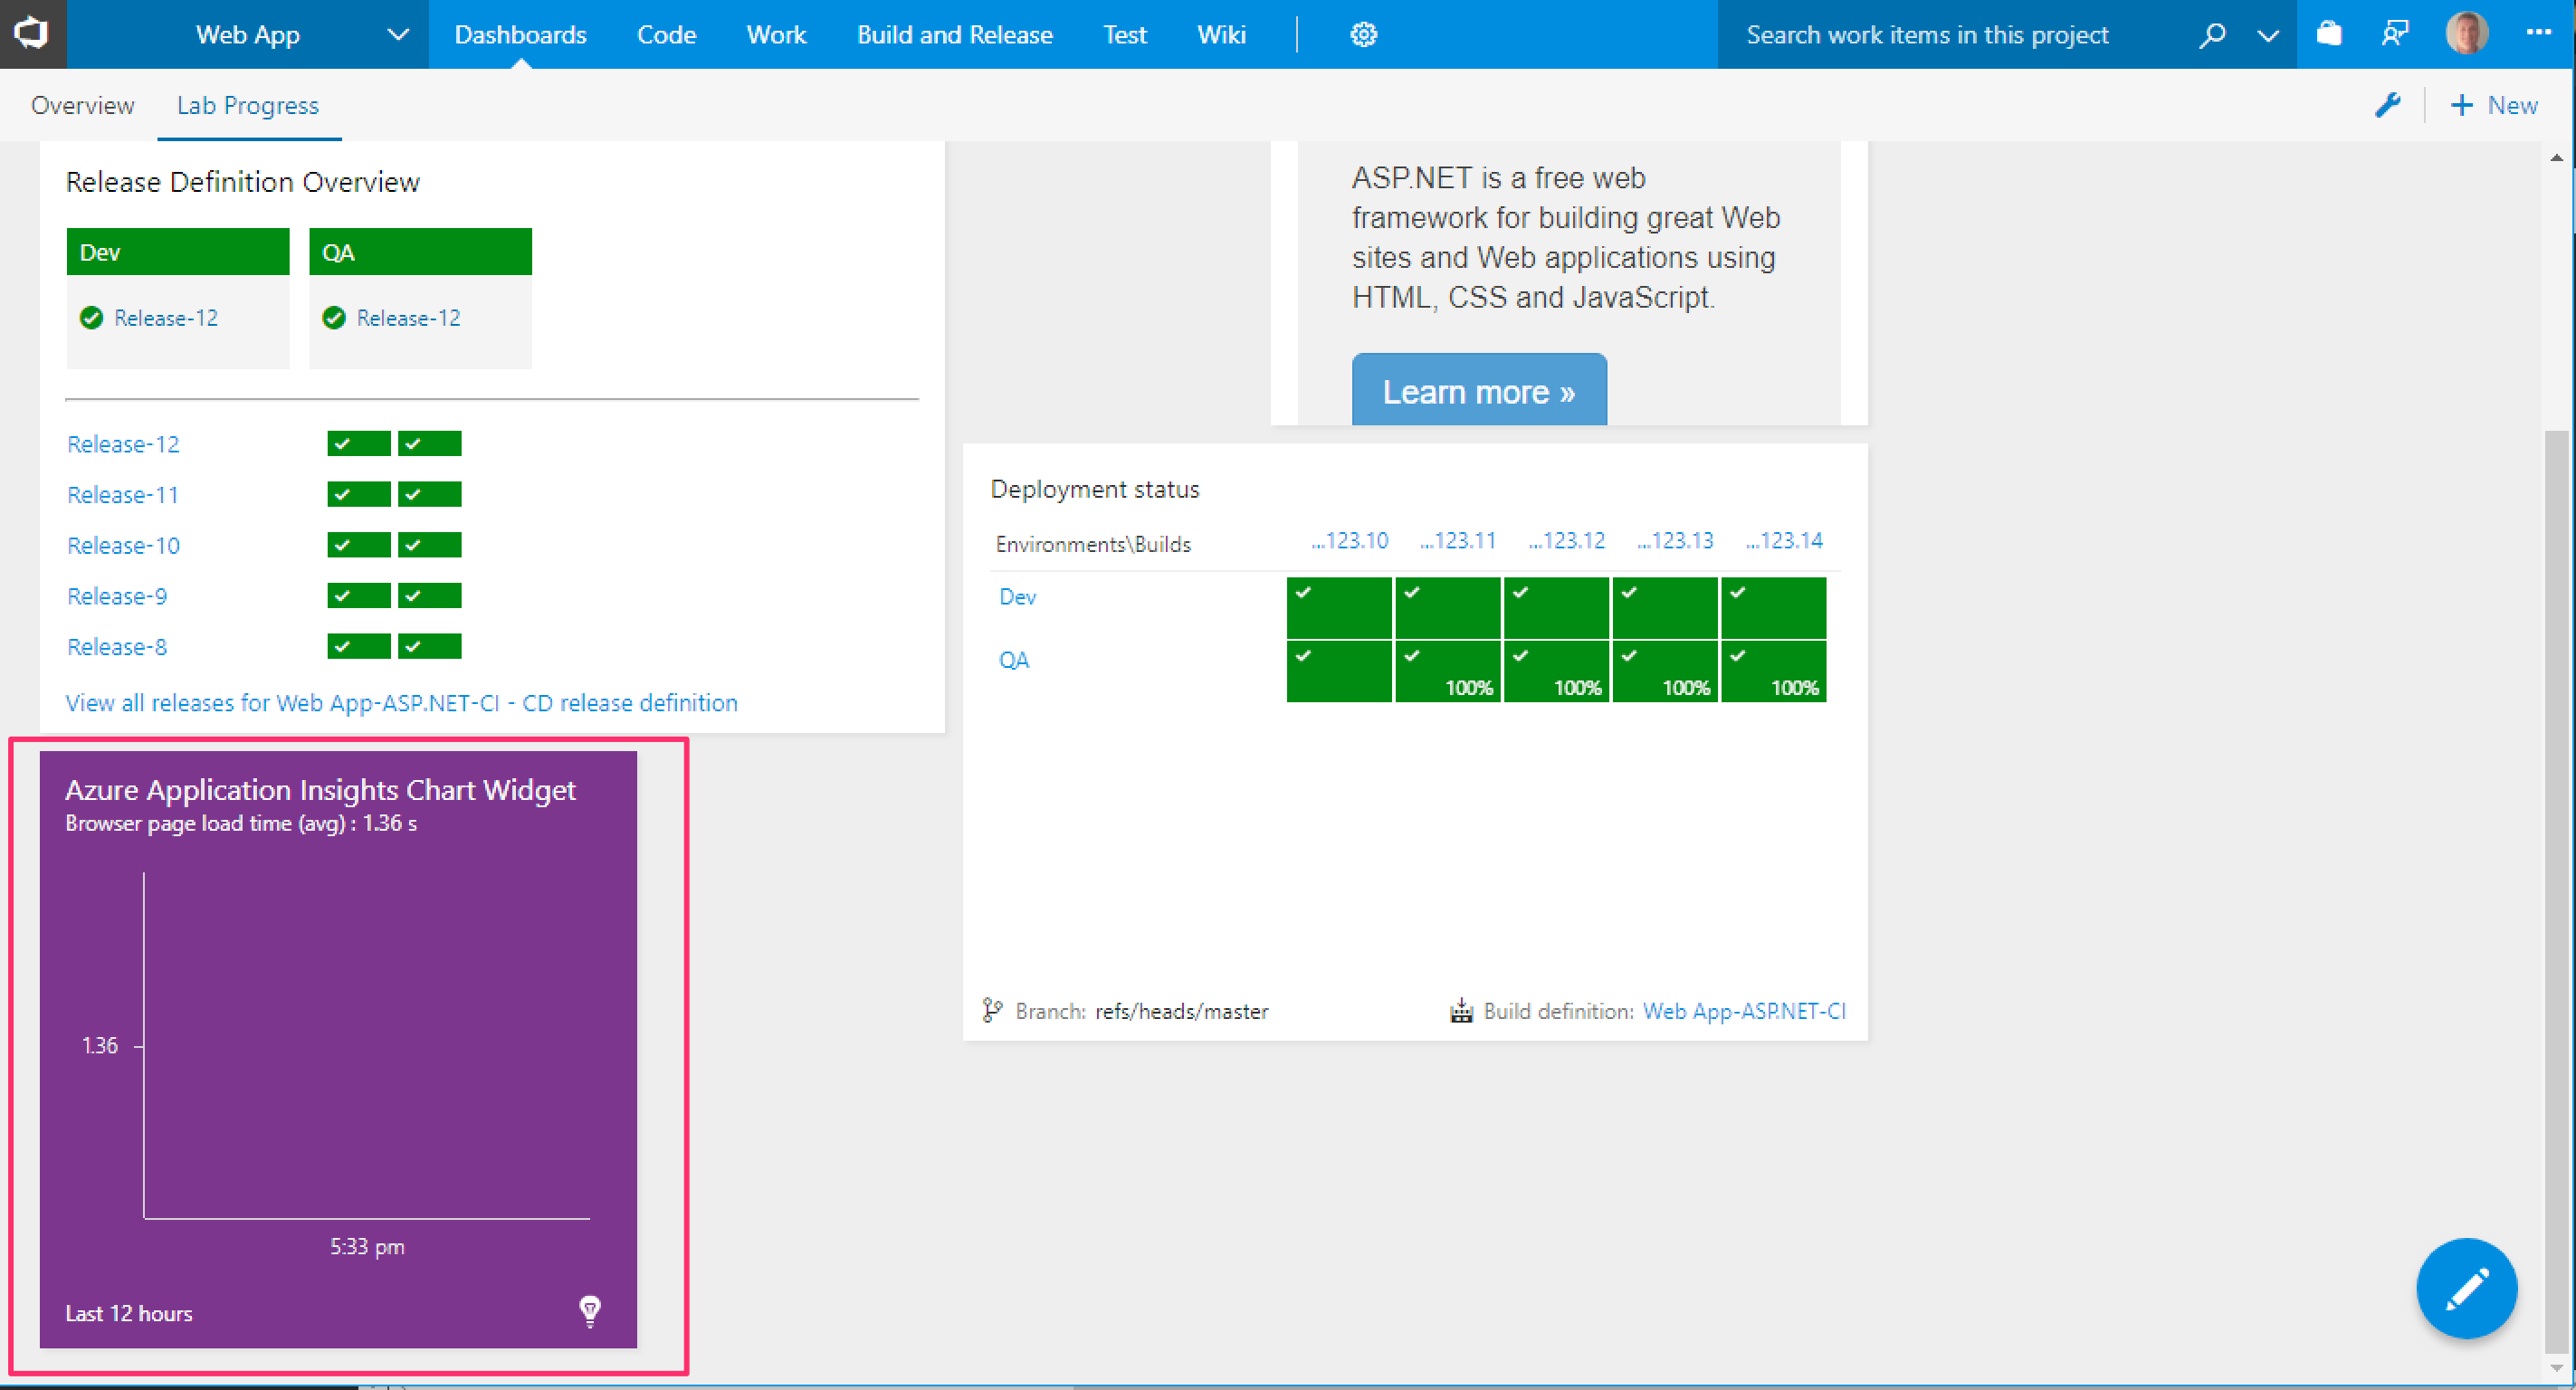

- Save the changes, close the widget gallery and save the dashboard by clicking on the blue edit button in the bottom right hand corner.
This lab outlines the key practices in implementing a DevOps pipeline but there are many other tasks that could be incorporated into the flow including:
- Setting pre and post approvals on release environments
- Using variables in releases across environment
- Adding load testing to the flow
- Linking changes to user stories and other work items to understand what has been built and released.
- Using Git branches and merging via Pull Requests
If you'd like to continue exploring DevOps with VSTS then related labs include:
A range of VSTS Labs from Agile to Testing
Node.js and Express continuous deployment with Visual Studio Team Services and Azure App Service