Learn how to use BrowserStack to run your selenium tests on multiple real devices and cross-browser environments. (Expected time: 30 mins)
BrowserStack is a service to run tests for mobile and web apps in cloud. It provides access to several real mobile devices, cross-platform and multiple browser environments. Essentially, it declutters the desk of a QA engineer - so that they can focus on writing their tests, and not carry around dozens of devices.
In this tutorial, we are going to write a simple automation test using Selenium in Node.js. Then with some additional lines of code, we'll be able to run it on two mobile devices and three browsers using BrowserStack. We will use the BrowserStack demo website for the purpose of this tutorial to write some test workflows e.g. login, add to cart and check offers.
Make sure you have Node.js (and npm) installed - preferably the LTS version. If not, use nvm to install it. Run the following in your command prompt
curl -o- https://raw.githubusercontent.com/nvm-sh/nvm/v0.39.1/install.sh | bash

nvm install --lts
nvm use --lts
Check the nvm docs for more detailed instruction.
Create a new empty directory for our test project. Now let's install the selenium-webdriver package, which is our primary dependency for running our tests in a browser of our configuration.
npm install selenium-webdriverWhile writing the tests from scract, we would want to have a local selenium setup. This will save us a lot of time in debugging and writing the tests faster. Once, we are able to run our tests in one particular browser environment, we will then use the power of BrowserStack and run it on three browsers - Chrome, Firefox and Safari and two mobile devices - iPhone (iOS) and OnePlus (android).
For the purpose of this tutorial, we will use chromedriver. Download the latest release of chromdriver from their releases page. Choose the particular executable per your operating system (Linux, macOS, Windows) which you'll be using for this tutorial, and move it to a location in your PATH. An example of using Chrome on Linux -
wget https://chromedriver.storage.googleapis.com/103.0.5060.53/chromedriver_linux64.zip
unzip chromedriver_linux64.zip
sudo mv chromedriver /usr/local/bin
We also need to make sure we have a Chrome browser installed. You can download Chrome directly from their website. If you are on Linux, you can also install it with apt-get.
wget https://dl.google.com/linux/direct/google-chrome-stable_current_amd64.deb
sudo apt -y install ./google-chrome-stable_current_amd64.deb
Note: Make sure that the major version of both the browser and chromedriver matches, or else you will get an error when creating the driver.
If you want to use Firefox, you can download the latest files from geckodriver releases page.
Head over to BrowserStack Sign Up page and create a new account for free. Once you are logged in, head over to your profile page and note down your Username and Access Key. We will need them once we are about to run our tests on BrowserStack.
That's all - let us begin! 💥
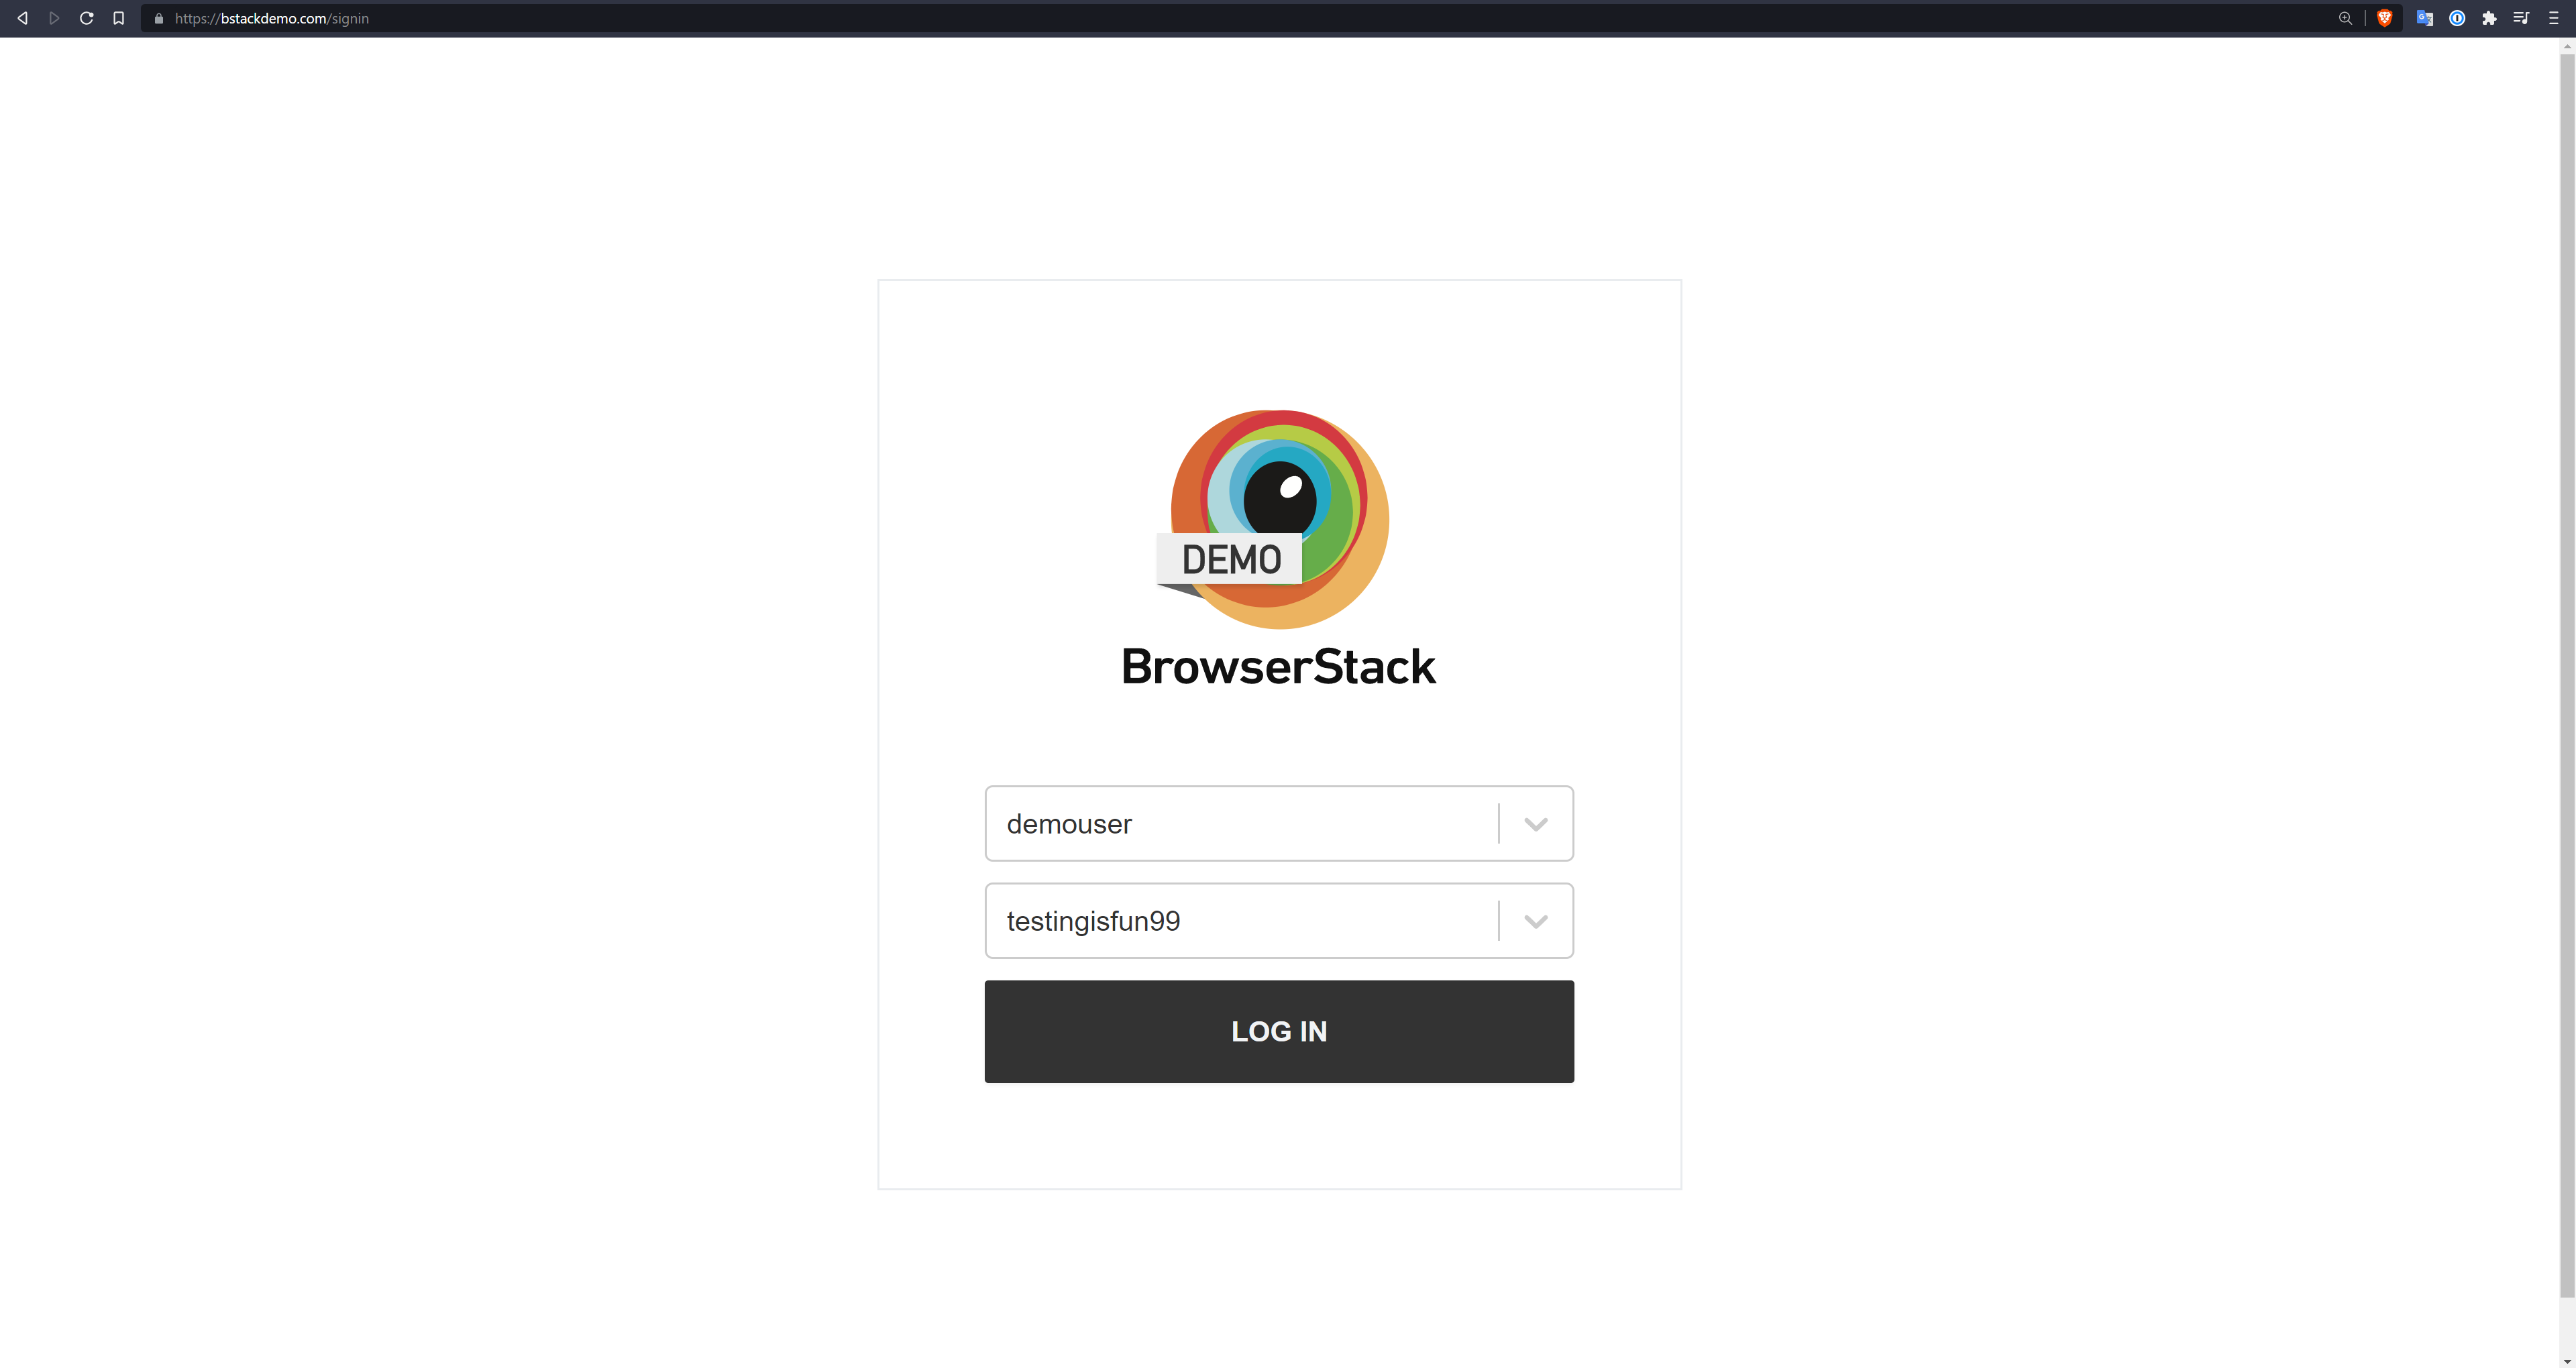
Head over to bstackdemo.com which is the demo website we will use for the purpose of this tutorial. There we can find a Sign in button on the top right corner.
Click on it to open the login page. There is a list of demo usernames and a demo password which can be used to sign in to the website. Let's pick the username demouser and password testingisfun99 for our purpose of this tutorial.
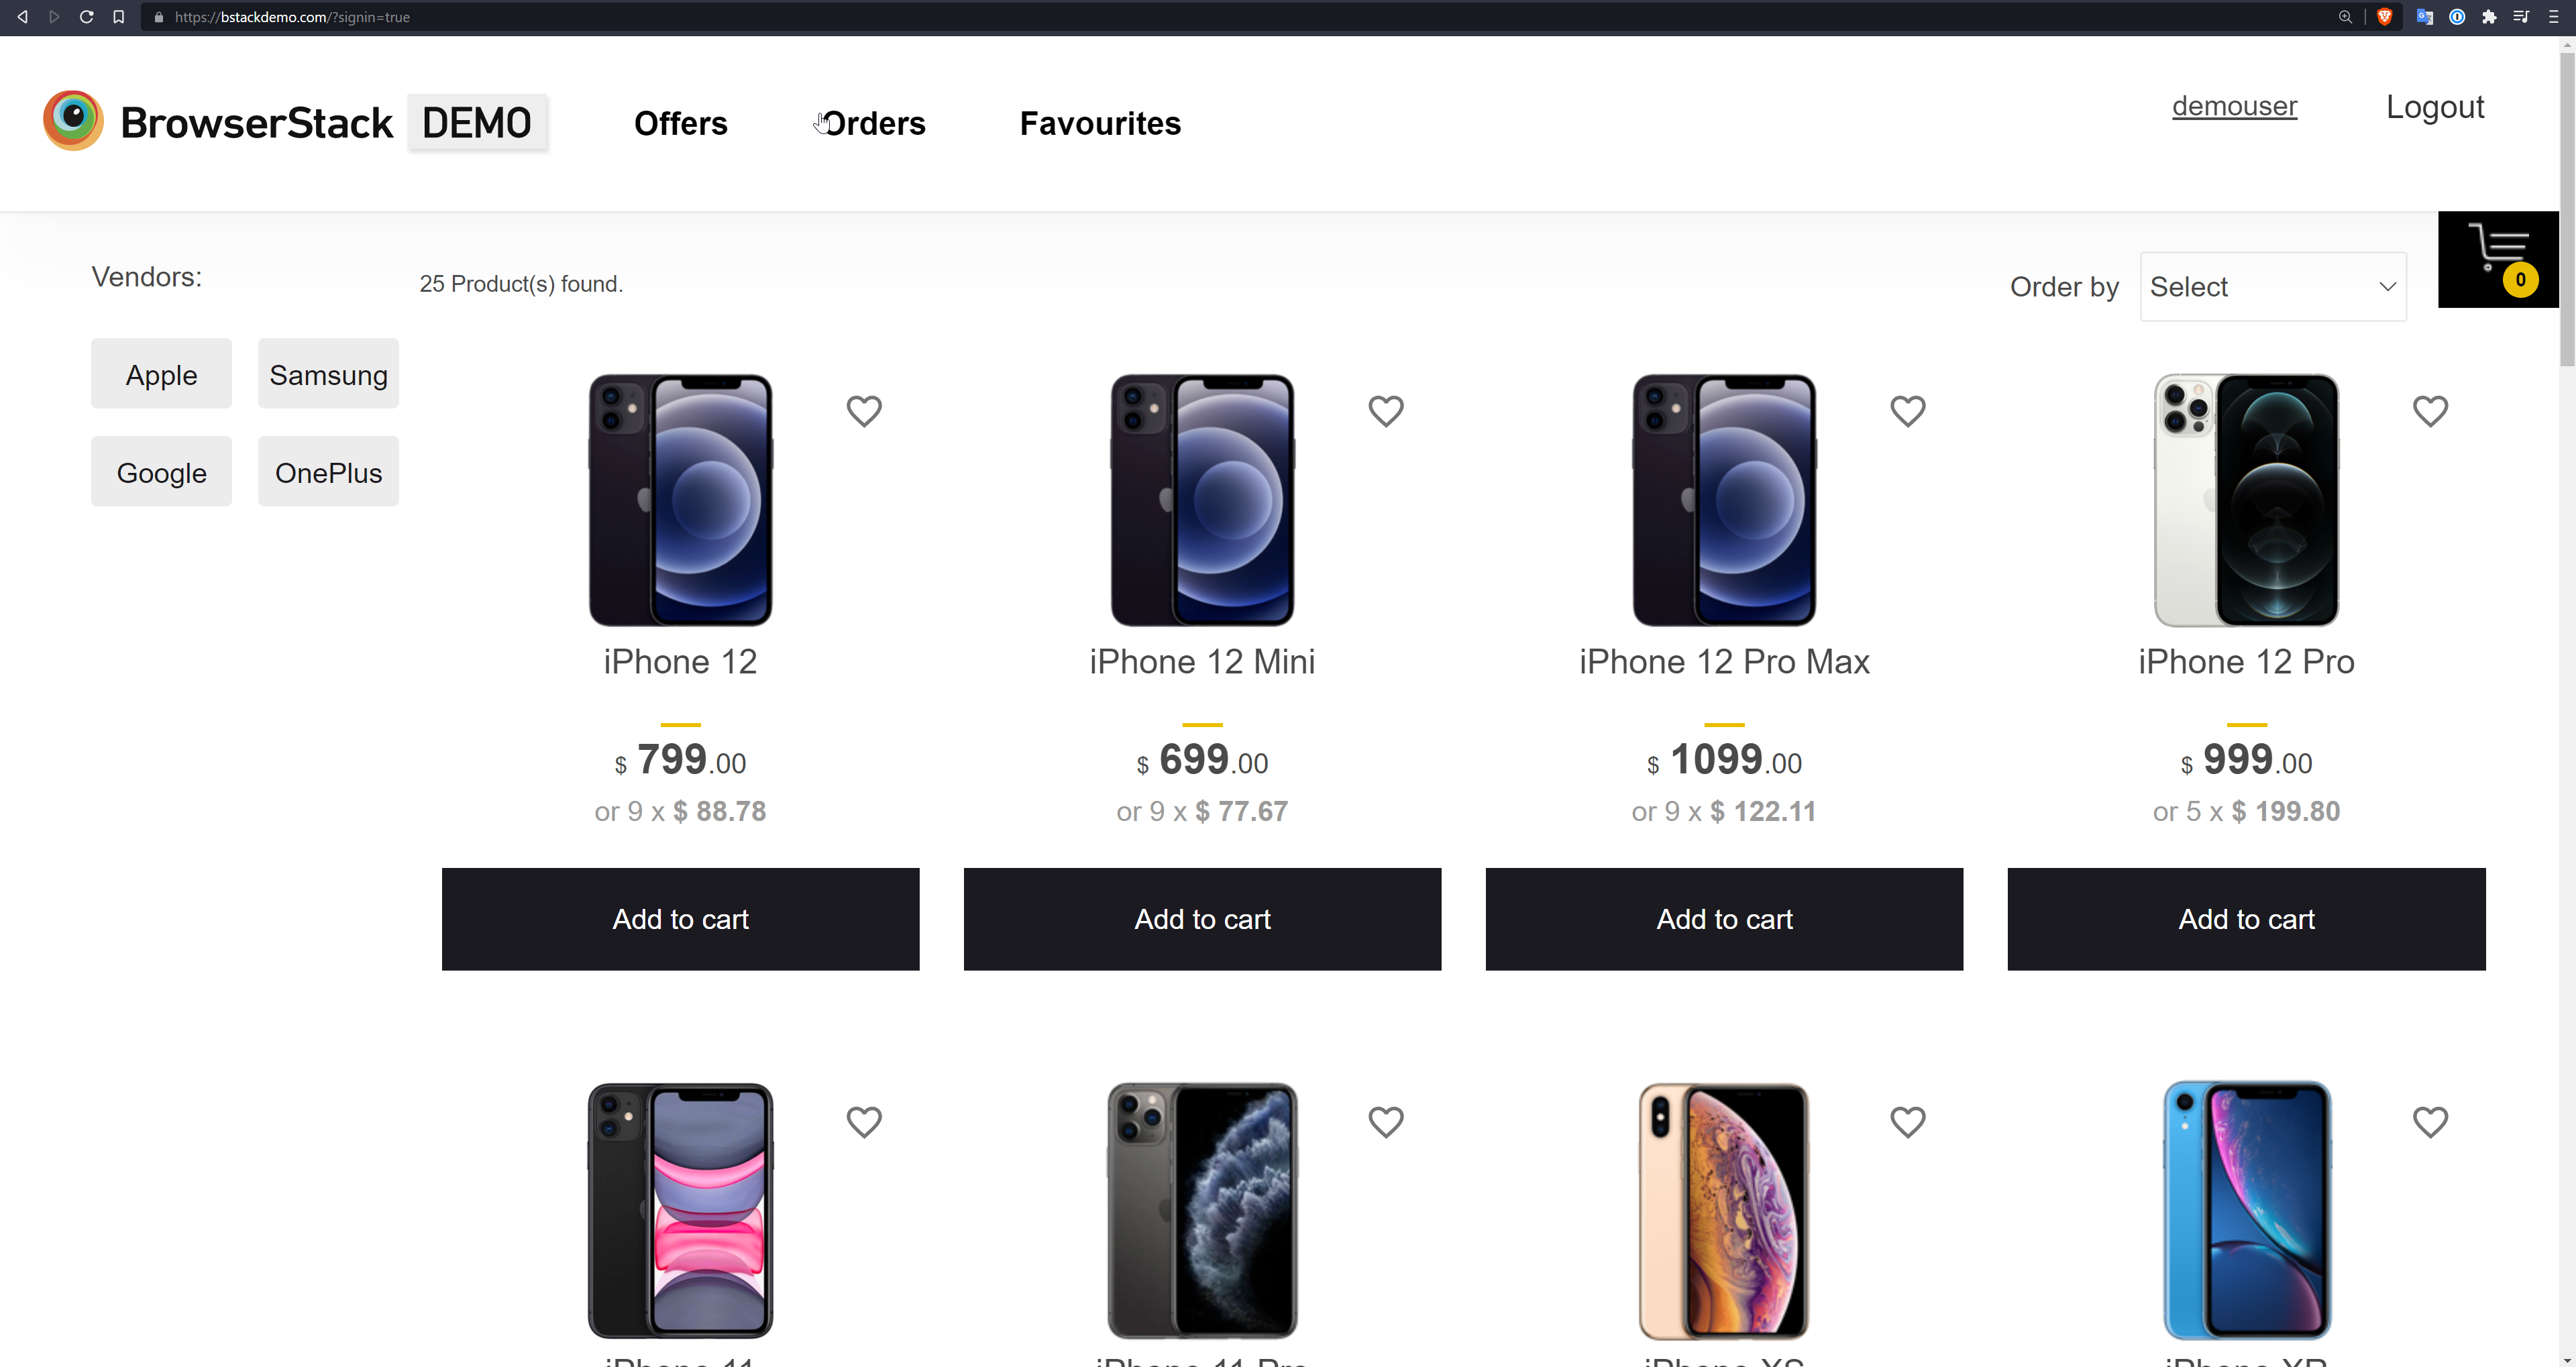
Upon hitting login, we are now logged in to the site. We can verify this by finding our username demouser on the top right corner of the page. And the Sign In button has now been replaced with Logout.
That's our first test! Let's write this workflow in Selenium.
Create a new directory and run npm install selenium-webdriver. If you have already run this, you should have the node_modules directory, package.json and package-lock.json.
Create a new file called testLogin.js with the following javascript code.
// File: testLogin.js
// Selenium test without using BrowserStack
const webdriver = require('selenium-webdriver');

async function runTest() {
  // Initialize a webdriver to use a local browser instance
  let driver = new webdriver.Builder()
  .forBrowser("chrome")
  .build();

  // Click the Sign In Button
  await driver.get("https://bstackdemo.com");

  console.log("Opening Sign In Page")
  const signInButton = await driver.findElement(webdriver.By.id("signin"));
  await signInButton.click()

  // Explicit wait until the username input field loads, with a timeout of 100 seconds
  await driver.wait(webdriver.until.elementLocated(webdriver.By.css('#username input')), 100);

  // Enter username and password
  const usernameField = await driver.findElement(webdriver.By.css('#username input'));
  await usernameField.sendKeys("demouser", webdriver.Key.ENTER);

  const passwordField = await driver.findElement(webdriver.By.css('#password input'));
  await passwordField.sendKeys("testingisfun99", webdriver.Key.ENTER);

  const submitButton = await driver.findElement(webdriver.By.id("login-btn"));
  await submitButton.click()

  // Verify logged in username
  await driver.wait(webdriver.until.elementLocated(webdriver.By.className("username")), 100);

  const usernameDisplay = await driver.findElement(webdriver.By.className("username"))
  if (await usernameDisplay.getText() == "demouser") {
    console.log("Successfully logged in!")
  } else {
    console.log("Something went wrong. Log in failed!");
  }

  await driver.quit();
  return;
}

runTest();
This might be a few too many lines of code, but essentially follows the steps we planned in step 1 and checks for a successful login. As of now, we have not used BrowserStack at all and are purely using selenium to run the test locally. Execute the test using
node testLogin.jsHopefully, you should see an selenium-controlled browser window open up, it'll automatically follow the log in steps and close successfully with positive log messages in the command prompt.
Congratulations! You have now written a successful selenium based test. Now let us use BrowserStack to run the test on different browsers and different operating systems.
Head over to your BrowserStack profile page and note down your Username and Access Key. Now, set them as environment variables, which is more secure than writing them in code. You can use the command prompt for this.
export BROWSERSTACK_USERNAME='my-username';
export BROWSERSTACK_ACCESS_KEY='my-access-key';Let us now tweak our code a bit to use BrowserStack for running our tests, instead of our local browser instance. Replace the entire testLogin.js file with the following code
// File: testLogin.js
// Selenium test using BrowserStack
const webdriver = require('selenium-webdriver');

const browserstackServerUrl = `http://${process.env['BROWSERSTACK_USERNAME']}:${process.env['BROWSERSTACK_ACCESS_KEY']}@hub-cloud.browserstack.com/wd/hub`;

async function runTest(capabilities) {
  // Initialize a webdriver to use a local browser instance
  let driver = new webdriver.Builder()
  .usingServer(browserstackServerUrl)
  .withCapabilities({
    ...capabilities,
    ...capabilities['browser'] && { browserName: capabilities['browser']}  // Because NodeJS language binding requires browserName to be defined
  })
  .build();

  // Click the Sign In Button
  await driver.get("https://bstackdemo.com");

  console.log("Opening Sign In Page")
  const signInButton = await driver.findElement(webdriver.By.id("signin"));
  await signInButton.click()

  // Explicit wait until the username input field loads, with a timeout of 100 seconds
  await driver.wait(webdriver.until.elementLocated(webdriver.By.css('#username input')), 100);

  // Enter username and password
  const usernameField = await driver.findElement(webdriver.By.css('#username input'));
  await usernameField.sendKeys("demouser", webdriver.Key.ENTER);

  const passwordField = await driver.findElement(webdriver.By.css('#password input'));
  await passwordField.sendKeys("testingisfun99", webdriver.Key.ENTER);

  const submitButton = await driver.findElement(webdriver.By.id("login-btn"));
  await submitButton.click()

  // Verify logged in username
  await driver.wait(webdriver.until.elementLocated(webdriver.By.className("username")), 100);

  const usernameDisplay = await driver.findElement(webdriver.By.className("username"))
  if (await usernameDisplay.getText() == "demouser") {
    console.log("Successfully logged in!")
    await driver.executeScript(
      'browserstack_executor: {"action": "setSessionStatus", "arguments": {"status":"passed","reason": "Successfully logged in!"}}'
    );
  } else {
    console.log("Something went wrong. Log in failed!");
    await driver.executeScript(
      'browserstack_executor: {"action": "setSessionStatus", "arguments": {"status":"failed","reason": "Something went wrong, could not log in!"}}'
    );
  }

  await driver.quit();
  return;
}

const baseCapabilities = {
  'realMobile': 'true',
  'build': 'Browserstack demo site',
}

const capabilities1 = {
  ...baseCapabilities,
  'name': 'Test 1',
  'device': 'iPhone 13 Pro Max',
  'osVersion': '15',
  'browserName': 'Safari'
}

const capabilities2 = {
  ...baseCapabilities,
  'name': 'Test 2',
  'device': 'iPhone 13 Pro Max',
  'osVersion': '15',
  'browserName': 'Chrome',
}

const capabilities3 = {
  ...baseCapabilities,
  'name': 'Test 3',
  'device': 'OnePlus 9',
  'osVersion': '11.0',
  'browserName': 'Chrome',
}

const capabilities4 = {
  ...baseCapabilities,
  'name': 'Test 4',
  'device': 'OnePlus 9',
  'osVersion': '11.0',
  'browserName': 'Firefox',
}

runTest(capabilities1);
runTest(capabilities2);
runTest(capabilities3);
runTest(capabilities4);We'll deep dive into the code in a bit, but let's first run it and see it in action. Execute the script using
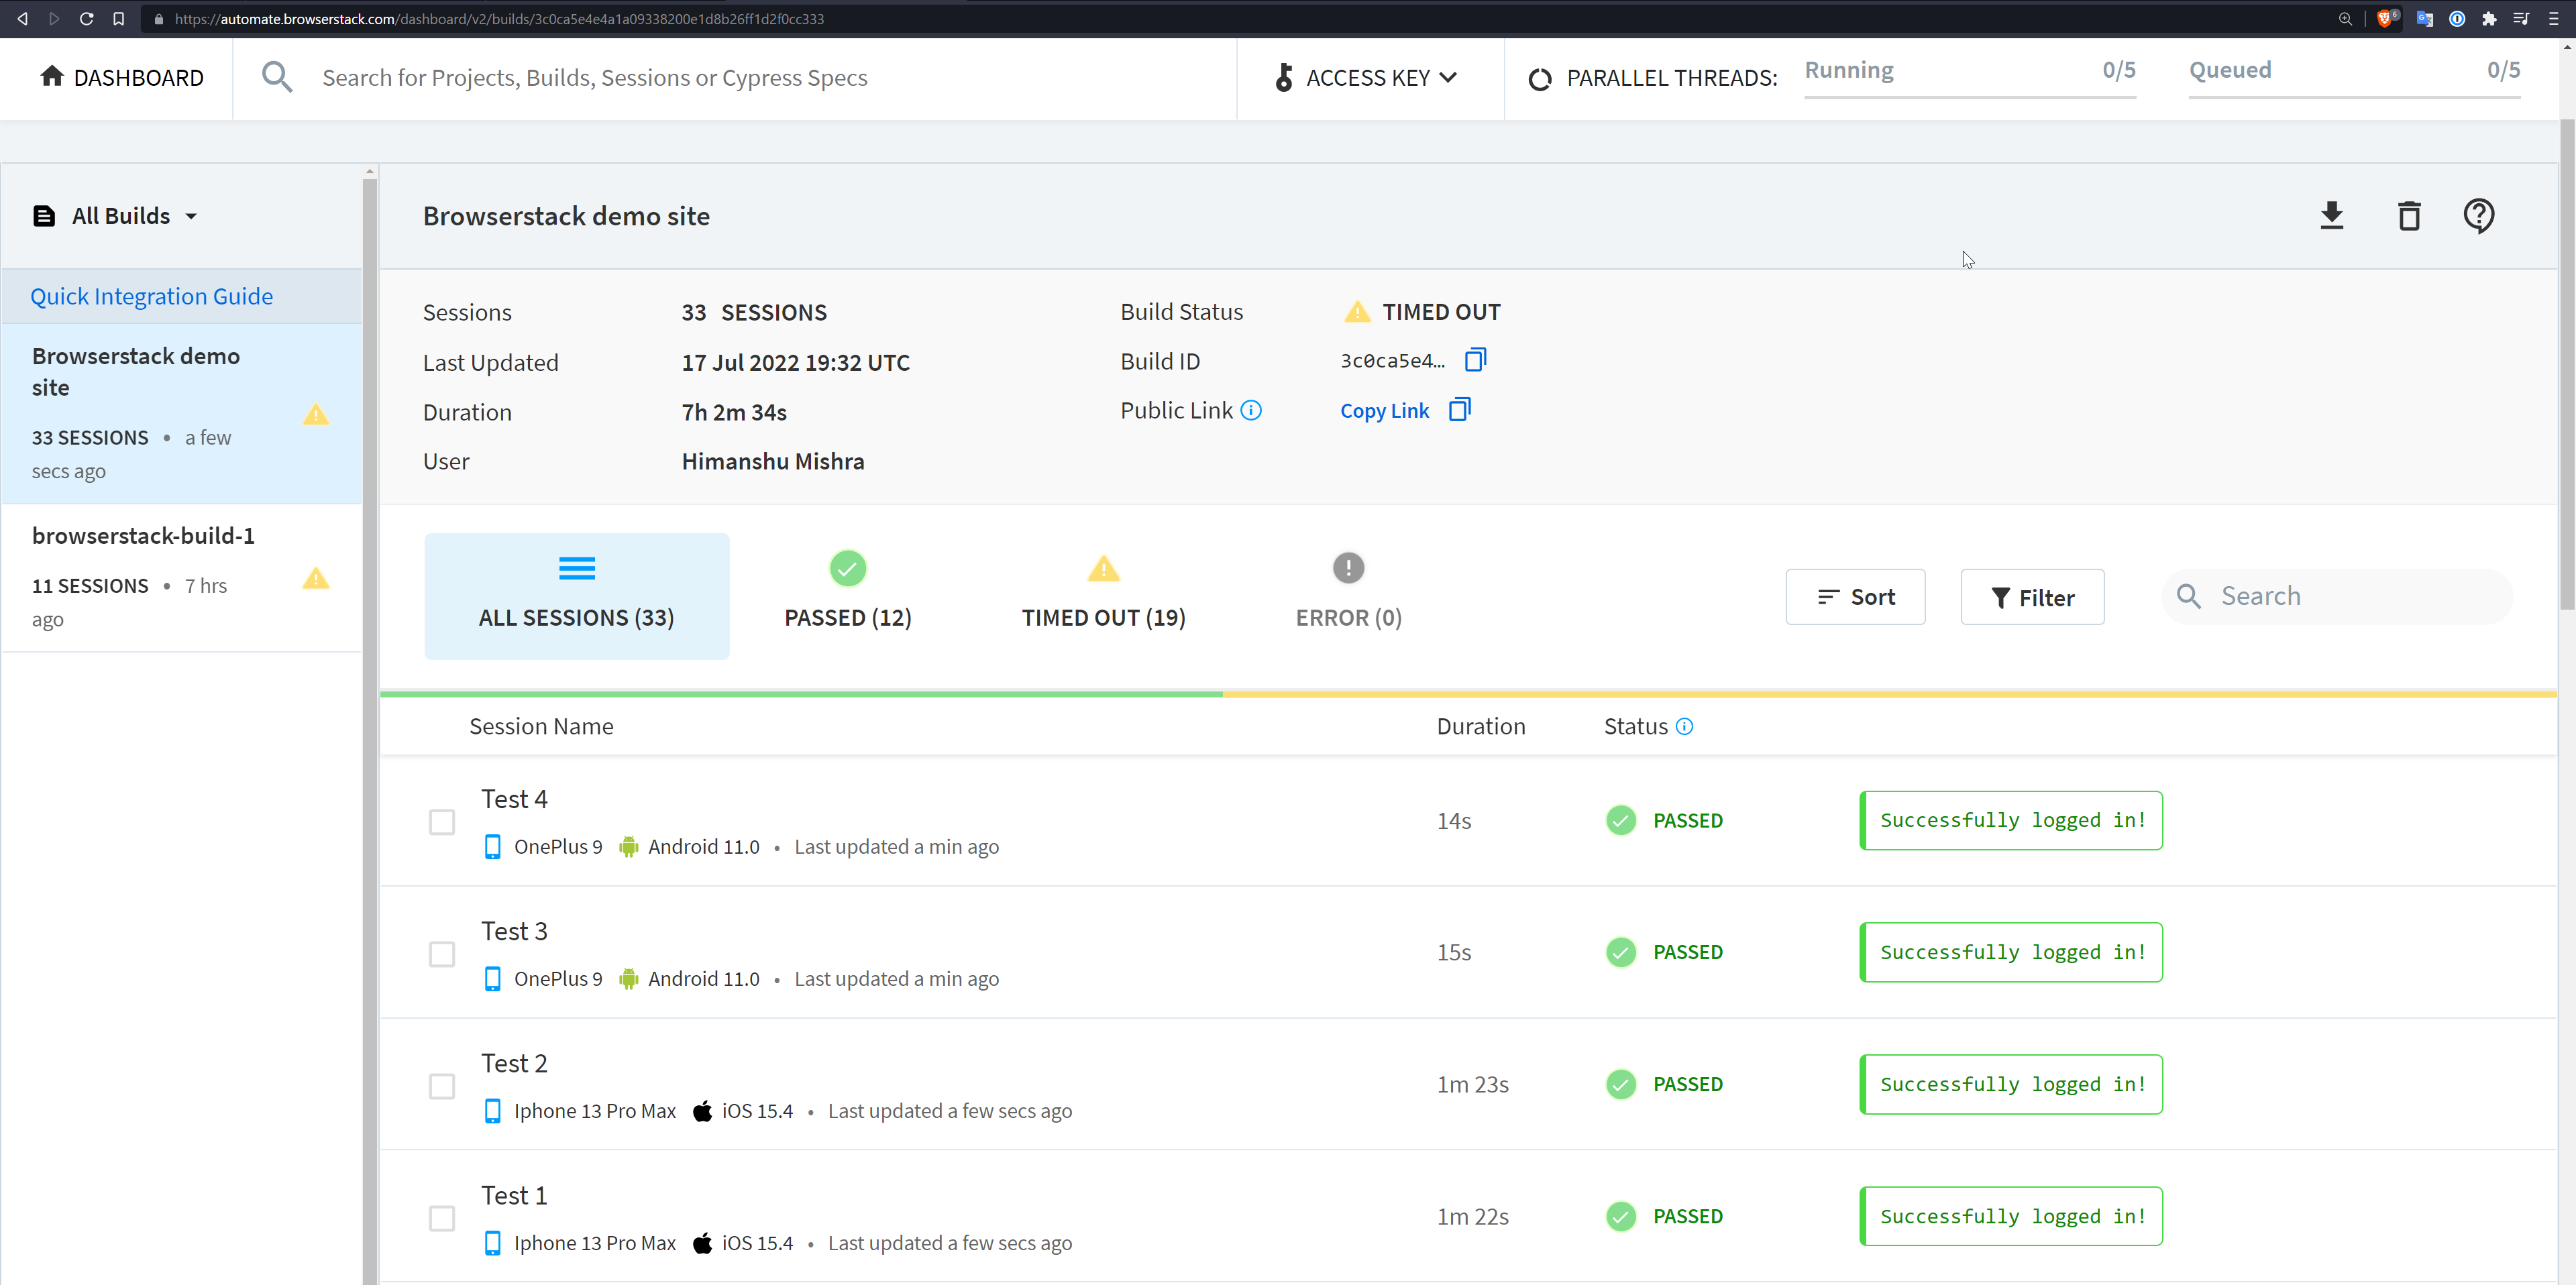
node testLogin.jsOpen your BrowserStack automate dashboard. On the left bar, find "All Builds" and click on the latest build. Shortly, if everything worked out well, you should see all 4 tests passed on different browsers and devices.
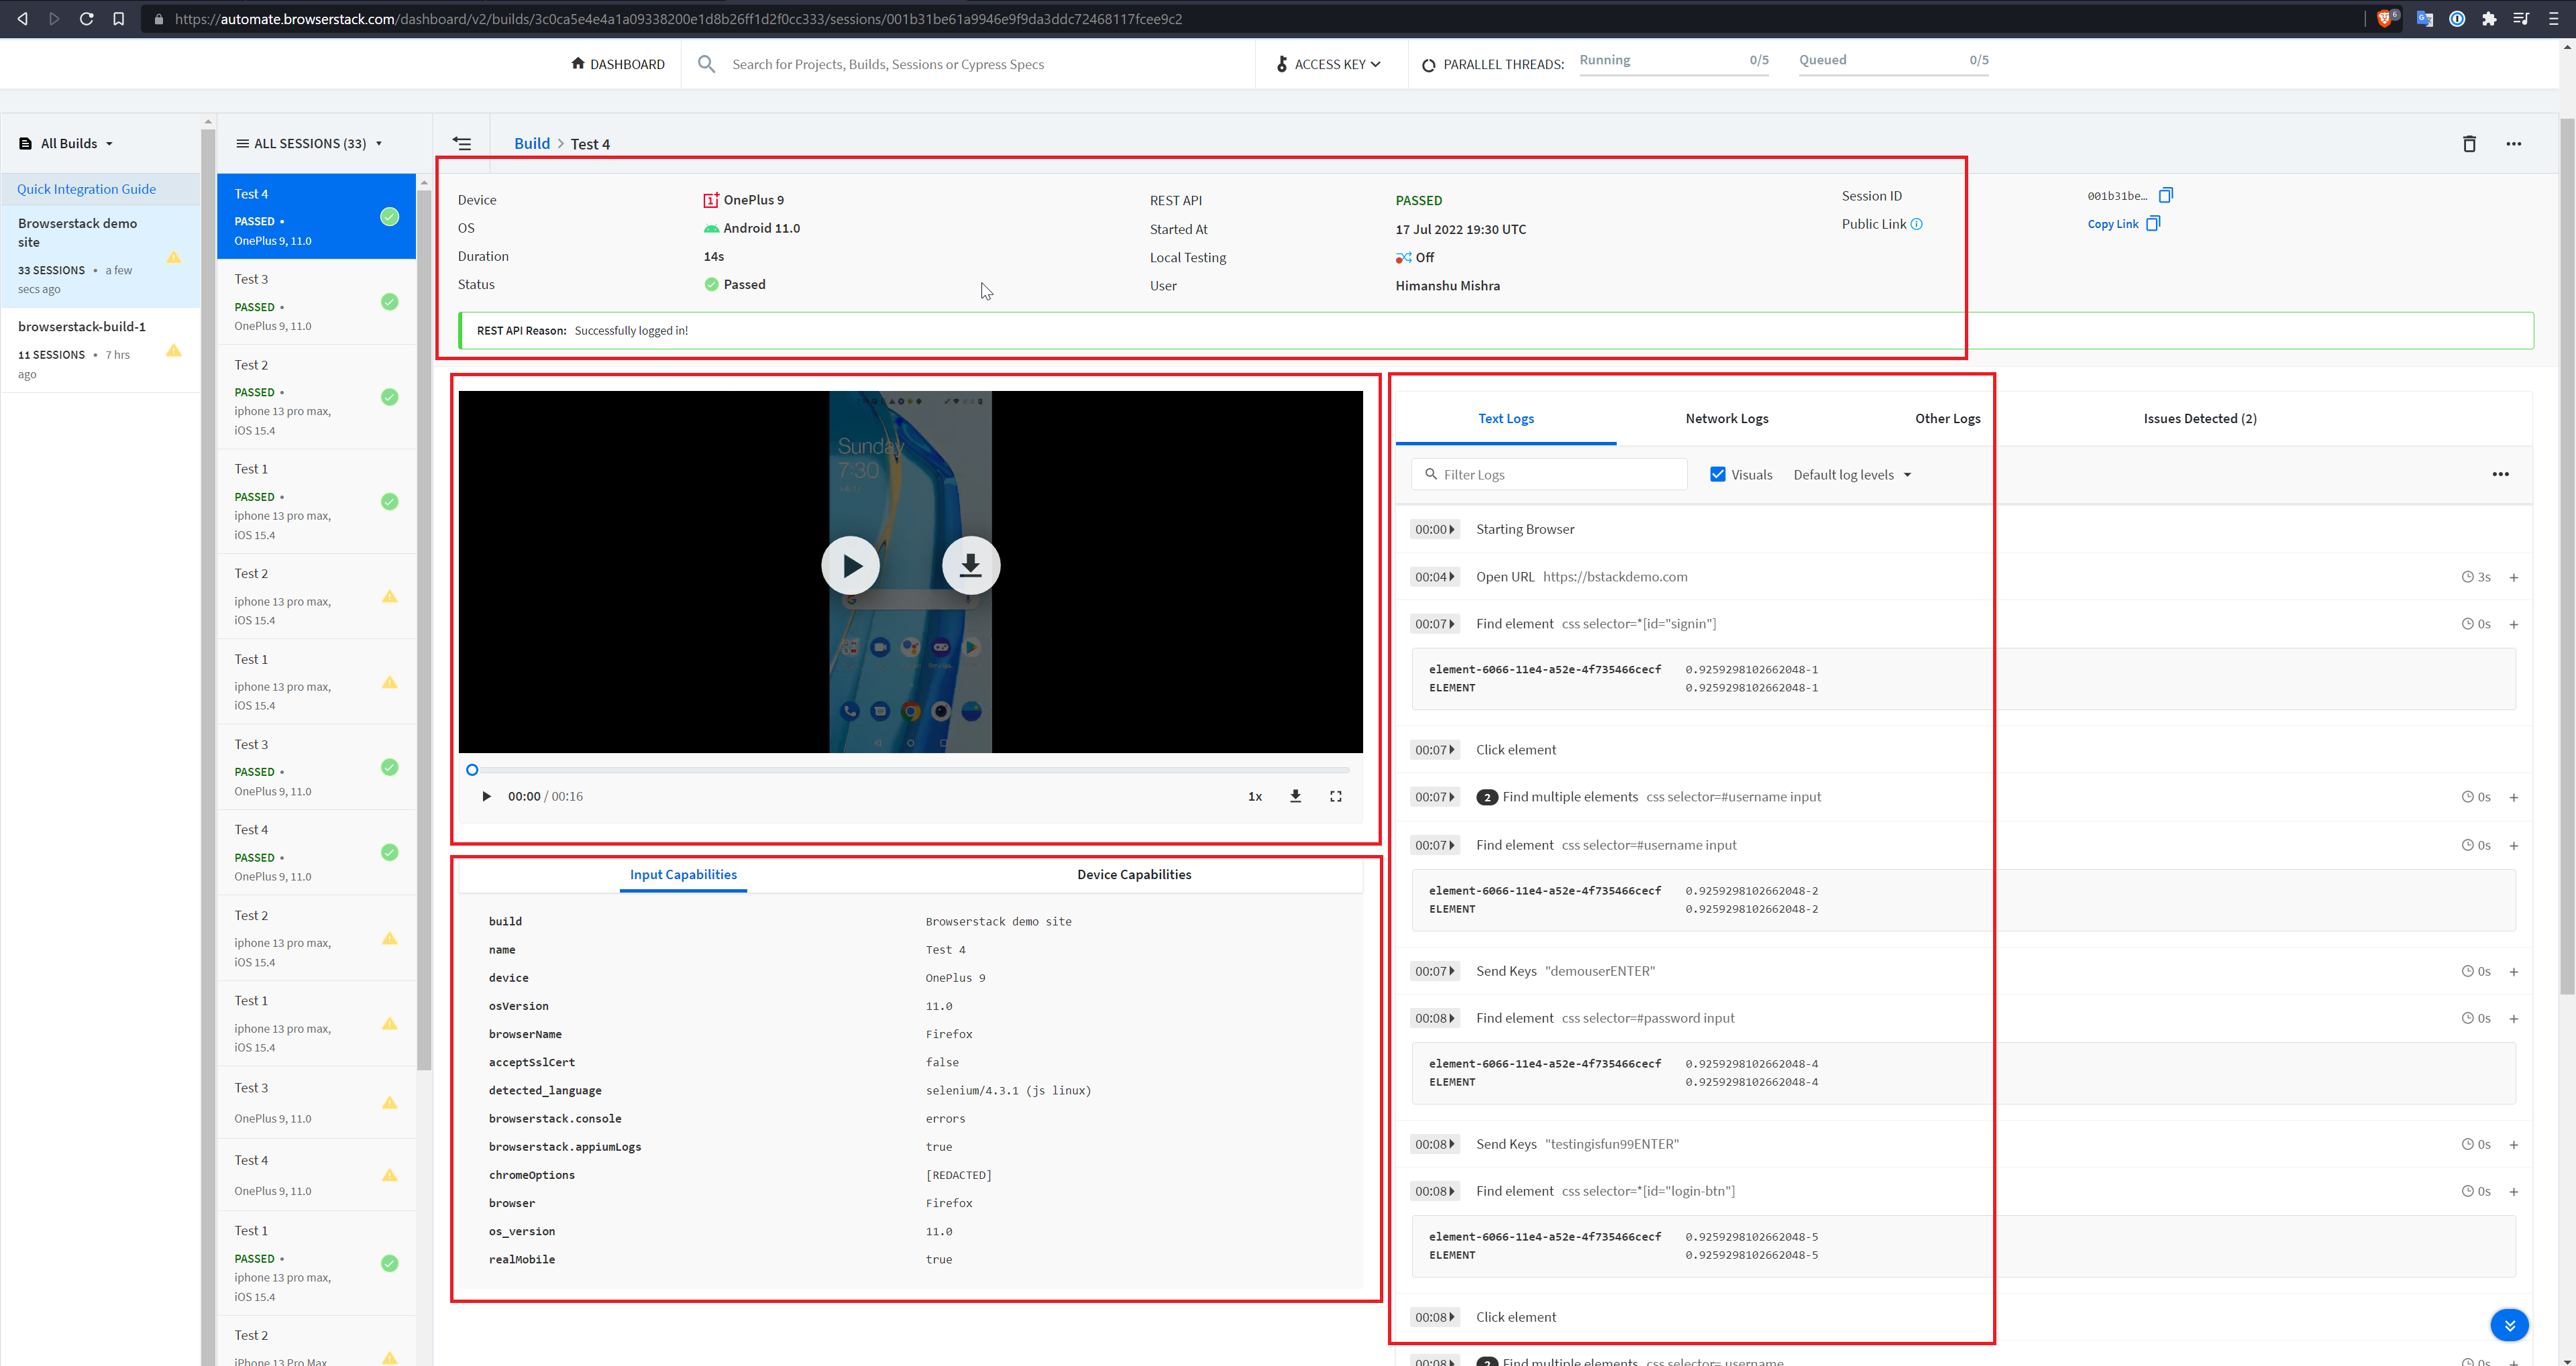
Click on one of the test, and open the details page. It will look something like this.
There are four main sections on this page. On the top most, you can find some basic details of the test e.g. Device used, user and the test result. Below it, you can see a video recording of the entire test in action, on a real mobile device (pretty amazing, right?). Just below the recording, you can find the input capabilities we provided for the test, along with a long list of device capabilities.
Note: Capabilities are basically settings or options to configure the test.
On the right hand side, you can find the logs and steps in detail, as well as other information like network logs - which are super useful for debugging.
Congratulations! You have now run a multi-device multi-browser automated test on BrowserStack. Now let's look at the changes in the Selenium code we had to make for it to happen. There are mainly three changes to look at.
+ const browserstackServerUrl = `http://${process.env['BROWSERSTACK_USERNAME']}:${process.env['BROWSERSTACK_ACCESS_KEY']}@hub-cloud.browserstack.com/wd/hub`;

- async function runTest() {
+ async function runTest(capabilities) {

  let driver = new webdriver.Builder()
-   .forBrowser("chrome")
+   .usingServer(browserstackServerUrl)
+   .withCapabilities({
+     ...capabilities,
+     ...capabilities['browser'] && { browserName: capabilities['browser']}  // Because NodeJS language binding requires browserName to be defined
+   })
    .build();
We modified the runTest function to accept an argument called capabilities here. We will provide options like device name, browser name, etc. using capabilities. We have defined a browserstackServerUrl using the BrowserStack username and Access Key set in the environment variable. We removed the local browser setting and added a usingServer call to use the BrowserStack remote server. We have also added a withCapabilities call to include the options we will provide for the test.
    if (await usernameDisplay.getText() == "demouser") {
      console.log("Successfully logged in!")
+     await driver.executeScript(
+       'browserstack_executor: {"action": "setSessionStatus", "arguments": {"status":"passed","reason": "Successfully logged in!"}}'
+     );
    } else {
      console.log("Something went wrong. Log in failed!");
+     await driver.executeScript(
+       'browserstack_executor: {"action": "setSessionStatus", "arguments": {"status":"failed","reason": "Something went wrong, could not log in!"}}'
+     );
    }
This is to tell BrowserStack that all our tests have passed. Thus triggering some follow up workflows like notify someone on Slack or start a new CI/CD pipeline.
- runTest();
+ const baseCapabilities = {
+   'realMobile': 'true',
+   'build': 'Browserstack demo site',
+ }
+
+ const capabilities1 = {
+   ...baseCapabilities,
+   'name': 'Test 1',
+   'device': 'iPhone 13 Pro Max',
+   'osVersion': '15',
+   'browserName': 'Safari'
+ }
+
+ const capabilities2 = {
+   ...baseCapabilities,
+   'name': 'Test 2',
+   'device': 'iPhone 13 Pro Max',
+   'osVersion': '15',
+   'browserName': 'Chrome',
+ }
+
+ const capabilities3 = {
+   ...baseCapabilities,
+   'name': 'Test 3',
+ 	'device': 'OnePlus 9',
+   'osVersion': '11.0',
+   'browserName': 'Chrome',
+ }
+
+ const capabilities4 = {
+   ...baseCapabilities,
+   'name': 'Test 4',
+ 	'device': 'OnePlus 9',
+   'osVersion': '11.0',
+   'browserName': 'Firefox',
+ }
+
+ runTest(capabilities1);
+ runTest(capabilities2);
+ runTest(capabilities3);
+ runTest(capabilities4);
For each test, we have mofied the type of the device used, its operating system version and the browser used. We are also running all the tests asychronously in parellel. You can find the list of all devices available in the reference documentation.
This repository contains two more example workflows using the same demo site - testAddToCart.js and testOffers.js. You can check them out to seek more inspiration on how to test different aspects of a website. However, the code responsible for BrowserStack integration is exactly the same as testLogin.js.
- Checkout BrowserStack getting started guides
- Learn more from Selenium documentation
Feel free to suggest changes and improvements! ❤️


