Stormwater flow sensor for raingardens Over 800 communities around the U.S. collect their stormwater along with sanitary and industrial wastewater in combined sewer systems. In these communities, excessive rainfall or snowmelt may result in combined sewer overflows (CSO) that, according to the Environmental Protection Agency (EPA), affect approximately 40 million people in 32 states every year. While current environmental regulations impede the construction of new combined sewers, mandating separate sanitary and stormwater systems, the legacy infrastructure of combined sewers still experiences thousands of overflows per year. Furthermore, large wet weather events may also produce stormwater runoff where water runs over impervious surfaces collecting contaminants and debris on its way to the sewer. The combined effect of large impervious areas such as parking lots, large roofs or paved streets may result in considerable amounts of stormwater runoff that ultimately contaminates a body of water. To mitigate the problem communities around the U.S. are employing raingardes to return the stormwater to the ground in the place where it is collected.
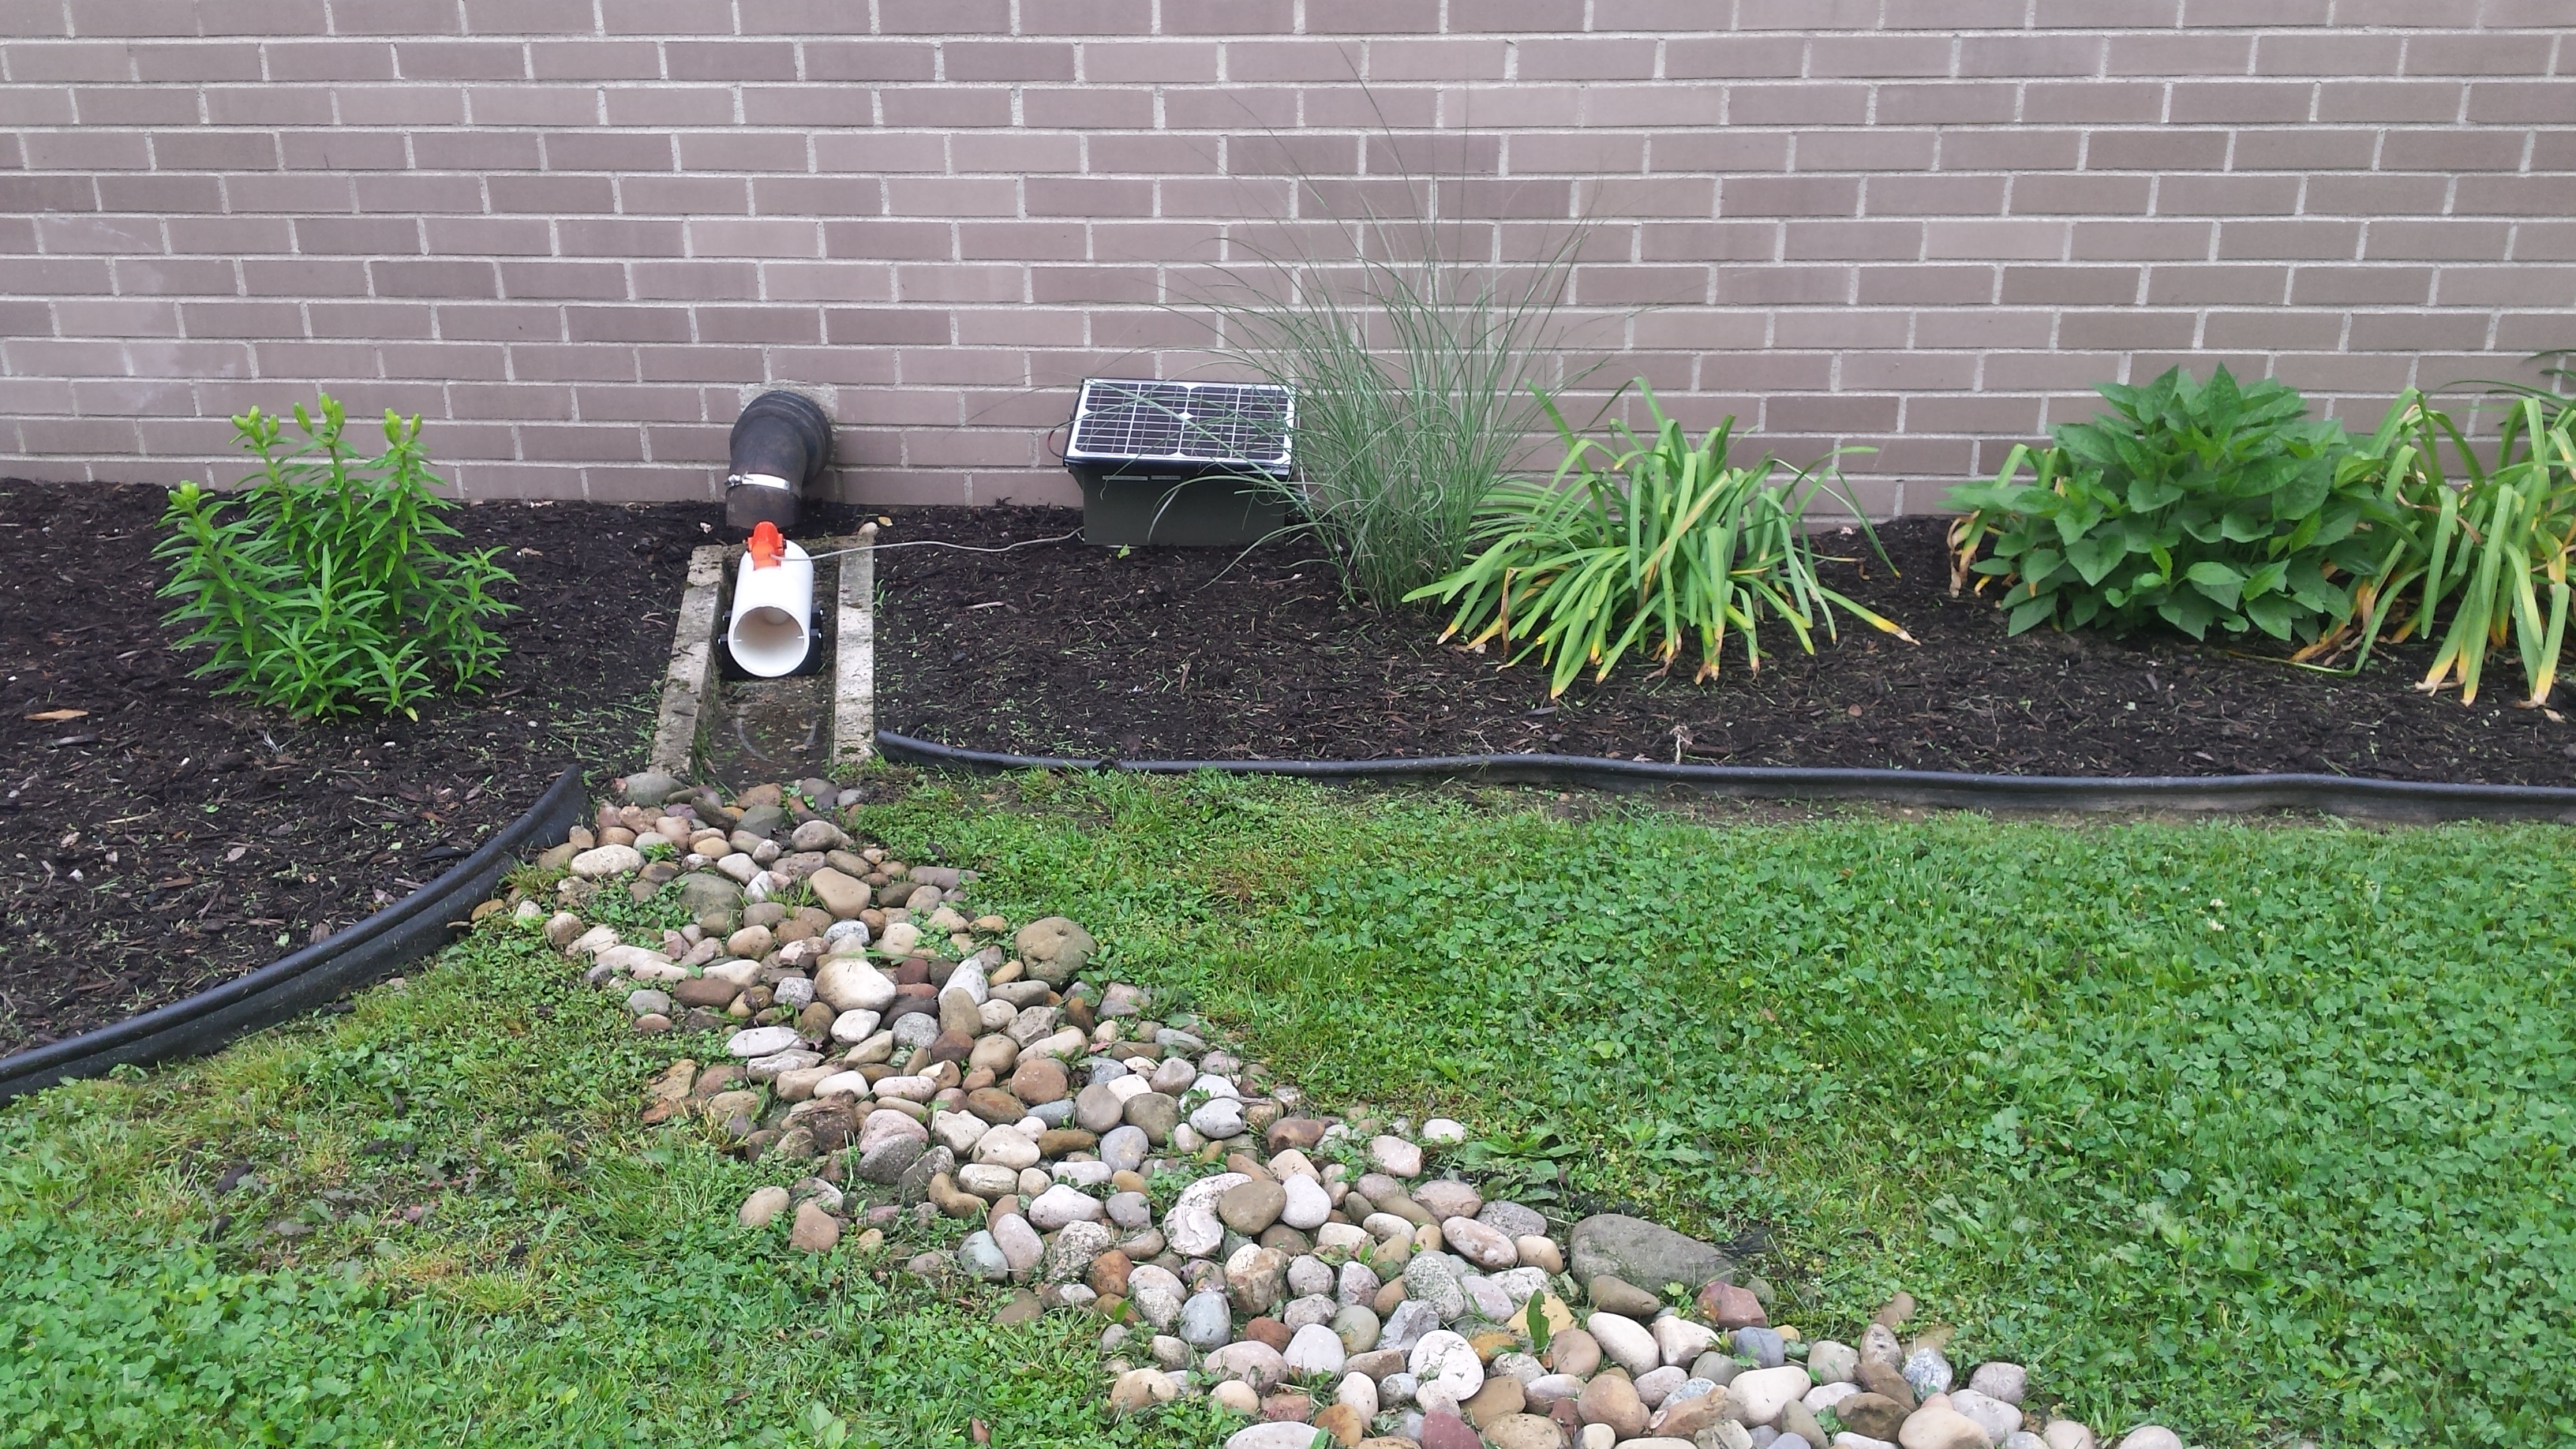
Over the past two years we have worked on developing low-cost, stormwater sensor. The sensor is based on Particle's Electron device and a water flow sensor based on a pendulum design. Attached to the pendulum there is a MPU6050 based accelerometer that allows the sensor to collect angle readings and then publish them to ATT's M2X via Particle's Webhooks. We have tested our sensor at two locations. The first one at the Athens City Community Center raingarden and the second one at the Athens City Code Enforcement office. More details can be found at www.its.ohio.edu/raingardens.
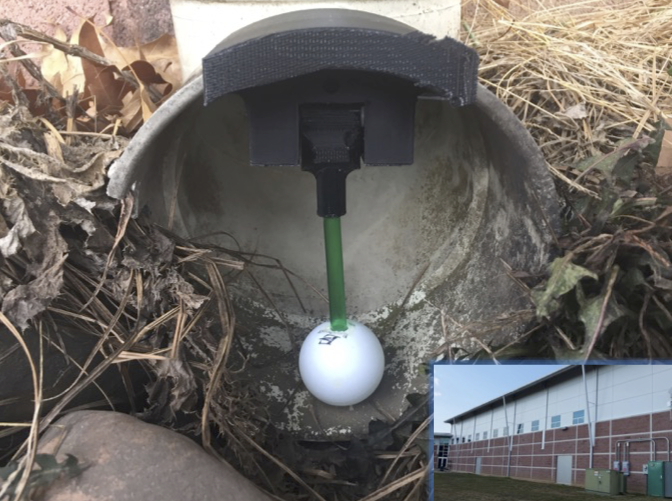
To make it easier to replicat our design we employed OnShape's public CAD system to design the 3D printed parts necessary to house the sensor. There are two designs we have made public via OnShape. One for a sensor that can be installed on a PVC pipe and a second for a sensor that can be mounted on the exterior of a 6 inch PVC 90 degree fitting.
The sensors housings we designed and mounted are shown below. A 3D detail is also available in the main branch.
To get things started, you will need:
- Particle Electron
- An MPU 6050 sensor board or other I2C based accelerometer
- A 10W 12V solar panel
- A solar charge controller
- 3D Print one of the sensor housings from Onshape: Design 1, Design 2
- [3/8 inch bushings] to hold the 3D printed interior sensor mount(https://www.lowes.com/pd/The-Hillman-Group-12-Count-3-8-in-Standard-SAE-Machine-Bushings/4483496)
- [0.312 inch nylon spacers] to attach the 3d printed interior sensor mount to the bushings(https://amzn.com/B000FP9Z1A)
- A nylon road to attach the floater to the 3d printed interior sensor mount(https://amzn.com/B000FMWYJ8)
- A floater for the pendulum, we tested a few you can even use a table tennis ball and attach it with super glue.
- A outdoor utility box
- A terminal board for the Electron to keep your connections in place
- A 10,000 mAh 12V sealed battery. Do not use a USB based Li-Ion battery as the housing might get too hot during the summer.
- Enameled copper wire
- Various cables and connectors
- Various tools: drill, drill bits, protection gloves and goggles, etc.
After printing the corresponding parts. Install the spacers and the pendulum along with the bushings. The challenging part is connecting the MPU6050 board using the enameled wire as it is very thin so you will need to patiently handle it with care and solder it to the board or to headers on the board. Then attach it to a four wire cable (1 to 2 meter long) that connects the MPU6050 to the terminal board the houses the Electron. The pictures below show the enameled wire connections as well as utility box with the external and internal components.
Notice how the enameled wires are connected to the headers on the sensor and then threaded through the 3D printed mount.
The picture below shows the details of the I2C connections to the Electron terminal board.
The easiest way to create your own version of the sensor is to create your own Particle account and use the Web IDE to compile your code. There are two files mpu6050v21.ino and constants.h in the repository. Add both of them to a new Particle application, compile on the web and deploy them to your Electron.
The MPU6050 board should be powered by the Electron's 3.3V pin and connected to the I2C terminals of the Electron. You will require the enamel copper wire to connect the sensor board terminals inside the housing. Other wires might be too heavy to allow free movement of the pendulum.
To configure the software all configuration varialbes are declared in the constants.h file. The following constants control the sampling data:
NUMANGLESAVERAGE 5 // Number of angle averages that might be reported
HOURSVOLTAGEREPORTING 4 // Number of hours between voltage reports to serial or cloud m2x (set to 0 for no reporting)
THRESHOLDANGLE 7.0 // Angle in degrees above which a report of an array of averages is reported
TIMEBETWEENANGLEREADSEC 30 // Number of seconds between consecutive angle reads, if set to every 30 seconds and 12 samples 5 averages covers 30 minutes
CONSECUTIVEANGFORAVERAGE 12 // Number of consecutive samples to store before computing one of the NUMANGLESAVERAGE averages
With the configuration shown above the Electron will compute the average of 12 samples collected every 30 seconds. It will do this 5 times before deciding to report the results or not. If any of the 5 averages correspond to angles of the pendulum higher than 7 degrees all 5 averages are reported otherwise none are reported. Additionally, every 4 hours the Electron can report its voltage of operation when a battery connected to its internal port (the Li-Ion port) is used. Again, we don't use a Li-Ion battery as the enclosure might get too hot in direct sunlight.
Additionally the constants allow you to configure three different levels of debugging (with growing level of detail) by setting to TRUE the constants DBGLVL1, DBGLVL2 or DBGLVL3. The OUTSERIAL and OUTCLOUD boolean constants enable reporting via the serial port and/or to the cloud respectively.
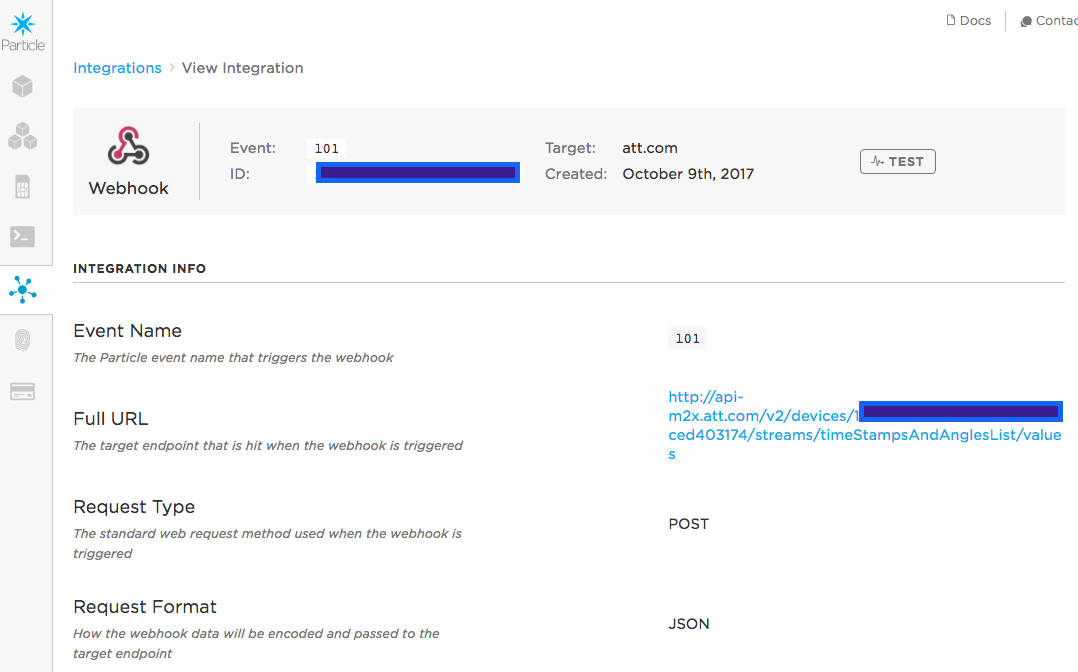
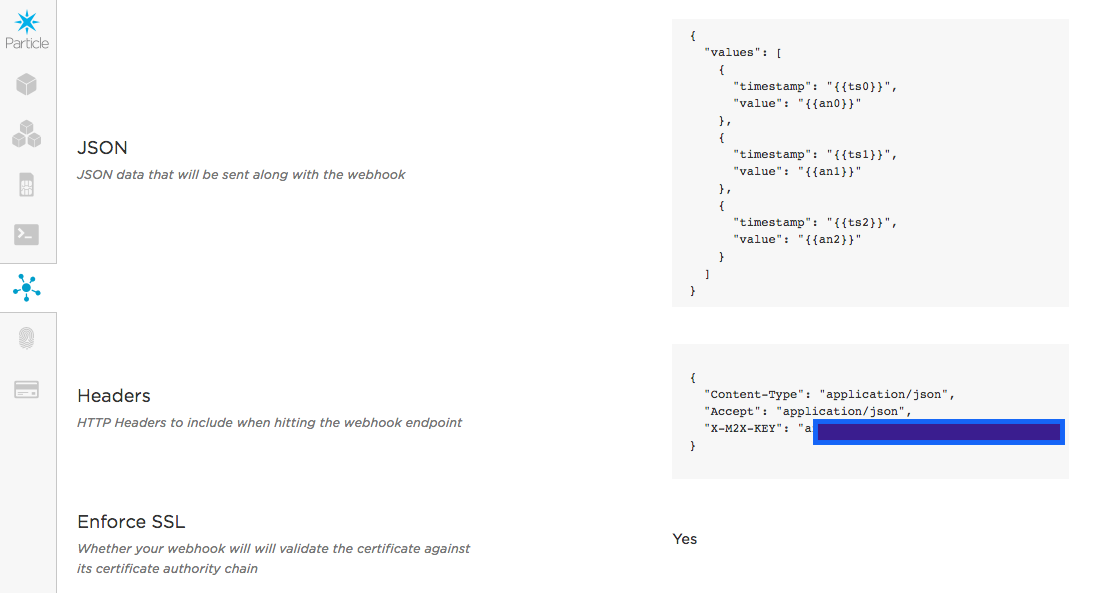
When reporting to the cloud the Electron uses two webhooks named l01 and m01 (or l02 and m02 for a second Electron). These webhooks are configured to report the five average angles (in two separate messages) to ATT's M2X platform.
To understand how to create the webhooks the two picture below show the "Integrations" configuration on Particle's Console.