This is a fully 3D printed clock that was designed in Fusion 360. The project is based on Ivan Miranda's Big Digital Clock and was completely re-designed.
Make sure to update all your libraries (3 dashes → manage palette → update)
- LOTS OF BUG FIXES
- Clock does no longer light up every 6 hours even when turned of
- Fixed a bug when clock mode was selected at 00:00 - 00:59 that it would made it show e.g. 24:15
- Fixed random reboots
- Fixed that alarm wouldn't trigger at the correct time
- Fixed a bug that occured when the API-key of openweathermap wasn't set
- Fixed error spamming in debug console of Node-red
- Fixed that timer would skip 1 second every minute
- Fixed bugs that would result in a crash of the clock
- and much more...
- Removed unnecessary buttons in the UI
- Added a settings tab to the UI, the settings section in the ui got moved over there
- Clock is now more precise
- Timer is now capable of displaying HH:MM and MM:SS format, depending on the remaining time
- SOURCE CODE OVERHAUL
- Functions are now modular
- Added tons of comments
- Made the code readable
- New functions
- Clock/Timer works now more precise (the clock shouldn't be off time more than 2 secs)
- Functions utilize much less global variables making the code easier to modify
- Weather algorithm got fixed
- Fade works more stable now and shouldn't cause a crash anymore
- Time is now set in HH:MM:SS before it was HH:MM
- Clock now request the time on startup and after connection loss
- Custom values now allow to disable digits
- Fixed fade-speed levels
- Node-red flows are now much more modular, this allows controlling additional clocks
- Debug Serial mode for the clock -> debugging can be disabled -> more stability
- Brightness slider is now logarithmic
- Fixed some typos
- Easy way to control more clock implemented
- Time offset should now be persistent
- Added Settings page
- Improved Alarm Creation
- Fixed tons of bugs
- Added alternative input formats
- Added input check → the user gets informed if the values aren't correct
- Adapted the form to the new dashboard plugin update
- The alarm triggers now at the correct time :D
- and more...
- Fixed a bug in the arduino code that would cause the shutdown of the clock if the weather gets displayed
- Due to an update of the dashboard library some code had to be changed for the timer
- Updated diffuser_white_28x, fixed the tiny hole on the bottom
All files and photos can be found at: Github
- Raspberry Pi 3B
- Raspberry Pi B+
- Wemos D1 mini
- Generic ESP8266 (Led Strip Pin must be changed)
- Responsive webinterface

- Create alarms
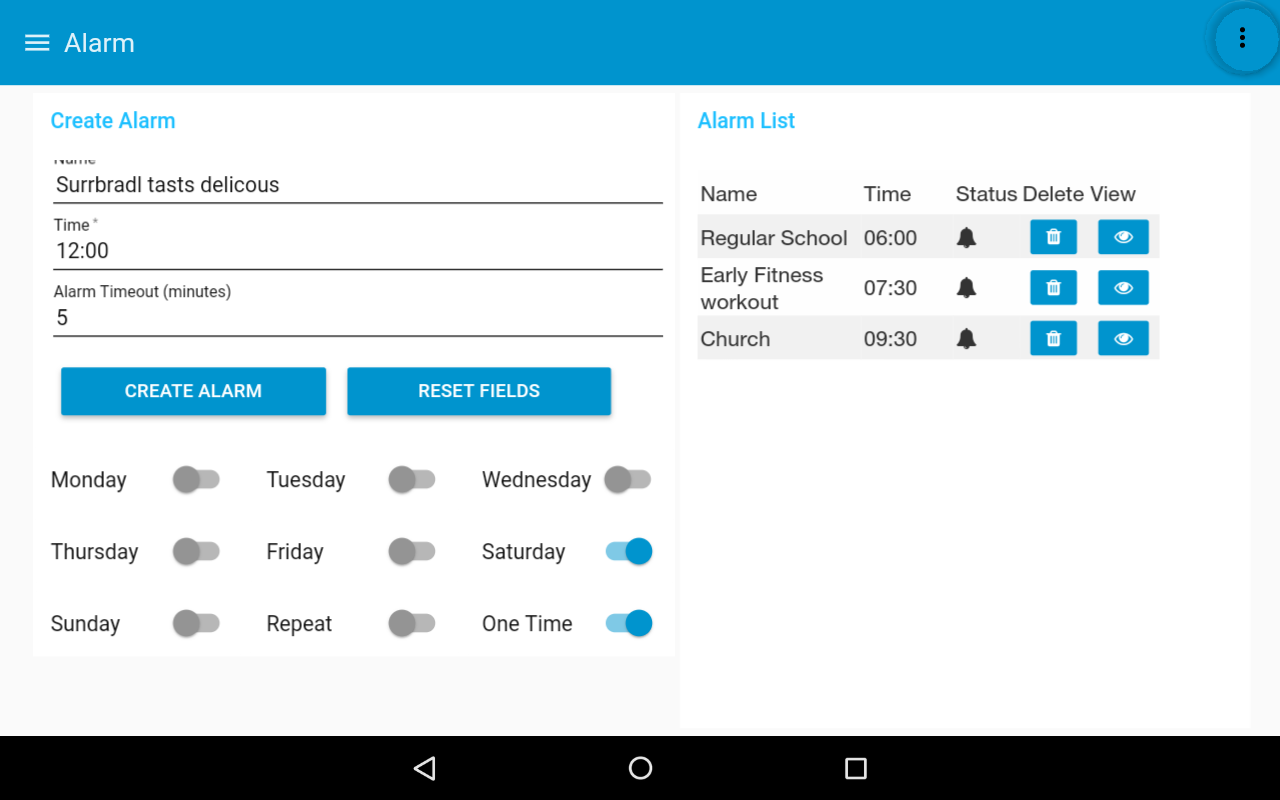
- Show current temperature in your region

- Configure settings

- Display local time
- Set individual colors of each digit
- Custom scoreboard mode
- Control brightness
- Save custom colors
- Fade colors
- 1x Raspberry Pi or any linux machine
- 1x Wemos d1 mini
- 1x 1m of WS2812 LED strip with 60 LED's
- 1x Power supply 5V, 4A
- 16x M3 * 10-16mm
- 16x M3 Nuts
- 1x Power jack adapter
- 2m Wire
- 4x Dupont connectors
- Soldering iron
- 3D Printer
- Pliers
- Hot glue gun
| Part | frame | dot_frame | back_cover | dot_back_cover | diffuser | dot_diffuser |
|---|---|---|---|---|---|---|
| Speed | 45mm/s | 45mm/s | 45mm/s | 45mm/s | 25mm/s | 25mm/s |
| Infill | 15% | 15% | 15% | 15% | 100% | 100% |
| Layer | 0.2mm | 0.2mm | 0.2mm | 0.2mm | 0.2mm | 0.2mm |
| Color | Black | Black | Black | Black | White | White |
| Amount | 4 | 1 | 4 | 1 | 28 | 2 |
First the LED strips have to be cut into pieces of 2 LEDs each, then the ends have to be bent until the solder pads are exposed. It is recommended to tape the strips onto a soldering mat or a table and solder the wires afterwards.
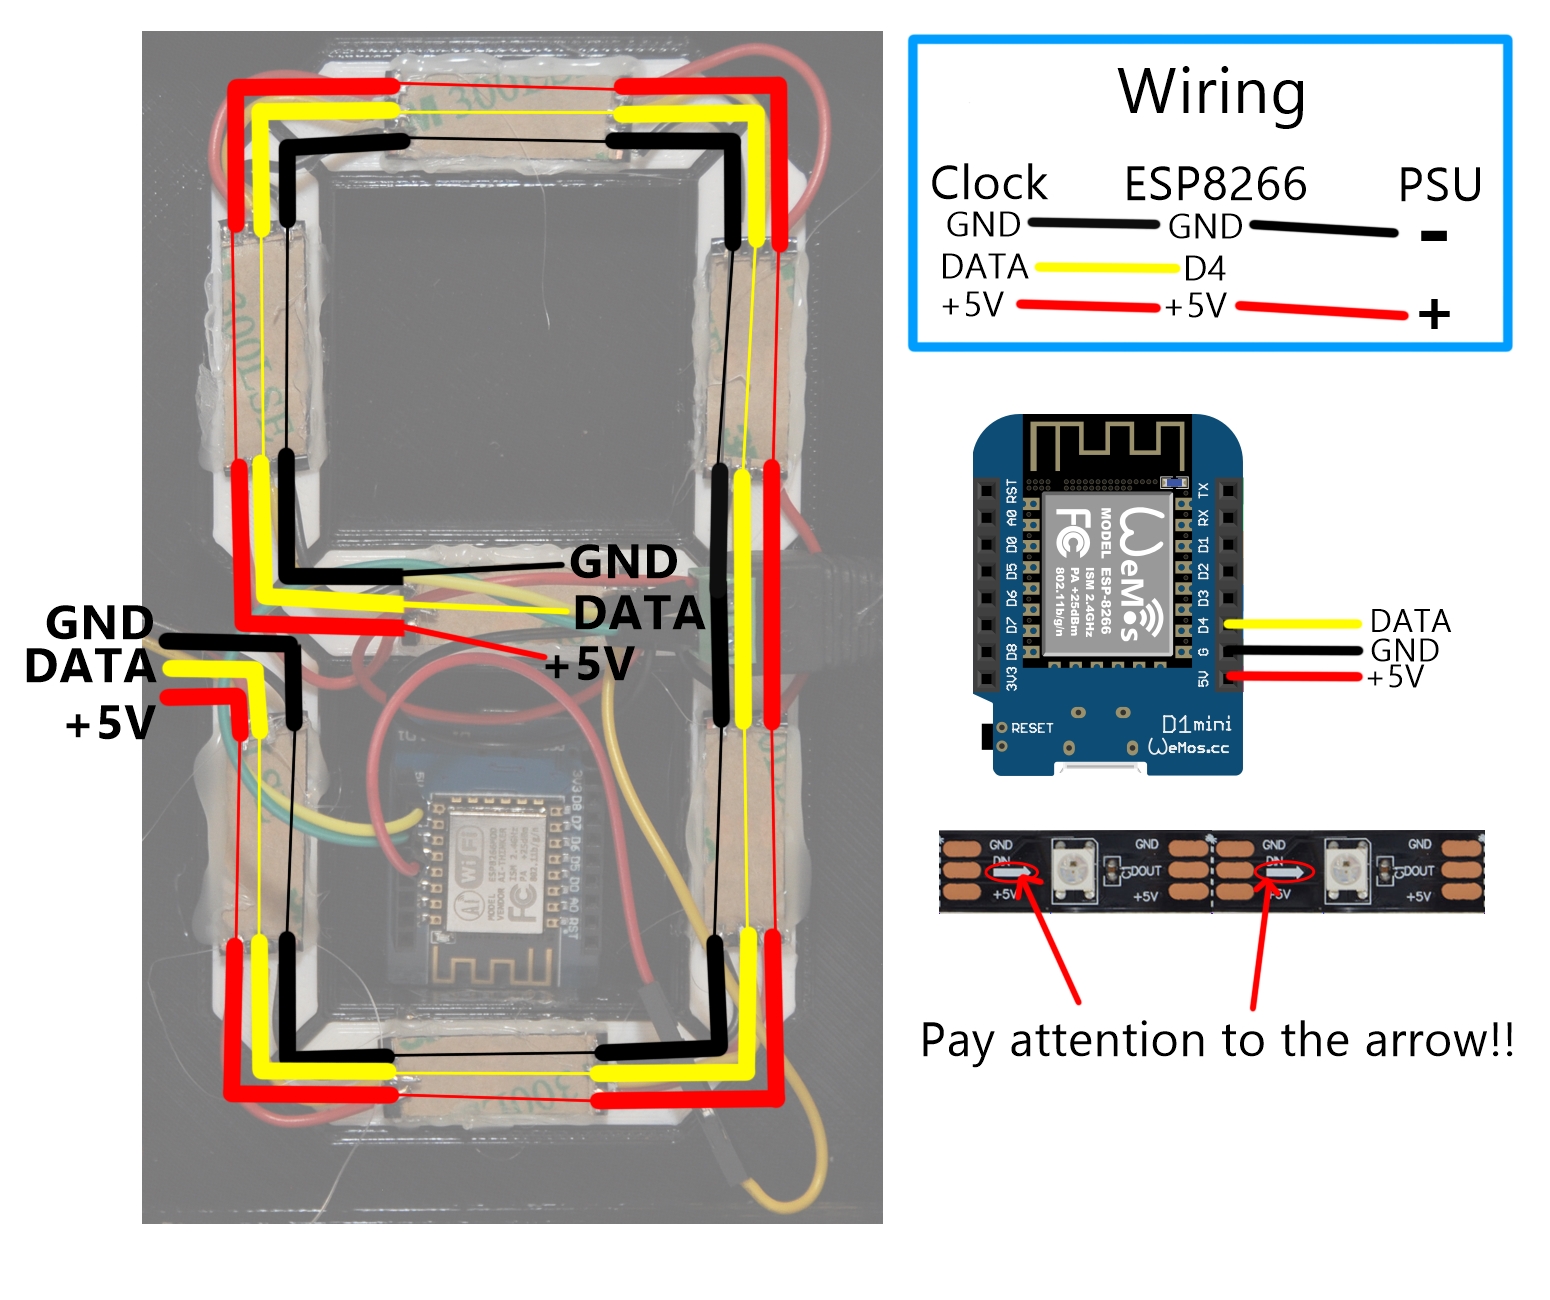

Be careful when wiring the dots, only one LED was used for these pieces.
Upload the clock_mqtt.ino sketch onto the ESP8266, if the leds don't show 0:0:0:1 after one minute, then you made a mistake or have loose wires somewhere.
Push in all 30 diffusers, use the 16 M3 screws and nuts to assemble the frame. This step should be self explainatory.
A hot glue gun needs to be used to glue on all LED strips. The start of the LED strip and the ESP8266 must be located on the left when looking at the clock from the front. Afterwards also glue on the microcontroller and the power jack once everything works the way it should. Finally attach the back covers.
- You could also install this on any linux machine
In case help with Raspberry Pi is needed, click here.
bash <(curl -sL https://raw.githubusercontent.com/node-red/raspbian-deb-package/master/resources/update-nodejs-and-nodered)
sudo apt-get install nodejs npm -y
cd $HOME/.node-red
npm install node-red-dashboard
- if you get an error try:
npm install --unsafe-perm node-red-dashboard
npm install node-red-node-openweathermap
npm install node-red-node-mysql
sudo apt-get install mosquitto -y
(optional) Setup mosquitto authentication
sudo apt-get install mysql-server -y
- Just hit OK or RETURN during installation
- (recommended) Setup a static ip on your router
- or on your Raspberry Pi
You will have to create a database named clock to be able to save alarms. Just type into your shell:
mysql -uroot
create database clock;
CREATE USER 'admin'@'localhost' IDENTIFIED BY 'raspberry';
GRANT ALL PRIVILEGES ON clock.* TO 'admin'@'localhost';
FLUSH PRIVILEGES;
quit
sudo node-red-start
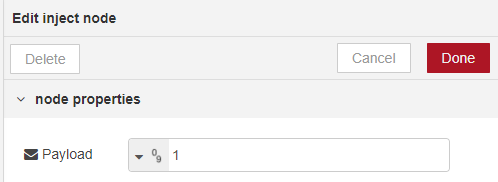
- Click on the 3 dashes in the top right corner → import → clipboard
- Enter the code snippet from all_flows_v2.txt and click import
- Set topic to clock
- Edit broker and enter localhost in the IP field
- If you had set up authentication before, the credentials must be entered in the Security tab
- Edit the mysql connection
- IP: 127.0.0.1
- Username: admin
- Password: raspberry
- Database: clock

- Enter the offset of the time, Germany and Austria would be = 1
- If temperature output is not needed, just delete the flow Thingiverse_weather and the weather section in the Thingiverse_clock flow.
- Head over to OpenWeatherMap and create an account
- Click on API-Keys and copy the value
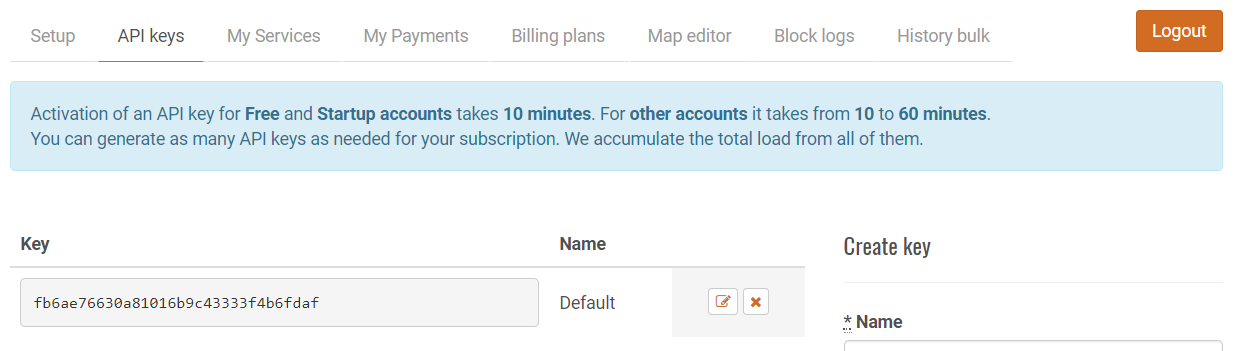
- Afterwards copy that key into the openweathermap node in the Thingiverse_weather flow.
- Either pick geo-coordinates or city to get the temperatures.

- Hit DEPLOY
- Now you can connect to the UI via: http://yourRaspberryIP:1880/ui
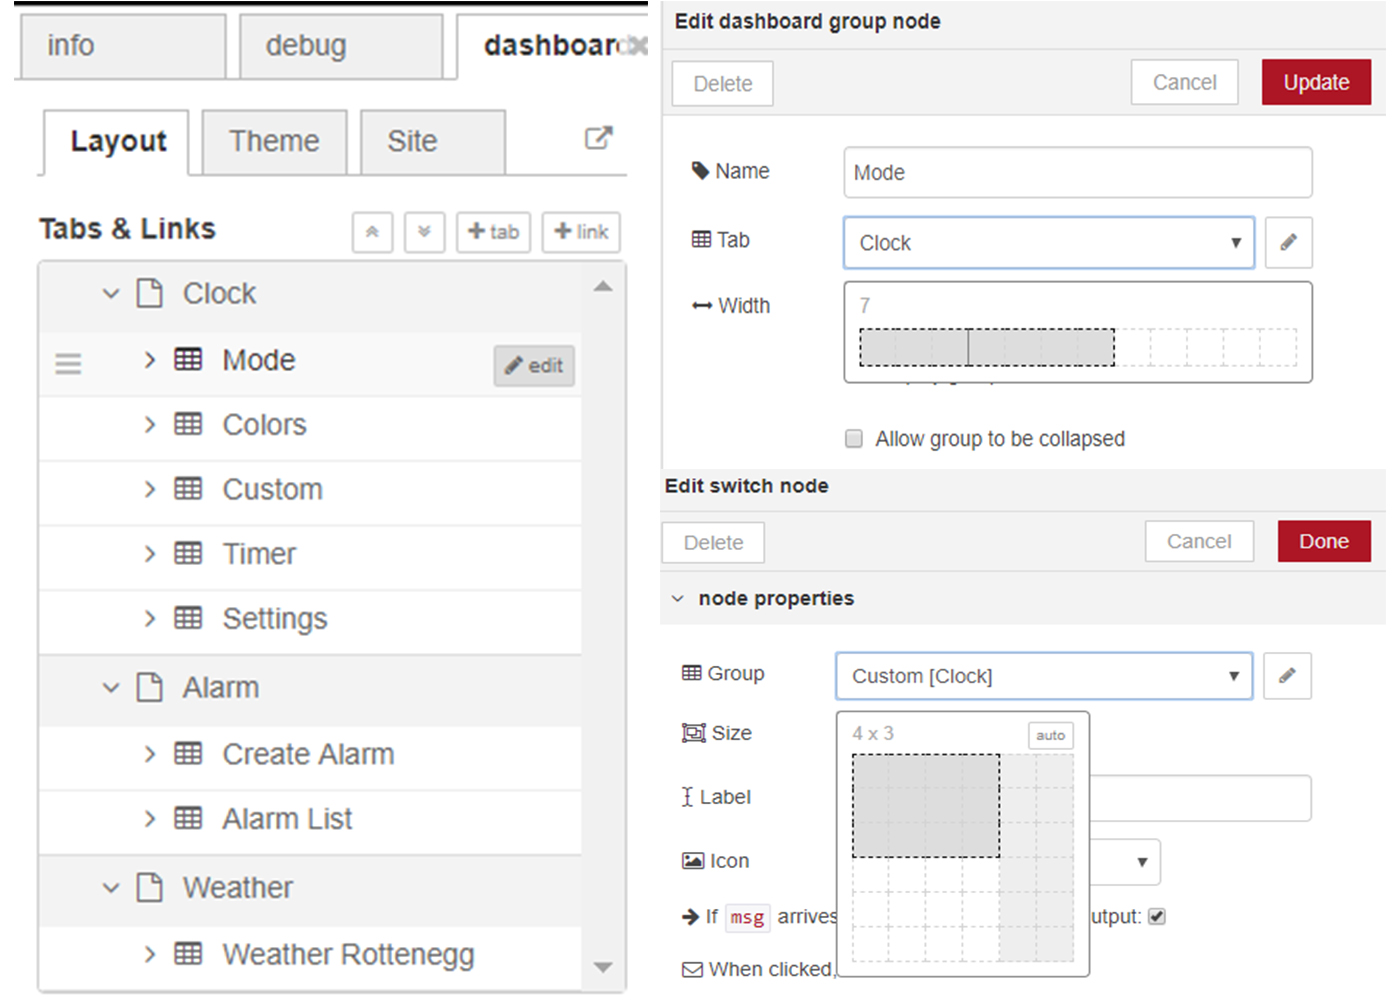
- The webinterface is designed to fit the whole screen of the Fire HD 8 Tablet, to fit your phone you have to change the dimensions of the elements.
- You can change the position by dragging the elements in the dashboard list.
- You can either choose one of the two default themes or set your own colors.

  1. Click on preferences
  2. Enter under *Additional Board Manager URLs*:
  http://arduino.esp8266.com/stable/package_esp8266com_index.json
  3. Now head to tools → Board → Boards-Manager
  - Search for **esp8266** and install the package
  4. Select **WeMos D1 R2 & mini** from the boards list
  1. Click on sketch → include libary → manage labraries
  2. Install *PubSubClient*
  3. Install *Adafruit Neopixel*
  1. Set your WiFi SSID and WiFi password
  2. Set **mqtt_server** to your Raspberry Pi's IP-Address
  3. If you had set up authentication before, change **mqtt_auth** to 1 and enter your credentials below, otherwise set it to 0

The table i'm using is an Amazon Fire HD 8 with an app called One Page Web Browser, this app can be found here.