This custom module that enhances Odoo's Project Management capabilities by adding custom fields, improving project forms, and providing dynamic behavior for project attributes. It also extends the Project List View with additional details and introduces custom filters for more efficient data retrieval. The module aims to streamline project management for different industries and improve visibility of key project metrics.
- Server: AWS Ubuntu instance
- Odoo Version: Odoo 18 Community Edition
- Module:
project_extension(Enhancements for Project Management)
Ensure you have the following before proceeding:
- A working server or instance with minimum 10 GB (for a basic installation without large data storage).
- SSH access the server or instance.
project_extension.zipfile (or GitHub repository link https://github.com/MuhammadSaleh96/custom_addons.git) module.- Visual Studio Code or PyCharm for your development workspace.
- New fields added:
project_typeindustry_typeclient_priorityexpected_revenuecontract_signed
- Dynamic behavior using Python to update fields based on user input.
- Displays additional fields for better visibility:
project_typeindustry_typeclient_priorityexpected_revenuecontract_signed
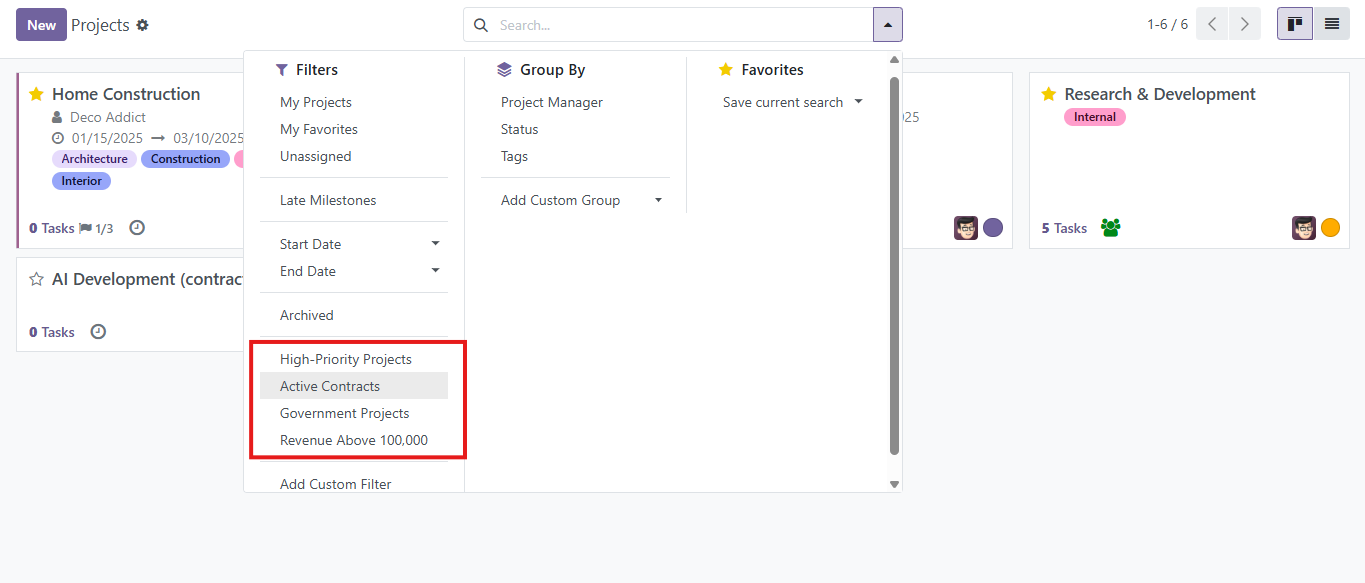
- High-Priority Projects: Filters projects where
client_priority = High. - Active Contracts: Filters projects where
contract_signed = True. - Government Projects: Filters projects where
project_type = Government. - Revenue Above 100,000: Filters projects where
expected_revenue > 100,000.
If your server requires a PEM key for authentication, use the following command:
ssh -i /path/to/your/key.pem username@server_ip_address/path/to/your/key.pem: Replace with the full path to your PEM key file.username: Replace with your server's username.server_ip_address: Replace with your server’s IP address.
sudo apt-get update && sudo apt-get upgrade -ysudo apt-get install -y openssh-server fail2ban
sudo systemctl start fail2ban
sudo systemctl enable fail2ban
sudo systemctl status fail2bansudo apt-get install -y python3-pip python3-dev libxml2-dev libxslt1-dev zlib1g-dev \
libsasl2-dev libldap2-dev build-essential libssl-dev libffi-dev libmysqlclient-dev \
libjpeg-dev libpq-dev libjpeg8-dev liblcms2-dev libblas-dev libatlas-base-dev npmCreate a symlink for Node.js:
sudo ln -s /usr/bin/nodejs /usr/bin/nodeInstall required Node.js packages:
sudo npm install -g less less-plugin-clean-css
sudo apt-get install -y node-lesssudo apt-get install -y postgresql
sudo su - postgres -c "createuser --createdb --username postgres --no-createrole --superuser --pwprompt odoo"
exitsudo adduser --system --home=/opt/odoo --group odoosudo apt-get install -y git
sudo su - odoo -s /bin/bash
cd /opt/odoo
git clone https://www.github.com/odoo/odoo --depth 1 --branch 18.0 --single-branch .
exitsudo apt install -y python3-venv
sudo python3 -m venv /opt/odoo/venv
source /opt/odoo/venv/bin/activate
pip install -r /opt/odoo/requirements.txtInstall wkhtmltopdf:
sudo wget https://github.com/wkhtmltopdf/wkhtmltopdf/releases/download/0.12.5/wkhtmltox_0.12.5-1.bionic_amd64.deb
sudo dpkg -i wkhtmltox_0.12.5-1.bionic_amd64.deb
sudo apt install -fsudo cp /opt/odoo/debian/odoo.conf /etc/odoo.conf
sudo nano /etc/odoo.confModify the file with the following settings:
[options]
admin_passwd = admin
db_host = localhost
db_port = 5432
db_user = odoo18
db_password = 123456
addons_path = /opt/odoo/addons
logfile = /var/log/odoo/odoo.log
Set permissions (optional):
sudo chown odoo: /etc/odoo.conf
sudo chmod 640 /etc/odoo.confsudo nano /etc/systemd/system/odoo.serviceAdd the following content:
[Unit]
Description=Odoo18
Documentation=http://www.odoo.com

[Service]
Type=simple
User=odoo
ExecStart=/opt/odoo/venv/bin/python3 /opt/odoo/odoo-bin -c /etc/odoo.conf

[Install]
WantedBy=default.target
Set permissions and start the service:
sudo chmod 755 /etc/systemd/system/odoo.service
sudo chown root: /etc/systemd/system/odoo.service
sudo systemctl start odoo.service
sudo systemctl enable odoo.service
Access Odoo in your browser:
http://<your_domain_or_IP_address>:8069Connect to your server or instance:
ssh -i your-key.pem ubuntu@your-ec2-public-ipNavigate to your Odoo addons directory:
cd /opt/odoo/custom_addonsClone the repository:
git clone https://github.com/MuhammadSaleh96/custom_addons.gitrestart odoo service:
sudo service odoo18 restart-
Use an Existing Custom Module or This Repository:
- You can either use your own custom module or clone this repository and proceed with the setup.
-
Start Odoo: Ensure Odoo is running:
sudo systemctl start odoo.service
-
Log in to Odoo:
- Open a browser and navigate to
http://<your_domain_or_IP_address>:8069 - Use the configured admin username and password.
- Open a browser and navigate to
-
Activate Developer Mode & Activate/Install Modules:
- Navigate to
Settings > General Settings - Scroll down to the bottom under
Developer Tools > Enable Developer Mode - Go to
Home Menuon the Top-left corner Icon then click onApps > Update List Apps - Click the
Updatebutton (note: this will let you see the custom project extention module in modules list panel) - Go to
Home Menuon the Top-left corner Icon - Select
Appsthen typeProjectorprojectin the search bar (note: the module has a tic symbol icon) - Click on the
Activatebutton to install and load project management module in odoo - Now search for
Project Extensionorproject extensionin search bar, make sure to clear the filter - Click on the
Activatebutton to install and load the custom project extension module
- Navigate to
-
New Project Extension Form
- Go to
Home Menuon the Top-left corner Icon - Select
Projectfrom the drop-down menu - Click on
Newbutton to create a new project - Fill in the custom fields
- Check the dynamic fields behavior
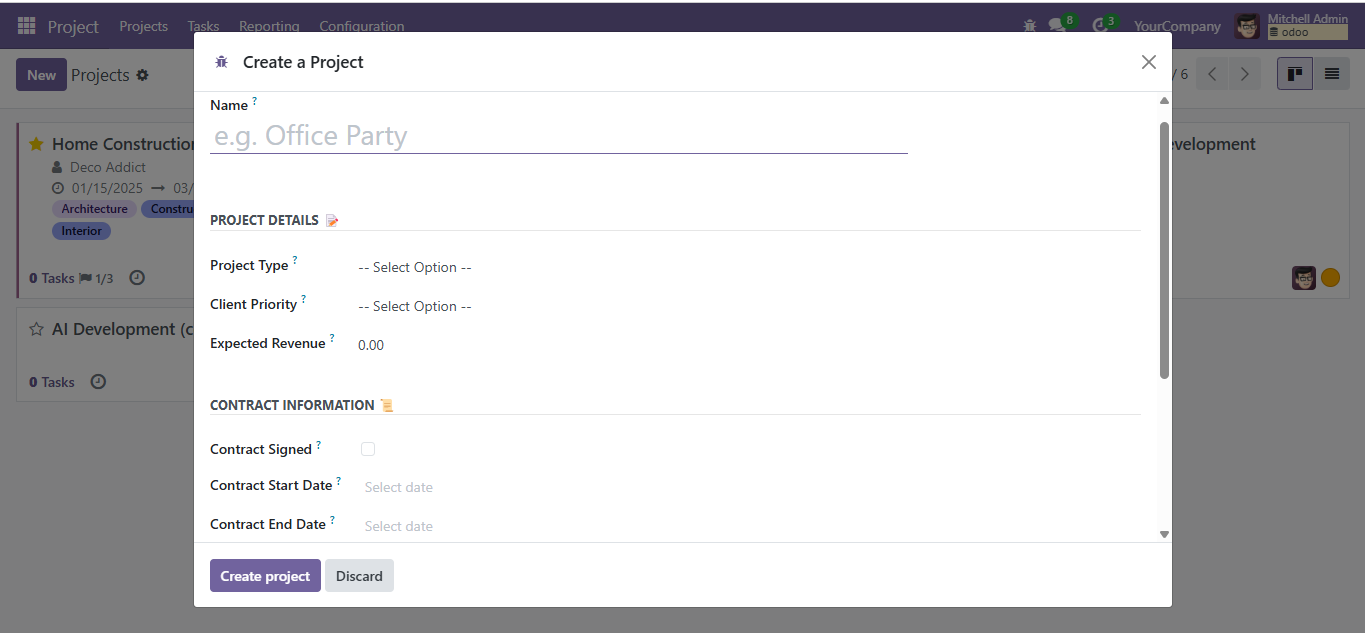
- Click on
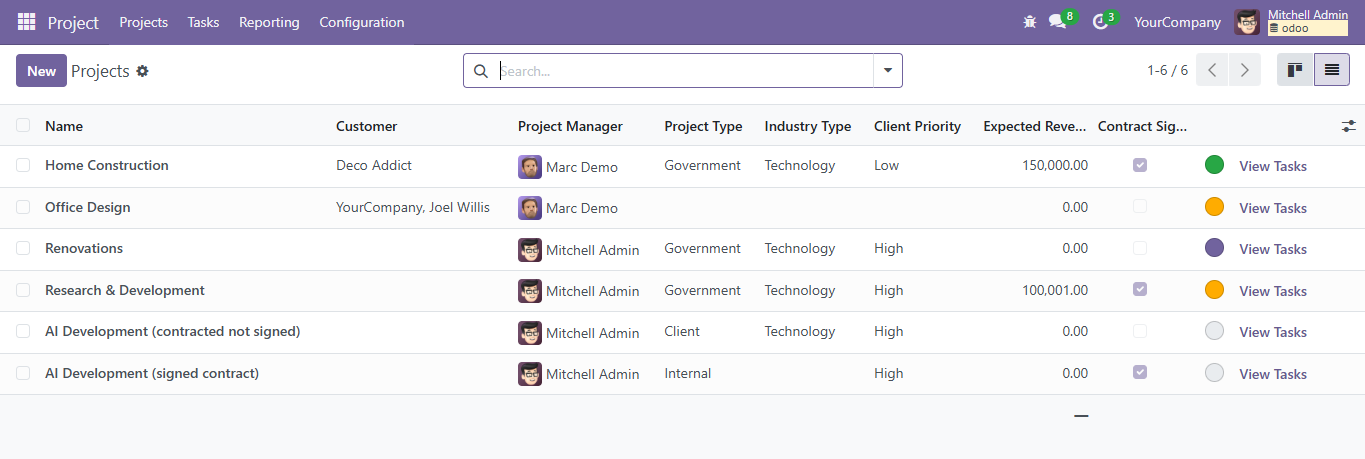
Create Project - Click on
Projectson the top menu bar - Verify that the project list view displays the new fields under two icon buttons in the image below

- Go to
-
Editing Existing Project Extension Form
- Go to
ProjectunderHome Menuon the Top-left corner Icon - Click on the
List ViewIcon and choose any of the existing projects
- Edit in the custom fields
- Check the dynamic fields behavior
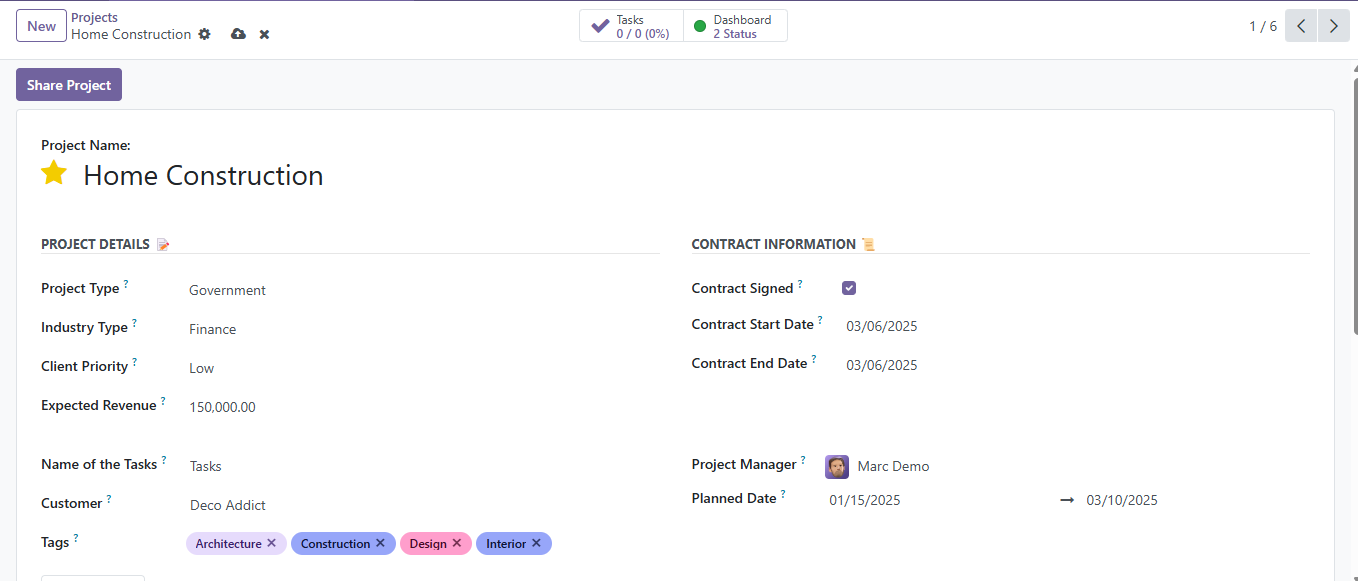
- Save the project after editing the required fields by clicking on the icon shown in the image below

- Go to
-
Custom Filters Project Extension
- Go to
ProjectunderHome Menuon the Top-left corner Icon - Click on the arrow icon in the search bar and verify custom filters are retriving projects accordantly
- Go to
-
Troubleshooting
-
Check the Odoo logs using the terminal:
tail -f /var/log/odoo/odoo.log
-


The project_extension module enhances Odoo’s Project Management capabilities by adding necessary fields, improving the user interface, and enabling advanced filtering options