Edit the theme files mentioned here with your text editor of choice. For example, you can use Visual Studio Code ↗ or Sublime Text ↗.
Once you finish making your changes, zip the theme files, and upload the final zip file to Ghost.
- Theme Installation
- Upload the routes.yaml File (Required)
- Create a New Content API Key (Required)
- Members / Subscriptions
- Navigation
- Search
- Pages
- Comments
- Show Authors
- Posts Per Page
- Related Posts
- Syntax Highlighting
- Google Analytics
- Responsive Tables
- Social Networks
- Update Favicon
- Languages
- Theme Deploy with GitHub Actions
- Theme Development
- Theme Update
The first step is to unzip the downloaded package. Inside the new directory krabi, you will find the zipped theme and a documentation file. Follow these steps to upload the theme to your blog:
- Log in to your Ghost website admin (example.com/ghost).
- Click Design in the left-side menu.
- Scroll down to the INSTALLED THEMES section.
- Click Upload a theme.
- Select the theme file (krabi.zip).
- Once uploaded, click Activate now to activate the theme immediately. If you want to activate it later, click Close.
The routes.yaml file is required for member sign up and subscription flows.
To upload the file, follow these steps:
- Unzip the
krabi.ziptheme file. - Go to the Labs page in Ghost admin (
/#/settings/labs). - Scroll down to the Routes section and click the Upload routes YAML button.
- Select and upload the
routes.yamlfile inside the theme zip file.

There will already be a default routes.yaml file uploaded to Ghost. You need to upload your theme's routes.yaml to override the default.
Do this separately, after uploading your theme's zip file.
To enable certain features, like Search and Related Posts, you'll need to create a new Content API Key. Follow these steps to create your key.
In the left-side menu of your Ghost admin, click Integrations then + Add custom integration.
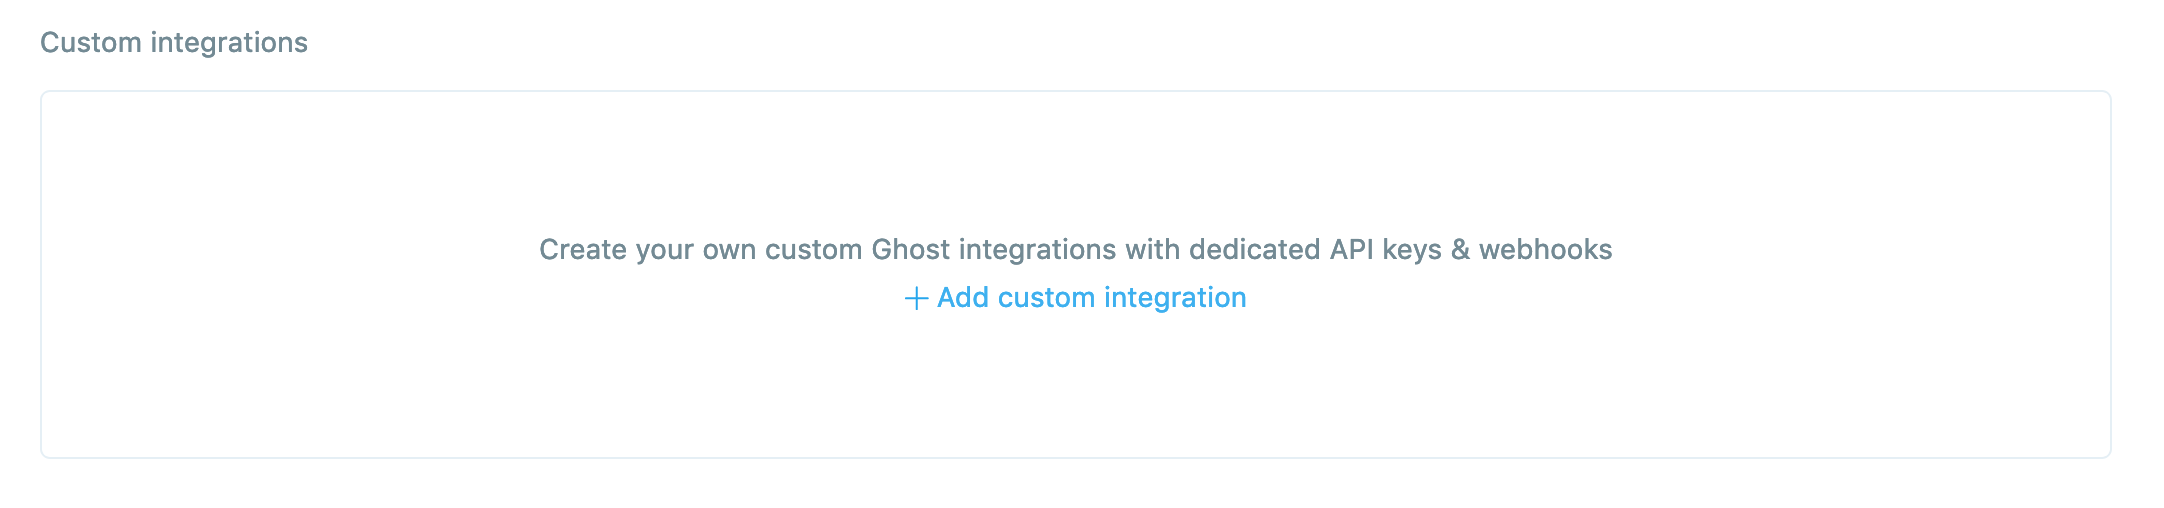
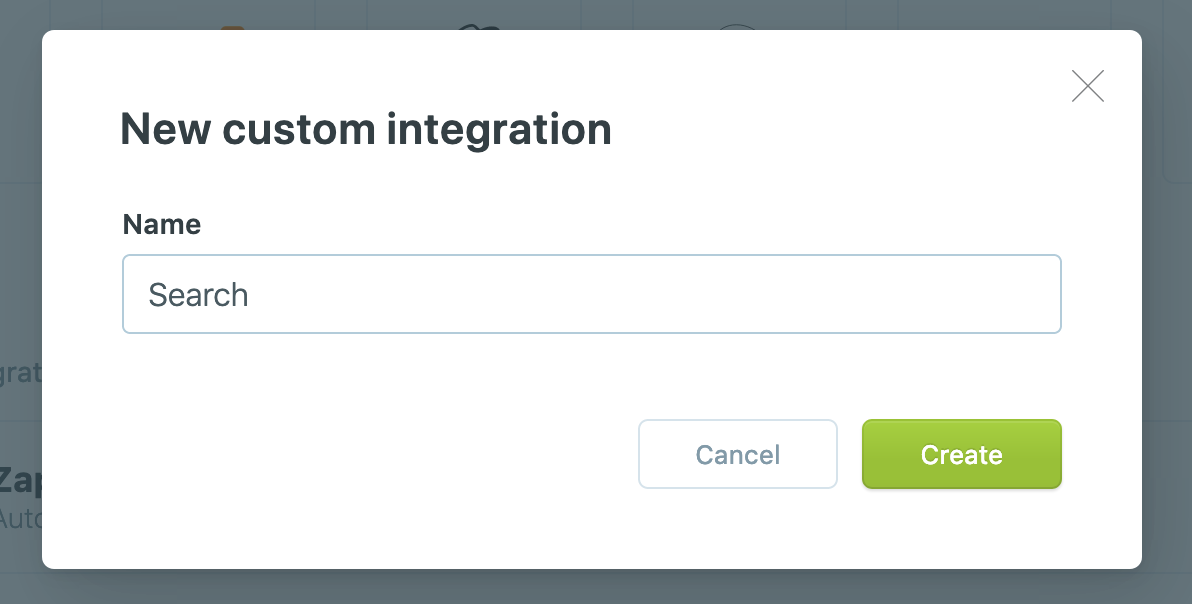
Give the new integration a name, like "Search", and click Create.
A new content API Key will be created. When you hover over it, a Copy button will appear. Click the button to copy the key to the clipboard.

Next, click Code injection from the left-side admin menu.
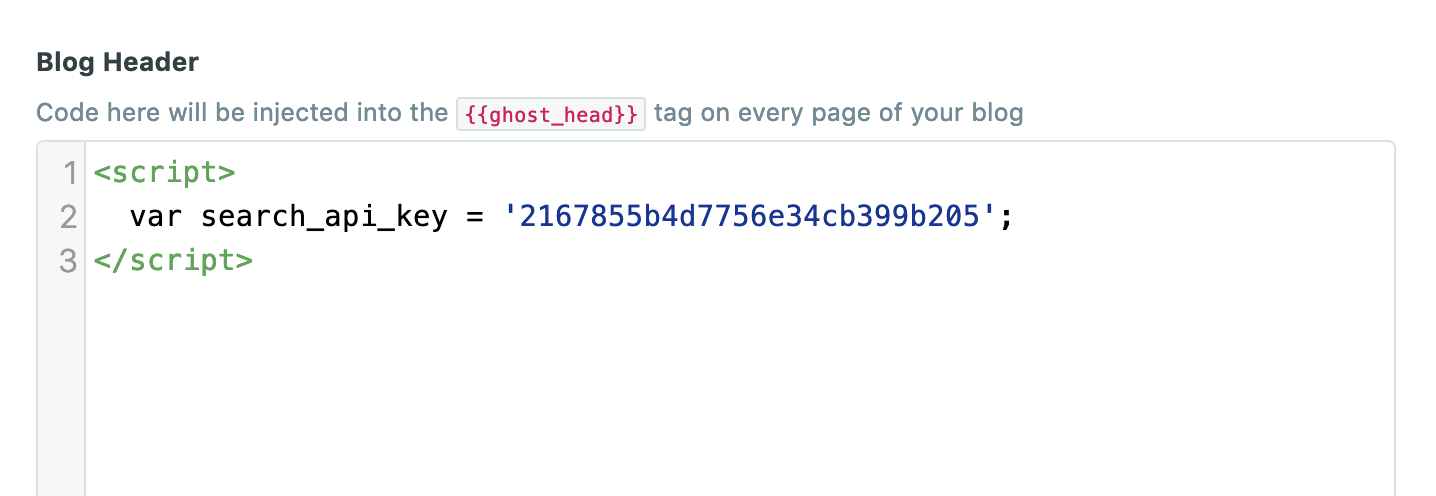
After replacing the API_KEY value with your API Key, add the following code to the Site Header box:
<script>
  var search_api_key = 'API_KEY';
</script>
It should look like this:
Click Save.
Make sure to Upload the routes.yaml file.
Enable subscribers by checking the Enable members checkbox on the Labs page in your Ghost admin panel.
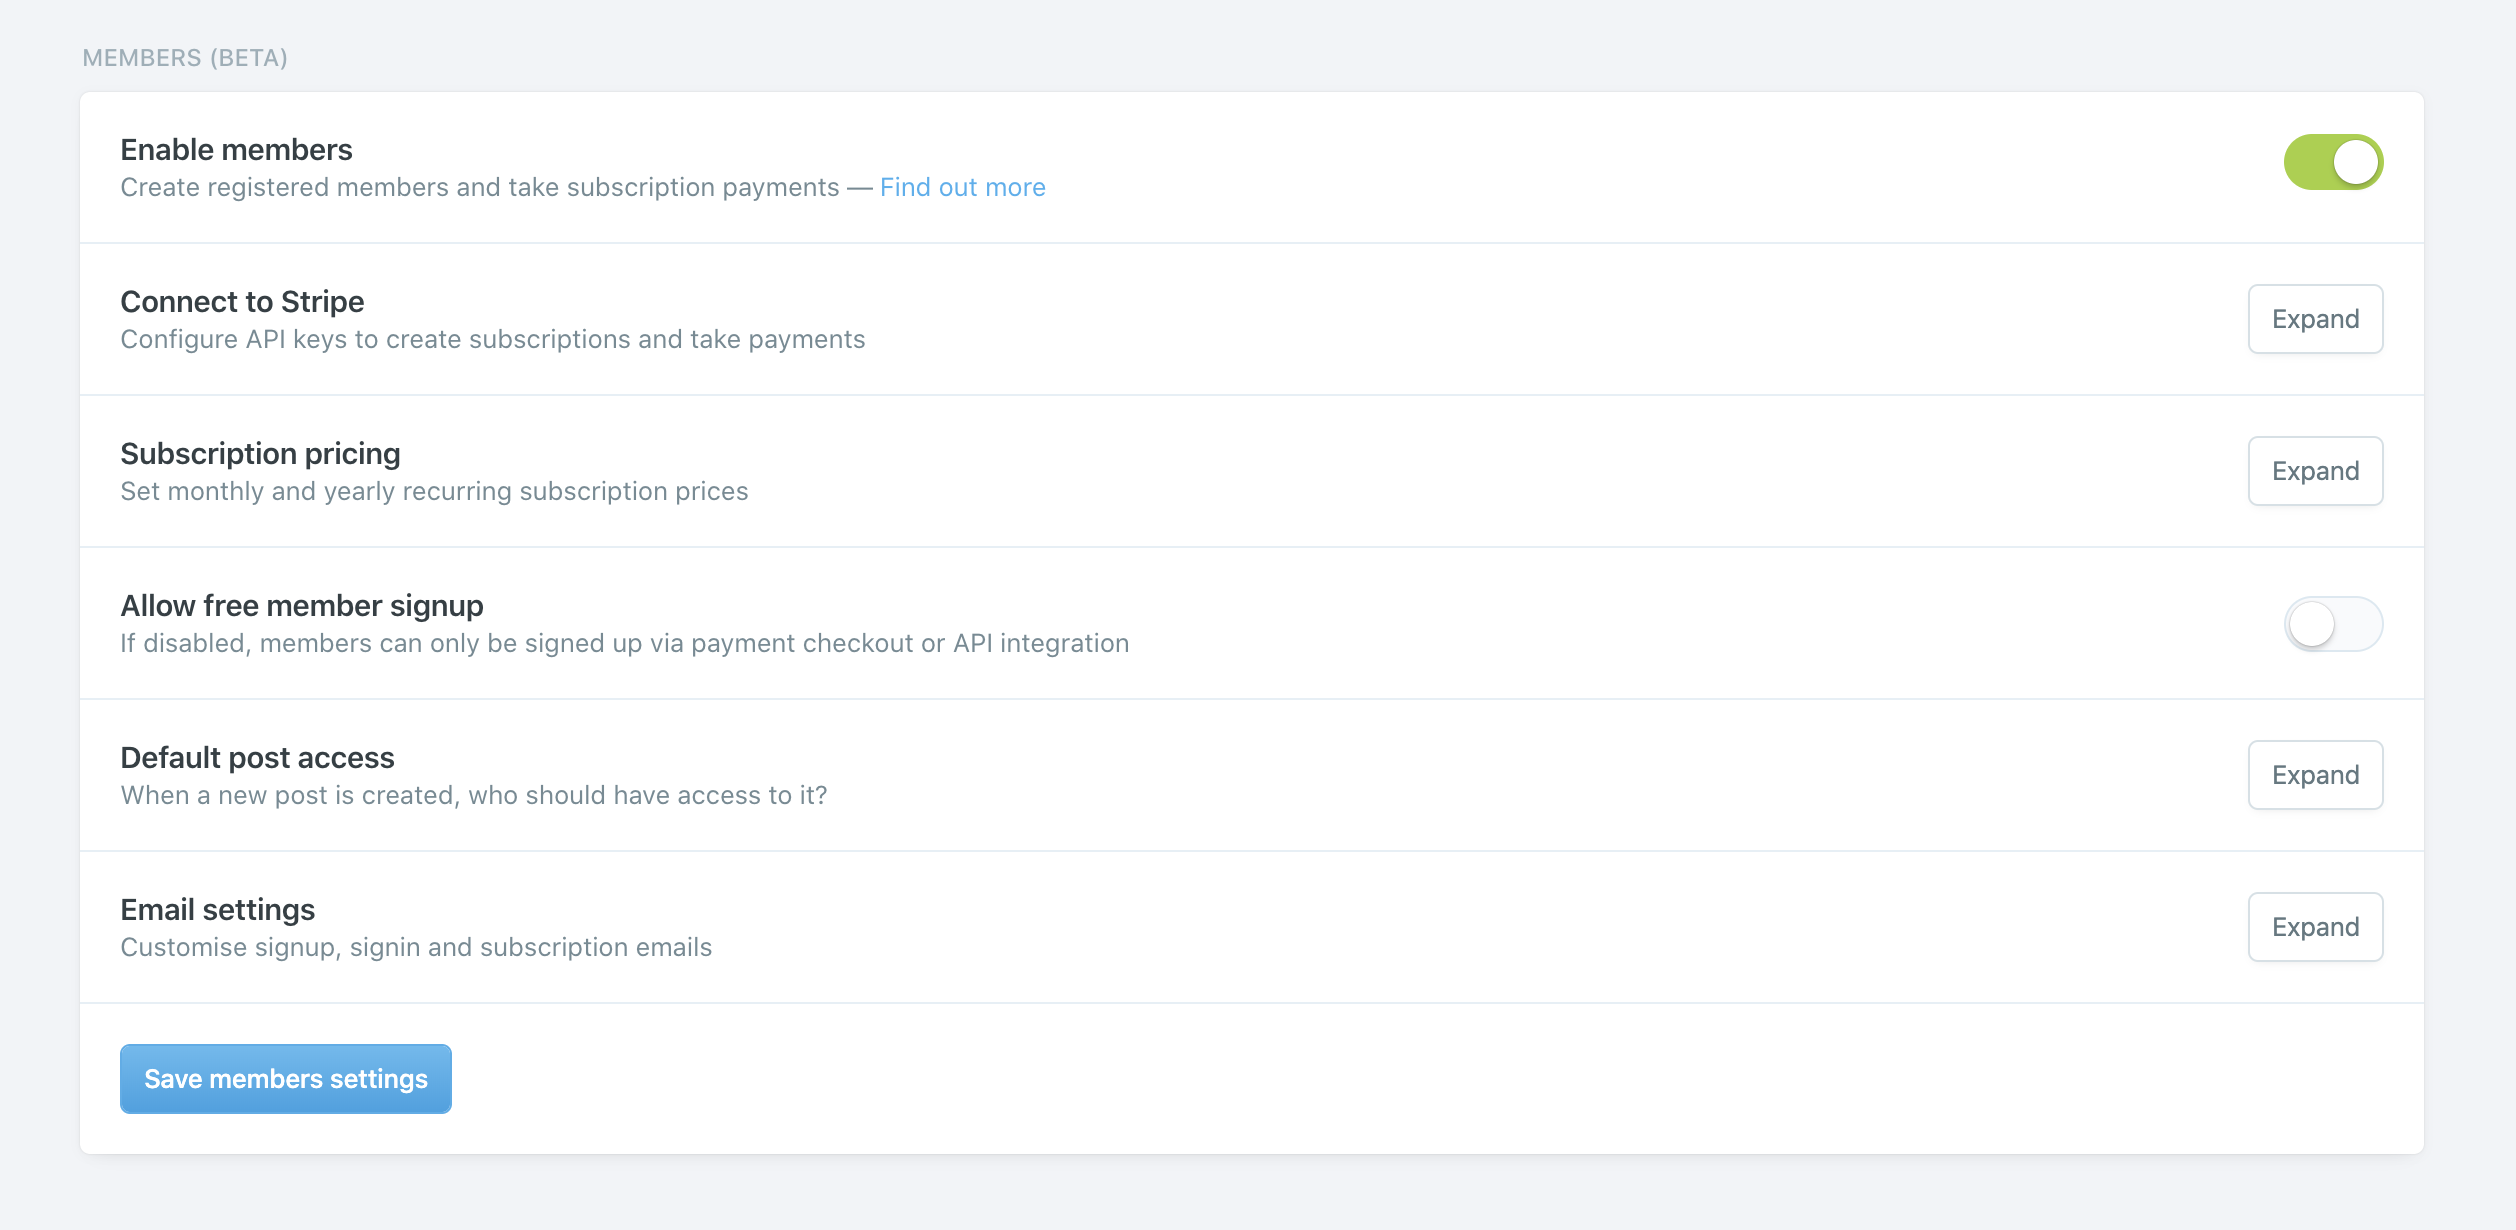
Once enabled, different parts of the theme will appear on the website:
- Login In and Subscribe buttons in the header
- Sidebar and Footer subscription forms
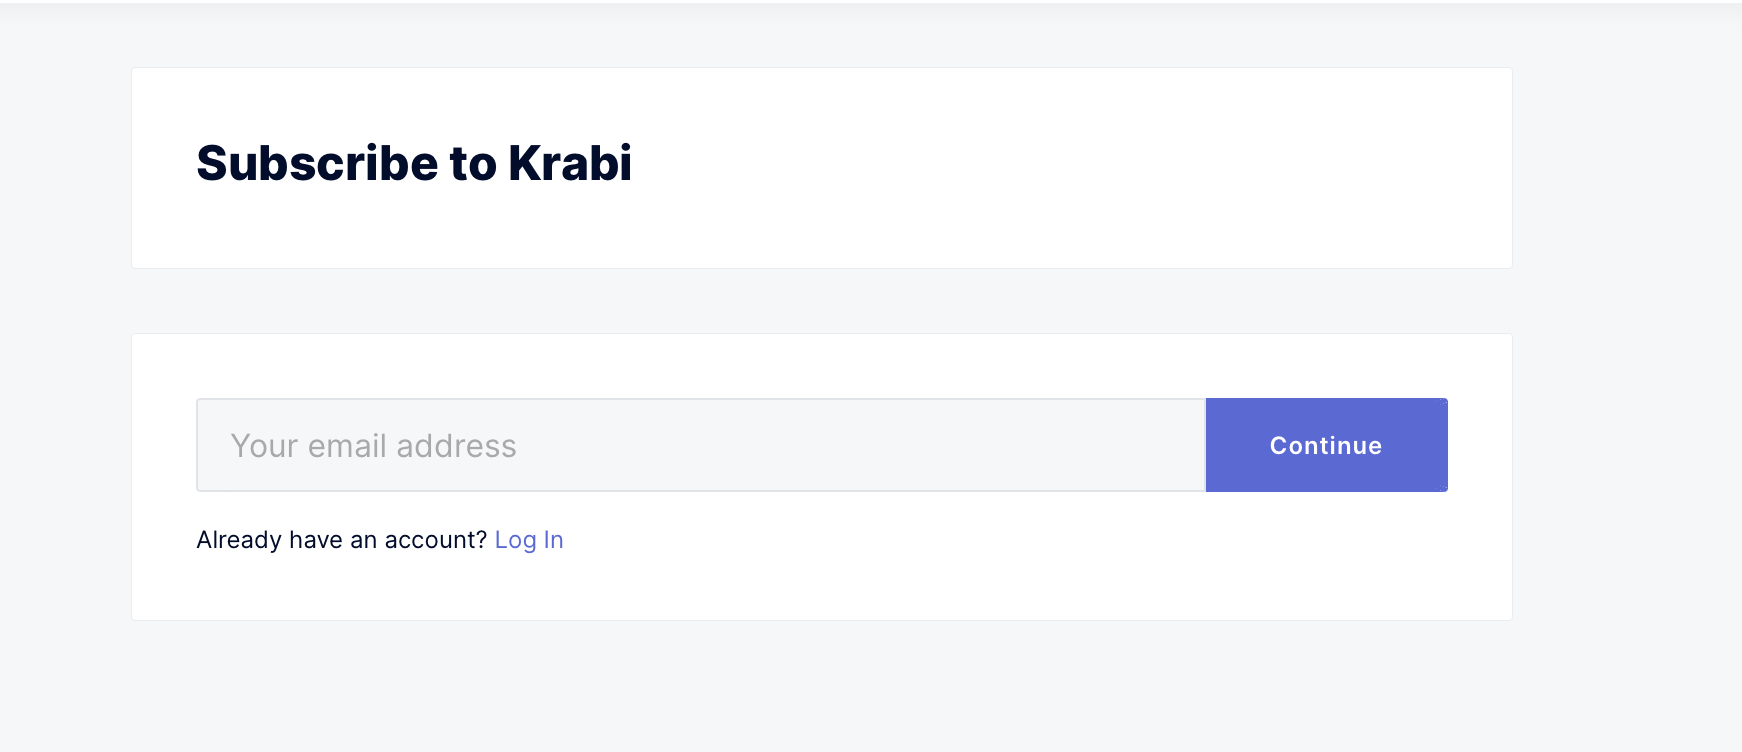
- A page subscription form
- If the post is set to Members Only, a Call to Action section on the Post page to encourage visitors to subscribe
If the user is already logged in, all the forms will be hidden automatically.
To edit plan features, edit the partials/member-plans.hbs file.
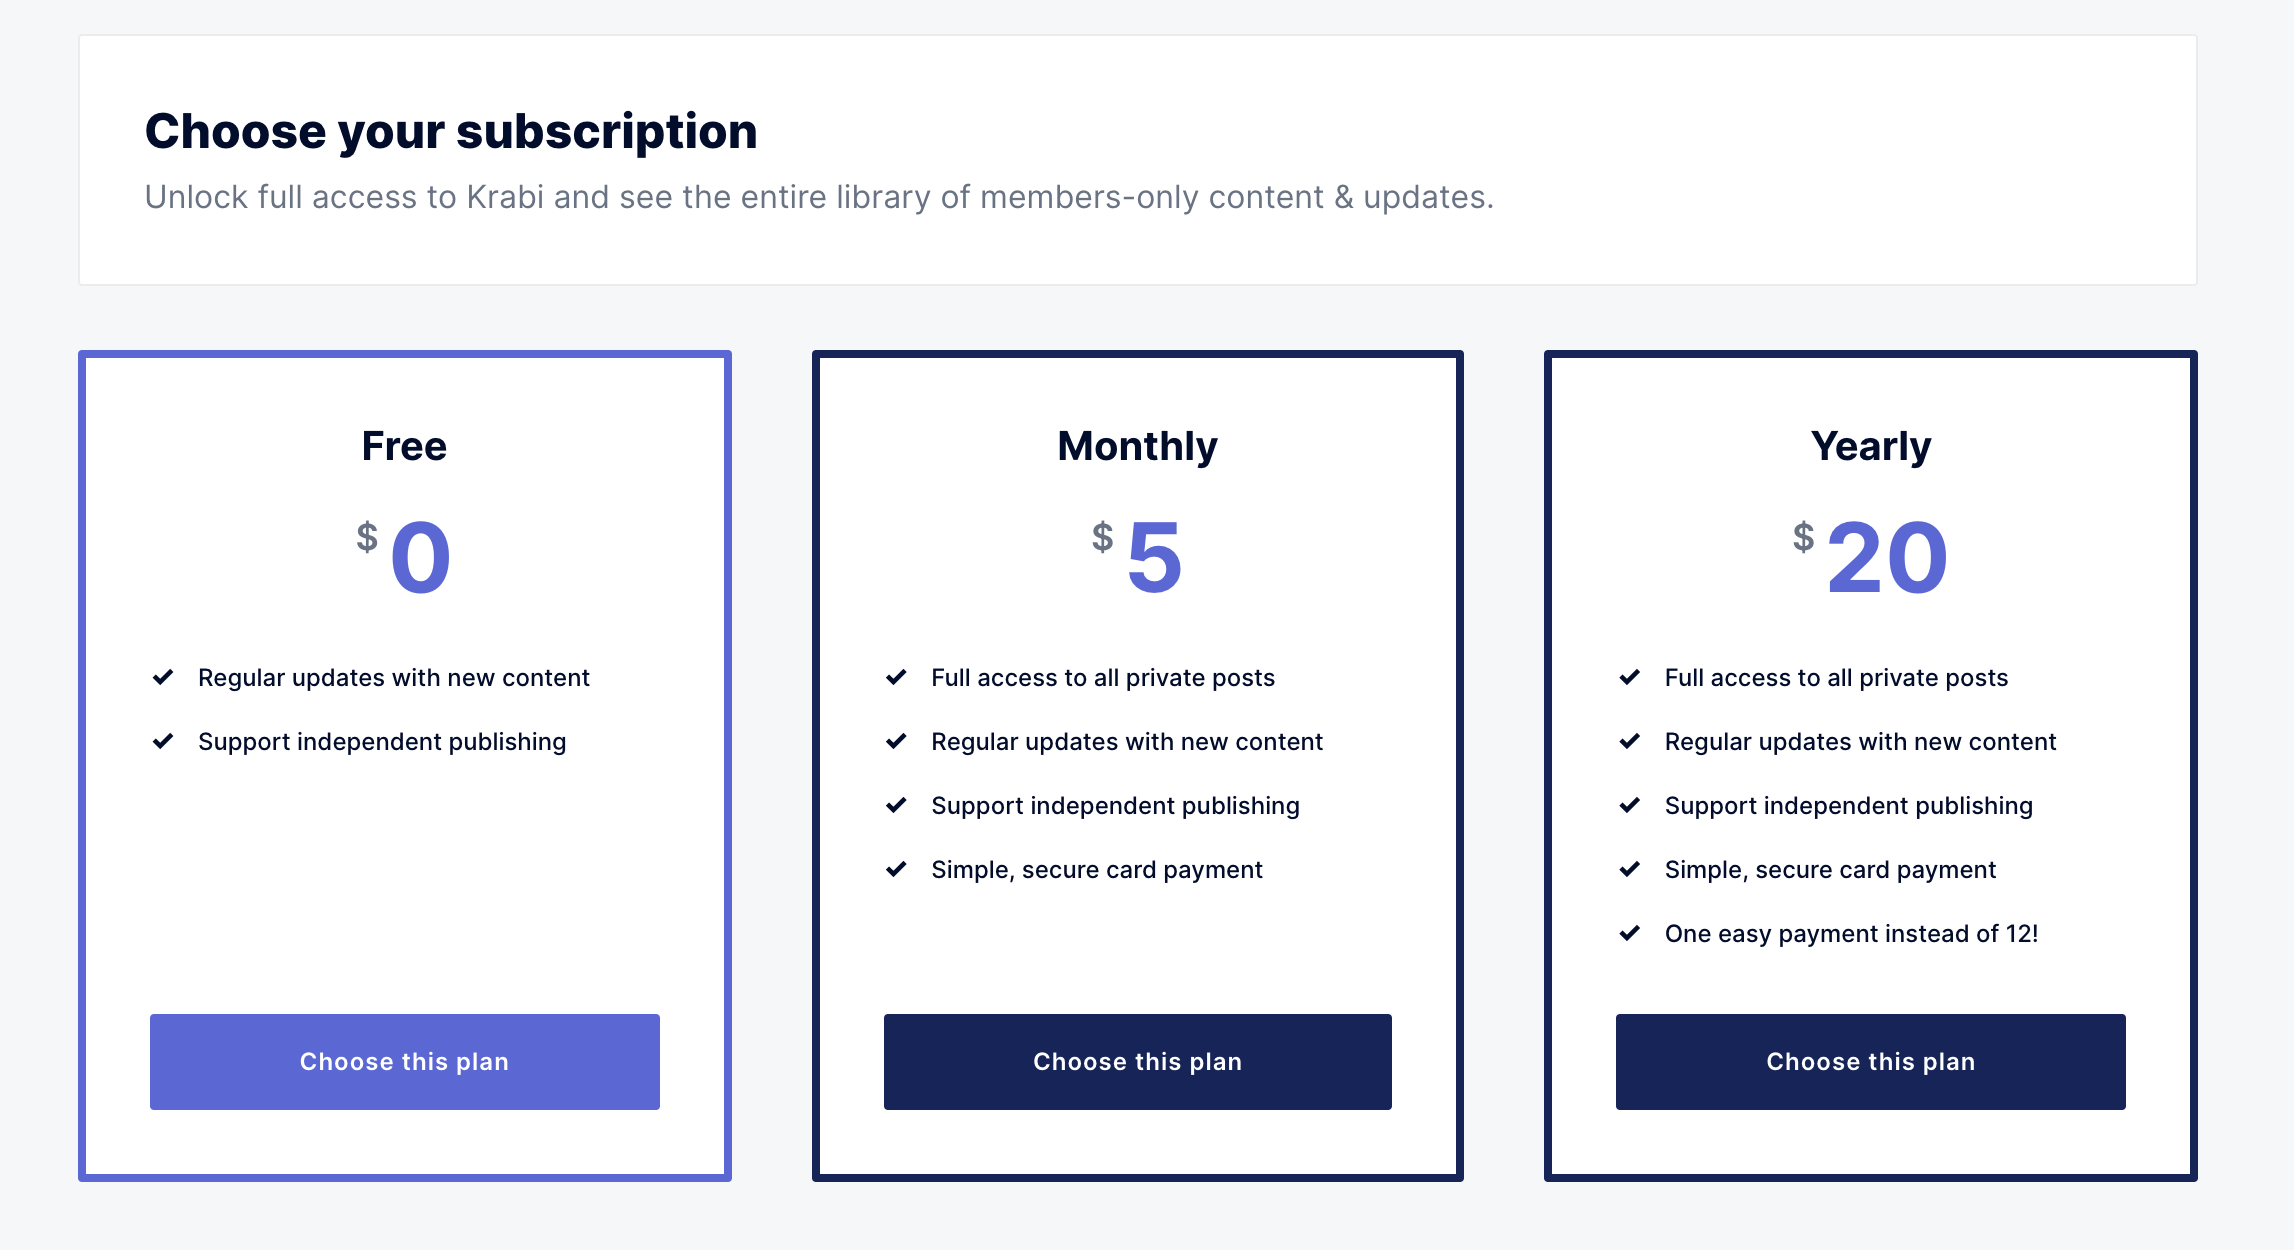
The free plan column will be visible to guest users when they visit the /subscribe/ page.
To remove this column, open the partials/member-plans.hbs file and remove lines 2 to 17.
Clicking the Free button will direct the user to /signup/.
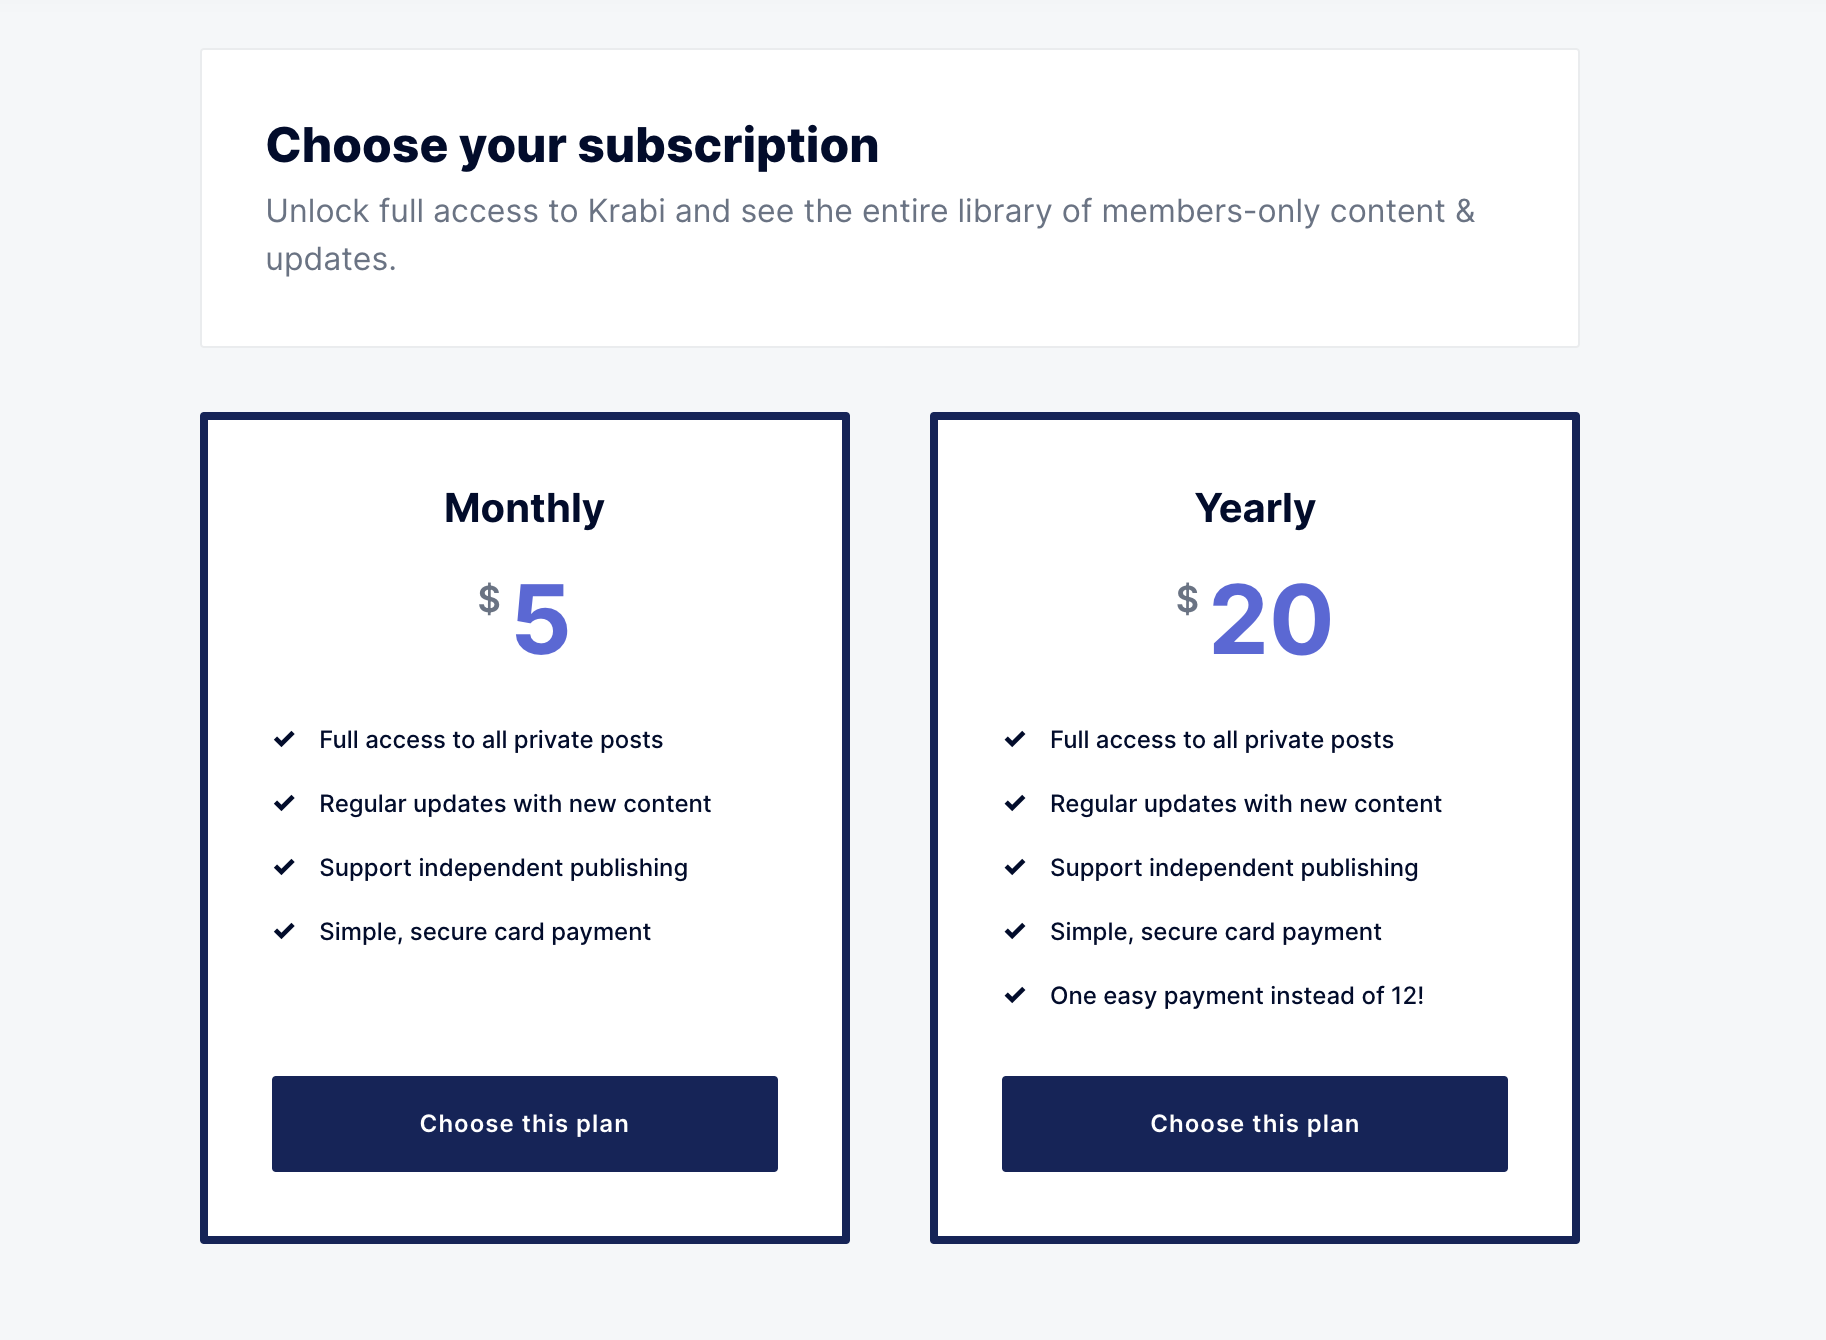
If logged-in users try to subscribe to a plan from their account page, only the monthly and yearly plans will display.
To remove Log In and Subscribe from the header, open the partials/header.hbs file and remove lines 30 to 38
If for any reason the subscribe form does not work or there is an error message, the following tips might help:
- If you are self-hosting your website, make sure to set up the mail config. After doing that, restart your Ghost server.
- The website config URL should match the URL used to access the website, as described in the Ghost docs.
Enter the URL that is used to access your publication. If using a subpath, enter the full path, https://example.com/blog/. If using SSL, always enter the URL with https://.
For more information about Members, connecting Stripe, and setting the package price, check the official Ghost documentation.
You can add, edit, delete, and reorder menu links on your Ghost blog in the Navigation section (Admin > Settings > Design).
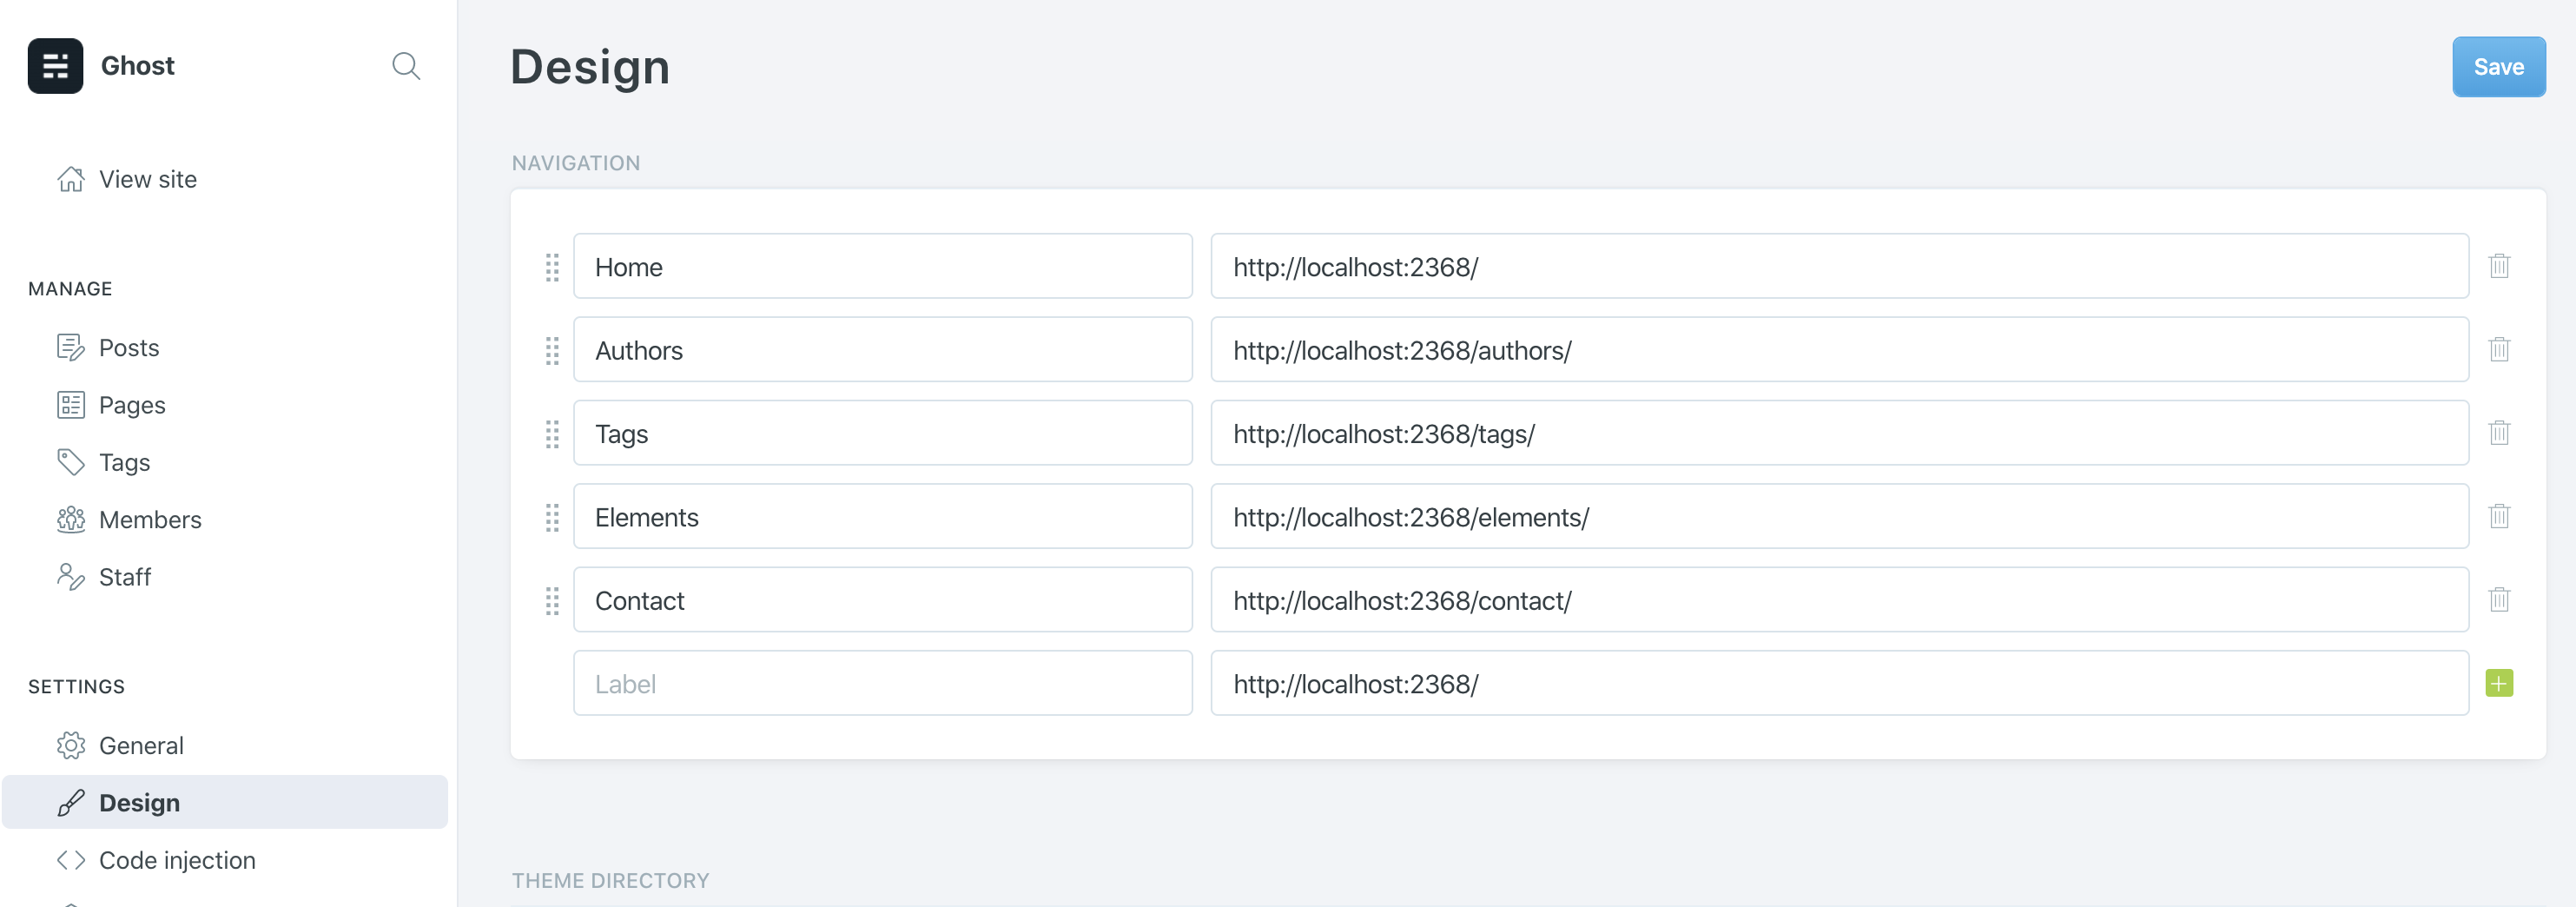
To include a static page on your navigation menu, follow these steps. First, type the name of the page as you'd like it to appear on your menu in the label field.

Next, click on the item's URL. The blog URL will already be auto-populated. Add the page slug after the final /. When you're satisfied with your page configurations, click the blue Save button to add the page to the navigation menu.
The tags menu will automatically show all the blog tags in alphabetical order.

If you want to remove the Latest tab, open the partials/tags-list.hbs file and remove lines 7 to 9.
If you want to remove the entire tags list, open the default.hbs and default-wide.hbs files and remove line 12 from both of them.
Similar to Header Navigation, we can add the footer navigation from the SECONDARY NAVIGATION section of the admin area located at ghost/#/settings/design.
Make sure to create a new Content API Key.
The theme uses ghostHunter.
Search goes through the Post title and the content. It supports only Posts, not Pages.
The supported languages are German, Spanish, French, Portuguese, Italian, Finnish, Dutch, Turkish, and Danish.
Manage pages for Tags, Authors, and Contacts from the Pages section of Ghost admin.
Follow these steps to create the Tags page:
- From the Ghost admin Pages section, create a new page and give it a title, like "Tags."
- From Page settings, select the Tags template.
- Publish the page.
- To add the page to the navigation, please check the Navigation section above.
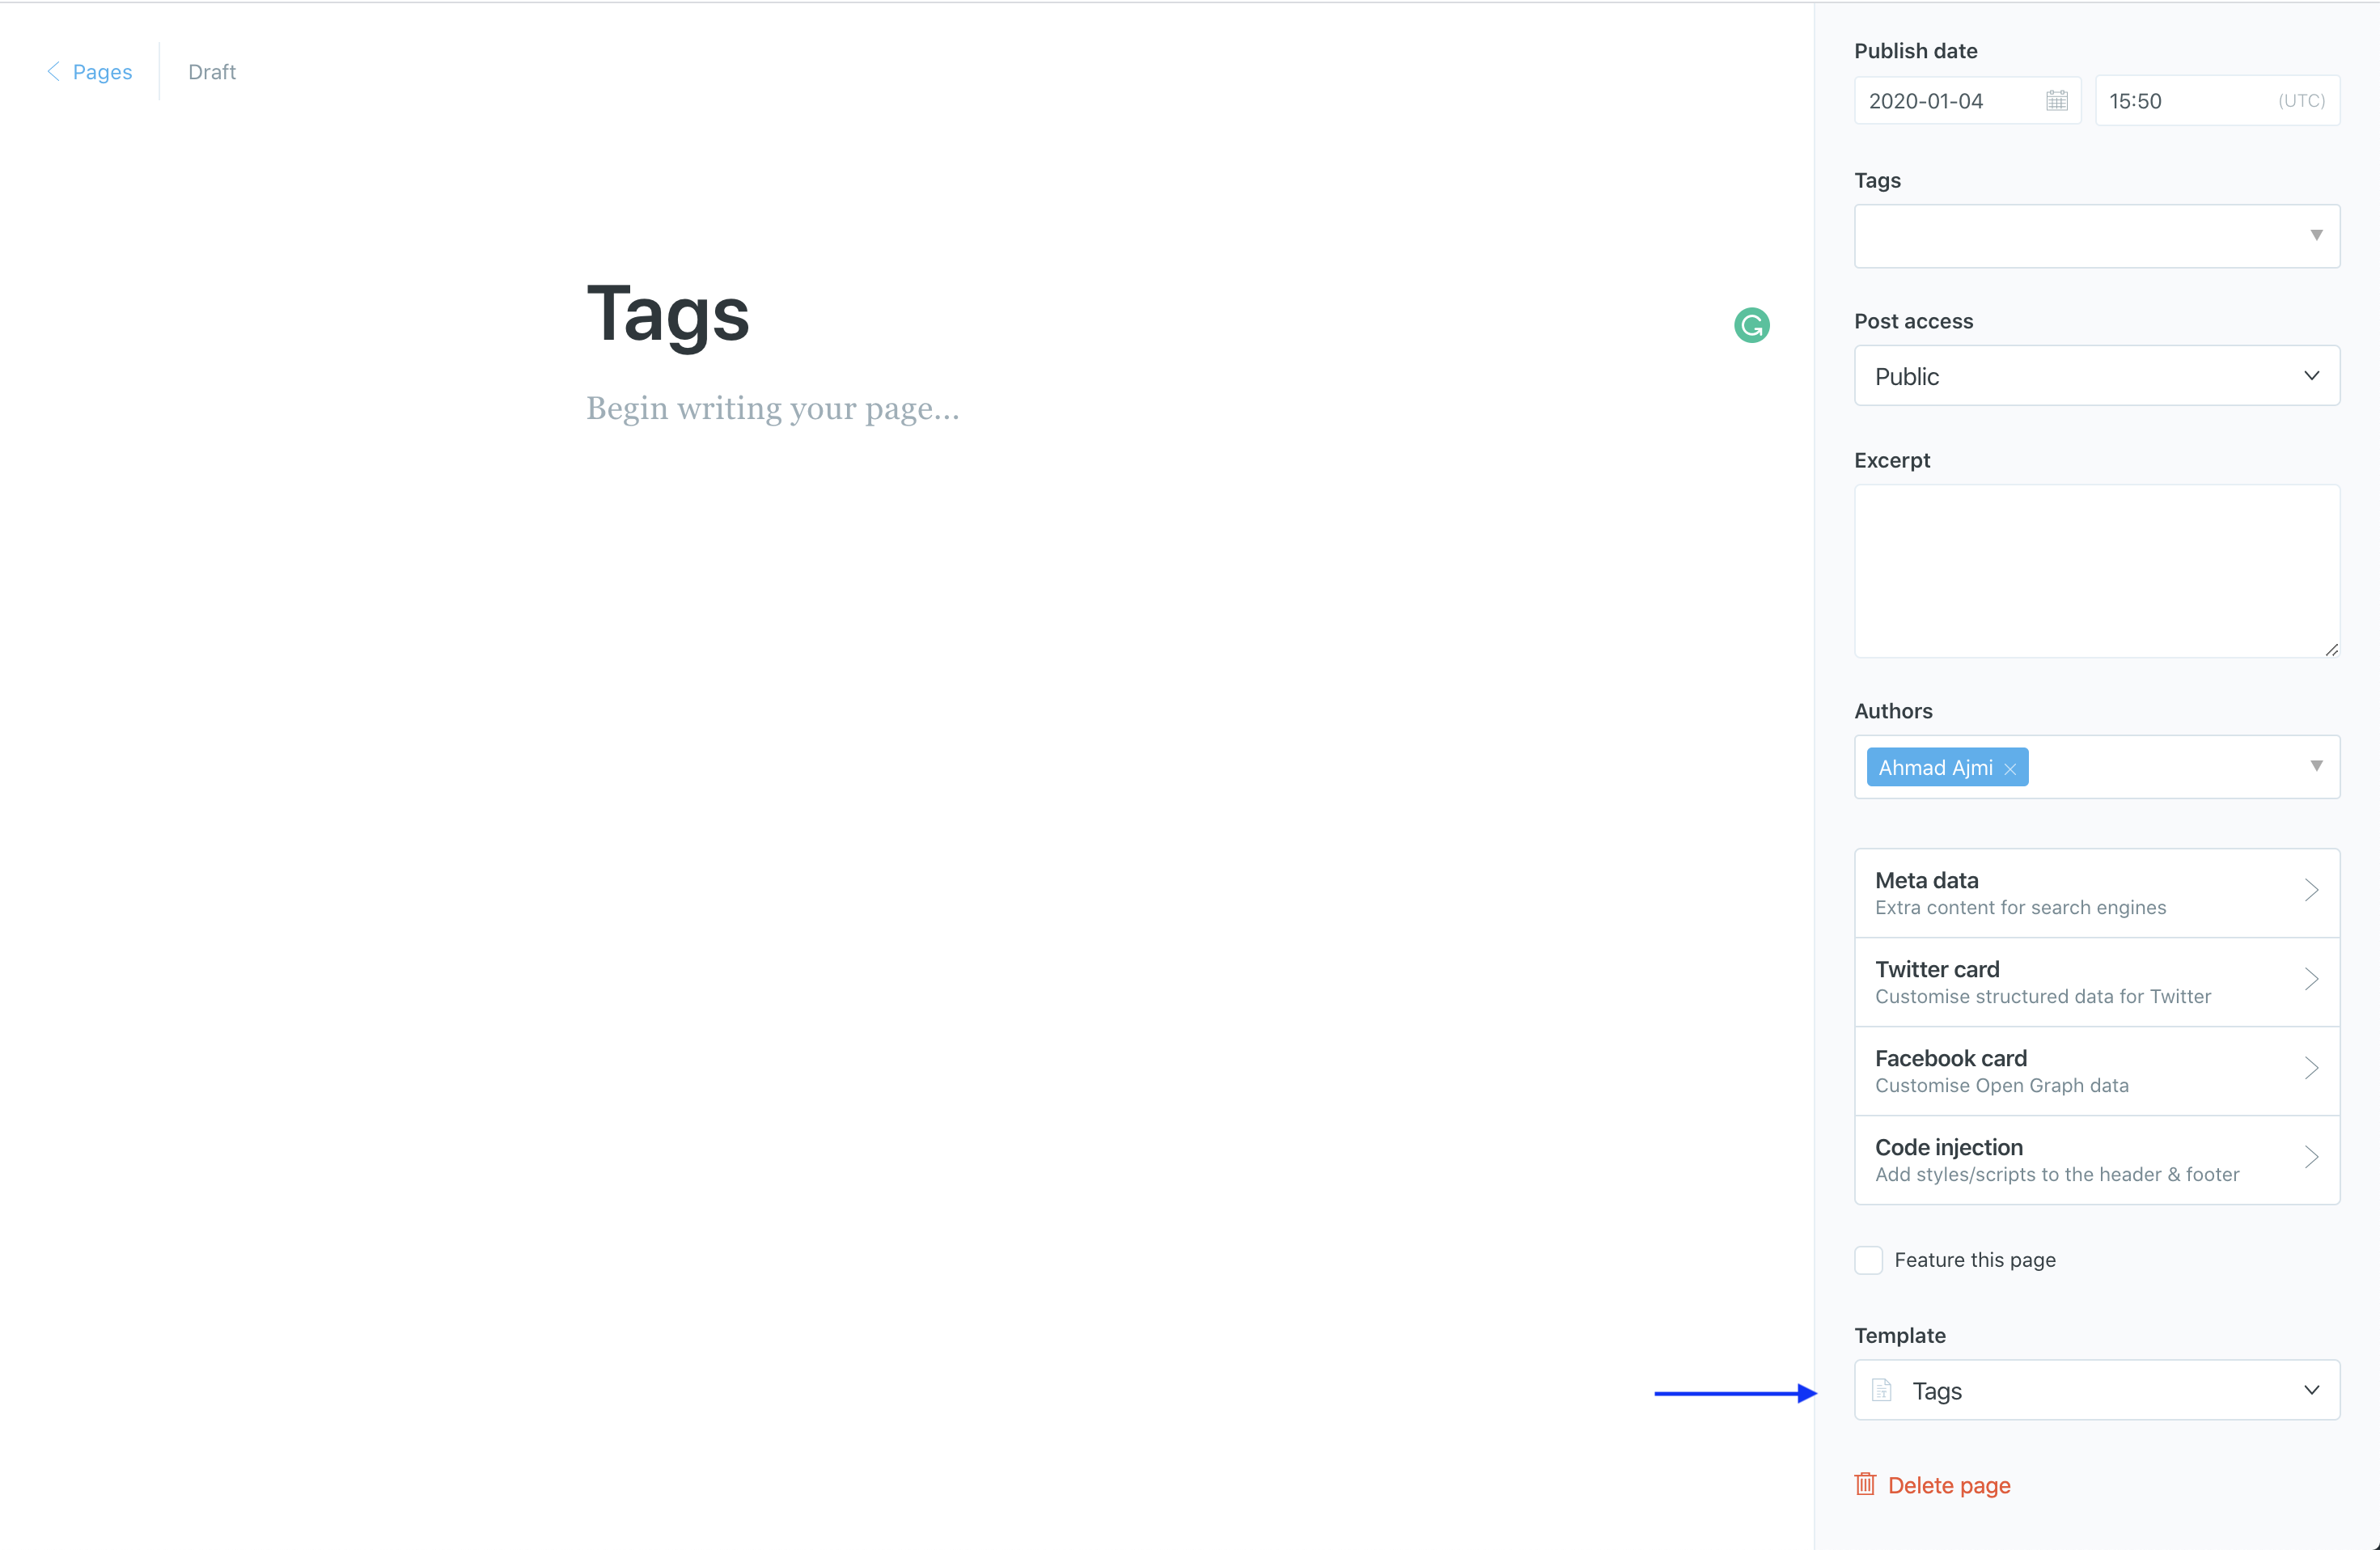
If you are self-hosting your website, you may need to do a server restart. This should get the Tags option to show up in the Template dropdown.
To create the Authors page:
- Create a new page and give it a title, like "Authors."
- From Page settings, select the Authors template.
- Publish the page
- To add the page to the navigation, please check the Navigation section above
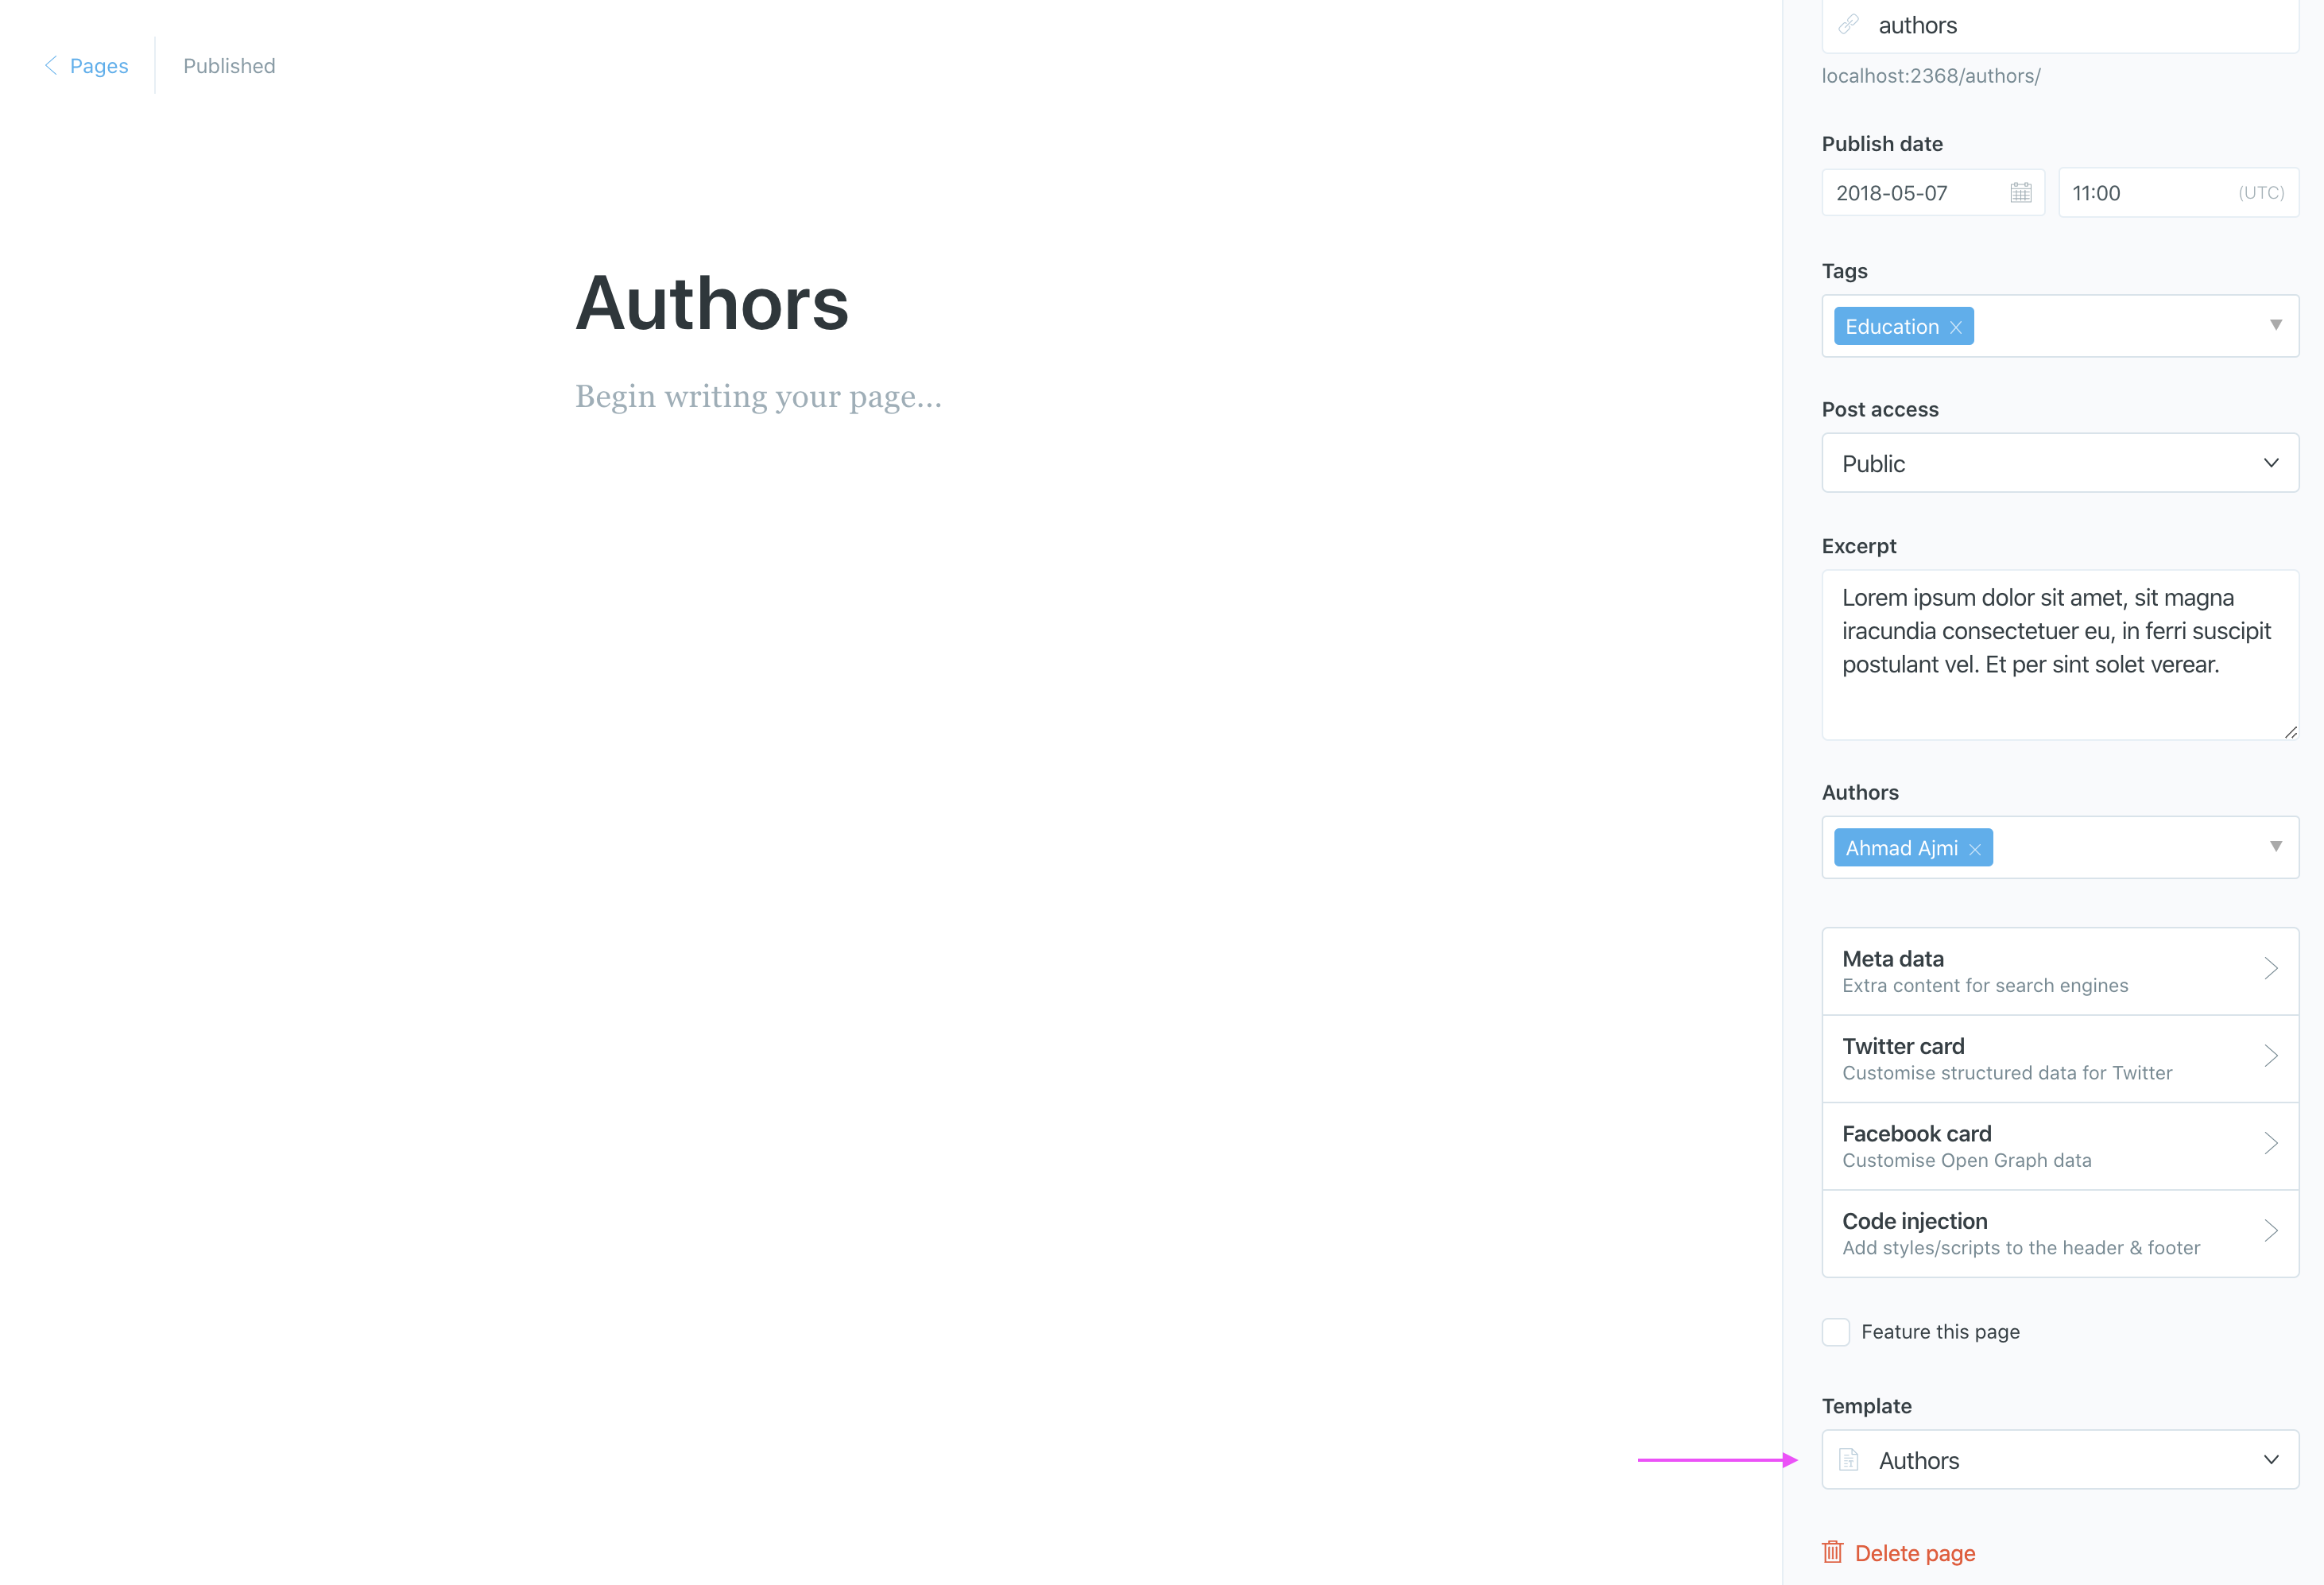
If you are self-hosting your website, you may need to do a server restart. This should get the Authors option to show up in the Template dropdown.
To create the Contact page:
- Create a new Page and give it a title, like "Contact."
- Add your content and the contact form code using FORMSPREE as a service. Please check the code example below.
- Publish the page.
- To add the page to the navigation, please check the Navigation section above
<form action="https://formspree.io/your@email.com" method="POST">
  <input type="text" name="name" placeholder="Name">
  <input type="email" name="_replyto" placeholder="Email">
  <textarea name='message' placeholder="Message"></textarea>
  <input class='c-btn c-btn--small c-btn--active' type="submit" value="Send">
</form>
For more information, check out How to Add a Contact Form to Your Ghost Blog.
The theme supports comments from Disqus, Commento and CommentBox.
To enable Disqus as a comments system, open the partials/disqus.hbs file. Replace the aspirethemes-demos value with the disqus_shortname variable to match your Disqus account shortname.
var disqus_shortname = 'aspirethemes-demos';So, if your Disqus shortname is exampleone, the final code above should be:
var disqus_shortname = 'exampleone';From the theme's side, that’s all you need to set up Disqus. If you have any issues with comments not loading, make sure you have registered your website with Disqus (Step 1).
If you still have issues, check the Disqus troubleshooting guide.
To disable Disqus comments, open the post.hbs file and comment or delete
the line containing the {{> disqus}} text (line 40).
If you want show comments for only signed-in users, open the post.hbs file and replace line 40 ({{> disqus}}) with the following code.
{{#if @labs.members}}
  {{#if @member}}
    {{> disqus}}
  {{/if}}
{{/if}}
You can read more about Ghost visibility choices at Content visibility.
To enable CommentBox as a comments system, open post.hbs file and replace line 40 replace with {{> commentbox}}.
The next step is to create a CommentBox account. From the dashboard, create a new project by filling your site information. You will then receive a Project ID.
Copy that Project ID, open the partials/commentbox.hbs file, and replace the my-project-id value with it. That's it.
To enable Commento as a comments system, open the post.hbs file and replace line 40 with {{> commento}}.
The next step is to create a Commento account and register your domain with it.
The theme lets you control how and where you show authors.
The sidebar Authors section shows 3 authors ordered by post count.
To remove this section, open the partials/sidebar.hbs file and remove line 8 ({{> sidebar-authors }}).
Article page will show Author info in two places.
-
In the top header, under the title and near the social sharing icons. To remove, open the
partials/post-header.hbsfile and remove lines16to24and lines26to27. -
Under the blog article content. To remove, open the
post.hbsfile and remove lines23to25.
You can control how many posts display per per page from the package.json file.
"config": {
  "posts_per_page": 8
}
The theme default value is set to {{include.postsPerPage}} posts per page.
If other posts share the same tags, related posts will be visible at the bottom of a post.
Enabling the Content API is required.
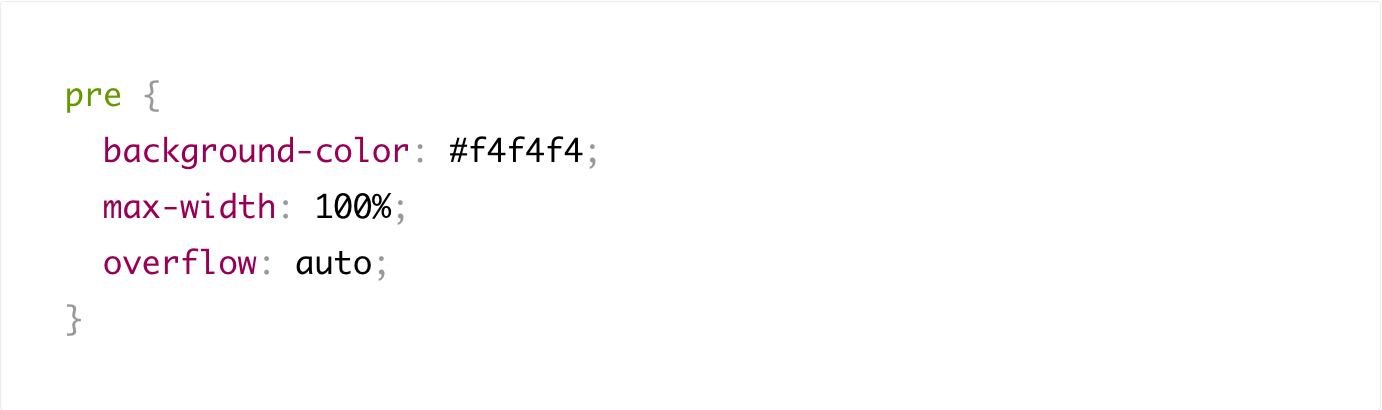
You can add a fenced code block by placing triple backticks ``` before and after the code block. For example:
```
pre {
  background-color: #f4f4f4;
  max-width: 100%;
  overflow: auto;
}
```
This will produce the following gray look:
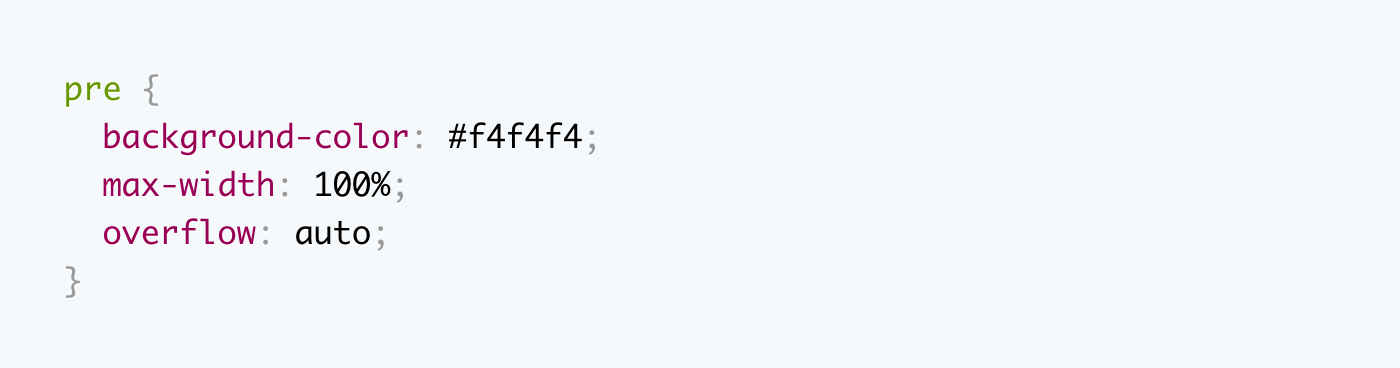
To highlight a code block, add the language alias like css or js to the code block. For example, the CSS code in the previous example will wrap between css</code> and <code>
```css
pre {
  background-color: #f4f4f4;
  max-width: 100%;
  overflow: auto;
}
```
This will produce the following colored look:
To add inline code, wrap the text between two backticks absolute="true" will produce the following look:

Krabi ships with Prism.js, a lightweight, robust, and elegant syntax highlighter.
The initial Prism package includes some languages, like Markup, CSS, C-like, and JavaScript.
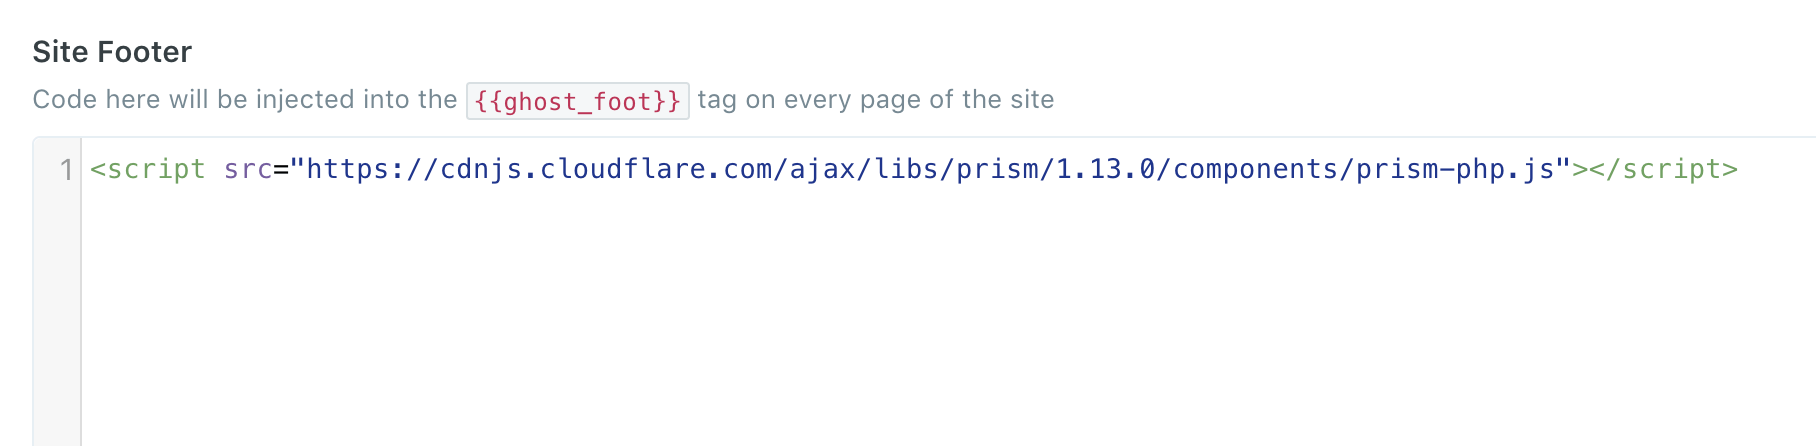
You can add support for more languages. For example, to add support for PHP, get the PHP component script from Prism CDN.
<script src="https://cdnjs.cloudflare.com/ajax/libs/prism/1.13.0/components/prism-php.js"></script>From the side admin menu, go to Code Injection and add the script to the Site Footer section. Be sure to click Save.
To integrate Google Analytics, I recommend using the Google Analytics integration by Ghost.
Responsive tables are required and essetial for adding tabular content and allowing tables to be scrolled horizontally. You can make any table responsive across all viewports by wrapping a table with .responsive-table, for example:
<div class='responsive-table'>
  <table>
    ...
  </table>
</div>The theme ships with many options to add sharing buttons and social media icons.
You can customize and update a post's social media sharing icons from the partials/share.hbs theme file.
Sidebar social media links are placed in the partials/sidebar-social-icons.hbs file.
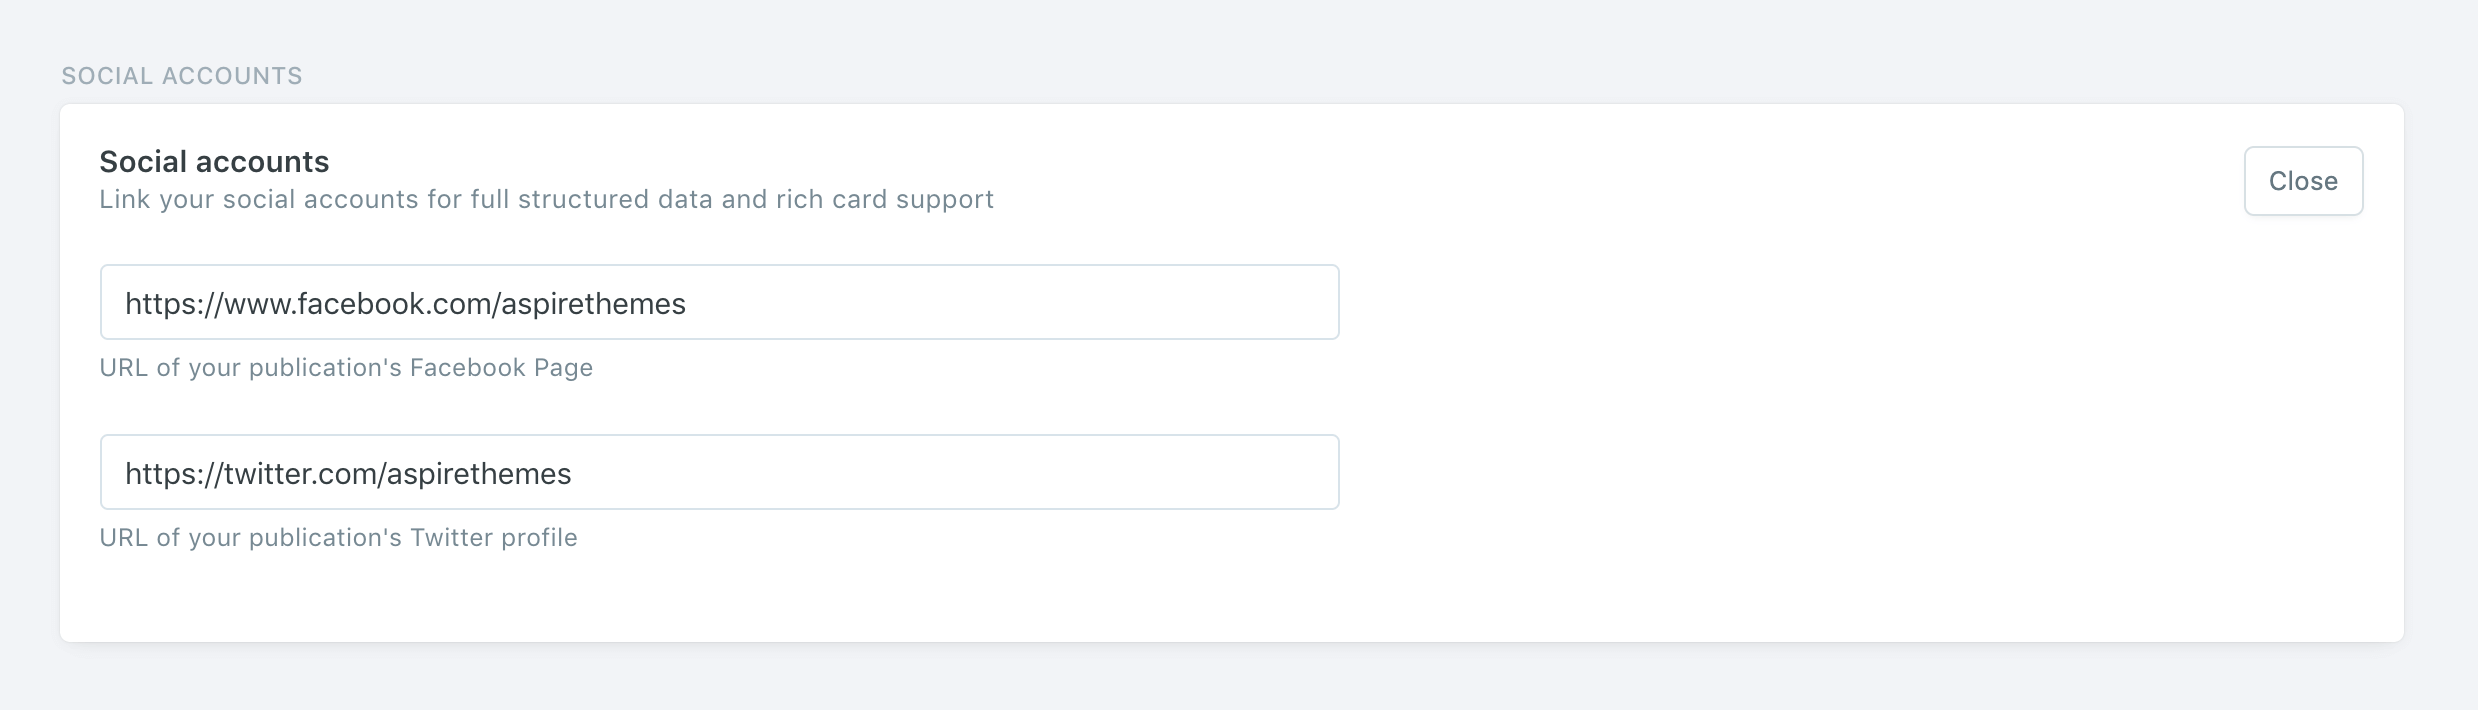
The Ghost CMS supports adding Facebook and Twitter profile URLs from the admin panel. Go to General > Social accounts and add your URLs. This will update Facebook and Twitter URLs within the footer social media section.
For other social accounts, the theme uses Evil Icons to provide very simple and clean icons. Here you can find a list of the social media icons to use:
<span data-icon='ei-sc-facebook' data-size='s'></span>GitHub
<span data-icon='ei-sc-github' data-size='s'></span><span data-icon='ei-sc-instagram' data-size='s'></span><span data-icon='ei-sc-linkedin' data-size='s'></span>Odnoklassniki
<span data-icon='ei-sc-odnoklassniki' data-size='s'></span><span data-icon='ei-sc-pinterest' data-size='s'></span>Skype
<span data-icon='ei-sc-skype' data-size='s'></span>SoundCloud
<span data-icon='ei-sc-soundcloud' data-size='s'></span>Telegram
<span data-icon='ei-sc-telegram' data-size='s'></span>Tumblr
<span data-icon='ei-sc-tumblr' data-size='s'></span><span data-icon='ei-sc-twitter' data-size='s'></span>Vimeo
<span data-icon='ei-sc-vimeo' data-size='s'></span>VK
<span data-icon='ei-sc-vk' data-size='s'></span>Youtube
<span data-icon='ei-sc-youtube' data-size='s'></span>As mentioned above, Ghosts supports adding only Twitter and Facebook links from the admin. But the theme comes with other social icons in the sidebar. Edit or update these in the partials/sidebar-social-icons.hbs file. For example, here's the Instagram code block:
<li class='c-social-icons__item'>
  <a href='#' aria-label='Instagram' target='_blank' rel='noopener'>
    <span class='c-social-icons__icon' data-icon='ei-sc-instagram' data-size='s'></span>
  </a>
The code above contains the ICON code from the above list, and the social media link (a) within a list element (li).
Next, replace your Instagram full URL with the link href value. If your Instagram URL is:
https://www.instagram.com/ghost/Then the new code will be:
<li class='c-social-icons__item'>
  <a href='https://www.instagram.com/ghost/' aria-label='Instagram' target='_blank' rel='noopener'>
    <span class='c-social-icons__icon' data-icon='ei-sc-instagram' data-size='s'></span>
  </a>
If you want to completely remove Instagram, you can delete all the code block, the li, a, and the icon.
You can change the favicon in Ghost from Admin > General > PUBLICATION IDENTITY > Publication icon.

Krabi ships with many languages already. But if you'd like to add another one, you'll be able to do that too.
Krabi supports Ghost i18n and comes with German, Italian, Spanish, French Finnish, Portuguese Dutch, Turkish and Danish translations.
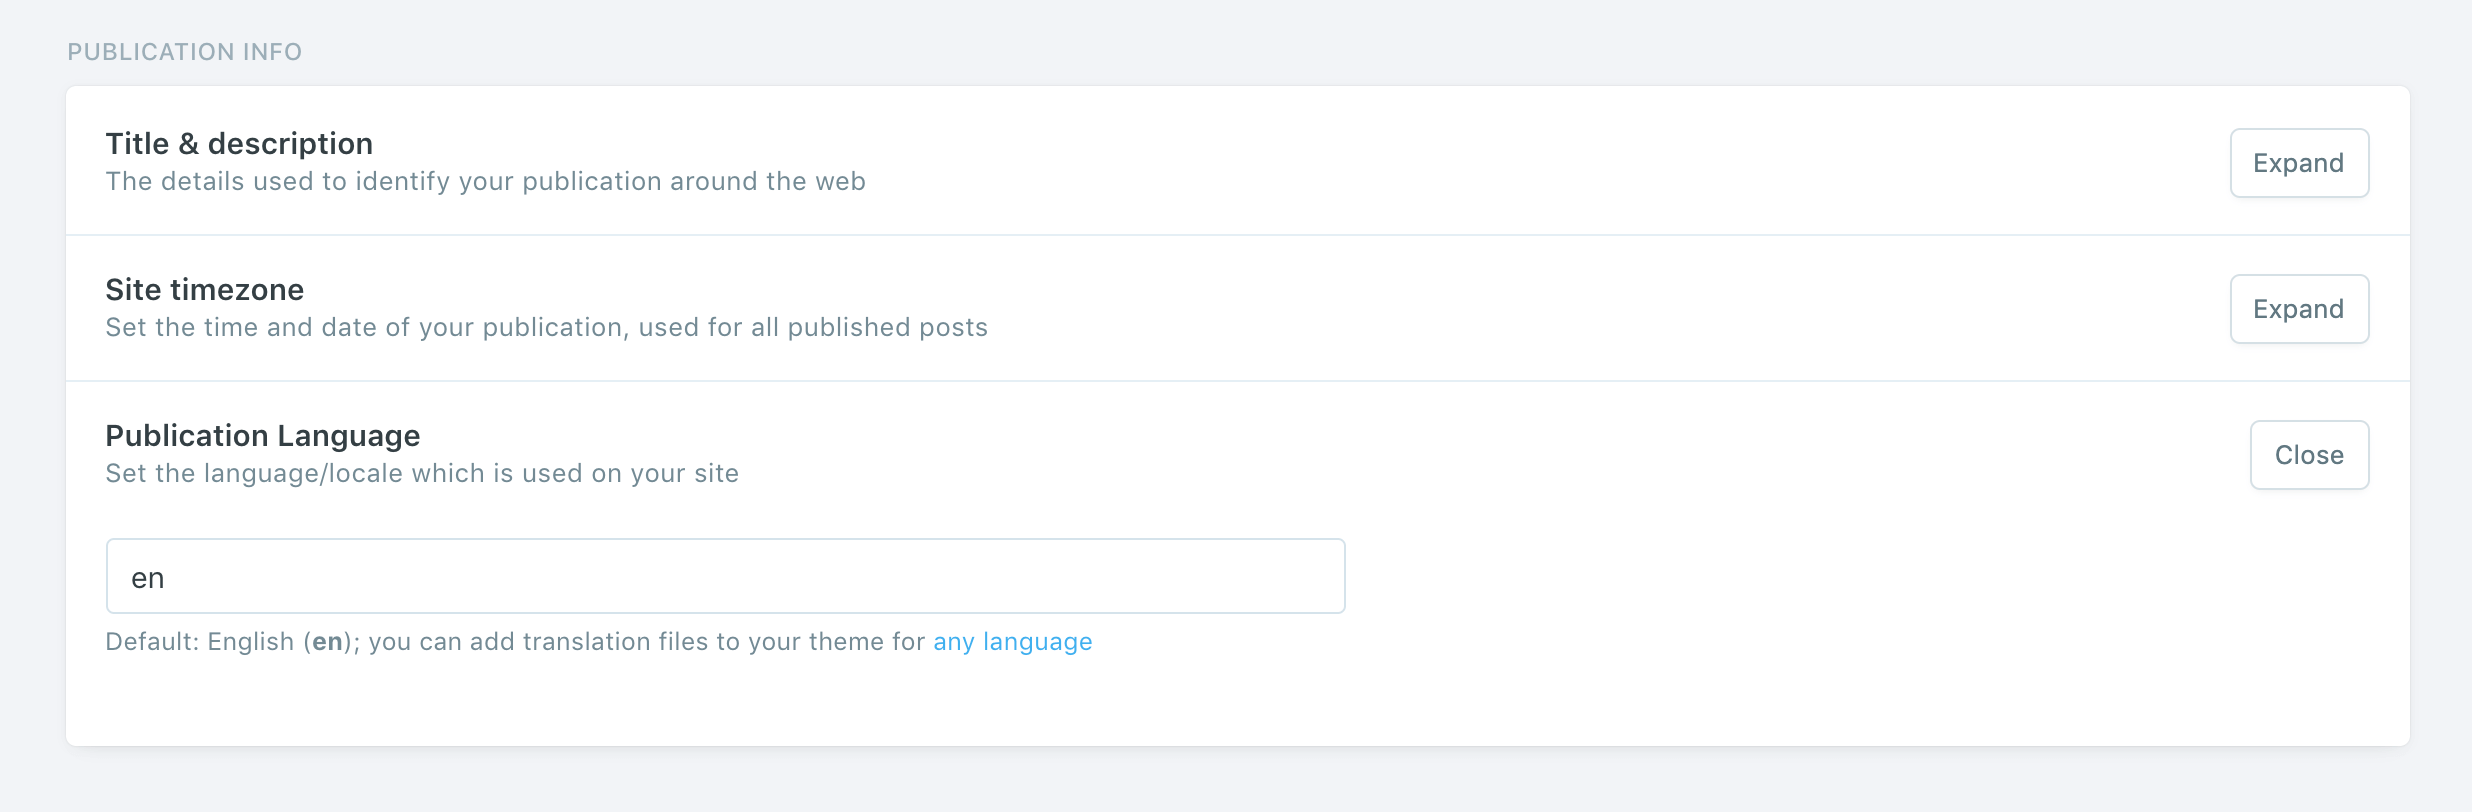
To use a language other than English, go to Admin > General > PUBLICATION INFO > Publication Language and enter the ISO Code.
dafor Danishdefor Germanydufor Dutchenfor Englishesfor Spanishfifor Finnishfrfor Frenchitfor Italianptfor Portuguesetrfor Turkish
RTL means right to left. Turning on RTL makes the theme readable for languages that are written from right to left, like Arabic or Hebrew.
To enable the RTL option, open the default.hbs file and change line 10 to {{> compiled/inline-css-rtl }}.

Save the file and upload the theme to your Ghost blog.
To add a new language, follow these steps.
- Create a new file in the theme's
localesfolder with the language ISO Code code. So, if the new language is Arabic, the new file name will bear.json. - Copy the
en.jsonfile content into your new file and start to translate, as shown in the following section. - Go to Admin > General > PUBLICATION INFO > Publication Language and enter the language code (
arin this example).
To improve or edit a translation in a specific available language, you can open
the language file in the locales folder:
|____locales
| |____da.json
| |____de.json
| |____du.json
| |____en.json
| |____es.json
| |____fi.json
| |____fr.json
| |____it.json
| |____pt.json
| |____tr.json
For example, the German translation file looks like this:
{
  "Loading": "Wird geladen",
  "More Posts": "Weitere Artikel",

  "Recent Posts": "kürzliche Artikel",
  "Featured Posts": "Beliebte Beiträge",
  "Page Not Found": "Seite nicht gefunden",
  "You might also like": "Das könnte Sie auch interessieren:",
  "Latest": "Neueste",
  "Authors": "Autoren",
  "Navigation": "Navigation",
  "Published with {ghostLink} & {themeLink}": "Veröffentlicht mit {ghostLink} & {themeLink}",

  "Share on Twitter": "Auf Twitter teilen",
  "Share on Facebook": "Auf Facebook teilen",
  "Share on LinkedIn": "Auf LinkedIn teilen",
  "Share on Pinterest": "Auf Pinterest teilen",
  "Share via Email": "Per E-Mail teilen",
  "Copy link": "Link kopieren",
  "Link copied to clipboard": "Link in die Zwischenablage kopiert",

  "Search": "Suche",
  "Search {siteTitle}": "Suche {siteTitle}",
  "Type to Search": "Suchbegriff(e) eingeben",

  "Paid": "Bezahlt",
  "Members": "Mitglieder",
  "Public": "Öffentlichkeit",

  "Account": "Konto",
  "Log In": "Einloggen",
  "Log Out": "Ausloggen",
  "Continue": "Fortsetzen",
  "Subscribe": "Abonnieren",
  "Subscribe Now": "Abonniere jetzt",
  "Your email address": "Deine E-Mail-Adresse",
  "Please check your inbox and click the link to confirm your subscription.": "Bitte überprüfen Sie Ihren Posteingang und klicken Sie auf den Link, um Ihr Abonnement zu bestätigen.",
  "Please enter a valid email address!": "Bitte geben Sie eine gültige E-Mail-Adresse ein!",
  "An error occurred, please try again later.": "Ein Fehler ist aufgetreten. Bitte versuchen Sie es später erneut.",

  "You've successfully subscribed to {siteTitle}": "Sie haben {siteTitle} erfolgreich abonniert.",
  "Great! Next, complete checkout for full access to {siteTitle}": "Toll! Schließen Sie als Nächstes die Prüfung ab, um vollen Zugriff auf {siteTitle} zu erhalten.",
  "Welcome back! You've successfully signed in.": "Willkommen zurück! Sie haben sich erfolgreich angemeldet.",
  "Success! Your account is fully activated, you now have access to all content.": "Erfolg! Ihr Konto ist vollständig aktiviert, Sie haben nun Zugriff auf alle Inhalte.",
  "Success! Your billing info is updated.": "Erfolg! Ihre Zahlungsinformationen werden aktualisiert.",
  "Billing info update failed.": "Aktualisierung der Rechnungsinformationen fehlgeschlagen.",

  "Already have an account?": "Hast du schon ein Konto?",
  "Don't have an account yet?": "Sie haben noch keinen Account?",

  "This post is for paying subscribers only": "Dieser Beitrag ist nur für zahlende Abonnenten",
  "This post is for subscribers only": "Dieser Beitrag ist nur für Abonnenten",
  "This page is for paying subscribers only": "Diese Seite ist nur für zahlende Abonnenten",
  "This page is for subscribers only": "Dieser Seite ist nur für Abonnenten",

  "Join the newsletter to receive the latest updates in your inbox.": "Treten Sie dem Newsletter bei, um die neuesten Updates in Ihrem Posteingang zu erhalten",

  "Choose your subscription": "Wählen Sie Ihr Abonnement",
  "Unlock full access to {siteTitle} and see the entire library of members-only content & updates.": "Schalte den vollen Zugriff auf {siteTitle} frei und sieh dir die gesamte Bibliothek mit Inhalten und Updates nur für Mitglieder an.",
  "Subscribe to {siteTitle}": "Anmelden bei {siteTitle}",
  "Choose this plan": "Wählen Sie diesen Plan",
  "Monthly": "Monatlich",
  "Yearly": "Jährlich",

  "Welcome back!": "Willkommen zurück!",
  "Log Into your account again.": "Melden Sie sich erneut in Ihrem Konto an.",
  "Send login link": "Anmeldelink senden",

  "Nice, you're a subscriber!": "Schön, dass Sie Abonnent sind!",
  "Your subscription will expire on": "Ihr Abonnement läuft am ab",
  "Your plan": "Dein Plan",
  "Card": "Karte",
  "Expires": "Läuft ab",
  "Next bill date": "Nächstes Rechnungsdatum",
  "Edit billing info": "ERechnungsinformationen bearbeiten",
  "You have an active {siteTitle} account with access to all posts.": "Sie haben ein aktives {siteTitle} Konto mit Zugriff auf alle Posts.",
  "You're a subscriber to free members updates": "Sie sind Abonnent der kostenlosen Mitgliederaktualisierungen",
  "You are subscribed to free updates from {siteTitle}, but don't have a paid subscription to read all the posts.": "Sie haben kostenlose Updates von {siteTitle} abonniert, haben jedoch kein kostenpflichtiges Abonnement, um alle Beiträge zu lesen."
}
Each line consists of a left key ("More Posts") and a right value ("Mehr Artikel").
The key is plain English that exists in all translation files and should not be changed. You should change only the value.
If you have any suggestions to improve a current translation or add a new language, please let me know.
Krabi comes integrated with the amazing Deploy Ghost Theme ↗ Github action.
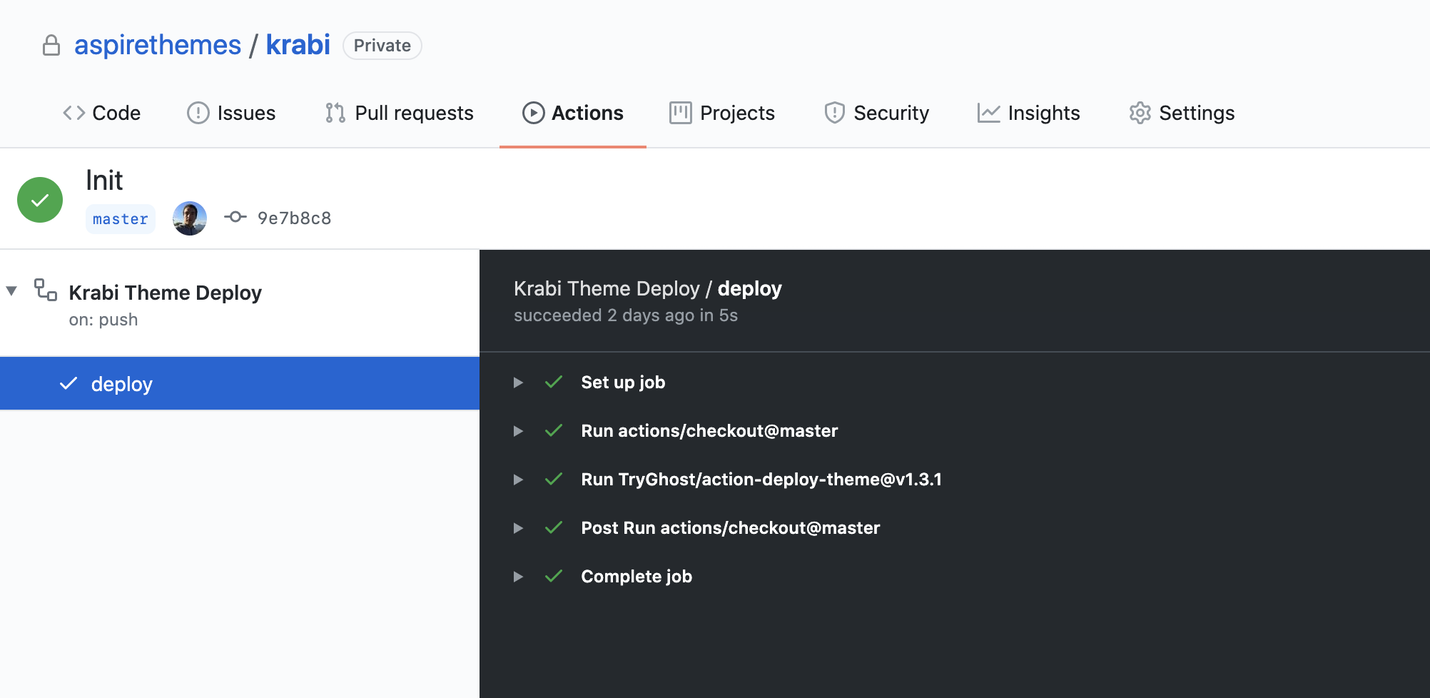
I have written about this at How to Deploy Your Ghost Theme Using Github Actions ↗. All you need to do is follow steps 1 and 2.
If you are a developer and need to do heavy customization work, the theme uses Gulp to compile Sass and JavaScript. This improves the development flow and makes it much faster.
Changing any hbs file, for example, the post.hbs file does not require being in development mode with gulp running. Just edit the file in your preferred editor and upload it.
First, make sure you have Node.js, npm, Gulp CLI, and Bower installed. Check My Current Setup.
Run the following command in the theme root directory to install npm and bower dependencies.
npm installTo start Gulp, run:
gulpThis will compile Sass and JavaScript files, and start marking changes as you edit files.
Gulp will produce two files:
assets/js/app.min.js: The final main JavaScript filepartials/compiled/inline-css.hbs: The final CSS file
If you are working with Gulp, it's recommended you avoid editing these files. Instead, do customizations in assets/sass for CSS or in assets/js/app.js
JavaScript. This way you can make sure the flow is going in the right direction and never lose any changes.
In case you are wondering what my current environment set up is, and which package versions I use, take a look at the following:
$ node -v
v10.16.0

$ npm -v
6.14.8

$ bower -v
1.8.8

$ gulp -v
CLI version: 2.2.0
Local version: 4.0.2
This environment works well for running Ghost and also for theme development.
I use macOS.
Another choice for customization is to use the Ghost Code Injection settings in Ghost admin. For a CSS example, you can use the following code to change the logo color and font size.
<style>
  .c-logo__link {
    color: #4550E5;
    font-size: 32px;
  }
</style>Using Code Injection, you can change the theme colors with CSS Variables.
For the list of available theme color variables, check out the assets/sass/settings/colors.scss theme file. It will look like this:
:root {
  --color-brand:   #5869DA;
  --color-white:   #FFFFFF;
  --color-dark:    #000C2D;
  --color-text:    #000C2D;
  --color-gray:    #687385;
  --color-error:   #CC3C64;
  --color-success: #07815C;
  --color-border:  rgba(0, 0, 0, .05);
  --color-border:  #EAECEE;

  --bg-color:      var(--color-white);
  --bg-gray:       #F5F7F9;
  --bg-dark:       #12245A;
  --bg-white:      var(--color-white);

  --color-code-inline: var(--color-text);
  --bg-tag-list: linear-gradient(to left, var(--bg-color), rgba(255, 255, 255, 0));
}
For example, if you wanted to change the theme's brand color, you'd change #5869DA in this case. You can copy the color variable to Code Injection > Site Header and assign it your new color, as in the following example.
<style>
  :root {
    --color-brand: red;
  }
</style>
The result will look like this:
The variable --color-brand is used for buttons, links, and link hovers. In the above example, we changed the color to be red. You can override this for any other variable.
If, for example, you want to add a color that's not in the available theme variables, or add another style to a new element, you can create a new variable and give it a name and value.
We can extend the previous example to add a new color for the logo color and assign that variable to the .c-logo__link class.
<style>
  :root {
    --color-brand: red;
    --color-logo: blue;
  }

  .c-logo__link {
    color: var(--color-logo);
  }
</style>
The logo will then have a blue color.
If you want to customize the height of the images on the home page or on the post page, you can use the following CSS code.
For a single post image, the theme default value is 56.25%. You can change this value to match your preference.
.c-post-image-wrap:after {
  padding-bottom: 56.25%;
}
For the homepage cards, the theme default value is also 56.25%.
.c-post-card__image-wrap {
  padding-top: 56.25%;
}
The full code in Code Injection would be:
<style>
  .c-post-image-wrap:after {
    padding-bottom: 56.25%;
  }

  .c-post-card__image-wrap {
    padding-top: 56.25%;
  }
</style>If you are using an image as a logo (instead of the site name) and want to change the logo size, you can use the following code.
<style>
  .c-logo__img {
    max-width: 96px;
  }
</style>
The default value is 96px, so you can increase this value to match your preference. If the logo image has a large white space around it, make sure you trim that space to get good results.

An example of the method at akash.at ↗
To center the blog post content and remove the sidebar, follow these steps.
- Duplicate the
default.hbsfile and give it another name, for example,default-post.hbs. Then, remove lines19to21. - In the
post.hbsfile, change the first line to{{!< default-post}}.
That’s all that you need to do. The post will be centered automatically.
In case you want to add a wide and full-width style to images, you can add the following CSS code to the Code Injection (Site Header) section.
<style>
  .kg-width-full {
    width: auto;
  }

  @media (min-width: 40em) {
    .kg-width-full .kg-image {
      max-width: 100vw;
      pointer-events: none;
    }
  }

  @media (min-width: 64em) {
    .kg-width-wide {
      width: 100vw;
      max-width: 1140px;
      padding-left: 40px;
      padding-right: 40px;
  }}
</style>Open the partials/post-card.hbs file and remove lines 23 to 29.
To remove the date from all posts, add the following CSS code to Ghost Code Injection.
<style>
  .c-teaser__date,
  .c-post-card__date,
  .c-post-header__date,
  .c-search-result__date {
    display: none;
  }
</style>
Click Save.
This code will remove the date from the following:
- Sidebar postcard
- Home postcard
- Post page
- Search results
If you want to add a new widget to the sidebar, use the following code as a skeleton for the widget.
To add it to the sidebar, copy and paste it in the /partials/sidebar.hbs theme file before line 9.
<div class='c-widget'>
  <div class='c-title-bar'>
    <h3 class='c-title-bar__title'>YOUR_TITLE</h3>
  </div>

  <div class='u-bg-white u-border u-border-radius u-p-32'>
    YOUR_CONTENT_HERE
  </div>
</div>
Here you have two content placeholders.
- YOUR_TITLE: Replace this with your widget title
- YOUR_CONTENT_HERE: Replace this with your widget content
If you don't want to add a title, your skeleton look like this:
<div class='c-widget'>
  <div class='u-bg-white u-border u-border-radius u-p-32'>
    YOUR_CONTENT_HERE
  </div>
</div>To create a clean and small theme package, you can exclude different directories using the following CLI command:
zip -r krabi.zip krabi -x '*node_modules*' '*bower_components*'This will exclude the node_modules and bower_components directories from the final zip file.
If you are running gulp, you can type the gulp zip command to do this.
You may be wondering: how can I update my theme to the latest theme version?
There are two choices:
- Keep your current theme and replace only the changed files from the new version. You can find the changed files on the theme page Changelog
- Use the new version as a starting point and redo your theme changes and customizations
One way to reduce the need for redoing customizations is to use the Code Injection tool. This is very helpful for adding custom CSS and tracking code. Keeping your custom CSS code with Code Injection is always recommended.