
- Project started: Saturday 30/05/2020 at 8.30 AM (GMT+7).
- Project finished: Sunday 31/05/2020 at 8.02 AM (GMT+7).
- Created using Express.js, ngrok, Bottender.js, Moment.js, MongoDB & Messenger Webhook.
-
Facebook Messenger Bot
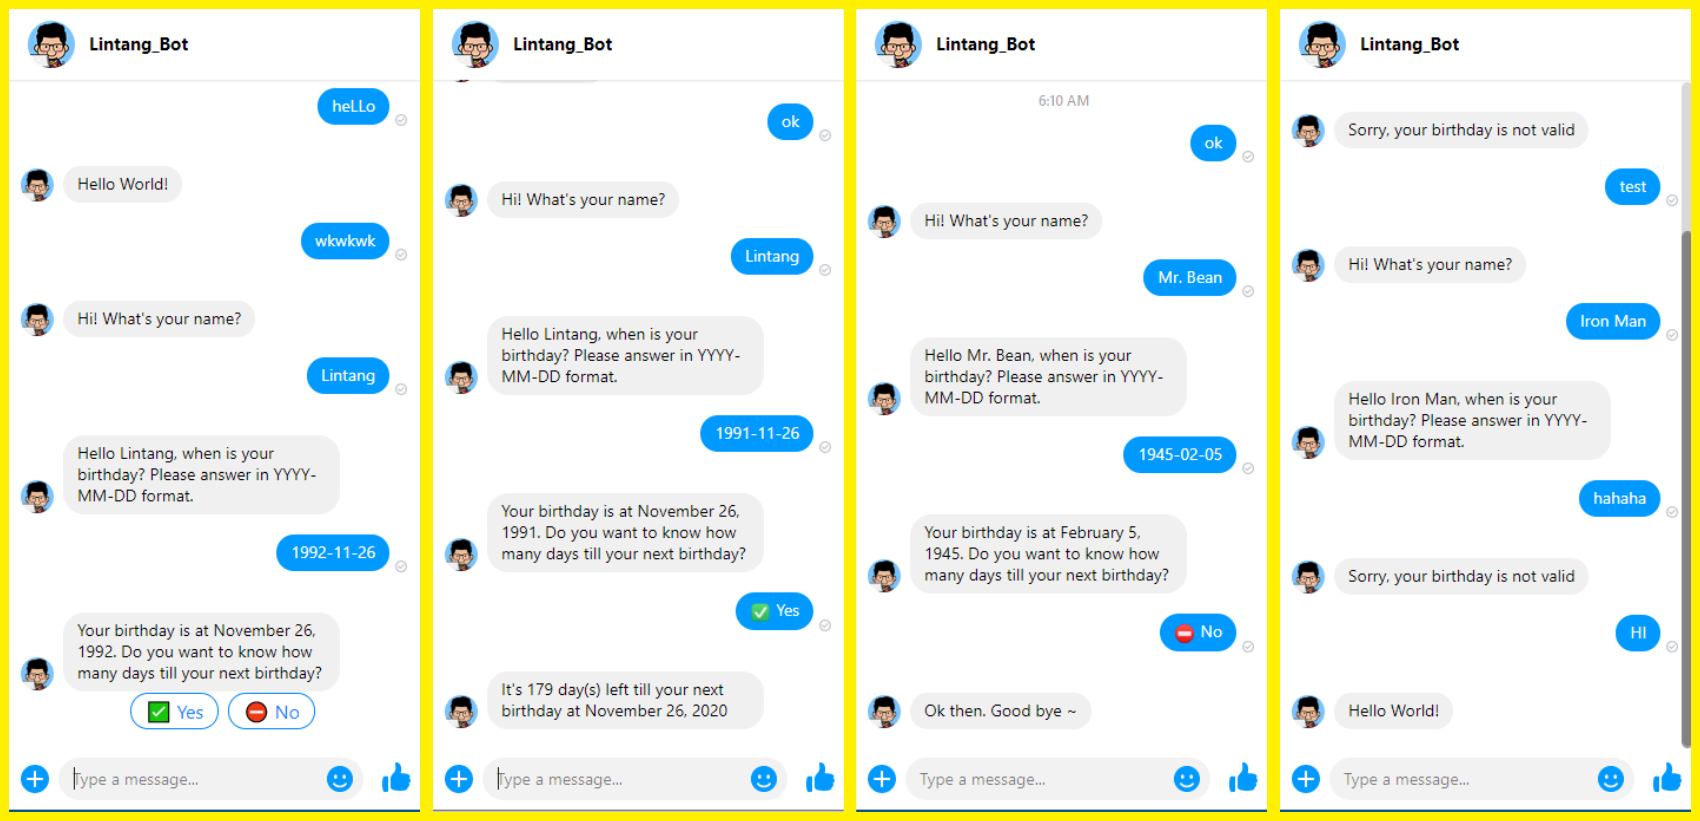
The chatbot can handle a simple task. When a user start a conversation & says "Hi" or "Hello", it will answer "Hello World!". When a users says something randomly, it will ask for user's name, user's birthday & offer to calculate how many days till user's next birthday.
-
Data Stored on MongoDB
Everything is stored on MongoDB database named
bottender, which has 2 collections:sessions&chats. Every latest user's sessions is stored onsessionscollection, while every received messages is stored onchatscollection.
-
REST API
It also has REST API that can be used to access all received messages, access single chat by ID (MongoDB ID) & delete single chat by ID (MongoDB ID).
-
GET
/messages: show all received messages
-
GET
/messages/{id}: show single message by MongoDB id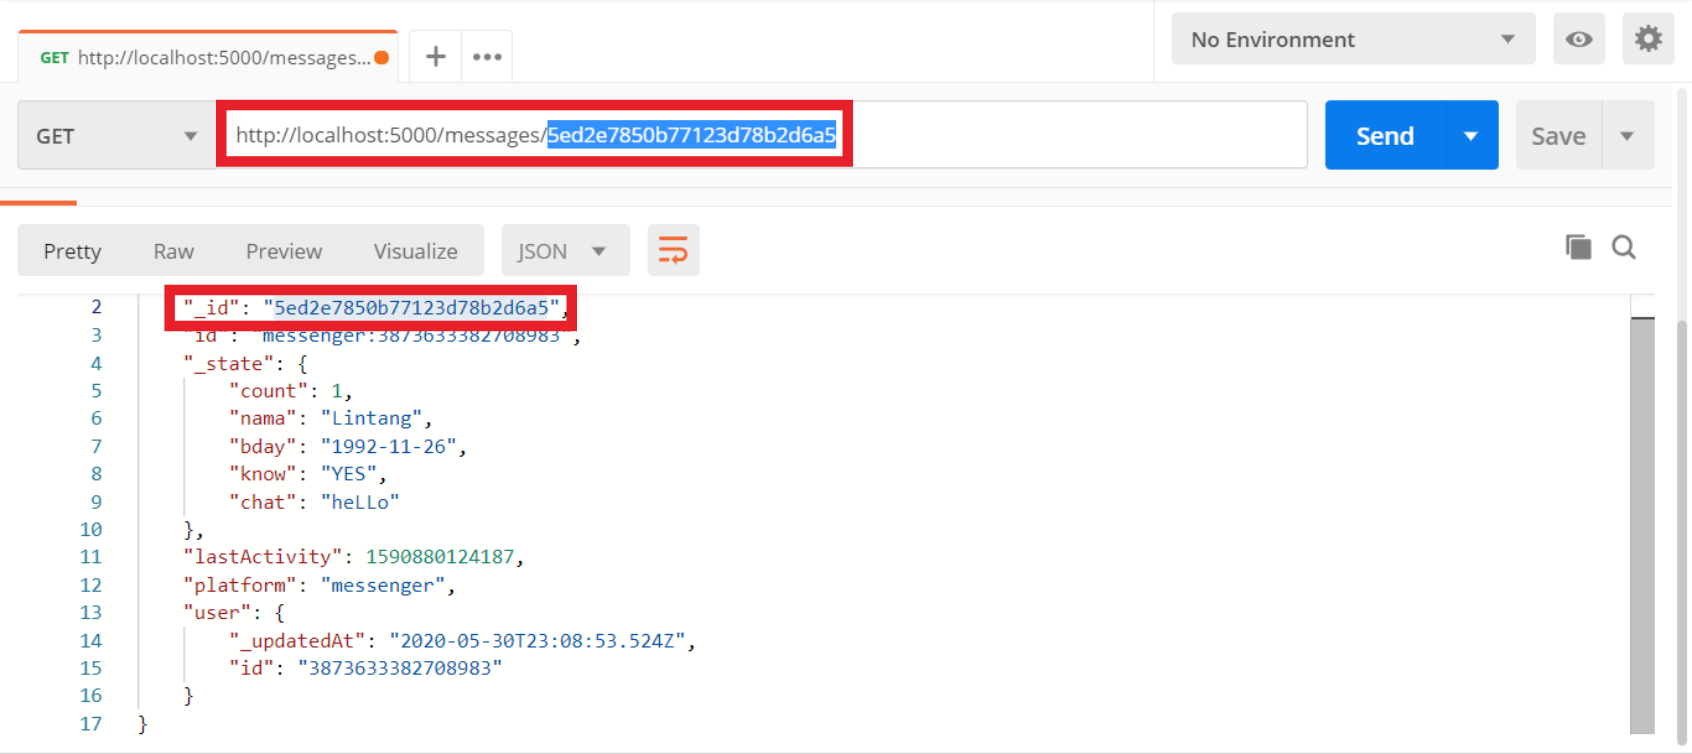
-
DELETE
/messages/{id}: delete single message by MongoDB id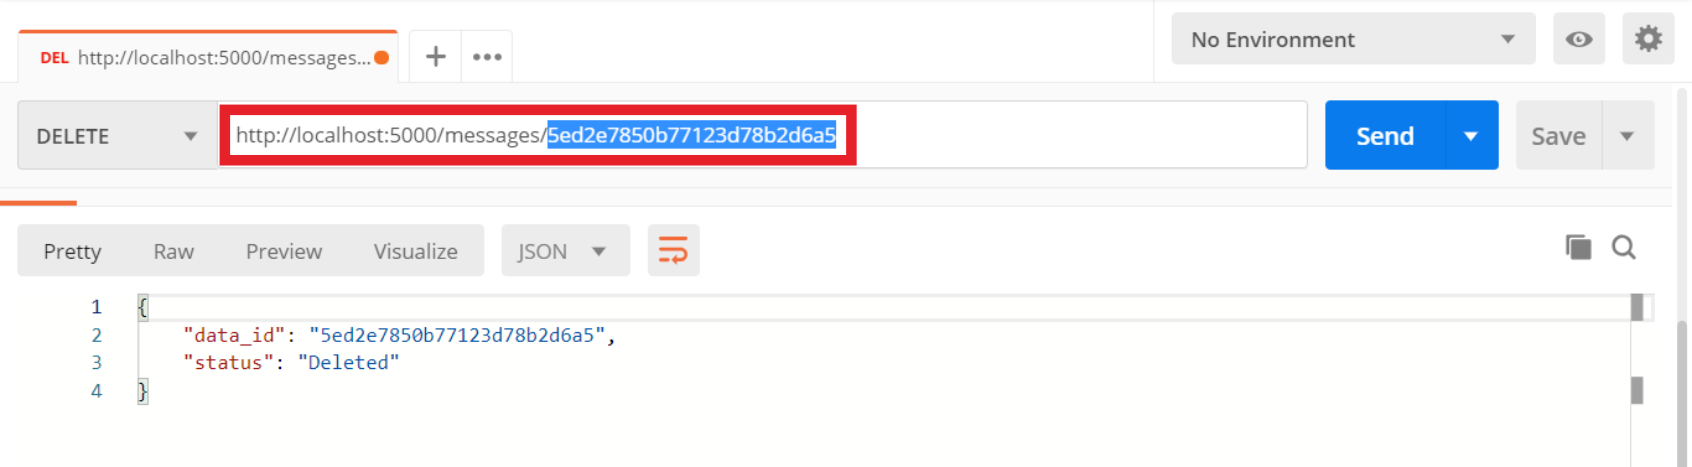
-


-
MongoDB Set Up
Activate your local MongoDB server then open MongoDB shell or its GUI (MongoDB Compass). I prefer use MongoDB shell. Create a database names
bottenderwith 2 collections inside:sessions&chats. To activate MongoDB server execute:$ cd C:\Program Files\MongoDB\Server\4.2\bin $ mongod
MongoDB server has activated. Open new terminal & execute these command to activate MongoDB work shell, create database, database user & collections:
$ cd C:\Program Files\MongoDB\Server\4.2\bin
$ mongo

> use bottender
> db.createUser({user:"YOUR_USERNAME", pwd:"YOUR_PASSWORD", roles:["readWrite",  "dbAdmin"]})
> db.createCollection('sessions')
> db.createCollection('chats')
-
Clone & Set Up Project
Simply clone this project from github then install all dependencies needed:
$ git clone https://github.com/LintangWisesa/Express-Bottender-Messenger-MongoDB.git
$ cd Express-Bottender-Messenger-MongoDB
$ npm i
-
Set Up
mongo.config.jsOn project root, open
mongo.config.jsthen edit the MongoDB url line with your MongoDB user, password & database.module.exports = { url: `mongodb://YOUR_USERNAME:YOUR_PASSWORD@localhost:27017/bottender`, }
Save it.
-
Connect to Facebook Messenger
To complete our Messenger connection, we have to find these values:
- Messenger Page ID
- Messenger Access Token
- Messenger App ID
- Messenger App Secret
- Messenger Verify Token
To do that, make sure you have an active Facebook Page then signup/login to Facebook for Deveopers. Create an application by click My Apps => Create App. Click Set Up button on Messenger & search for those 5 values (Note: you can set Messenger Verify Token to any text or simply insert your application name).
After that, back to your project directory & create an
.envfile with these following values:MESSENGER_PAGE_ID=your_page_id MESSENGER_ACCESS_TOKEN=your_access_token_id MESSENGER_APP_ID=your_app_id MESSENGER_APP_SECRET=your_app_secret MESSENGER_VERIFY_TOKEN=your_app_name
Save it.
-
Run the project
You can run your bot on terminal using Bottender Console or activate it on your Express server.
-
Running on Terminal (Bottender Console)
If you want to run this project on console, first open
package.jsonand set these value:"dev": "bottender dev", "start": "bottender start",
Save, then execute this command:
$ npm run dev -- --console
Now you can chat with your bot on terminal.
-
Running on Express Server
If you want to run this project on Express server, first open
package.jsonand set these value:"dev": "nodemon server.js", "start": "node server.js",
Save, then execute this command:
$ npm run dev
Now your bot application is run on
http://localhost:5000, including its REST API. Try to GET/messagesto show all received messages.
-
-
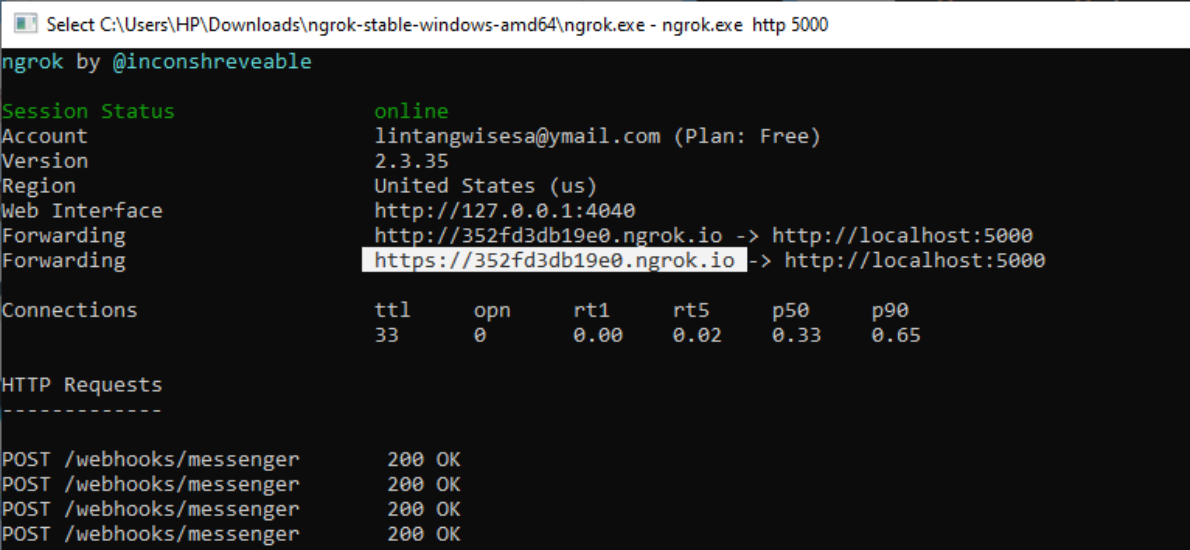
Make Public Server
Run your project on Express server, then make it public. You can deploy the project on cloud (for instance: Heroku, AWS or Google Cloud) or in this case I simply use ngrok to create public URL for my project. Download ngrok here then execute from terminal:
$ ngrok.exe http 5000
Then you'll get these information, including your server's public URL. Note your HTTPS public URL!

-
Set Webhook & Going Live!
Note your HTTPS public URL, then back to your project. In your project, open new terminal then execute this:
$ npx bottender messenger webhook set -w https://YOUR_HTTPS_PUBLIC_URL/webhooks/messengerIt will set Messenger webhook, connect your project to Facebook application & your bot will live on your Facebook Page. Try to send a message!
Enjoy ~ 😎
Lintang Wisesa 💌 lintangwisesa@ymail.com
Facebook | Twitter | LinkedIn | Youtube | :octocat: GitHub | Hackster