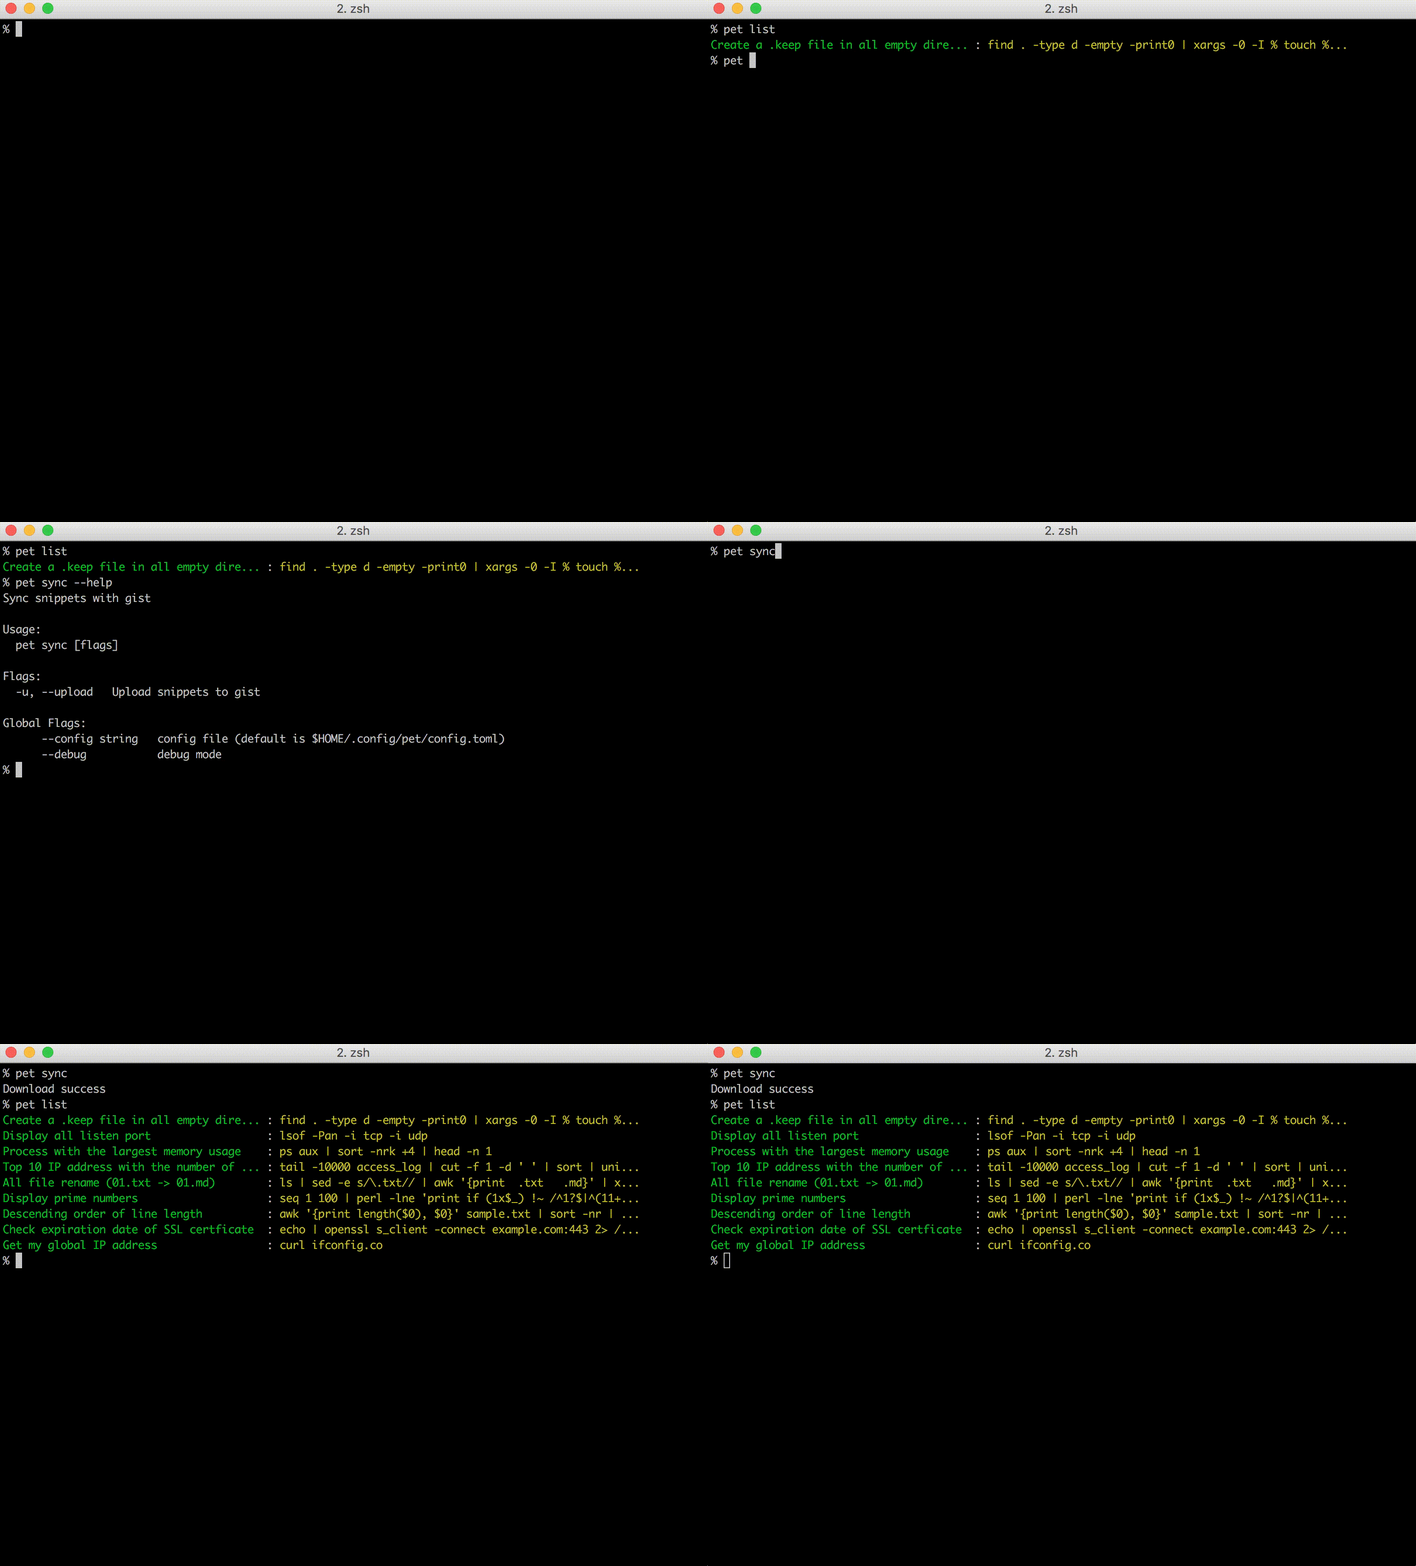
Simple command-line snippet manager, written in Go
You can use variables (<param> or <param=default_value> ) in snippets.
pet is written in Go, and therefore you can just grab the binary releases and drop it in your $PATH.
pet is a simple command-line snippet manager (inspired by memo).
I always forget commands that I rarely use. Moreover, it is difficult to search them from shell history. There are many similar commands, but they are all different.
e.g.
$ awk -F, 'NR <=2 {print $0}; NR >= 5 && NR <= 10 {print $0}' company.csv(What I am looking for)$ awk -F, '$0 !~ "DNS|Protocol" {print $0}' packet.csv$ awk -F, '{print $0} {if((NR-1) % 5 == 0) {print "----------"}}' test.csv
In the above case, I search by awk from shell history, but many commands hit.
Even if I register an alias, I forget the name of alias (because I rarely use that command).
So I made it possible to register snippets with description and search them easily.
- Main features
- Parameters
- Examples
- Features
- Hands-on Tutorial
- Usage
- Snippet
- Configuration
- Installation
- Migration
- Contribute
pet has the following features.
- Register your command snippets easily.
- Use variables (with one or several default values) in snippets.
- Search snippets interactively.
- Run snippets directly.
- Edit snippets easily (config is just a TOML file).
- Sync snippets via Gist or GitLab Snippets automatically.
There are <n_ways> ways of entering parameters.
They can contain default values: Hello <subject=world>
defined by the equal sign.
They can even contain <content=spaces & = signs> where the default value would be <content=spaces & = signs>.
Default values just can't <end with spaces >.
They can also contain multiple default values:
Hello <subject=|_John_||_Sam_||_Jane Doe = special #chars_|>
The values in this case would be :Hello <subject=|_John_||_Sam_||_Jane Doe = special #chars_|>
Some examples are shown below.
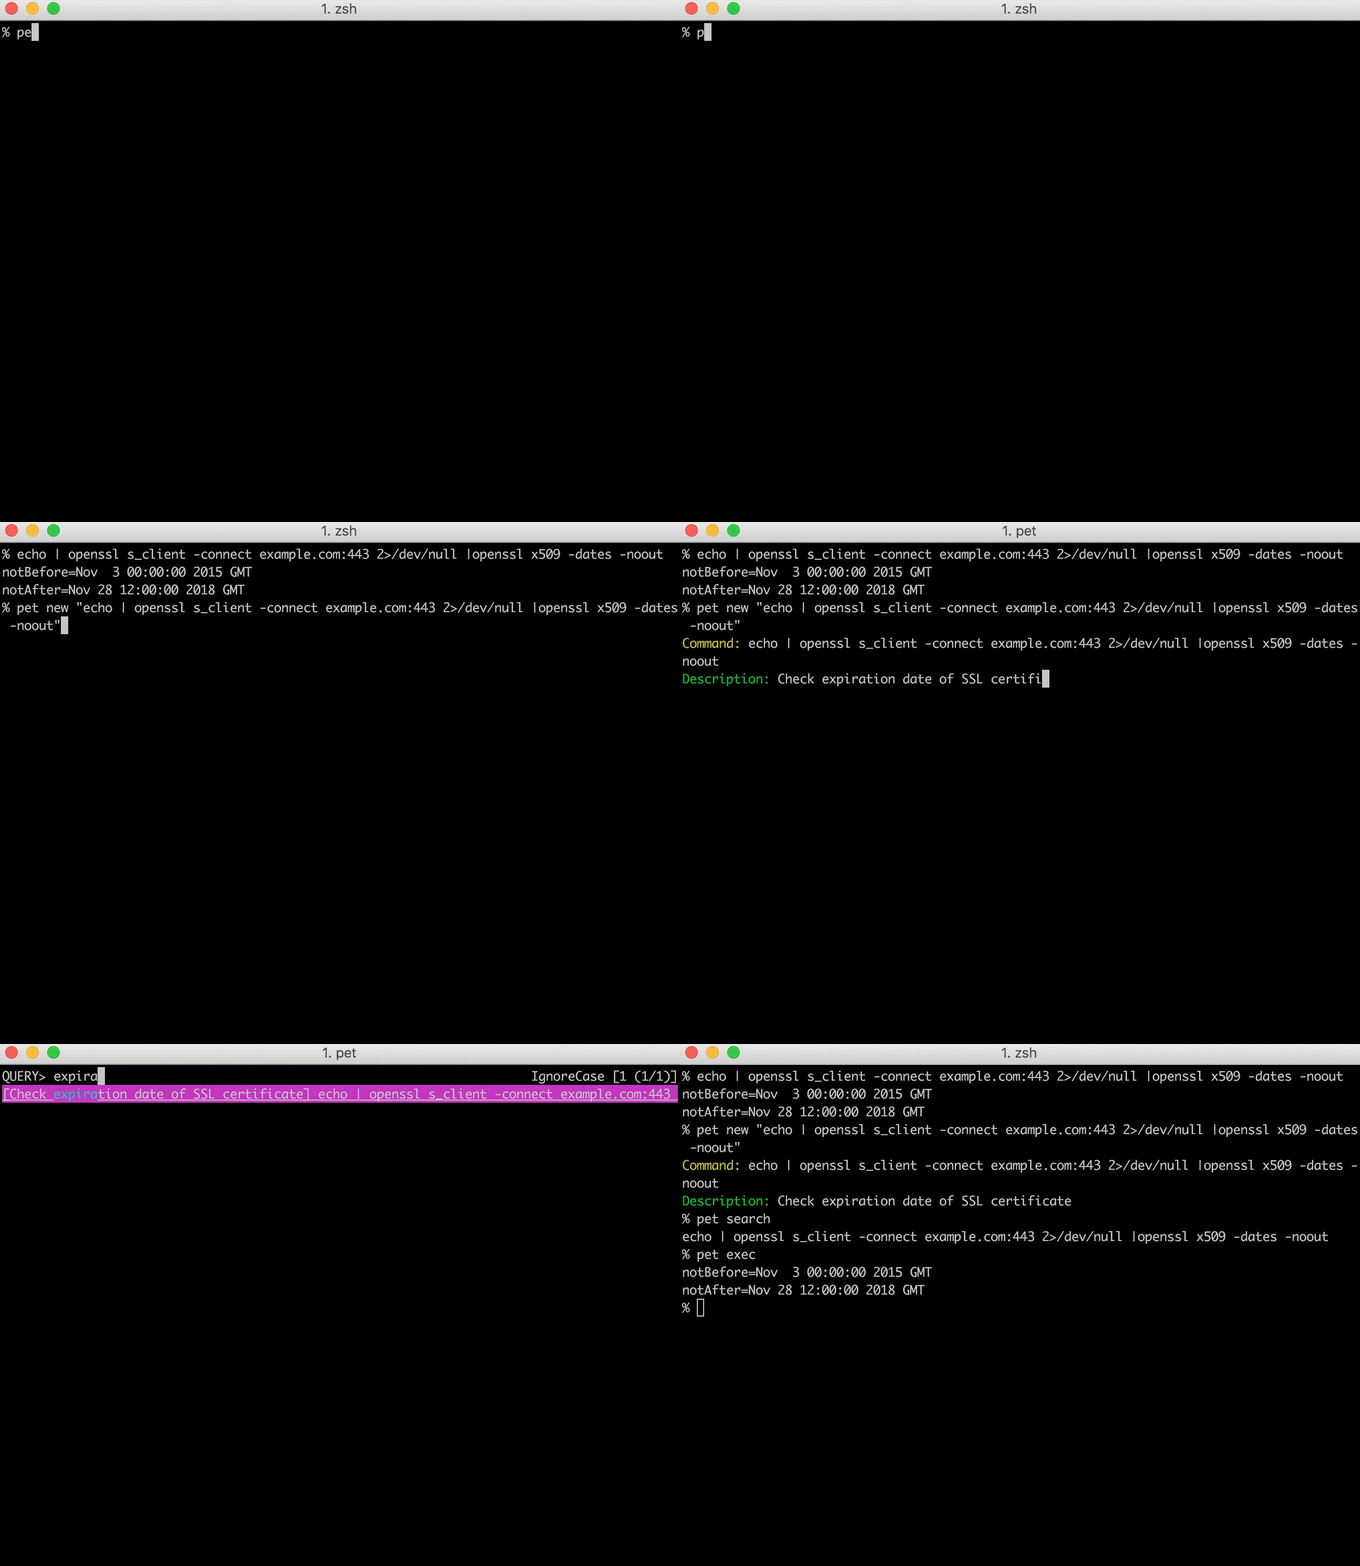
By adding the following config to .bashrc or .zshrc, you can easily register the previous command.
function prev() {
  PREV=$(echo `history | tail -n2 | head -n1` | sed 's/[0-9]* //')
  sh -c "pet new `printf %q "$PREV"`"
}
$ cat .zshrc
function prev() {
  PREV=$(fc -lrn | head -n 1)
  sh -c "pet new `printf %q "$PREV"`"
}
See below for details.
https://github.com/otms61/fish-pet
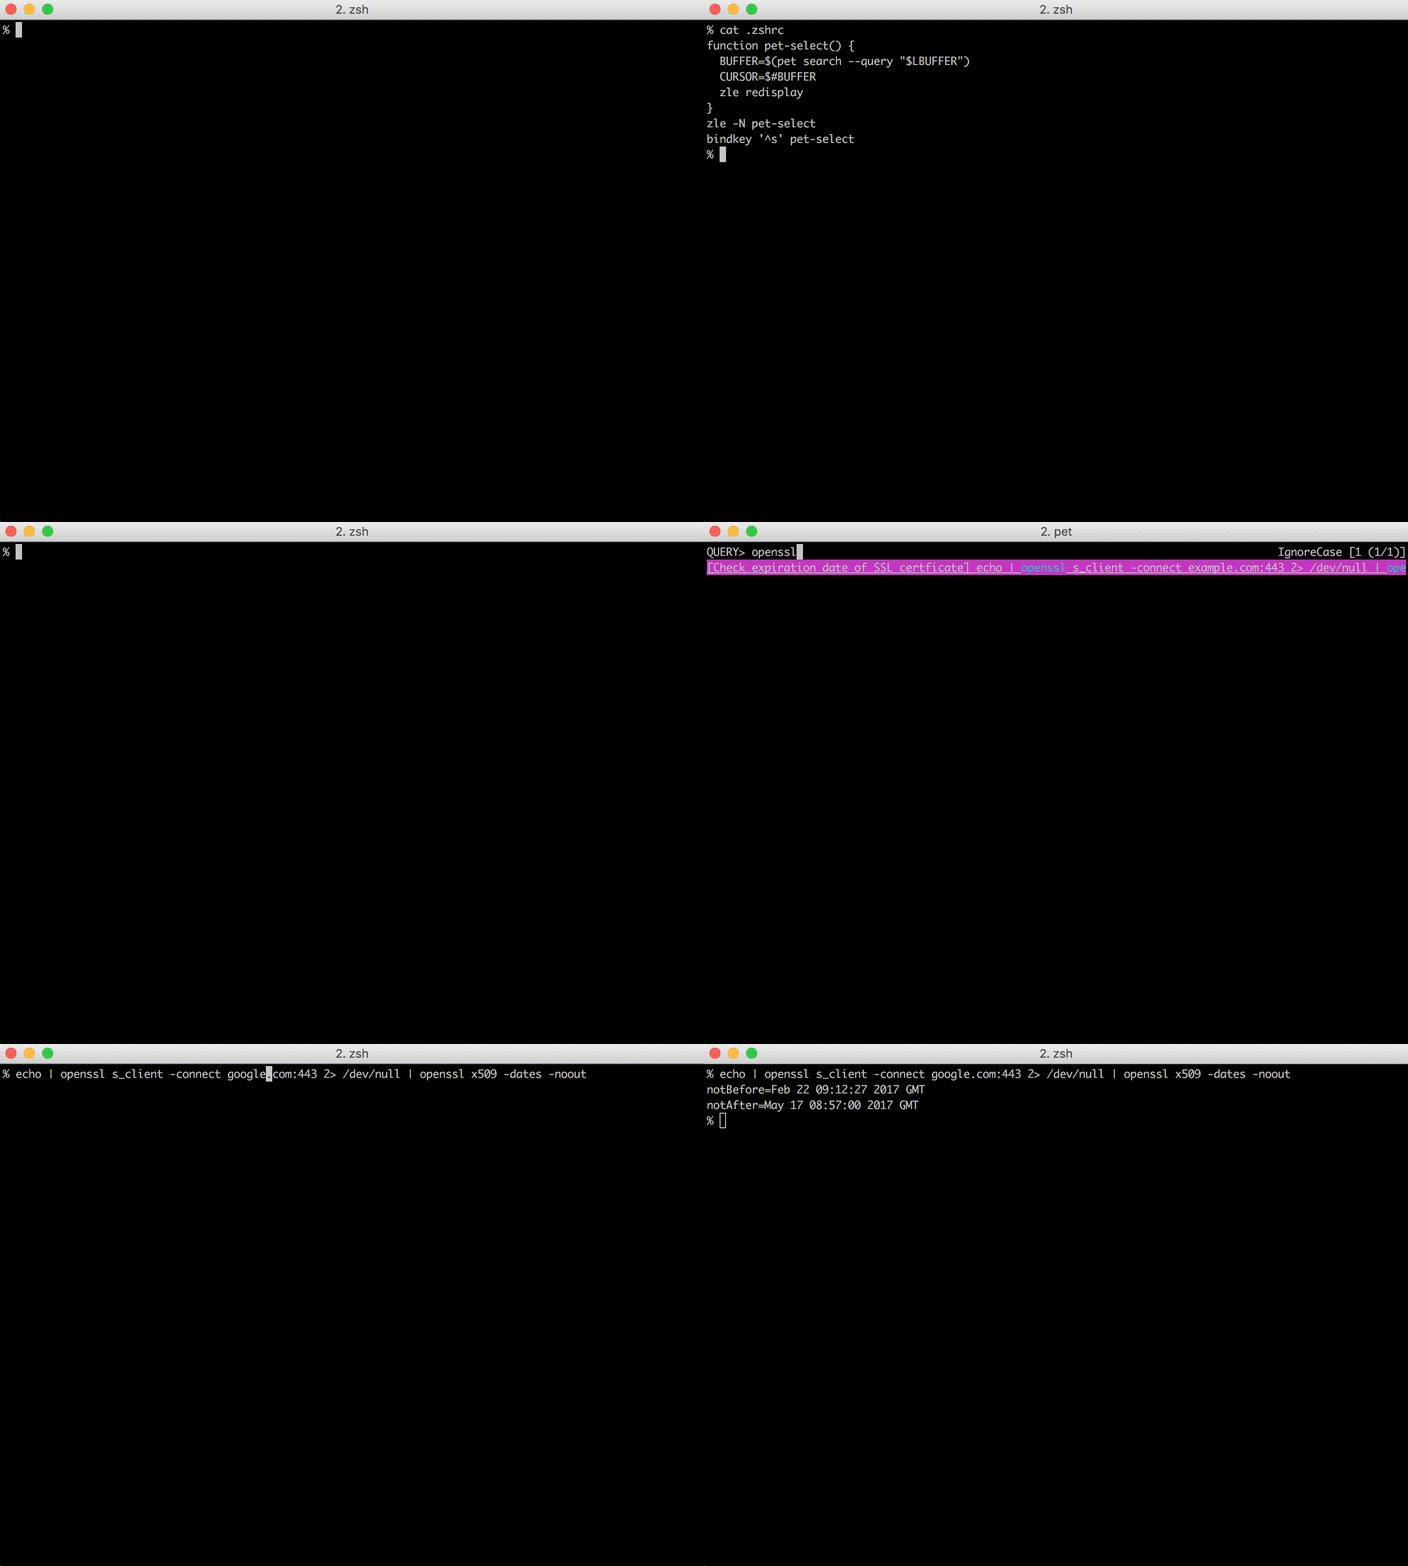
By adding the following config to .bashrc, you can search snippets and output on the shell.
This will also allow you to execute the commands yourself, which will add them to your shell history! This is basically the only way we can manipulate shell history.
This also allows you to chain commands! Example here
$ cat .bashrc
function pet-select() {
  BUFFER=$(pet search --query "$READLINE_LINE")
  READLINE_LINE=$BUFFER
  READLINE_POINT=${#BUFFER}
}
bind -x '"\C-x\C-r": pet-select'
$ cat .zshrc
function pet-select() {
  BUFFER=$(pet search --query "$LBUFFER")
  CURSOR=$#BUFFER
  zle redisplay
}
zle -N pet-select
stty -ixon
bindkey '^s' pet-select
See below for details.
https://github.com/otms61/fish-pet
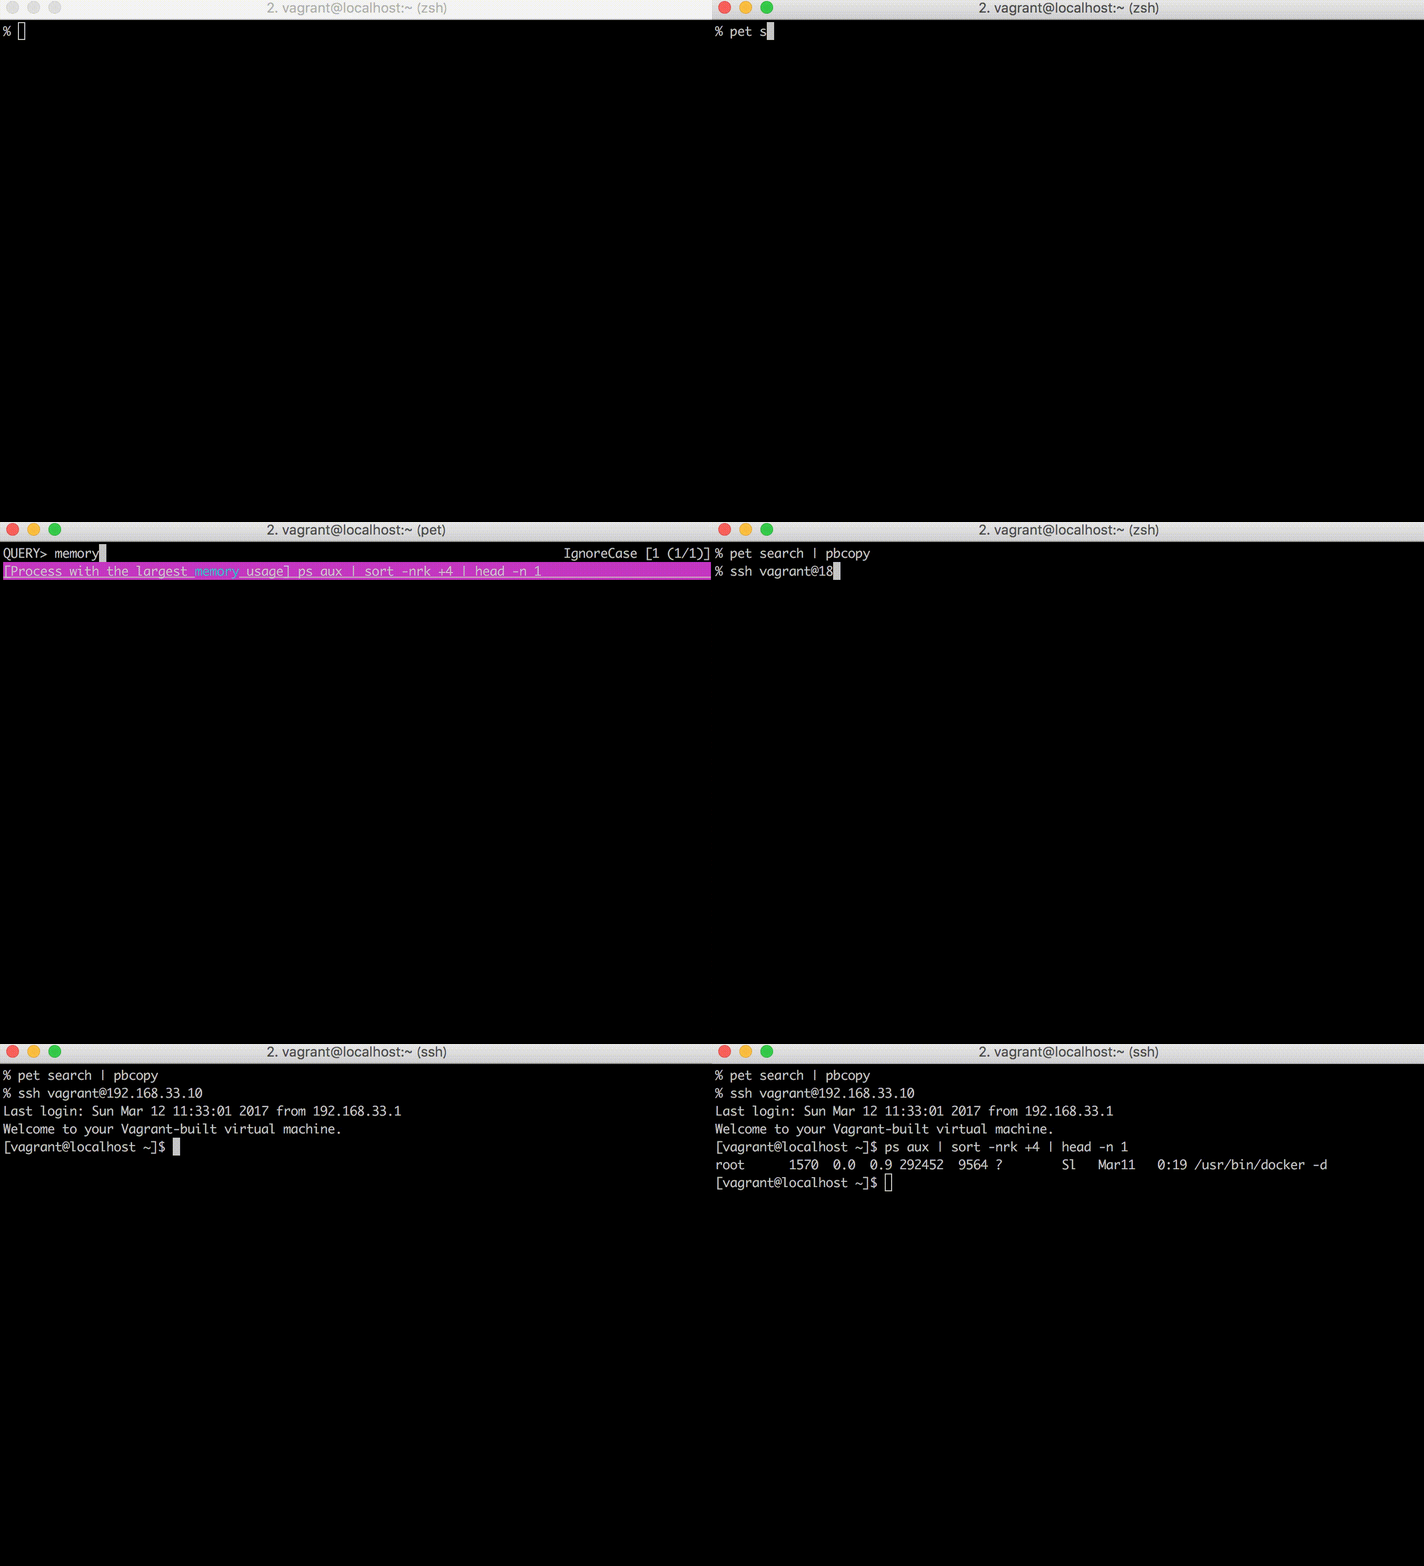
By using pbcopy on OS X, you can copy snippets to clipboard.
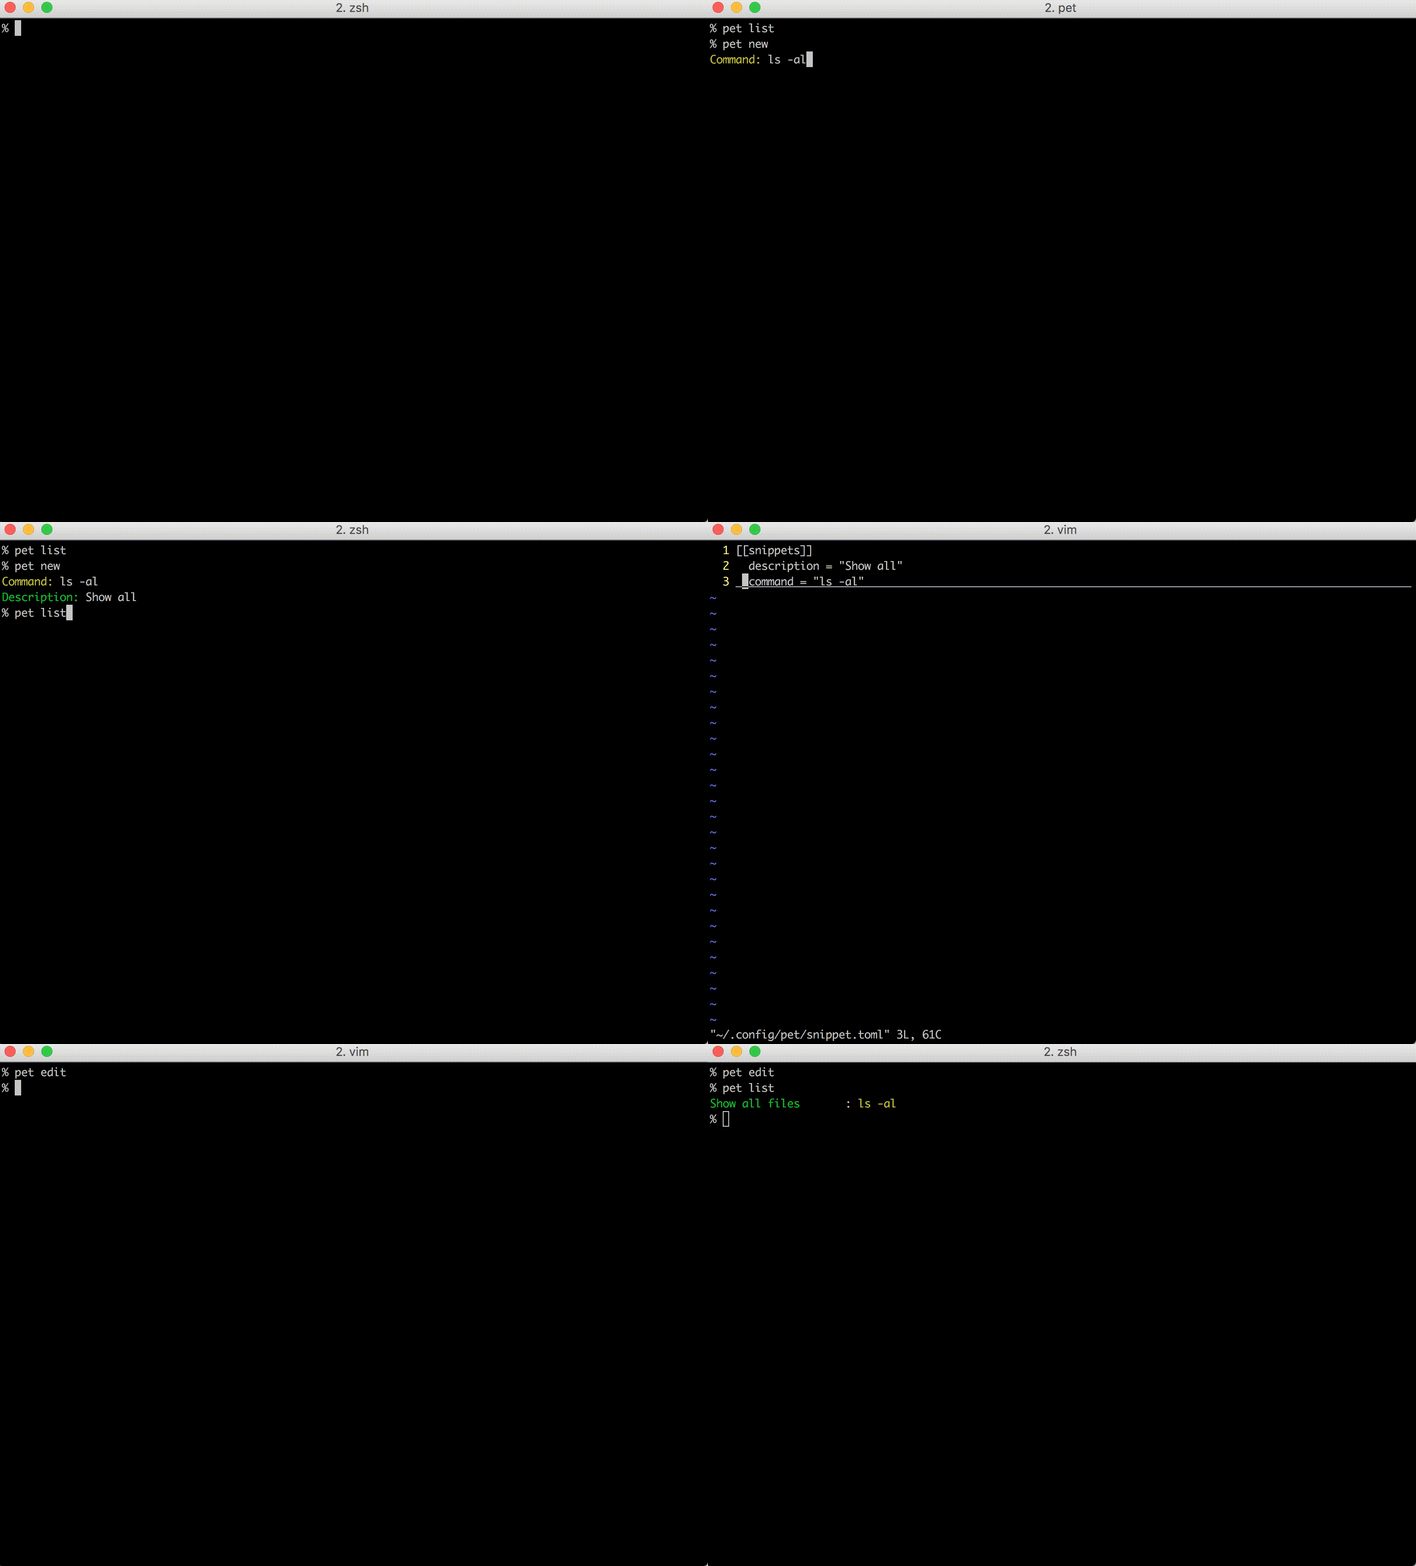
The snippets are managed in the TOML file, so it's easy to edit.
You can share snippets via Gist.
pet - Simple command-line snippet manager.

Usage:
  pet [command]

Available Commands:
  configure   Edit config file
  edit        Edit snippet file
  exec        Run the selected commands
  help        Help about any command
  list        Show all snippets
  new         Create a new snippet
  search      Search snippets
  sync        Sync snippets
  version     Print the version number

Flags:
      --config string   config file (default is $HOME/.config/pet/config.toml)
      --debug           debug mode

Use "pet [command] --help" for more information about a command.
Run pet edit
You can also register the output of command (but cannot search).
[[snippets]]
  command = "echo | openssl s_client -connect example.com:443 2>/dev/null |openssl x509 -dates -noout"
  description = "Show expiration date of SSL certificate"
  output = """
notBefore=Nov  3 00:00:00 2015 GMT
notAfter=Nov 28 12:00:00 2018 GMT"""
Run pet list
    Command: echo | openssl s_client -connect example.com:443 2>/dev/null |openssl x509 -dates -noout
Description: Show expiration date of SSL certificate
     Output: notBefore=Nov  3 00:00:00 2015 GMT
             notAfter=Nov 28 12:00:00 2018 GMT
------------------------------
Run pet configure
[General]
  snippetfile = "path/to/snippet" # specify snippet directory
  editor = "vim"                  # your favorite text editor
  column = 40                     # column size for list command
  selectcmd = "fzf"               # selector command for edit command (fzf or peco)
  backend = "gist"                # specify backend service to sync snippets (gist, ghe or gitlab, default: gist)
  sortby  = "description"         # specify how snippets get sorted (recency (default), -recency, description, -description, command, -command, output, -output)
  cmd = ["sh", "-c"]              # specify the command to execute the snippet with

[Gist]
  file_name = "pet-snippet.toml"  # specify gist file name
  access_token = ""               # your access token
  gist_id = ""                    # Gist ID
  public = false                  # public or priate
  auto_sync = false               # sync automatically when editing snippets

[GitLab]
  file_name = "pet-snippet.toml"  # specify GitLab Snippets file name
  access_token = "XXXXXXXXXXXXX"  # your access token
  id = ""                         # GitLab Snippets ID
  visibility = "private"          # public or internal or private
  auto_sync = false               # sync automatically when editing snippets

[GHEGist]
  base_url = ""                   # GHE base URL
  upload_url = ""                 # GHE upload URL (often the same as the base URL)
  file_name = "pet-snippet.toml"  # specify gist file name
  access_token = ""               # your access token
  gist_id = ""                    # Gist ID
  public = false                  # public or priate
  auto_sync = false               # sync automatically when editing snippets
Example1: Change layout (bottom up)
$ pet configure
[General]
...
  selectcmd = "fzf"
...
Example2: Enable colorized output
$ pet configure
[General]
...
  selectcmd = "fzf --ansi"
...
$ pet search --color
You can use tags (delimiter: space).
$ pet new -t
Command> ping 8.8.8.8
Description> ping
Tag> network google
Or edit manually.
$ pet edit
[[snippets]]
  description = "ping"
  command = "ping 8.8.8.8"
  tag = ["network", "google"]
  output = ""
They are displayed with snippets.
$ pet search
[ping]: ping 8.8.8.8 #network #google
You can exec snipet with filtering the tag
$ pet exec -t google

[ping]: ping 8.8.8.8 #network #google
You must obtain access token.
Go https://github.com/settings/tokens/new and create access token (only need "gist" scope).
Set that to access_token in [Gist] or use an environment variable with the name $PET_GITHUB_ACCESS_TOKEN.
After setting, you can upload snippets to Gist.
If gist_id is not set, new gist will be created.
$ pet sync
Gist ID: 1cedddf4e06d1170bf0c5612fb31a758
Upload success
Set Gist ID to gist_id in [Gist].
pet sync compares the local file and gist with the update date and automatically download or upload.
If the local file is older than gist, pet sync download snippets.
$ pet sync
Download success
If gist is older than the local file, pet sync upload snippets.
$ pet sync
Upload success
Note: -u option is deprecated
To use Gist with GitHub Enterprise, you need to follow these steps:
- Obtain an Access Token: Visit your GitHub Enterprise settings page to create a new access token with just the "gist" scope. This is necessary to authenticate and interact with the Gist API on GitHub Enterprise.
- Set the Access Token: Assign the newly created access token to
access_tokenin the[GHEGist]section of your configuration. Alternatively, you can use an environment variable named$PET_GITHUB_ENTERPRISE_ACCESS_TOKENto manage your token securely. - Configure API Endpoints: Unlike the regular Gist config, you need to set
base_urlandupload_urlto point to your GitHub Enterprise API endpoints. For example:
[GHEGist]
base_url = "https://github-enterprise.example.com/api/v3/gists"
upload_url = "https://github-enterprise.example.com/api/v3/gists"  # Often the same as the base URL
By setting these parameters, your tool will be configured to interact with GitHub Enterprise Gist, enabling you to sync and manage your snippets just as you would with the standard GitHub Gist service.
Remember to replace https://github-enterprise.example.com with the actual URL of your GitHub Enterprise instance. This customization allows your tool to correctly connect to and use the Gist service in a GitHub Enterprise environment.
You must obtain access token.
Go https://gitlab.com/-/profile/personal_access_tokens and create access token.
Set that to access_token in [GitLab] or use an environment variable with the name $PET_GITLAB_ACCESS_TOKEN.
You also have to configure the url under [GitLab], so pet knows which endpoint to access. You would use url = "https://gitlab.com"unless you have another instance of Gitlab.
At last, switch the backend under [General] to backend = "gitlab".
After setting, you can upload snippets to GitLab Snippets.
If id is not set, new snippet will be created.
$ pet sync
GitLab Snippet ID: 12345678
Upload success
Set GitLab Snippet ID to id in [GitLab].
pet sync compares the local file and gitlab with the update date and automatically download or upload.
If the local file is older than gitlab, pet sync download snippets.
$ pet sync
Download success
If gitlab is older than the local file, pet sync upload snippets.
$ pet sync
Upload success
You can sync snippets automatically.
Set true to auto_sync in [Gist], [GHEGist] or [GitLab].
Then, your snippets sync automatically when pet new or pet edit.
$ pet edit
Getting Gist...
Updating Gist...
Upload success
You need to install selector command (fzf or peco).
homebrew install fzf automatically.
Go to the releases page, find the version you want, and download the zip file. Unpack the zip file, and put the binary to somewhere you want (on UNIX-y systems, /usr/local/bin or the like). Make sure it has execution bits turned on.
You can use homebrew on OS X.
$ brew install knqyf263/pet/pet
If you receive an error (Error: knqyf263/pet/pet 64 already installed) during brew upgrade, try the following command
$ brew unlink pet && brew uninstall pet
($ rm -rf /usr/local/Cellar/pet/64)
$ brew install knqyf263/pet/pet
Download rpm package from the releases page
$ sudo rpm -ivh https://github.com/knqyf263/pet/releases/download/v0.3.0/pet_0.3.0_linux_amd64.rpm
Download deb package from the releases page
$ wget https://github.com/knqyf263/pet/releases/download/v0.3.6/pet_0.3.6_linux_amd64.deb
dpkg -i pet_0.3.6_linux_amd64.deb
Two packages are available in AUR. You can install the package from source:
$ yaourt -S pet-git
Or from the binary:
$ yaourt -S pet-bin
$ mkdir -p $GOPATH/src/github.com/knqyf263
$ cd $GOPATH/src/github.com/knqyf263
$ git clone https://github.com/knqyf263/pet.git
$ cd pet
$ make install
https://blog.saltedbrain.org/2018/12/converting-keep-to-pet-snippets.html
- fork a repository: github.com/knqyf263/pet to github.com/you/repo
- get original code:
go get github.com/knqyf263/pet - work on original code
- add remote to your repo: git remote add myfork https://github.com/you/repo.git
- push your changes: git push myfork
- create a new Pull Request
MIT
Teppei Fukuda


