python包的构建和分发
官网地址:https://setuptools.pypa.io/en/latest/userguide/index.html
早期pkg管理工具easy_install,现在已经被pip取代。
其他细节:https://packaging.python.org/en/latest/key_projects/
早期的包构建和分发工具distutils,将在python3.12之后被移除,彻底采用setuptools
distutils:https://docs.python.org/zh-cn/3/library/distutils.html
打包工具推荐
1.使用setuptools定义项目。
2.使用build创建Source Distributions和wheel。如果您有二进制扩展并希望为多个平台分发轮子,请使用cibuildwheel作为 CI 设置的一部分来构建可分发轮子。
3.使用twine将分布上传到PyPI。(需要先pypi创建账号)
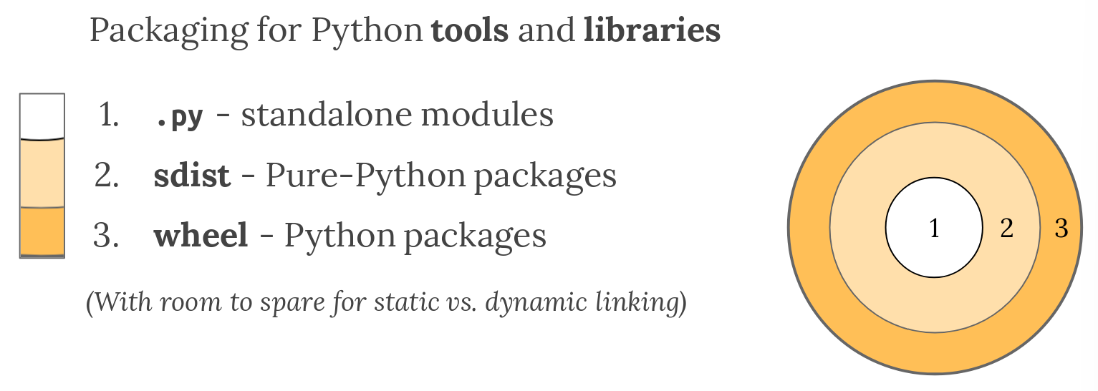
源码包
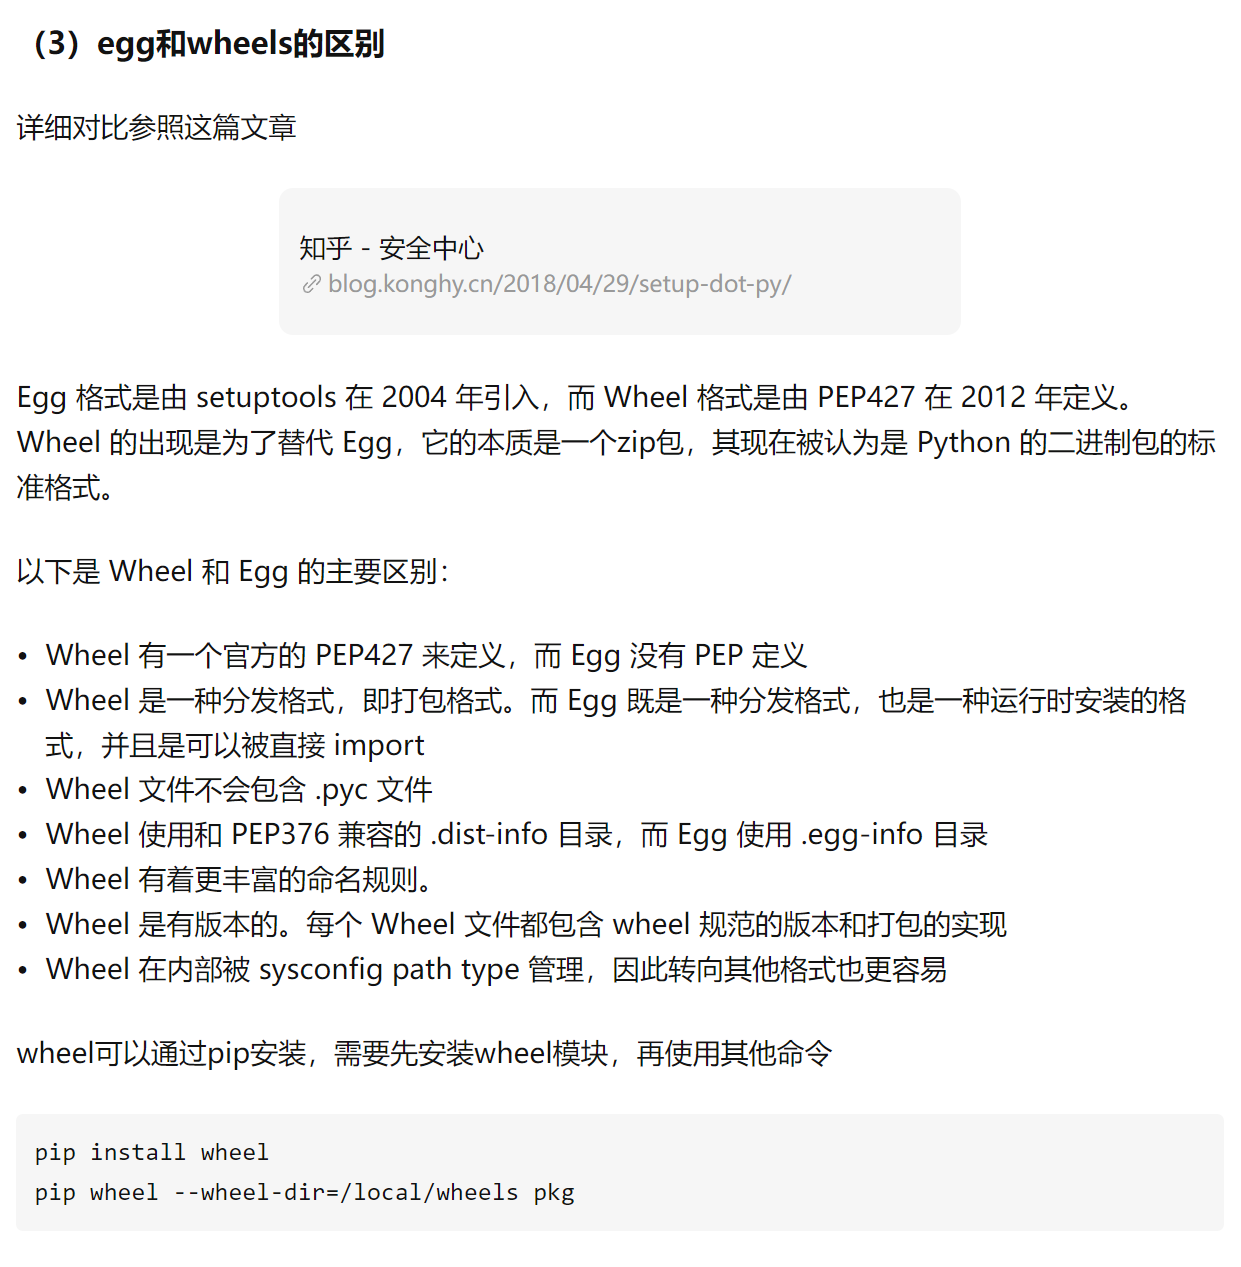
二进制包
.gg包已经过时。
目前主流构建方式
默认环境
# build是python的命令行工具,可以通过它来快捷构建project
$ pip install --upgrade build wheel setuptools setuptools-scm
推荐的构筑方式
# wheel 二进制格式
$ python3 -m build --wheel source-tree-directory
# sdist 源码格式
$ python3 -m build --sdist source-tree-directory
# 命令行工具
$ python -m build -h
配置文件的三种形式
# 使用setuptools时,需要的包配置文件。任选一种or三种自由组合。。。
pyproject.toml
setup.cfg
setup.py

# 这里我们选择官方推荐的.toml格式的配置文件(python 内置了)
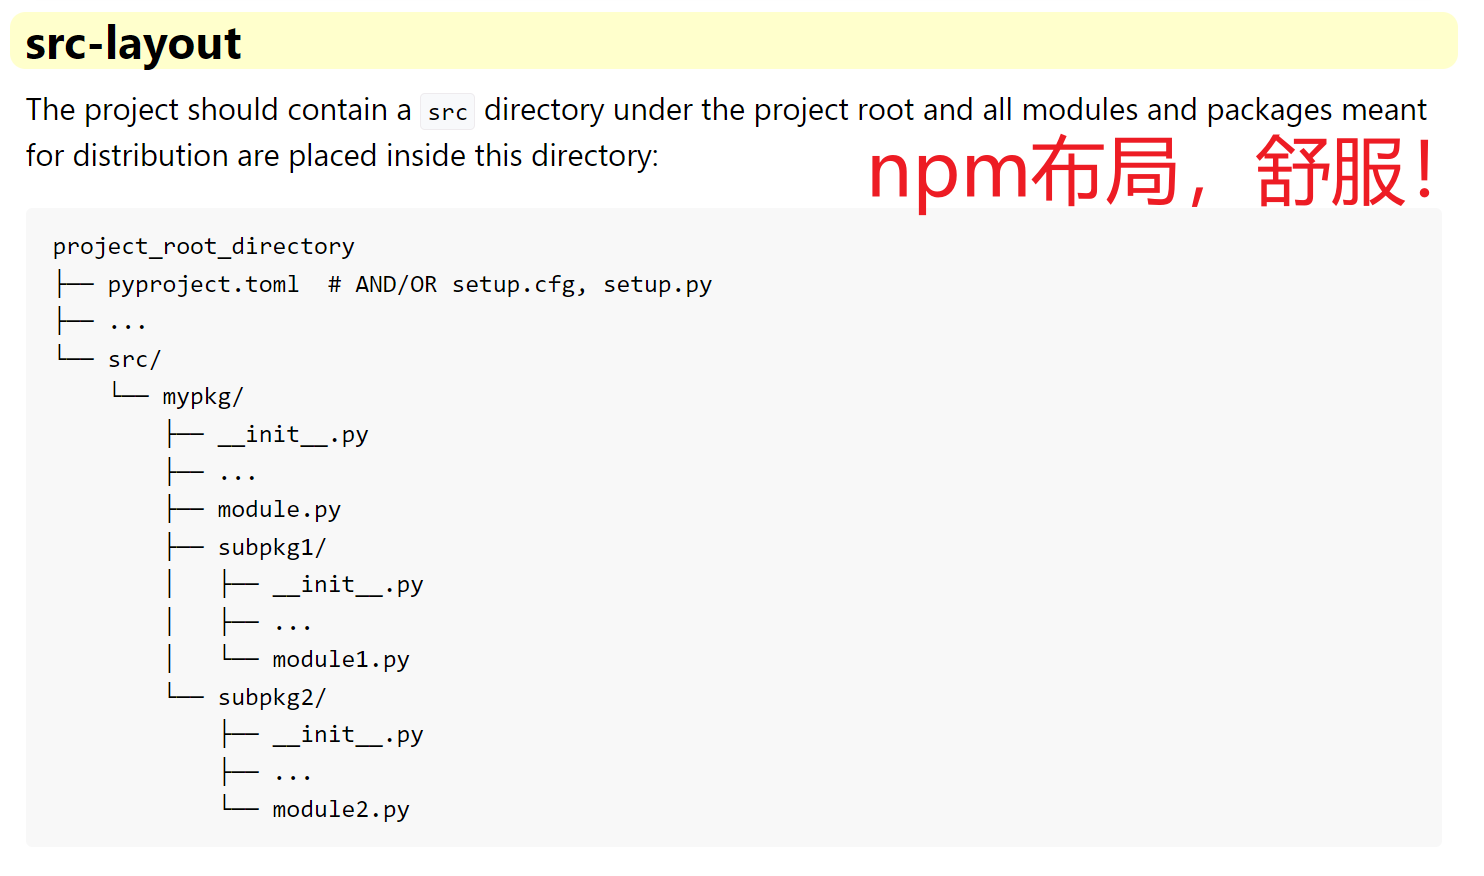
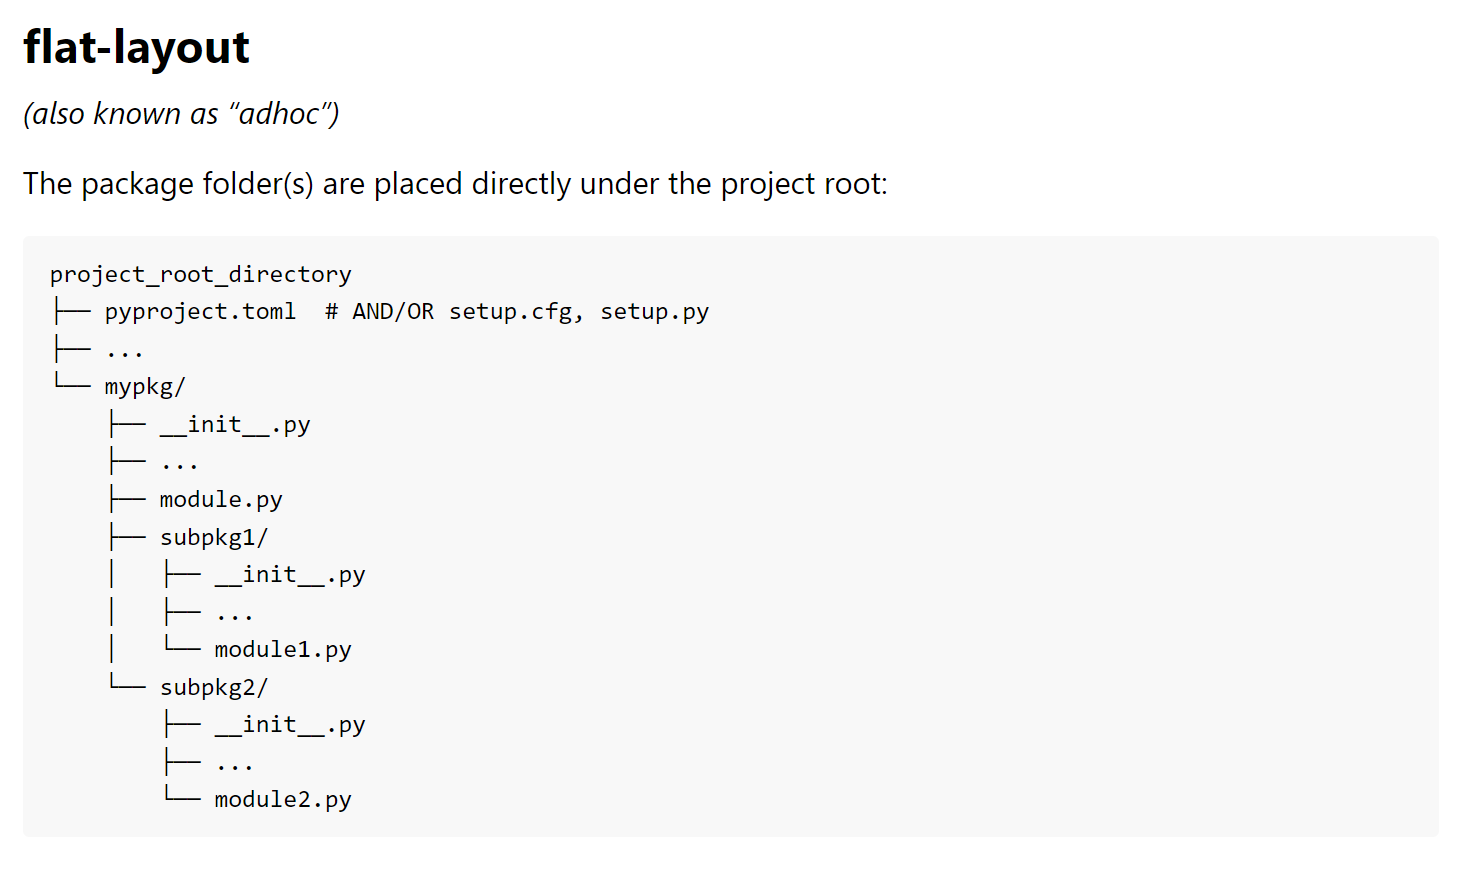
目录结构
结构1
mypackage
├── pyproject.toml  # and/or setup.cfg/setup.py (depending on the configuration method)
├── # README.rst or README.md (a nice description of your package)
├── # LICENCE (properly chosen license information, e.g. MIT, BSD-3, GPL-3, MPL-2, etc...)
└── mypackage1
|   ├── __init__.py
|   └── ... (other Python files)
└── mypackage2
    ├── __init__.py
    └── ... (other Python files)
.....
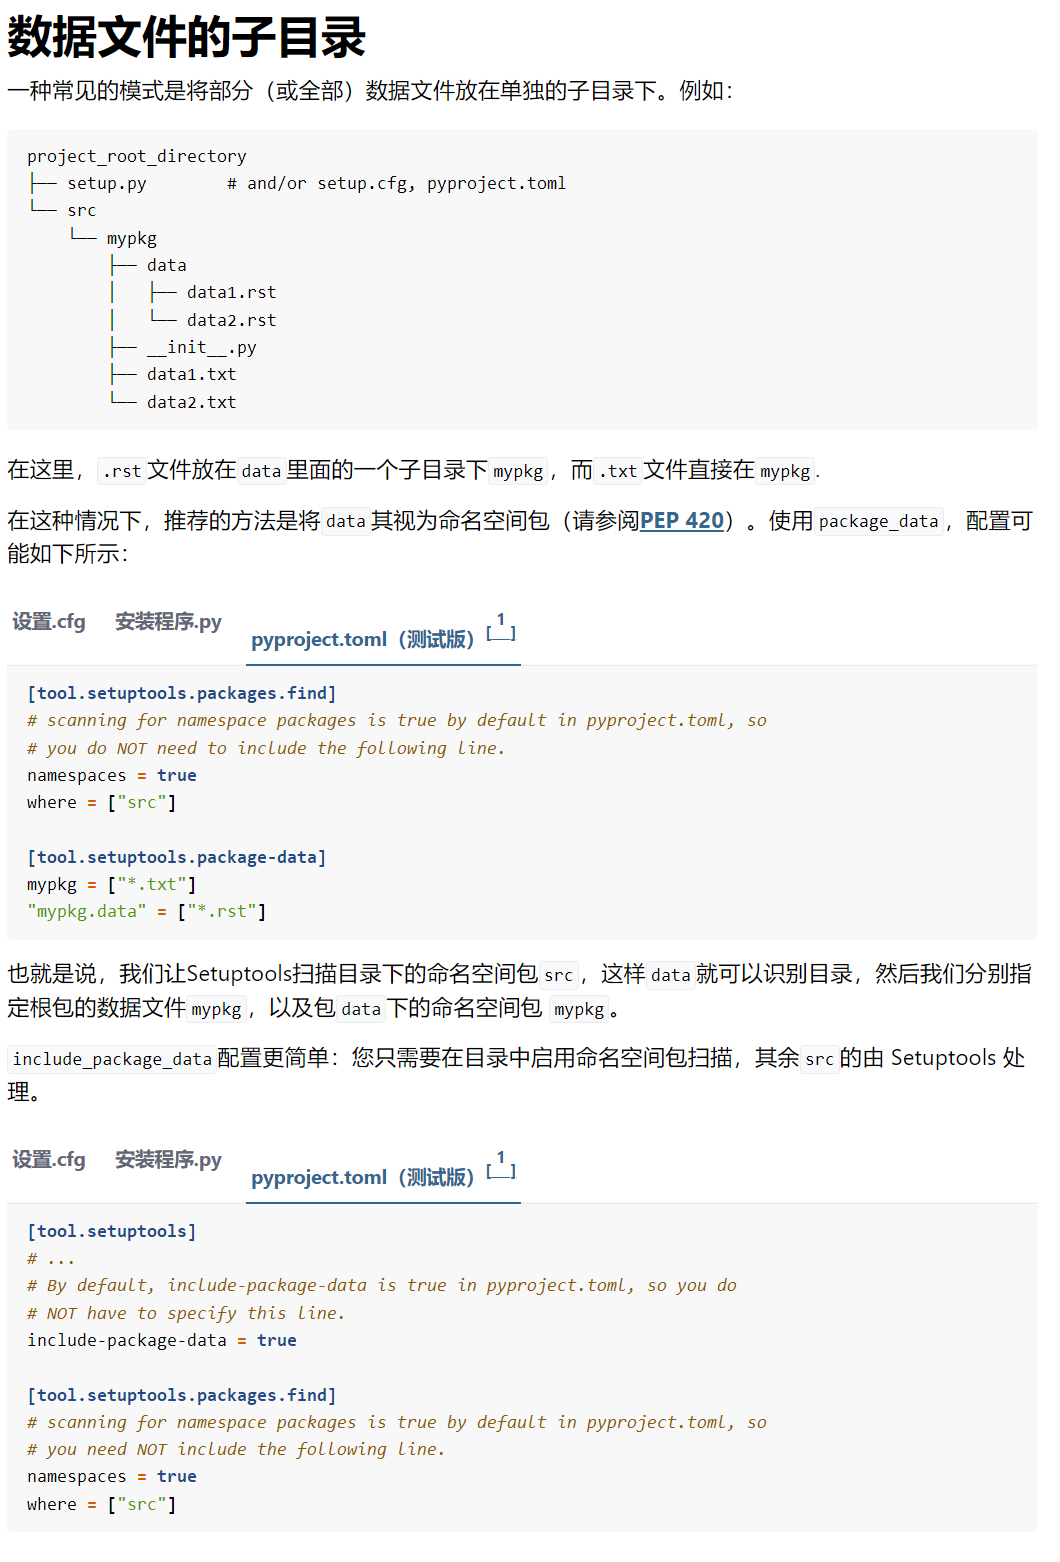
结构2本人强烈推荐这种布局
结构3
配置文件参数
元数据字段:https://packaging.python.org/en/latest/specifications/declaring-project-metadata/
# 官方推荐使用pyproject.toml在项目根目录中,一口气配置全部参数

# 系统构建
[build-system]
# 使用插件
requires = ["setuptools", "setuptools-scm"]
# requires = ["setuptools"]
build-backend = "setuptools.build_meta"

# 配置工具
[tool.setuptools]
# 自动添加数据文件
include-package-data = true

# 配置插件
[tool.setuptools_scm]
# 设置版本自动更新
write_to = "src/_version.py"
# 默认版本模板
write_to_template= '__version__ = "{version}"'
# 版本风格
version_scheme = "guess-next-dev"
local_scheme = "no-local-version"

# 项目基础信息https://packaging.python.org/en/latest/specifications/declaring-project-metadata/
[project]
# 项目名称
name = "LeroykTest"
# 版本,由于使用了setuptools_scm可以自动更新版本,如果配置,则会报错
# version = "1.0.0"

# 项目描述
description = "用来测试python打包"
# 完整自述文件readme.md or README.rst
readme = "readme.md"
# python版本要求
requires-python = ">=3.6"
# 作者信息
authors = [
  {email = "bridieiybnf@gmail.com"},
  {name = "LeroyK"}
]
# 维护人员
# maintainers = [
  {name = "Brett Cannon", email = "brett@python.org"}
]


# 遵守协议
license = {text = "MIT License"}
# 分类器https://pypi.org/classifiers/根据需求填写
classifiers = [
    "Programming Language :: Python :: 3",
    "Development Status :: 4 - Beta"
]
# 忽略字段,会被彻底忽略,官方推荐安装setuptools_scm,则会忽略version这个字段
dynamic = ["version"]
# 关键字段,会被pypi展示
keywords = ["name", "authors", "urls"]
# 官方地址
urls = {Project-URL="https://github.com/LeroyK111/python_packing_notes"}

# 必须依赖
dependencies = [
    "requests",
    'importlib-metadata; python_version>"3.6"',
    "PySimpleGUI"
]

# 可选依赖
[project.optional-dependencies]
pdf = ["ReportLab>=1.2", "RXP"]
rest = ["docutils>=0.3", "pack==1.1, ==1.3"]

# 更多网址
# [project.urls]
# homepage = "https://example.com"
# documentation = "https://readthedocs.org"
# repository = "https://github.com"
# changelog = "https://github.com/me/spam/blob/master/CHANGELOG.md"


# python脚本,可以直接在shell中执行LeroykTest从而调用func
# 写在__init__中的对象,不需要在加点LeroykTest.__init__
# https://setuptools.pypa.io/en/latest/userguide/entry_point.html
[project.scripts]
LeroykTest = "function"

# PySimpleGUI专用
[project.gui-scripts]
spam-gui = "spam:main_gui"

# 插件语法:https://setuptools.pypa.io/en/latest/userguide/entry_point.html
# [project.entry-points."spam.magical"]
# tomatoes = "spam:main_tomatoes"
简单目录结构,可以自己检查所有package。但是总有意外。。。算法并不是无敌的。
高级包管理tool.setuptools.packages
一般都是自动发现包,前提是目录结构不会太夸张.
https://setuptools.pypa.io/en/latest/userguide/package_discovery.html
# 方法一,手动包发现
[tool.setuptools]
packages = ["mypkg", "mypkg.subpkg1", "mypkg.subpkg2"]
package-dir = {"" = "src"}

[tool.setuptools.package-dir]
mypkg = "lib"
"mypkg.subpkg1" = "lib1"


# 方法二,列表配置,一项项来
[tool.setuptools.packages.find]
where = ["src"]  # ["."] by default
include = ["mypackage*"]  # ["*"] by default
exclude = ["mypackage.tests*"]  # empty by default
namespaces = false  # true by default


# 方法三,字典配置包所在目录
[tool.setuptools.packages]
find = {}  # Scanning implicit namespaces is active by default
# OR
find = {namespaces = false}  # Disable implicit namespaces
系统构建build-system
setuptools-scm:https://github.com/pypa/setuptools_scm/
[build-system]
requires = ["setuptools", "setuptools-scm"]
build-backend = "setuptools.build_meta"
入口点project.scripts
https://setuptools.pypa.io/en/latest/userguide/entry_point.html
除了对pkg中加入__main__.py,然后使用python -m pkg外。
可以设置脚本script, 直接将命令放入shell中。可以全局调用。
[project.scripts]
my-script = "LeroykTest.module:function"
依赖管理
https://setuptools.pypa.io/en/latest/userguide/dependency_management.html
[project]
# 必须依赖
dependencies = [
    "docutils",
    "BazSpam == 1.1",
    "enum34; python_version<'3.4'",
    "enum34; python_version<'3.4'",
    "pywin32 >= 1.0; platform_system=='Windows'",
    "Package-A @ git+https://example.net/package-a.git@main",
]
# 可选依赖
[project.optional-dependencies]
PDF = ["ReportLab>=1.2", "RXP"]
数据文件支持
https://setuptools.pypa.io/en/latest/userguide/datafiles.html
就是打包的适合,可以放入其他非.py的文件进入,比如html,css,js等等。。。
[tool.setuptools]
# 开启数据打包即可
include-package-data = true

[tool.setuptools.package-data]
# 筛选器
mypkg = ["*.txt", "*.rst"]
# 高级筛选器
"*" = ["*.txt"]
mypkg1 = ["data1.rst"]


[tool.setuptools.exclude-package-data]
# 排除包
mypkg = [".gitattributes"]
构建扩展模块(了解cpython)
https://setuptools.pypa.io/en/latest/userguide/ext_modules.html
Setuptools 可以构建 C/C++ 扩展模块。比如pandas numpy等.
通过插件,也可以构建golang。
pip install Cython
开发模式(了解)
https://setuptools.pypa.io/en/latest/userguide/development_mode.html
pip install --editable .
开始build
官网地址:https://pypa-build.readthedocs.io/en/latest/
有坑:
由于我们使用了setuptools_scm插件,则会自动更新project的version版本号,但是大多数情况,我们还是想要自定义版本号, 那我们就需要停用setuptools_scm插件。
# 如果报错,请查看log
$ python -m build

# 默认会生成root/dist文件夹,默认构筑两种形式。
project
|--dist
|	|
|	|--LeroykTest-0.1.dev2-py3-none-any.whl
|	|--LeroykTest-0.1.dev2.tar.gz
|
|--src
	|
	|--module1
	|--module2
	|--__init__.py
	|--_version.py
	|...


# 其他命令(只构筑源码or只构筑轮子)
python -m build -h
usage: python -m build [-h] [--version] [--sdist] [--wheel] [--outdir OUTDIR] [--skip-dependency-check] [--no-isolation] [--config-setting CONFIG_SETTING] [srcdir]

    A simple, correct PEP 517 build frontend.

                        output directory (defaults to {srcdir}\dist)
  --skip-dependency-check, -x
                        do not check that build dependencies are installed
  --no-isolation, -n    do not isolate the build in a virtual environment
  --config-setting CONFIG_SETTING, -C CONFIG_SETTING
                        pass options to the backend.  options which begin with a hyphen must be in the form of "--config-setting=--opt(=value)" or "-C--opt(=value)"
twine分发
官网https://twine.readthedocs.io/en/latest/
安装上传工具
$ pip install twine
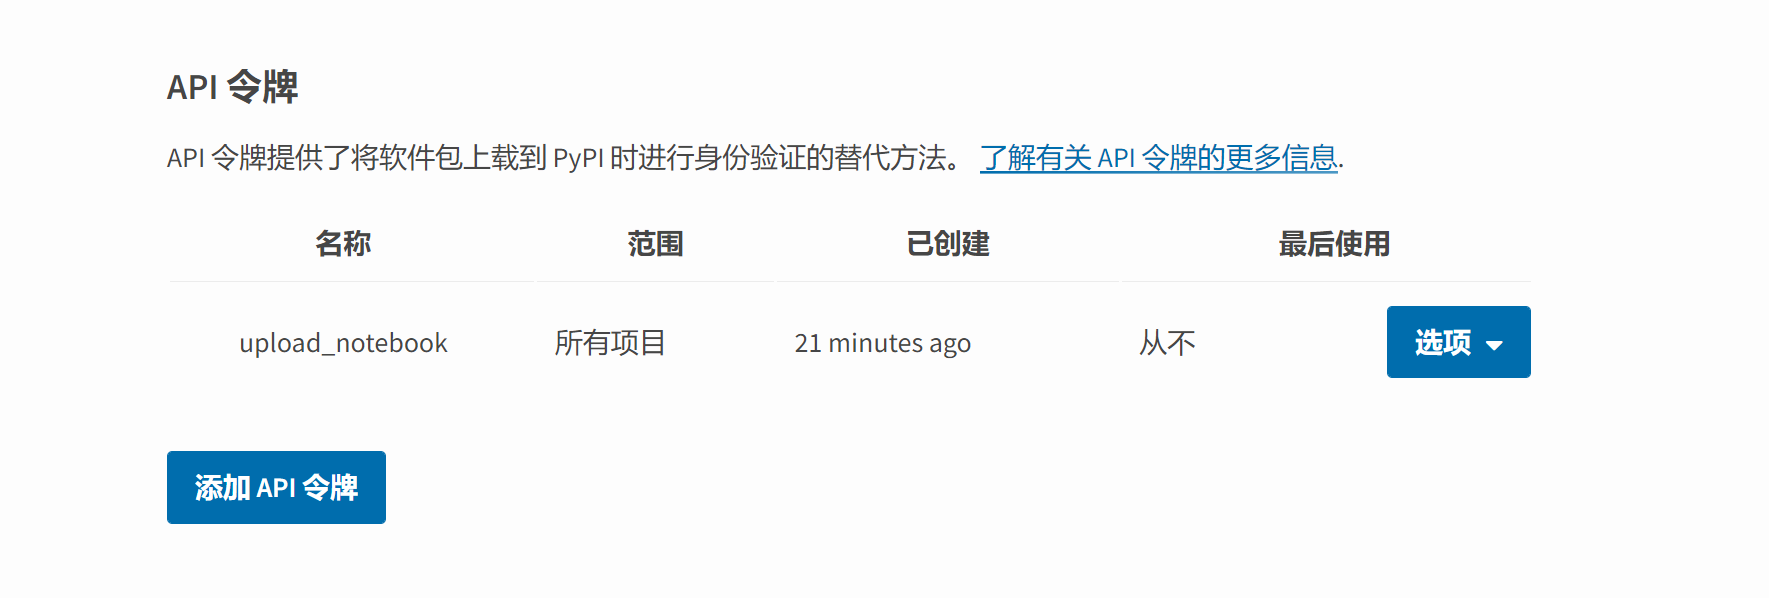
注册pypi账号
https://pypi.org/manage/account/
推荐生成token API密钥,配置$HOME/.pypirc文件进行上传包。
常用命令
推荐使用token配置文件,进行无登录的上传package。
$HOME/.pypirc
https://packaging.python.org/en/latest/specifications/pypirc/
# Twine 将提示您输入用户名和密码。(这里是即时login in)
# 也可以使用.pypirc进行无登录上传文件。

# 不推荐上传到测试库,经常失联!!!
$ twine upload -r testpypi dist/*

# 上传到PyPI:
$ twine upload dist/*

# 检查发行库(用来判断pypi和本地dist/*的一致性)
$ twine check -h
$ twine check dist/*

# 注册(只适合提供注册服务的服务器,官方还是推荐PyPI token上传)
$ twine register -h
# file: $HOME/.pypirc 用户目录下

# 启用服务器
[distutils]
index-servers =
    pypi
    testpypi
    private-repository

# 正式上传服务器
[pypi]
username = __token__
password = <PyPI token>

# 测试上传服务器
[testpypi]
repository = https://test.pypi.org/legacy/
username = <your TestPyPI username>
password = <your TestPyPI password>

# 其他上传服务器
[private-repository]
repository = <private-repository URL>
username = <private-repository username>
password = <private-repository password>
其他
可执行文件
- pyInstaller - 跨平台
- cx_Freeze - 跨平台
- 构造函数- 用于命令行安装程序
- py2exe - 仅限 Windows
- py2app - 仅限 Mac
- osnap - Windows 和 Mac
- pynsist - 仅限 Windows
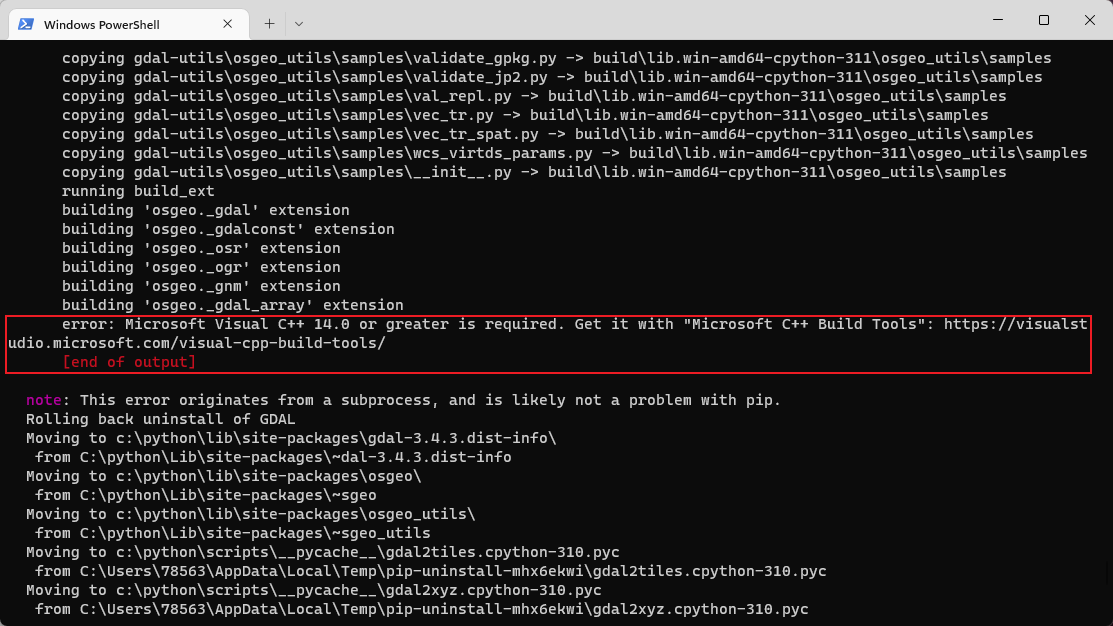
常见构筑错误
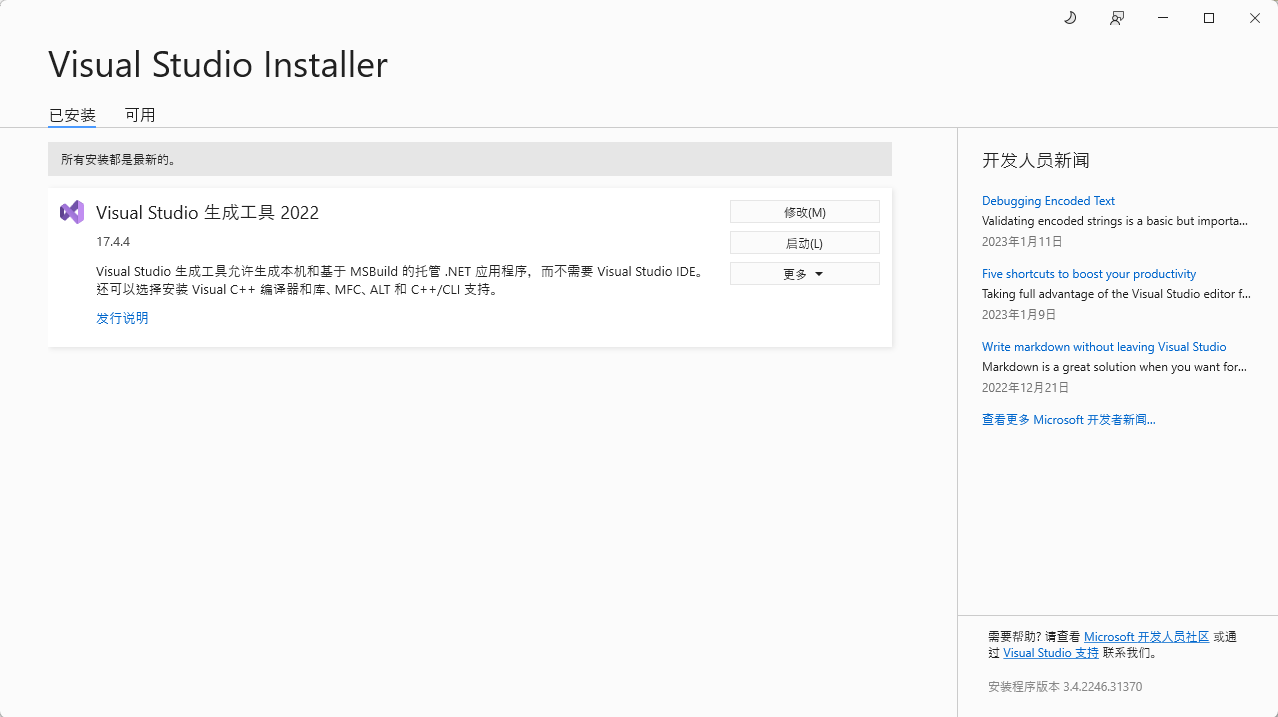
C++扩展构筑异常
直接下载对应构筑的工具,然后安装即可。

