Forge Interactive Video Tutorials
Stack details
- TypeScript
- Tailwind for CSS styling
- Planetscale for data persistence
- Prisma for ORM
- NextAuth for authentication via GitHub
- Mux for video streaming and thumbnail generation
- Mux Player for video playback
- Mux Uploader for video uploading
Progressive Decentralization
I'm a cheapskate, everything will hopefully move to IPFS or Arweave. But ain't got time fo dat now.
Create a .env.local file
This project uses several secrets to access the different accounts used throughout the codebase. You can configure these values locally by copying the .env.local.example file to a new file called .env.local and filling out the values as you receive them in the steps below.
Also, don't forget to add the values to the project's environment variables in production on Vercel.
Mux account setup
To authenticate this application with your Mux account, create a new access token within the Mux dashboard and copy the access token ID and secret into your .env.local file and into your Vercel environment variables.
Database Setup
First, make sure you have mysql-client installed locally so you can take full advantage of the pscale CLI tool down the road. On MacOS with Homebrew installed, you can run the following command in your terminal:
brew install mysql-client
Next, install the Planetscale CLI. Again, on MacOS, this command will do the trick:
brew install planetscale/tap/pscale
Next, authorize the Planetscale CLI with your newly created account by running:
pscale auth
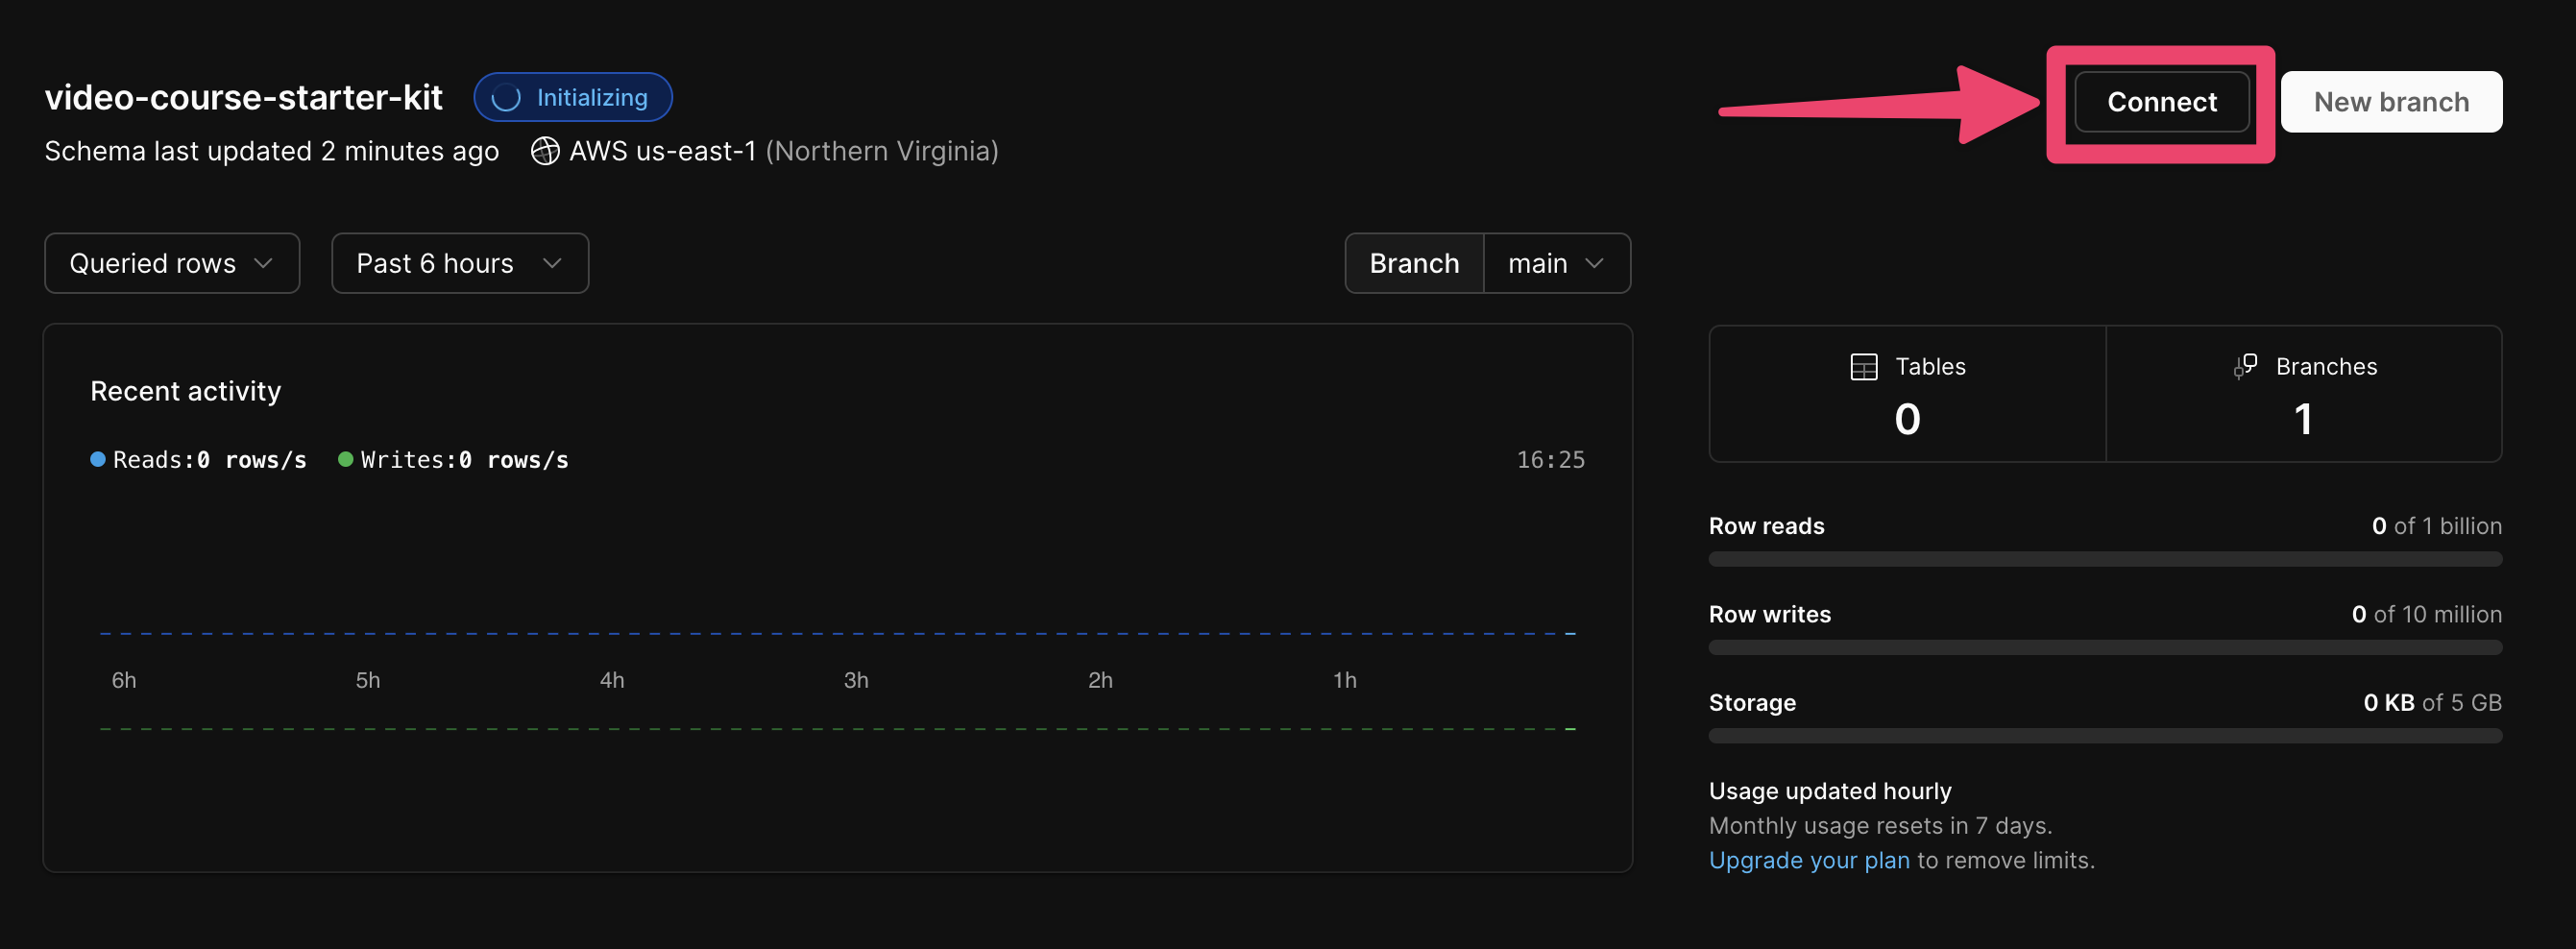
Create a new database in your Planetscale account called video-course-starter-kit
pscale database create video-course-starter-kit
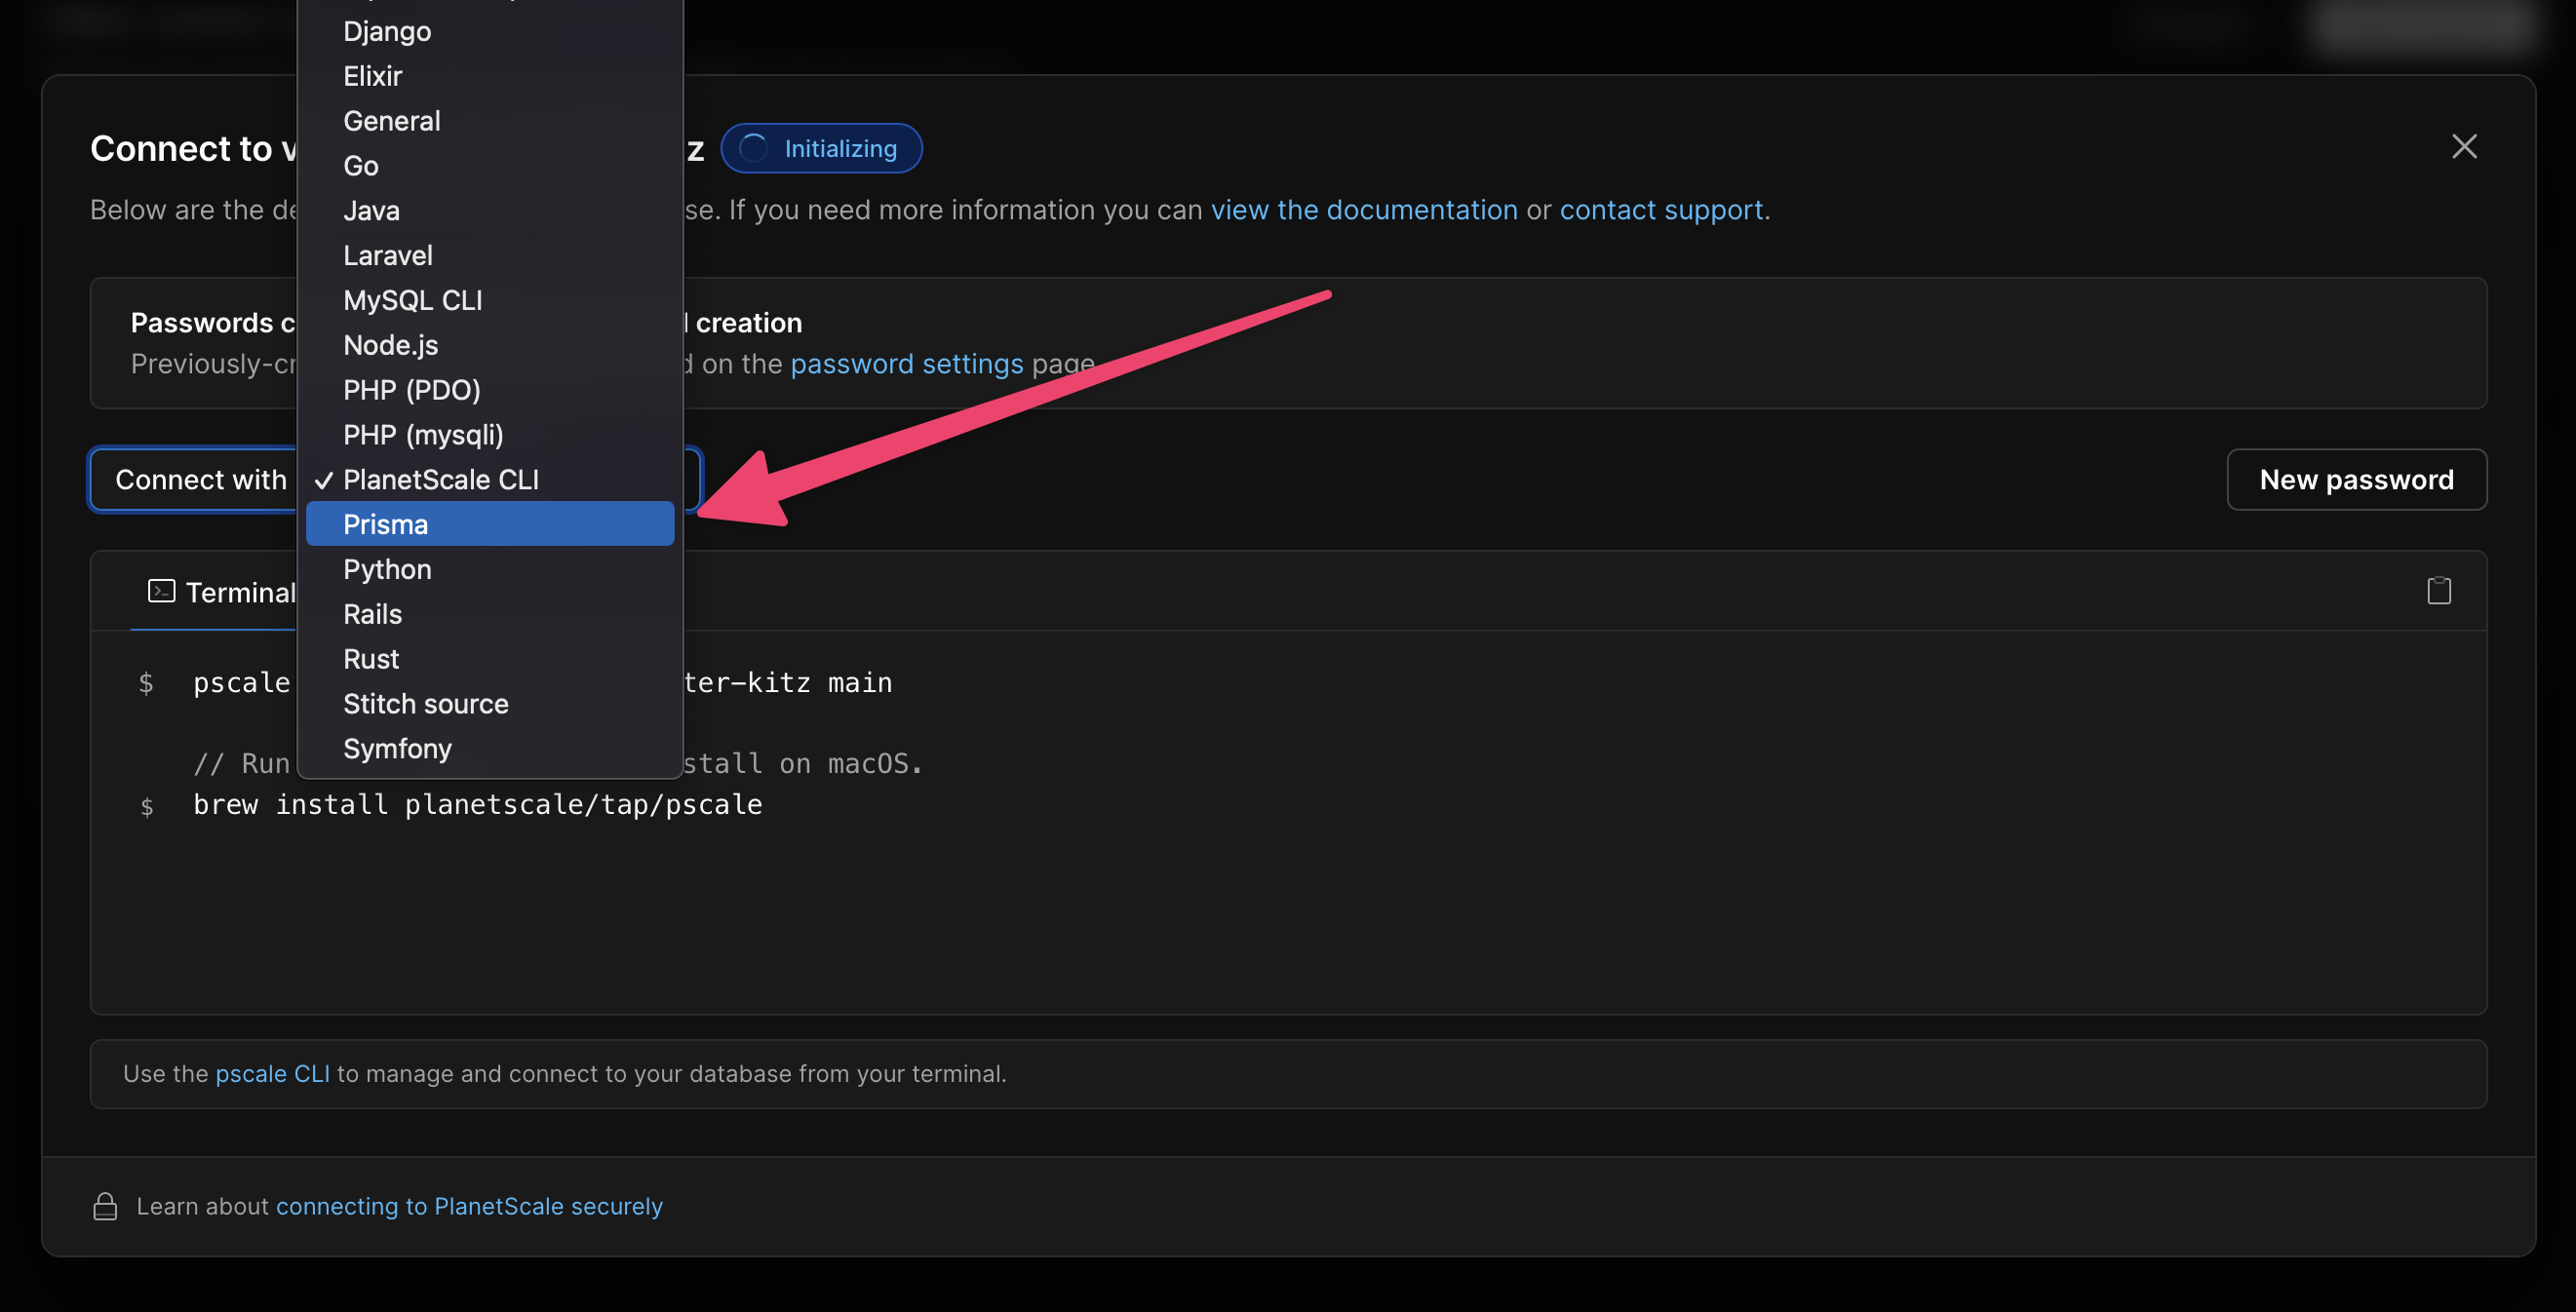
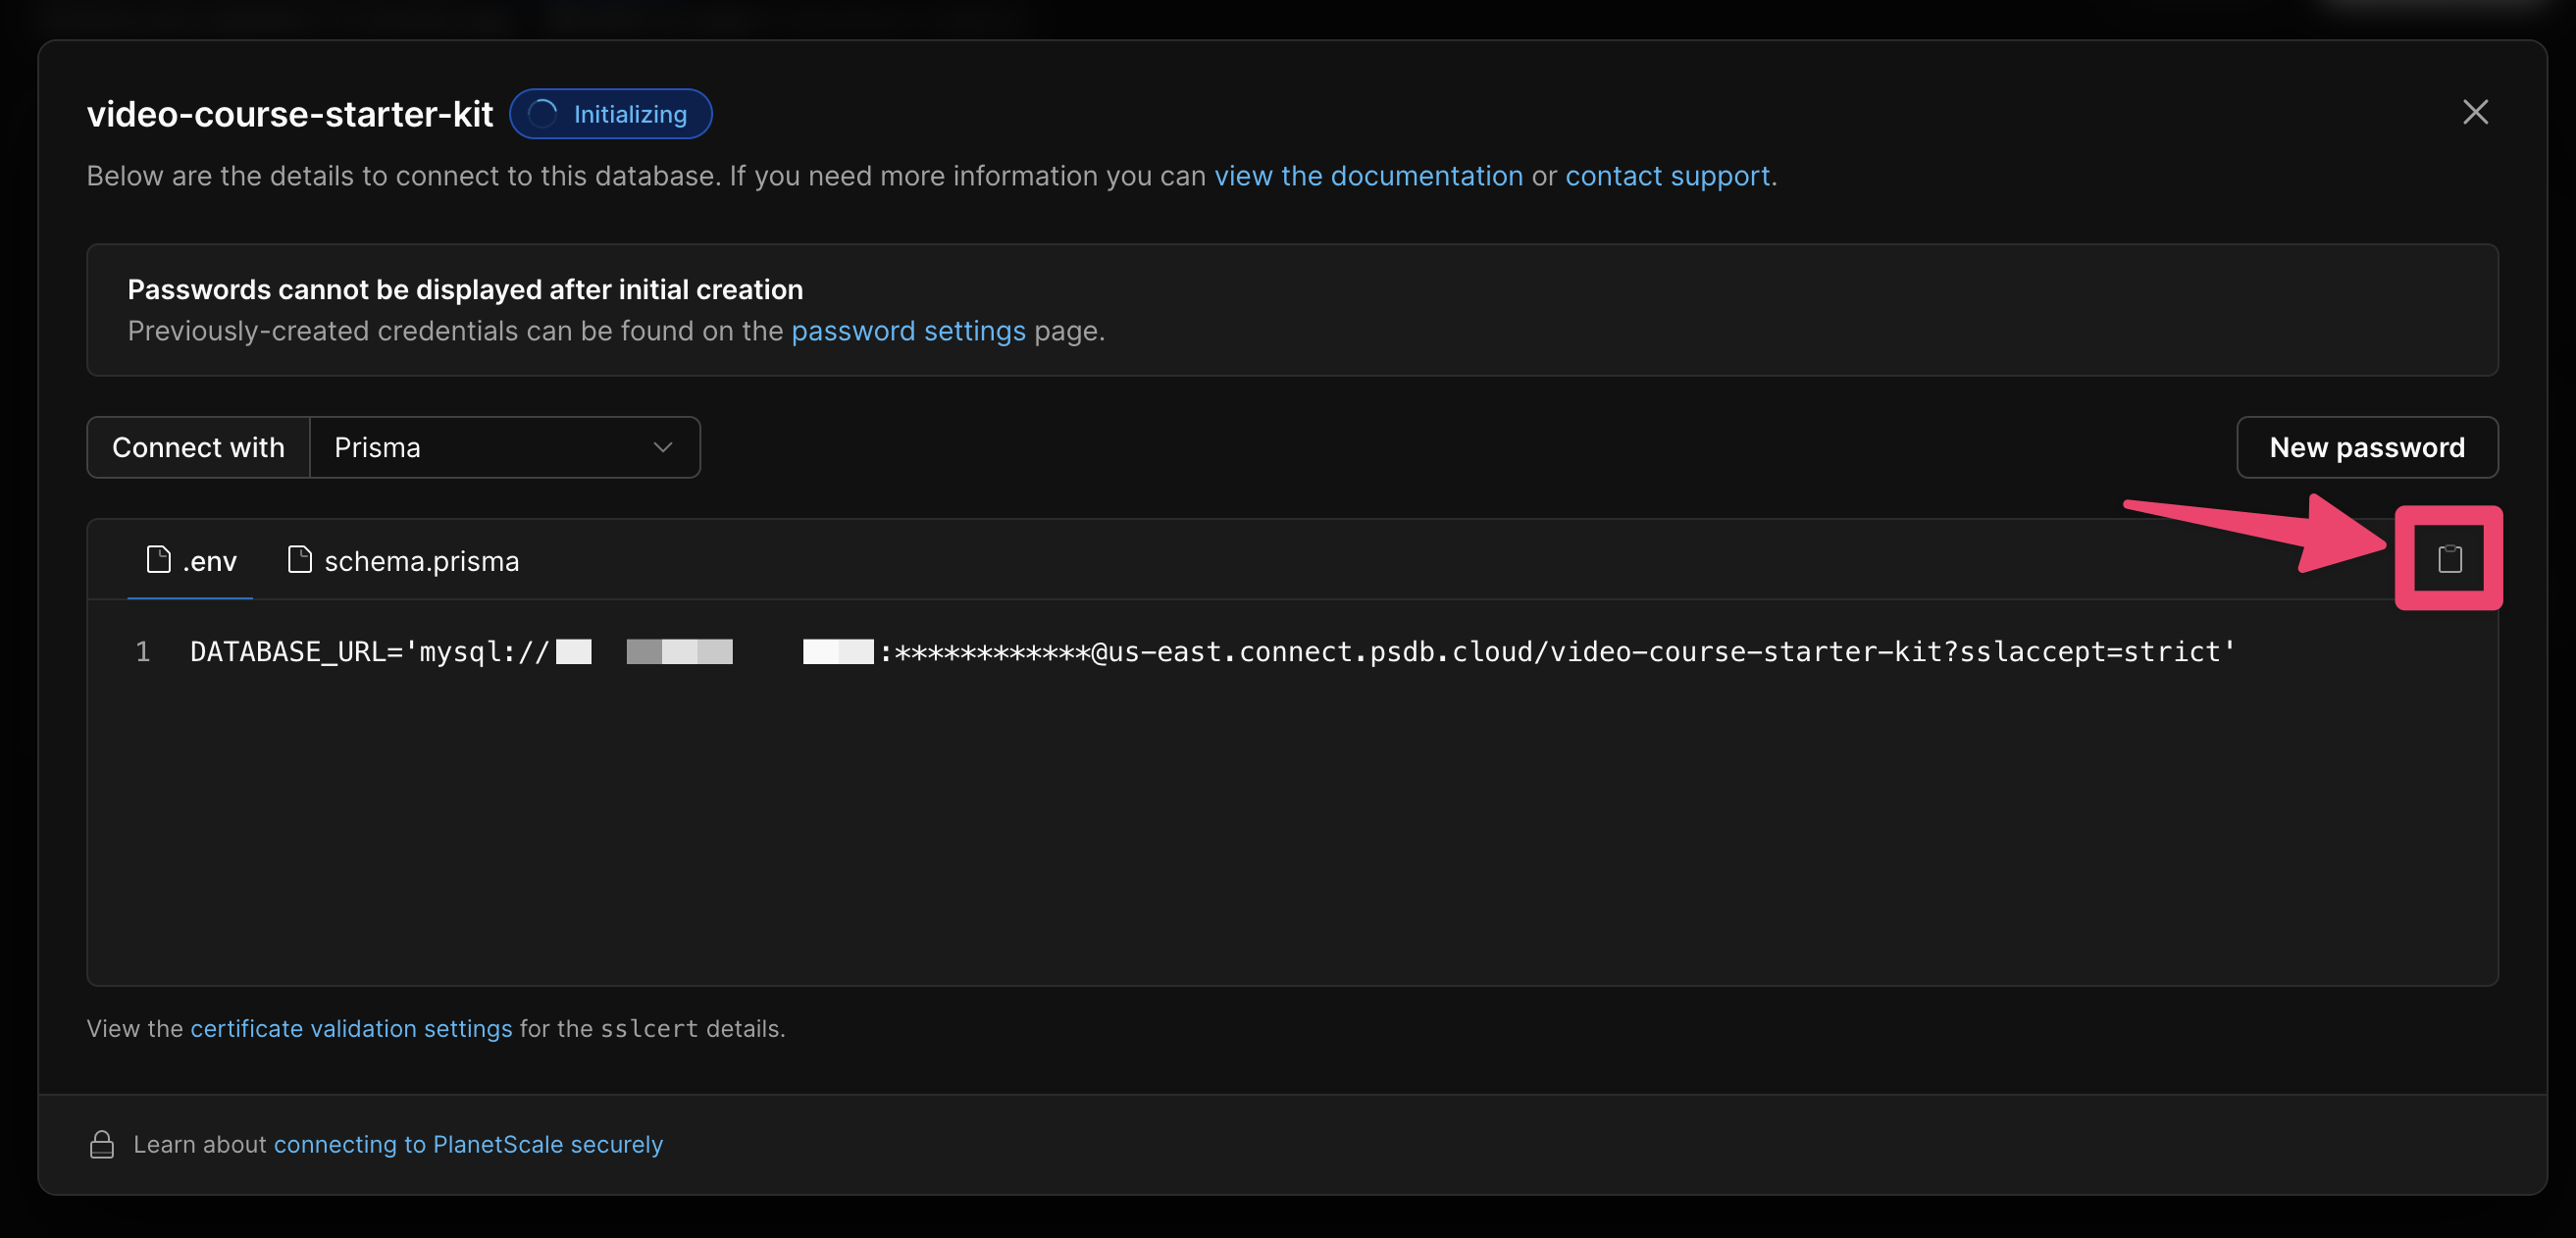
Follow the link provided to you as a result of running this command to get the connection string for your database.
Copy the resulting authenticated database url value into your .env.local file and into your Vercel environment variables.
We'll connect to this database locally by opening a connection to it on a local port. Here's how you can connect to the Planetscale database video-course-starter-kit on port 3309:
pscale connect video-course-starter-kit main --port 3309
Modifying the database schema
If you'd like to make any changes to the database schema, you can do so by following these steps:
pscale branch create video-course-starter-kit my-new-branch

# after a few moments, close and reopen db proxy to the new branch
pscale connect video-course-starter-kit my-new-branch --port 3309

# change your schema in the prisma/schema.prisma file... then,
npx prisma generate
npx prisma db push

# when ready, make a deploy request
pscale deploy-request create video-course-starter-kit my-new-branch

# shipit
pscale deploy-request deploy video-course-starter-kit 1
Inspecting the database
Prisma provides a nice interface to be able to load up your database contents and see the data that is powering your application. When you've connected to your Planetscale database, you can load up the Prisma GUI with the following command:
npx prisma studio
Handling webhooks
Mux uses webhooks to communicate the status of your uploaded video assets back to your application. To handle these webhooks locally, you'll first need to install ngrok.
brew install ngrok/ngrok/ngrok
ngrok config add-authtoken <YOUR_NGROK_TOKEN>
ngrok http 3000
Now, we need to make Mux aware of your ngrok URL. Visit https://dashboard.mux.com/settings/webhooks and add the tunnel URL listed in your terminal as a URL that Mux should notify with new events.
Make sure to append
/api/webhooks/muxto the end of your tunnel URL.
Then, copy the Webhook signing secret value and paste it into your .env.local file under MUX_WEBHOOK_SECRET
Run the development server
Starting up the dev server is a simple one line command:
yarn dev
GitHub OAuth setup
End users of this video course application can authenticate with their GitHub account. As a prerequisite, you'll need to create an OAuth App on GitHub that associates a user's access to your application with your GitHub account.
To create your OAuth app, follow these steps:
-
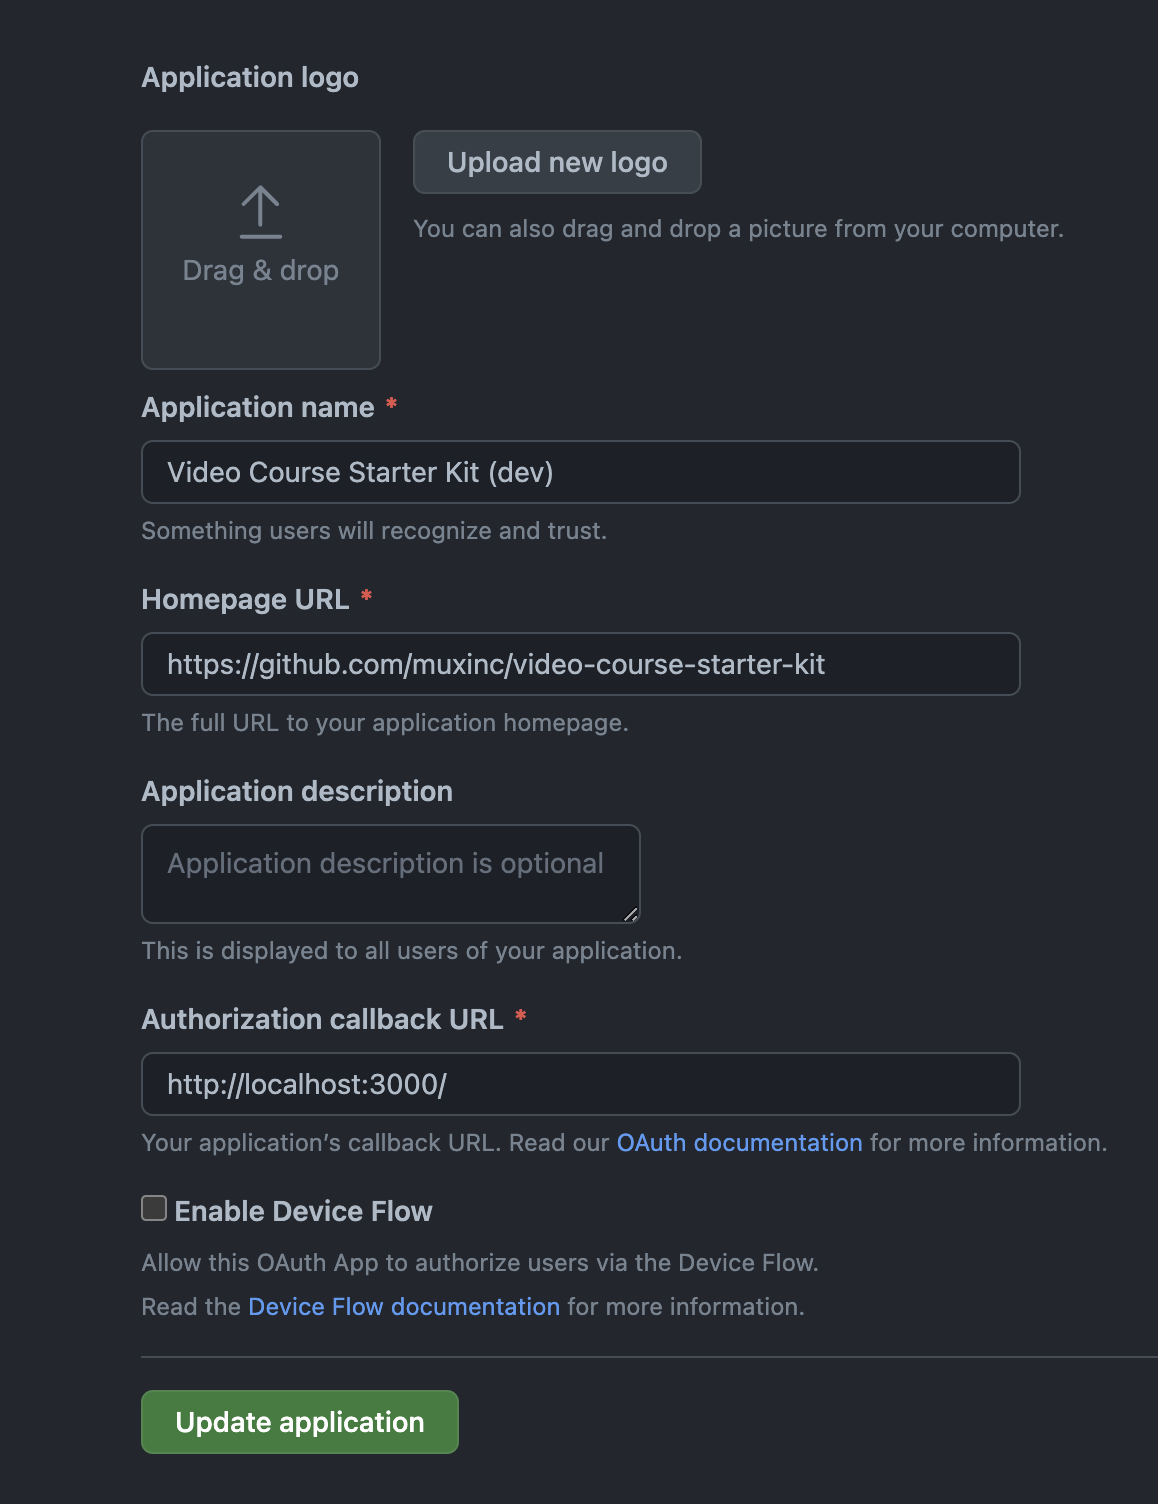
Click "OAuth Apps" and create an Oauth application to use in Development:
| Application name | Homepage URL | Authorization callback URL |
|---|---|---|
| Video Course Starter Kit (dev) | https://github.com/muxinc/video-course-starter-kit | http://localhost:3000/ |
- Copy the
GITHUB_IDandGITHUB_SECRETand paste them into your environment variables on Vercel and in your.env.localfile.
Note: when you deploy a production copy of this application, you'll need to create another GitHub OAuth app which uses your production URL as the "Authorization callback URL" value.
Recommended VS code extensions
Prisma
The Prisma extension adds syntax highlighting, formatting, auto-completion, jump-to-definition and linting for .prisma files.
Questions? Comments?
Tweet us @MuxHQ or email help@mux.com with anything you need help with.


