This repository shows a simple example for Kubeflow Pipelines (KFP) and Cloud Build. The aim from this example is to:
- Create KFP components with inputs and outputs.
- Show how to organise the repository structure for implementing your components (source code, unit tests, Dockerfiles, specs, and pipeline workflow and settings).
- How to perform build and deploy for your pipeline using Cloud Build.
You need to have your GCP Project. You can use Cloud Shell or gcloud CLI to run all the commands in this guideline.
Follow the instruction and create a GCP project. Once created, enable the Dataflow API, BigQuery API in this page. You can also find more details about enabling the billing.
We recommend to use CloudShell from the GCP console to run the below commands. CloudShell starts with an environment already logged in to your account and set to the currently selected project. The following commands are required only in a workstation shell environment, they are not needed in the CloudShell.
gcloud auth login
gcloud auth application-default login
gcloud config set project [your-project-id]
gcloudYou can deploy a Kubeflow instance on Google Cloud Platform (GCP) by following the instructions in Kubeflow documentations.
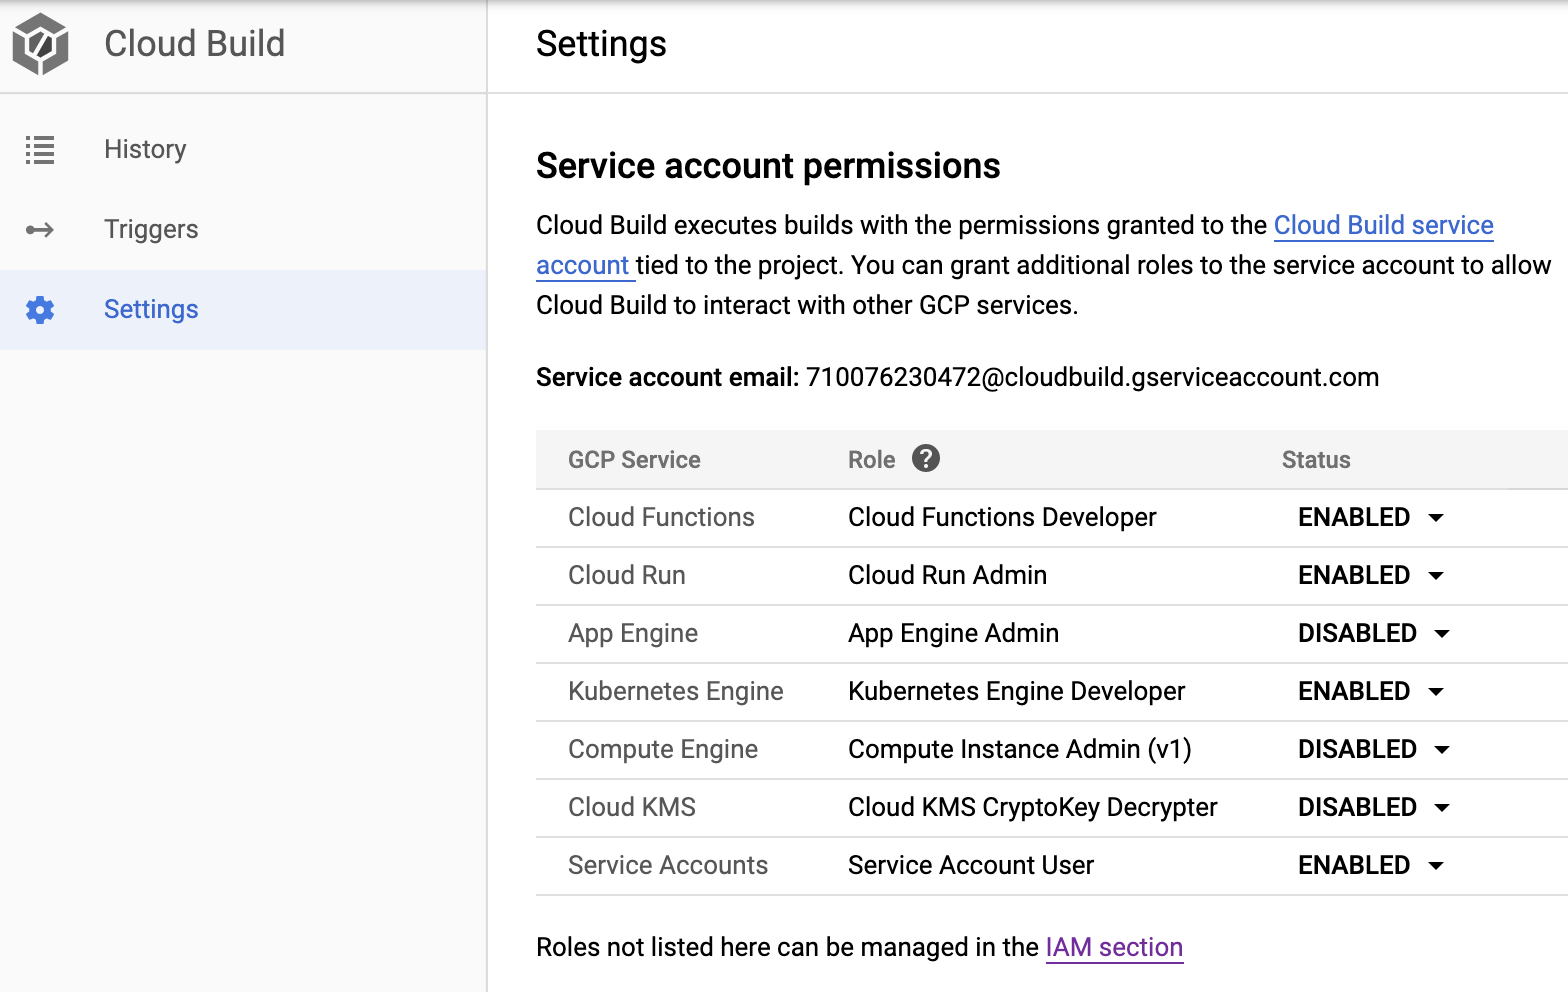
Cloud Build executes builds with the permissions granted to the Cloud Build service account tied to the project. You need to grant the service account the Kubernetes Engine Developer role to allow running Kubeflow Pipelines, as follows:
- Select Cloud Build from the GCP console menu.
- Select Settings from the right-hand-side menu.
- Enable Kubernetes Engine Developer role.
This is shown in the following screenshot:
1. components
This directory includes the artifacts required for each component in the pipeline. Each component has its own directory: . In this example, there are two components: my_add, and my_divide.
Each component directory includes the following files:
- [component-name].py: This includes the source code of the components. For example, my_add.py.
- test_[component-name].py: This includes the unit tests for the functions in the component source code. For example, my_add.py.
- Dockerfile: This defines the container image to run the component code. For example, see the Dockerfile for the my_add component.
- component.yaml: This defines the component specs for the pipeline. The specs includes component inputs, outputs, and image. For example, see the component.yaml for the my_add component.
In addition, the test.sh includes the scripts to run unit test modules in all the components.
2. pipeline
The pipeline directory includes the following fies:
- workflow.py: This includes the definition of the Kubeflow Pipeline.
More specifically:
- Component ops are created from the component.yaml files, using the kfp.components.ComponentStore API.
- A pipeline function is created, with @dsl_pipline decorator, where the component ops are executed and chained together to compose the workflow of the pipeline.
- settings.yaml: This includes are the parameter values for the pipeline to run with.
- helper.py: This implements the following functionality:
- update_component_spec(): This change the image property of all of the component.yaml with respect to the given docker container image repository and image tag. This is executed when new container image are created, as part of the build process, and new tags are generated.
- read_settings(): This reads all the parameter values from the settings.yaml file, to invoke the pipeline run with.
- run_pipeline(): This creates and experiment and run a given pipeline package using the kfp.Client API.
3. build
The build directory includes the following files:
- Dockerfile: This is a definition for the kfp-util container image required
to deploy and run the Kubeflow pipelines:
- It is based on gcr.io/cloud-builders/kubectl image, which has the gcloud SDK installed and sets the kubeconfig.
- It installs Python 3.6.8.
- It installs the Kubeflow Pipeline SDK and other required Python packages.
- cloudbuild.yaml: This is the Cloud Build configuration file the defines the various build steps. This file is designed for manual execution.
- build.sh: This is the entry point to execute the build.
4. notebooks
This directory includes the notebook(s) needed for interactive testing and experimentation of the pipeline components, as well as submitting the pipeline to KFP
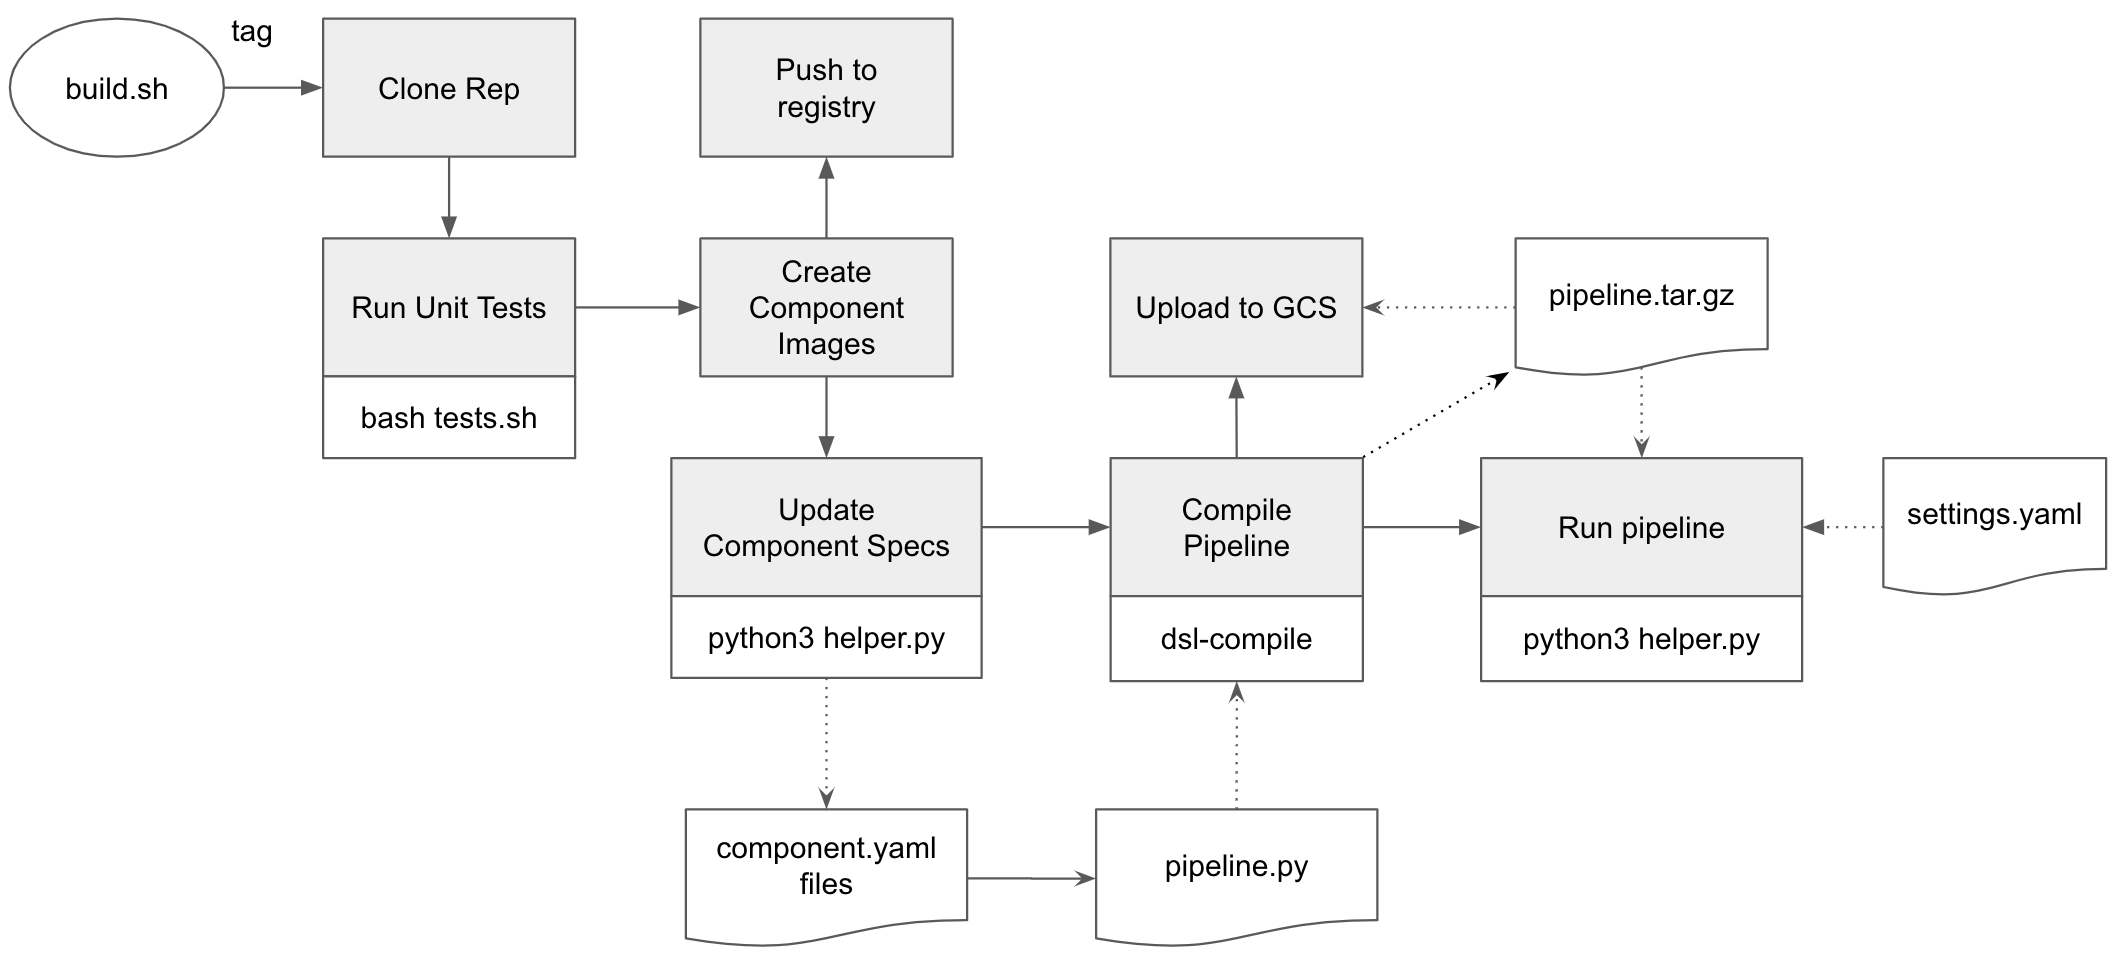
The following diagram shows the build steps:
-
Clone Repo: When executing the build.sh script with the necessary substitutions, the first step is to clone the code repository to the Cloud Build local environment.
- This step uses gcr.io/cloud-builders/git image.
-
Run Unit Tests: This step executes the tests.sh script that run the unit test for the various components.
- This step uses the custom kfp-util image defines in this Dockefile.
-
Build Component Images: In this example, we build Docker container images for two components: my_add and my_divide, and tag with the ${_TAG} value passed in the substitutions. * This step uses gcr.io/cloud-builders/docker image.
-
Push Images to Registry: This is performed automatically when you define the images section in the cloudbuild.yaml file.
-
Update Component Specs: This executes the update_component_specs method in the helper.py module. The method uses the recently created and tagged image urls and update them to the component.yaml files. Note that these component.yaml specs are loaded - with the updated specs - by the pipeline before it is complied.
- This step uses the custom kfp-util image defines in this Dockefile.
-
Compile Pipeline: This executes dsl-compile to compile the pipeline defined in workflow.py, to generate pipeline.tar.gz package.
- This step uses the custom kfp-util image defines in this Dockefile.
-
Upload to GCS: This uploads the pipeline.tar.gz package to GCS.
- This step uses gcr.io/cloud-builders/gsutil image.
-
Deploy & Run Pipeline: This executes the deploy_pipeline method in the helper.py module, given the pipeline.tar.gz package and pipeline version. The method deploys the pipeline package to KFP. If an optional --run argument is passed,
the method also creates and experiment in KFP, and run pipeline given the created experiment, compiled pipeline package, and loaded parameter values from the settings.yaml file.- This step uses the custom kfp-util image defines in this Dockefile.
To run the build routine defined in the build/cloudbuild.yaml file, you can execute the build/build.sh script file, after setting the substitution values.
| Substitution | Description |
|---|---|
| _REPO_URL | Your source code repository |
| _PROJECT_ID | GCP project Id where you container registry lives |
| _COMPUTE_ZONE | Compute zone of your GKE cluster of your Kubeflow deployment |
| _CLUSTER_NAME | Your GKE cluster name |
| _GCS_LOCATION | The GCS location where the compiled pipeline is uploaded |
| _EXPERIMENT_NAME | The name of the experiment to use for running the pipeline |
| _TAG | The label to use to tag the component images when built |
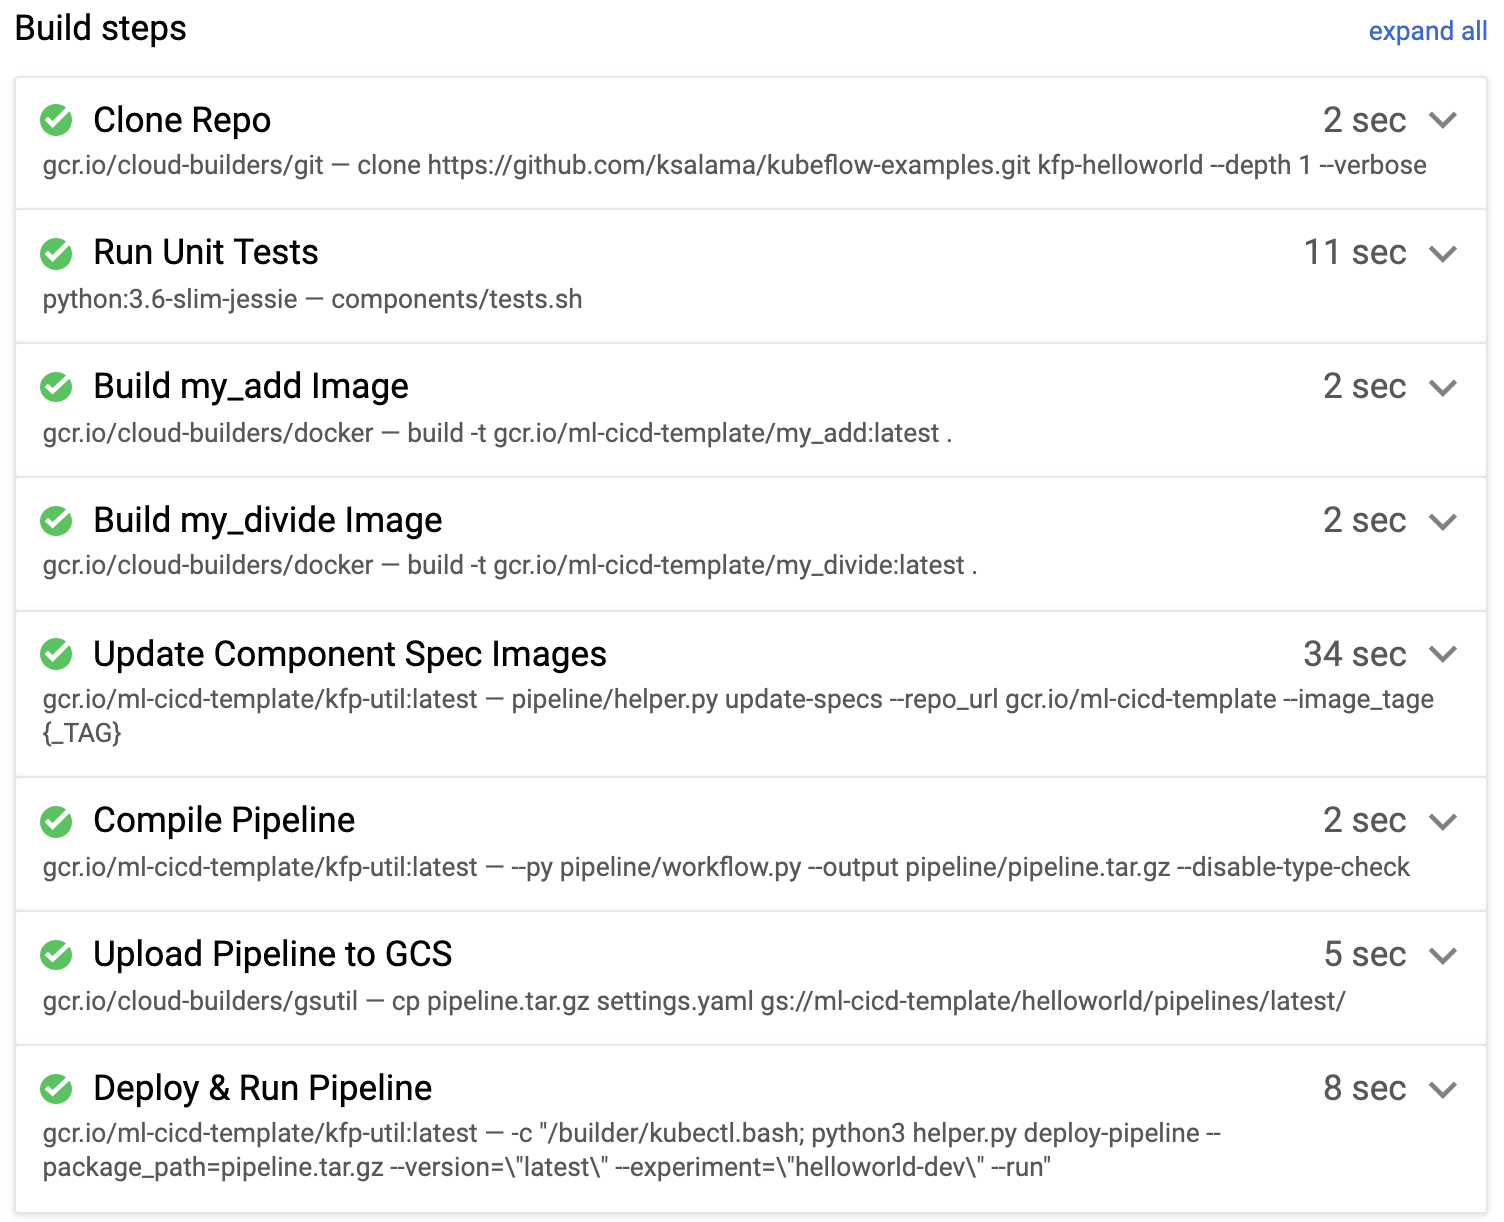
The folowing screenshot shows the output of a build process:


