


The Mixpanel library for iOS is an open source project, and we'd love to see your contributions! We'd also love for you to come and work with us! Check out https://mixpanel.com/jobs/#openings for details.
If you are using Swift, we recommend our Swift Library.
Mixpanel supports CocoaPods for easy installation.
To Install, see our full documentation »
pod 'Mixpanel'
Mixpanel also supports Carthage to package your dependencies as a framework.
Check out the Carthage docs » for more info.
To integrate Mixpanel into your Xcode project using Carthage, specify it in your Cartfile:
github "mixpanel/mixpanel-iphone"
Run carthage update to build the framework and drag the built Mixpanel.framework into your Xcode project.
To help users stay up to date with the latests version of our iOS SDK, we always recommend integrating our SDK via CocoaPods, which simplifies version updates and dependency management. However, there are cases where users can't use CocoaPods. Not to worry, just follow these manual installation steps and you'll be all set.
Add Mixpanel as a submodule to your local git repo like so:
git submodule add git@github.com:mixpanel/mixpanel-iphone.git
Now the Mixpanel project and its files should be in your project folder!
Drag and drop Mixpanel.xcodeproj from the mixpanel-iphone folder into your Xcode Project Workspace:

Select your app .xcodeproj file. Under "General", add the Mixpanel framework as an embedded binary. Once added, please make sure Mixpanel.framework shows under both "Linked Frameworks and Libaries" and "Embedded Binaries".
Import <Mixpanel/Mixpanel.h> into AppDelegate.m, and initialize Mixpanel within application:didFinishLaunchingWithOptions:
#import "AppDelegate.h"
#import <Mixpanel/Mixpanel.h>

@implementation AppDelegate

- (BOOL)application:(UIApplication *)application didFinishLaunchingWithOptions:(NSDictionary *)launchOptions {
    [Mixpanel sharedInstanceWithToken:MIXPANEL_TOKEN];
}
You initialize your Mixpanel instance with the token provided to you on mixpanel.com.
After installing the library into your iOS app, Mixpanel will automatically collect common mobile events. You can enable/ disable automatic collection through your project settings.
Tracking additional events is as easy as adding track: or track:properties: anywhere after initializing Mixpanel.
[[Mixpanel sharedInstance] track:@"Event name"];
[[Mixpanel sharedInstance] track:@"Event name" properties:@{@"Prop name": @"Prop value"}];
You're done! You've successfully integrated the Mixpanel SDK into your app. To stay up to speed on important SDK releases and updates watch our iPhone repository on Github.
Have any questions? Reach out to support@mixpanel.com to speak to someone smart, quickly.
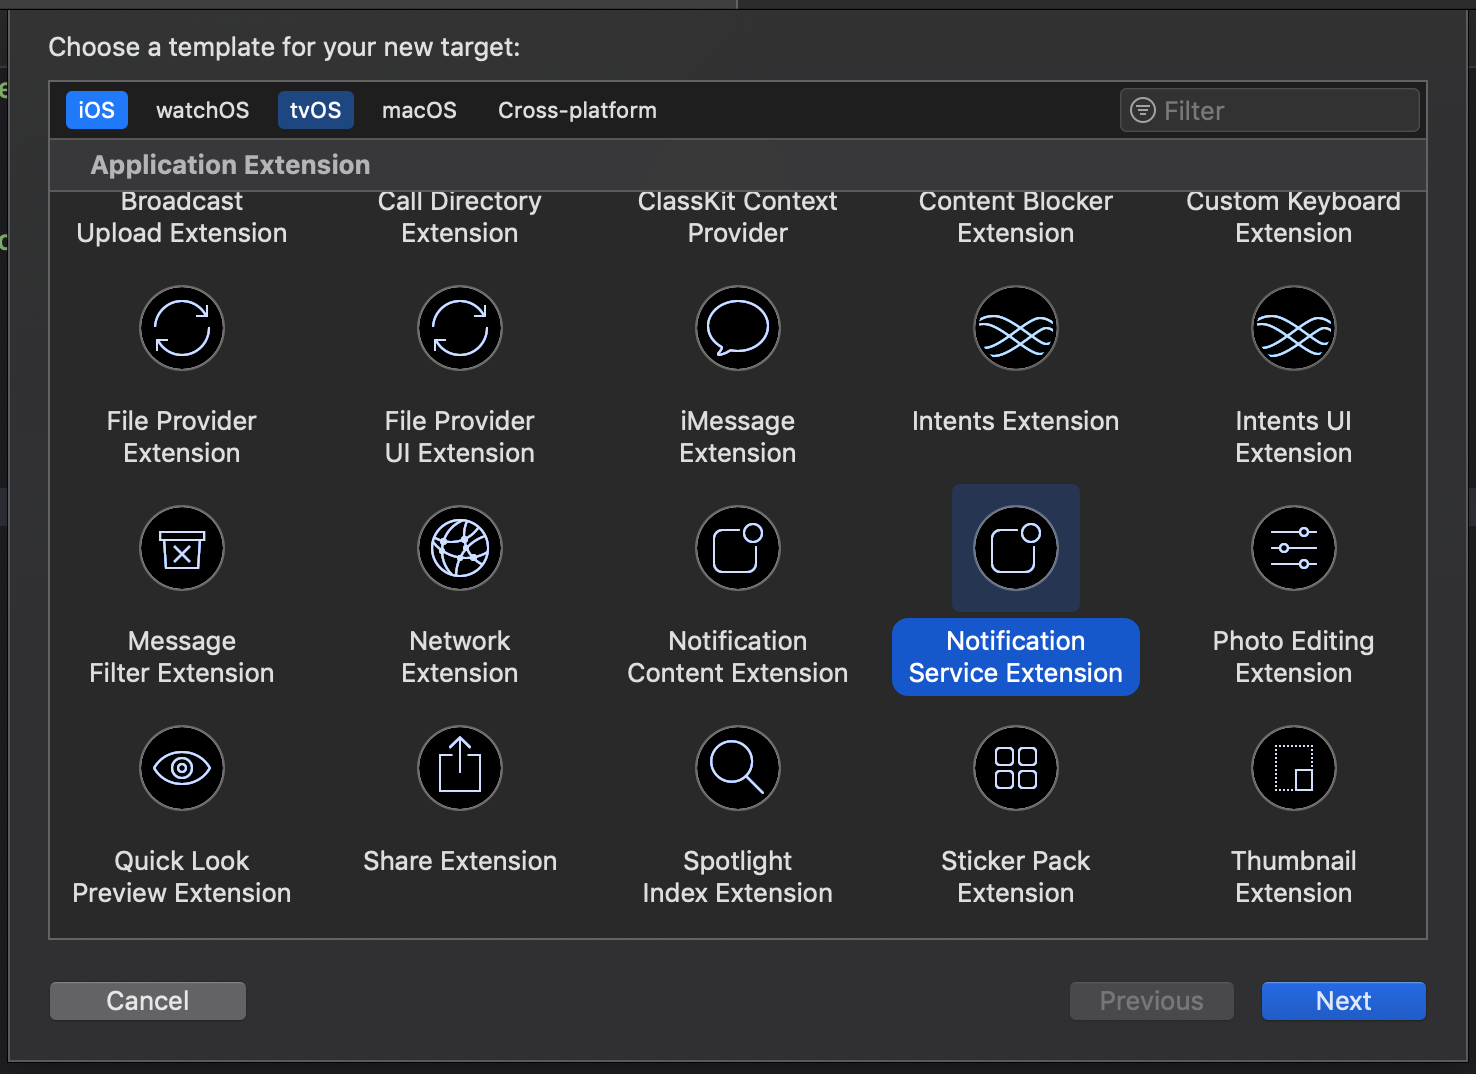
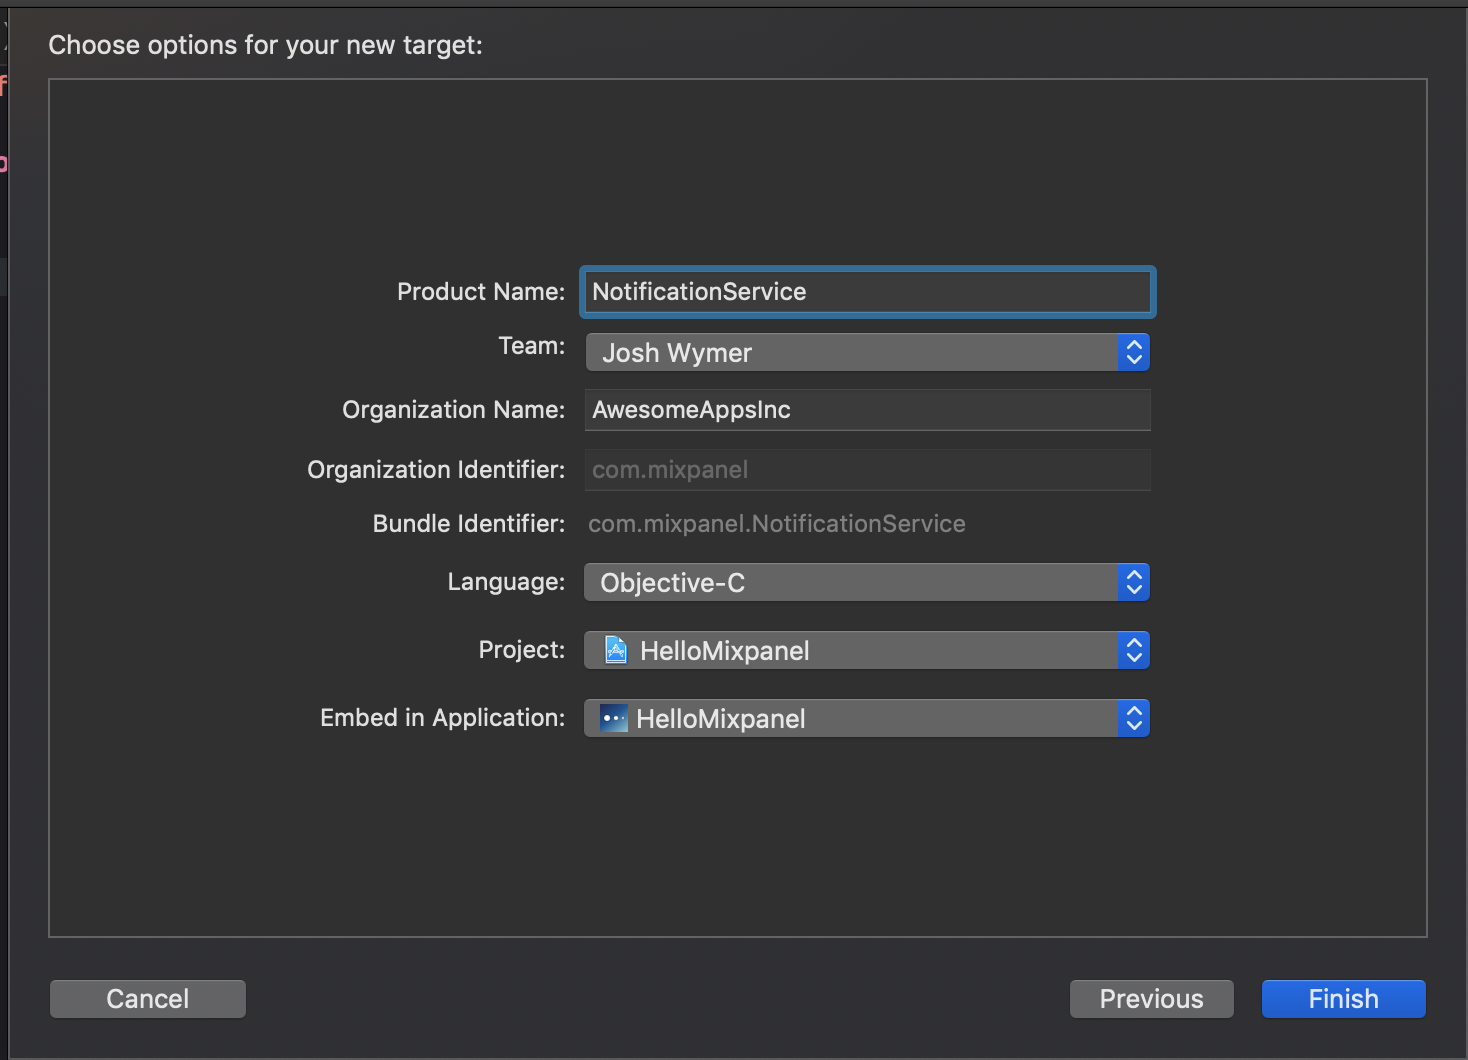
First enable Mixpanel push notifications in your app. Then for Rich Push Notifications, you'll need to integrate your application with the MixpanelNotificationServiceExtension.
The Mixpanel SDK comes with a custom Notification Service Extension used to render rich media, custom action buttons, and track when push notifications are received. In order to enable these features, you will need to integrate it into your application.

Add the following to the end of your Podfile:
target 'NotificationService' do
  use_frameworks!

  pod 'Mixpanel'
end
Then run pod install
Replace the contents of your NotificationService.h file with the following:
@import Mixpanel;

@interface NotificationService : MPNotificationServiceExtension

@end
Replace the contents of your NotificationService.m file with the following:
#import "NotificationService.h"

@implementation NotificationService

@endIn your AppDelegate.m file:
- (void)userNotificationCenter:(UNUserNotificationCenter *)center
didReceiveNotificationResponse:(UNNotificationResponse *)response
         withCompletionHandler:(void (^)(void))completionHandler
{
    if ([Mixpanel isMixpanelPushNotification:response.notification.request.content]) {
        NSLog(@"%@ delegating to Mixpanel SDK handler to handle push notification response...", self);
        [Mixpanel userNotificationCenter:center didReceiveNotificationResponse:response withCompletionHandler:completionHandler];
    } else {
        NSLog(@"%@ Not a Mixpanel push notification....", self);
        completionHandler();
    }
}
This will make sure the tap actions are appropriately handled (open url, deeplink, etc) as well as track whether a notification was tapped or dismissed.
That's it! Your app should now be able to receive rich push notifications from Mixpanel.