This is a Gatsby Shopify Store starter, complete with cart and checkout functionality, and styled with Theme-UI. It is available for configuration and use with any Shopify store.
I built this starter as an opportunity for others to learn and see how a Gatsby Shopify site can be created. I have supplied several comments throughout the code to help explain what the different parts are doing and how to use them.
- Helpful Resources
- Getting Started
- Create a new Shopify store
- Create a private app
- Populate your app with products
- Connect your Gatsby site to Shopify
- Use Shopify to trigger builds in Netlify
- Connect your bank account for transactions
- View the Live Site Here
- Build a Gatsby ecommerce site with Shopify
- Shopify Buy API
- Authenticate a private app with Shopify
- Set up Shopify Payments
- Set up Shopify Webhooks to trigger Netlify Builds
- If you haven't already, create a new Shopify Account and store.
- Personally, I recommend signing up for their partner program where you can experiment with multiple different
Development Storesfor experimentation and transfer ownership to store owners when you are ready. - Login to your account and create a new store
- Your URL should read
yourStoreName.myshopify.com/admin, and you should see something akin to the following: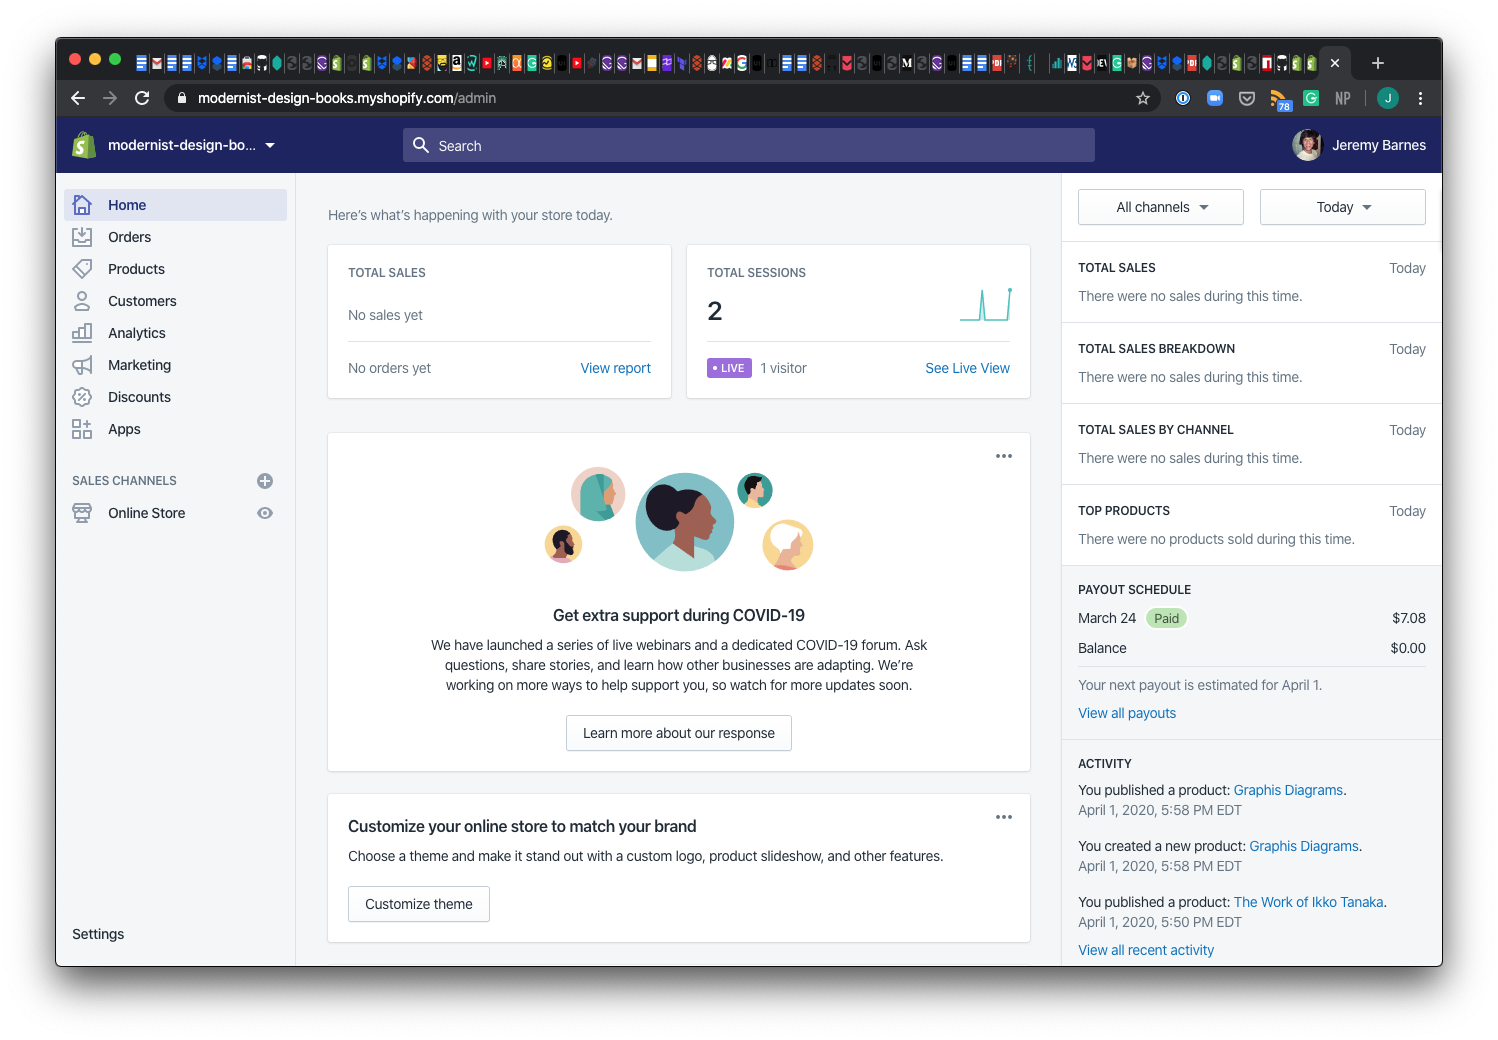

- In your Admin view, create a
private app:- navigate to your
Apps - click the ( undiscoverable )
Manage private appslink at the bottom of yourAppspage. - select
create a new private app, and you should see the following: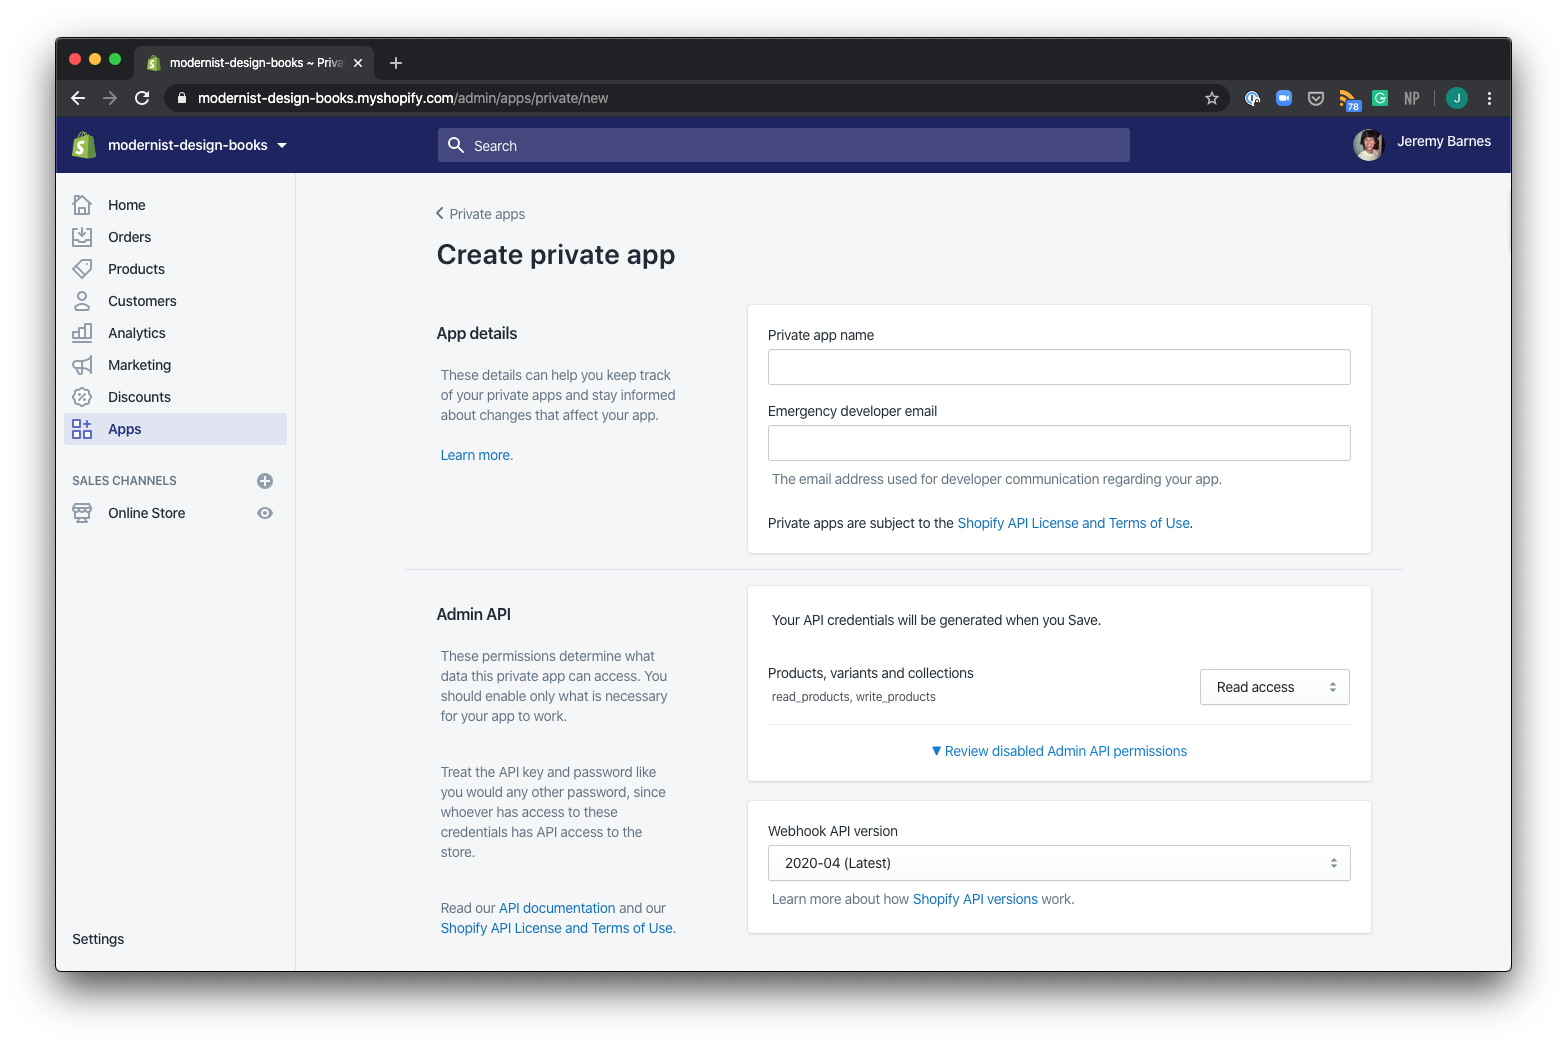
- Provide a
private app name, leave yourAdmin APIcredentials asRead Access - Towards the bottom check "Allow this app to access your storefront data using the Storefront API."
- Check
Read product tagsandRead customer tagsin addition to the default permissions. - Click Save.
- navigate to your

- In your Products view, click add product. For the best experience, I recommend filling in data for the following:
- Title
- Description
- Media
- Pricing ( Price )
- Inventory (Quantity, Track Quantity)
- Shipping (Weight, Country of origin)
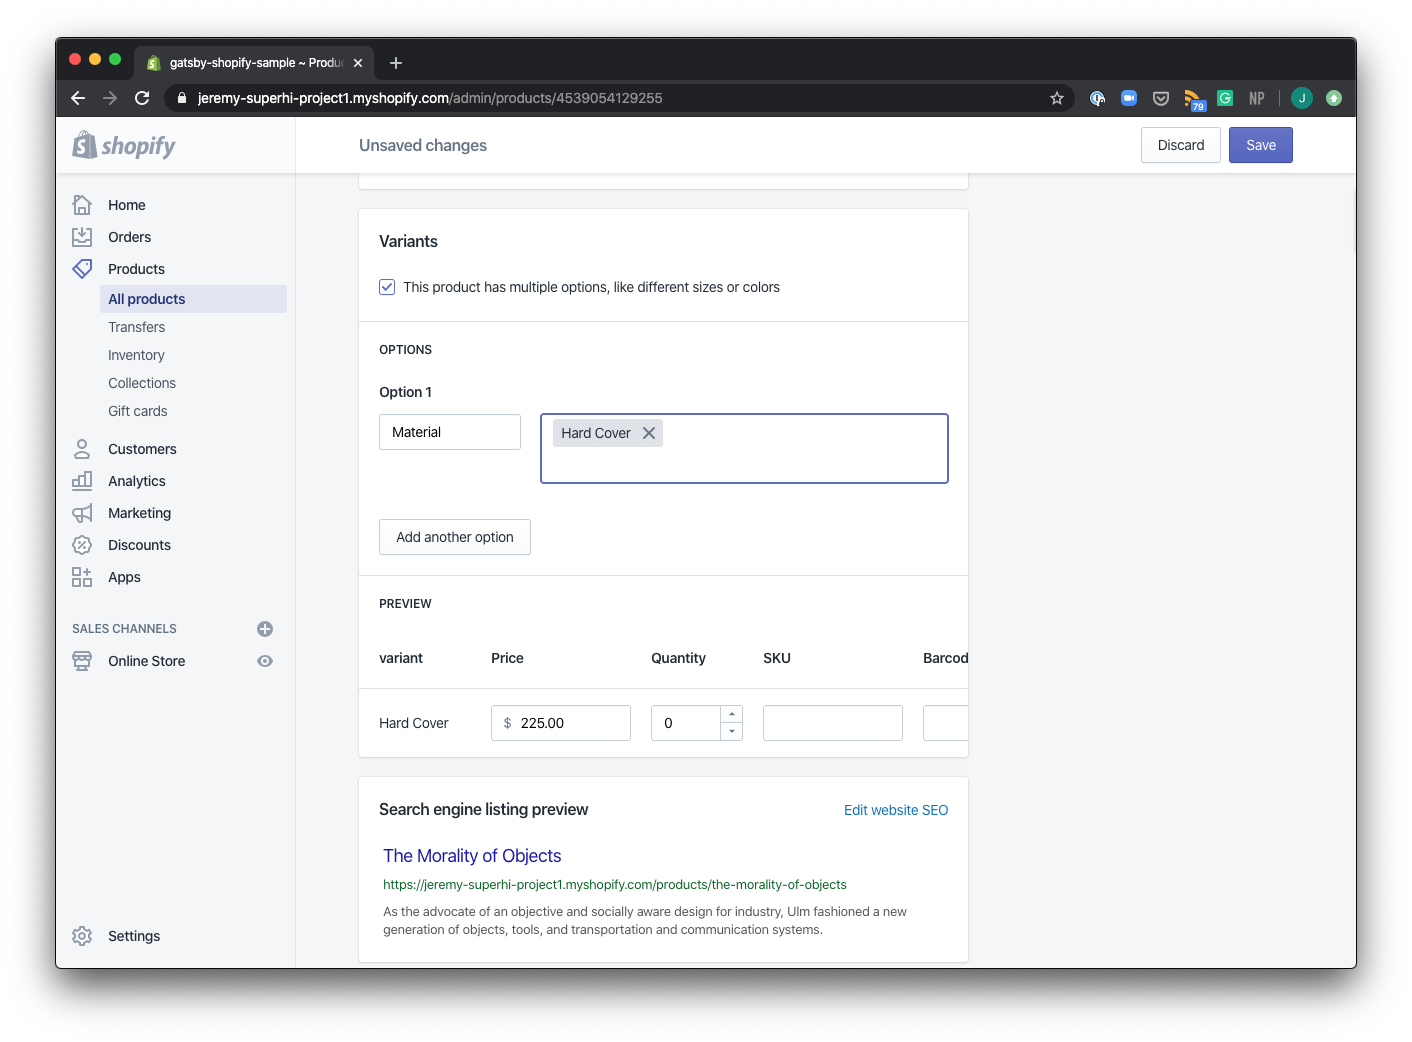
- Variants (Optional, as this starter supports variants)
- I would recommend adding at least 2 products, with perhaps some variants ( i.e. in mine, I added a soft cover and a hard cover, for "materials"), see image below:

-
Let's connect your Shopify store to your Gatsby App now.
-
First clone this repo to your computer.
-
Open this repo in your code editor
-
Run
yarn installto install all dependencies -
Run
yarn develop, and you should now see the following:
-
Now, to pull in your own products from Shopify, all you need to do is update the
.env.developmentvariables in this project. -
The
.envfile will look as follows:
GATSBY_SHOP_NAME = jeremy-superhi-project1 GATSBY_SHOPIFY_ACCESS_TOKEN = a3155a160132b0ae0bf6bc40fa1c0dc0- Your
GATSBY_SHOPIFY_ACCESS_TOKENwill be yourStorefront access tokenfrom your Shopify App. - To access this, in your Shopify Store, navigate to Apps > Private Apps >
<YourPrivateApp>page. Scroll to the bottom and you'll see yourStorefront access token. - Copy this token, and set
GATSBY_SHOPIFY_ACCESS_TOKENequal to yourStorefront access token. - Now, let's update the
GATSBY_SHOPIFY_ACCESS_TOKEN. You can find this by looking at your Shopify Shop URL:https://<yourShopName>.myshopify.com/admin- copy the
<yourShopName>portion from the URL, and setGATSBY_SHOP_NAMEequal to it.
- Now, stop your server and run
gatsby clean. This clears your cache so you don't run into any problems. - Next, run
yarn developand you should see the store populated with your shop items.
-

If you have deployed your site to Netlify using Continuous Integration with Github, then you can also trigger new builds of your site when you make content updates in Shopify. You can accomplish this through Webhooks:
-
In Netlify, navigate to your "Settings" page.
-
Next click on "Build & deploy" and scroll to the "Build Hooks" section
-
Create a new build hook and call it
Shopify Changes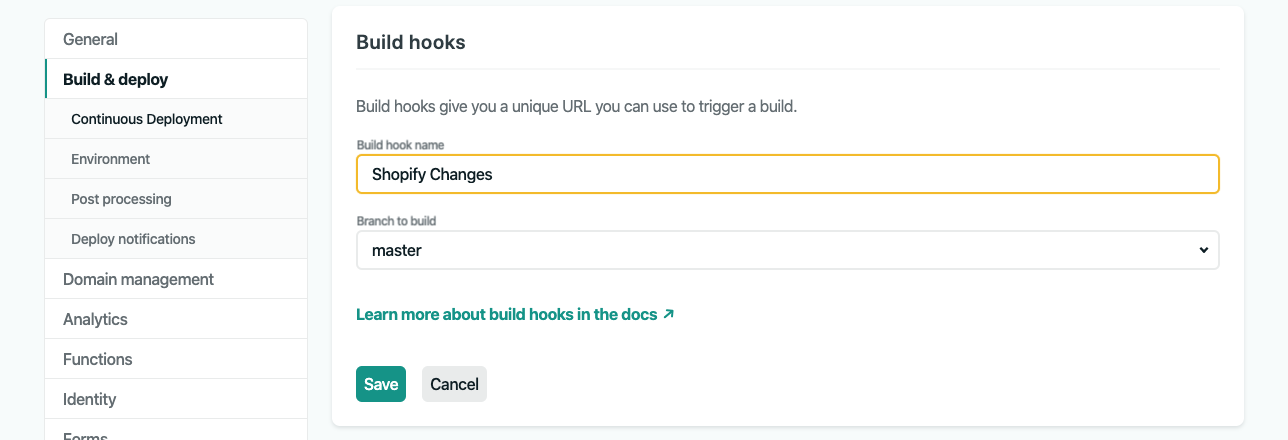
-
Now copy the Build Hook URL to your clipboard.
-
Navigate over to your Shopify Store.
-
In your store, navigate to Settings > Notifications > and Scroll to the bottom.
-
You will see a "Create webhook" button. Click this and select
Product creationfor event type. Paste your Netlify Build Hook URL in theURLfield. Click "Save webhook."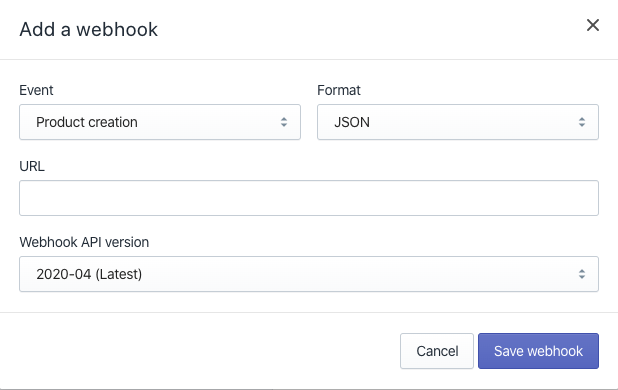
-
Your site will now rebuild every time you publish a new product.
-
I also chose to set up an event for
Product updateandProduct deleteusing the same Netlify Build Hook, so my store updates whenever any of these events are triggered in Shopify.


-
If you're satisfied with your setup, you can connect your bank account for transactions:
-
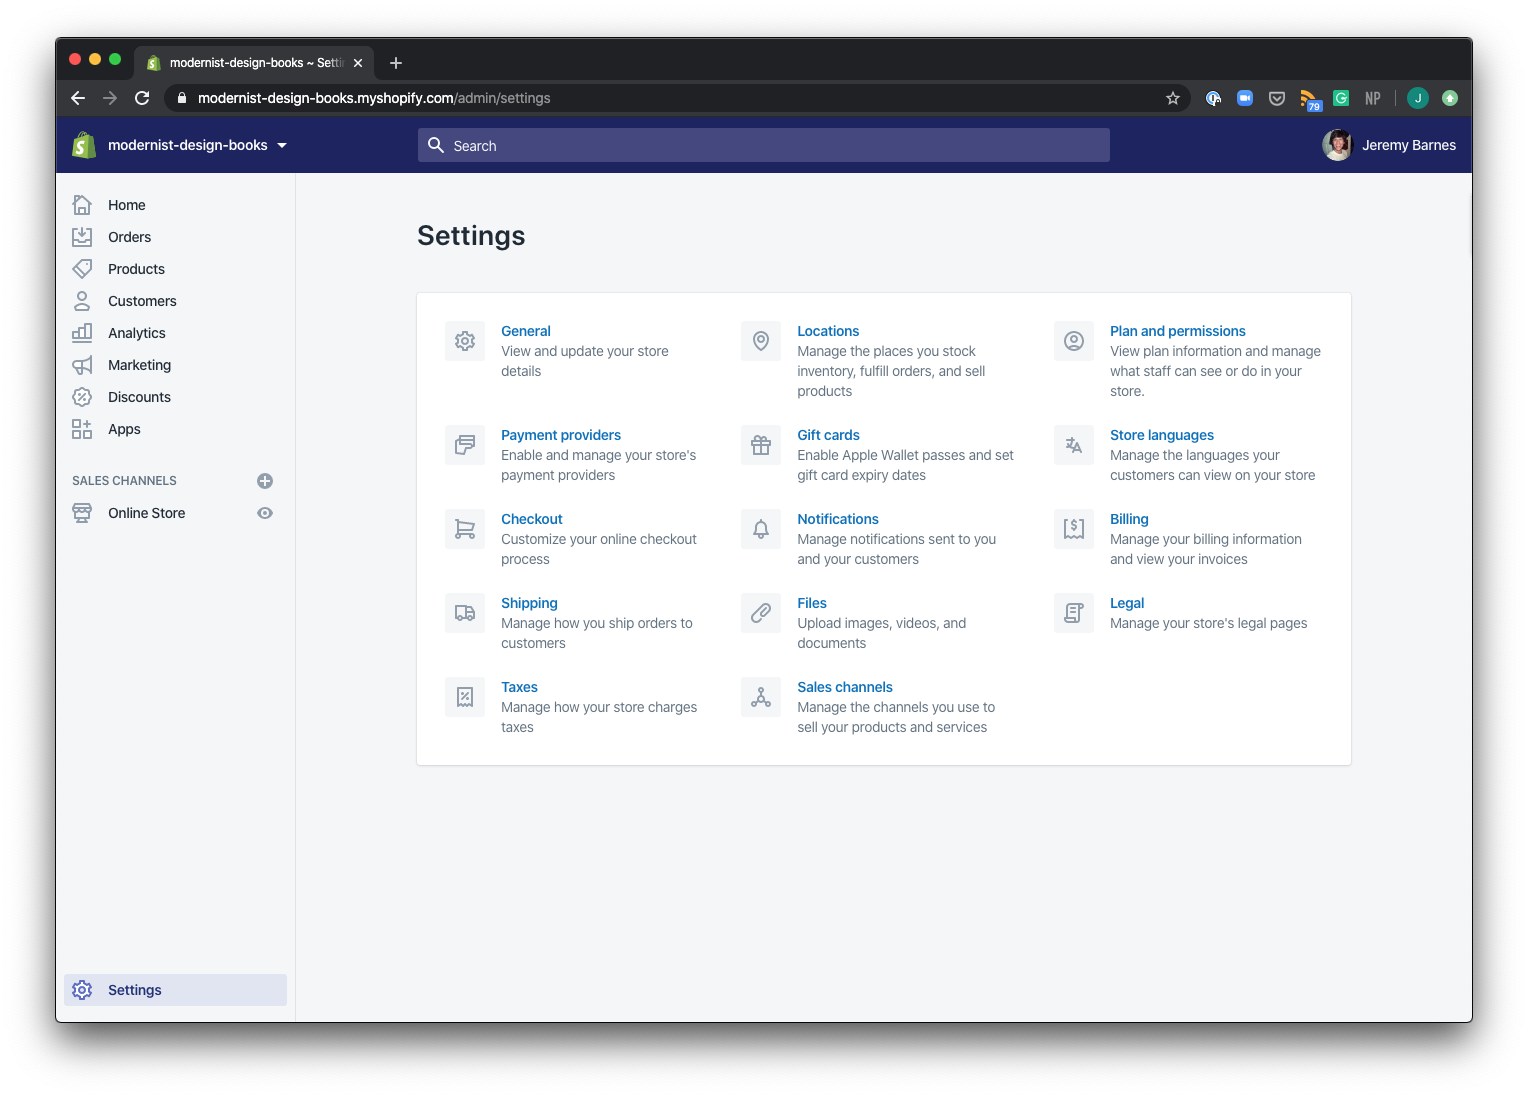
In your Shopify store, click "Settings." You should see the following:
-
Follow these Shopify instructions to set up Payment Providers.
-
For more details around Payment Providers, you can visit Shopify's documentation.
-
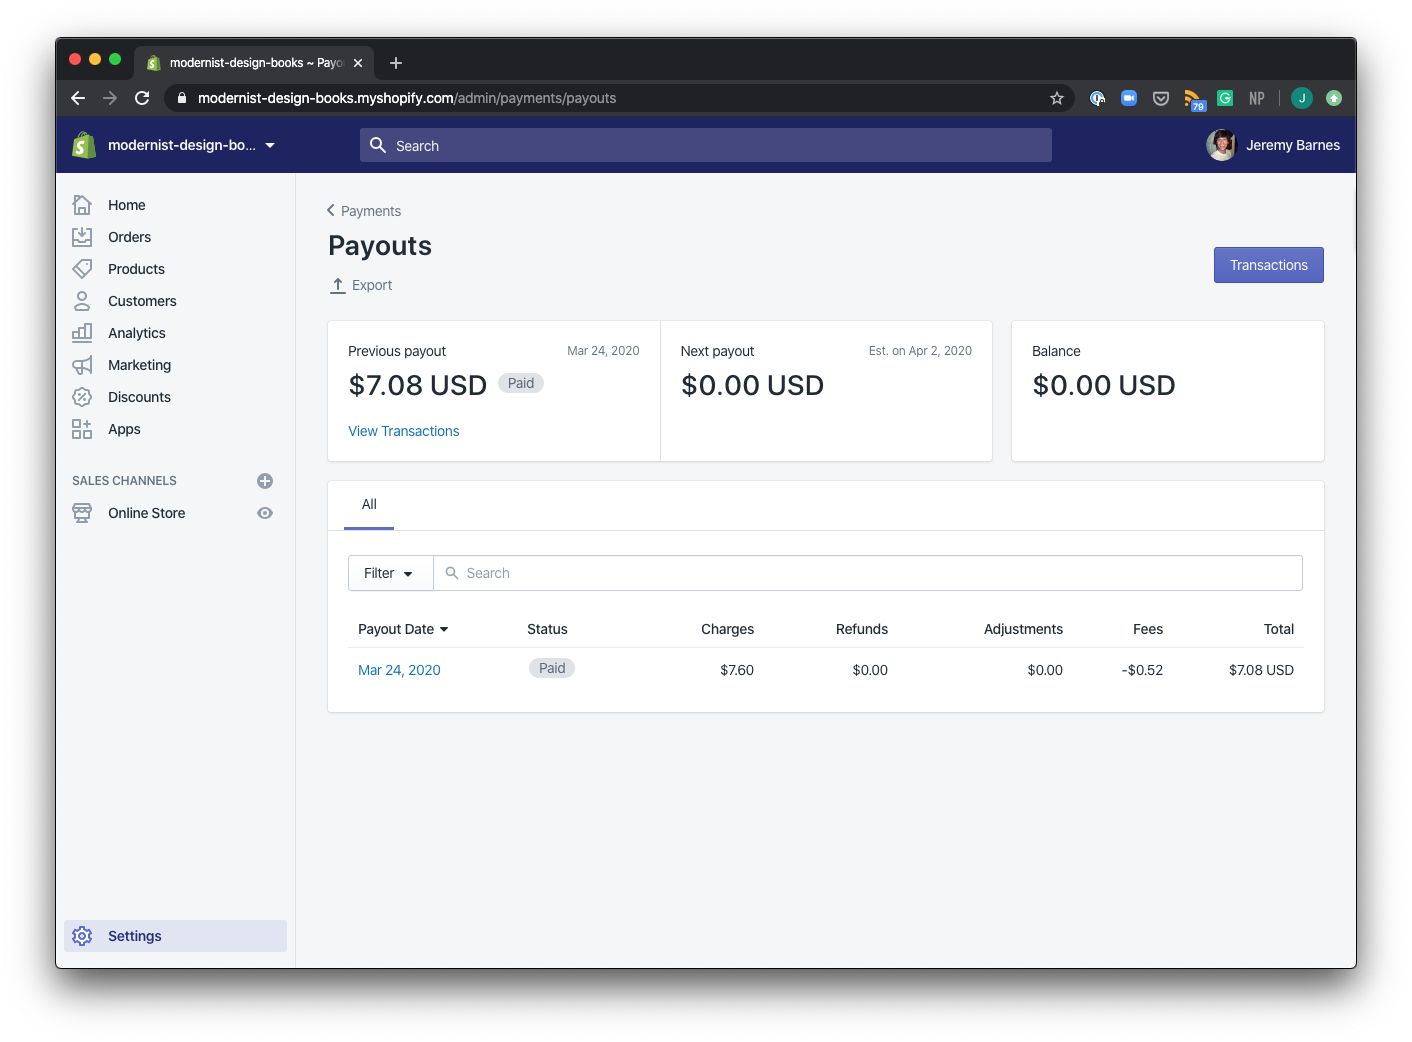
Once you have set up Payment Providers, you can click "View Payouts" to see your transactions and their status.
-
You can also view incoming orders through your "Orders" tab in the left nav.
-

