ESP branding looks like to be a chaotic mess.
You can clearly see Espressif brand logo on the board, but it's called ESP8266 Wemos D1 Mini?
I bought it on Amazon.de.
Datasheet can be found here.
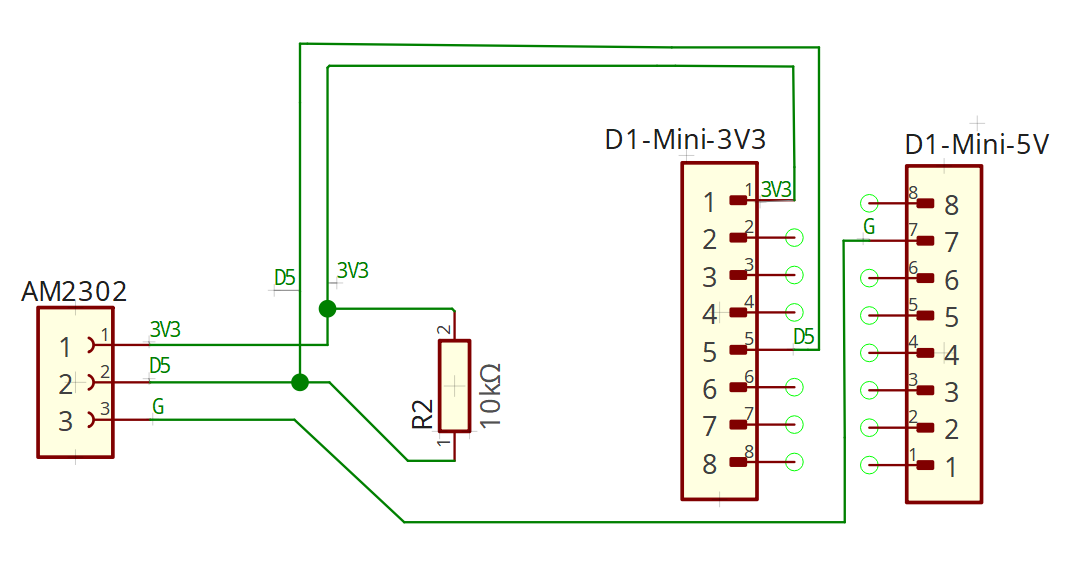
AM2302 is the same a s DHT22, but with a plastic cover.
Datasheet can be found here.
Copy and paste credentials.h-SAMPLE to credentials.h and fill in your credentials appropriately,
but double check to do not store credentials in git.
-
Install VSCode
-
Install Arduino CLI
- Put the
arduino-cli.exefor example in
C:\Program Files\Arduino-CLIand run
set PATH=%PATH%;C:\Program Files\Arduino-CLI
- Put the
-
and/or install Arduino IDE, but I prefer CLI
-
Install the Arduino extension
-
Press
F1and typeSelect BoardselectArduino: Board Manager. ExpandTypeand select ESP8266. Select the latest version and install it. -
Press
F1and typeSelect PortselectArduino: Select Serial Port. Select the port your ESP8266 is connected to. -
Press
Ctrl+Shift+Ifor rebuilding IntelliSense Configuration. -
Press
Ctrl+Shift+Rfor compiling the sketch. This will generate a new Arduino configuration in thec_cpp_properties.jsonfile. Then reload VSCode. -
Use
Ctrl+Alt+Uto upload the sketch to the board.
- Press
F1and typeOpen Serial MonitorselectArduino: Open Serial Monitor.
Library management is only easy, when those are provided by Arduino Library Manager, otherwise it's a bit annoying. Further readings!
Download the HARestAPI v0.3.2 library and extract its content to C:\Users\%USERNAME%\Documents\Arduino\libraries\HARestAPI.
Download the ESPAsyncWebServer-master library and extract its content to C:\Users\%USERNAME%\Documents\Arduino\libraries\ESPAsyncWebServer.
The sensor will be automatically added as entities in Home Assistant, but not as a device.
Entity IDs will be
sensor.esp8266_thcs_{n}_temperature,
sensor.esp8266_thcs_{n}_humidity and
sensor.esp8266_thcs_{n}_wifi_rssi.
{n} is the number of the device, starting with 1 and can be configured in credentials.h, see #define SECRET_DEVICE_NAME.
I am using a horizontal-stack card:
title: Garage
type: horizontal-stack
cards:
  - type: tile
    entity: sensor.esp8266_thcs_1_temperature
    name: Temperature
    icon: mdi:thermometer
    state_content:
      - state
      - last-changed
    vertical: true
  - type: tile
    name: Humidity
    icon: mdi:water-percent
    show_entity_picture: false
    vertical: true
    hide_state: false
    state_content:
      - state
      - last-changed
    entity: sensor.esp8266_thcs_1_humidity
  - type: gauge
    entity: sensor.esp8266_thcs_1_wifi_rssi
    unit: dBm
    name: WiFi RSSI
    needle: true
    max: -30
    severity:
      green: -50
      yellow: -70
      red: -90
min: -90In credentials.h you need to set all #defines to your needs.
Depending on your SECRET_DEVICE_NAME and SECRET_WEB_SERVER_PORT the OTA update URL will be
http://{SECRET_DEVICE_NAME}.local:{SECRET_WEB_SERVER_PORT}/update like so
http://esp8266-thcs-1.local:80/update.
Make sure to adjust your .vscode/arduino.json file with:
{
  ...,
  "output": "build"
}
After the first upload, you can use the OTA update on the same network with http://esp8266-thcs-1.local:80/update and select the build\\main.ino.bin file.
