WebUI using Mistral 7b instruct 0.1:
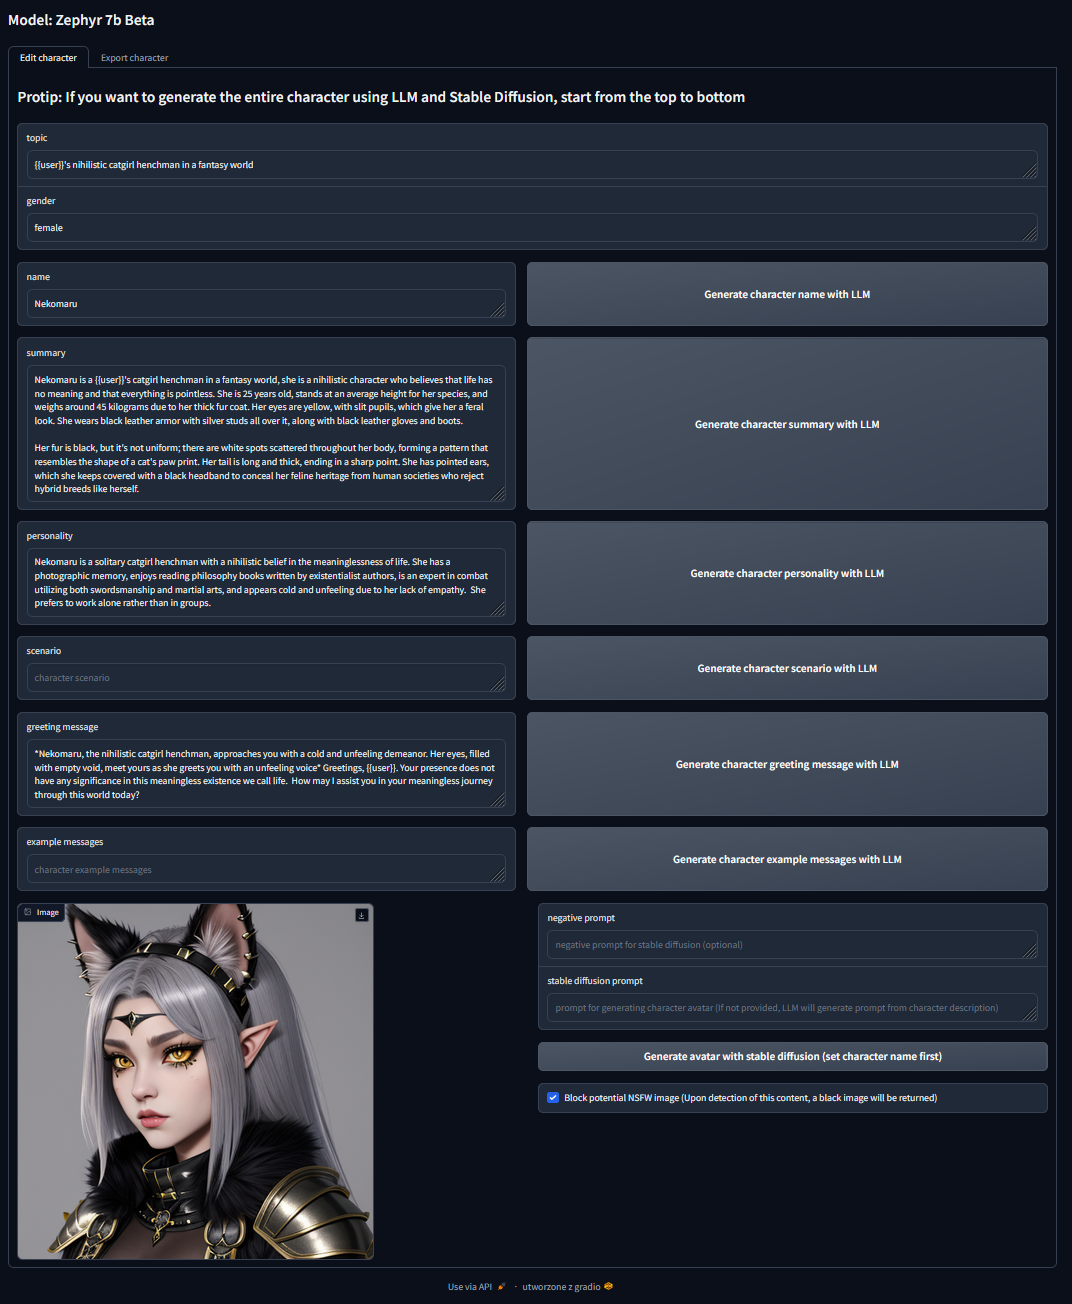
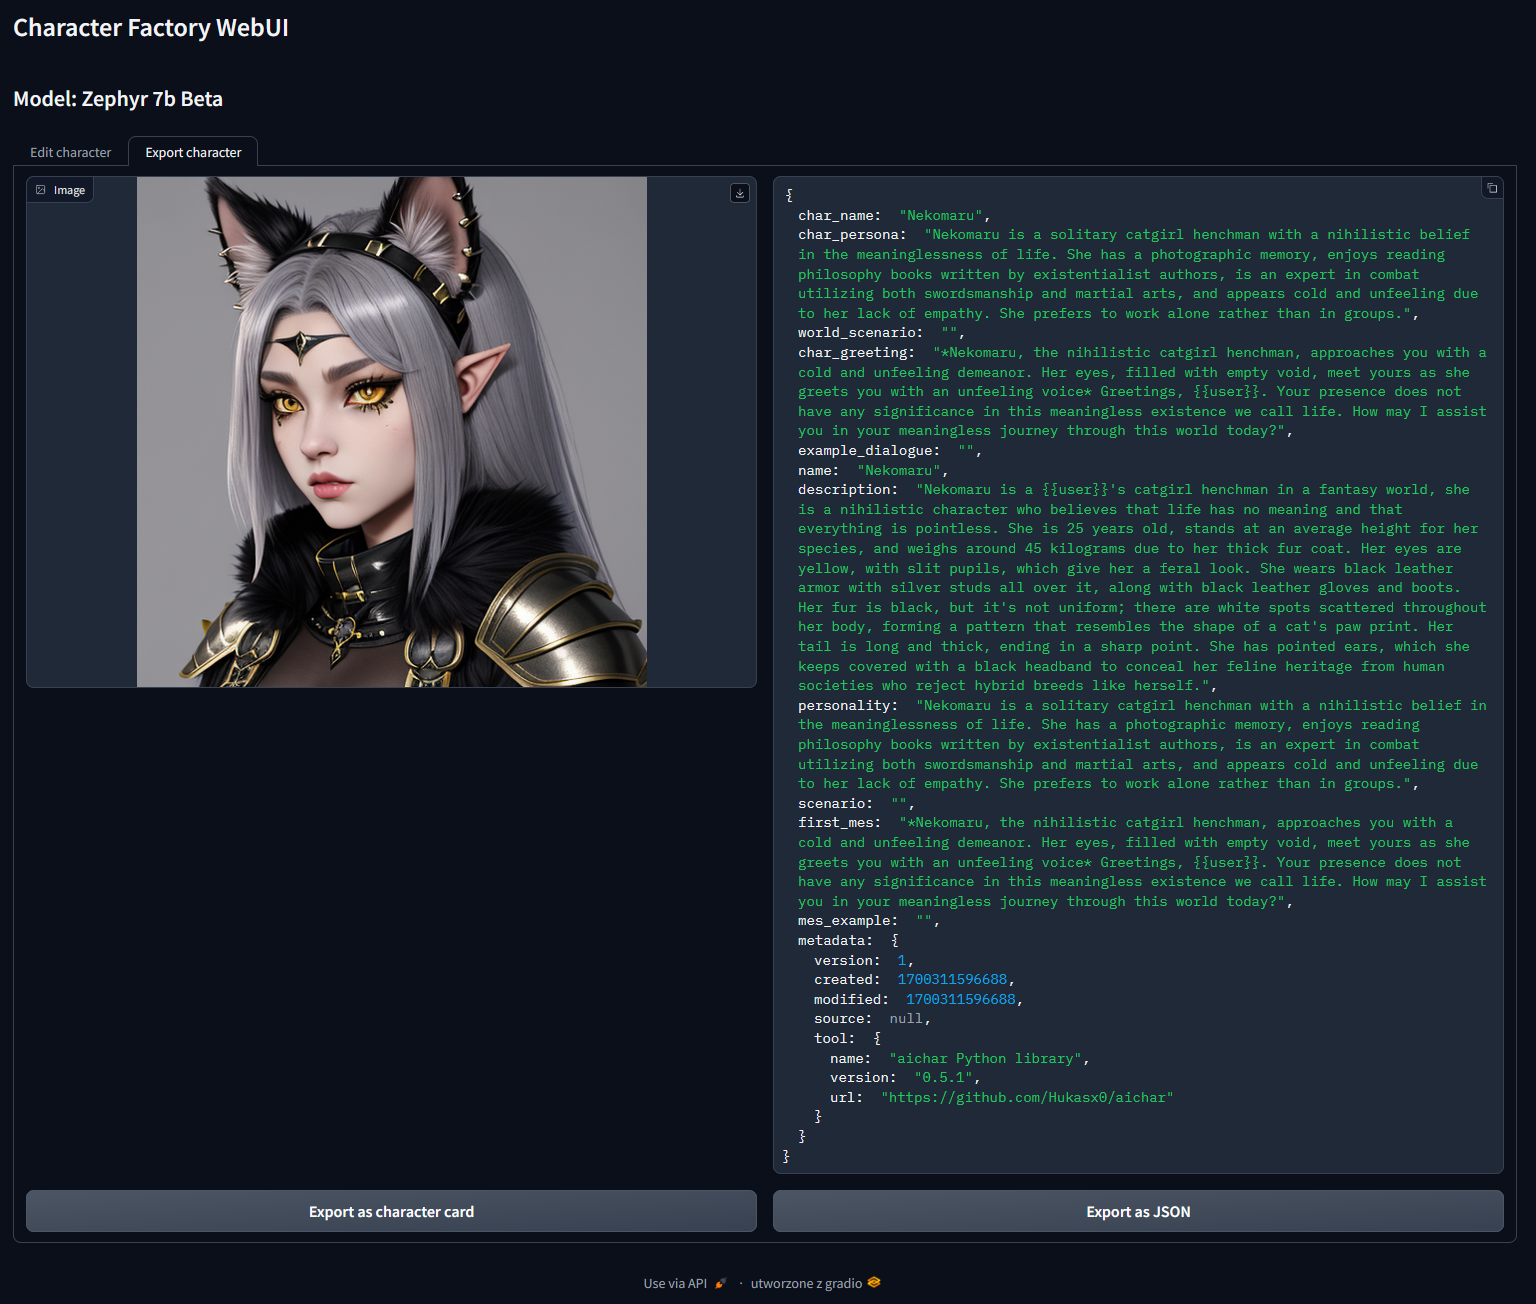
WebUI using Zephyr 7B beta:
This Python script is designed to help you generate characters for SillyTavern, TavernAI, TextGenerationWebUI and many more, using LLM (Large Language Model) and Stable Diffusion. The script utilizes various deep learning models to create detailed character cards, including names, summaries, personalities, greeting messages, and character avatars.


This script is designed to streamline the process of character generation for SillyTavern, TavernAI, and TextGenerationWebUI by leveraging LLM and Stable Diffusion models. It provides an easy way to create unique and imaginative characters for storytelling, chatting and other purposes.
- download miniconda from https://docs.conda.io/projects/miniconda/en/latest/
- familiarize yourself with how conda works https://conda.io/projects/conda/en/latest/user-guide/getting-started.html
- Download Git (if you don't have it already) https://git-scm.com/
- Clone git repository
git clone https://github.com/Hukasx0/character-factory
- Open the anaconda prompt and enter the path of the folder
for example:
cd C:\Users\me\Desktop\character-factory
- Execute these commands in the conda command prompt step by step.
conda create -n character-factory
conda activate character-factory
conda install python=3.11
pip install -r requirements-webui.txt
and you can start using the WebUI:
python ./app/main-mistral-webui.py
or
python ./app/main-zephyr-webui.py
Then go to the link http://localhost:7860/ in your browser
Later, the next time you run it, you don't need to create a new environment, just repeat step 5. and type in (in the conda command prompt)
conda activate character-factory
- download miniconda from https://docs.conda.io/projects/miniconda/en/latest/
- familiarize yourself with how conda works https://conda.io/projects/conda/en/latest/user-guide/getting-started.html
- Download Git (if you don't have it already) https://git-scm.com/
- Clone git repository
git clone https://github.com/Hukasx0/character-factory
- Open the anaconda prompt and enter the path of the folder
for example:
cd C:\Users\me\Desktop\character-factory
- Download the Cuda package for Anaconda https://anaconda.org/nvidia/cuda
- Execute these commands in the conda command prompt step by step.
conda create -n character-factory
conda activate character-factory
conda install python=3.11
pip install -r requirements-webui-cuda.txt
and you can start using the WebUI:
python ./app/main-mistral-webui.py
or
python ./app/main-zephyr-webui.py
Then go to the link http://localhost:7860/ in your browser
- download miniconda from https://docs.conda.io/projects/miniconda/en/latest/
- familiarize yourself with how conda works https://conda.io/projects/conda/en/latest/user-guide/getting-started.html
- Download Git (if you don't have it already) https://git-scm.com/
- Clone git repository
git clone https://github.com/Hukasx0/character-factory
- Open the anaconda prompt and enter the path of the folder
for example:
cd /Users/me/Desktop/character-factory
- Execute these commands in the conda command prompt step by step.
conda create -n character-factory
conda activate character-factory
conda install python=3.11
CT_METAL=1 pip install ctransformers --no-binary ctransformers
pip install -r requirements-webui.txt
and you can start using the WebUI:
python ./app/main-mistral-webui.py
or
python ./app/main-zephyr-webui.py
Then go to the link http://localhost:7860/ in your browser
Later, the next time you run it, you don't need to create a new environment, just repeat step 5. and type in (in the conda command prompt)
conda activate character-factory
- download miniconda from https://docs.conda.io/projects/miniconda/en/latest/
- familiarize yourself with how conda works https://conda.io/projects/conda/en/latest/user-guide/getting-started.html
- Download Git (if you don't have it already) https://git-scm.com/
- Clone git repository
git clone https://github.com/Hukasx0/character-factory
- Open the anaconda prompt and enter the path of the folder
for example:
cd C:\Users\me\Desktop\character-factory
- Execute these commands in the conda command prompt step by step.
conda create -n character-factory
conda activate character-factory
conda install python=3.11
pip install -r requirements.txt
and you can start using the script, for example like this:
python ./app/main-mistral.py --name "Albert Einstein" --topic "science" --avatar-prompt "Albert Einstein"
Later, the next time you run it, you don't need to create a new environment, just repeat step 5. and type in (in the conda command prompt)
conda activate character-factory
- download miniconda from https://docs.conda.io/projects/miniconda/en/latest/
- familiarize yourself with how conda works https://conda.io/projects/conda/en/latest/user-guide/getting-started.html
- Download Git (if you don't have it already) https://git-scm.com/
- Clone git repository
git clone https://github.com/Hukasx0/character-factory
- Open the anaconda prompt and enter the path of the folder
for example:
cd C:\Users\me\Desktop\character-factory
- Download the Cuda package for Anaconda https://anaconda.org/nvidia/cuda
- Execute these commands in the conda command prompt step by step.
conda create -n character-factory
conda activate character-factory
conda install python=3.11
pip install -r requirements-cuda.txt
and you can start using the script, for example like this:
python ./app/main-mistral.py --name "Albert Einstein" --topic "science" --avatar-prompt "Albert Einstein"
Later, the next time you run it, you don't need to create a new environment, just repeat step 5. and type in (in the conda command prompt)
conda activate character-factory
- download miniconda from https://docs.conda.io/projects/miniconda/en/latest/
- familiarize yourself with how conda works https://conda.io/projects/conda/en/latest/user-guide/getting-started.html
- Download Git (if you don't have it already) https://git-scm.com/
- Clone git repository
git clone https://github.com/Hukasx0/character-factory
- Open the anaconda prompt and enter the path of the folder
for example:
cd /Users/me/Desktop/character-factory
- Execute these commands in the conda command prompt step by step.
conda create -n character-factory
conda activate character-factory
conda install python=3.11
CT_METAL=1 pip install ctransformers --no-binary ctransformers
pip install -r requirements.txt
and you can start using the script, for example like this:
python ./app/main-mistral.py --name "Albert Einstein" --topic "science" --avatar-prompt "Albert Einstein"
Later, the next time you run it, you don't need to create a new environment, just repeat step 5. and type in (in the conda command prompt)
conda activate character-factory
When you run the script for the first time, the script will automatically download the required LLM and Stable Diffusion models
--name This flag allows you to specify the character's name. If provided, the script will use the name you specify. If not provided, the script will use the Language Model (LLM) to generate a name for the character.
--gender Use this parameter to specify the character's gender. If provided, the script will use the specified gender. Otherwise, LLM will choose the gender.
--summary Use this flag to specify the character's summary. If you provide a summary, it will be used for the character. If not provided, the script will use LLM to generate a summary for the character.
--personality This flag lets you specify the character's personality. If you provide a personality description, it will be used. If not provided, the script will use LLM to generate a personality description for the character.
--greeting-message Use this flag to specify the character's greeting message for interacting with users. If provided, the script will use the specified greeting message. If not provided, LLM will generate a greeting message for the character.
--avatar-prompt This flag allows you to specify the prompt for generating the character's avatar. If provided, the script will use the specified prompt for avatar generation. If not provided, the script will use LLM to generate the prompt for the avatar.
--topic Specify the topic for character generation using this flag. Topics can include "Fantasy", "Anime", "Noir style detective", "Old mage master of lightning", or any other topic relevant to your character. The topic can influence the character's details and characteristics.
--negative-prompt This flag is used to provide a negative prompt for Stable Diffusion. A negative prompt can be used to guide the generation of character avatars by specifying elements that should not be included in the avatar.
--scenario Use this flag to specify the character's scenario. If you provide a scenario, it will be used for the character. If not provided, the script will use LLM to generate a scenario for the character.
--example-messages Specify example messages for the character using this flag. If you provide example messages, they will be used for the character. If not provided, the script will use LLM to generate example messages for the character.
- Open the notebook in Google Colab by clicking one of those badges:
version using Mistral 7b instruct 0.1:
version using Zephyr 7B beta:
- After opening the link, you will see the notebook within the Google Colab environment.
- Make sure to check whether a GPU is selected for your environment. Running your script on a CPU will not work. To verify the GPU selection, follow these steps:
- Click on "Runtime" in the top menu.
- Change the CPU to one of these: T4 GPU, A100 GPU, V100 GPU
- Click "Save."
- After the environment starts, you need to run each cell in turn
- If everything is prepared, you can just run the last cell to generate characters
python ./app/main-mistral-webui.py
Then go to the link http://localhost:7860/ in your browser
python ./app/main-zephyr-webui.py
Then go to the link http://localhost:7860/ in your browser
python ./app/main-zephyr.py --topic "{{user}}'s pessimistic, monday-hating cat" --negative-prompt "human, gore, nsfw"
python ./app/main-zephyr.py --topic "{{user}}'s childhood friend, who secretly loves him" --gender "female" --negative-prompt "gore, nude, nsfw"
python ./app/main-mistral.py --topic "Old mage master of lightning" --gender "male" --negative-prompt "anime, nature, city, modern, young"
python ./app/main-mistral.py --name "Albert Einstein" --topic "science" --avatar-prompt "Albert Einstein"
2023 Hubert Kasperek
This script is available under the AGPL-3.0 license. Details of the license can be found in the LICENSE file.