Good new Hackers !
Our client demands an update for the artistify application. The frontend will now be developed with ReactJs. Some additional features may also be implemented.
- User favorites
- Search bar
- Comments
You'll find the base source code here : base repo
Clone it and get ready for ruuuumble !!!!
The repository contains 2 main folders :
- client (frontend A.K.A the react application)
- server (backend A.K.A the express application)
You will need 2 separate terminal windows to manage the 2 ends of the stack.
Do you remember express, mongo, dotenv, mongoose and friends ?
Yes, No, Maybe ?
Don't worry : it's time to refresh your memory :)
Start by checking the /server/package.json to get an overview of the project.
The usual shell process :
once in the /server folder, run the following command to install required dependencies.
npm install
Create a .env file directly in /server, like so:
CLIENT_URL = http://localhost:3000
CLOUDINARY_NAME = your-name
CLOUDINARY_KEY = your-cloudinary-key
CLOUDINARY_SECRET = your-cloudinary-secret
MONGO_URI = mongodb://localhost/your-db-name
PORT = 5000
SECRET_SESSION = a-long-string-that-should-be-hard-to-crack
Some scripts in the package.json facilitate the seeding process.
npm run seed:all
The one above will drop all existing collections and reseed with a fresh dataset.
Don't forget to ctrl + c to kill the shell once the seeding is done !
A script is ready to seed each resource type individually !
npm run seed:artist
npm run seed:album
npm run seed:style
npm run seed:label
You can reuse those tools as many times as needed during the workshop.
Take a look to the package.json. Notice any new library ? Yes : cors was not there during module 2. This acronym stands for Cross Origin Resource Sharing. In a nutshell, it's meant to allow another domain name (here the client application), to communicate with the backend through AJAX requests.
The configuration of this middleware is pretty straight forward :
const corsOptions = {
  origin: [process.env.CLIENT_URL],
  credentials: true,
  optionsSuccessStatus: 200
};

app.use(cors(corsOptions));
Implement the CORS configuration starting line 43 of /server/app.js
Learn more abour CORS:
You should be ready to launch the server.
npm run dev
Pay attention to the backend terminal to see if the app launched correctly.
All the models files are already provided and required. 👍
All the routers files are already provided and required. 👍
You'll need to code the actual routes though. 🤓
Today you'll only deal with READ and DELETE. 😮💨
IMPORTANT : all the backend routes are prefixed with /api ❗️❗️❗️
IMPORTANT : all the routes return a HTTP response formated in JSON. ❗️❗️❗️
This file is located in /server/routes/artists.js.
| Route | VERB | HTTP status | Description |
|---|---|---|---|
| /artists | GET | 200 OR 500 | get all artists |
| /artists/:id | GET | 200 OR 500 | get one artist by id |
| /artists/:id | DELETE | 200 OR 500 | delete one artist by id |
Should populate:
- style
This file is located in /server/routes/albums.js.
| Route | VERB | HTTP status | Description |
|---|---|---|---|
| /albums | GET | 200 OR 500 | get all albums |
| /albums/:id | GET | 200 OR 500 | get one album by id |
| /albums/:id | DELETE | 200 OR 500 | delete one album by id |
Should populate:
- artist
- artist.style
- label
This file is located in /server/routes/styles.js.
| Route | VERB | HTTP status | Description |
|---|---|---|---|
| /styles | GET | 200 OR 500 | get all styles |
| /styles/:id | GET | 200 OR 500 | get one style by id |
| /styles/:id | DELETE | 200 OR 500 | delete one style by id |
This file is located in /server/routes/labels.js.
| Route | VERB | HTTP status | Description |
|---|---|---|---|
| /labels | GET | 200 OR 500 | get all labels |
| /labels/:id | GET | 200 OR 500 | get one label by id |
| /labels/:id | DELETE | 200 OR 500 | delete one label by id |
Hints on HTTP verbs and statuses:
- https://developer.mozilla.org/fr/docs/Web/HTTP/Methods/GET
- https://developer.mozilla.org/fr/docs/Web/HTTP/Methods/DELETE
Postman is a really nice tool to design, test and document REST APIs.
Create an artistify-react collection and implement the routes you created on the previous iteration, for the Albums and Artists collections.
Hint: Use the course card for more infos.
The usual shell process :
once in the /client folder, run the following command to install required dependencies.
npm install
Create a .env file directly in /client, like so:
REACT_APP_BACKEND_URL = http://localhost:5000
Yes : react applications can also have environment variables !
Note that you MUST prefix ALL the keys with REACT_APP_{KEY}.
ex: REACT_APP_MY_PAID_API_TOKEN = abcdefg1234
This value is used by the /client/api/APIHandler.js file, coming soon ; )
npm start
Pay attention to the frontend terminal to see if the app launched correctly.
Have a quick look to the available pages.
IMPORTANT
Some widgets are provided in /client/src/components.
You are free to reuse some/all or choose your own file/folder organisation.
A tool is provided in /client/api/handler.js to make AJAX exchanges from client to server easier. The main idea is to avoid rewriting the axios instance's configuration multiple times. Be curious and check this file !
Here is an implementation example :
import APIHandler from "./api/APIHandler.js"

APIHandler.get("/api/albums")
.then({data} => console.log(data))
.catch(err => console.error(err));
Time to connect the dots. The front is ready to receive some datas from the backend
On the public artists page (http://localhost:3000/artists)
- Fetch all artists from the database.
- If the artists list is empty, display an info message in the list.
- Else, display a card for each artist.
- Provide a router to="/artists/artist.id" />,
- Leading to separate component ArtistDetails component.
On the public albums page (http://localhost:3000/albums)
- Fetch all albums from the database.
- If the albums list is empty, display an info message in the list.
- Else, display a card for each album.
- Provide a router to="albums/album.id" />,
- Leading to separate component AlbumDetails component.
Note: We will handle the icon tomorrow. Trick: Why not try using CSS grid to organise the results display ?
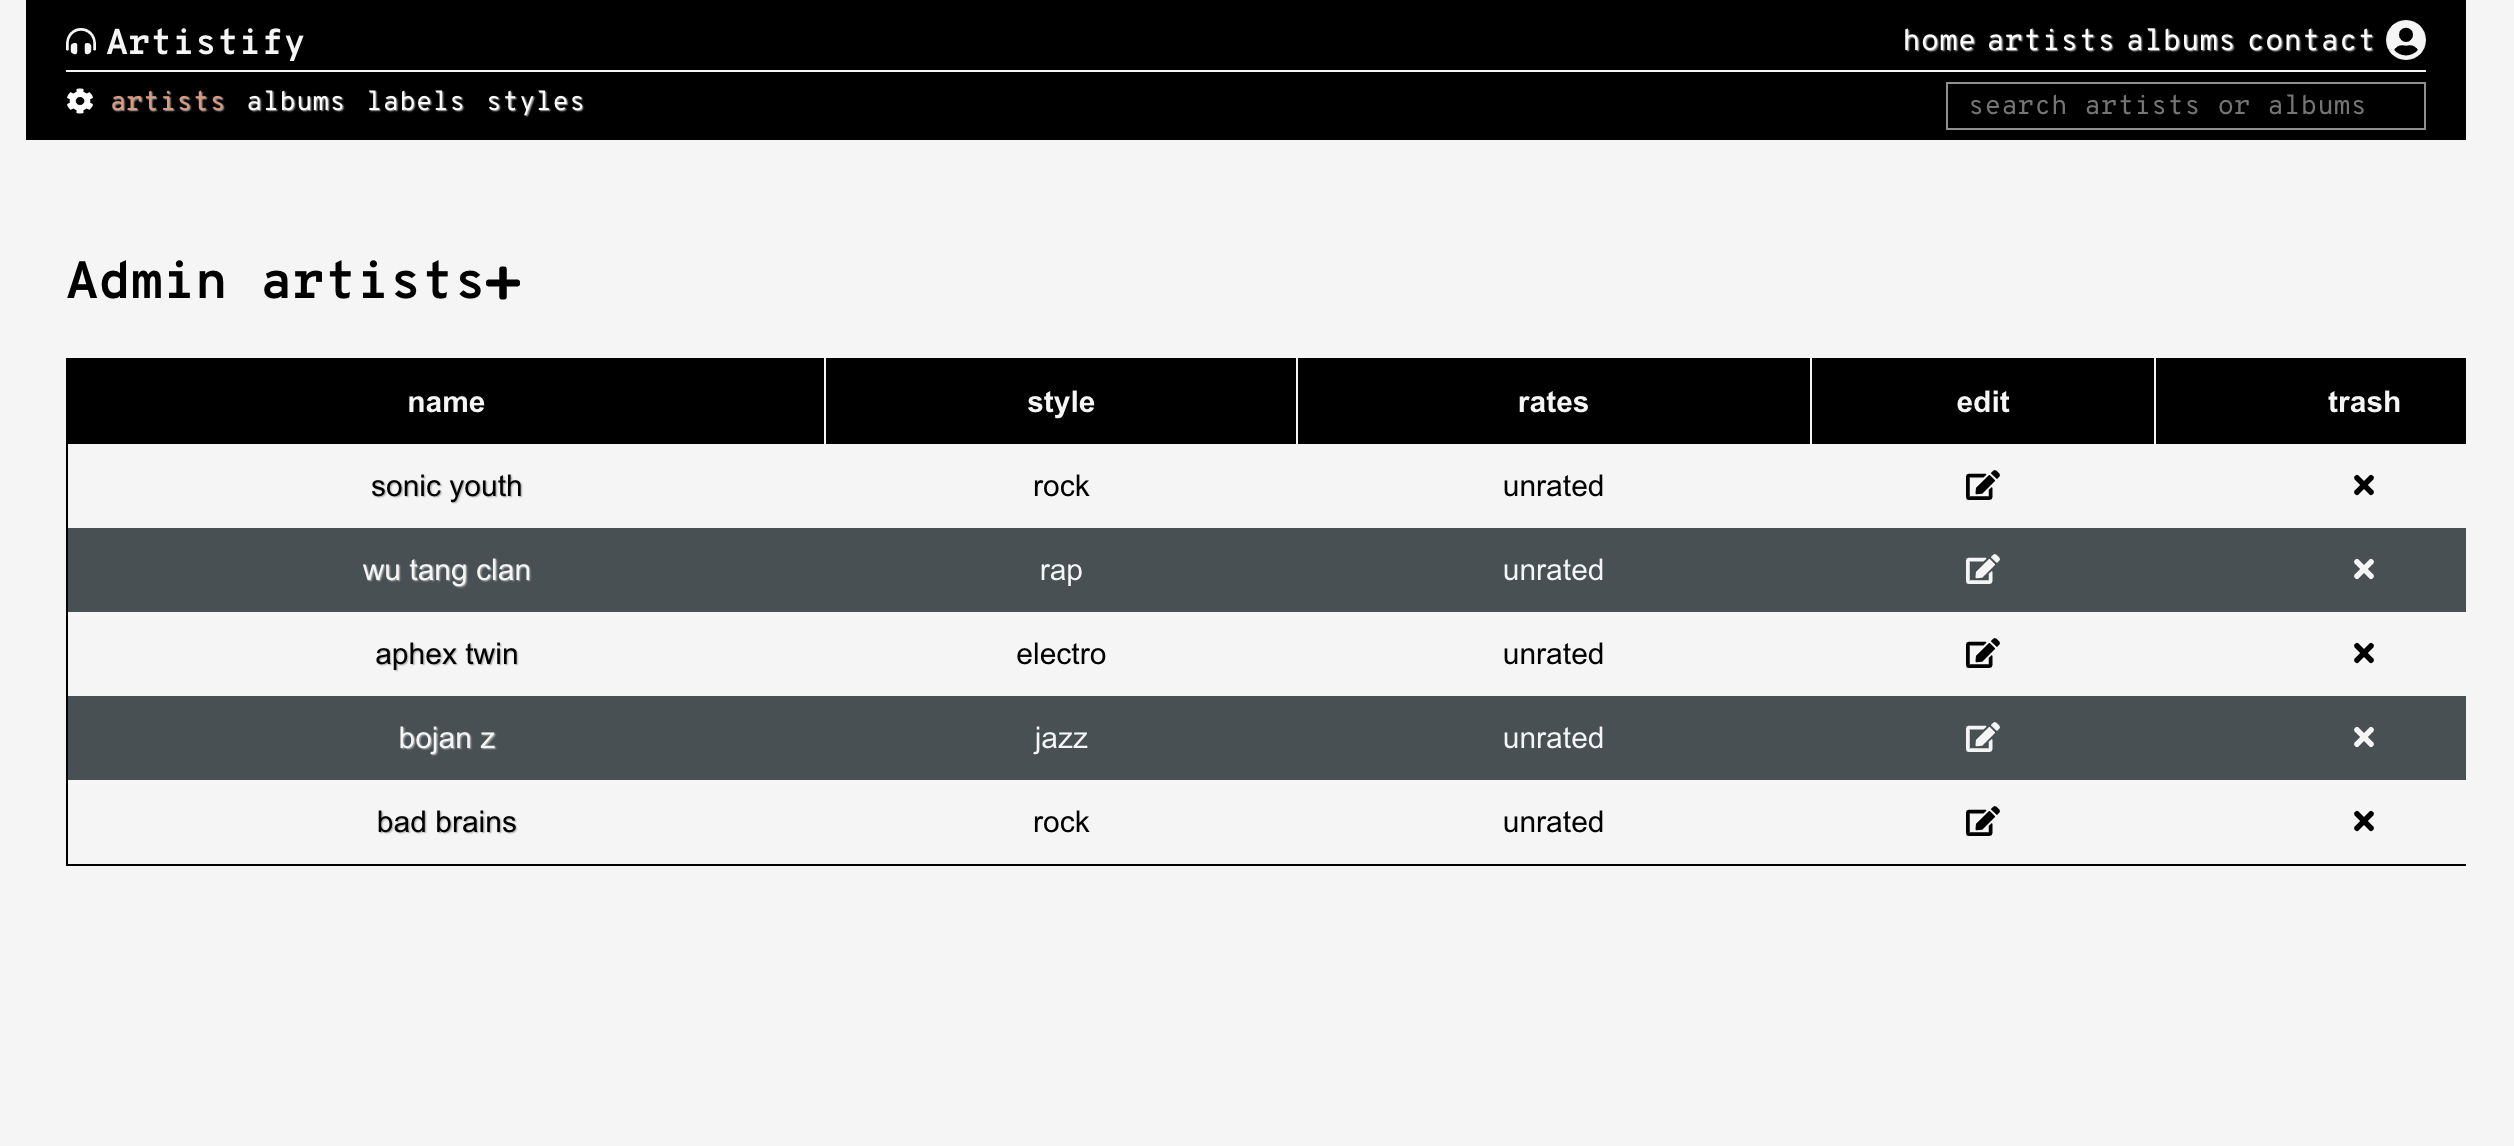
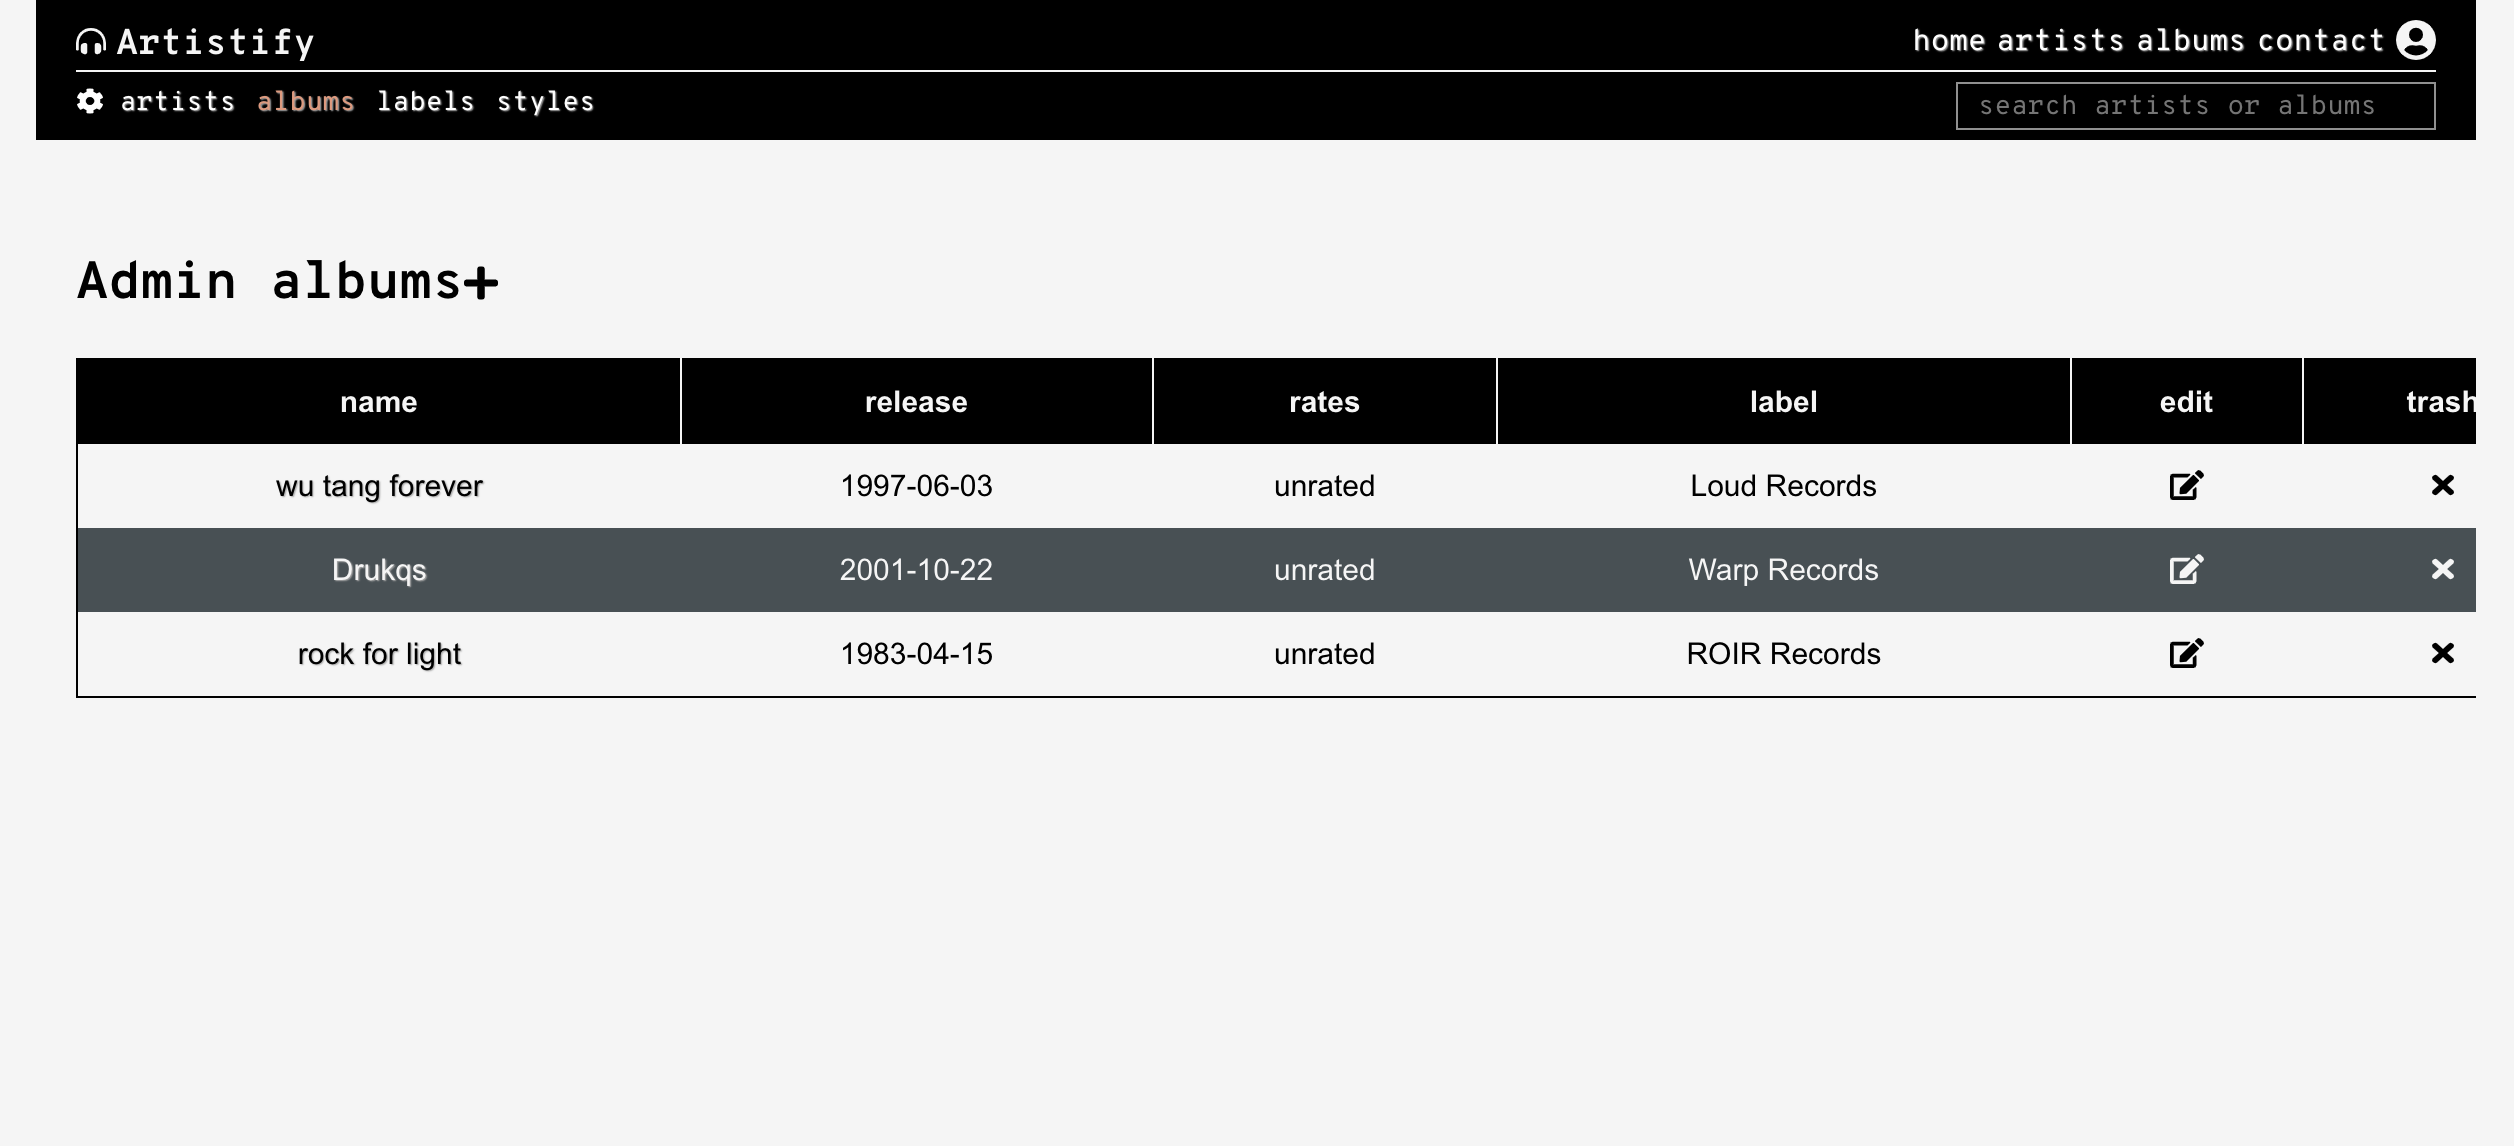
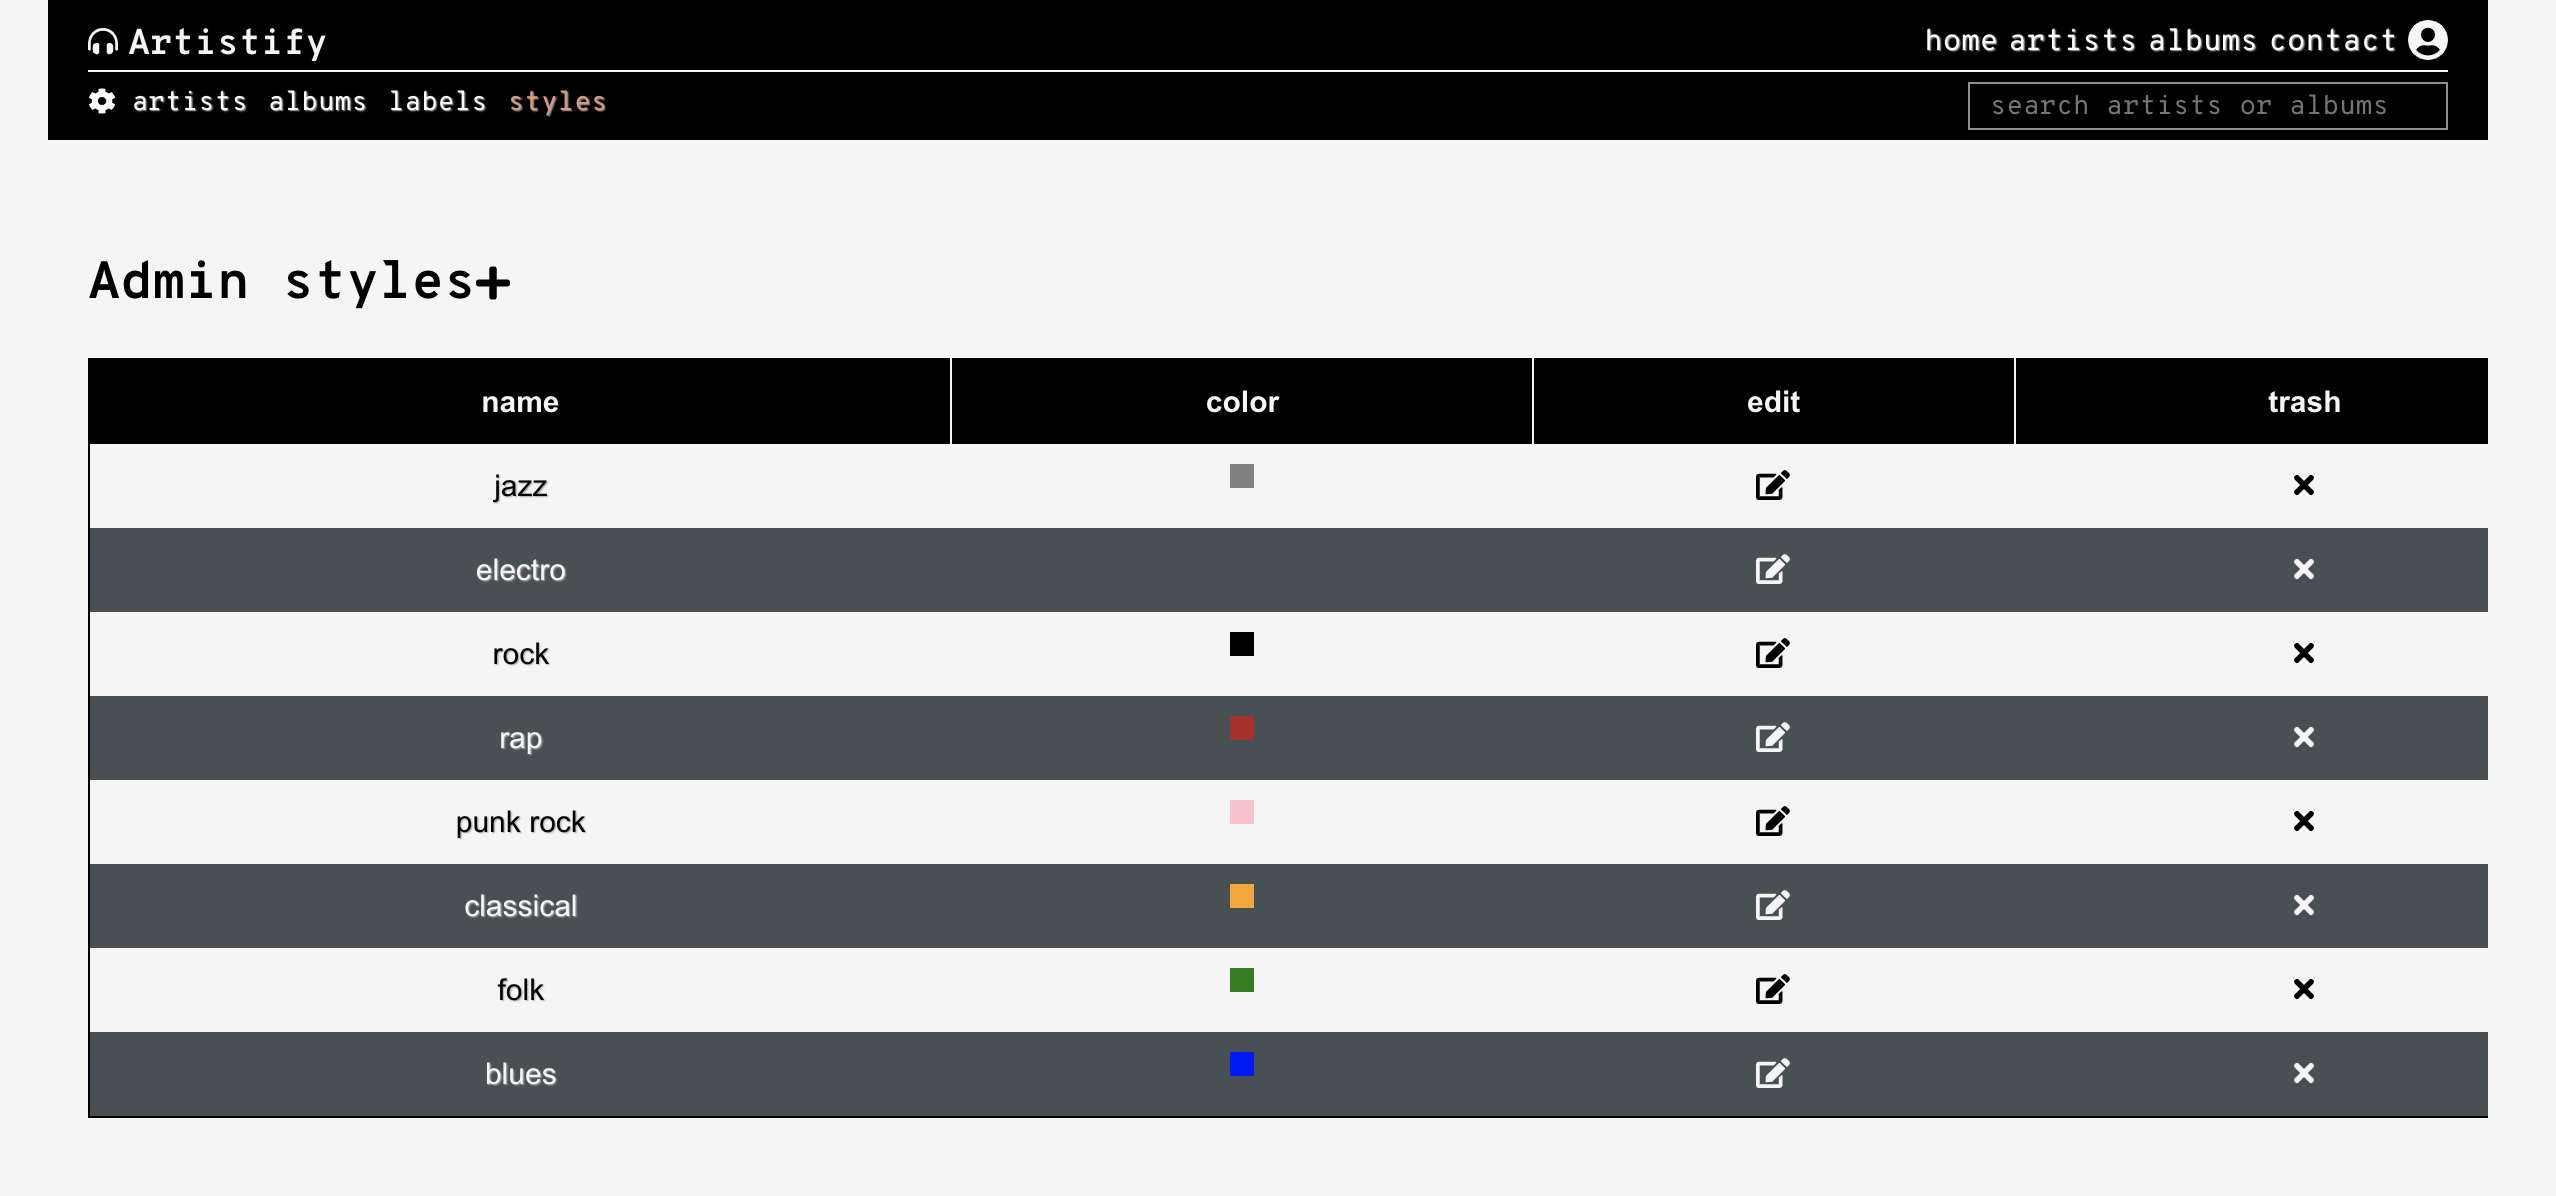
The dashboard is there to manage artists, albums, labels and styles.
- http://localhost:3000/admin/artists
- http://localhost:3000/admin/albums
- http://localhost:3000/admin/labels
- http://localhost:3000/admin/styles
Your task here is to :
- Fetch and display resources from the backend.
- Plug the delete buttons to a handler, removing the desired resource in the backend.
Here is an overview of the desired results :
Here are some bonuses.
On the home page (http://localhost:3000)
- Fetch the 2 latests artists AND albums.
- Implement the search bar for all artists and/or albums.
- Code a Discography component displaying all the albums related to a given artist's id
On the admin root page (http://localhost:3000/admin/)
- Create a nice datavizualisation with chart.js, or rechart.js or d3.js ...


