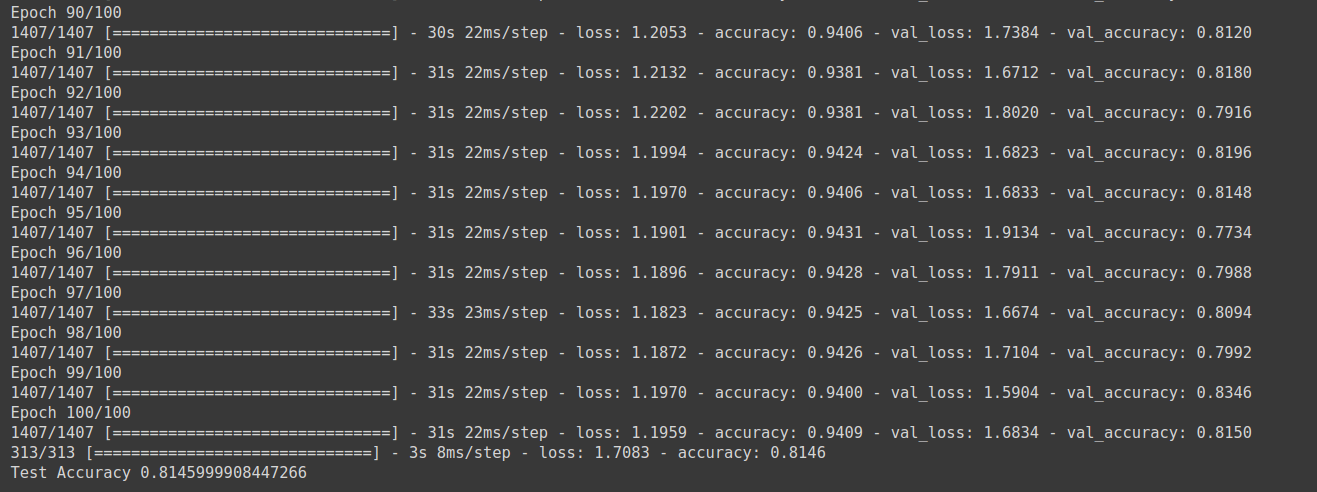
Objective of this project is to classify the datasets which include some images like(ship,dog,cat,airplane,deer... e.g.)into 10 labes. And our model predict accuracy is 0.8146 in VGG16, most of the researcher also got 0.66 ~ 0.78 accuracy with these datasets, so our model make sounds good! We use the Cifar10 datatsets for practice is because it only contain 10 different types of images in data,so you can go for Cifar100 for larger datasets and details.
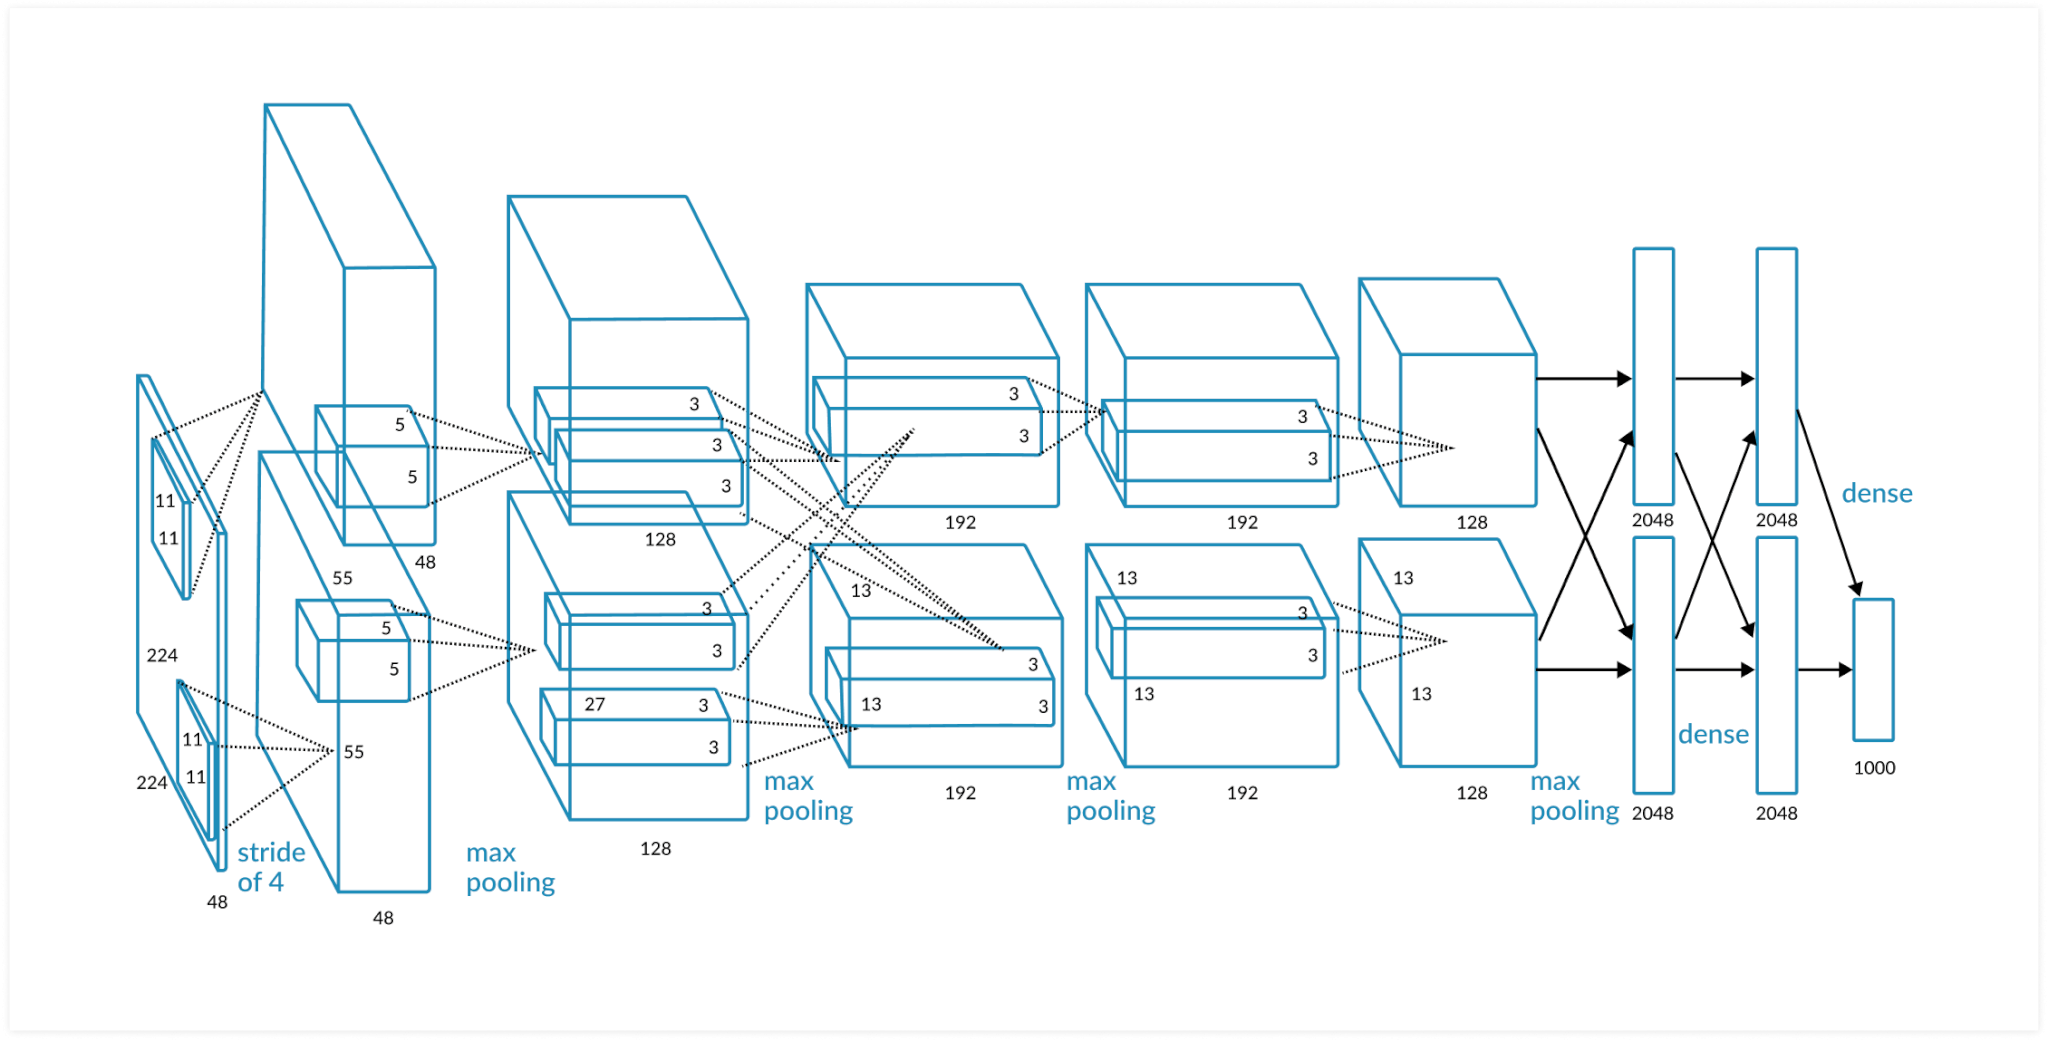
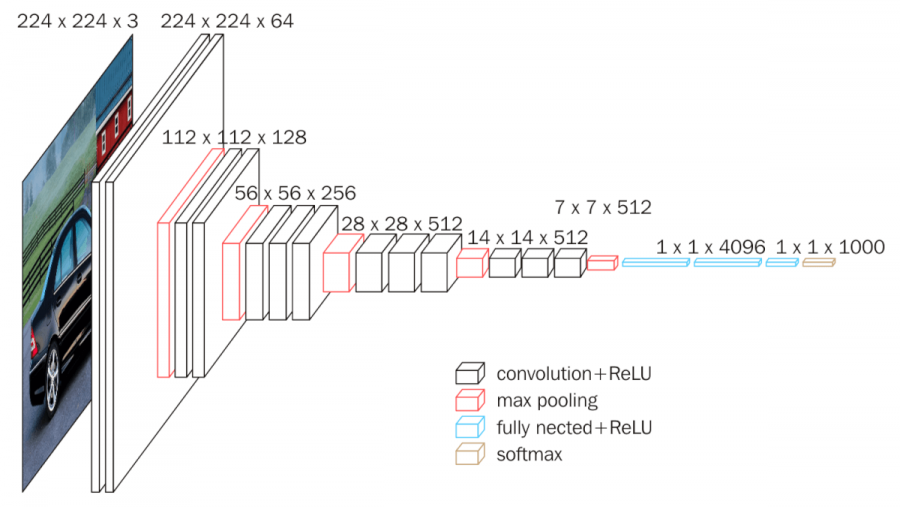
We will use two kinds of different neural network strcuture which are Alexnet and VGG16.But we will focus on the research and discuss on VGG16 at here.
- 0 : airplane
- 1 : automobile
- 2 : bird
- 3 : car
- 4 : deer
- 5 : dog
- 6 : frog
- 7 : horse
- 8 : ship
- 9 : truck
- Neural Network Structure
- Alexnet
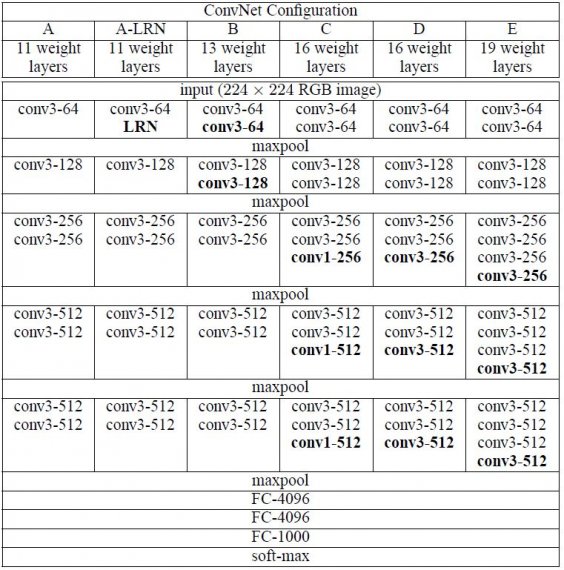
- VGG16
- Model Structure and Layers(VGG16)
- Python 3.8.2 or above
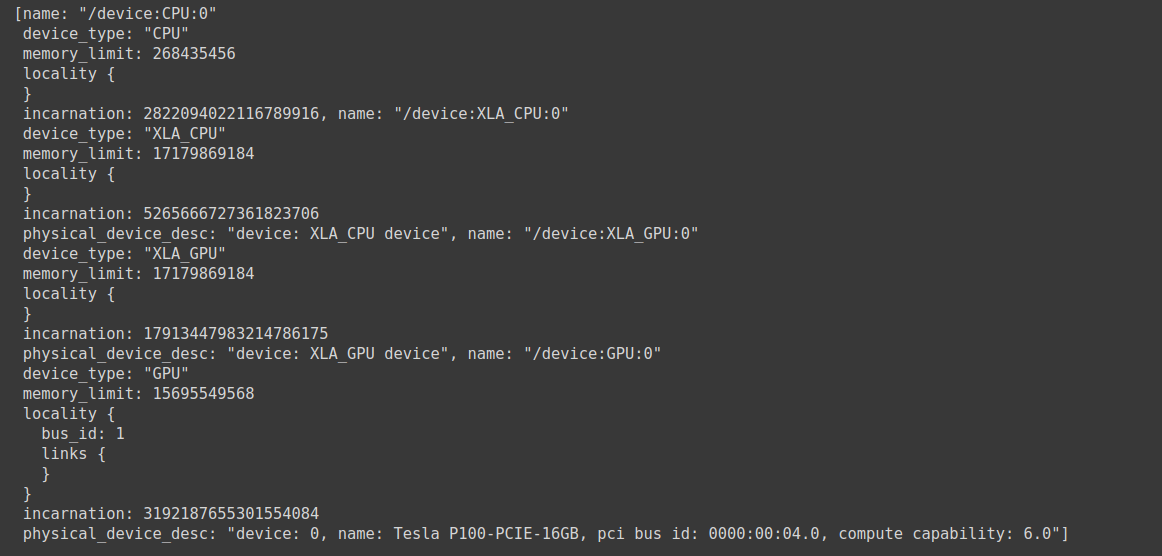
- GPU (recommended)
- Tensorflow
- Keras
- Matplotlib
- Cifar10
For .py file
python3 cifar10.py
python3 cifar10_VGG16.py
Or you can run the .ipynb file on notebook for tracking the output of each line.
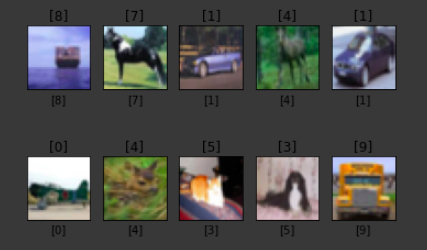
The following output image show the Pediction of the Model and the Label of each image. The title of each image refer to it's Model Prediction,and the xlabel refer to it's Label Answer. And it is briefly to observe that there only got almost 80% accuracy of the prediction.
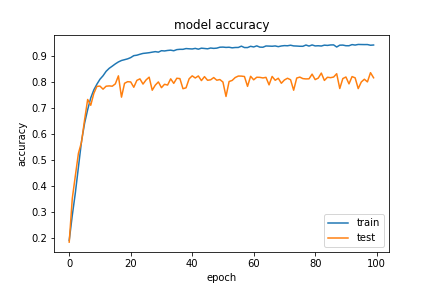
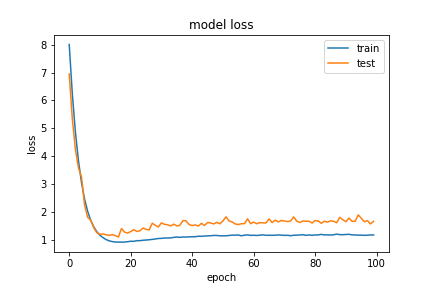
From the output we can observe that model Loss is getting decrease and Accuracy become greater and approach 0.8146.
I will take a note about what I had found about How the Parameters and Regularization affect your model accuracy and loss with this project as example. You also can check my commit history, I already mark down each change and how was the Accuracy affected.All the explanation will mentioned in a small word,I will make a clear Technique Conclusion Note later, and feel free to discuss with me!
-
Normalization with Mean and Standard Deviation
With the
meanandstdfunctions which are provided by thenumpylibrary can help you to calculate the mean and standard deviation of your training and testing data, and make it become smooth and extreme value, data become closer to the medium and mean value.In conclusion, it work! but just increase 0.4% accuracy. In my opinion, this way is not helpful with these data, maybe it will work on the dataset that have too much extreme value or dirty, incomplete datasets. -
Weight Decay
In a short word,
Weight Decayis one of theRegularization Techniquesthat used to avoid data become too specialized and cause overfitting.It will decrease the weight of each neuron and connection gradually and make our model not to become too complex.Once we get a greater value ofWeight Decay,that means the complex model will also have greater value ofcomplex functionsandcomplex problem.At all, Weight Decay=0.005 will have a better performance than 0.001. -
Batch Normalization
This is the most important part that cause the accuracy reach 0.7X , if you didn't take this step, you won't get a high accuracy like this.You can use
BatchNormalizationafter eachConv2DorDense.The function ofBatch Normalizationis can help you to fasten conrvergence, avoid overfitting, no need to usedropoutanymore(it will help you to select the best dropout parameter value), allow to use a higherLearning Rateat first.

