** This project is a continuation of the inactive base project to other platforms (WinUI/Uno.Skia.Wpf/Console) - ❤️ https://github.com/hardcodet/wpf-notifyicon ❤️ **
This is an implementation of a NotifyIcon (aka system tray icon or taskbar icon) for .Net 6 WPF/WinUI/Uno.Skia.WPF/Console platforms. It does not just rely on the Windows Forms NotifyIcon component, but is a purely independent control which leverages several features of the WPF/WinUI frameworks in order to display rich tooltips, popups, context menus, and balloon messages. It can be used directly in code or embedded in any XAML file.
- Notifications
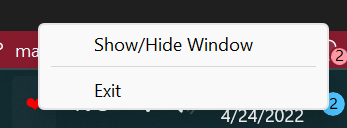
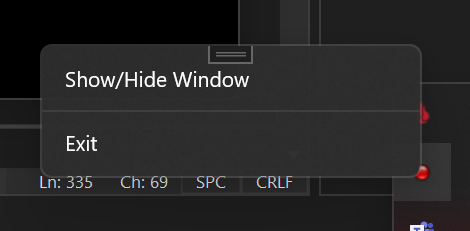
- Context menus
- ICommand support
- Design-time access
- Efficiency Mode
- Dynamic icon generation


Install-Package H.NotifyIcon.Wpf
Install-Package H.NotifyIcon.WinUI
Install-Package H.NotifyIcon.Uno
Install-Package H.NotifyIcon.Uno.WinUI
# If you need other platforms, you can use this Core library -
# it allows you to make NotifyIcon even in a console application.
Install-Package H.NotifyIcon<Window
xmlns:tb="clr-namespace:H.NotifyIcon;assembly=H.NotifyIcon.Wpf" // WPF
xmlns:tb="using:H.NotifyIcon" // WinUI
>
<tb:TaskbarIcon
ToolTipText="ToolTip"
IconSource="/Images/TrayIcons/Logo.ico"
ContextMenu="{StaticResource TrayMenu}"
MenuActivation="LeftOrRightClick"
TrayPopup="{StaticResource TrayStatusPopup}"
PopupActivation="DoubleClick"
TrayToolTip="{StaticResource TrayToolTip}"
/>
</Window>
Windows 11 introduces a new concept called Efficiency Mode.
Since, basically, this library is intended for applications to exist in the background with the ability to interact through TrayIcon, the library implements an API for this mode:
EfficiencyModeUtilities.SetEfficiencyMode(bool value)
WindowExtensions.Hide(this Window window, enableEfficiencyMode: true) // default value
WindowExtensions.Show(this Window window, disableEfficiencyMode: true) // default value
TaskbarIcon.ForceCreate(bool enablesEfficiencyMode = true) // default valueExample 1: 
<tb:TaskbarIcon>
    <tb:TaskbarIcon.IconSource>
        <tb:GeneratedIconSource
            Text="❤️"
            Foreground="Red"
            />
    </tb:TaskbarIcon.IconSource>
</tb:TaskbarIcon>
Example 2: 
<tb:TaskbarIcon
    IconSource="/Icons/Error.ico"
    >
    <tb:TaskbarIcon.IconSource>
        <tb:GeneratedIconSource
            Text="5"
            Foreground="Black"
            FontSize="36"
            FontWeight="Bold"
            />
    </tb:TaskbarIcon.IconSource>
</tb:TaskbarIcon>
Example 3: 
<tb:TaskbarIcon>
    <tb:TaskbarIcon.IconSource>
        <tb:GeneratedIconSource
            Text="❤️"
            Foreground="Red"
            FontFamily="Segoe UI Emoji"
            Background="AliceBlue"
            FontWeight="Bold"
            FontSize="38"
            />
    </tb:TaskbarIcon.IconSource>
</tb:TaskbarIcon>
Example 4: 
<tb:TaskbarIcon>
    <tb:TaskbarIcon.IconSource>
        <tb:GeneratedIconSource
            Text="❤️"
            BorderThickness="5"
            FontSize="46"
            >
            <tb:GeneratedIconSource.Foreground>
                <LinearGradientBrush StartPoint="0,0" EndPoint="128,128">
                    <GradientStop Color="White" />
                    <GradientStop Color="Red" />
                </LinearGradientBrush>
            </tb:GeneratedIconSource.Foreground>
            <tb:GeneratedIconSource.BorderBrush>
                <LinearGradientBrush StartPoint="0,0" EndPoint="128,128">
                    <GradientStop Color="White" />
                    <GradientStop Color="Red" />
                </LinearGradientBrush>
            </tb:GeneratedIconSource.BorderBrush>
        </tb:GeneratedIconSource>
    </tb:TaskbarIcon.IconSource>
</tb:TaskbarIcon>It is recommended to pin the designer icon for easy viewing. To do this, go to Taskbar Settings -> Other system tray icons and enable this icon:

At the moment, three modes are implemented, each with its own pros and cons.
- Based on your MenuFlyout, a Win32 PopupMenu will be created that will call the commands attached to your MenuFlyoutItem. This is the default.
- The menu will be created in your open window, in the corner of the screen.
- A second transparent window will be created and used to render the native menu.. At the moment it is in the preview stage. To do this you need to explicitly set ContextMenuMode="SecondWindow"
Availability of various options(depends on the version of WindowsAppSDK you are using):
| Option | Packaged App | Unpackaged App |
|---|---|---|
| Transparency | 🟢 from 1.1.0-preview | 🟢 from 1.1.0-preview |
| Borderless | 🔷 | 🟢 from 1.1.0-preview |
| Animations | 🟢, but with borders | 🟢 from 1.1.0-preview |
| Submenus | 🔷 | 🔷 |
- This implementation currently uses the Guid associated with each TrayIcon. The default is a hash function that creates a unique Guid based on the path to your file, because Windows associates the guid with the current path when TrayIcon is registered. The only way to keep the settings when changing the file path is to use Authenticode. Read more here: https://docs.microsoft.com/en-us/windows/win32/api/shellapi/ns-shellapi-notifyicondataa#troubleshooting
Priority place for bugs: https://github.com/HavenDV/H.NotifyIcon/issues\
Priority place for ideas and general questions: https://github.com/HavenDV/H.NotifyIcon/discussions\
I also have a Discord support channel:
https://discord.gg/g8u2t9dKgE