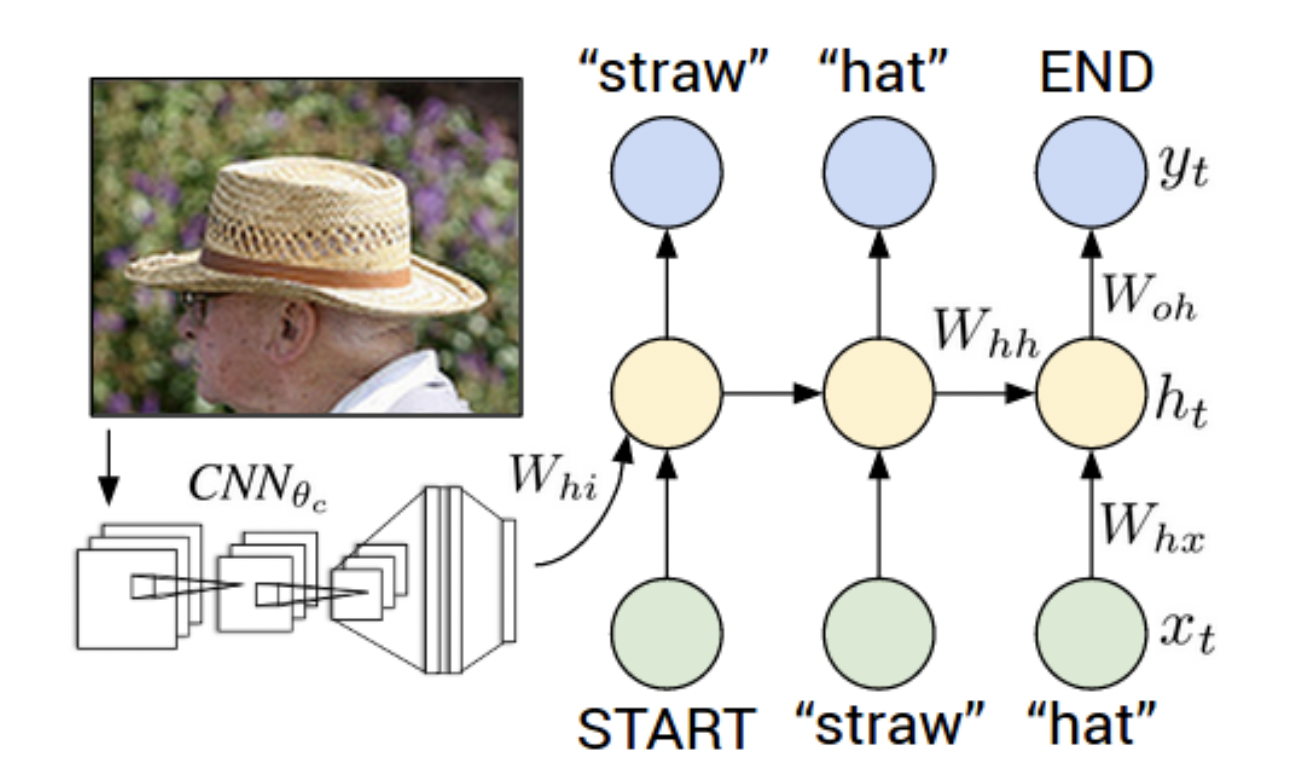
Image captioning is a task for generating textual description of an image. for example:
There is a lot of approaches and trials to approach the task, the most celebrated ones are referred to bellow, most of the work done in the last years is a combination of those works.
- Andrej Karpathy Ph.D. work was done about image description: Deep Visual-Semantic Alignments for Generating Image Descriptions the work mostly showed the idea of RCNN, scoring method and the idea to build the sentence by looking at different parts of the image.
- Google builds on the previous work using LSTM instead of plain RNN and beam search:
- Microsoft architecture added the ability to identify landmarks and celebrities: Rich Image Captioning in the Wild
All The above models are based upon an architicture which consists of a CNN that learns a feature-map followed by an RNN that generates the caption:
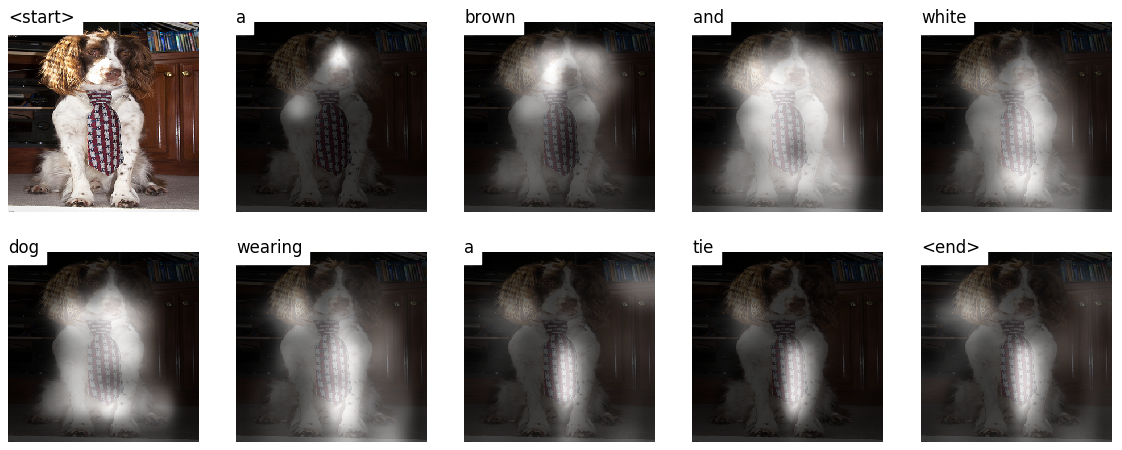
In this project we will implement a model which is based on:Show, Attend and Tell where soft attention mechanism has been added to the architicture, which at each time-step the models learns where to look.
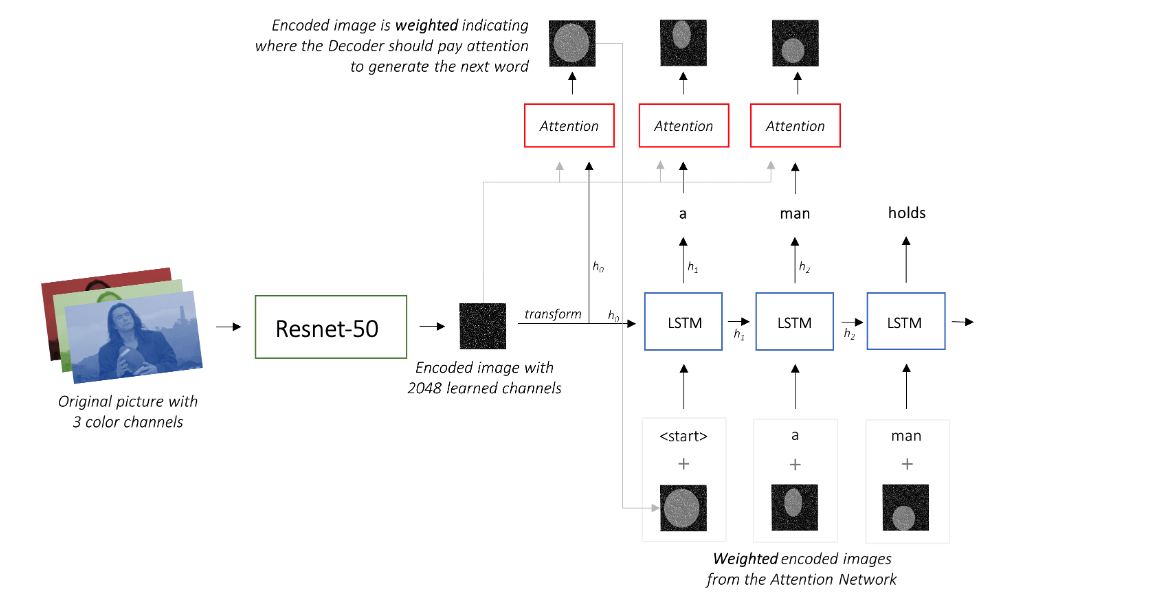
Our model is a decoder-encoder which have 4 main parts:
- A convolutional neural network that extracts features from the images (Encoder) - for this part we decided to use a pretrained Resnet-50
- an attention mechanism that weights the image features -
- Embeddings for the tokens in the captions - Pre-trained word embeddings added as optional
- An RNN that generates captions to describe the weighted image features (Decoder) - We will use an LSTM
We will use the Flicker8k dataset which can be downloaded from here that have 8092 images along with 5 reference captions per image (used for evaluation
- We will use the popular Karpathy split, which can be downloaded from here
By far the most popular metric for evaluating generated sentences is the Blue score Which uses the 5 reference captions provided in the dataset to evaluate the generated caption.
- software dependencies can be found in requirements.txt
- Download the dataset as described above
- The dataset contains :
- Images folder which contains all the images
- captions.txt which contains 5 different captions for each image(name) in Images folder
- karpathy split is availabe in Karpathy_split.json
Since we are using a pretrained CNN, we need to preprocess the images to have similar shape/stats that this model expect. This page contains information regarding the preprocessing needed. in our case, we are using the following preprocessing:
transforms = T.Compose([
    T.Resize(226),
    T.RandomCrop(224),
    T.ToTensor(),
    T.Normalize((0.485, 0.456, 0.406), (0.229, 0.224, 0.225))
])See data.py for details and implementation.
- We start by building the vocabulary from the full data with the addition of the special tokens:
<PAD>,<SOS>,<EOS>,<UNK>;see build_vocab() - for each caption we add the
<SOS>,<EOS>to the beginning/end respectively, replace rare words with<UNK> - Since we are passing the captions as tensors, we need to maintain fixed size inputs. therefore we add
<PAD>tokens at the end of shorter captions. - using the vocabulary, we numericalize the captions using the
stoito be compatible with PyTorch Embedding layer.
See data.py for details.
FlickrDataset is a subclass of PyTorch Dataset. It needs a __len__ method defined, which returns the size of the dataset, and a __getitem__ method which returns the ith image, caption, and caption length.
The FlickrDataset will be used by a PyTorch DataLoader in train.py to create and feed batches of data to the model for training or validation.
See models.py for details and implementation.
EncoderCNNuses a pretrained Resnet-50 already available in PyTorch'storchvisionmodule as mentioned before, feel free to use a different model. We discard the last two layers since we only want to encode the image.AttentionNetwork transforms both the the encoded image and the and the Decoder's hidden state to the same dimenstionattention_dimusing a fully connected NN withtanhactivations. This is later transformed using a linear layer with softmax to getalphawhich sum to 1. returns thealphaand the weights (which are also used for visualization later).DecoderRNNwhich consists of an embedding layer, an LSTM and an attention model. The Embeddings weights are initialized randomly if no pre-trained word embedding model is available, otherwise for each word in our vocabulary we take the learned embedding from the model, if some word doesn't exist in the model we initialize the weights randomly. The list of available models intorchtextcan be found here. We also initialize the hidden and cell state using the encoded image with theinit_hidden_state()method, which uses two separate linear layers. In order to execute the attention mechanism in the forward pass we iterate through the tokens manually using PyTorch LSTMCell and compute the weights and attention-weighted encoding at each timestep with theAttentionnetwork. We concatenate the attention-weighted encoding with the embedding of the previous word and run the LSTMCell to generate the new hidden state. A linear layer transforms this new hidden state into scores for each word in the vocabulary.
you can perform the entire training by running Train.py The hyperparameters are at the beginnning of the file, so you can change it easily. or by using Demo.ipynb
We will use the bleu score from the nltk package to evaluate the captions generated by our model. Few important comparisons:
- our model's results vs performance reported in Attend, Show and Tell paper.
- with vs without pre-trained word embeddings


