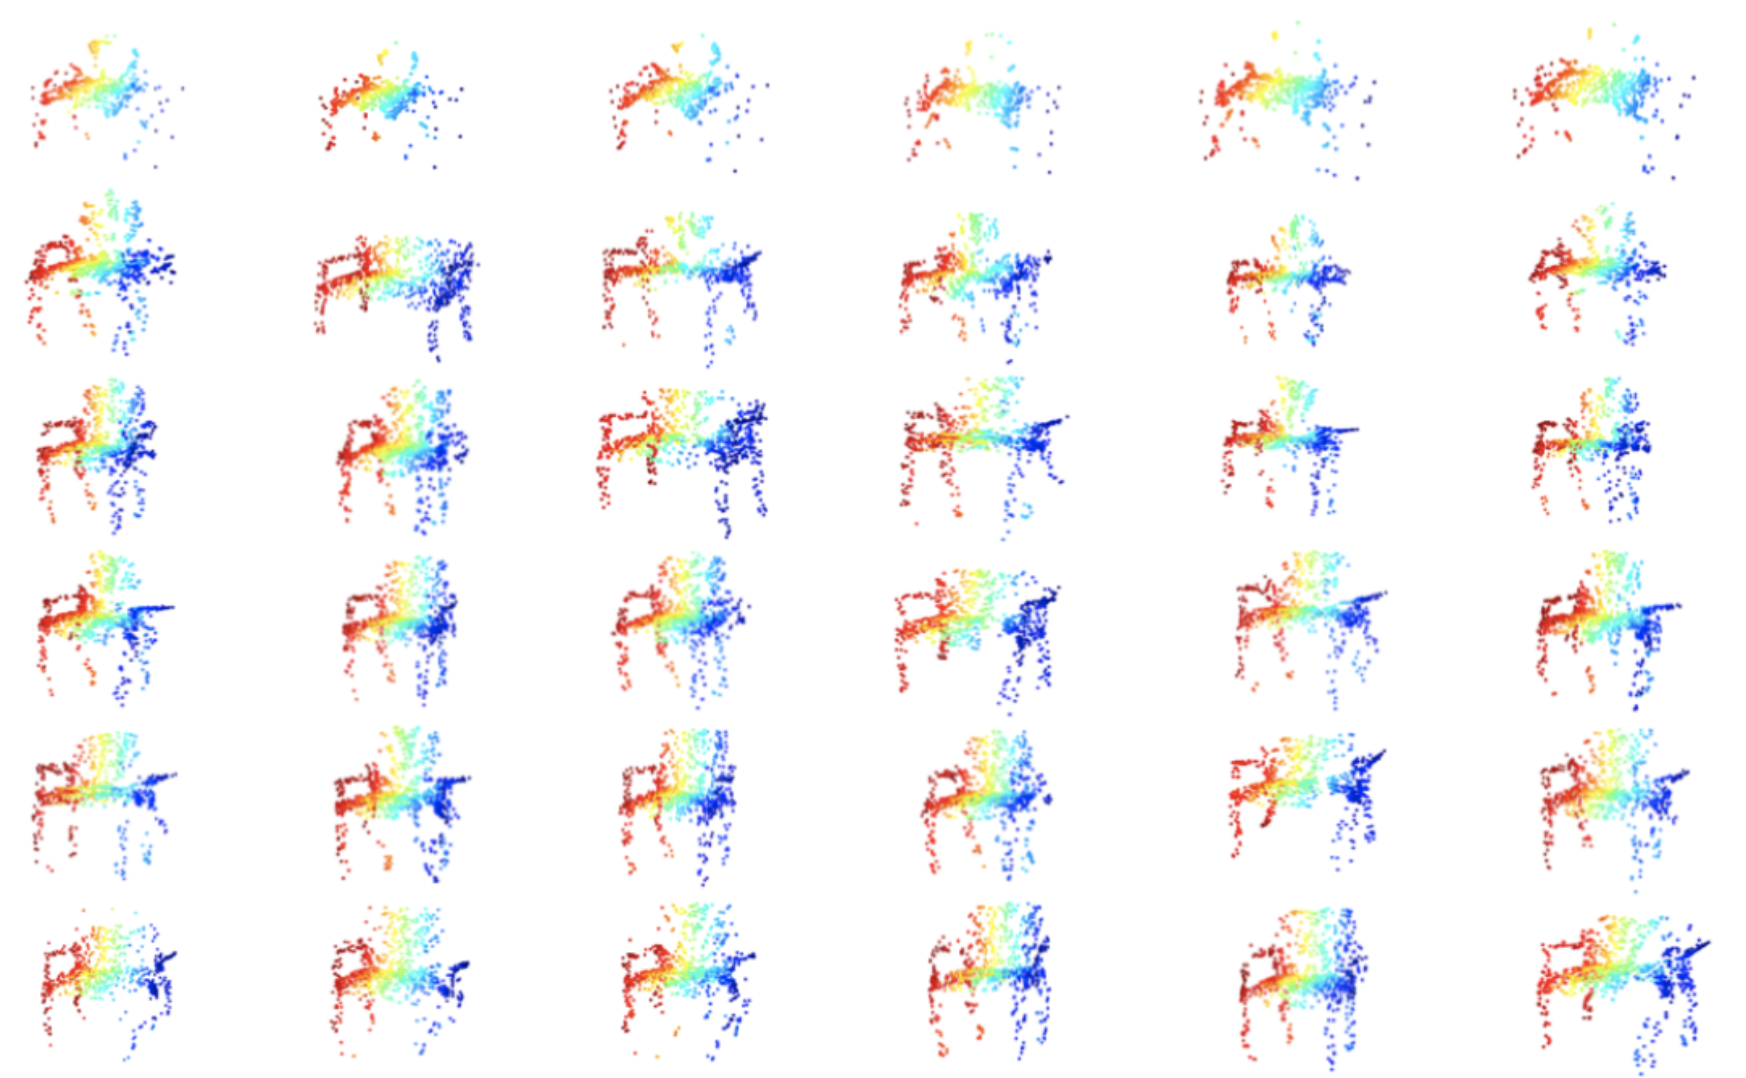
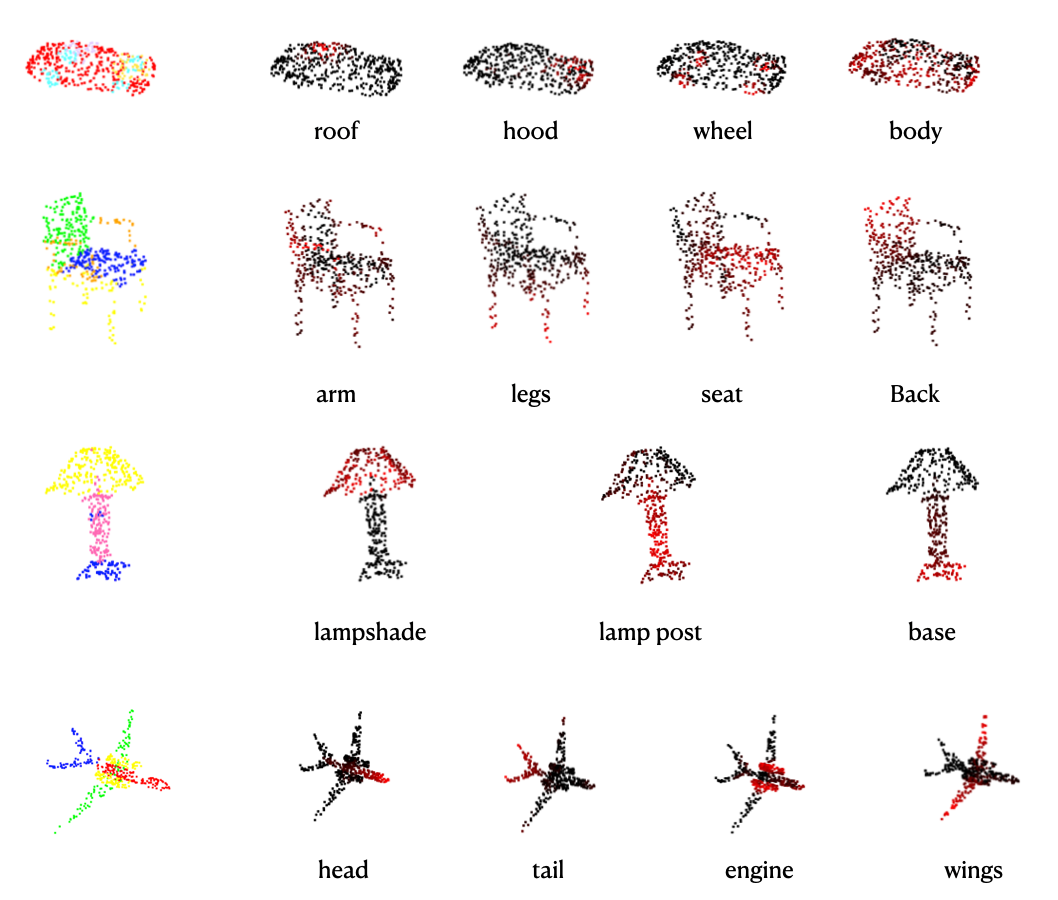
This work views the style of 3D objects from a geometric perspective. Assume we are given two 3D objects, one referred as the content, the other referred as the style. We intent to perform "part-to-part" style transfer by trying to naturally align the geometry of a target part of the style object with the overall geometry of the content object.
As a point of departure, we try to tackle the part-to-part style transfer problem without relying on a generative model or novel neural network architectures. Instead, we exploit the geometric information concealed in the part segmentation scores of a 3D part segmentation network. To that end, we propose potential solutions using gradient-based attribution methods, which are designed for explaining the predictions of complex neural networks.
The code repository consists of the following parts:
-
configs: contains configurations for running the optimization-based NST algorithm -
data: contains the ShapeNet Parts dataset (seePartAnnotation) and a subset of ShapeNetCore.v2 (seeShapeNetCore.v2). Additionally, it contains train/test splits for training the PointNet classifier. -
preprocessed_meshes: contains preprocessed meshes from ShapeNetCore.v2 in .xyz format -
modules: contains PyTorch modules (models, losses) -
pretrained_models:contains pretrained models -
scripts: contains shell scripts from older version of the code repo for running NST experiments -
legacy: some deprecated codes
-
utils.py: a bunch of utility functions -
run_nst.py,run_nst_clf.py: run the NST algorithm with pretrained PointNet segmentation/classification network as feature extractor -
GradCAM.py,guided_bp.py,integrated_gradients.py: implementations of the employed gradient-based attribution methods -
deepdream3d.py: implementation of DeepDream for point clouds -
dataset.py: file for processing the ShapeNet Parts dataset for classification -
train_pointnet_classifier.py,test_clf.py: files for training and testing the PointNet classifier -
visualization.py: provides simple visualization of point cloud objects (e.g. rotation, interpolating between objects)
The code has been tested in Python 3.8.3. The dependencies are listed in requirements.txt. Run pip install -r requirements.txt to install the required packages.
If your remote server's OS supports environment modules, you can use module load to load the packages. Make sure to first runmodule list to check which modules are available. Here is an example in shell script:
declare -a moduleNames=(
"gcc/6.3.0"
"python/3.8.5"
"cuda/10.1.243"
"cudnn/7.6.4"
"open3d"
)

for name in "${moduleNames[@]}"; do
        module load $name
done
You can use this repository to run your own experiments for the optimization-based 3D neural style transfer with a pretrained PointNet segmentation network. You can also visualize the learned features with DeepDream and create attribution maps. Moreover, you can train our custom PointNet classifier on the ShapeNet Parts dataset. For each type of usage, it is advised to follow the instructions below.
Before running the experiments, we need to preprocess/read from the point clouds/meshes depending on the dataset we use.
-
ShapeNet Parts: If you decide to use objects from ShapeNet Parts, where the feature extractor has been trained on, please use
get_samples('path/to/object', d_type='txt')to obtain the samples directly. -
ShapeNetCore.v2: If you decide to use objects from ShapeNetCore.v2, you have to preprocess the
.plyfiles withpreprocess.py. Runpython preprocess.py <args>. If you do not specify thesave_path, it will create a folder insidepreprocessed_mesheswith the attributes you provide to the argparser (exp_name, attr, subdiv_iters, format). Moreover, the number of subdivisions depends on the object itself. Visualize the object by enabling--visualizeto inspect whether to object is appropriately sampled. Example:python preprocess.py --data_path path/to/obj --subdiv_iters 2 --format xyz --visualizeperforms 2 iterations of mesh subdivision and then saves the vertices as point cloud in.xyzformat inpreprocessed_meshes/experiment_0___sbd2.xyz. The folderpreprocessed_meshescontains already processed meshes.
View how the object gets modified by by running
python deepdream3d.py <args>
. Usually around 10 iterations suffice to observe feature changes. Every visualization will show the modified object and the gradients of the object's points (summed along the coordinate dimension). Brighter red means larger positive value, brighter blue means smaller negative value.
example:
python deepdream3d.py --obj_path lamp.xyz --obj_cat lamp --layer_ids 0 --channel_ids 0 8 16 --lr 0.01 --num_iters 10 --visualize_every 2
See the script for the default values. The object must be stored in .xyz format, see preprocessing step.
Note that the number of channels from layer 0 to 5 are: 64, 128, 128, 512, 2048, 2048.
To visually inspect the attribution map, you can test the following methods: Guided Backpropagation, Integrated Gradients and HiResCAM. Note that HiResCAM can only be visualized with the mode --visualize_negpos. Objects from ShapeNet Parts should be used. You may want to inspect which part ids corresponds to the object, running python utils.py --<obj_category> prints a list of part ids corresponding to the object and a dictionary with the part names corresponding to the part ids (note that not every part is printed). The object categories can be found in data/PartAnnotation/synsetoffset2category.txt. Otherwise, for quick reference, see the code below from Torch Points 3D:
category_ids = {
        "Airplane": "02691156",
        "Bag": "02773838",
        "Cap": "02954340",
        "Car": "02958343",
        "Chair": "03001627",
        "Earphone": "03261776",
        "Guitar": "03467517",
        "Knife": "03624134",
        "Lamp": "03636649",
        "Laptop": "03642806",
        "Motorbike": "03790512",
        "Mug": "03797390",
        "Pistol": "03948459",
        "Rocket": "04099429",
        "Skateboard": "04225987",
        "Table": "04379243",
    }

    seg_classes = {
        "Airplane": [0, 1, 2, 3],
        "Bag": [4, 5],
        "Cap": [6, 7],
        "Car": [8, 9, 10, 11],
        "Chair": [12, 13, 14, 15],
        "Earphone": [16, 17, 18],
        "Guitar": [19, 20, 21],
        "Knife": [22, 23],
        "Lamp": [24, 25, 26, 27],
        "Laptop": [28, 29],
        "Motorbike": [30, 31, 32, 33, 34, 35],
        "Mug": [36, 37],
        "Pistol": [38, 39, 40],
        "Rocket": [41, 42, 43],
        "Skateboard": [44, 45, 46],
        "Table": [47, 48, 49],
    }
Examples:
1.Guided Backpropagation
python attribution.py --obj_path data/PartAnnotation/[...]/points/[...].pts --obj_cat lamp --mode gbp --pretrained --vis_negpos --num_samples 1000 --part_id 24
2.Integrated Gradients
python attribution.py --obj_path data/PartAnnotation/[...]/points/[...].pts --obj_cat lamp --mode ig --pretrained --vis_magnitude --num_samples 256 --part_id 24 --n_steps 10
3.HiResCAM
python attribution.py --obj_path data/PartAnnotation/[...]/points/[...].pts --obj_cat lamp --mode grad_cam --pretrained --vis_negpos --num_samples 512 --part_id 24
To run experiments with the optimization-based NST algorithm, see file run_nst.py. The parameters in configs/nst_opt_based.py have to be set accordingly, please refer to the scipt for details on the parameters. Note that you only need to specify opt.output_dir = path/to/<your_folder>, this will automatically create a folder, where the objects created during the optimization process will be stored in.
To see the summary of the optimization, run the command tensorboard --logdir path/to/<your_folder>.
There are two ways to run the script: you can either choose to write a shell script (then you should set arg_parser = True in run_nst.py) or you can directly write your code in run_nst.py's main part (then you should set arg_parser = False in run_nst.py).
If you only want to run a single NST experient, you can run
python run_nst.py <args>
Below is a shell scipt example to run the NST algorithm for individual layers. For more scripts (now deprecated, for reference only), see folder scripts. Don't forget to set SCRIPT_PATH = ../run_nst.py when you run inside scripts. However, it is strongly recommended to write your experiments in Python as it encourages fine-grained control.
SCRIPT_PATH="run_nst.py"

CONTENT_OBJ="<path_to_content_obj>"

STYLE_OBJ="<path_to_style_obj>"

LAYERS=(
    '0' '1' '2' '3' '4' '5'       # single layer
)

for idx in "${!LAYERS[@]}"
do
  EXP_NAME="single_$((idx))"

  args=(
      --num_iters 5000
      --save_every 500
      --content_shape $CONTENT_OBJ
      --style_shape $STYLE_OBJ
      --pretrained_enc "pretrained_models/shapenet.pointnet.pth.tar"
      --output_dir "logs/table_layers"
      --style_weight 10
      --num_points 32000
      --layers ${LAYERS[idx]}
      --layers_exp_suffix $EXP_NAME
  )

  python $SCRIPT_PATH "${args[@]}"
done
Now we demonstrate some examples of writing experiments in the main part of run_nst.py:
1.Minimizing the style loss only in the vanilla NST objective:
for w in [0.1, 1, 10, 100, 1000]:
	opt.style_weight = w					 # set style weight
	opt.content_weight = 0				     # set content weight
	opt.output_dir = 'logs/test'			 # creates output folder
	opt.content_layers = [0, 1, 2, 3, 4]     # set content layers
	opt.style_layers = [3, 4]				 # set style layers
	opt.randn_noise = True					 # random initialization
	run_grad_mask()
2. Progressively add layers:
lc = []
for i in range(6):
        lc.append(i) 								# add content layers
        opt.output_dir = "<path/to/your/directory>" # output directory
        opt.content_layers = lc
        opt.content_weight = 1
        opt.style_weight = 0
        run_grad_mask()
3. Part masking
style_shape = 'data/PartAnnotation/04379243/points/1ac080a115a94477c9fc9da372dd139a.pts'
style_category = 'table'
content_shape = 'data/PartAnnotation/03001627/points/1a6f615e8b1b5ae4dbbc9440457e303e.pts'
content_category = 'chair'
opt.mask_class_list = [25]      # these parts of the content object will be optimized
opt.content_part_class = 25     # part id of the content object to be optimized
opt.style_part_class = 13 		# transferring to the style of this target part
run_nst_part_specific()
4. GBP-based NST
style_shape = 'data/PartAnnotation/04379243/points/1ac080a115a94477c9fc9da372dd139a.pts'
style_category = 'table'
content_shape = 'data/PartAnnotation/03001627/points/1a6f615e8b1b5ae4dbbc9440457e303e.pts'
content_category = 'chair'
opt.mode = 'gbp'		# set attribution mode, currently the only implemented attribution-mask method
opt.part_id_c = 25		# provide content part id
opt.part_id_s = 13		# provide style part id
run_grad_mask()
5. Attribution-based NST with HiResCAM
style_shape = 'data/PartAnnotation/04379243/points/1ac080a115a94477c9fc9da372dd139a.pts'
style_category = 'table'
content_shape = 'data/PartAnnotation/03001627/points/1a6f615e8b1b5ae4dbbc9440457e303e.pts'
content_category = 'chair'
opt.part_specific = False   # if you set this to True, you have to provide a list of part classes whose points will be optimized
#opt.mask_class_list = [25] # uncomment this if opt.part_specific = True
opt.part_id_c = 25			# provide content part id
opt.part_id_s = 13			# provide style part id
opt.attr_weight = 10		# set weight of the attribution loss
run_nst_grad_cam()
Note: all trained models have to be placed inside the folder pretrained_models.
Data Preparation
Create the folder PartAnnotation in your working directory and run python dataset.py. This will create two split files train_data.txt and test_data.txt inside data/PartAnnotation/train_test_split.
Train the Classifier
After processing the data, you can modify the parameters in the global configs section in train_pointnet_classifier.py and run the script. To test the quality of a specific classifier, you can use the function test_class_accuracy(ckpt_path=<path/to/pretrained/model>). If you have multiple models in a folder (which is saved by the training process by default), you can use the function select_best_model(). You may want to tune the number of points and the batch size in the global variables section at the beginning.
Guided Backpropagation Link to Paper
Integrated Gradients Link to Paper
GradCAM Link to Paper
HiResCAM Link to Paper

