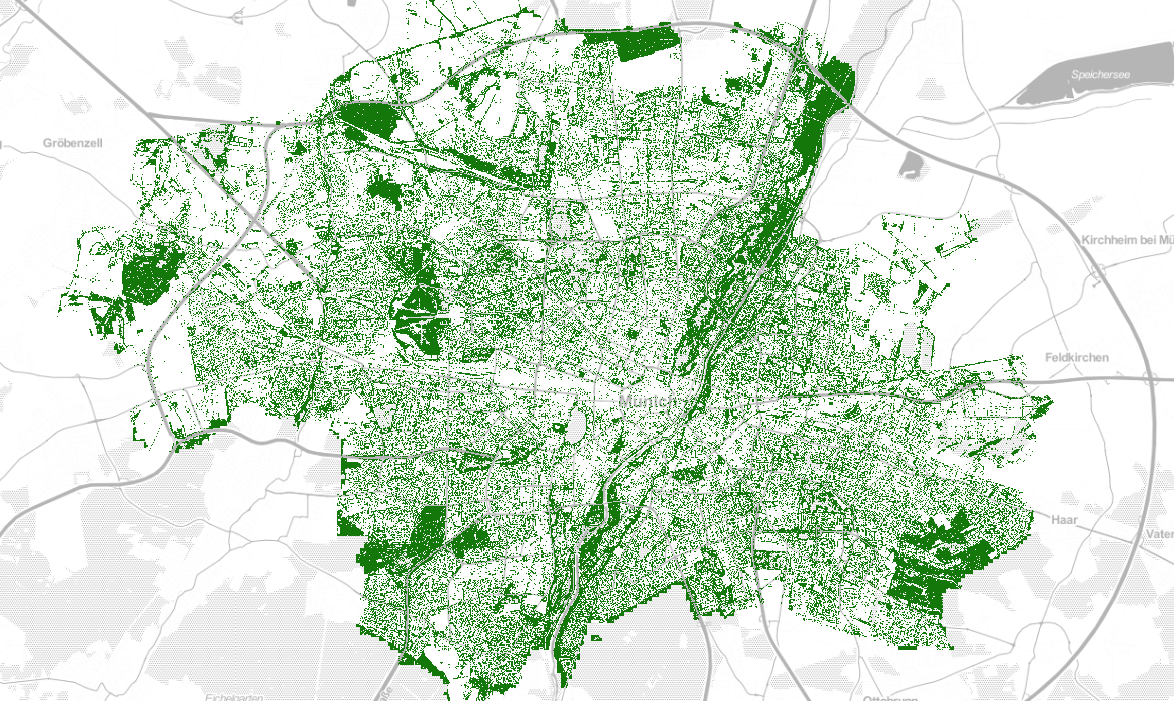
An interactive map to find missing trees in Muninch between 2017 and 2020.
A short introduction and background story: here.
- determine urban tree coverage in Munich City 🍺 from different years and visualize result in a map to assist finding missing trees
- identify missing trees (or ideally new planted trees) automatically
- enhance tree detection performance with better images and transfer learning
- gather tree (crown) information and serve as input for OpenStreetMap or further tree registration purpose
- try with different locations (e.g. cities)
- Freely available aerial images may not have good image resolution and would not have infrared or depth information.
- Trees can be hardly identified if aerial images are not ideally captured in summer season.
- Manual labeling and annotating trees in aerial images is time consuming and its quality can be far from perfect due to low resolution images.
- Young urban trees can be very small to detect.
- RGB-only color aerial image photos (available open data) from Munich as input
- machine learning
- supervised learning with a small amount of imprecise (handcrafted) training data with annotations
- "traditional" computer vision methods on pixel feature vectors (e.g. color, texture and etc.) with Adaboost classifier
- "deep learning" neural network (e.g. RetinaNet)
- visualization (e.g. tree canopy as map overlay)
ℹ️ This repository contains Python notebooks with which you can reproduce the result by your own. The source images, training data with annotations are not available yet in this repository due to their file sizes and constantly change under experiment. You may find any trained model in the releases page while other assets have to be downloaded or generated additionally.
- wms-tile-get for downloading map tiles from map server
- detectree, DeepForest for machine learning specialized for tree classification and segmentation
- labelme for image annotation or labeling
- conda to manage python environment and install packages
- GeoServer for manage, render and serve maps
- QGIS for display and inspect maps
- Luftbilder der Landeshauptstadt München 60 cm Bodenauflösung: images with 0.6m resolution taken in the summer 2017
- Digitales Orthophoto 80cm (BVV): images with 0.8m resolution taken on 26-April-2020
- Luftbild München 2019 RGB 20cm: images with 0.2m resolution taken probably on a winter day in 2019
See also Luftbilder München
Use wms-tile-get to download map tiles from WMS and store in Slippy Map structure (i.e. XYZ format). Alternatively arbitrary extents of map images can also be directly requested from WMS server. However, XYZ format is preferable for offline data storage.
 $ wms-tile-get -s contrib/munich/wms.munich_2017.json \
                -g contrib/munich/munich.boundary.geojson \
                -z 18 \
                -o aerial_images/opendata_luftbild_dop60
 $ wms-tile-get -s contrib/munich/wms.munich_2020.json \
               -g contrib/munich/munich.boundary.geojson \
               -z 18 \
               -o aerial_images/by_dop80c
Alternatively you can download cached map tiles from opendata_luftbild_dop60 and by_dop80c.
$ git clone https://github.com/easz/opendata_luftbild_dop60_Y2017 aerial_images/opendata_luftbild_dop60
$ git clone https://github.com/easz/by_dop80c_Y2020 aerial_images/by_dop80c
- Most of following steps are done in Python notebooks.
- The global configurable parameters stored in
settingsfolder are shared by all notebooks. - working folders are organized with structure
See wf-resample-map-tiles notebook
- generate tiles with arbitrary sizes with overlapping.
- generate tiles are in geo-referenced TIFF format.
- A additional meta data is generated containing
nodataratio of each resampled image.
See wf-feature-split-dataset notebook
- some representative images are selected as training data for supervised machine learning.
- The selected training data will be copied to the specified training folder.
- Alternatively, you can just randomly select training set.
- Manually labeling with
labelme - for simplicity trees are labeled/masked with circles.
- the training images have to be at first converted to raster images with labelme_json_to_dataset command
$ for f in *.json; do labelme_json_to_dataset $f; done
- then, generate response dataset with wf-segmentation-generate-response
- Generate response dataset with wf-detection-generate-response
See wf-segmentation-train-model and wf-detection-train-model notebooks
- The trained result (i.e. classifier model) will be stored in the specified output folder.
See wf-segmentation-inference and wf-detection-inference notebooks
- detect trees in images
- the result will be stored in the specified folder
- Use
GeoServerto create dataStoreofImageMosaictype containing the folder of prediction result and serve them (e.g. via WMS or WMTS service) as web map tiles. - Use
QGIS(e.g. openoverview.qgs) to review map tiles by adding corresponding layers.
- Bosch M. 2020. “DetecTree: Tree detection from aerial imagery in Python”. Journal of Open Source Software, 5(50), 2172.
- Yang, L., Wu, X., Praun, E., & Ma, X. (2009). Tree detection from aerial imagery. In Proceedings of the 17th ACM SIGSPATIAL International Conference on Advances in Geographic Information Systems (pp. 131-137). ACM.
- Weinstein, B.G.; Marconi, S.; Bohlman, S.; Zare, A.; White, E. Individual Tree-Crown Detection in RGB Imagery Using Semi-Supervised Deep Learning Neural Networks. Remote Sens. 2019, 11, 1309
