If you do not have jq installed, you can find the installation instructions here.
If you do not have gh installed, you can find the installation instructions here.
If you do not have Wayfinder CLI installed, you can find the installation instructions here.
We will be using Wayfinder to simplify cloud deployment. It is a platform that allows developers to deploy applications to Kubernetes clusters. It provides a number of features that make it easy to deploy and manage applications, such as automated deployments, rollbacks, and monitoring. As it is a cloud-based platform, you don't need Kubernetes expertise to use it. You can find the Wayfinder documentation here.
Open up a terminal and run the following commands to log in and authenticate to GitHub and Wayfinder.
gh auth login
wf login Once that is done, navigate to the root of this repository and run the following command:
./setup.sh You will be prompted to enter the name of a new workspace to be created. The name has to be all lowercase and between two to five unique alphanumeric characters. We recommend using your Imperial College London shortcode for this.
setup.sh will use the information you inputted to create a new workspace using the Wayfinder cli command wf create workspace.

You should be able to see the workspace you just created by logging on to https://portal-20-0-245-170.go.wayfinder.run/ using your Imperial College London email address and password. It may take some time before you can access the workspace you just created on the Wayfinder UI.
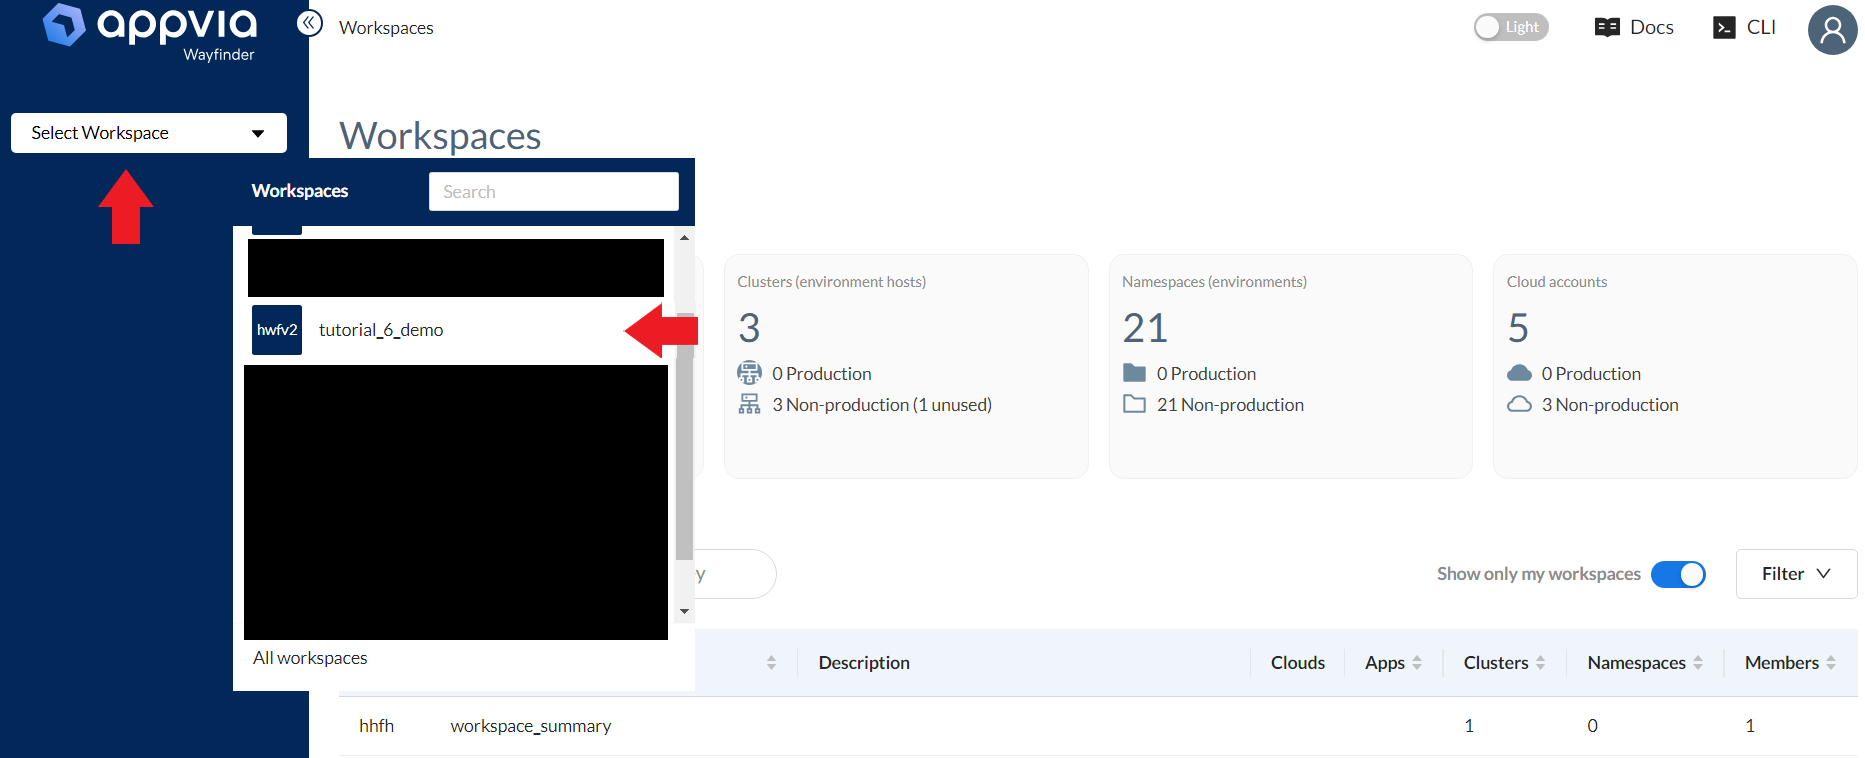
On the UI, select the correct workspace and you can create an application by pressing on the blue create application button on the top right corner.

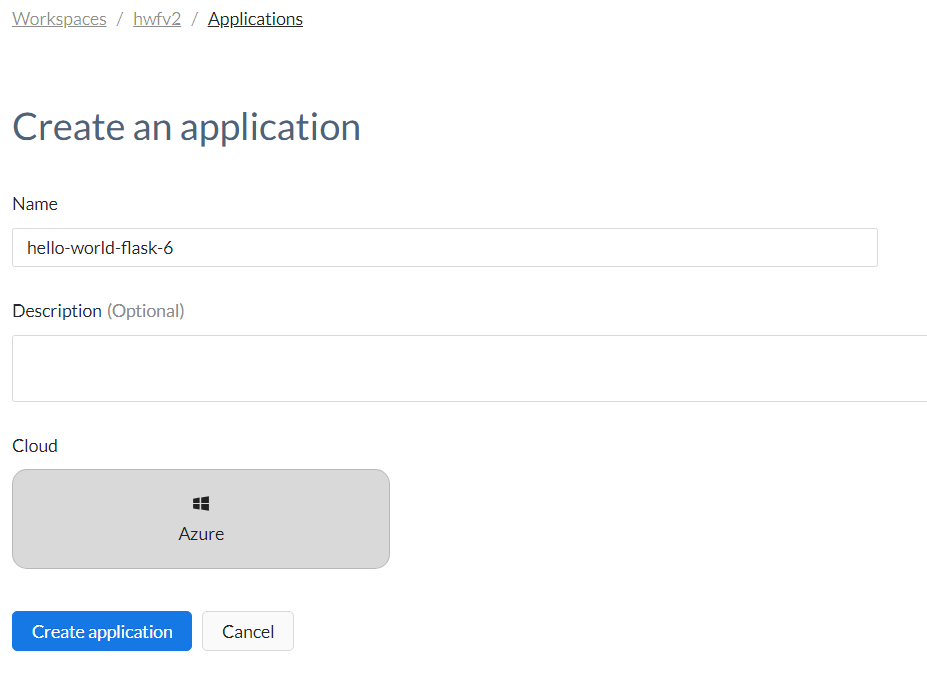
Provide a name for your application and select Azure as the cloud provider.
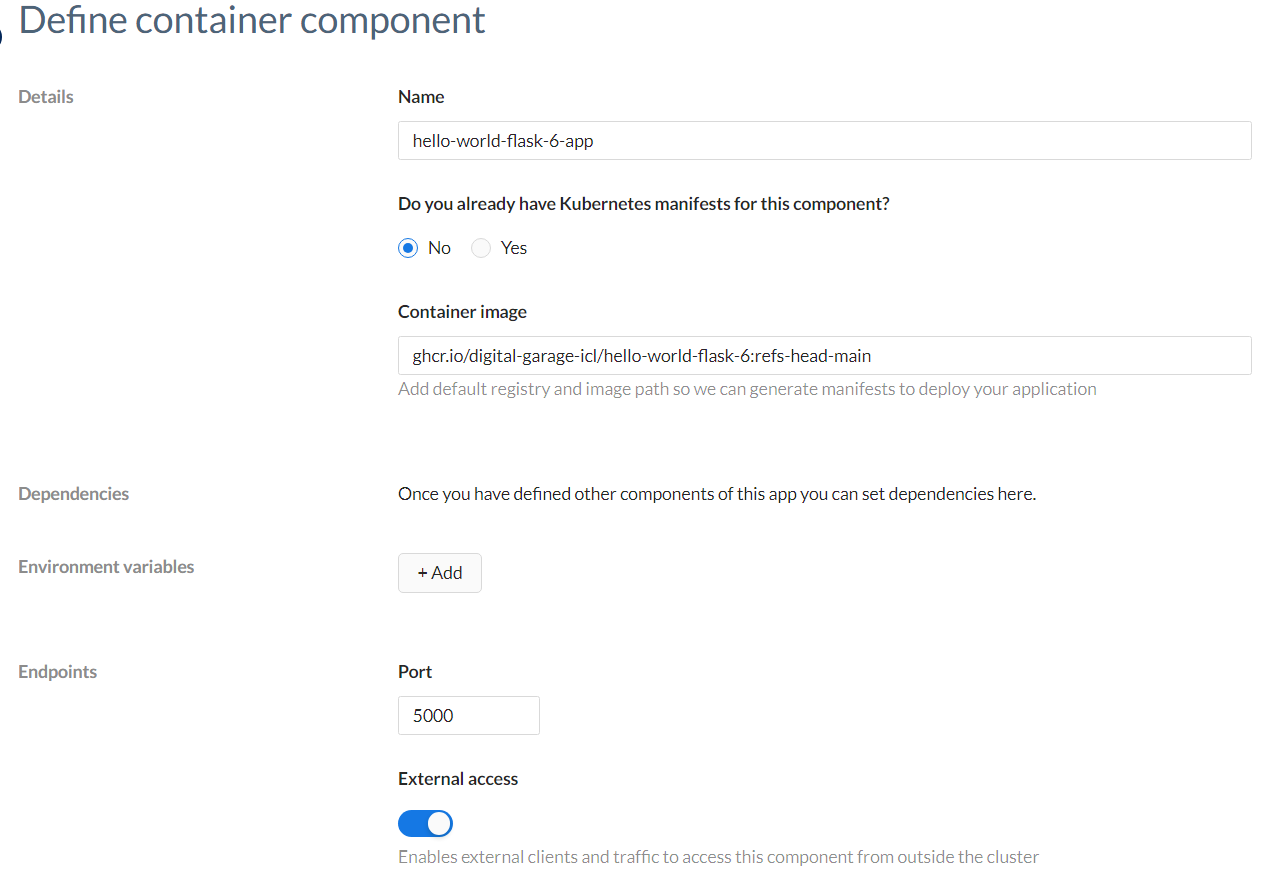
Once you have named your application, you have to define the required container components. In this case, we have to define a container component for our Flask app. Give the component a reasonable name and specify the container image path using the format specified: ghcr.io/{account-name}/{repository-name}:refs-heads-main For example, we used ghcr.io/digital-garage-icl/hello-world-flask-6:refs-heads-main. Please make sure the path is in lowercase. You now have to set the port number to be the same as the port number specified in the Dockerfile used to build the image.
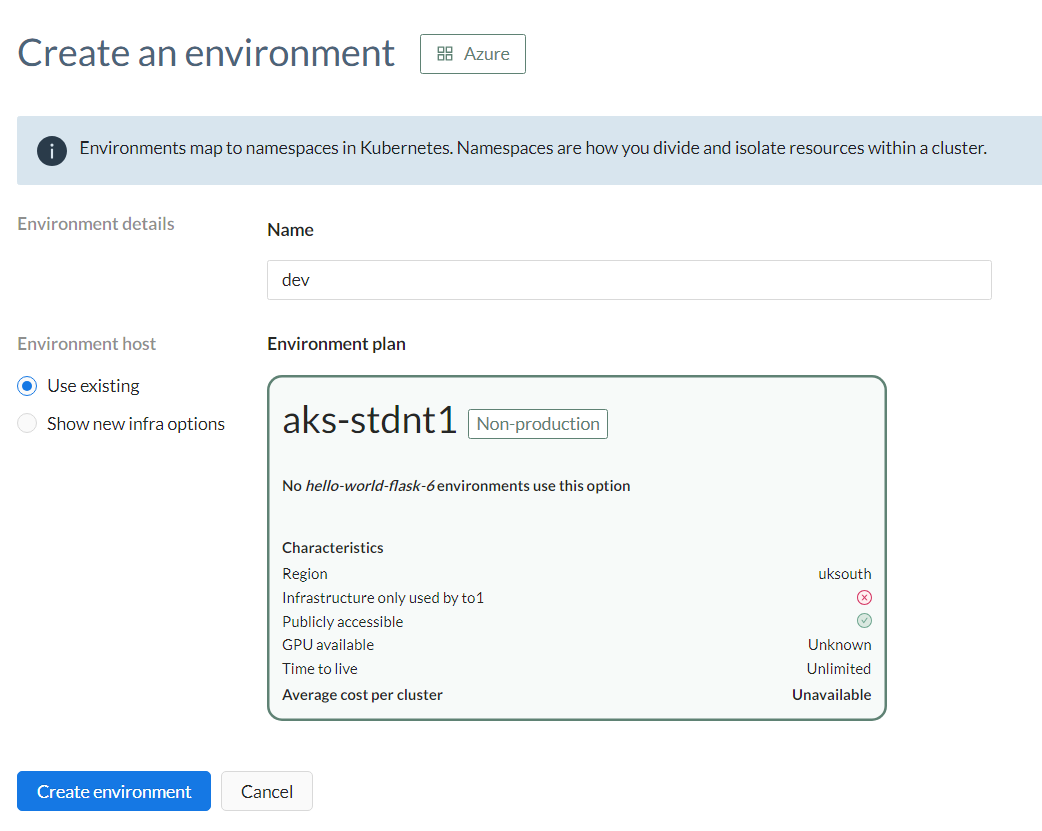
Once you have created the container component, you can create a new environment called dev. Select the most suitable cluster that you have access to. In this case, we only have access to one cluster called aks-stdnt1 so we selected that.
After you defined the components and the application environment, you have to rerun setup.sh and enter the name of your workspace, application, container component and environment. You will be prompted to enter a GitHub personal access token (classic). Please make sure the access token has read:packages permission and that you have pressed the Configure SSO button if it is present on the access token GitHub page. This option authorises the cloud to pull the image when you deploy your application.
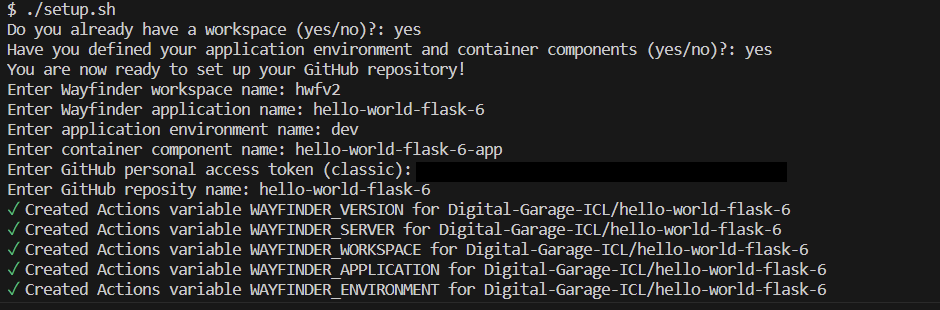
setup.sh will use the information you provided to create a workspace access token (WAT). This token allows us to access cloud resources by providing us with a set of permissions that are assigned via access roles. setup.sh uses Wayfinder CLI to assign access roles such as appmanager and appdeployer to us. These roles allow us to manage and deploy applications in Wayfinder. The script also sets the WAT as a GitHub secret, which can be used later on in the GitHub actions workflow.
You can now make some changes to app.py or index.html and push the changes to the repository. You should see that your Docker image is automatically built, published and the application is deployed to the cloud using GitHub Actions.
We have three jobs in the ci.yaml file located in .github/workflows. The first two, test and push were discussed in Tutorial 3 and Tutorial 5 respectively, so we will only go through the final job, namely deploy in this tutorial.
The workflow uses the wftoolbox image which is a Wayfinder toolbox image that contains useful tools for working with Wayfinder. The workflows also sets the WAT, server endpoint and workspace name as environment variables which is needed for further on in the workflow for deployment.
The deploy job consists of several steps:
- The first step, Checkout checks-out code from the repository so that the workflow can access it.
- Deploy application deploys the application using the
wf deploy appcommand.
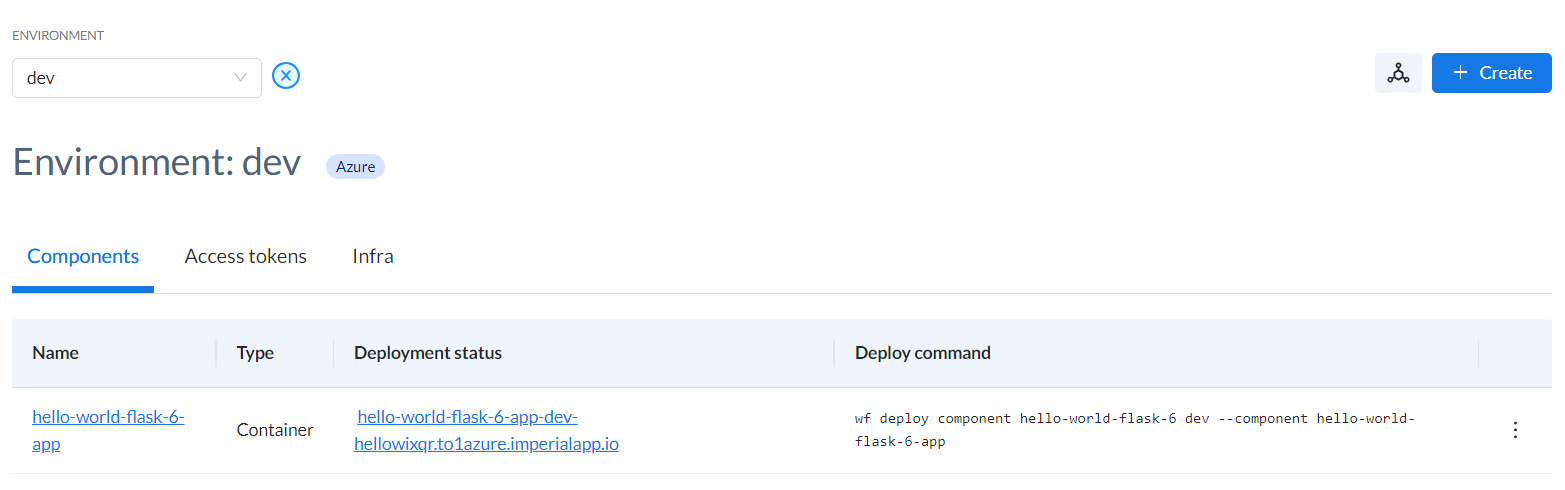
Now, log into the Wayfinder UI, select the correct workspace and select the application you just deployed. Click on the application environment and you should be able to see the application deployment status.
If you click on the component, you should be able to see the status, DNS entry and container image.
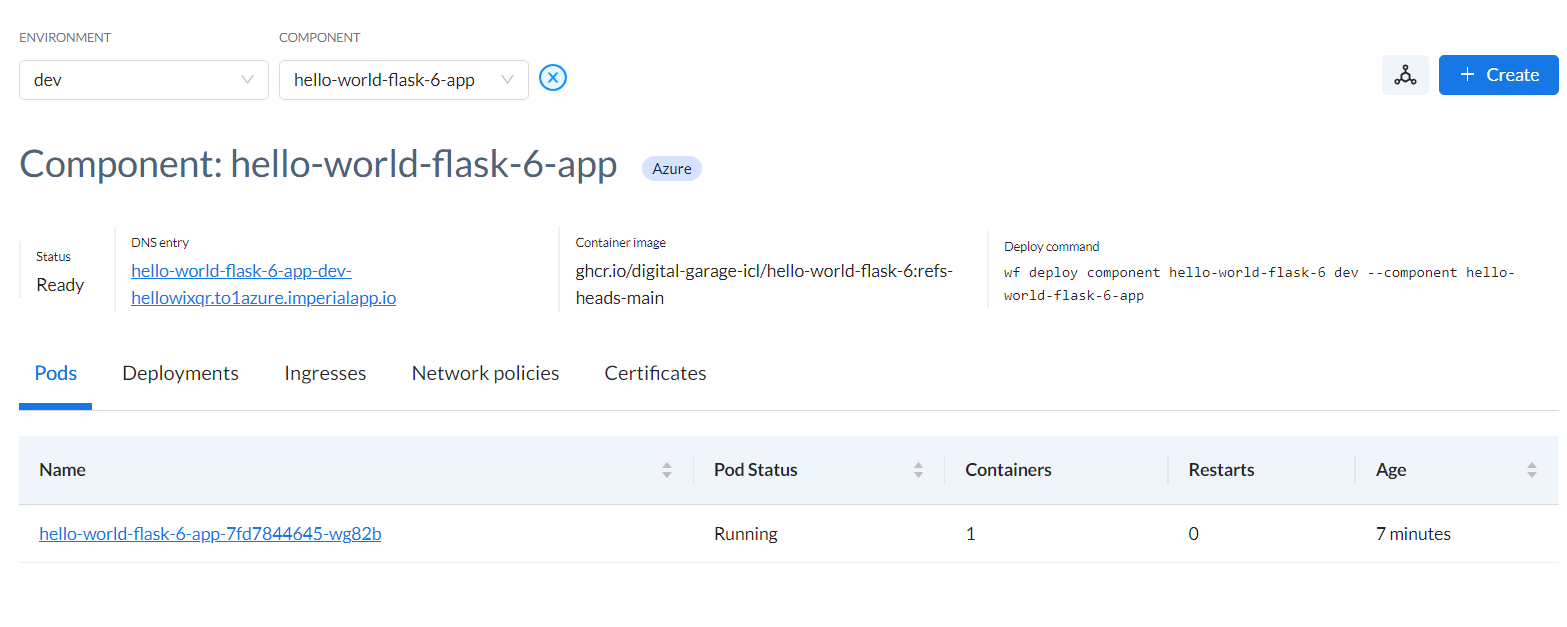
If you are familiar with Kubernetes, you can also click on the pods to get the logs. But if not, do not worry about this.
You can now click on the DNS entry which should lead you to the deployed application. Congratulations! You just deployed an application to the cloud!