This repository should help bootstrap new users of conda for managing programming environments.
No knowledge of git is required (though it is strongly recommended) to use this repository.
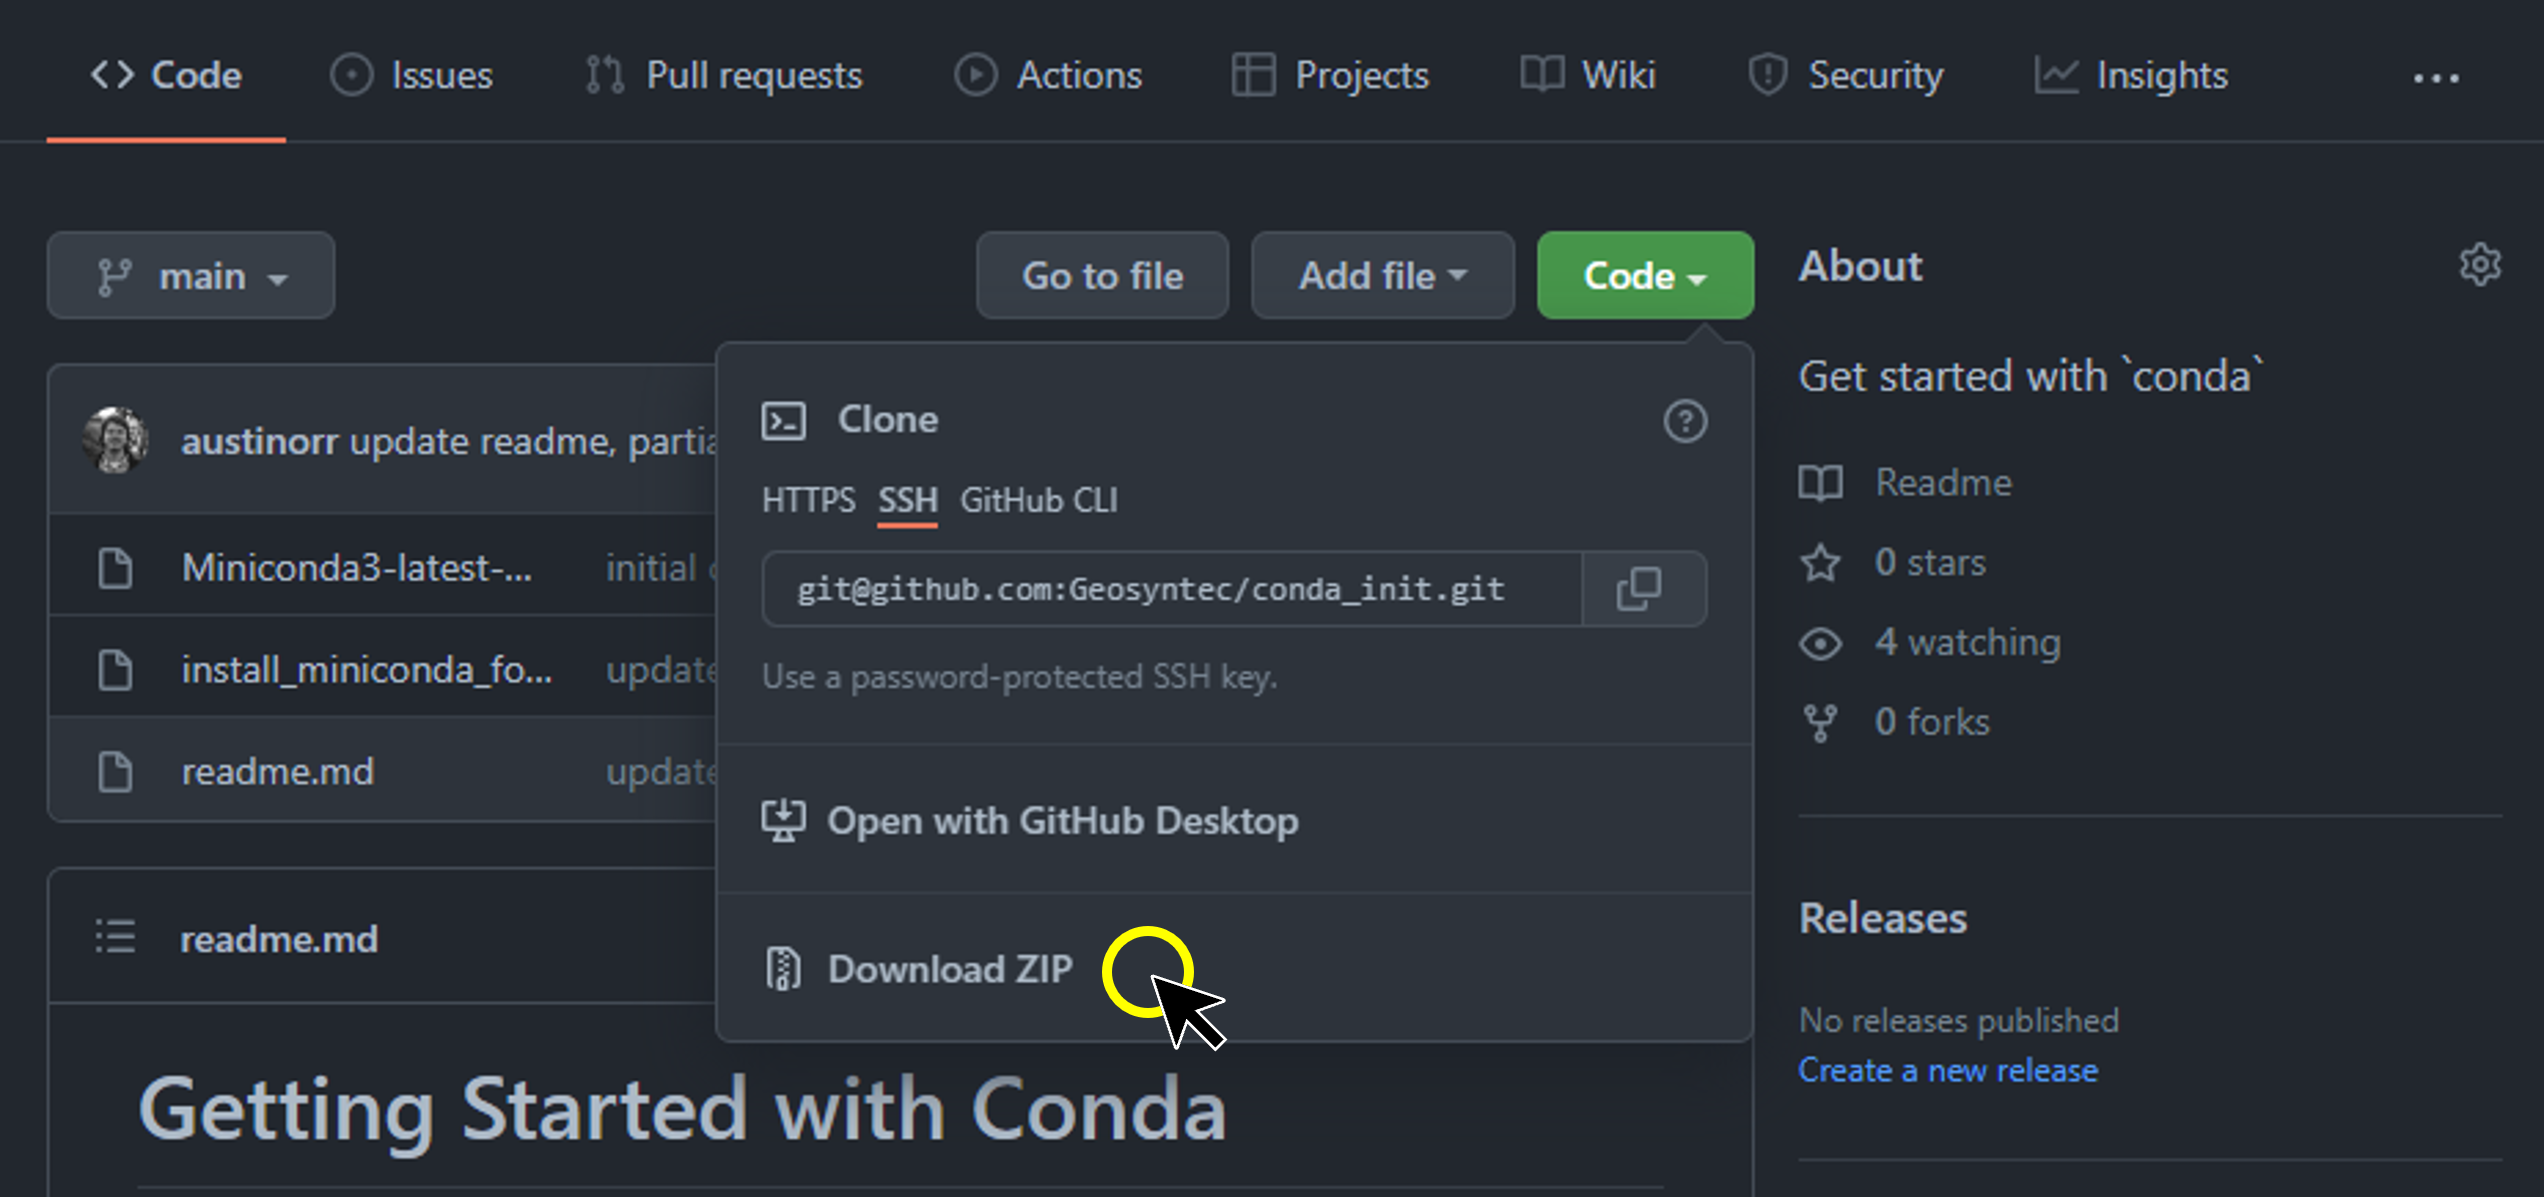
TLDR: If you have conda on your machine, you're good to go. If not, download this repo as a zip, click the .bat, profit.
Only do this if you have not previously installed conda on your machine.
To see if you have conda, type the following into your command prompt:
>conda --versionIf you see a version number, you should skip to the "How To conda" section.
If you see an error, then you probably need to install conda on your machine or add it to your path.
To be extra sure, search your start menu for 'anaconda', 'miniconda' and 'conda' to make sure the application is not installed on your machine.
Only you can prevent duplicate conda installs.
The following operations will install conda on your machine, so make sure this is what you want to do.
-
Download this repository as a .zip file
-
Extract it
-
Open the extracted directory
-
Rename the file
install_miniconda_for_user.txttoinstall_miniconda_for_user.bat. If this makes you squeamish - which is not unreasonable - here are the contents of the file:@echo off echo Checking if miniconda3 already exists for this user... if exist %UserProfile%\miniconda3 ( echo miniconda3 already exists for this user, exiting without modifying the system... pause EXIT /B ) else ( echo installing conda... start /wait "" Miniconda3-latest-Windows-x86_64.exe /InstallationType=JustMe /RegisterPython=0 /AddToPath=1 /S /D=%UserProfile%\miniconda3 echo installation complete. ) pause
The line that does all the action is below, and you may run it yourself from the terminal if you wish (and then skip the next step which is to run the .bat):
start /wait "" Miniconda3-latest-Windows-x86_64.exe /InstallationType=JustMe /RegisterPython=0 /AddToPath=1 /S /D=%UserProfile%\miniconda3 -
Double click the "install_miniconda_for_user.bat" file to install conda
- If a blue pop up appears that indicates that Windows is protecting your PC by blocking a the .bat file from running, click 'More Info' and then 'Run Anyway'.
- This will install miniconda on your machine for your user profile.
- The
condacommand will be available from the cmd prompt because it will be appended to your user PATH variable. - The location is %UserProfile%\miniconda3. Normalizing this install location allows IT to find this directory and white-list certain processes if needed.
-
Open a new command prompt and try it out. One way to do so is to click your start menu and type
cmd, then click Command Prompt. That should allow you to check if the install worked by running the following command:>conda --version conda 4.11.0If it worked you'll see the
condaversion, or you'll be prompted to runconda initand try again. If it failed with'conda' is not recognized as an internal or external command, operable program or batch file.Then you have not successfully installed conda on your system. If something else happened, you are on your own.
-
Optional finish setting up
condawith the following:>conda update -n base conda >conda install -n base conda-libmamba-solver >conda config --set solver libmambaThis will ensure you're running on the latest conda release, and that you're using the optimized dependency solver that's >6x faster than the default.

Always create a conda environment for new projects that you work on.
This will allow you to properly 'silo' the libraries you install so that as you assist with more and more projects you're still able to return to old project environments and run the code with the libraries that worked for your project when it was written.
It also helps your peers recreate the project python environment on their machine during peer review or just in case you get hit by a train and are unable to work on your important project from the hospital.
To create a new environment for an example project called Regional Climate Assessment for which we'll need to load datafiles, do maths on them, make plots from the maths, and produce figures and summary statistics, we will create a new conda environment.
Let's call the new env 'rca' since we'll be typing it a lot.
We also know we want to work with python and use the pandas and scipy and matplotlib libraries to support our analysis.
Let's also install jupyter so we can do our exploratory analysis from jupyter notebook.
We can handle all this with a single command:
>conda create -n rca python=3.9 pandas scipy matplotlib jupyterNow all we need to do is to activate the env:
>conda activate rcaNow your command prompt looks something like this:
(rca) >That will make python and our libraries available to us from this command prompt only.
Now we can navigate to our project directory and use this environment to do data analysis on our project files. Changing to the project directory might like this, for example:
Switch to a network drive:
(rca) >P:Then change to the project directory (i.e., cd):
(rca) >cd "P:/some/path/to/projects/Regional Climate Assessment/Technical Analysis"Then we just launch a jupyter notebook and start working:
(rca) >jupyter notebookIt's important to be able to save a record of your packages so that others (or you) are able to recreate it.
There is a `conda`` command to support saving your environment to a file:
>conda env export -n rca --no-builds > rca_env.ymlThere is also a `conda`` command to support creating a new environment from a environment yml file:
>conda env create -f rca_env.yml -n rcaThere will likely come a time when you need to do add libraries to your existing conda env.
Simply activate the environment that you wish to modify, and install the libraries:
> conda activate rca
(rca) >conda install geopandas -c conda-forge
The above command will install the geopandas library and all of its dependencies into the current environment.
The "-c conda-forge" ensures that all the libraries are fully compatible with eachother and with the libraries already installed within the current environment.
This is one of the main advantages to using conda is that for tricky packages like geopandas conda will help resolve package conflicts and ensure that the environment 'just works'.
Sometimes it's really helpful to run conda env export prior to installing or updating your libraries.
Keep that in mind in case your update breaks some of your old code and you need to try to track down the cause.
ESRI products use python internally for many of their functions and both ArcGIS Pro and ArcMap 10.x expose their arcpy library for users with active licenses.
If you do not have a license, you will find that this section of this how-to document does not apply to you.
Everything in this section is also available (and likely more current) on ESRI's own documentation here.
ESRI's fancy new multi-core modern desktop application, ArcGIS Pro, loves conda so much that they actually ship both conda and a massive conda environment containing python and other arcpy dependencies.
To use ArcGIS Pro's python when running standalone scripts that need arcpy use:
>c:\Progra~1\ArcGIS\Pro\bin\Python\scripts\propy.bat my_script.pyTo activate the ArcGIS Pro environment use:
>c:\Progra~1\ArcGIS\Pro\bin\Python\scripts\proenv.batIf you want to run an arcpy enabled jupyter notebook, simply cd to the directory containing the notebook file, run the above command to activate the arcgispro-py3 environment, and then type jupyter notebook.
Consult ESRI's documentation for other advanced features about the ArcGIS Pro environment, including cloning and installing new packages.
This is not necessary for nearly all use cases involving arcpy, but if you want to explore options, see their docs.
If you're still using ArcMap, consider starting to use ArcGIS Pro.
If that is not an option for you or your project, use the following command to execute the (long ago deprecated and abandoned) python 2.7 executable that ESRI ships with ArcMap 10.x:
>c:\python27\ArcGIS10.7\python.exe my_script.pyYou'll probably need to adjust the path above if you're using a different version of ArcMap.
Lastly, if you're still using ArcMap, consider starting to use ArcGIS Pro.