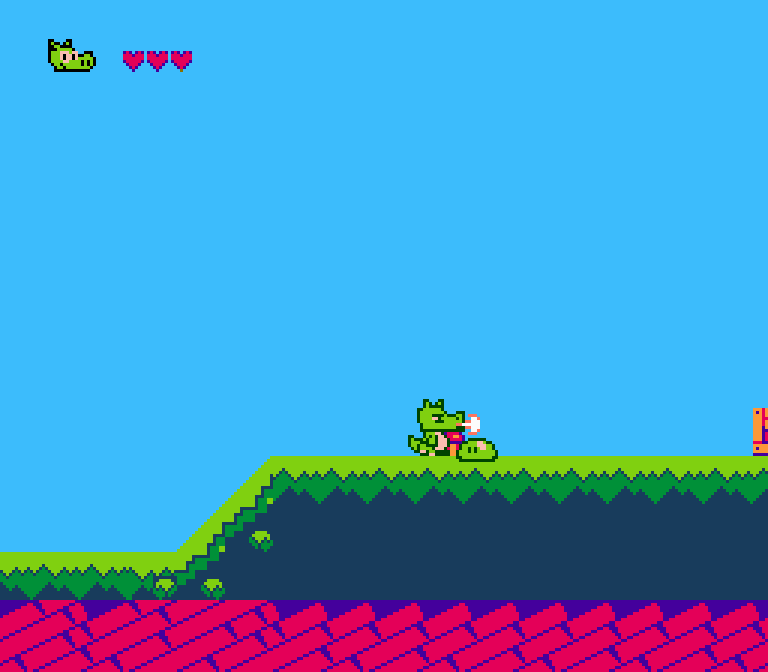
An NES Platformer Written In Millfork
Controls:
- A - Jump
- B - Attack
- D-Pad - Move
- Start - Pause
Plese note that currently the cartridge space is completely filled up! This means that if you want to add anything, it would be necessary to remove something to make more room (I recommend removing either Famitone or one of the levels to make more space). I plan to eventually port this game over to using UxROM instead of NROM to get more PRGROM space, so check back to get that version if you plan to use this project as a starting point for a new project.
Run make.bat to compile. Make sure to edit make.bat to point to your Millfork installation before running it.
The resulting binaries are placed in the
bin directory.
Levels are edited using Tiled. The .tmx files for each level are stored in the ./src/levels/data directory.
You must install the python script located in the tiled_plugin directory in order to be able to export these maps.
To export a map, make sure the python plugin is installed, and then in Tiled you'll be able to click File->Export and see *.meta as one of the
"Save as type" options. In order for the map to export properly, make sure it follows all of these rules:
- Levels must be a multiple of
16tiles in width, and exactly15tiles in height. - All levels must use
metatiles.pngas their tilesheet. - Tiles must be drawn on a tile layer named
Tiles. Enemy spawn objects must be placed on an object layer labeledEnemies. - Enemy spawn objects must have the exact string
enemy_spawnin theirTypeproperty. - Enemy spawn objects must each have a custom property named
enemy_type, and the value of that property determines what enemy spawns at that location, i.e. a value of0inenemy_typewill spawn a boomba in that location. - There must only be one enemy spawn object per 16 pixel column.
- Currently the maximum amount of enemy spawns per level is
32. This can be changed by changing the size of the arrays found inlevels.mfk
See test.tmx as an example map.
All levels must also have their own .mfk file which is then imported into the levels.mfk file.
Use level0.mfk as a template by copy-pasting its contents into your own levelX.mfk file and then replace all the data with your own level data.
Finally, go into levels.mfk and in the load_level function, add your level load function to the list of if statements like so:
    if level_num == 0 {
        load_level0()
    }
    if level_num == X {
        load_levelX()
    }
Also remember to import your level at the top of the file:
import level0
import levelX
[ ... ] (rest of the file)
After this, you should be able to go to any existing level, change next_level to your new level's number, and it'll load your new level after completing that one.
Graphics data (from now on referred to as the CHRROM code) is stored in the ./src/graphics/twin_dragons.chr file.
To add new tiles/sprites, simply edit this file with the appropriate bits that represent your tile.
I recommend using YY-CHR to do this easily.
Please Note: The location of a tile in CHRROM determines its collidability
Currently, these two functions in .src/physics.mfk determine the ranges for which tiles in CHRROM collide with movable objects:
bool is_collidable(byte tile) {
    if tile >= $C0 && tile < $FF {
        if tile == $F0 || tile == $F1 || tile == $F2 || tile == $F3 ||
            tile == $D4 || tile == $D5 || tile == $D6 || tile == $D7 {
            hit_spike = 1
        }
        return true
    }
    if tile >= $68 && tile <= $6B{
        touched_goal = 1
    }
    return false
}

inline void slope_check(byte tile) {
    if tile == $CA || tile == $C9 {
        on_slope = 2
    }
    else if tile == $CC || tile == $CF {
        on_slope = 1
    }
    else {
        on_slope = 0
    }
}
These functions label all tiles between $C0 and $FF as collidable tiles.
Slopes are also detected through the tiles placed between $C9,$CA,$CC and $CF.
Make sure to edit these functions/ranges if you plan to change which tiles are collidable with the player/enemies.
Metatiles are 16x16 pixel tiles made up of 4 8x8 graphics tiles.
To add/define new metatiles, first make a new metatile in src/graphics/metatiles.png. This is so that the metatile
shows up in maps that are edited using Tiled. Make sure that the tiles that make up the metatile already exist within
CHRROM.
Next, define the new metatile's component tiles in the array located in metatiles.mfk.
At the bottom of the file, you'll find an array called Metatiles:
const array metatiles = [
			//Tile positions:
			//top-left	bot-left	top-right	bot-right
            $24,		$24,		$24,		$24,
            [ ... ]
            $68,        $6A,        $69,        $6B

]
The [...] represents already defined metatiles.
Say we want to define a metatile that uses tile $00 as its top-left tile,
$01 as its bottom-left tile, $02 as its top-right tile, and
$03 as its bottom-right tile.
To define this metatile, simply add its four component tiles to the end of the array like so:
const array metatiles = [
			//Tile positions:
			//top-left	bot-left	top-right	bot-right
            $24,		$24,		$24,		$24,
            [ ... ]
            $68,        $6A,        $69,        $6B,
            $00,        $01,        $02,        $03

]
Notice how this is an array, so every entry must have a comma after it except for the last entry.
Also note that this only applies if you're appending a new metatile to the end of your metatile list.
If you instead inserted a metatile in the middle of metatiles.png, then you need to find the correct
location within the array to insert its tiles.
Next, you need to edit the tiled python script supplied in the tiled_plugin directory.
Open up metatile_nes.py and you'll see at the top of the file is a dictionary named tile_attrs.
You must add the number of your new metatile and the palette that it uses to this dictionary. If you are
appending a new metatile, then its metatile number is simply +1 of the second-to-last number in the dictionary.
For example, if we currently only have a single metatile defined, then tile_attrs looks like this:
#Which palette does each metatile use? Edit this to the appropriate palette
#number when making new metatiles (metatile_number : palette_number)
tile_attrs = {
    0:0,
    255:1
}
If we appended a metatile which uses the second palette (index 1), then we change the dictionary by adding one line:
#Which palette does each metatile use? Edit this to the appropriate palette
#number when making new metatiles (metatile_number : palette_number)
tile_attrs = {
    0:0,
    1:1,
    255:1
}
After this is done, re-install your newly modified python script to your ~/.tiled directory to see the changes in Tiled.
If the new metatile you've added is a slope, don't forget to change the slope_check function in physics.mfk to have
it work properly in-game.
See animation_structure.txt for info on how animation data is structured. By convention, all frame/animation data is placed at the bottom of animation.mfk.
Once you've got your frame/animation data ready, you need to add them to the functions handle_current_anim and draw_current_frame in animation.mfk in order to use them in-game.
For example, in draw_current_frame, if you have a new frame called health_pickup_static_frame, you can add it in like so:
    if frame_num == 0 {
        sprite_draw_frame(player_idle_frame.addr, x,y, mirroring)
    }
    if frame_num == X {
        sprite_draw_frame(health_pickup_static_frame.addr, x,y, mirroring)
    }
Where X is your new frame number that doesn't conflict with any other frame numbers. Note that these frame numbers also define the frames represented by the frame numbers in animation data.
For adding animations in handle_current_anim, you do something similar:
    if current_anim->anim_num == 0 {
        anim_ptr = player_idle_anim.addr
    }
    if current_anim->anim_num == X {
        anim_ptr = health_pickup_static_anim.addr
    }
Where X is an animation number that doesn't conflict with other animation numbers.
When adding animations, it is best to add them to handle_current_anim and write the code to display the animation first before trying to completely fill out the animation data. That way you'll be able to see how the animation looks like right away and adjust any errors visually.
To add a new enemy, first create a new file in src/enemies named *.mfk where * is the name of your enemy.
This file will contain all of the logic that controls this enemy type. To learn how to program enemies properly, see the
Programming Enemies/Enemy Structure section.
There are 6 functions that must be implemented by each enemy. They can be named whatever you want, but each of them
needs to be an inline void function and also must handle one of the following:
- initialization (1 argument: byte)
- animations (1 argument: pointer.Enemy)
- physics (1 argument: pointer.Enemy)
- on-screen logic (1 argument: pointer.Enemy)
- death logic (1 argument: pointer.Enemy)
- hit by player logic (1 argument: pointer.Enemy)
For example, in boomba.mfk, these functions are implemented as follows:
inline void init_boomba(byte heap_spot): initializes the boombainline void handle_boomba_anims(pointer.Enemy enemy_ptr): draws boomba sprites into ram based on current animation.inline void handle_boomba_phys(pointer.Enemy enemy_ptr): moves the boomba based on current physics state.inline void handle_boomba_logic(pointer.Enemy enemy_ptr): determines whether boomba should jump or not and updates animation info.inline void handle_boomba_death_logic(pointer.Enemy enemy_ptr): starts up death animation, stops all jumping.inline void hit_boomba(pointer.Enemy enemy_ptr): if the boomba's been hit, set it to the death state.
Once these functions are implemented, you need to hook each of these functions up to the enemy system, located in enemies.mfk.
To add your init function (i.e. init_enemyX), edit this section in the spawn_enemies function:
    if type == 0 {
        init_boomba(heap_spot)
    }
to this:
    if type == 0 {
        init_boomba(heap_spot)
    }
    if type == X {
        init_enemyX(heap_spot)
    }
Where X is the type number of your new enemy. Make sure you keep that type number consistent in the following functions you'll be adding to.
IMPORTANT NOTE FOR ENEMY TYPE NUMBERS: Enemy type numbers range from 0-127. This is because the last bit of the byte is reserved as a flag for telling when an enemy is dead. This means that when you check an enemies type, you must check both its base number (i.e. 0 for boomba) and its base number + 128 (i.e. 128 for boomba). So the second enemy with type number 1 also has type number 129, the 3rd enemy with type number 2 also has type number 130, and so on.
With that in mind, here's how to hook up the other functions:
Enemy Hit:
In the function hit_enemy, change
    if enemy_ptr->enemy_type == 0 {
        hit_boomba(enemy_ptr)
    }
to
    if enemy_ptr->enemy_type == 0 {
        hit_boomba(enemy_ptr)
    }
    if enemy_ptr->enemy_type == X {
        hit_enemyX(enemy_ptr)
    }
Enemy Physics:
In the function handle_enemy_phys, change
    if enemy_ptr->enemy_type == 0 || enemy_ptr->enemy_type == 128{
        handle_boomba_phys(enemy_ptr)
    }
to
    if enemy_ptr->enemy_type == 0 || enemy_ptr->enemy_type == 128{
        handle_boomba_phys(enemy_ptr)
    }
    if enemy_ptr->enemy_type == 1 || enemy_ptr->enemy_type == 129{
        handle_enemyX_phys(enemy_ptr)
    }
Enemy Animations:
In the function handle_enemy_anims, change
    if enemy_ptr->enemy_type == 0 || enemy_ptr->enemy_type == 128{
        handle_boomba_anims(enemy_ptr)
    }
to
    if enemy_ptr->enemy_type == 0 || enemy_ptr->enemy_type == 128{
        handle_boomba_anims(enemy_ptr)
    }
    if enemy_ptr->enemy_type == 1 || enemy_ptr->enemy_type == 129{
        handle_enemyX_anims(enemy_ptr)
    }
Enemy Logic and Death Logic:
In the function handle_enemy_logic, change
    if enemy_ptr->enemy_type & %10000000 != 0 {
        //Death flag is on, so handle the death animation
        if enemy_ptr->enemy_type == (128 + 0) {
            handle_boomba_death_logic(enemy_ptr)
        }
    }
    if enemy_ptr->enemy_type == 0 {
        handle_boomba_logic(enemy_ptr)
    }
to
    if enemy_ptr->enemy_type & %10000000 != 0 {
        //Death flag is on, so handle the death animation
        if enemy_ptr->enemy_type == (128 + 0) {
            handle_boomba_death_logic(enemy_ptr)
        }
        if enemy_ptr->enemy_type == (128 + 1) {
            handle_enemyX_death_logic(enemy_ptr)
        }
    }
    if enemy_ptr->enemy_type == 0 {
        handle_boomba_logic(enemy_ptr)
    }
    if enemy_ptr->enemy_type == 1 {
        handle_enemyX_logic(enemy_ptr)
    }
With these changes, your new enemy should be ready to be handled by the enemy system.
Enemies are spawned using the spawn_enemy function, which is automatically called for any spawners that were placed in the Tiled map.
Enemies are despawned using the add_to_enemy_remove_queue function. If you don't want your enemy to respawn, pass in the value $FF as
the second argument to the function.
When programming enemy logic, each enemy gets its own location in memory with its own Enemy struct.
The Enemy structure definition is located in game_lib.mfk and is exactly 16 bytes in size for alignment reasons:
struct Enemy {
    Box pos,
    byte xfrac, //fractional part of player's x coordinate, can range from 0-3 (first 2 bits)
    byte yfrac, //fractional part of player's y coordinate, can range from 0-3 (first 2 bits)
    sbyte xvel,
    sbyte yvel,
    byte on_slope,
    bool on_ground,
    byte id,
    byte enemy_type,
    Anim anim,
    bool mirroring
}
(Anim structs are 3 bytes long, Box structs are 4 bytes long, bools and sbytes are single bytes)
Each on-screen enemy is given these bytes to access through its position in the enemy_heap array.
The only property that you should not change during the enemy's lifetime is its id and enemy_type properties,
as these are used by various functions in enemies.mfk to update the enemies each frame.
Every other property, however, can be used to store whatever you wish, even in spite of their names.
While most enemies will end up using these variables for intended purposes, you could use them for other purposes,
i.e. if you have a completely stationary enemy, then you could use the xvel and yvel variables for other
purposes, since they'll never be used in that enemy's physics_update function.
Each enemy also has an additional 4 bytes of storage in the form of reserved bytes in the enemy_aux_heap heap,
which is an array of Enemy_Aux structs:
struct Enemy_Aux {
    byte spawner, //reference number for spawner, used to respawn
    byte aux0,
    byte aux1,
    byte aux2
}
In general, the spawner property should not be changed, but if your enemy will never respawn, then you can
use it for other purposes. The rest of the bytes are auxillary bytes that can be used however you need.
- Some artwork in this project was originally made by surt and is distributed here under a CC-BY 3.0 license.
- All code (except famitone5) is released under a zlib license (see LICENSE). For famitone5, see readme.txt in the famitone5 directory. Famitone2 originally made by Shiru, Famitone5 made by nesdoug
- Music in the
famitone5directory and the SFXtwin_dragons_sfx.ftmfile in themusicdirectory is made by Shiru, all rights reserved. - All other music is made by Garydos and is released under a Creative Commons 4.0 BY license.