The purpose of this demo is to develop a Mobile Application using the Ionic, Feedhenry & Cordova Hybrid HTML5 Frameworks.
The project will be developed in 2 parts:
- The first part will explain how to setup the project using the
openshift.feedhenry.comcloud portal and run it locally on your machine - The second part will use the code part of this github repository to call the backend REST services designed for the JBoss Fuse Blog application developed here.
|  |
|  |
|  |
|  |
|
To access the backend from the backend-service nodejs application, new express routes have been added
app.get('/articles', blogService.findAll);
app.get('/articles/searchid/:id', blogService.findById);
app.get('/articles/searchuser/:user', blogService.findByUser)
app.post('/articles', blogService.newPost);
Each route is associated to a function that the server will use to call the Camel REST endpoint running into JBoss Fuse. By example, the findById function has been created as such
exports.findById = function (req, res, next) {
    console.log("Service FindById called");
    var id = req.params.id;
    request('http://localhost:9191/blog/article/search/id/' + id, function (error, response, body) {
        if (!error && response.statusCode == 200) {
            console.log(body);
            res.send(body);
        }
    })
};
The parameter that we need to use is retrieved using the javascript req.params.id function and next added within the url request http://localhost:9191/blog/article/search/id/' + id. When the response is received, it is returned
back using the response object.
Remark : To run the project on Android, please use the code modified and pushed to the branch Android
- Nodejs - v0.10.30 -
npm install -g npm@0.10.30 - Grunt
- Ionic - 1.7.7
- Cordova - 5.4.1
-
Log to openshift.feedhenry.com web site and click on the button to create a new project
-
Select from the template list the
IONIC HELLO WORLD PROJECTand click on the buttonchoose -
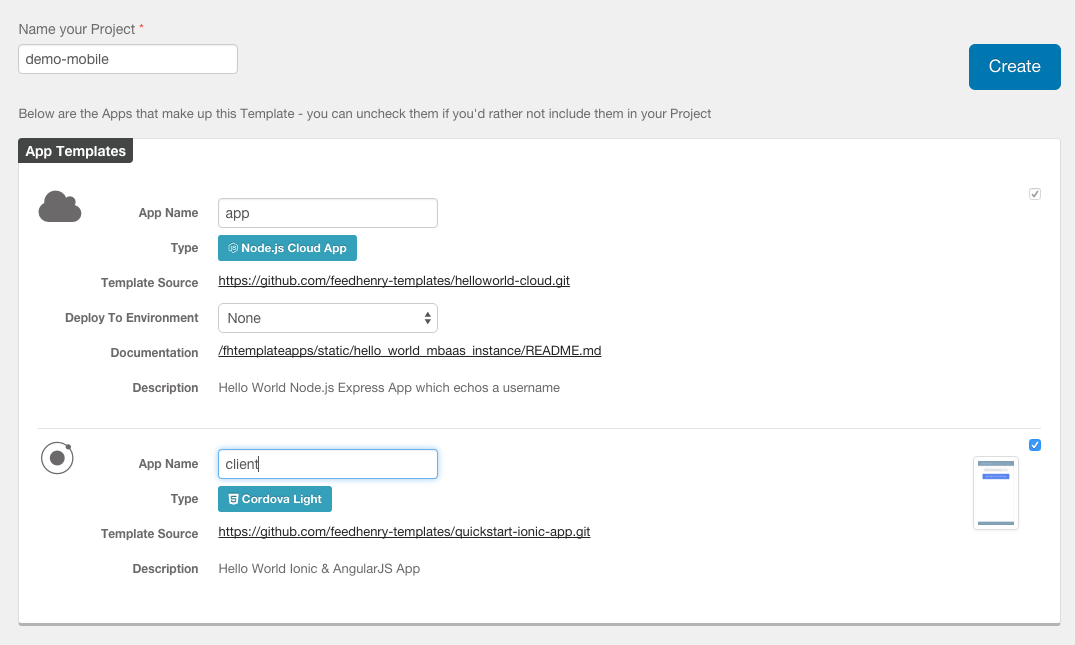
Add your project name
demo-mobilelike also the name of theclientandapplication -
Click on the button
create
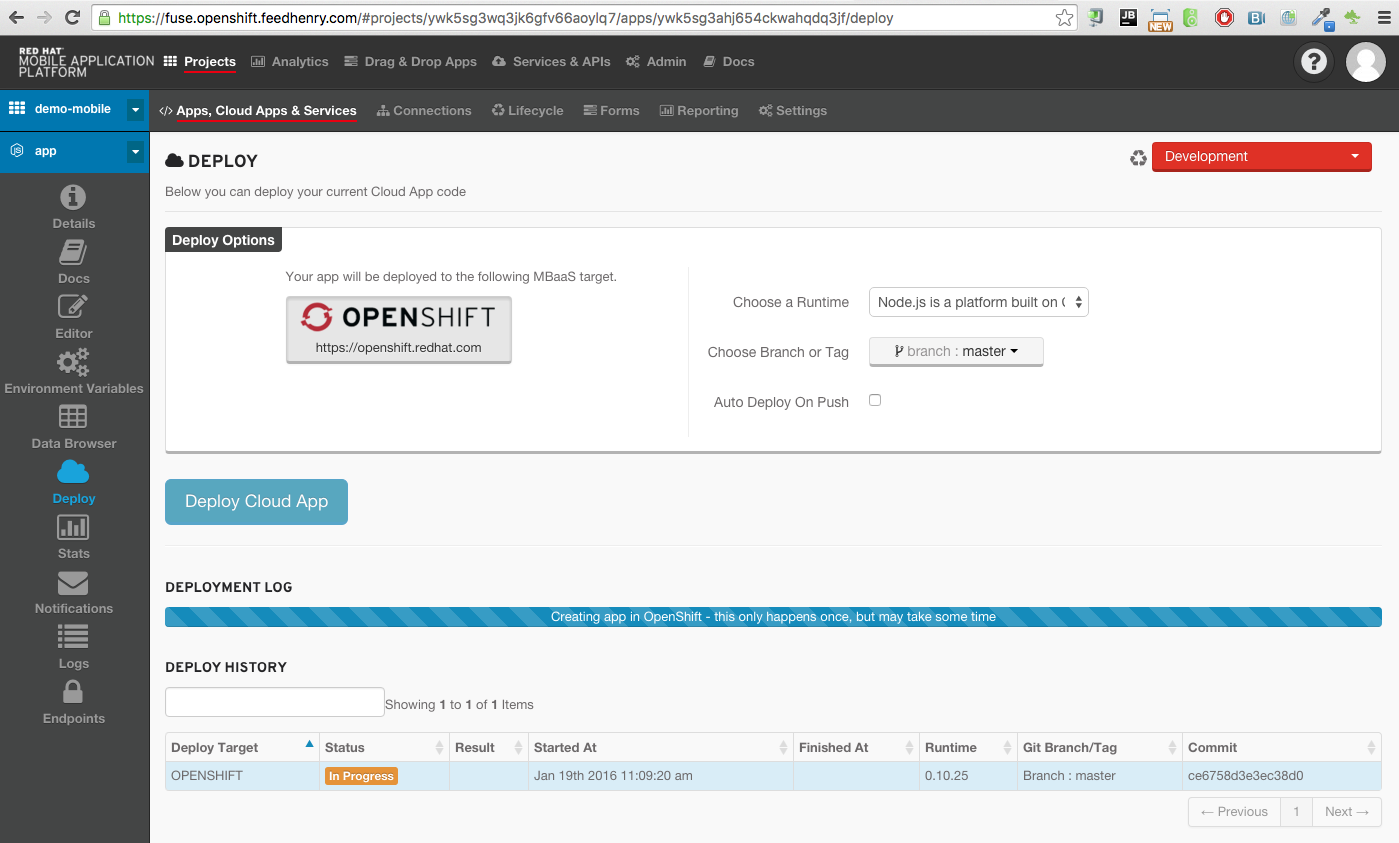
- Select the
Cloud Appof thedemo-mobileproject on the openshift.feedhenry.com web site and click on thecloudicon to start the deployment process of the nodejs application
-
On your machine, open a terminal and create a folder with the name of your project
demo-mobile -
When the project has been created on openshift.feedhenry.com, copy/paste the git urls
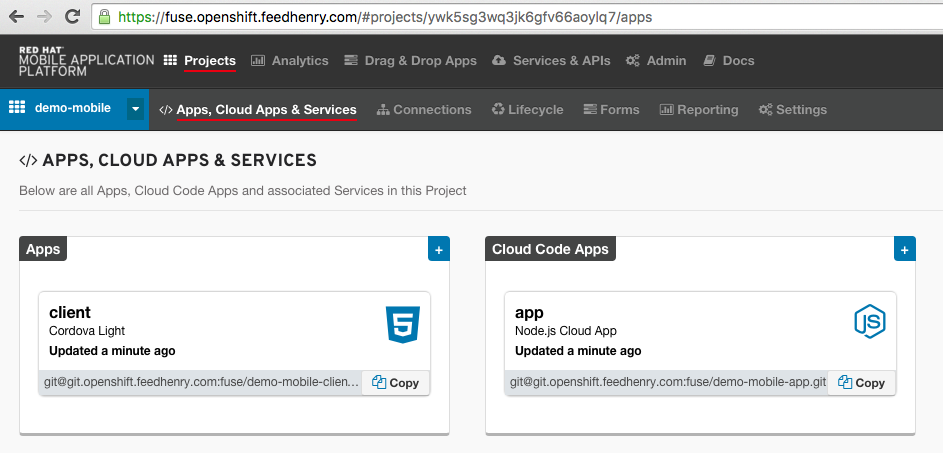
- And clone the mobile client and the backend application using the
git clonecommand as such
git clone git@git.openshift.feedhenry.com:fuse/demo-mobile-client.git client
git clone git@git.openshift.feedhenry.com:fuse/demo-mobile-app.git application
- Move to the folder
clientand deploy the node packages
npm install
- Open another terminal and move to the
applicationfolder - Deploy too the node packages and grunt
npm install
npm install grunt
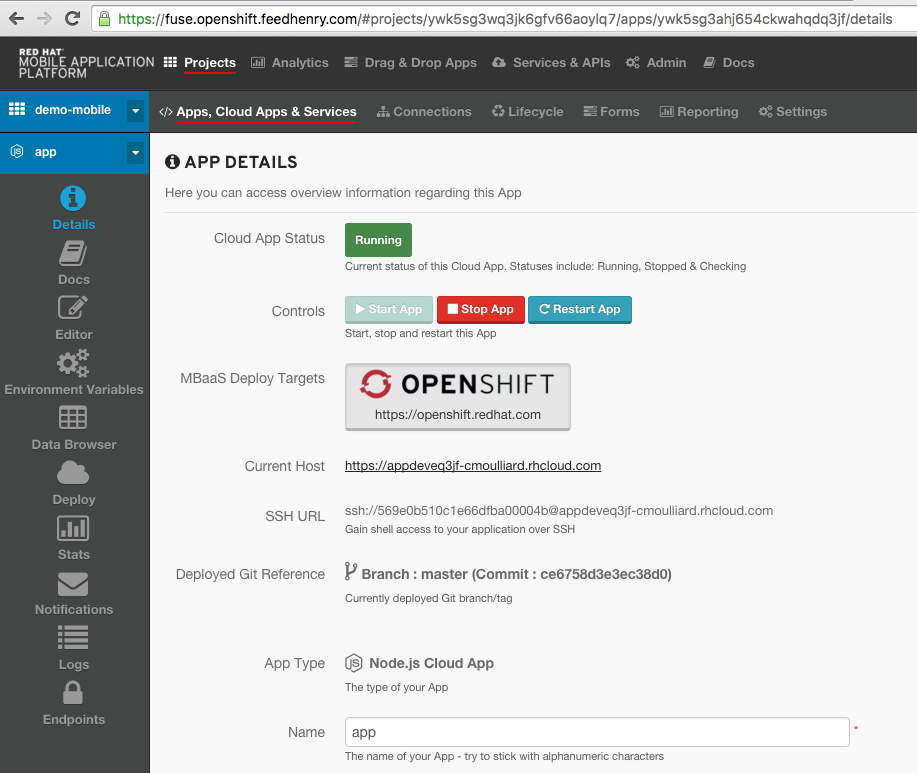
- If the
Cloud Applicationhas been deployed successfully and is started,
- You can start locally on your machine the mobile application using the
grunt:servetask that you will execute within theclientproject
grunt:serve
-
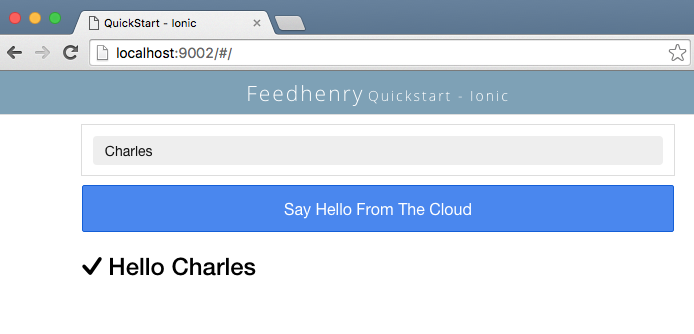
Your browser will be called and this address will appear
http://localhost:9002/# -
Add your name within the field and click on the button
Say hello from the cloud -
You will receive a response from the nodejs server running in the cloud
-
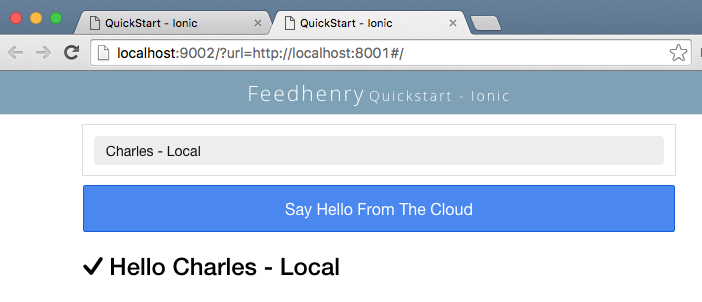
You can also make a test using your local backend server which is a nodejs application
-
Within the client terminal, stop the grunt task and relaunch using using the local parameter
grunt serve:local
- The url displayed into the browser is different as it contains the hostname of the local backend server to call
http://localhost:9002/?url=http://localhost:8001#/
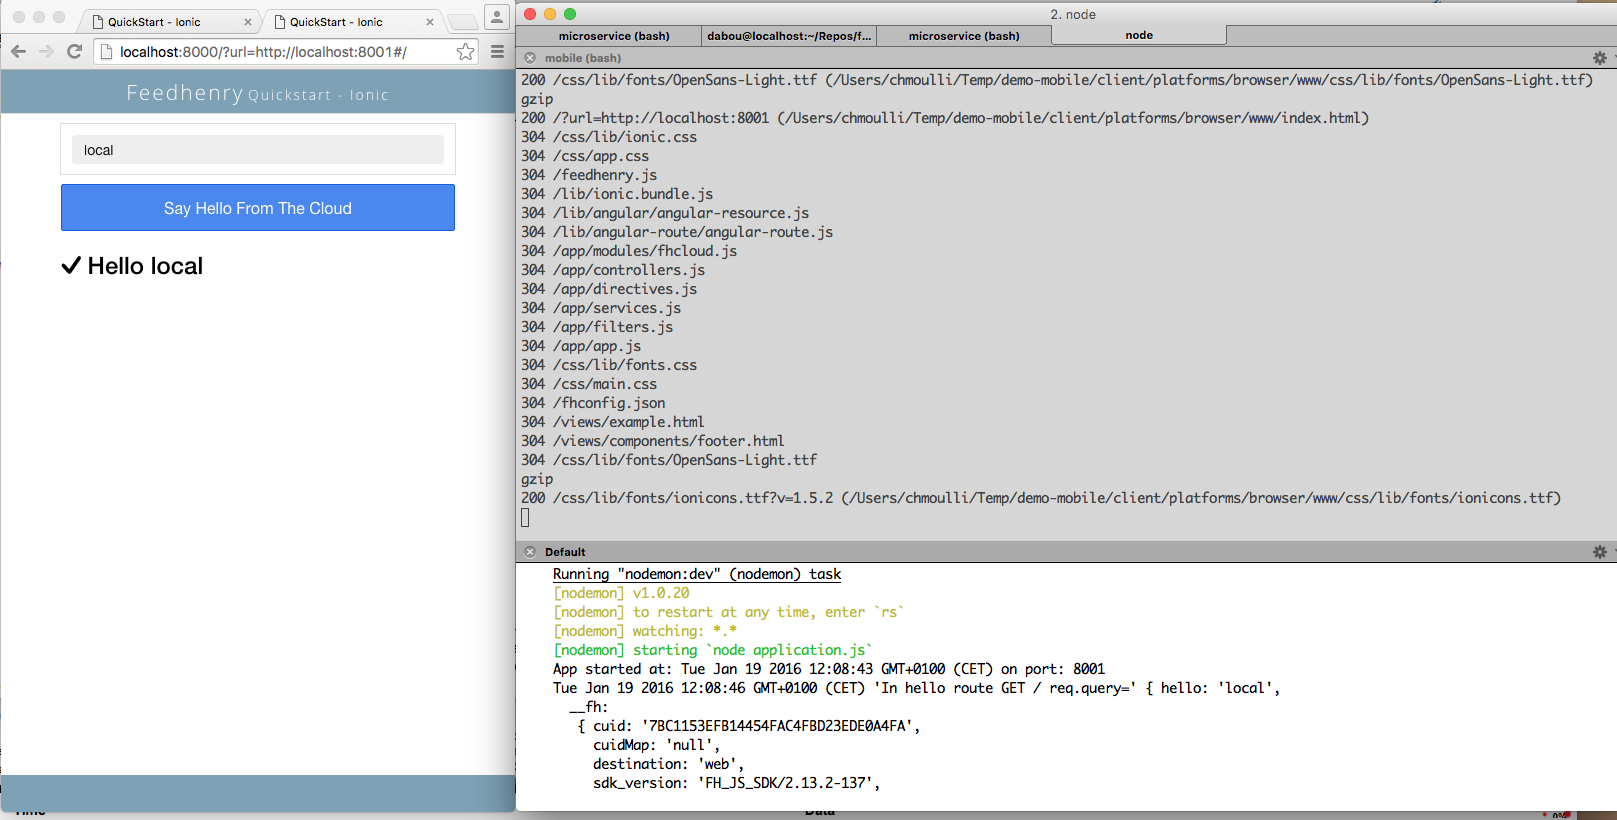
- Within the project
applicationof the second terminal, launch the backend server using this grunt task
grunt serve
- Say hello using now your local backend server
- Everything is in place to use now Cordova/Ionic tools to play with the iPhone/Android/Browser emulator
- To use the ionic client & the mobile framework developed by [http://ionicframework.com/]Ionic, we must install
the node
ionicpackage globally as such :
npm install -g ionic
- The Cordova Hooks represent special scripts which could be added by application and plugin developers or even by your own build system to customize cordova commands. They must be installed within the project of the client.
- So run these commands
ionic hooks add
chmod +x hooks/
- Create the config.xml file needed by cordova and add it within the client folder. The two most important parameters are the id and the name
<?xml version="1.0" encoding="UTF-8" standalone="yes"?>
<widget id="org.fuse.ionic.js" android-versionCode="23" version="0.0.1" xmlns="http://www.w3.org/ns/widgets" xmlns:cdv="http://cordova.apache.org/ns/1.0">
  <name>Fuse Ionic JS App</name>
  <description>This is simple Feedhenry Ionic JS App</description>
  <content src="index.html"/>
  <access origin="*"/>
  <preference name="permissions" value="none"/>
  <preference name="fullscreen" value="true"/>
  <preference name="webviewbounce" value="true"/>
  <preference name="SplashScreen" value="screen"/>
  <preference name="SplashScreenDelay" value="3000"/>
</widget>
- In order to add the cordova files required to use the HTML5 Mobile hybrid application running on IoS, Android, a Browser, we will add the required platforms using these commands
ionic platform add browser
ionic platform add ios
ionic platform add android
- We can now build the project (for a further deployment)
ionic build ios
ionic build android
ionic build browser
- To emulate the application running into a mobile browser, run this command within the
clientproject
ionic run browser
- To run the iOS emulator, use this command
ionic run ios
- To run this project, open a unix/windows terminal and git clone the project or download the code
- Next move to the mentioned folders hereafter and follow the instructions in order to start the Mobile Client and the Backend server communicating with the Apache Camel REST Services.
- In order to use the nodejs javascript server, we have to install first the javascript packages required
- As the ionic client tool will be used to generate the HTML5 Hybrid code and emulate the iOS or Android Mobile application, then we will specify within the next section how to build and emulate the Mobile environment.
- Move to the
client-ionicdirectory and execute these commands
npm install
- Add the Cordova platform specific config files
rm -rf resources/
rm -rf plugins
rm -rf platforms/
ionic hooks add
ionic platform add ios
ionic platform add browser
- Run the client using as target platform the browser or the iPhone
ionic run browser
ionic run ios
- Build HTML5 Mobile hybrid code (optional- only required to deploy on a smartphone)
ionic build ios
ionic build browser
- To use and emulate Android locally on your machine. Use the branch
androidand install the node packages or grunt as done previously for the client-ionic and backend-service - Next, run these commands within the client-ionic direcrory within a terminal
ionic platform add android
ionic emulate android
- You can create a customized device using
android advmanager to by example use the Samsung S6 Galaxy Smartphone and next specify it to the emulator
ionic emulate --target=Samsung-Galaxy-S6
- To access the application using the browser of the device, use this command
ionic run browser

and within the browser of the android browser

http://10.0.2.2:8000?url=http://10.0.0.2:8001/#app/articles
- Move to the
backend-servicedirectory and execute these commands to install the node javascript modules and start the node js server
    npm install
    npm install grunt
- Run the nodejs server and emulate the browser or ios
grunt serve
Remark : Don't forget to follow the installation procedure here of Rest DSL in Action in order to use the backend services.