How to configure Kubernetes minimal cluster
Prerequisites ⚠️
In order to run your very minimal Kubernetes cluster you have to firstly install all of the following software. All installation commands we are using here are for MacOSX users so please bear in mind that the installation process might vary for your OS.
Kudos goes to @k911 who gave me a hint the we don't have to seperetely setup docker since minikube is sufficient and setups it for us.
- Install Docker 🐳
brew cask install docker
- Install Virtualbox 🗄
brew cask install virtualbox
- Install minikube
brew cask install minikube
-
Restart terminal
-
Start minikube
minikube start
- Configure shell and read carefully the next section. This will make docker command available in your current shell.
eval $(minikube docker-env)
Getting cluster ran 😱🤩
- In order to check how Kubernetes dashboard looks like run the command:
minikube dashboard
This is also the way we'll confirm that our app is running within Kubernetes cluster.
- Building the image of an application First we have to build image of our app since it'll be used to create a pod. To build the image simply run the following command where -t stands for the tag which we're assigning to the image.
docker build . -t k8s-node-app
- Our pod will consist only of one container which will be created out of one image k8s-node-app. Here is how can we create deployment which manages the pod:
kubectl run node-app-instance --image=k8s-node-app --port=3000 --image-pull-policy=Never -l="env=prod,ecosystem=nodejs"
-
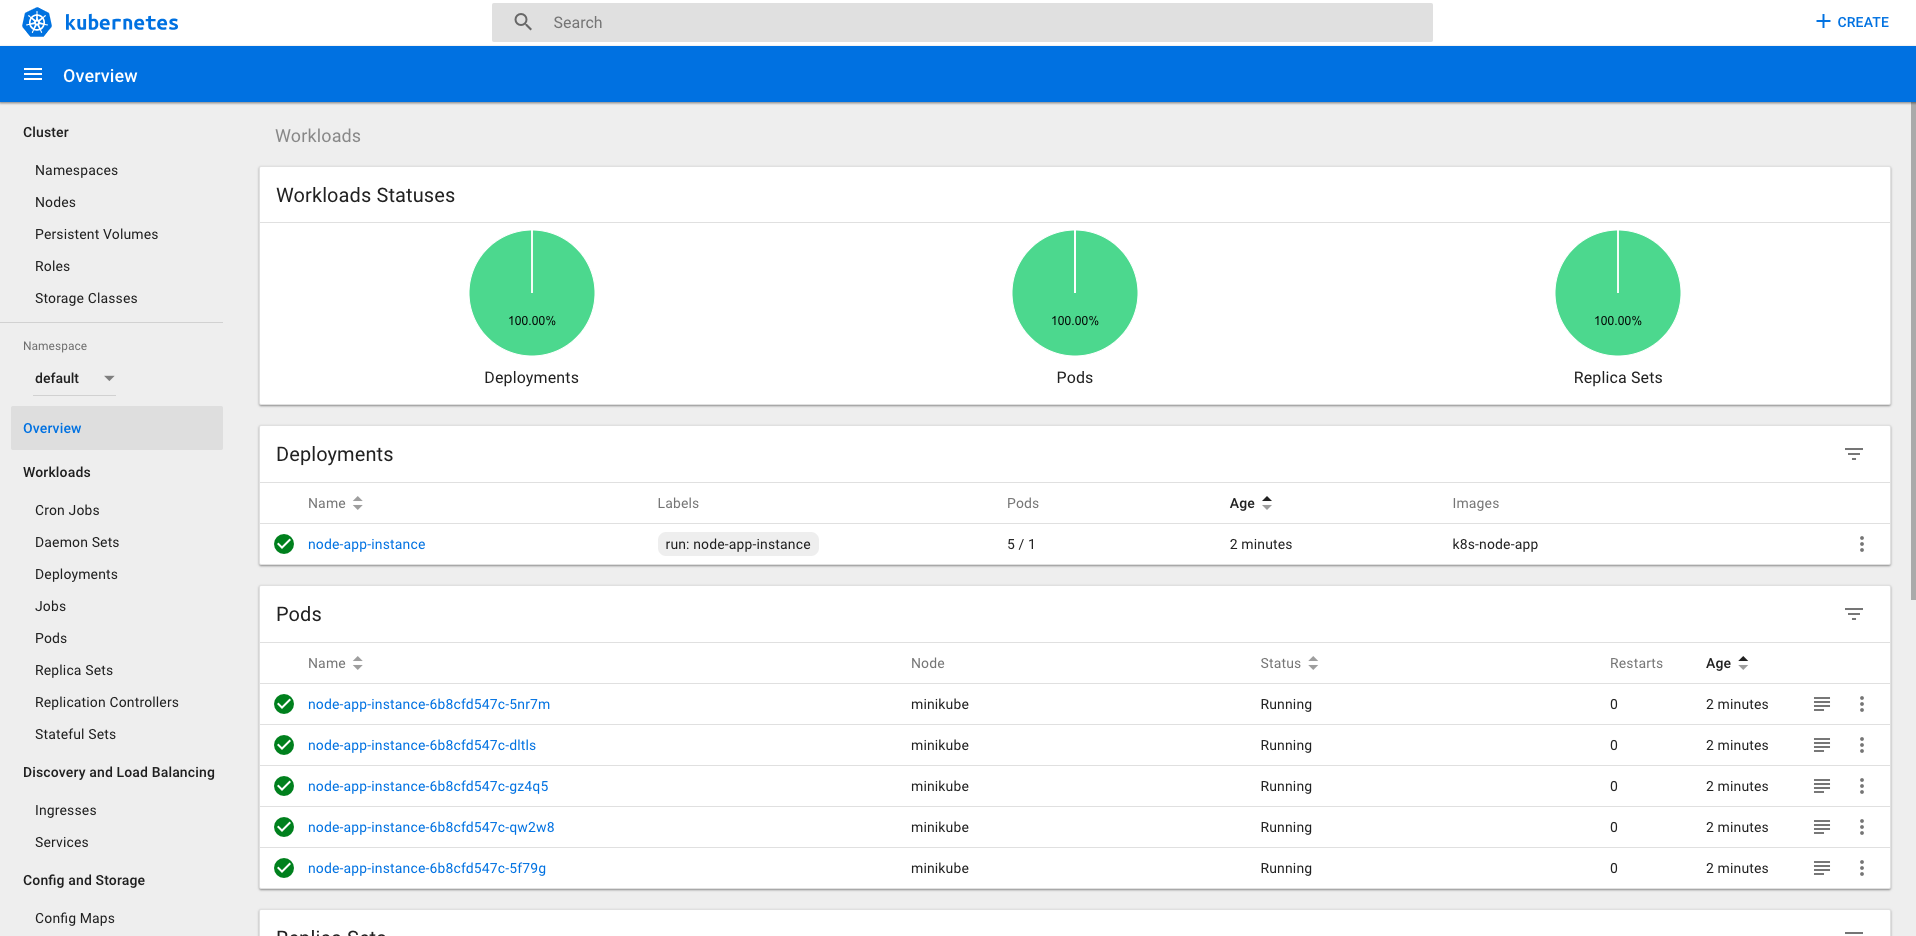
Go to dashboard. You should see a green circle there like in image:
-
Play with the dashboard and scale the pods to 5 instances
-
Try hit http://localhost:3000 It doesn't work?! Why?! The reason is simple: The pods within the cluster are only accesible by their's internal IP's (they live in virtual network) therefore to expose the virtual network to outside world we have to create a service: LoadBalancer specifically.
-
To expose the virtual network we will use the following command:
kubectl expose deployment node-app-instance --type=LoadBalancer
- That's not all because as we're using minikube locally we also have to start the service from minikube. This command should open your web browser.
minikube service node-app-instance
- That's all! You probably now running your first cluster in life. Good job! 🎉 🎉 🎉
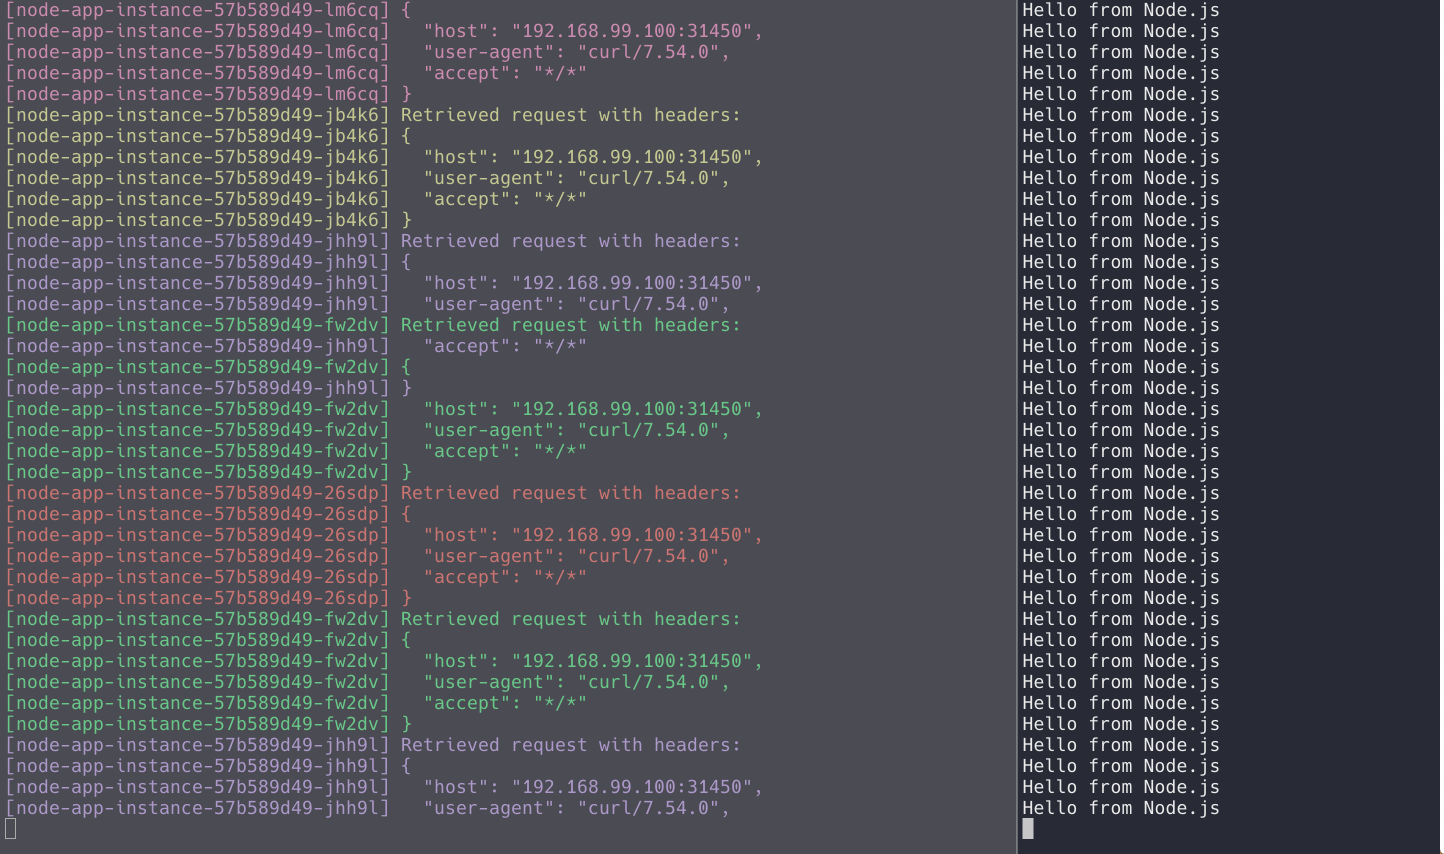
Hint: You can take all logs from all containers using the label we've created in step 3. In order to do it continuosly we will use Kubetail.
brew tap johanhaleby/kubetail && brew install kubetail # Install kubetail
then duplicate existing terminal and type
kubetail -l ecosystem=nodejs
in other window type
for i in `seq 1 10000`; do curl -w '\n' http://192.168.99.100:31790/; done # Remember to replace the url here :D
Now you should see some colors 🌈🍕❤️
Troubleshooting
If for some reason the minikube hangs try the following commands: 🔥
docker ps $(docker ps -qa) # Removes all running containers
minikube delete # Removes the vm
minikube start --logtostderr
Resources 📖
Simulator: https://cloud.google.com/kubernetes-engine/#terminal_simulator
Interactive tutorial: https://kubernetes.io/docs/tutorials/kubernetes-basics/create-cluster/cluster-interactive/
Deploying tutorial: https://kubernetes.io/docs/tutorials/kubernetes-basics/deploy-app/deploy-interactive/
Learn Kubernetes using Interactive Browser-Based Scenarios https://katacoda.com/courses/kubernetes