This is a documentation and tutorial for creating an Azure machine learning web app which will classify an image of a date into one of the following categories:
- PR_Class_Model
- PR_Skin_Model
- PR_Waste_Model
This project isn't too heavy but if you have never worked on a data science project before (Which I recommend you get familiar with Machine Learning before jumping into Deep Learning) the process could take no less than a hour.
- Download the environment that is used in this project, Anaconda - a great environment and dependencies manager for data science tools.
- Install Azure CLI, create an Azure account and use it to create a resource group, container registry and web app.
- Install Docker (This will be used to upload our app to cloud).
- Optional (for Nvidia GPU enabled devices) - CUDA 10.1 and CUDNN 7.6.5 for CUDA 10.1 (Do not install newer version as tensorflow supports only version 10.1 and below as of writing this)
Note - It is highly recommended to install all of your dependencies with Anaconda via conda install command to avoid conflicts. Using conda-forge channel is also recommended. To add it, type in the terminal:
conda config --add channels conda-forge
conda config --set channel_priority strict
└── date_classification
    ├── Dockerfile
    ├── README.md
    ├── app.py
    ├── custom_CNN.py
    ├── fast_predict.py
    ├── saved_files
    │   ├── logs
    │   ├── predict
    │   └── models
    ├── split
    │   ├── test
    │   │   ├── PR_Class_Model
    │   │   ├── PR_Skin_Model
    │   │   └── PR_Waste_Model
    │   ├── train
    │   │   ├── PR_Class_Model
    │   │   ├── PR_Skin_Model
    │   │   └── PR_Waste_Model
    │   └── val
    │       ├── PR_Class_Model
    │       ├── PR_Skin_Model
    │       └── PR_Waste_Model
    ├── templates
    │   ├── index.html
    │   ├── layout.html
    │   └── store.html
    └── transfer_learning_CNN.py
This is the project structure I used. At the beginning I was very stubborn to keep all of the images seperated only in 3 folders according to their classes but essentially I gave up with the workarounds and decided to make test/train/val split folders which later on proved to be much more comfortable and intuitive. Aside from that, you can choose which way you want to split your data and name it, it doesn't really affect anything aside from cosmetics. If you do, remember to change the variables that have the folder names assigned to them.
-
python=3.7
-
tensorflow-gpu
Our models will be built using TensorFlow API, I suggest using tensorflow-gpu (If you have a GPU) dependency that performs the calculations on your Nvidia GPU usage for better performance overall.
-
flask
-
matplotlib
-
pillow
-
numpy
-
split-folders (optional)
While not necessary, I recommend using pip library split-folders.
To install, simply type this command in terminal: pip install split-folders
The process is very simple and requires only two lines of code
import splitfolders as sf
sf.ratio(in_path, out_path, seed=1337, ratio=(.7, .2, .1))
This will basically take all of the subfolders from in_path and will split the data to a new folder that is located in out_path with the ratio of (train-70%, validation-20%, test-10%).
This reopository includes two unique methods of training
 This is what your CNN basically sees and identifies different patterns and qualities.
 This is how the CNN performs over time on training (blue) and validation (pink) data.
To build a custom CNN, you will be using custom_CNN.py module in the project.
The main functions that you will have to use are: import_data(), train_model(), score().
If you have some knowledge or want to experiment with the models you can easily change parameters of your model in train_model().
I would suggest tinkering with learning_rate of the optimizer, filter_size and batch_size or even changing the structure of the CNN.
After you're done with setting up the model to your liking, create a folder under the project's directory with save_path's value as the name.
Note - Remember to change values of train/val/test paths according to the folder name where you will be importing data from (out_path if you've used the splitfolders method )
And now it's showtime! To build and train your model type in:
train_gen, val_gen = import_data()
train_model(train_gen, val_gen)
Later on you can use it again and even classify new data using the following method:
model = load_model(join(home, save_path, model_name))
model.load_weights(join(save_path, weights_path))
result = score(filepath, filename)
This code will load your trained model and the weights that performed the best during training - It's a good habit to save and load your models, just to make sure they are not corrupted and moreover, you don't want to train a new model everytime when you will be deploying your app to the web, it will be computationally expensive and time wasting.
The model will classify the new image and will return a JSON object. Here's an example: {"confidence":0.9818311333656311,"label":"PR_Class_Model"}
If you want to get even deeper, and analyze your models, feel free to check the other functions that are in this module. Note - You can see a graph of your model's performance using Tensorboard - Tensorflow's visualization toolkit. You can run Tensorboard terminal by typing tensorboard --logdir yourpath/to/logs. I suggest creating a logging dir under save_path folder.
To use a predefined model that was trained on a large dataset beforehand, you will be using transfer_learning.py for this task.
This module works very similarly to custom_CNN.py, so you can follow the same steps in the previous paragraph. I would suggesting read
Although the workflow is pretty much the same, you can see some interesting differences between the two methods. Due to previously training on a large dataset, this model will get a much better headstart than the former model. In contrast, its improvement will decay faster until it reaches a point when the custom model actually performs better (My hypothesis is that the model can't improve too much since all of its pretrained parts are frozen, and the top layer is just insufficient to provide full adaptation to this problem; this is where fine-tuning can actually help). If you want to use this project for more general purposes, like classifying animals, I am sure this method might will provide better results than a custom model. Since this project has a more specific purpose, transfer learning doesn't work in our favour in this case.
After training the models and testing them it's time to deploy them! We'll begin from making an app that will work in your local network and after it's ready we will expand it onto a remote server in Azure that can be accessed from anywhere.
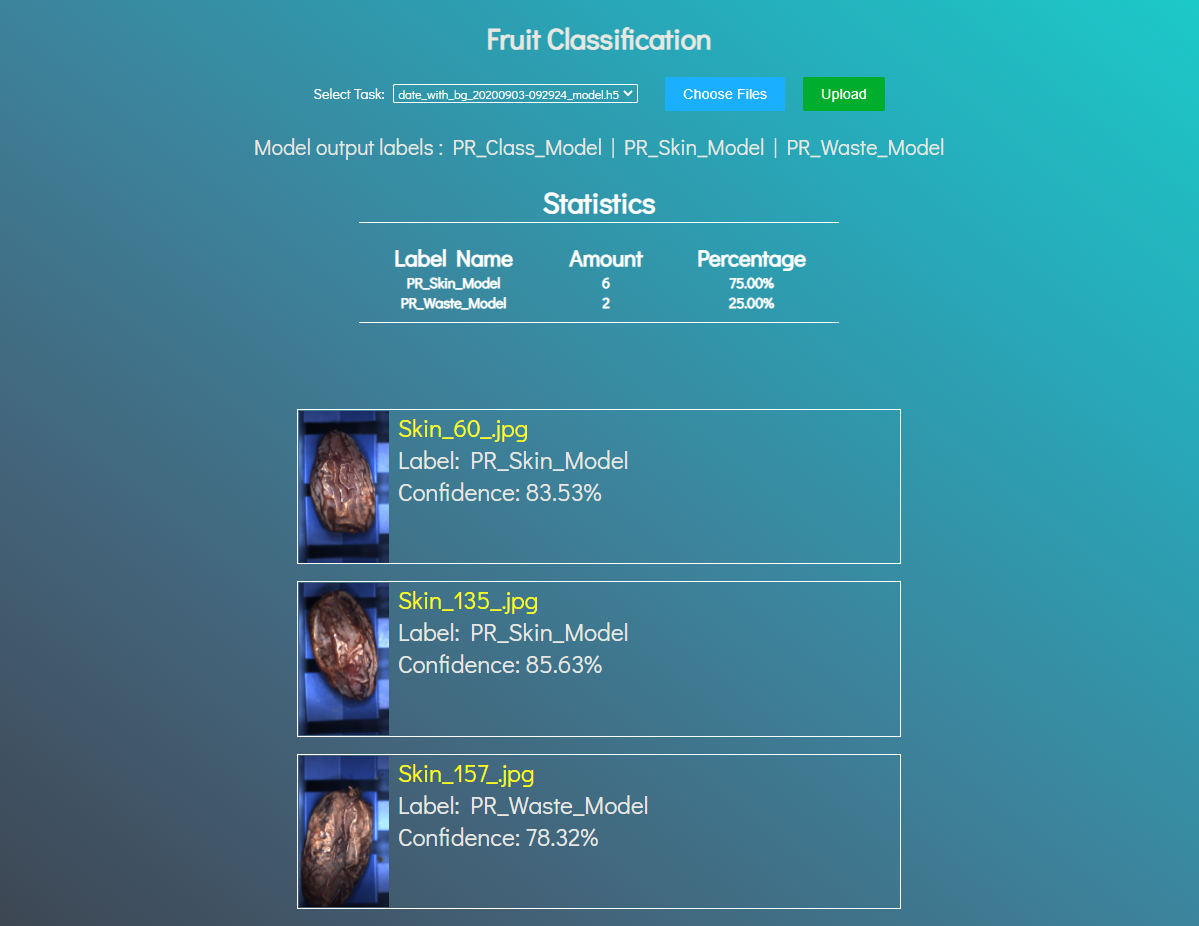
In this section we create a web app on a local machine and we begin automating the process and making a pipeline. The code for creating the app is provided in app.py. You are not required to do much, just choose the names for your upload folder and model names.
Currently there are two REST functions.
score() is used for our main purpose, classifying a date into one of the three classes.
store() is used for keeping the models updated, you will want to retrain your model on new data and then upload the newer version.
You can test the local app by running it or typing python app.py in the terminal. Open it up in the browser by typing localhost:<PORT>/score.
Now it's finally the last step to make your app being accessible to everyone else. Up until now we have added more and more layers to our project but now there's nothing left except packing it up and uploading it onto the cloud.
If you have ever tried before uploading machine learning projects via the usual method you probably would know what a headache it is and why it can be so frustrating doing this. Nevertheless, don't hesitate! This step can be done in less than half a hour if you will follow this guide. Before doing so please note that step 3 in the tutorial is done differently, and will be done here instead since we are using Anaconda.
Using Anaconda environment in a docker container can be a bit tricky and frustrating so I have made my research and provided a dockerfile already in the repository so you can avoid the headaches. It was optimized and has a 3x smaller size than using continuum/miniconda image.