Quickr-V2
In this version, we have developed our workflow by building upon the existing codebase from Deforum-art. They offer a powerful interface and a wide range of robust utilities for us to leverage. We reused some of their video processing code and added our own algorithms to the workflow. This workflow serves as an extension of the AUTOMATIC1111/Stable-Diffusion-WebUI.
How to use
To utilize the entire workflow, you need to set up a complete pipeline for Stable Diffusion and its WebUI (will introduce in the next section). This process involves numerous options and buttons to choose from, making deployment and usage more complex. Additionally, to run the entire pipeline, you must have a GPU with at least 8GB of memory. For video processing with controlNet, a minimum of 24GB of CPU memory is also required (based on my own experience, I initially used a 16GB CPU memory, and it failed to load the controlNet model).
To facilitate easier testing of our code by the Professor/TA, we have created an example folder containing some scripts. These python scripts demonstrate our key algorithms and illustrate how we rapidly prototype our ideas. The extension is built to provide the internal algorithms with a graphical user interface and an integration with Stable Diffusion configurations.
Example (🌟 Easy-to-run training scripts for TA/Professor to test our code)
The fspbt folder consists of the code and the data needed for a simple run of the Few-Shot Patch-Based Training algorithm.
There is another README.md file in the folder that explains how to run the code.
Deployment (🤖️ For serious users with decent GPU and CPU memory)
- Install the AUTOMATIC1111/Stable-Diffusion-WebUI.
Please refer to the official repository for guidance. Note that this repo is updating frequently, so for your reference we are using commit
22bcc7be. - Install our extension. You can put this directory to the
extensionsfolder of the Stable Diffusion WebUI, or you can open your WebUI and install for URL under theExtensiontab.
- After reloading the window, you should be able to see
Quickrtab on the top bar. Click on it and you will see the interface of our extension: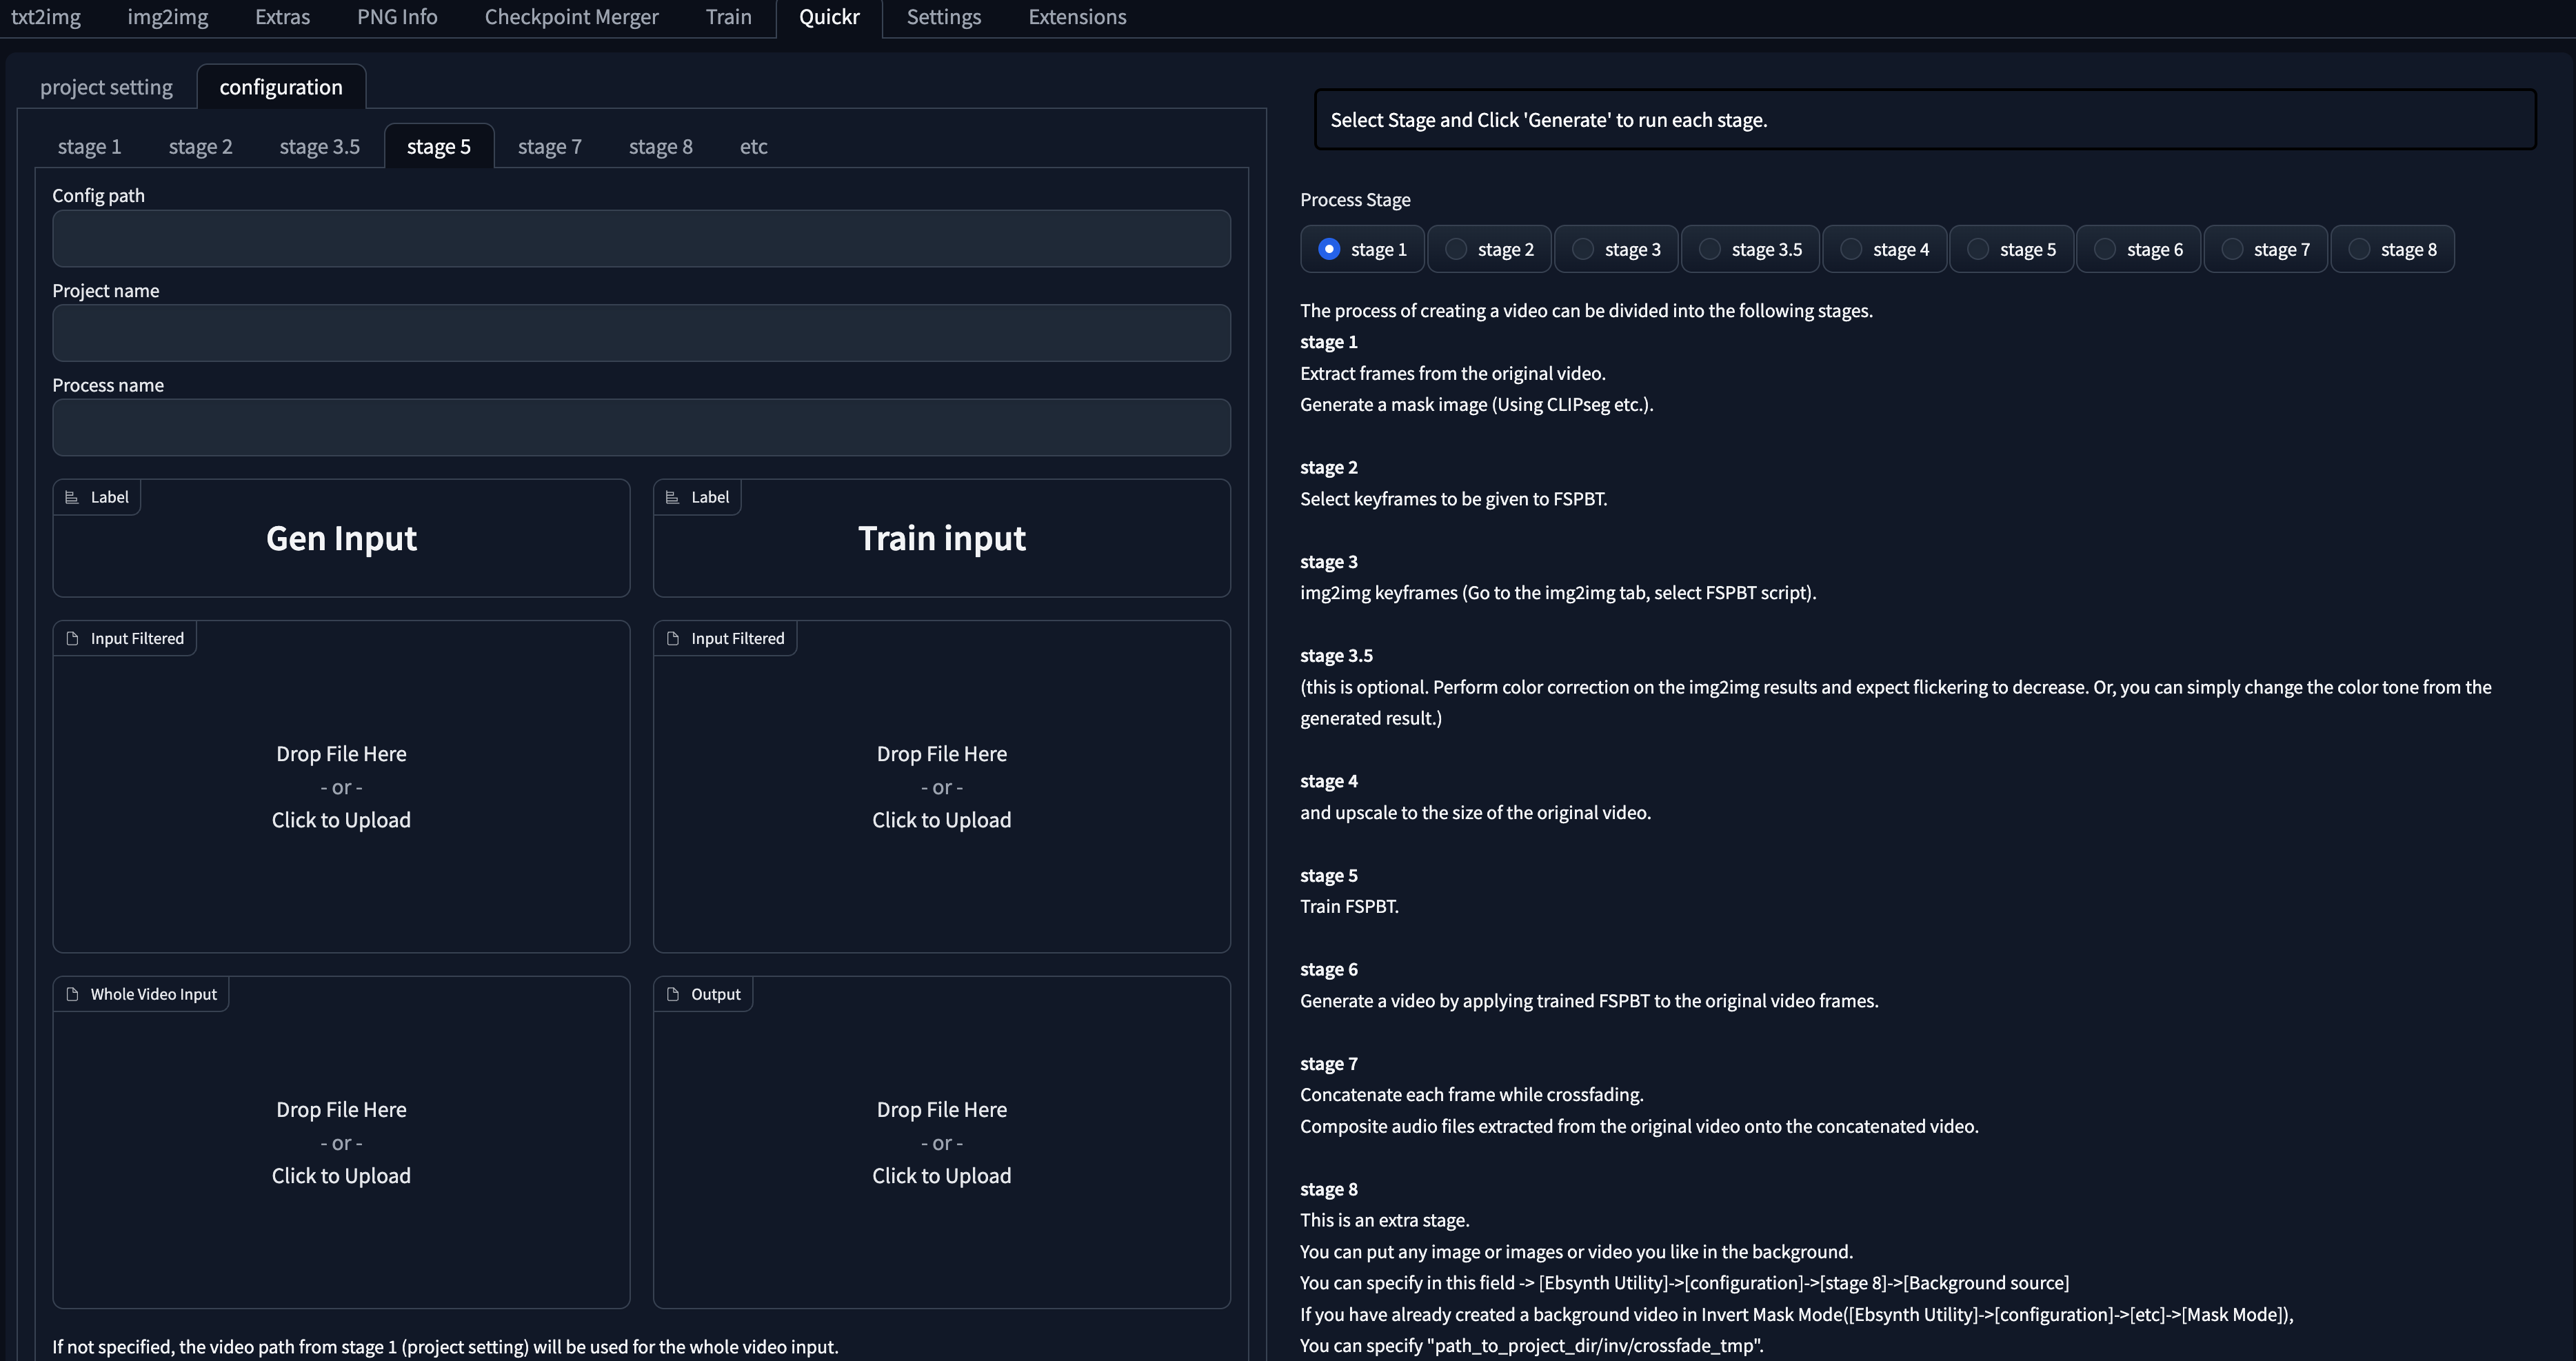 This example is the setting of our stage 5: training FSPBT. For the meaning of each input box, please refer to the official repository, or our example folder.
 - The usage of each stage is shown on the right. You can tune configs for each stage on the left, and select one stage and click 'Generate' on the right once you finish configuring one stage. For step 3, you should go back to the
img2imgtab, and selectQuickr ScriptinScriptdropdown menu. Then you can tune your configuration for Quickr and img2img and run the script there.