YoloV7 and TensorRT Inference (C++)
- Training the network on custom data;
- Converting the resulting model into an ONNX and TRT (ENGINE) model;
- Deploying the model into an inference in C++.
The repository is taken as a basis: WongKinYiu/yolov7 (github.com)
I will show by my example what needs to be done to run a trained yolov7 network on a custom dataset with custom classes.
I advise you to perform all actions in a virtual environment, however, this is not necessary.
First of all, you need to download the repository to your computer. Open a terminal and enter the command:
git clone https://github.com/Egorundel/yolov7_and_tensorrt-cpp-inference.git
Next, you need to install all the necessary libraries for your work. To do this, launch the terminal from the downloaded folder and run the command:
pip install -r requirements.txt
You can also download pre-prepared dataset at our.zip (disk.yandex.ru) and enter the password: KnFt
1. Preparing data for training
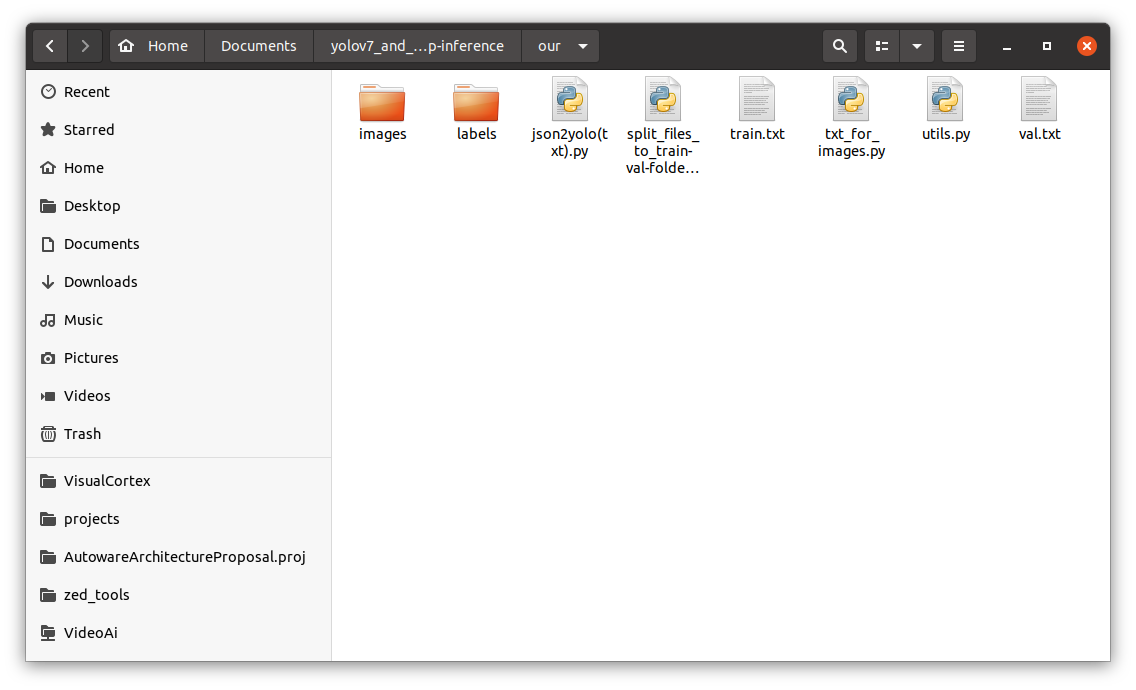
To begin with, I advise you to create a folder with your training files in the folder yolov7_and_tensorrt-cpp-inference. I have this folder called our with the following structure:
You can take the files json2yolo(txt).py, split_files_to_train-val-folders.py, txt_for_images.py and utils.py from the useful_python_codes folder and move them to your dataset folder.
Situations you may encounter:
- If you have just a set of photos, but you need to scatter them in the folders train, val and test, then you need to run the file split_files_to_train-val-folders.py in which you need to specify the folder with the path images and the folders where you want to save the split data.
In this code, I divide the images only into train and val. However, you can modify the code to split the data into train, val and test, but this is not necessary.
import os
import shutil

path = 'images/'
train_path = 'images/train'
val_path = 'images/val'

files = [f for f in os.listdir(path) if f.endswith('.jpg')]  # you can change to .png or .txt

n = len(files)
train_n = int(n * 0.8)

print(n)

for i in range(train_n):
  shutil.move(os.path.join(path, files[i]), train_path)

for i in range(train_n, n):
  shutil.move(os.path.join(path, files[i]), val_path)
You can do the same for labels, since they also need to be divided into train and val (and test, if you need), according to the images.
- You may not have files in the format .txt with markup for each frame, and there is only a file .json, which has markup. To do this, you can use the following code from ultralytics/JSON2YOLO (github.com). File general_json2yolo.py.
- And finally, you may not have .txt files that contain paths to photos. To do this, run the file txt_for_images.py , having previously changed the path to your folder with train images there (do the same for val and test).
import os

# A function that runs through images and saves paths to a file that you specify below in the output_file variable
def save_file_paths(root_dir, file):
    with open(file, 'w') as f:
        for root, dirs, files in os.walk(root_dir):
            for filename in files:
                file_path = './' + os.path.join(root, filename)[os.path.join(root, filename).find("images") + 0:]
                print(file_path)
                f.write(file_path + '\n')

# Path to folder images/train (images/val, images/test)
train_dir = 'images/train'

# Path to file, in which will be saved paths to pictures
output_file = 'train.txt'

# Starting file crawling and saving image paths to output_file
save_file_paths(train_dir, output_file)- If you want to split annotations.json into 3 .json files (train, val, test), then you need to follow these steps:
- split the file .json for three files .json
you can do this using pyodi coco split
- to do this, install pyodi into the system by typing in the terminal
pip install pyodi - and run the following code in the terminal first once:
pyodi coco random-split YOUR_PATH_TO_JSON.json ./random_coco_split --val-percentage 0.3 - In fact, you got two .json file. This is train, where there is 70% of the data and val, where there is 30% of the data. Now, according to the same principle, you will split the val data into val and test. To do this, specify in --val-percentage not 0.3, but 0.1.
pyodi coco random-split YOUR_PATH_TO_SECOND_JSON_AFTER_PREVIOUS_CODE.json ./random_coco_split --val-percentage 0.1
- to do this, install pyodi into the system by typing in the terminal
- split the file .json for three files .json
you can do this using pyodi coco split
As a result, you get 3 files: train (70% of the data), val (20% of the data) and test (10% of the data).
Next you need to turn these .json files to txt files.
Next you need to create custom.yaml in the data folder. You can do this with the following commands (run in the terminal):
cd data
touch custom.yaml
And then open this file in any text editor, for example, Sublime Tex and edit the file (I'll show you with my example).
# train and val data as 1) directory: path/images/, 2) file: path/images.txt, or 3) list: [path1/images/, path2/images/]
train: ./our/train.txt # ~23840 images
val: ./our/val.txt # ~5960 images
# test: ./PATH_to_TEST_file (if you want to test later)

# number of classes
nc: 11

# class names
names: ['biker', 'car', 'pedestrian', 'trafficLight', 'trafficLight-Green', 'trafficLight-GreenLeft', 'trafficLight-Red', 'trafficLight-RedLeft', 'trafficLight-Yellow', 'trafficLight-YellowLeft', 'truck']
Then you need edit nc in cfg/training/yolov7_custom.yaml:
# parameters
nc: 11  # number of classes
depth_multiple: 1.0  # model depth multiple
width_multiple: 1.0  # layer channel multiple
2. Training
Single GPU training
# finetune p5 models
python3 train.py --workers 8 --device 0 --batch-size 32 --data data/custom.yaml --img 640 640 --cfg cfg/training/custom.yaml --weights '' --name yolov7-custom --hyp data/hyp.scratch.custom.yaml

# finetune p6 models
python3 train_aux.py --workers 8 --device 0 --batch-size 16 --data data/custom.yaml --img 1280 1280 --cfg cfg/training/custom.yaml --weights '' --name yolov7-custom --hyp data/hyp.scratch.custom.yaml
Multiple GPU training
# train p5 models
python3 -m torch.distributed.launch --nproc_per_node 4 --master_port 9527 train.py --workers 8 --device 0,1,2,3 --sync-bn --batch-size 128 --data data/custom.yaml --img 640 640 --cfg cfg/training/custom.yaml --weights '' --name yolov7-custom --hyp data/hyp.scratch.custom.yaml

# train p6 models
python3 -m torch.distributed.launch --nproc_per_node 8 --master_port 9527 train_aux.py --workers 8 --device 0,1,2,3,4,5,6,7 --sync-bn --batch-size 128 --data data/custom.yaml --img 1280 1280 --cfg cfg/training/custom.yaml --weights '' --name yolov7-custom --hyp data/hyp.scratch.custom.yaml
Note: if you don't have a very powerful computer, try reducing the number of workers and batch_size.
Also be careful, the default number of epochs=300. If you want to make training with less number of epochs, then when executing the above commands add --epochs 100 (for example).
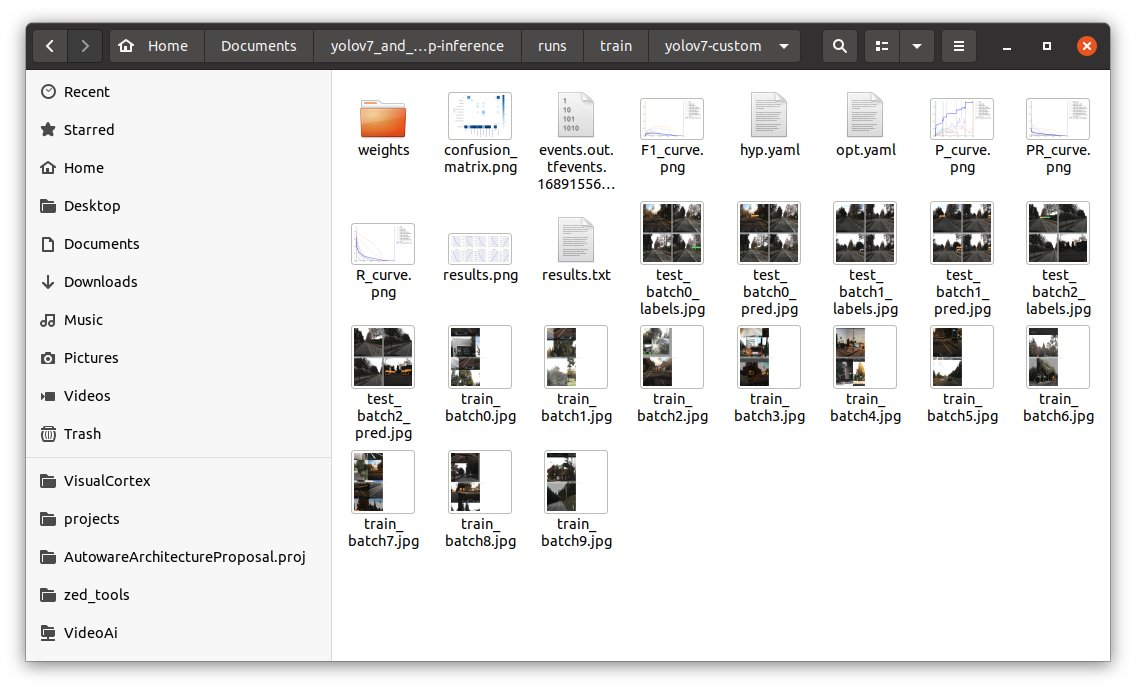
After training, you will be able to go to runs/train/yolov7_custom and look at your training results

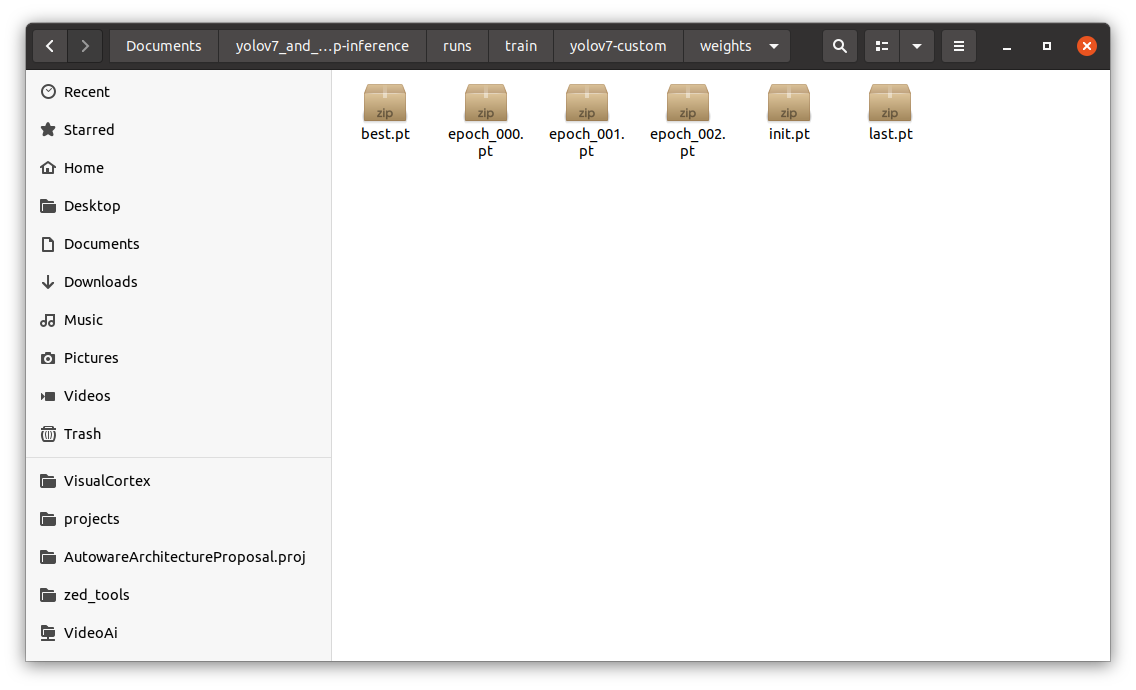
And in the weights folder you will find the resulting weights in .pt format after training. We will need them again.

My results were not very good, so I was too lazy to wait for long training, and in general I trained the network with the number of epochs equal to 3 😝
3. Creating an ONNX model (.onnx)
Run the following commands in the terminal that was launched from the yolov7_and_tensorrt-cpp-inference folder
without NMS Plugin:
python3 export.py --weights runs/train/yolov7-custom/weights/best.pt --grid --simplify --topk-all 100 --iou-thres 0.65 --conf-thres 0.35 --img-size 640 640 --max-wh 640with batchedNMSPlugin only for TensorRT 7/8:
python3 export.py --weights runs/train/yolov7-custom/weights/best.pt --grid --simplify --topk-all 100 --iou-thres 0.65 --conf-thres 0.35 --img-size 640 640 --max-wh 640Next, go to the export_ONNX_with_BatchdedNMS folder and edit files yolov7_add_postprocess.py and yolov7_add_nms.py.
cd export_ONNX_with_BatchdedNMSedit code of yolov7_add_postprocess.py:
  graph = gs.import_onnx(onnx.load("./best.onnx"))  # change on your path

  num_classes = 11  # change on your number

  # input
  origin_output = [node for node in graph.nodes if node.name == "Concat_386"][0]  # change 386 on your last Concat number
To see your last Concat number, you need to upload your ONNX model to Netron App from the developer lutzroeder/netron (github.com) and look there in the properties of your latest Concat Node number.
edit code of yolov7_add_nms.py:
number_classes = 11 # change on your numberAfter making changes to these files, you need to run these commands one by one:
python3 yolov7_add_postprocess.py
python3 yolov7_add_nms.py
Then you can also upload your resulting model to the Netron App and check that your model at the end contains the batchedNMS exactly.
with efficientNMSPlugin for TensorRT 8:
python3 export.py --weights ./yolov7-tiny.pt --grid --end2end --simplify --topk-all 100 --iou-thres 0.65 --conf-thres 0.35 --img-size 640 640Then you can also upload your resulting model to the Netron App and check that your model at the end contains the efficientNMS exactly.
4. Converting ONNX model to TensorRT engine (.trt or .engine)
trtexec --onnx=postprocessed_model_nms.onnx --saveEngine=yolov7.trt --workspace=3000 --verbose5. TensorRT inference in C++
Open the whole project, for example, in Clion IDE.
Next, in the yolov7.h file, edit the NUM_CLASS, class_names, change the mode of operation (video or image) and class_colors as desired.
And in the file yolov7.cpp change the path to the engine engine_filepath. Also, don't forget to download video files or photos to the appropriate samples_video or samples_images folders and specify the paths to them in the yolov7.cpp code.
NOTE: I'm considering a project with the NMS Plugin. If you are working without NMS Plugin, change the number 5 to number 2 in void* buffers[5]; in yolov7.h and reduce the number of lines cudaMalloc, cudaMemcpy and cudaFree to 2 instead of 5 in yolov7.cpp. However, you may need to further refine the code or you can try to use the code from the developer linghu8812/tensorrt_inference (github.com)
And finally, run CMake (don't forget to correct the paths to the libraries in CMakeLists.txt), build the project and run the code.
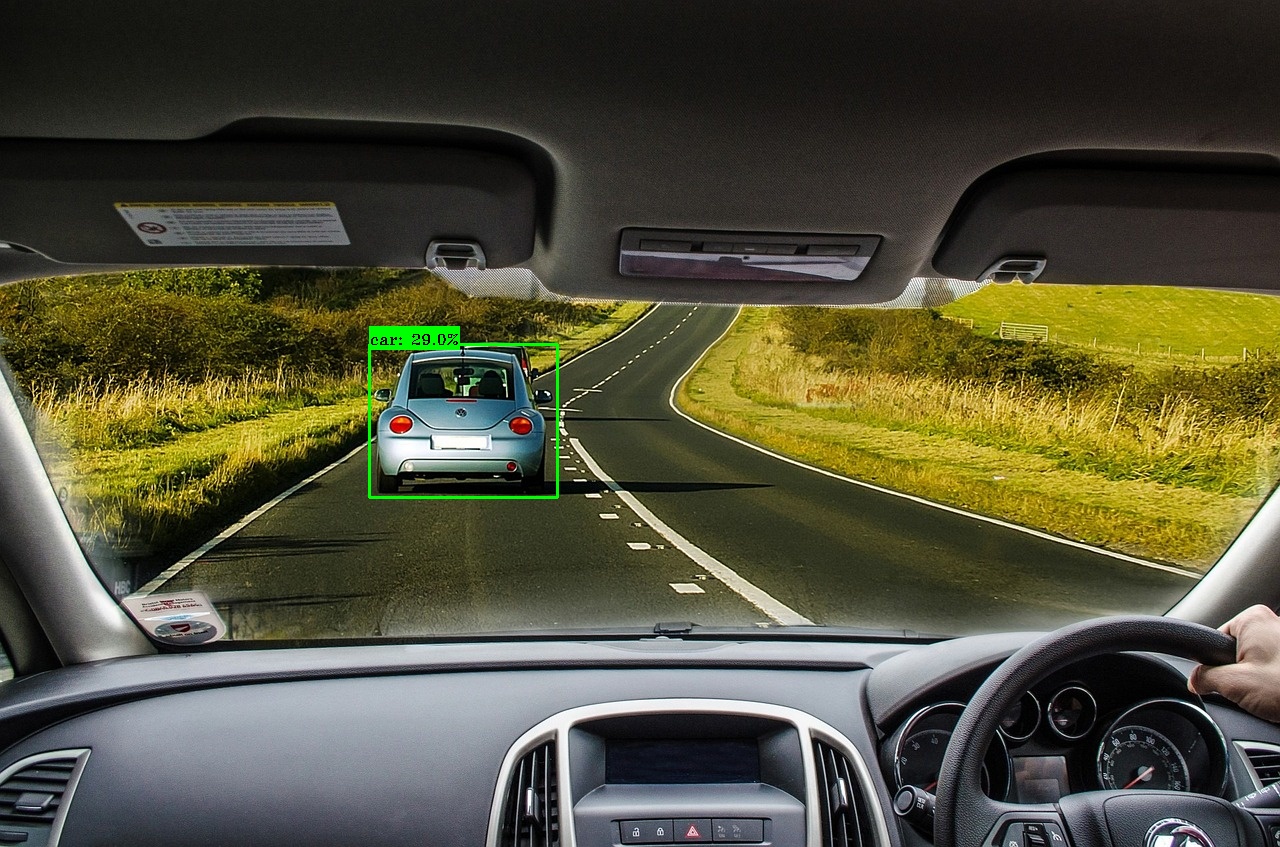
Results:
IMPORTANT INFORMATION: I remind you that my model performs poorly because I'm lazy and was too lazy to wait for a large number of epochs and maybe I didn't have good quality data, but I only used open data everywhere so as not to violate copyrights. On your real working examples the situation should be better.
Tested with:
- Python: 3.7
- TensorRT: 7.2.1.6
- CUDA: 11.1
- Graphics: RTX 2070
Acknowledgements
- https://github.com/WongKinYiu/yolov7
- https://github.com/DataXujing/YOLOv7
- https://github.com/linghu8812/tensorrt_inference
- https://public.roboflow.com/object-detection/self-driving-car/3/download
- https://github.com/ultralytics/JSON2YOLO
- https://github.com/lutzroeder/netron

