Start off by creating any simple data model class to store primitive values.
    [Serializable]
    public class Item
    {
        public string Name;
        public double Weight;
    }
Add a new Controller Class to the Controllers folder.
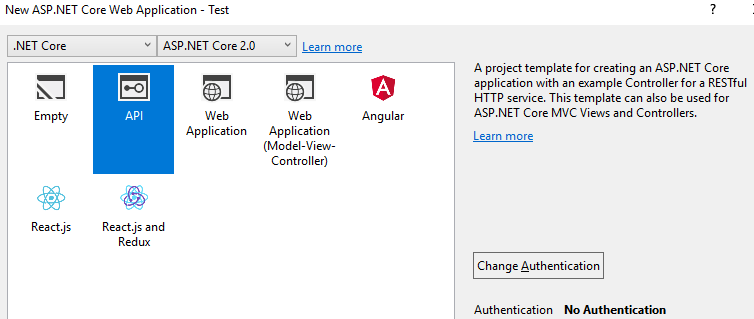
Make sure you select the Controller Type as "API".
You can start with a simple Controller that only has a Get method.
- You must specify the Route (URL) to the Controller. (api/Items)
- You must specify the data type the Controller Produces. (application/json)
- Returning only a primitive value is ironically complicated, so stick with using objects.
    [Route("api/Items")]
    [Produces("application/json")]
    public class ItemsController : Controller
    {
        [HttpGet]
        public Item Get()
        {
            return new Item()
            {
                Name = "Thing",
                Weight = 100.5
            };
        }
    }
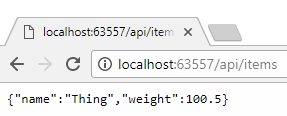
With your Controller complete, you can launch your API and direct your browser to it.
Keep in mind that your launchSettings.json file controls the location of your API.
(That's where the mysterious localhost port number comes from...)
    "WebAPI": {
      "commandName": "Project",
      "launchBrowser": true,
      "launchUrl": "api/items",
      "environmentVariables": {
        "ASPNETCORE_ENVIRONMENT": "Development"
      },
      "applicationUrl": "http://localhost:63557/"
    }
- You could use a 3rd party application to test your API further, such as a REST API Client.
- I find it much more convenient to build a test page directly into the Visual Studio project.
Add another new Controller Class to the Controllers folder.
Make sure you select the Controller Type as "MVC".
Name this Controller something generic, like "Home", and do not modify the default code.
    public class HomeController : Controller
    {
        public IActionResult Index()
        {
            return View();
        }
    }
Add a root level folder "Views" with a sub-folder with the same Controller name you used. ("Home")
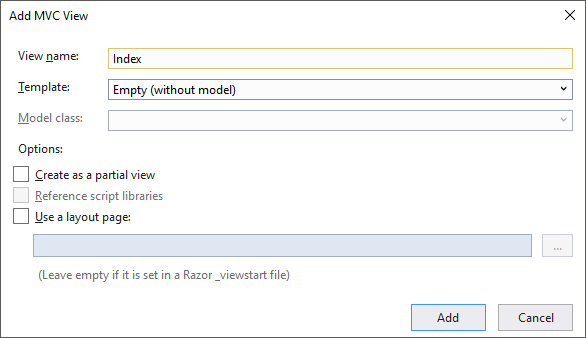
Right click on /Views/Home in the Solution Explorer and select Add New View. Name it "Index".
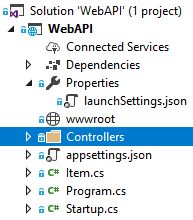
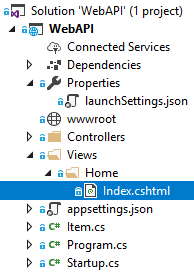
Your folder structure should now look like this.
Update your launchSettings.json file to use your new Home View as the launchUrl.
    "WebAPI": {
      "commandName": "Project",
      "launchBrowser": true,
      "launchUrl": "Home",
      "environmentVariables": {
        "ASPNETCORE_ENVIRONMENT": "Development"
      },
      "applicationUrl": "http://localhost:63558/"
    }
Add MVC to your ConfigureServices method in Startup.cs.
    public void ConfigureServices(IServiceCollection services)
    {
        services.AddMvc();                  // Needed for MVC.
    }
Add MVC to your Configure method in Startup.cs.
    public void Configure(IApplicationBuilder app, IHostingEnvironment env)
    {
        if (env.IsDevelopment())
        {
            app.UseDeveloperExceptionPage();
        }

        app.UseMvc(routes =>                // Needed for MVC.
        {
            routes.MapRoute(
                name: "default",
                template: "{controller=Home}/{action=Index}/{id?}");
        });
    }
I guess we should also probably put some actual HTML in the View. :)
<!-- Views/Home/Index.cshtml -->

<html>
    <body>
        <div>
            Hello World!
        </div>
    </body>
</html>
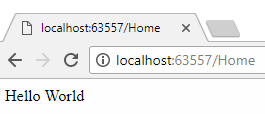
We now will see our Test Page (Home) launch when we run our API.
First, let's actually go back to our ItemsController and add a POST method.
    [HttpPost]
    public void Post([FromBody]Item item)
    {
        // Do whatever you want with the item object.
    }
Writing front-end script is a little tedious, but we can use JQuery.ajax to easily POST an Item to our new API method.
(It's even easier if you just hard code the data, but I decided to let the user input it for better testing)
<!-- Views/Home/Index.cshtml -->

<html>
    <body>

        <script src="https://ajax.googleapis.com/ajax/libs/jquery/3.3.1/jquery.min.js"></script>

        <script>
            $(document).ready(function () {
                $(".item-button").click(function () {
                    $.ajax({
                        headers: { 'Content-Type': 'application/json' },
                        'type': 'POST',
                        'url': "api/items",
                        'data': JSON.stringify( {
                            'Name': $(".item-name").val(),
                            'Weight': parseFloat($(".item-weight").val()) } ),
                        complete: function (xhr, textStatus) {
                            alert("Response Code: " + xhr.status);
                        }
                    });
                });
            });
        </script>

        <input class="item-name" type="text" value="" /> (Item Name) <br />
        <input class="item-weight" type="text" value="" /> (Item Weight) <br />
        <input class="item-button" type="button" value="POST" /><br />

    </body>
</html>
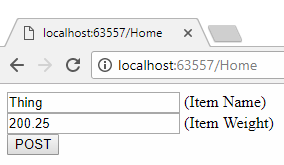
Now just launch the test page and POST to the API.
Your Controller POST method should receive the de-serialized object with the correct values. Magic!
- Without adding Session and Cookies, each API request is Connectionless.
- This means two subsequent requests cannot be attributed to the same client.
- This is the reason we implement Session and Cookies; to identify unique clients.
Add Session to your ConfigureServices method in Startup.cs.
    public void ConfigureServices(IServiceCollection services)
    {
        services.AddMvc();
        services.AddSession();              // Needed for Session.
    }
Add Session to your Configure method in Startup.cs.
    public void Configure(IApplicationBuilder app, IHostingEnvironment env)
    {
        if (env.IsDevelopment())
        {
            app.UseDeveloperExceptionPage();
        }

        app.UseSession();                   // Needed for Session.
        app.UseMvc(routes =>
        {
            routes.MapRoute(
                name: "default",
                template: "{controller=Home}/{action=Index}/{id?}");
        });
}Notice we are augmenting our controller to save the item to Session when we POST it.
This will allow us to retrieve it later, since the Session can identify us a unique client.
    using Microsoft.AspNetCore.Http;
    using Microsoft.AspNetCore.Mvc;
    using Newtonsoft.Json;

    namespace WebAPI.Controllers
    {
        [Produces("application/json")]
        [Route("api/Items")]
        public class ItemsController : Controller
        {
            [HttpGet]
            public Item Get()
            {
                // Get Session data that is specific to our unique client.
                var data = HttpContext.Session.GetString("uniqueKey");
                var item = JsonConvert.DeserializeObject<Item>(data);
                return item;
            }

            [HttpPost]
            public void Post([FromBody]Item item)
            {
                // Save to Session, accessible to requests made only by our unique client.
                HttpContext.Session.SetString("uniqueKey", JsonConvert.SerializeObject(item));
            }
        }
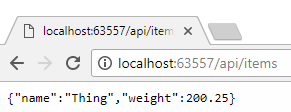
}This is live Web API Server Session Data being retrieved based on our unique client request.
-
- You can change the return types in the Controller to use Collections like System.Collections.Generic.List.
-
- For collections you can access them directly through the URL with indexing.
        [HttpGet("{index}", Name = "Get")]
        public List<Item> Get(int index)
        {
            var data = HttpContext.Session.GetString("uniqueKey");
            var items = JsonConvert.DeserializeObject<List<Item>>(data);
            return items[index];
        }
- For collections you can access them directly through the URL with indexing.
-
-
You can use URL parameters to do pretty much anything.
-
Just don't use them as an easy, hacky way to do things that may be better with a different controller.
-
        using System.Linq;

        [HttpGet]
        public List<Item> Get()
        {
            // Retrieve the value of "maxWeight" from the URL Request.
            string maxWeight = HttpContext.Request.Query["maxWeight"];
            if (string.IsNullOrEmpty(maxWeight)) return items;
            float max = float.Parse(HttpContext.Request.Query["maxWeight"]);

            // This will filter out all the items that are heavier than the max weight.
            return items.Where(item => { return item.Weight < max; }).ToList();
}This WebAPI is just to show you how to get started. For some more advanced examples, see my other solution in this same code repository on github.
- https://github.com/DonnieSantos/WebAPI/tree/master/WebAPI%20Basics
- https://github.com/DonnieSantos/WebAPI/tree/master/MyWebAPI
- Donald J. Santos
- Lead Software Developer, Progressive Insurance Mobile Native Apps
- http://www.github.com/donniesantos
- https://www.youtube.com/channel/UCFb08xSV43hIGvDSpdSrBvw/featured?view_as=subscriber

