##Cocos2DX SDK for AppWarp
Visit AppWarp Cocos2DX home page to learn about AppWarp features and documentation.
IMPORTANT The instructions below assume you have already setup Cocos2DX environment for iOS and Android development. To help set up your development for Cocos2DX, you can read this Cocos2DX getting started guide.
The steps below describe the integration points of AppWarpX in your Cococs2DX application.
##Instructions for iOS
-
Download the contents of this repo
-
Extract the contents and add (drag n drop) the AppWarpX folder to your xcode project.
-
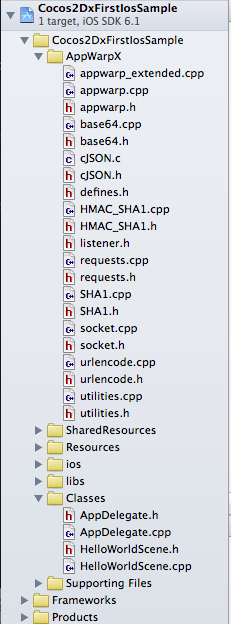
Your XCode structure should look something like this
-
Now add path for curl as follows:
-Open Xcode project
-Click on project name in the left pane
-Select your project under PROJECT heading and search for Header Search Path
-Double click on the value of Header Search Path
-Click on "+" button on the bottom left cornor of the popup appeared
-Add this: "$(SRCROOT)/../cocos2d/external/curl/include/ios"
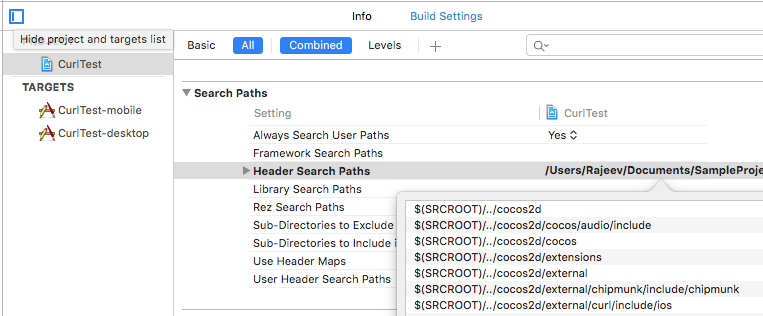
The Header Search path should look like this
You also need to add library search path as follows:
-Select your project under PROJECT heading and search for Library Search Path

-Double click on the value of Library Search Path

-Click on "+" button on the bottom left cornor of the popup appeared

-Add this: "$(SRCROOT)/../cocos2d/external/curl/prebuilt/ios"
The Library Search path should look like this

Now select your project under Targets section and add $(inherited) to Library Search Path under build settings:
The Library Search path should look like this

After that, add "-lcurl" to Other Linker Flags under build settings:
The Other Linker Flags should look like this

- Build
##Instructions for Android
-
Download the contents of this repo
-
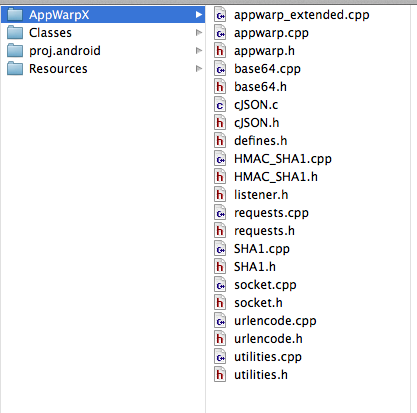
Extract and add the AppWarpX folder next to your Classes folder. The directory structure should look like this
-
download
and install it
-
copy cocos2d folder to NinjaFightMultiplayerDemo/cocos2d
-
Edit proj.android\jni\Android.mk file
-
Add $(call import-module,curl/prebuilt/android) to Android.mk file if you are using cocos V3.X or above for enabling cURL support.
Add AppWarp source c and cpp files so that they can also be built. After adding the AppWarp source files, your android.mk file should be as follows:
LOCAL_SRC_FILES := hellocpp/main.cpp \
                   ../../Classes/AppDelegate.cpp \
                   ../../Classes/HelloWorldScene.cpp \
                   ../../AppWarpX/appwarp.cpp \
                   ../../AppWarpX/appwarp_extended.cpp \
                   ../../AppWarpX/base64.cpp \
                   ../../AppWarpX/cJSON.c \
                   ../../AppWarpX/HMAC_SHA1.cpp \
                   ../../AppWarpX/requests.cpp \
                   ../../AppWarpX/SHA1.cpp \
                   ../../AppWarpX/socket.cpp \
                   ../../AppWarpX/udpsocket.cpp \
                   ../../AppWarpX/urlencode.cpp \
                   ../../AppWarpX/utilities.cpp
Add AppWarp source file folder so that it can be detected by Compiler. For Example :
	LOCAL_C_INCLUDES := $(LOCAL_PATH)/../../Classes \
			    		$(LOCAL_PATH)/../../AppWarpX
-
Build the native code
-
Add the following to your manifest file to give internet permission if not given already
<uses-permission android:name="android.permission.INTERNET" />
- Run your Android application