This is the HashiCorp demo application on Amazon EKS. It incorporates the following tools:
- Terraform 1.0.3
- HashiCorp Cloud Platform (HCP) Consul 1.9.8
- HashiCorp Cloud Platform (HCP) Vault 1.7.3
- Boundary 0.4.0

Each folder contains a few different configurations.
-
Terraform Modules
boundary-deployment/: This is a local Terraform module because it includes the Boundary binary and an SSH key. It is referenced byinfrastructure/.
-
Terraform Configurations
infrastructure/: All the infrastructure to run the system.- VPC (3 private subnets, 3 public subnets)
- Boundary cluster (controllers, workers, and AWS RDS PostgreSQL database)
- AWS Elastic Kubernetes Service cluster
- AWS RDS (PostgreSQL) database for demo application
- HashiCorp Virtual Network (peered to VPC)
- HCP Consul
- HCP Vault
boundary-configuration: Configures Boundary with two projects, one for operations and the other for development teams.consul-deployment/: Deploys a Consul cluster via Helm chart.vault-deployment/: Deploy a Vault cluster via Helm chart.
-
Kubernetes
application/: Deploys the HashiCorp Demo Application (AKA HashiCups)
- Terraform Cloud
- AWS Account
- HashiCorp Cloud Platform account
- You need access to HCP Consul and Vault.
- Create a service principal for the HCP Terraform provider.
jqinstalled- Install HashiCorp Boundary and an SSH key to the
boundary-deployment/bindirectory.- Download Boundary to
boundary-deployment/bin/boundary.cd boundary-deployment/bin curl https://releases.hashicorp.com/boundary/0.4.0/boundary_0.4.0_linux_amd64.zip -o boundary.zip unzip boundary.zip rm boundary.zip - Add an SSH key named
id_rsatoboundary-deployment/bin. You can optionally add a passphrase.$ ssh-keygen -t rsa Enter file in which to save the key (~/.ssh/id_rsa): boundary-deployment/bin/id_rsa
- Download Boundary to
- Fork this repository.
Note: When you run this, you might get the error
Provider produced inconsistent final plan. This is because we're usingdefault_tags. Re-run the plan and apply to resolve the error.
First, set up the Terraform workspace.
- Create a new Terraform workspace.
- Choose "Version control workflow".
- Connect to GitHub.
- Choose your fork of this repository.
- Name the workpsace
infrastructure. - Select the "Advanced Options" dropdown.
- Use the working directory
infrastructure. - Select "Create workspace".
Next, configure the workspace's variables.
-
Variables should include:
private_ssh_key(sensitive): base64 encoded SSH Key for Boundary SSHdatabase_password(sensitive): password for Amazon RDS PostgreSQL database for application. SAVE THIS PASSWORD! YOU'LL NEED IT TO LOG IN LATER!client_cidr_block(sensitive): public IP address of your machine, in00.00.00.00/32form. You get it by runningcurl ifconfig.mein your terminal.
-
Environment Variables should include:
HCP_CLIENT_ID: HCP service principal IDHCP_CLIENT_SECRET(sensitive): HCP service principal secretAWS_ACCESS_KEY_ID: AWS access key IDAWS_SECRET_ACCESS_KEY(sensitive): AWS secret access keyAWS_SESSION_TOKEN(sensitive): If applicable, the token for session
If you have additional variables you want to customize, including region, make sure to update them in
the infrastructure/terraform.auto.tfvars file.
Finally, start a new plan and apply it. It can take more than 15 minutes to provision!
First, set up the Terraform workspace.
- Create a new Terraform workspace.
- Choose "Version control workflow".
- Connect to GitHub.
- Choose your fork of this repository.
- Name the workpsace
boundary-configuration. - Select the "Advanced Options" dropdown.
- Use the working directory
boundary-configuration. - Select "Create workspace".
Next, configure the workspace's variables. This Terraform configuration
retrieves a set of variables using terraform_remote_state data source.
-
Variables should include:
tfc_organization: your Terraform Cloud organization nametfc_workspace:infrastructure
-
Environment Variables should include:
AWS_ACCESS_KEY_ID: AWS access key IDAWS_SECRET_ACCESS_KEY(sensitive): AWS secret access keyAWS_SESSION_TOKEN(sensitive): If applicable, the token for session
Queue to plan and apply. This creates an organization with two scopes:
core_infra, which allows you to SSH into EKS nodesproduct_infra, which allows you to access the PostgreSQL database
Only product users will be able to access product_infra.
operations users will be able to access both core_infra
and product_infra.
To use Boundary, use your terminal in the top level of this repository.
-
Set the
BOUNDARY_ADDRenvironment variable to the Boundary endpoint.export BOUNDARY_ADDR=$(cd boundary-configuration && terraform output -raw boundary_endpoint)
-
Use the example command in top-level
Makefileto SSH to the EKS nodes as the operations team.make ssh-operations
-
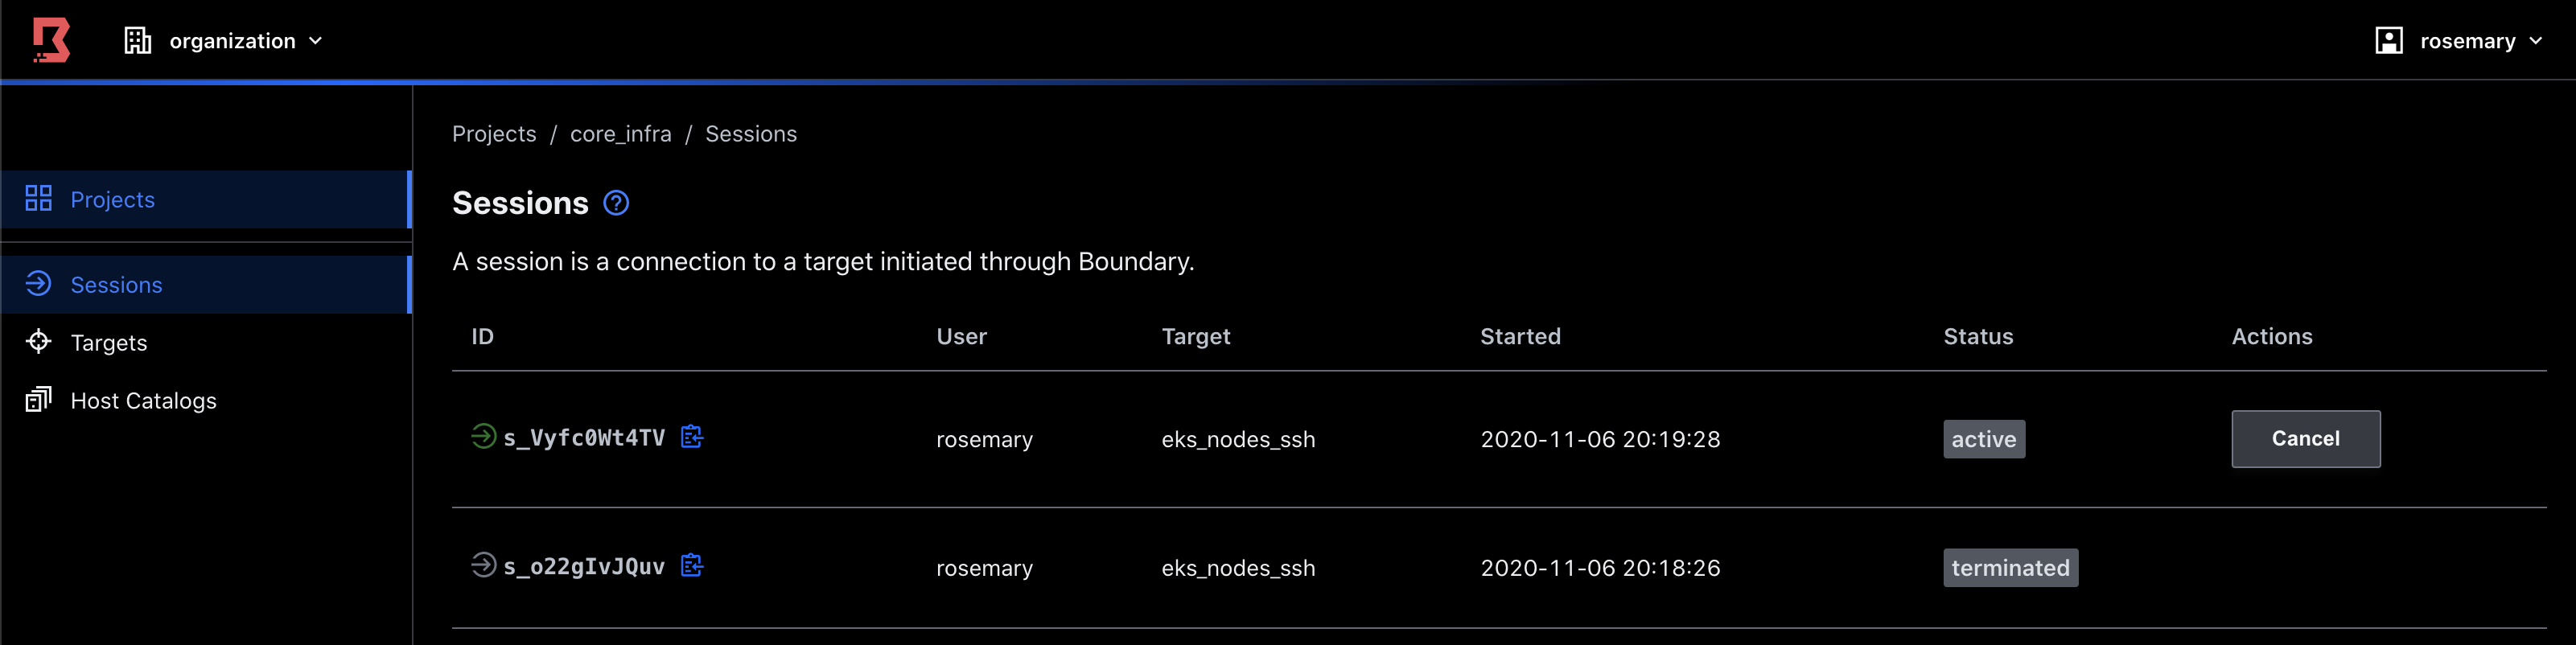
Go to the Boundary UI and examine the "Sessions". You should get an active session in the Boundary list because you accessed the EKS node over SSH.

To add data, you need to log into the PostgreSQL database. However, it's on a private network. You need to use Boundary to proxy to the database.
-
Set the
PGPASSWORDenvironment variable to the database password you defined in theinfrastructureTerraform workspace.export PGPASSWORD=<password that you set in infrastructure workspace>
-
Run the following commands to log in and load data into the
productsdatabase.make configure-db
-
If you try to log in as a user of the
productsteam, you can print out the tables.make postgres-products
Note: When you run this, the Helm release for Consul will fail. You need to run a separate command to configure the terminating gateway with an ACL. Once you run the command, run another plan and apply. The Helm chart will successfully flag as released.
First, set up the Terraform workspace.
- Create a new Terraform workspace.
- Choose "Version control workflow".
- Connect to GitHub.
- Choose your fork of this repository.
- Name the workpsace
consul-deployment. - Select the "Advanced Options" dropdown.
- Use the working directory
consul-deployment. - Select "Create workspace".
Next, configure the workspace's variables. This Terraform configuration
retrieves a set of variables using terraform_remote_state data source.
-
Variables should include:
tfc_organization: your Terraform Cloud organization nametfc_workspace:infrastructure
-
Environment Variables should include:
HCP_CLIENT_ID: HCP service principal IDHCP_CLIENT_SECRET(sensitive): HCP service principal secretAWS_ACCESS_KEY_ID: AWS access key IDAWS_SECRET_ACCESS_KEY(sensitive): AWS secret access keyAWS_SESSION_TOKEN(sensitive): If applicable, the token for session
-
Queue to plan and apply. This deploys Consul clients and a terminating gateway via the Consul Helm chart to the EKS cluster to join the HCP Consul servers. It also registers the database as an external service to Consul.
-
Update the terminating gateway with a write policy to the database. You need to run this outside of Terraform in your CLI!
export CONSUL_HTTP_ADDR=$(cd infrastructure && terraform output -raw hcp_consul_public_address)
export CONSUL_HTTP_TOKEN=$(cd consul-deployment && terraform output -raw hcp_consul_token)
make configure-consul
Note: To delete, you will need to run
make clean-consulbefore destroying the infrastructure with Terraform.
First, set up the Terraform workspace.
- Create a new Terraform workspace.
- Choose "Version control workflow".
- Connect to GitHub.
- Choose your fork of this repository.
- Name the workpsace
vault-deployment. - Select the "Advanced Options" dropdown.
- Use the working directory
vault-deployment. - Select "Create workspace".
Next, configure the workspace's variables. This Terraform configuration
retrieves a set of variables using terraform_remote_state data source.
-
Variables should include:
tfc_organization: your Terraform Cloud organization nametfc_workspace:infrastructure
-
Environment Variables should include:
HCP_CLIENT_ID: HCP service principal IDHCP_CLIENT_SECRET(sensitive): HCP service principal secretAWS_ACCESS_KEY_ID: AWS access key IDAWS_SECRET_ACCESS_KEY(sensitive): AWS secret access keyAWS_SESSION_TOKEN(sensitive): If applicable, the token for session
Terraform will set up Kubernetes authentication method and PostgreSQL database secrets engine.
Note: To delete, you will need to run
make clean-vaultbefore destroying the infrastructure with Terraform.
To deploy the example application, run make configure-application.
Note: To delete, you will need to run
make clean-application.
You can check if everything by checking the pods in Kubernetes.
$ kubectl get pods

NAME                                                          READY   STATUS    RESTARTS   AGE
consul-46zp9                                                  1/1     Running   0          5m12s
consul-connect-injector-webhook-deployment-79b8b7986d-zsc5f   1/1     Running   0          5m12s
consul-controller-64cf857cdc-d9vq6                            1/1     Running   0          5m12s
consul-cq56l                                                  1/1     Running   0          5m12s
consul-hmfr4                                                  1/1     Running   0          5m12s
consul-terminating-gateway-5f5d9947cf-k8m8h                   2/2     Running   0          5m12s
consul-webhook-cert-manager-5745cbb9d-w7qqk                   1/1     Running   0          5m12s
frontend-99765b95f-r8z8j                                      3/3     Running   0          3m46s
product-589b95f9f5-p5ncz                                      4/4     Running   0          3m45s
public-86b5578cd-29k4s                                        3/3     Running   0          3m45s
vault-agent-injector-57dc4886cd-7sfnf                         1/1     Running   0          63m
Port forward the frontend service to http://localhost:8080.
kubectl port-forward svc/frontend 8080:80You'll get a UI with a "Packer-Spiced Latte".
-
The module for Boundary is based on the Boundary AWS Reference Architecture with slight modifications.
-
The demo application comes from the HashiCorp Demo Application.