Andiodine is a dns-tunneling solutions that allows you tunnel IPv4 data through a DNS server. This is very usable in different situations where internet access is blocked by a firewall, but DNS queries are not. In addition, Andiodine is excellent to bypass wifi logins, and secure your web traffic in public places!
To create an Andiodine server you need:
   ✦ VPS server with IPv4 adress.
   ✦ Domain name that supports A and NS records.
   ✦ And follow the steps below.
Suppose that domain.com is your domain name.
- Create an A record by pointing a subdomain subd1.domain.com to your vps IP.
- Create an NS record by pointing another subdomain subd2.domain.com to subd1.domain.com.
Now everything is good!
SSH to your vps using the terminal or another ssh client and copy/paste the following commands as root.
       ♯ apt-get update
       ♯ apt-get install iodine
♯ sysctl -w net.ipv4.ip_forward=1
       ♯ /sbin/iptables -t nat -A POSTROUTING -o eth0 -j MASQUERADE
       ♯ /sbin/iptables -A FORWARD -i eth0 -o dns0 -m state –state RELATED,ESTABLISHED -j ACCEPT
       ♯ /sbin/iptables -A FORWARD -i dns0 -o eth0 -j ACCEPT
       ♯ iptables-save > /etc/iptables.rules
♯ iodined -f -c -m 1280 -DDDDD -P 9999 10.0.0.1 subd2.domain.com &
9999 is the password, you can change it.
Excellent! Excellent! Excellent! Now lets move to Andiodine client side.
Downlaod Iodine client for android 4.+.
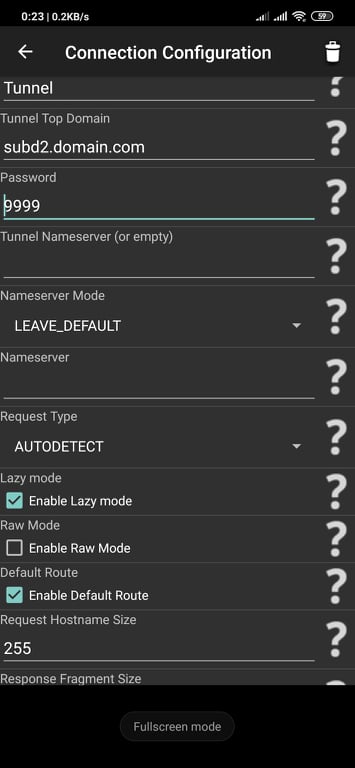
Connect and enjoy the freedom!
This is a simplified tutorial provided by Zakaria Dahbi. Email: etriziko@gmail.com.