
Based on WebSocket.
main.py: contains the main function of the project, should be run withpython main.py, spawns multiple threadshand.py: the main file of the driver, mapswebsocketjsoninto human readable python objectscube.py: OpenGL program, used for rendering the hand on the screen, skip it if you don't want to seeshadersbeacon.py: the Serial (possibly via Bluetooth) communication manager, core is aPySerialobject, can be disabled for debugginglog.py: global logger, for a friendly debugging experience with time of the log can colors to identify the importanceutils.py: not used in the main program, used for testing the serial connection, it just prints out every message it receiveshelper.py: some OpenGL styled transformation matrix, expanded on theglmpackage provided byglumpy

See ppt.md for some Chinese version development log.
First, you should have a python 3 installation available, conda or just python with both work fine.
Then, install the required package listed in requirements.txt by:
pip install -r requirements.txtFor Windows user, the glumpy package need to be fixed to properly display fonts.
- Navigate to
<YOUR PYTHON ROOT>/lib/site-packages/glumpy/graphics/text/sdf_font.py, line45 - Change both the
(ratio*ncols)and(ratio*nrows)toint(ratio*ncols)andint(ratio*nrows)
For python 3.8 or above, since time.clock() has been removed, you need to fix it in the glumpy installation.
- Navigate to
<YOUR PYTHON ROOT>/lib/site-packages/glumpy/app/clock.py, line164. - Change
time.clocktotime.perf_counter - See this issue for more information
First you need to download the software development kit from Leap Motion's developer portal.
Then, buy a Leap Motion Controller and plug it in your system.
For your convenience, this is the download link for the 4.1.0 Windows SDK.
-
Install the SDK by double clicking the
.exefile and click through -
After that if all went well you should see a green bar lying in your task bar (assume you're a Windows user)
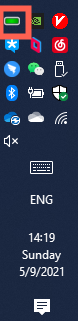
-
Click the green bar and you'll see some convenient information listed, some funny debugging tool. Play around if your like.
-
Then, you need to check the enable web app checkbox in the settings or
glum.pywon't run. Since our driver is based onWebSocket

You can just run
python main.pyto see whether everything is working now.
Raise your hand above the Leap Motion Controller, to see some fingers rendered


Typically, you might encounter these problems:
-
Cannot connect to WebSocketThis is caused by invalid SDKWebSocketversion or not enabling web app in the Leap Motion Controller Panel. Try changing the URI presented in thesamplefunction of theglum.pyfile. Try outv6.jsonorv7.json -
Low Frame Rate, typically,glum.pyshould be able to run close to 60 FPS (at least above 40) on a discrete GPU. This might be caused by not enabling your python instance to use the Discrete GPU (Most likely Nvidia?). Go to Nvidia Control Panel, navigate to 3D settings, change per app settings and add yourpythonto the list, then selectHigh Performance Processor. This might also be caused by not installing a good backend forglumpy, installglfwby the following link Check this link for more information and for a step-by-step 64-bit Windows installation guide.
If you've got a Bluetooth to serial slave device on your Arduino or whatever, you can read on to try connecting to it directly. Otherwise jump to the next small section to see how to simulate the virtual port and test your output first.
Connect the Arduino BT04 Bluetooth to serial device first:
- It's a little bit tricky but I believe you'll first try to search for the Bluetooth device with that default name (usually BT04 or BT06)
- Connect to it using default PIN (you can change the PIN if you have direct serial access to the chip, but that won't be necessary): 1234
- After that you'll be able to see some serial port pop out of your system
- On Windows, check out the Bluetooth serial device in Control Panel for added BT04 Outgoing Port
- On *nix,
ls /dev/tty.*for something containing BT04
- Note that the chip will declare connected once the serial port mentioned above is opened, not the Bluetooth connection. So you might still notice a blinking red light even if the pairing is successful
Now you're able to talk to the device using the port mentioned above.
This section will be helpful if you want to simulate a serial port interface and check out what you've passed on to the port.
On Windows, check out the com0com utility by googling it.
Set up the virtual ports and you can read stuff from it using utils.py
On *nix, check out socat, you can install it using sudo apt install socat or brew install socat, create a pair of port on /dev/master and /dev/slave using:
socat -d -d pty,link=/dev/master,raw,echo=0 pty,link=/dev/slave,raw,echo=0