- We have installed Bitrix24 latest version here http://tsaritnp.beget.tech. So you can test the installation and functions of integration module.
- To get the account for testing, please contact via telegram: huytran2017
The algorithm for installing and configuring the module after installation
- Installation algorithm :
- Type the following address into your browser
http://<website address>/bitrix/admin/update_system_partner.php?addmodule=<module code>:- website address – domain of Bitrix24 portal;
- module code -
citrus.dhfi;
- Example link with module code:
http://tsaritnp.beget.tech/bitrix/admin/update_system_partner.php?addmodule=citrus.dhfi;
- Create and configure payment system for payers:
- Go to
CRM → More → Settings → CRM Settings
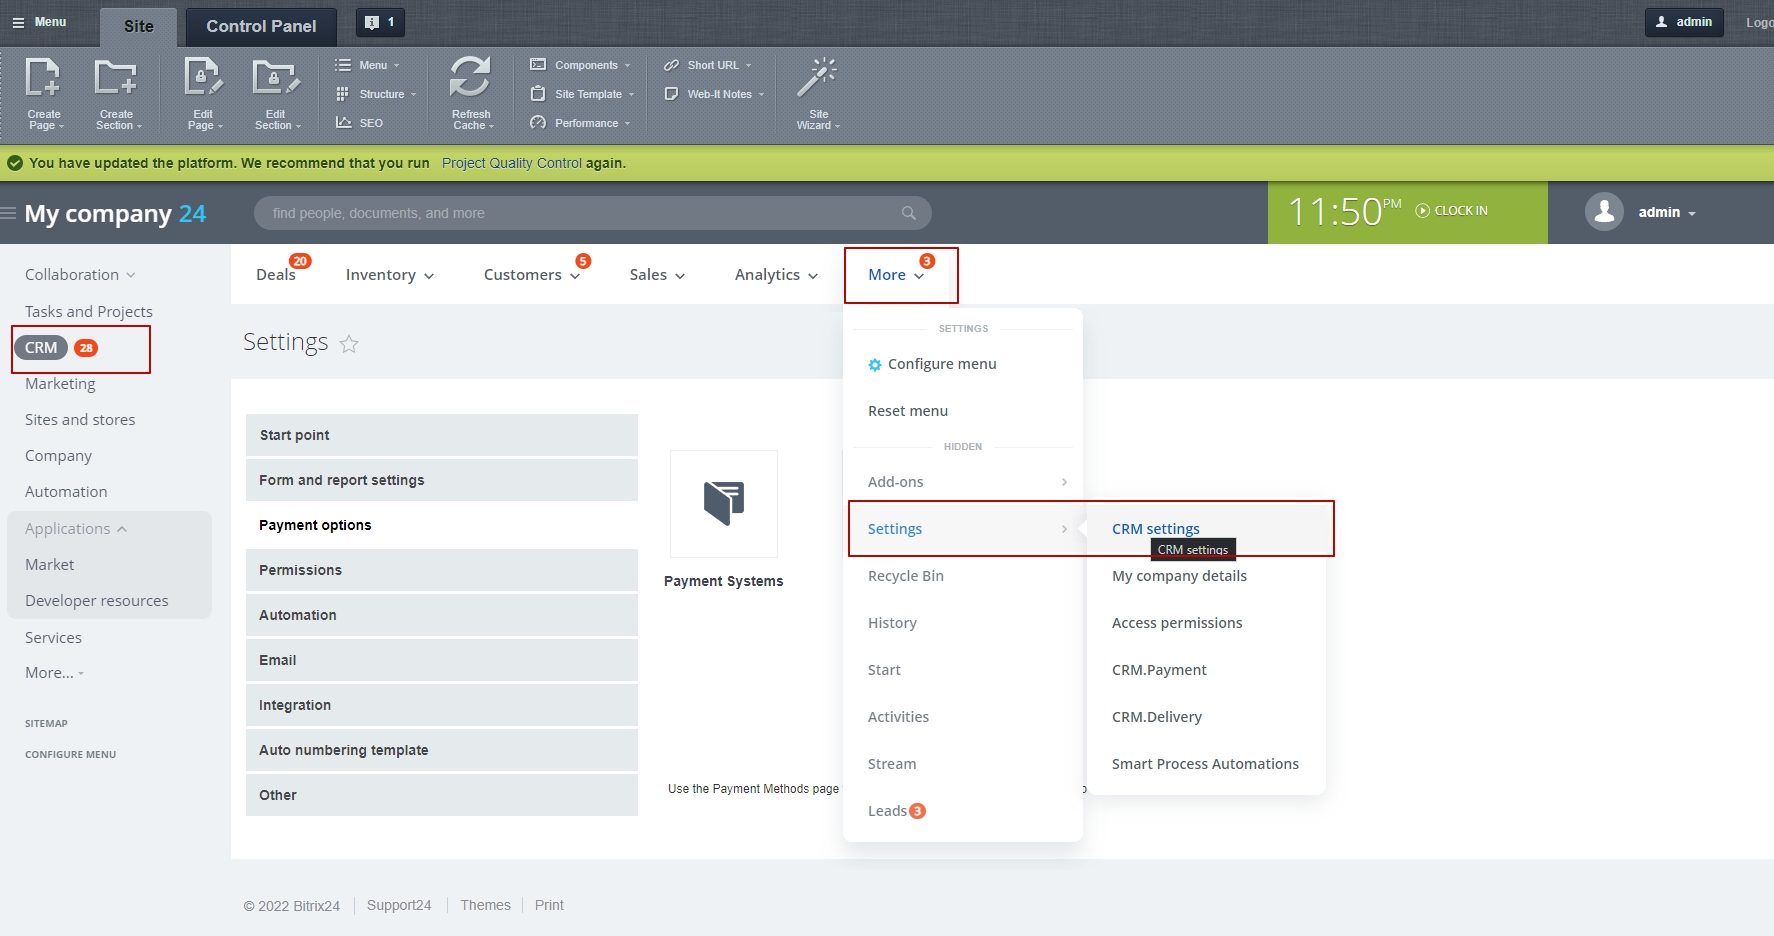
- Choose
Payment option → Payment systems

- Click on Create payment system;
- In the form of creation of the payment system we fill in the lines:
- Name -
DHFinance; - Handler – Choose
DHFinance (dhfi); - Active – put in checkbox;
- Client type – creation of 2 payment systems is required, which will be specified by choosing the given feature, for one we choose Contact, for the second Company;
- API key – fill in the shop API key from DHFI service;
- DHFI api server – fill in the address of the API interaction service;
- Is required to create 2 payment systems depending on the type of payers to whom the invoicing is made:
- Payment system for Contacts;
- Payment system for Companies;
- The given configuration is used for the all version of accounts;
-
Example if filling in the form of payment system
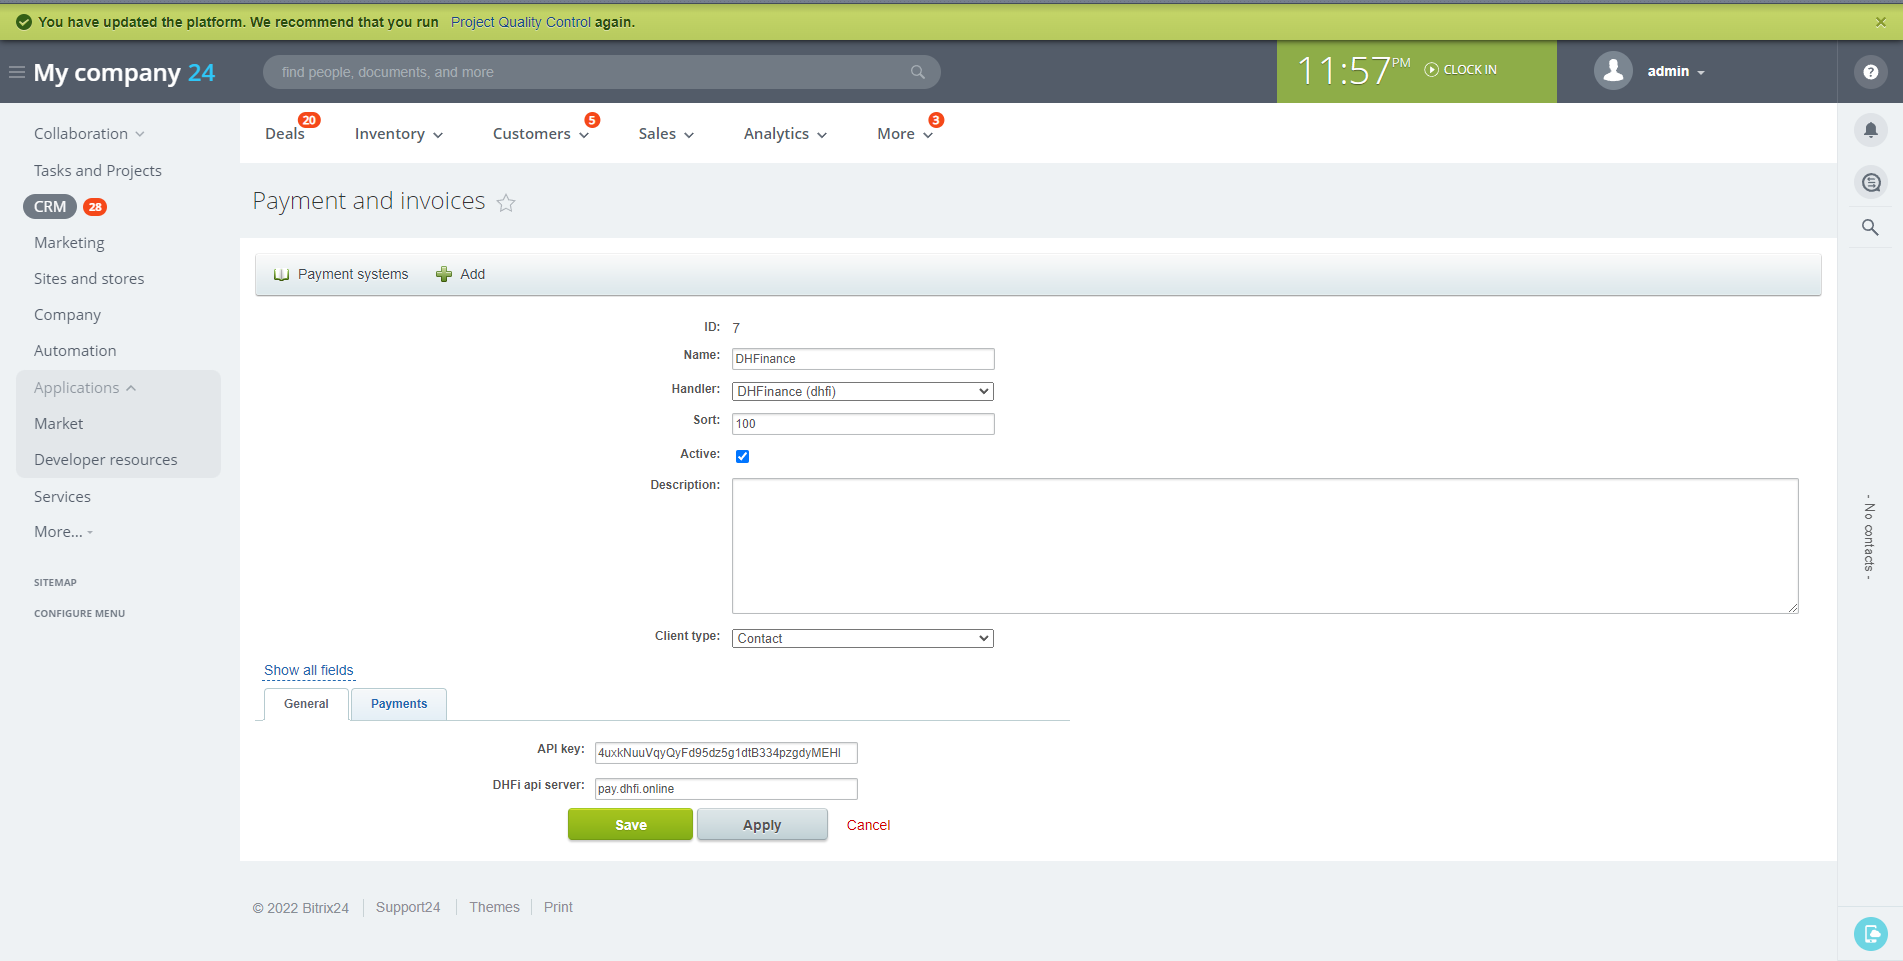


-
Performs the necessary settings for data exchange via the API: in the payment system settings should be indicated the shop ID and API key from pay.dhfi.online
-
Payment system DHFI, after activation and correct configuration, is shown in the Public page of the invoice (Illustration 2).
- Video examples of using the invoicing module: This is an introductory video, guiding the process of creating invoices on Bitrix24 and paying with CSPR via DHFinance payment gateway here
- After the Client has made an invoice on Bitrix24 , the public link of an invoice is send to the customer via the choosen communication channel;
- The customer opens a given invoice link to choose the payment method and proceeding the payment;
- In a block “Pay Using” we can see an icon and the name of the payment method of Module - “DHFinance”;
- On the invoice page the customer chooses the payment system “DHFinance” and clicks on “Pay” or the icon of the payment system;
- Module sends data request with the parameters to the side of the payment system “DHFI”
- Parameters are filled in from Bitrix24: Sum of the payment; Unique account identificator;
- The portal receives via API the ready-made formed link to the invoice;
- The customer is addressed to the page of the payment, a link to which the portal has received as the answer to the request of the parameters mentioned and described above;
- The customer proceeds payment on the side of DHFI;
- DHFI, after the payment is received, sends to the portal the information on the completed invoice via CSPR on the DHFI;
- Status of the invoice in the case of received data of the payment from DHFI, is changed to “Close invoice”.
Illustraton 1 – Example of filling in the form of the payment system

Illustration 2 – Public page of the invoice

NodeJS LTS with npm 8.12. Is required for work
- Copy
.env.exampleto.env, - Specify test Bitrix24 URL, admin login and password in
.envfile, - Proceed
npm install
- Create «CRM + Internet-shop» in the «Shop» section
- Configure the SMS provider. Without it, a link to the payment can’t be generated,
- Set payment methods for the accounts: for contacts and for companies,
- Payment method should be called «DHFinance», on the payment pages tests are oriented to that name.
npm run codeceptjs: runs tests in console with visible browser window. Test results are output to the console upon competition.npm run codeceptjs:ui: opens UI to run all or seperate tests in browser window. Test results are in UI, click on a particular test to see its results in depth.npm run codeceptjs:headlessruns tests in console only with no browser window. Test results are output to the console upon competition.