- Overview
- Manage custom extension
- Samples repositories and building custom extensions
- Monitoring
- Installation
- Build Instructions
- Analytics Builder Extension Backend
- Analytics Builder Block SDK
- Troubleshooting
This solution extends the functionality of the standard Cumulocity Streaming Analytics application by incorporating a plugin to manage and add Analytics Builder extensions. The current standard user interface lacks the capability to upload custom blocks packaged as .zip files. This plugin enhances the Streaming-Analytics UI by introducing these capabilities.
The extension allows you to manage the complete lifecycle of an extension:
- List, upload, download, update and delete Analytics Builder extensions.
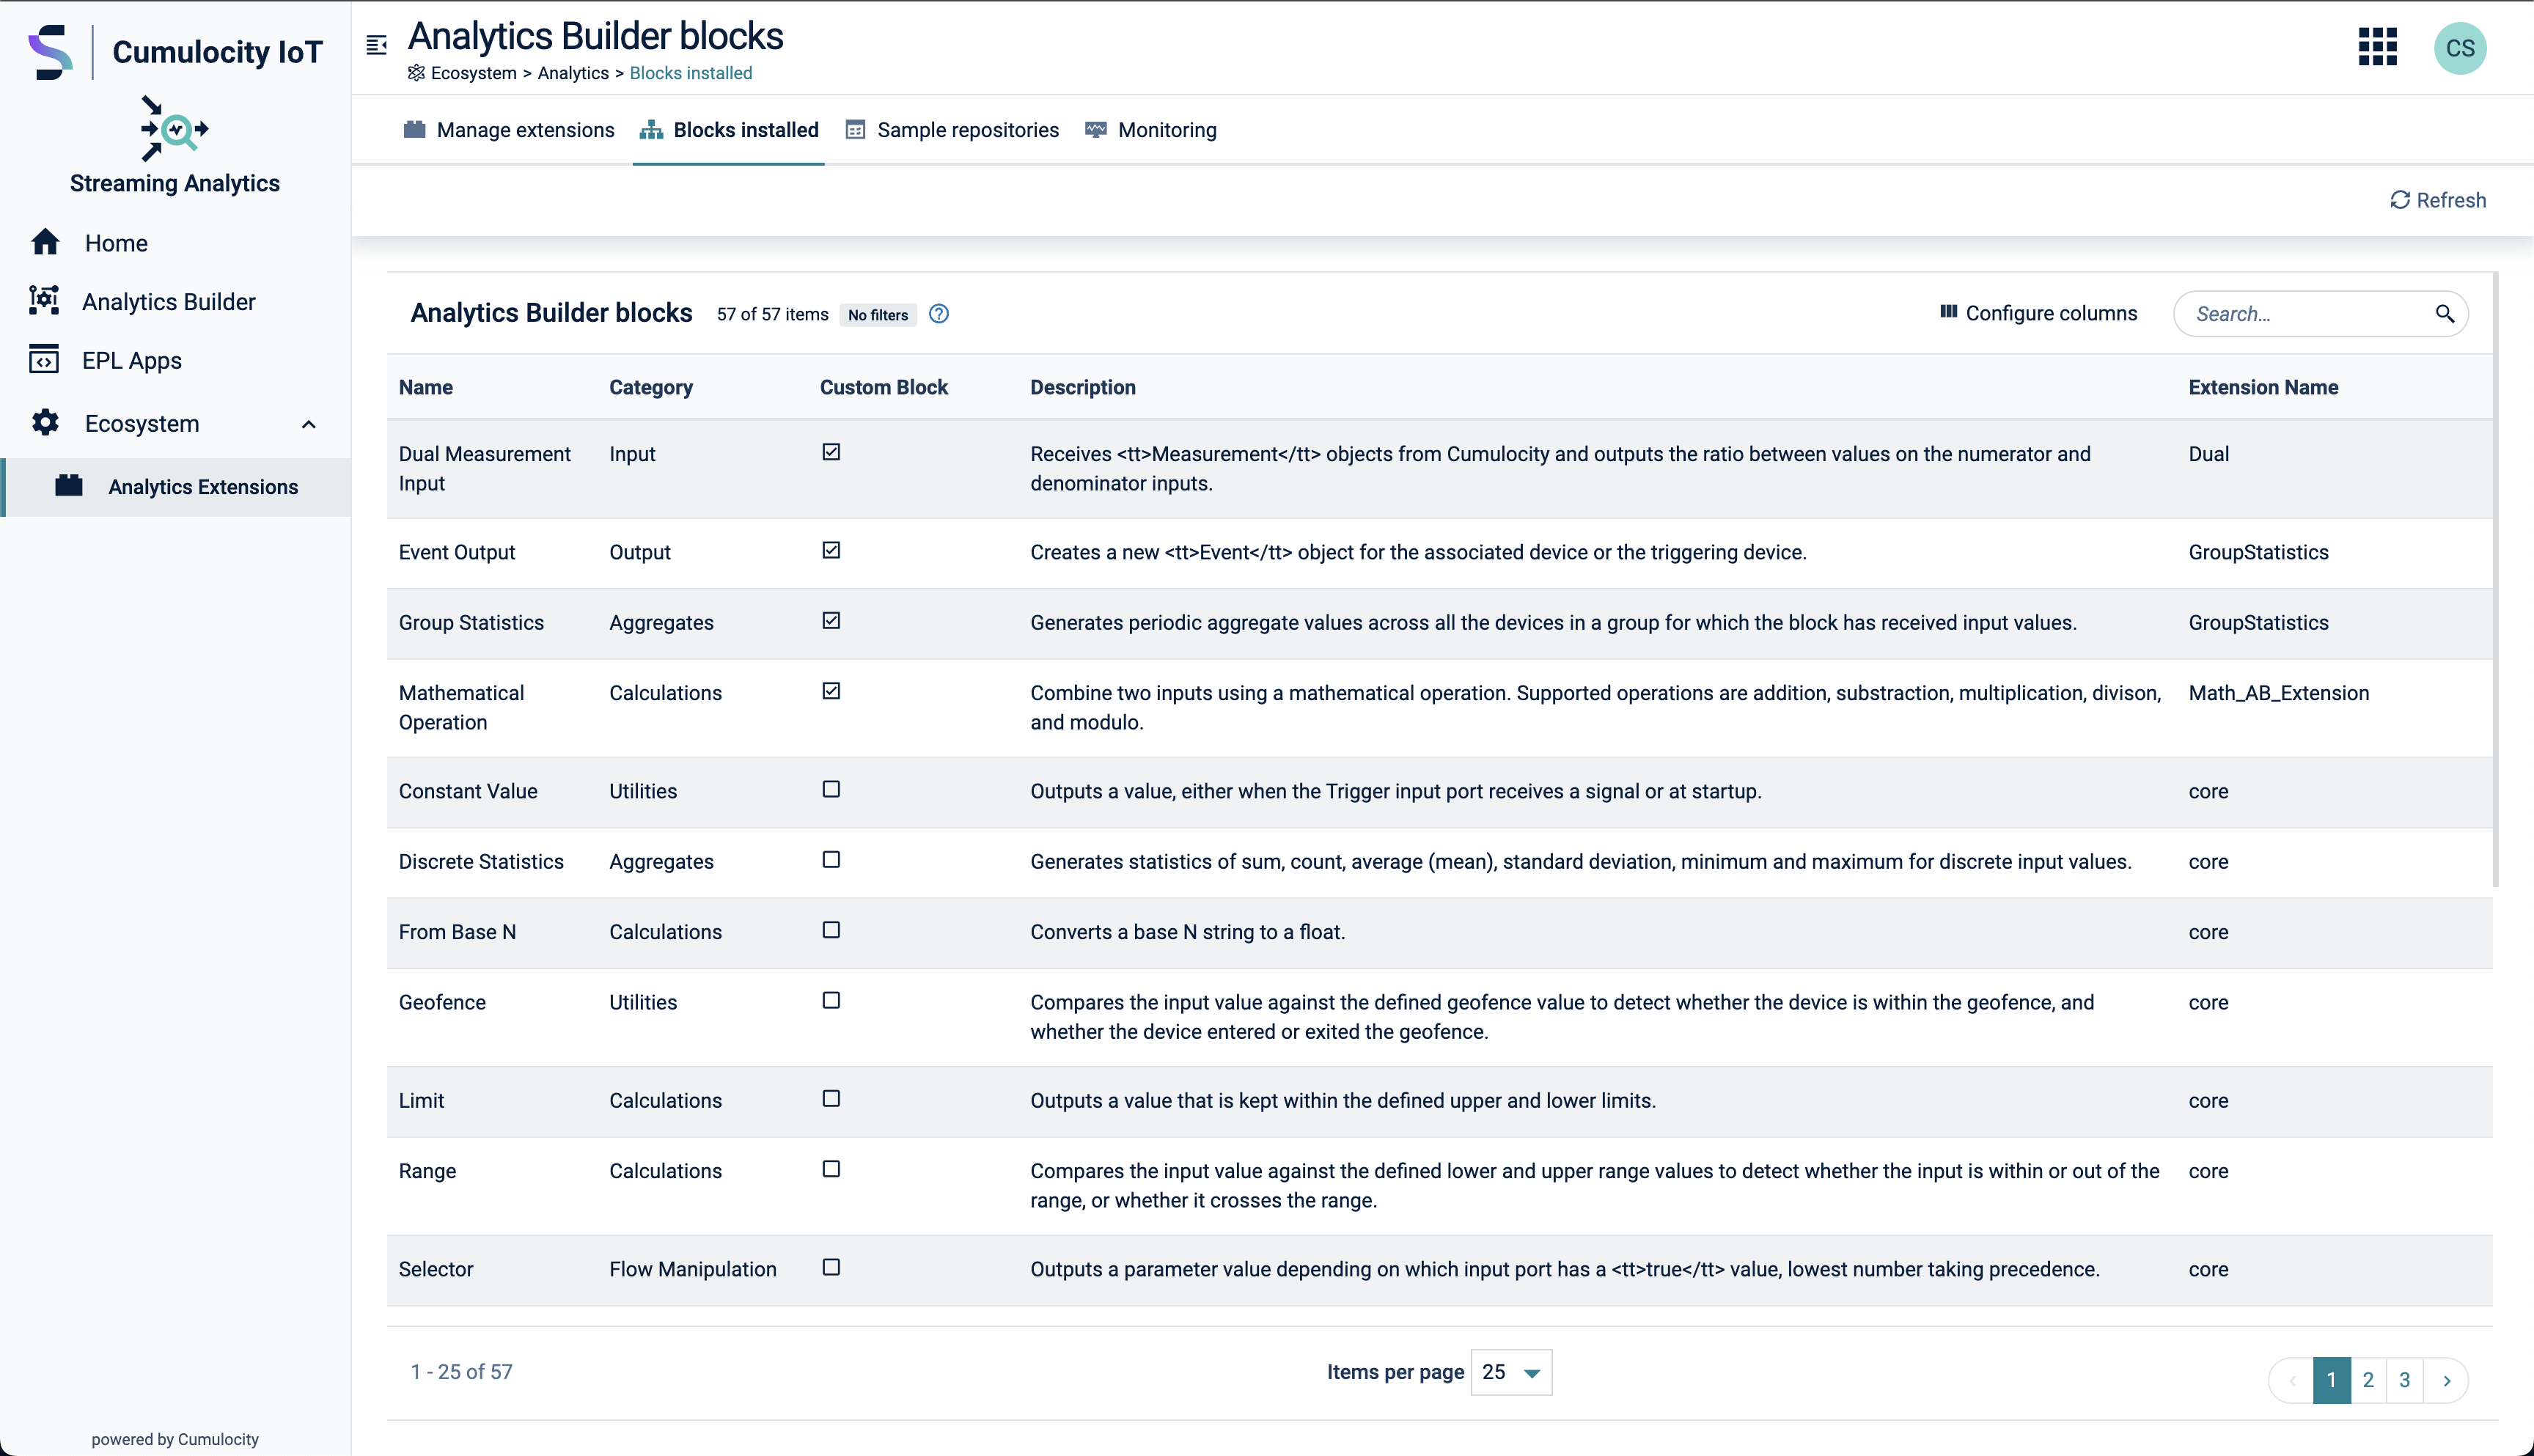
- List installed blocks.
- Manage GitHub repositories, which act as a source for dynamically building new extensions.
- Build new extensions from selected blocks and deploy them in the Streaming Analytics engine.
- Monitor alarm status and events sent from the Analytics Builder engine to analyze deployment failures.
Analytics Builder blocks are build using the Analytics Builder Block SDK. Additionally, externally built extensions can be uploaded in the UI.
In addition a table lists all installed analytics blocks with the following information: name, category, custom block, extension package name.
Custom extension can be uploaded from your local system. In addition they can be downloaded and deletes as well. For a deletion or upload to take effect you need to restart the analytics streaming engine.
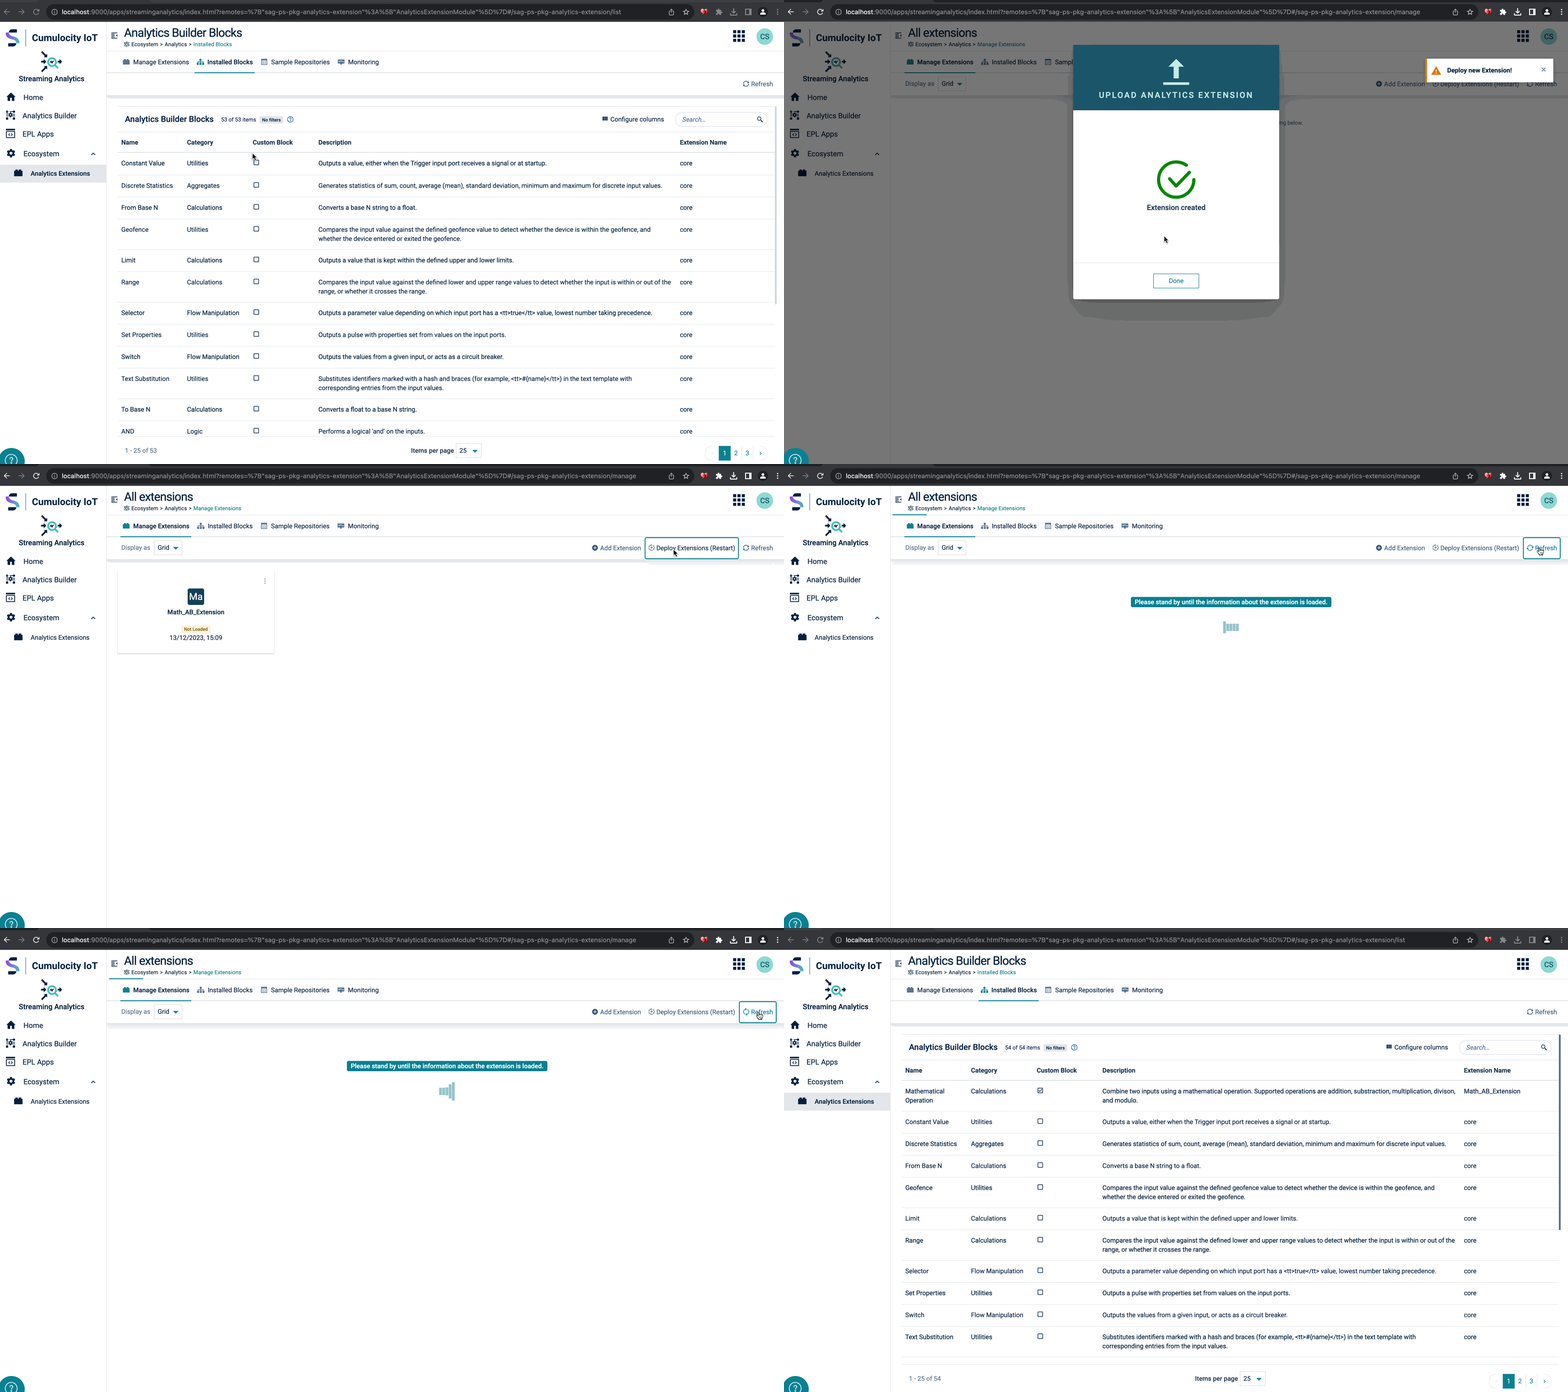
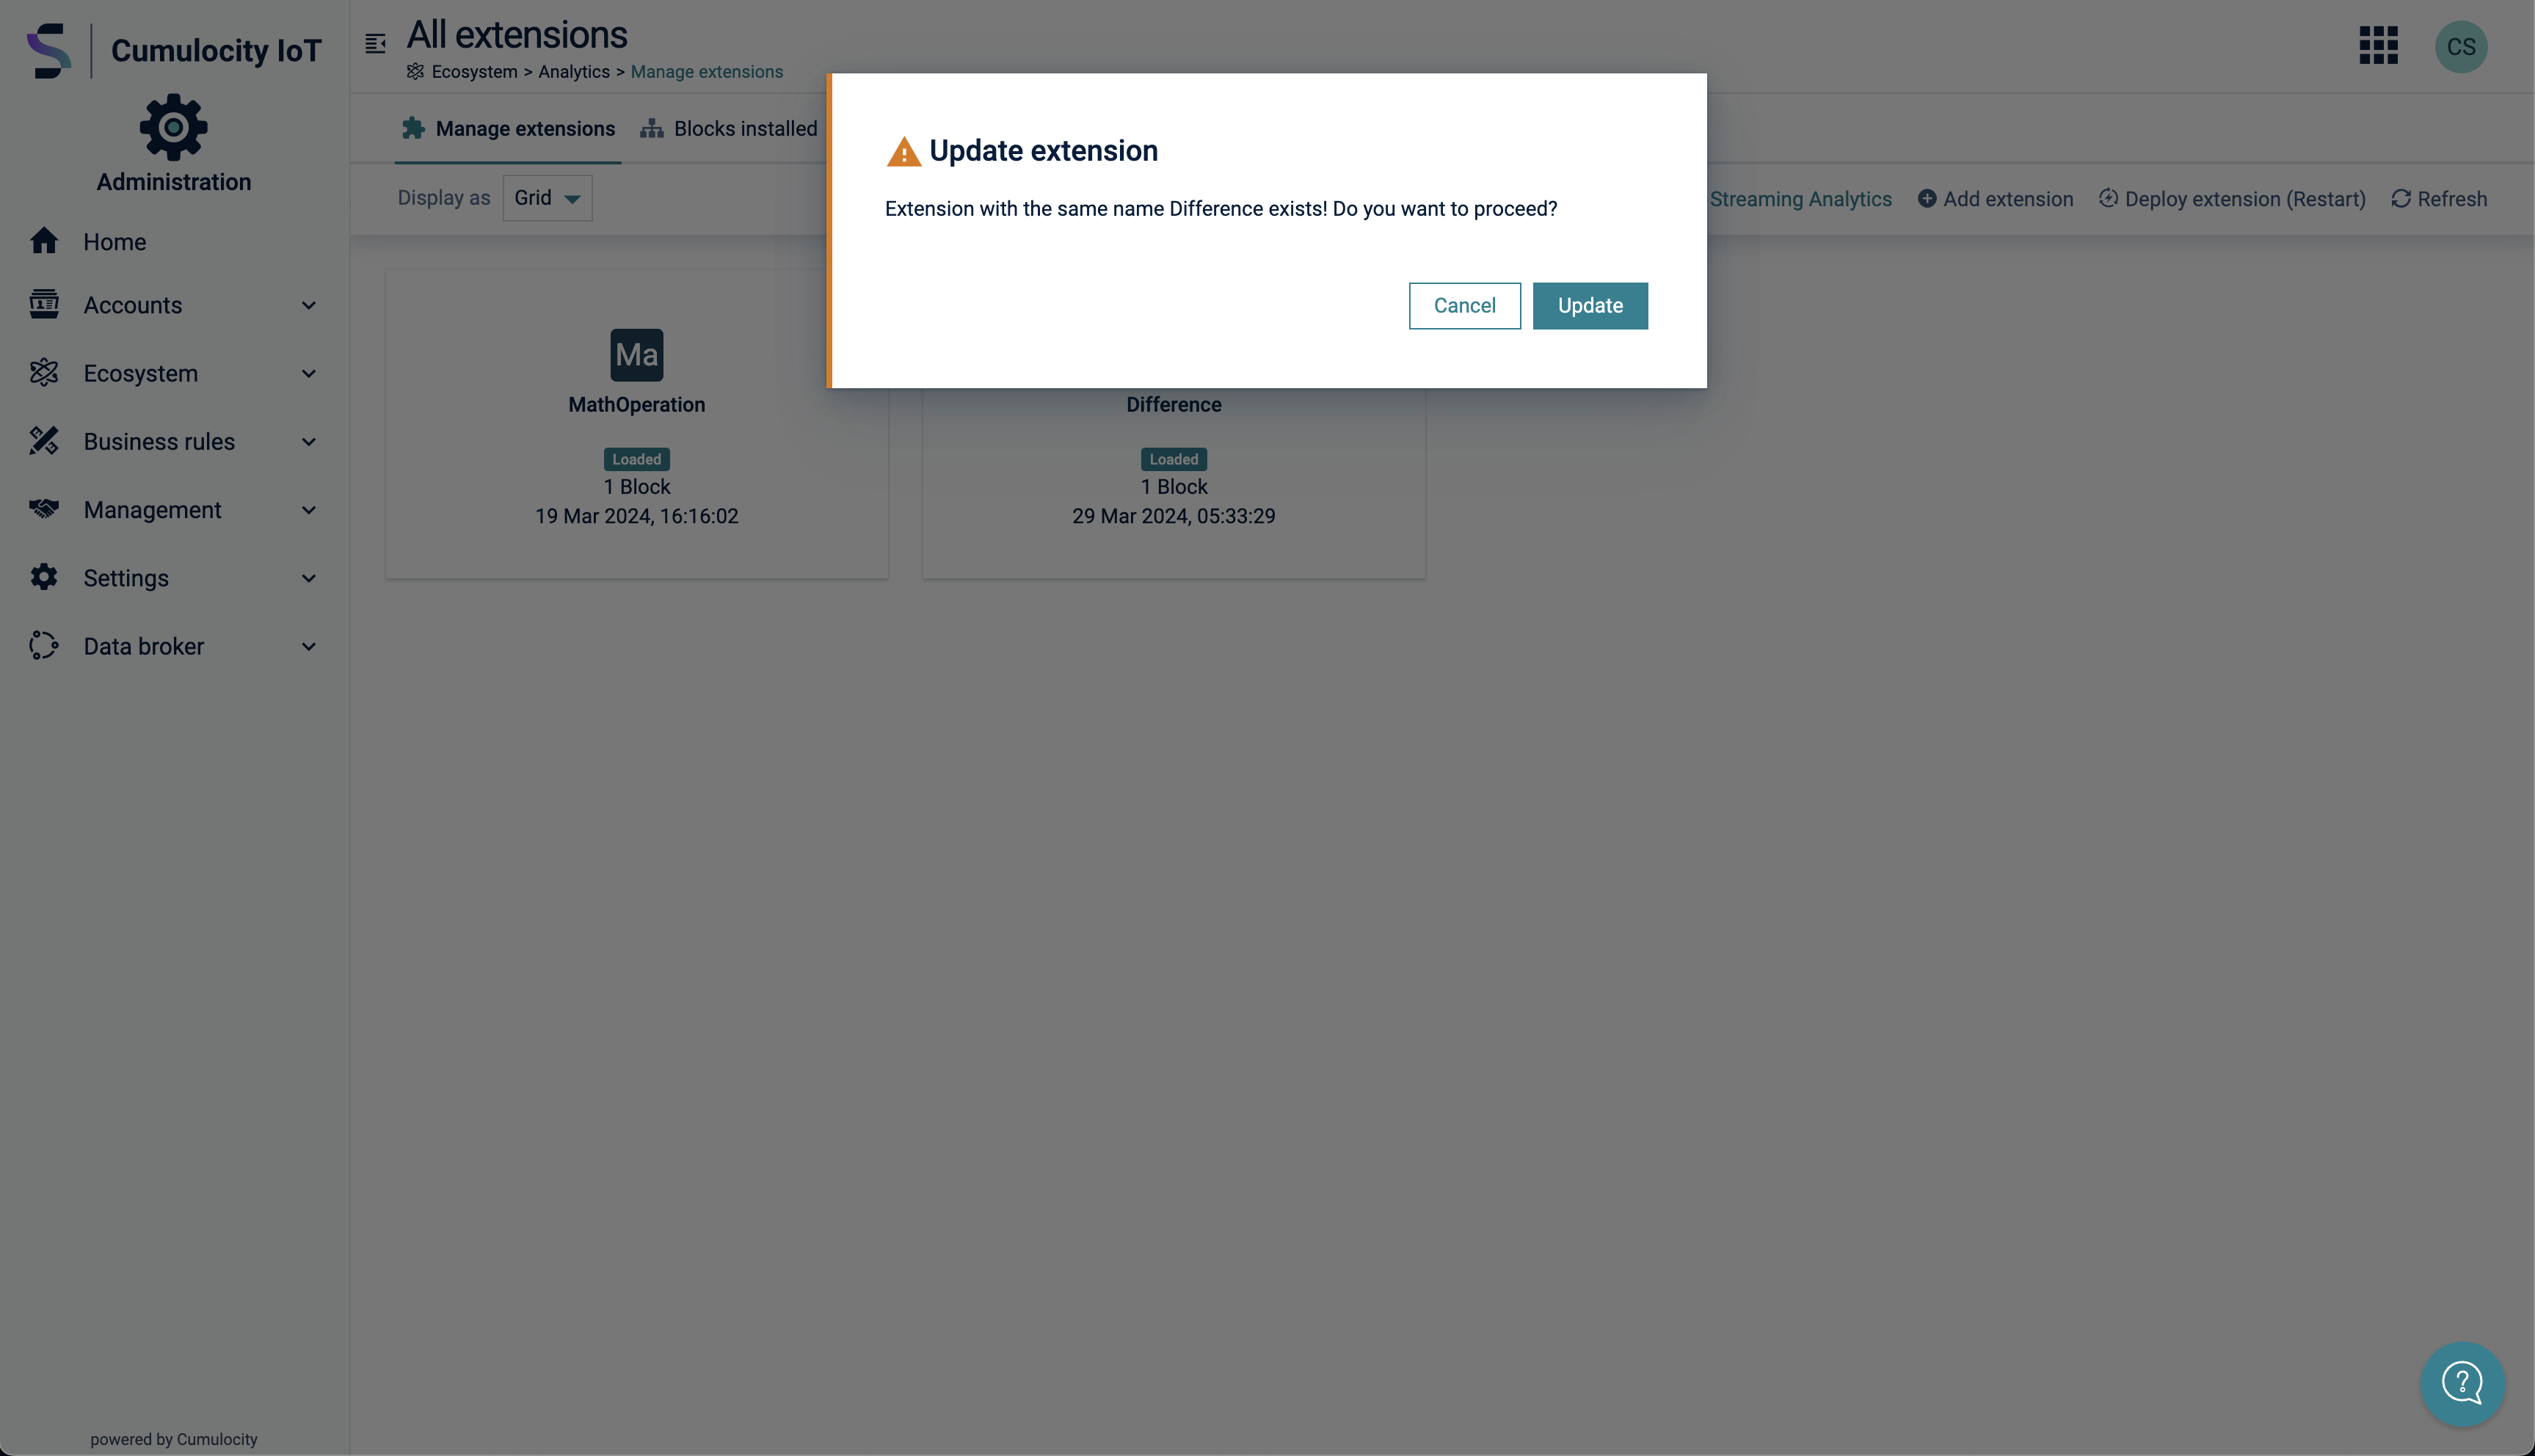
An externally built extensions can be uploaded via the button Add extension. Simply drop the .zip file to the modal dialog and the extension will be loaded to the repository, but not yet deployed. To use them, restart the Streaming Analytics engine by clicking on the button Deploy extension (Restart) and wait for the notification confirming the engine restart. When you try to add an extension with a name that already exists, you have the choice to confirm that the version of the existing extension is replaces with the new one you are about to upload. You can as well cancel the process if this is not what you intend.
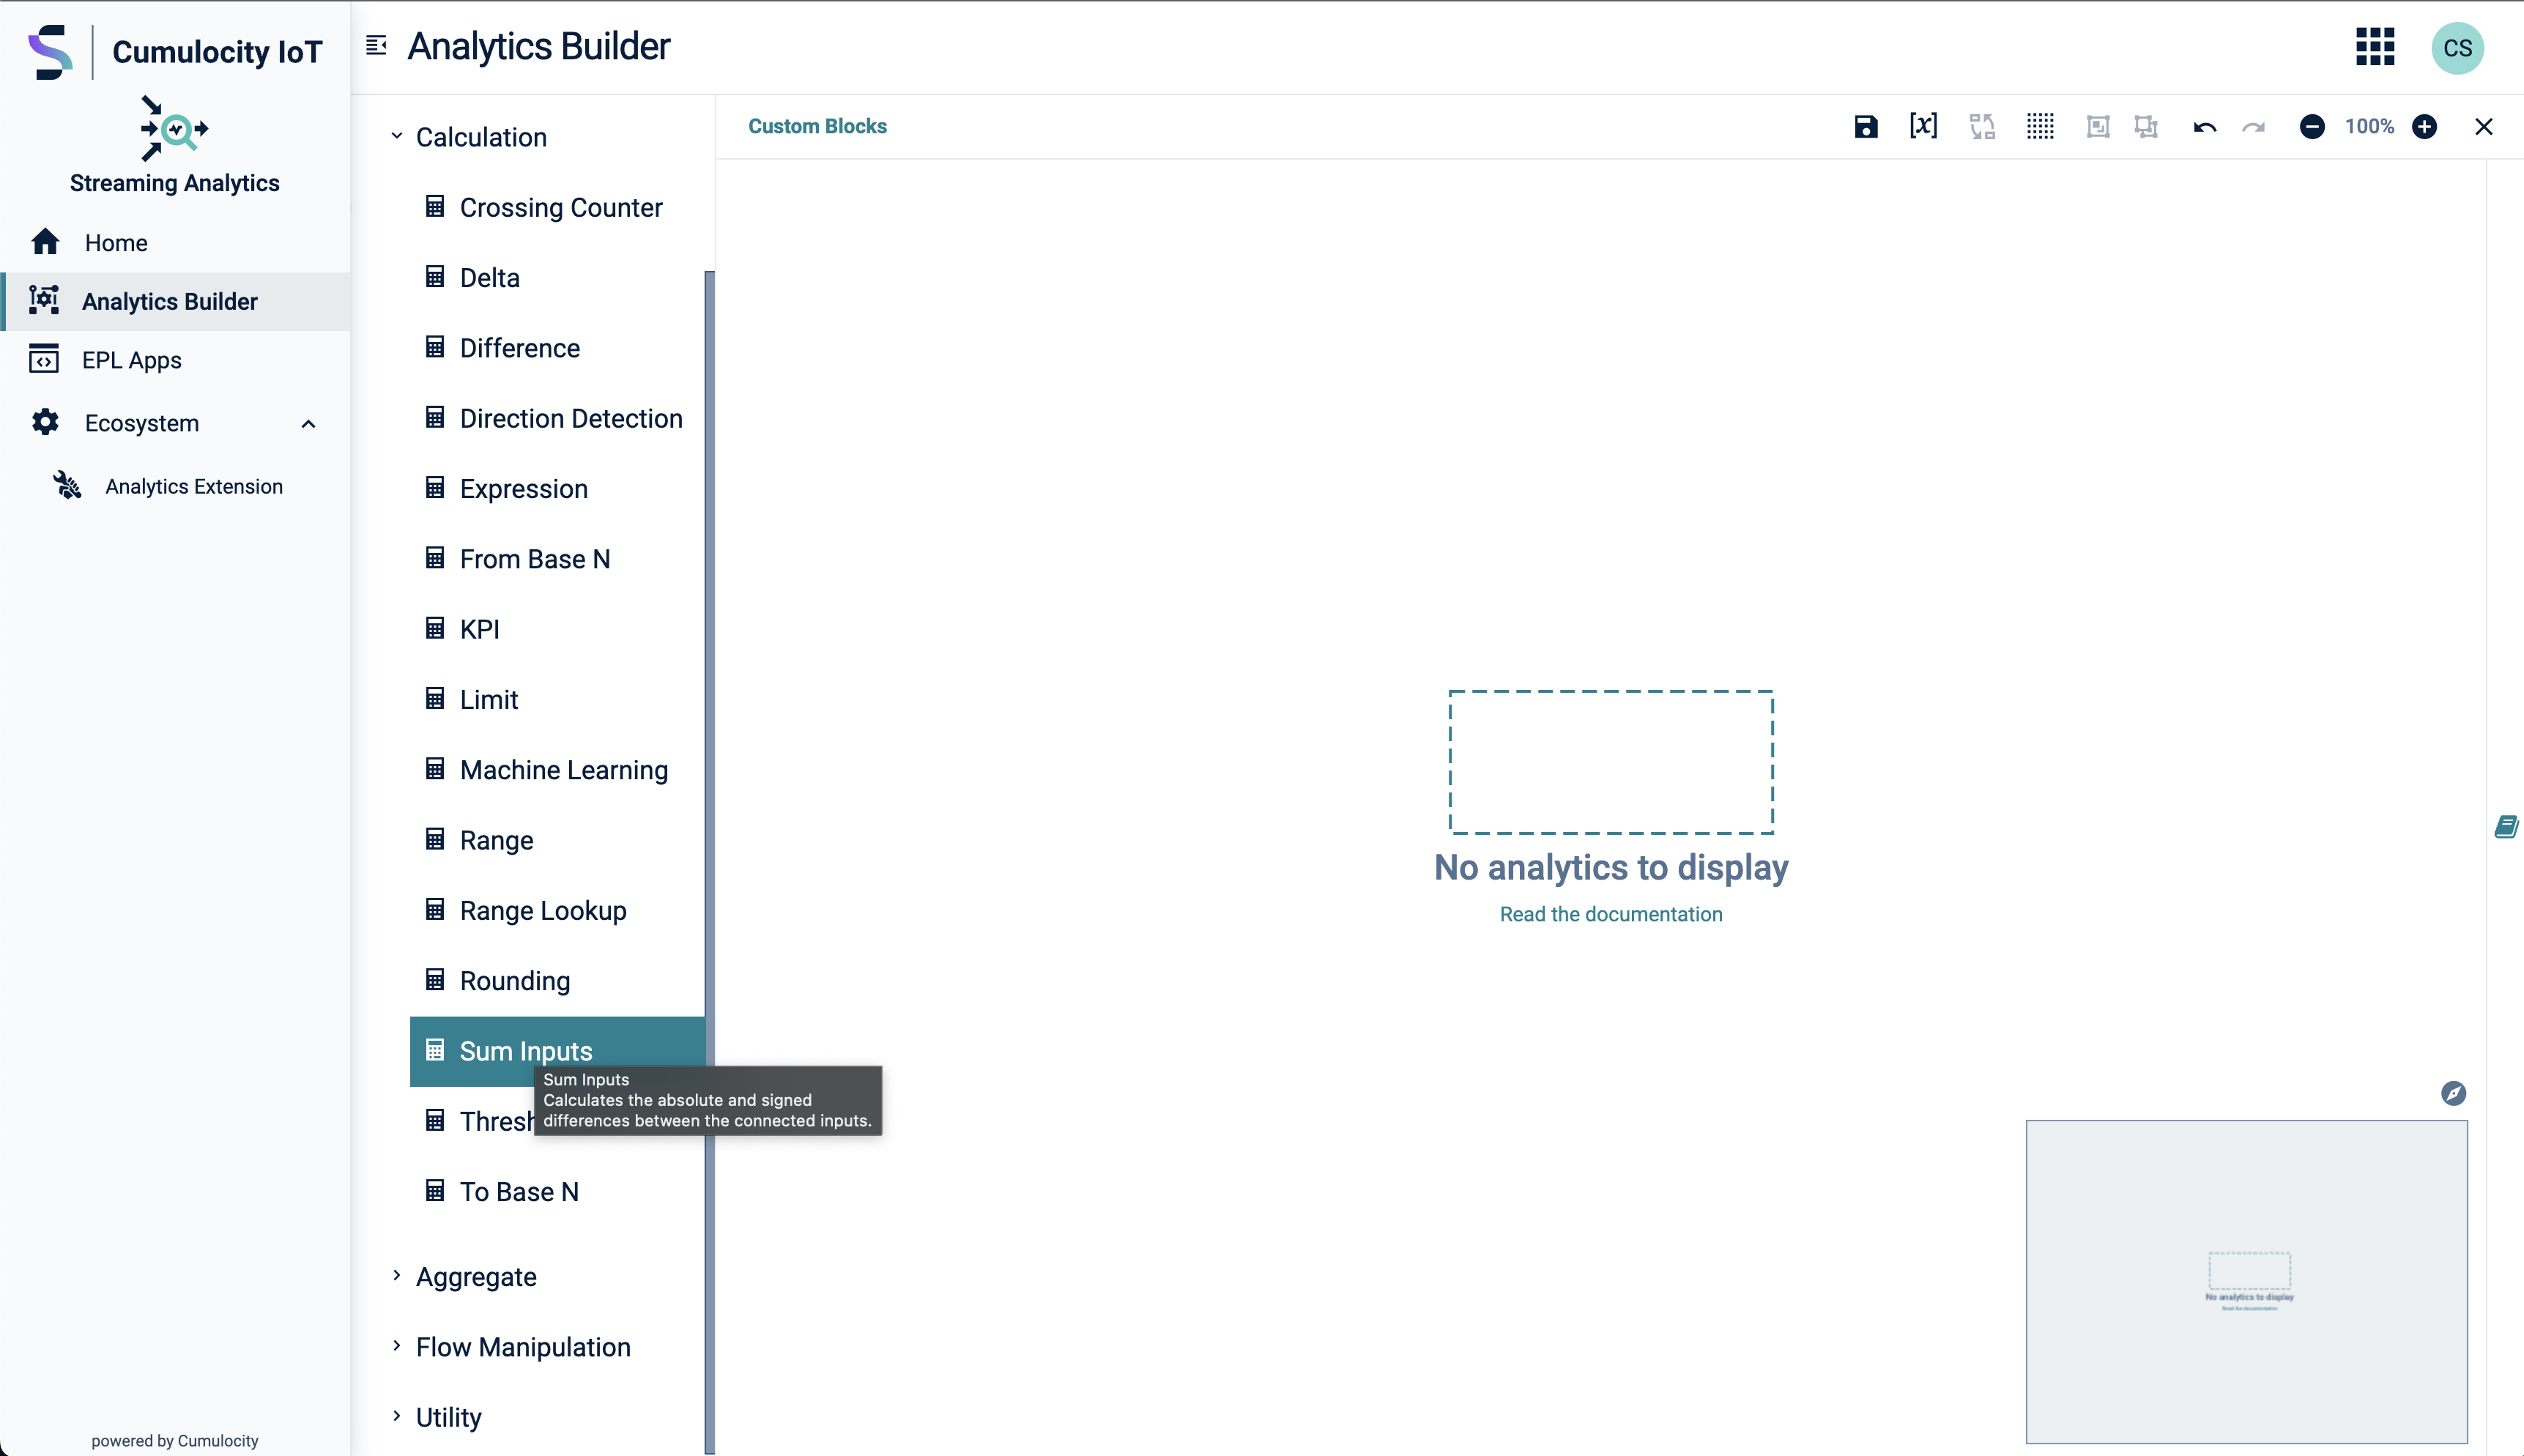
After the deployment (restart of streaming analytics) the block will be available within the Streaming Analytics Application.
When the deployment of the extension was not successful an indicator Safe Mode modus appears in the action bar of the Manage extensions tab, as on the image below.
This usually happen when you try to deploy a faulty extension. In this case please check the logs of the microservice apama-ctrl-Xc-Xg, delete the extension and restart the Streaming Analytics engine.
Removing an extension will eliminate the block once more. It's important to note that when deleting an extension, there is no verification of whether the blocks within this extension are utilized in existing models. This could lead to models that are no longer deployable.
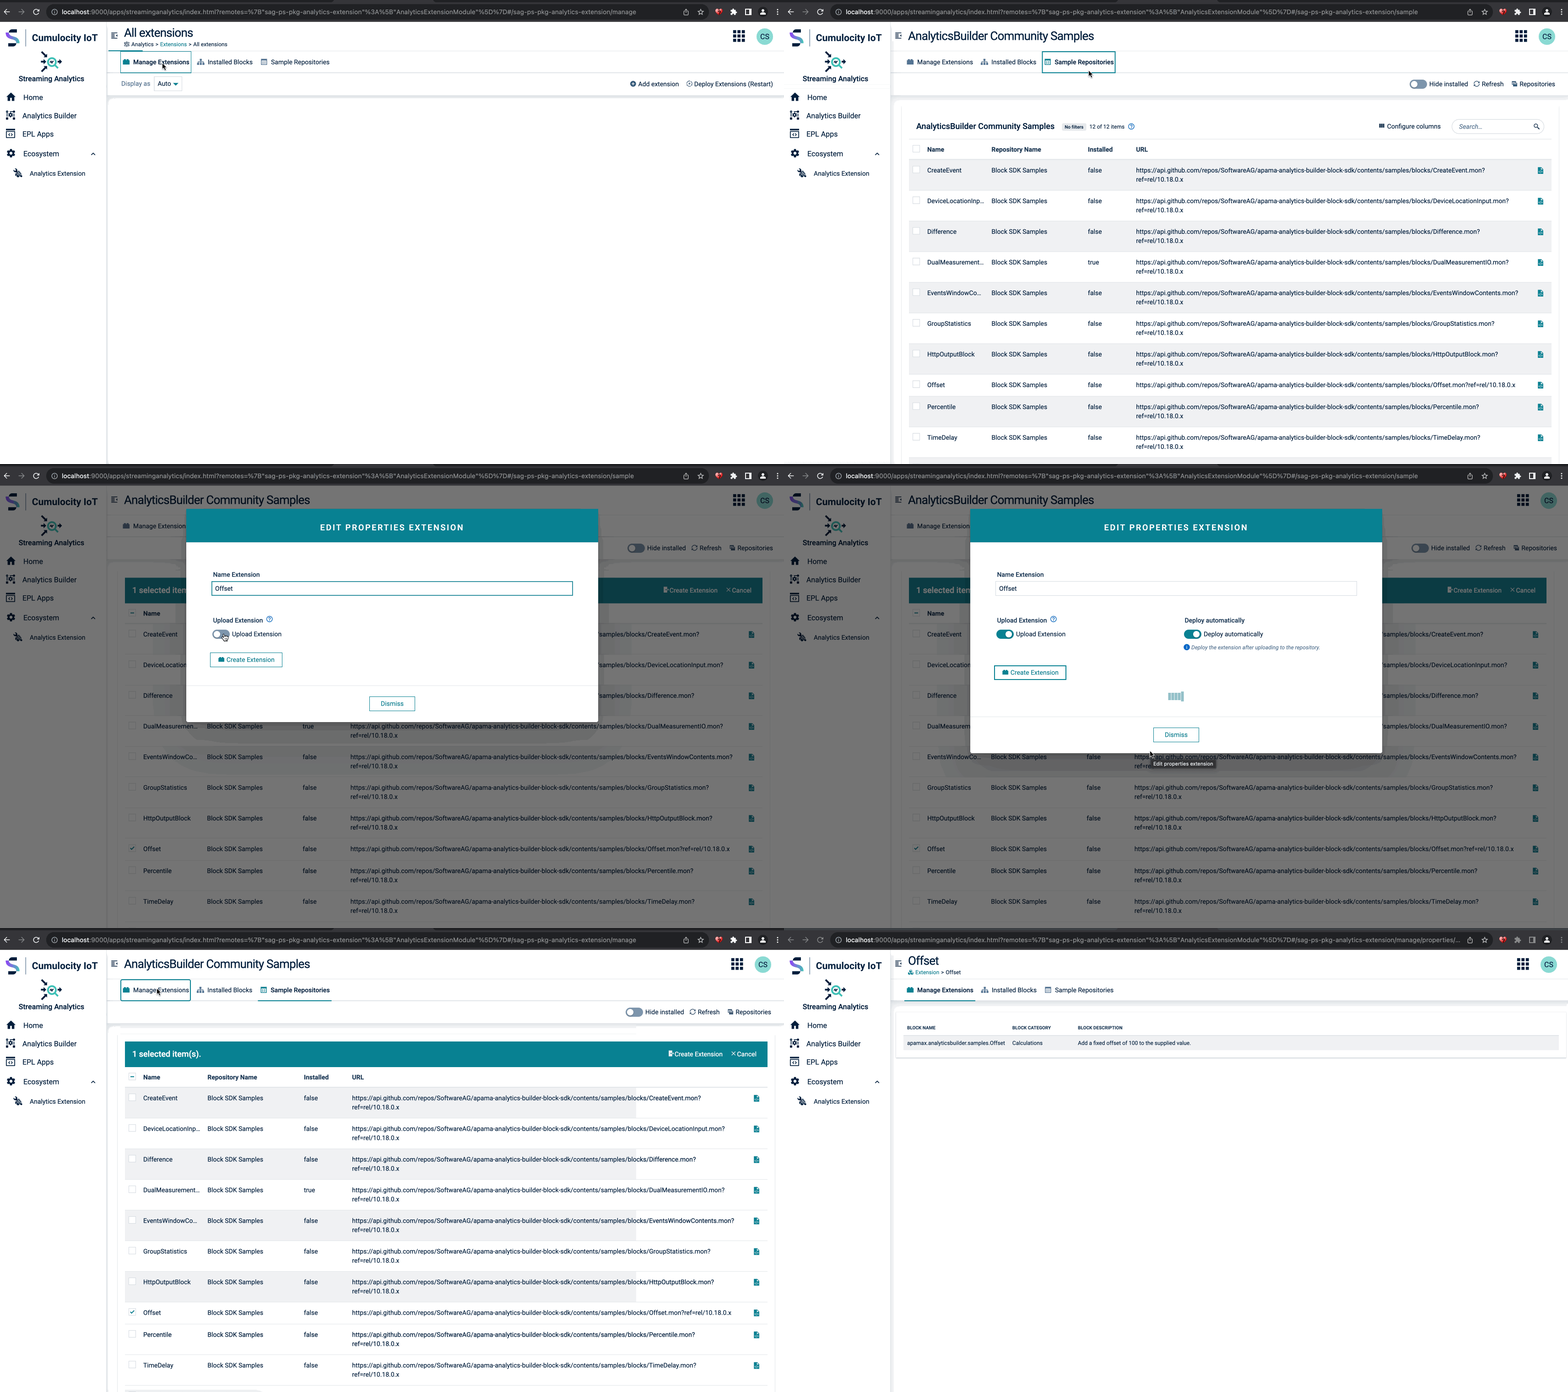
You can build and uploads a custom extension by following the screen flow below:
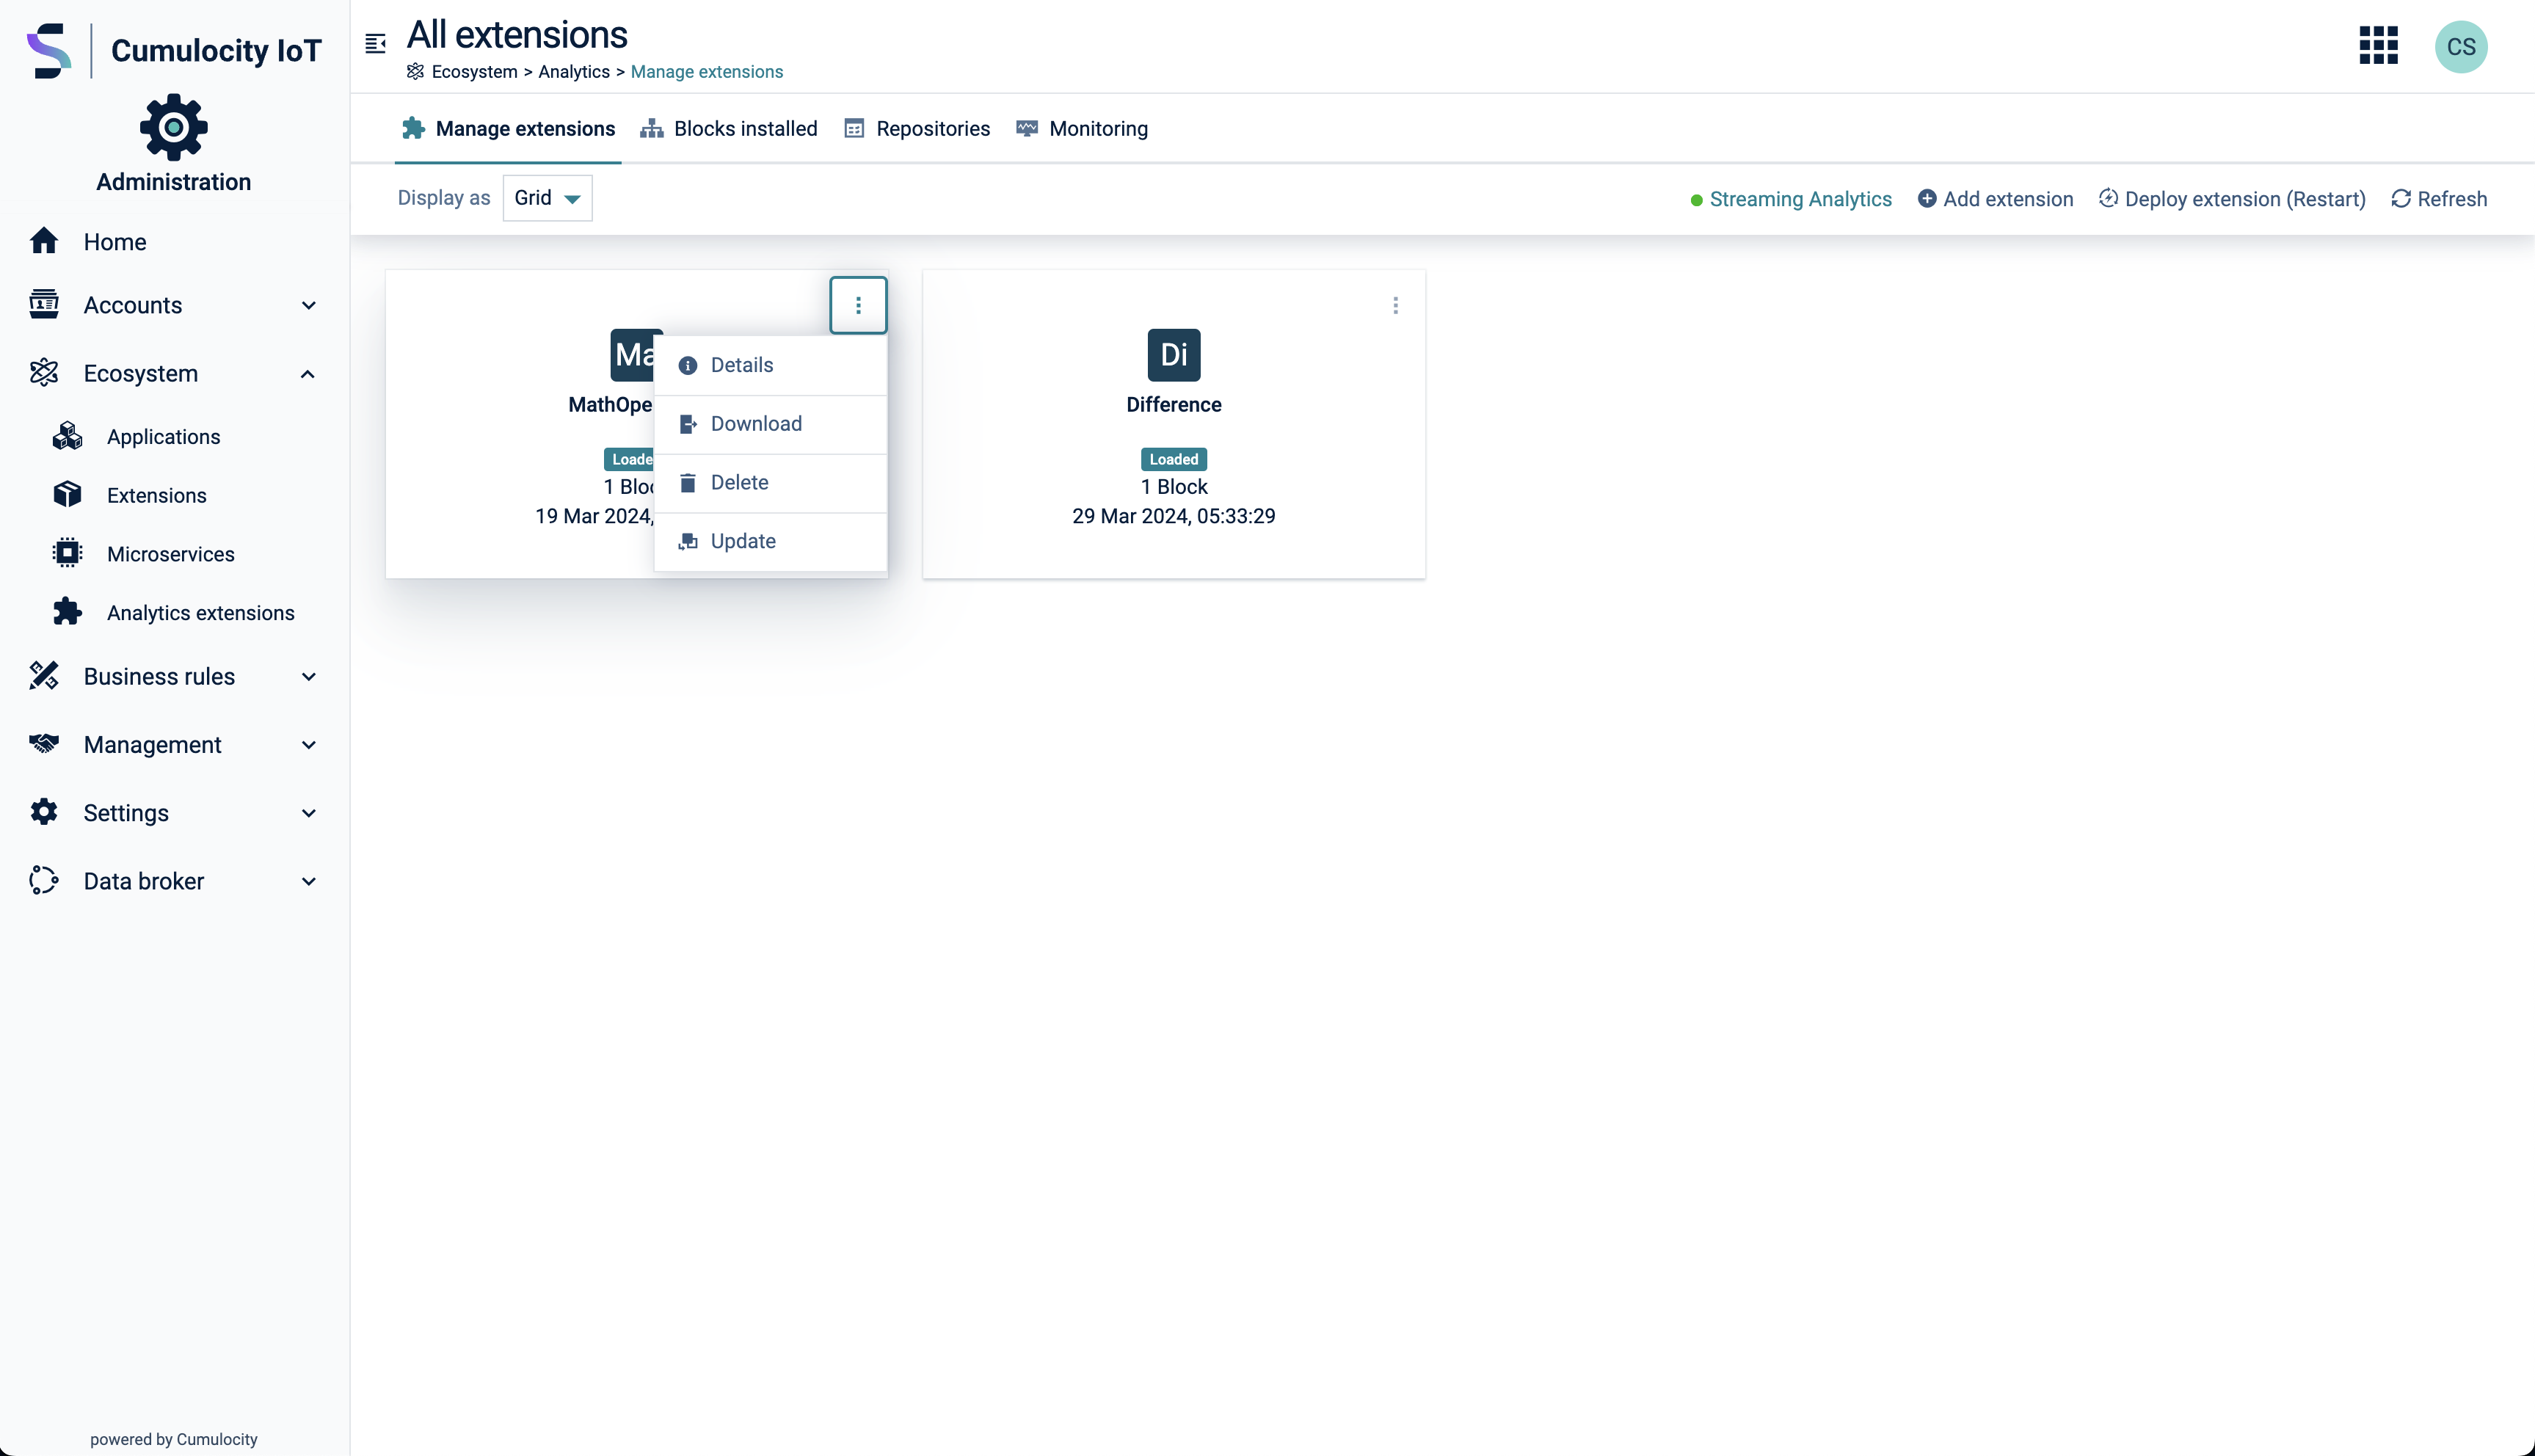
For a custom extension you have the following options:
- Delete: deletes the custom extension permanently. To take effect you need to restart the streaming analytics engine.
- Update: updates the custom extension with a new version of the extension. To take effect you need to restart the streaming analytics engine.
- Details: lists the included blocks of the custom extension on a detail page.
- Download: downloads the custom extension as a zip file.
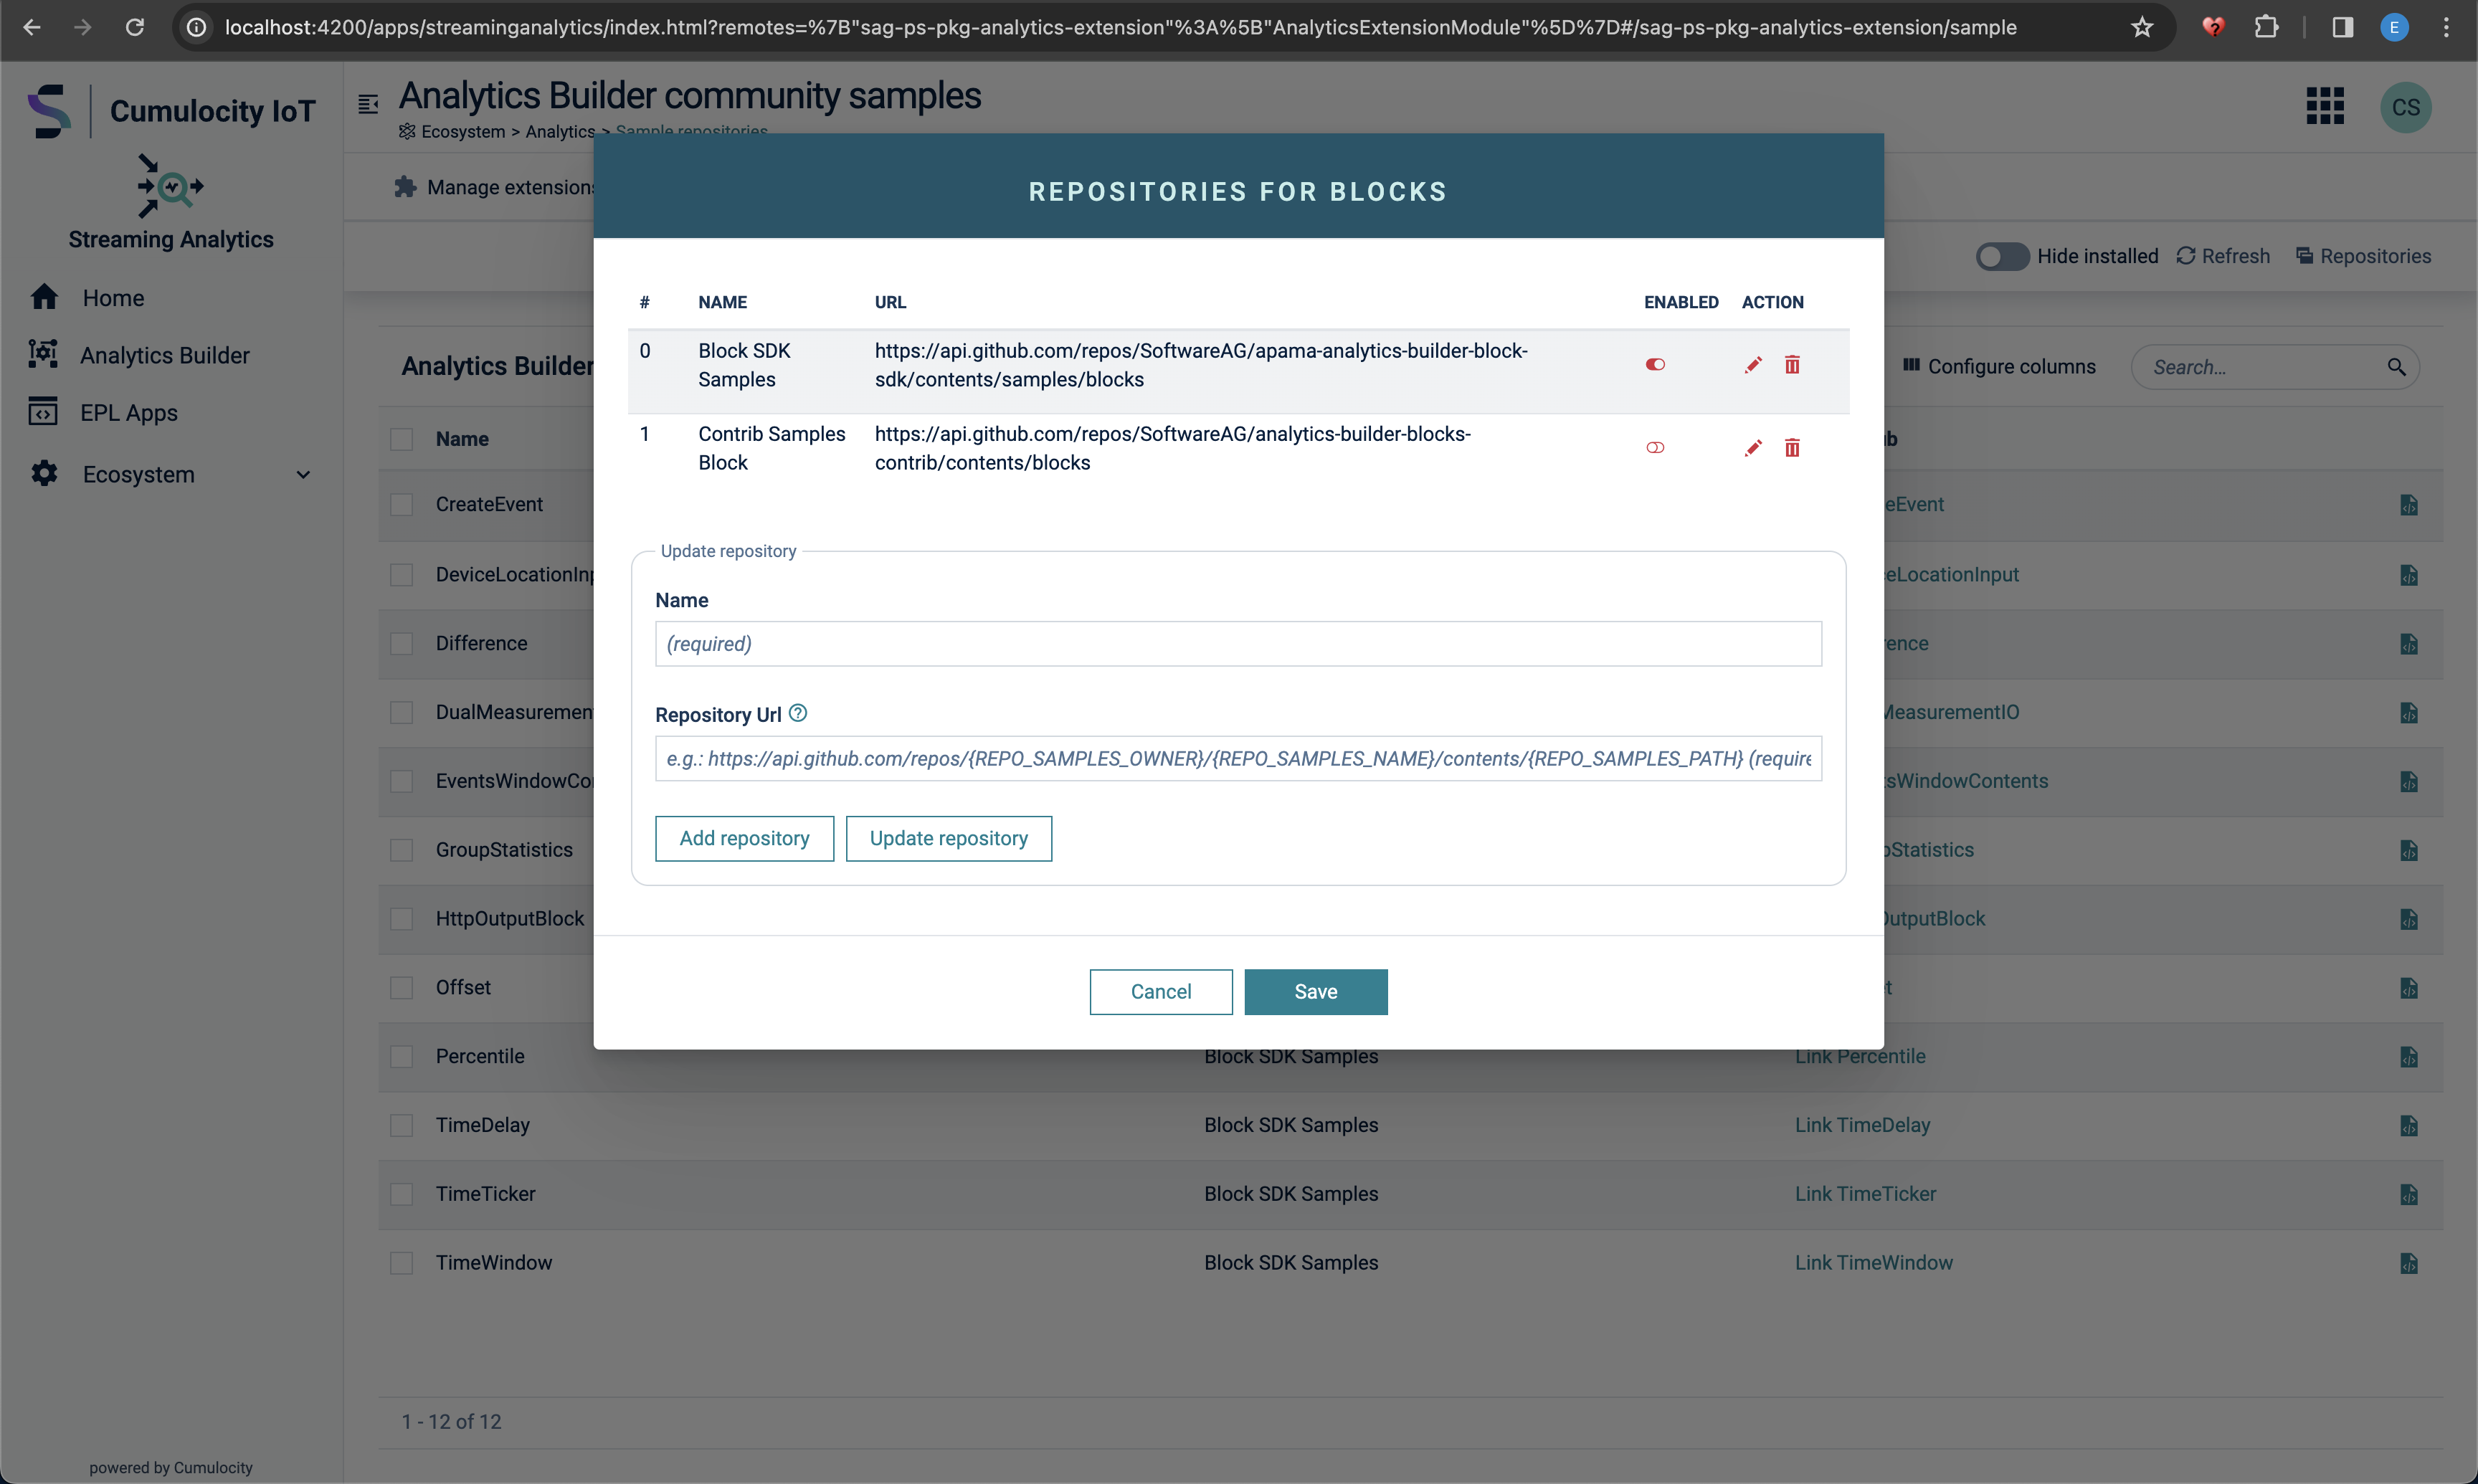
Block samples from GitHub repositories can be selected to build a custom extension online. To utilize this option, you must first configure your GitHub repository. Configured repositories can be updated, deleted, and enabled/disabled. Only enabled repositories will appear in the list of block samples. You can manage GitHub repositories using the provided user interface (UI):
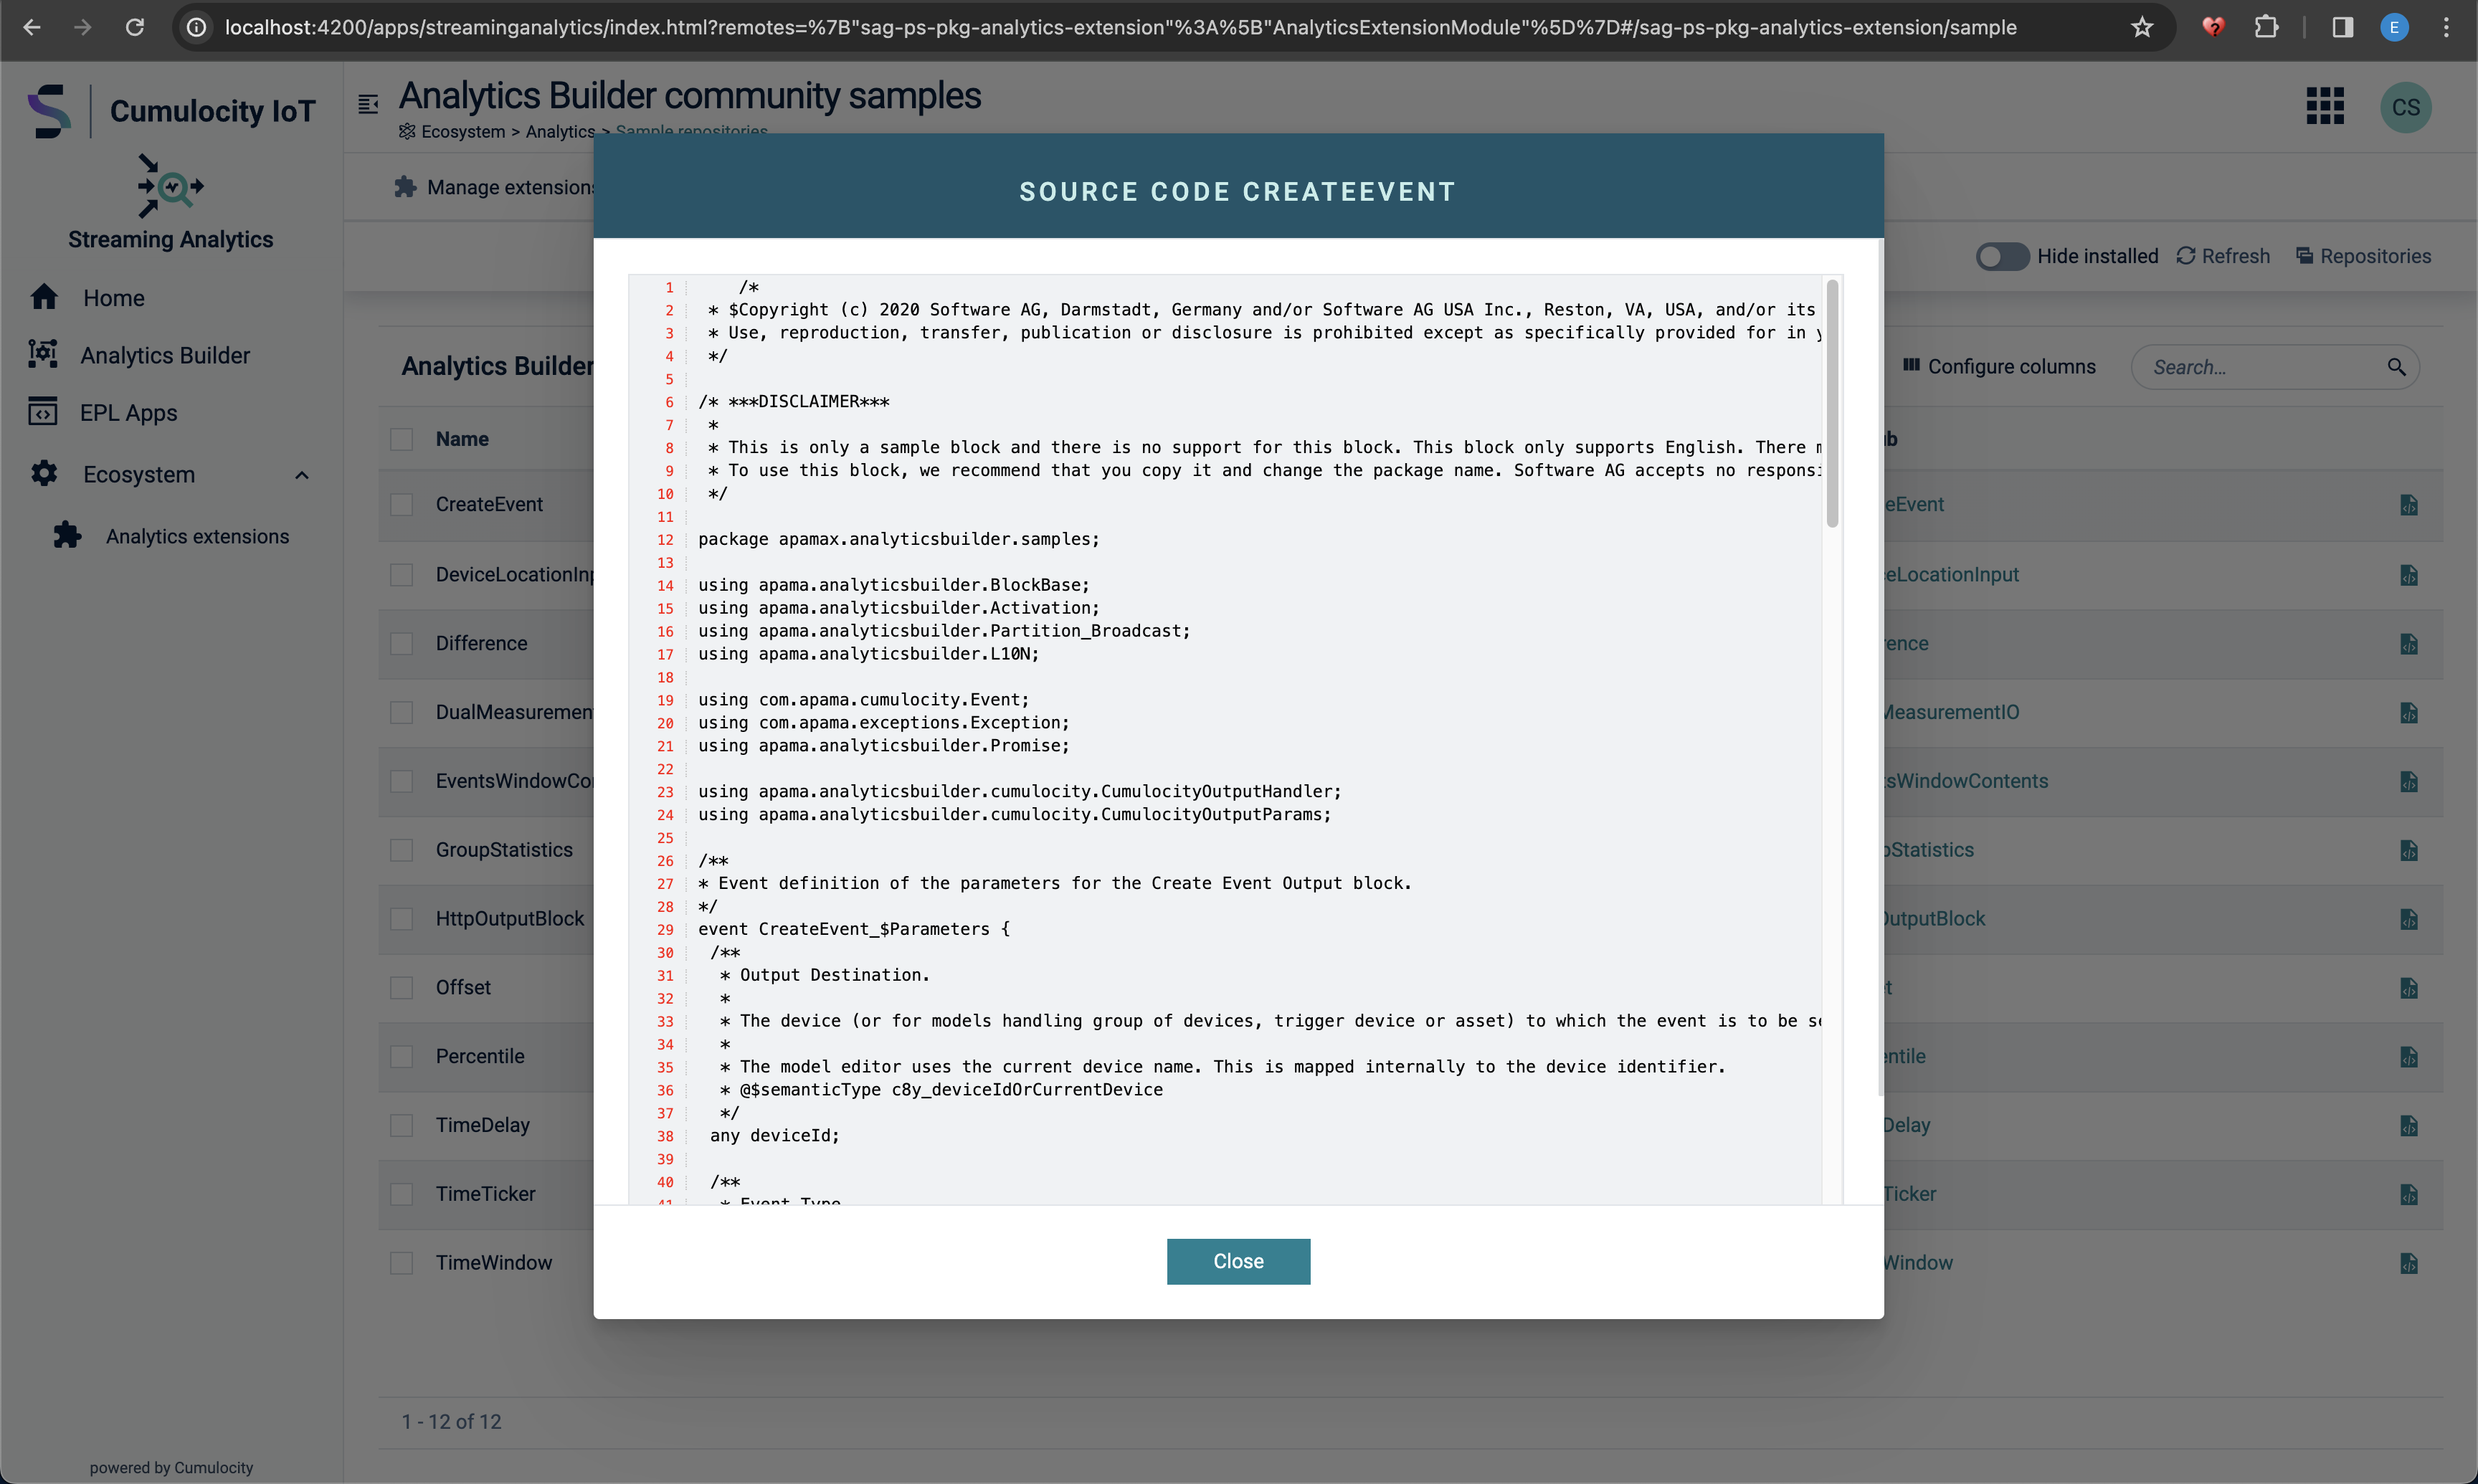
In addition you can view the EPL (event processing language) source code:
Building a custom extension starts by selecting the blocks from the list of samples. On selection of blocks an action in the table header appears custom extension.
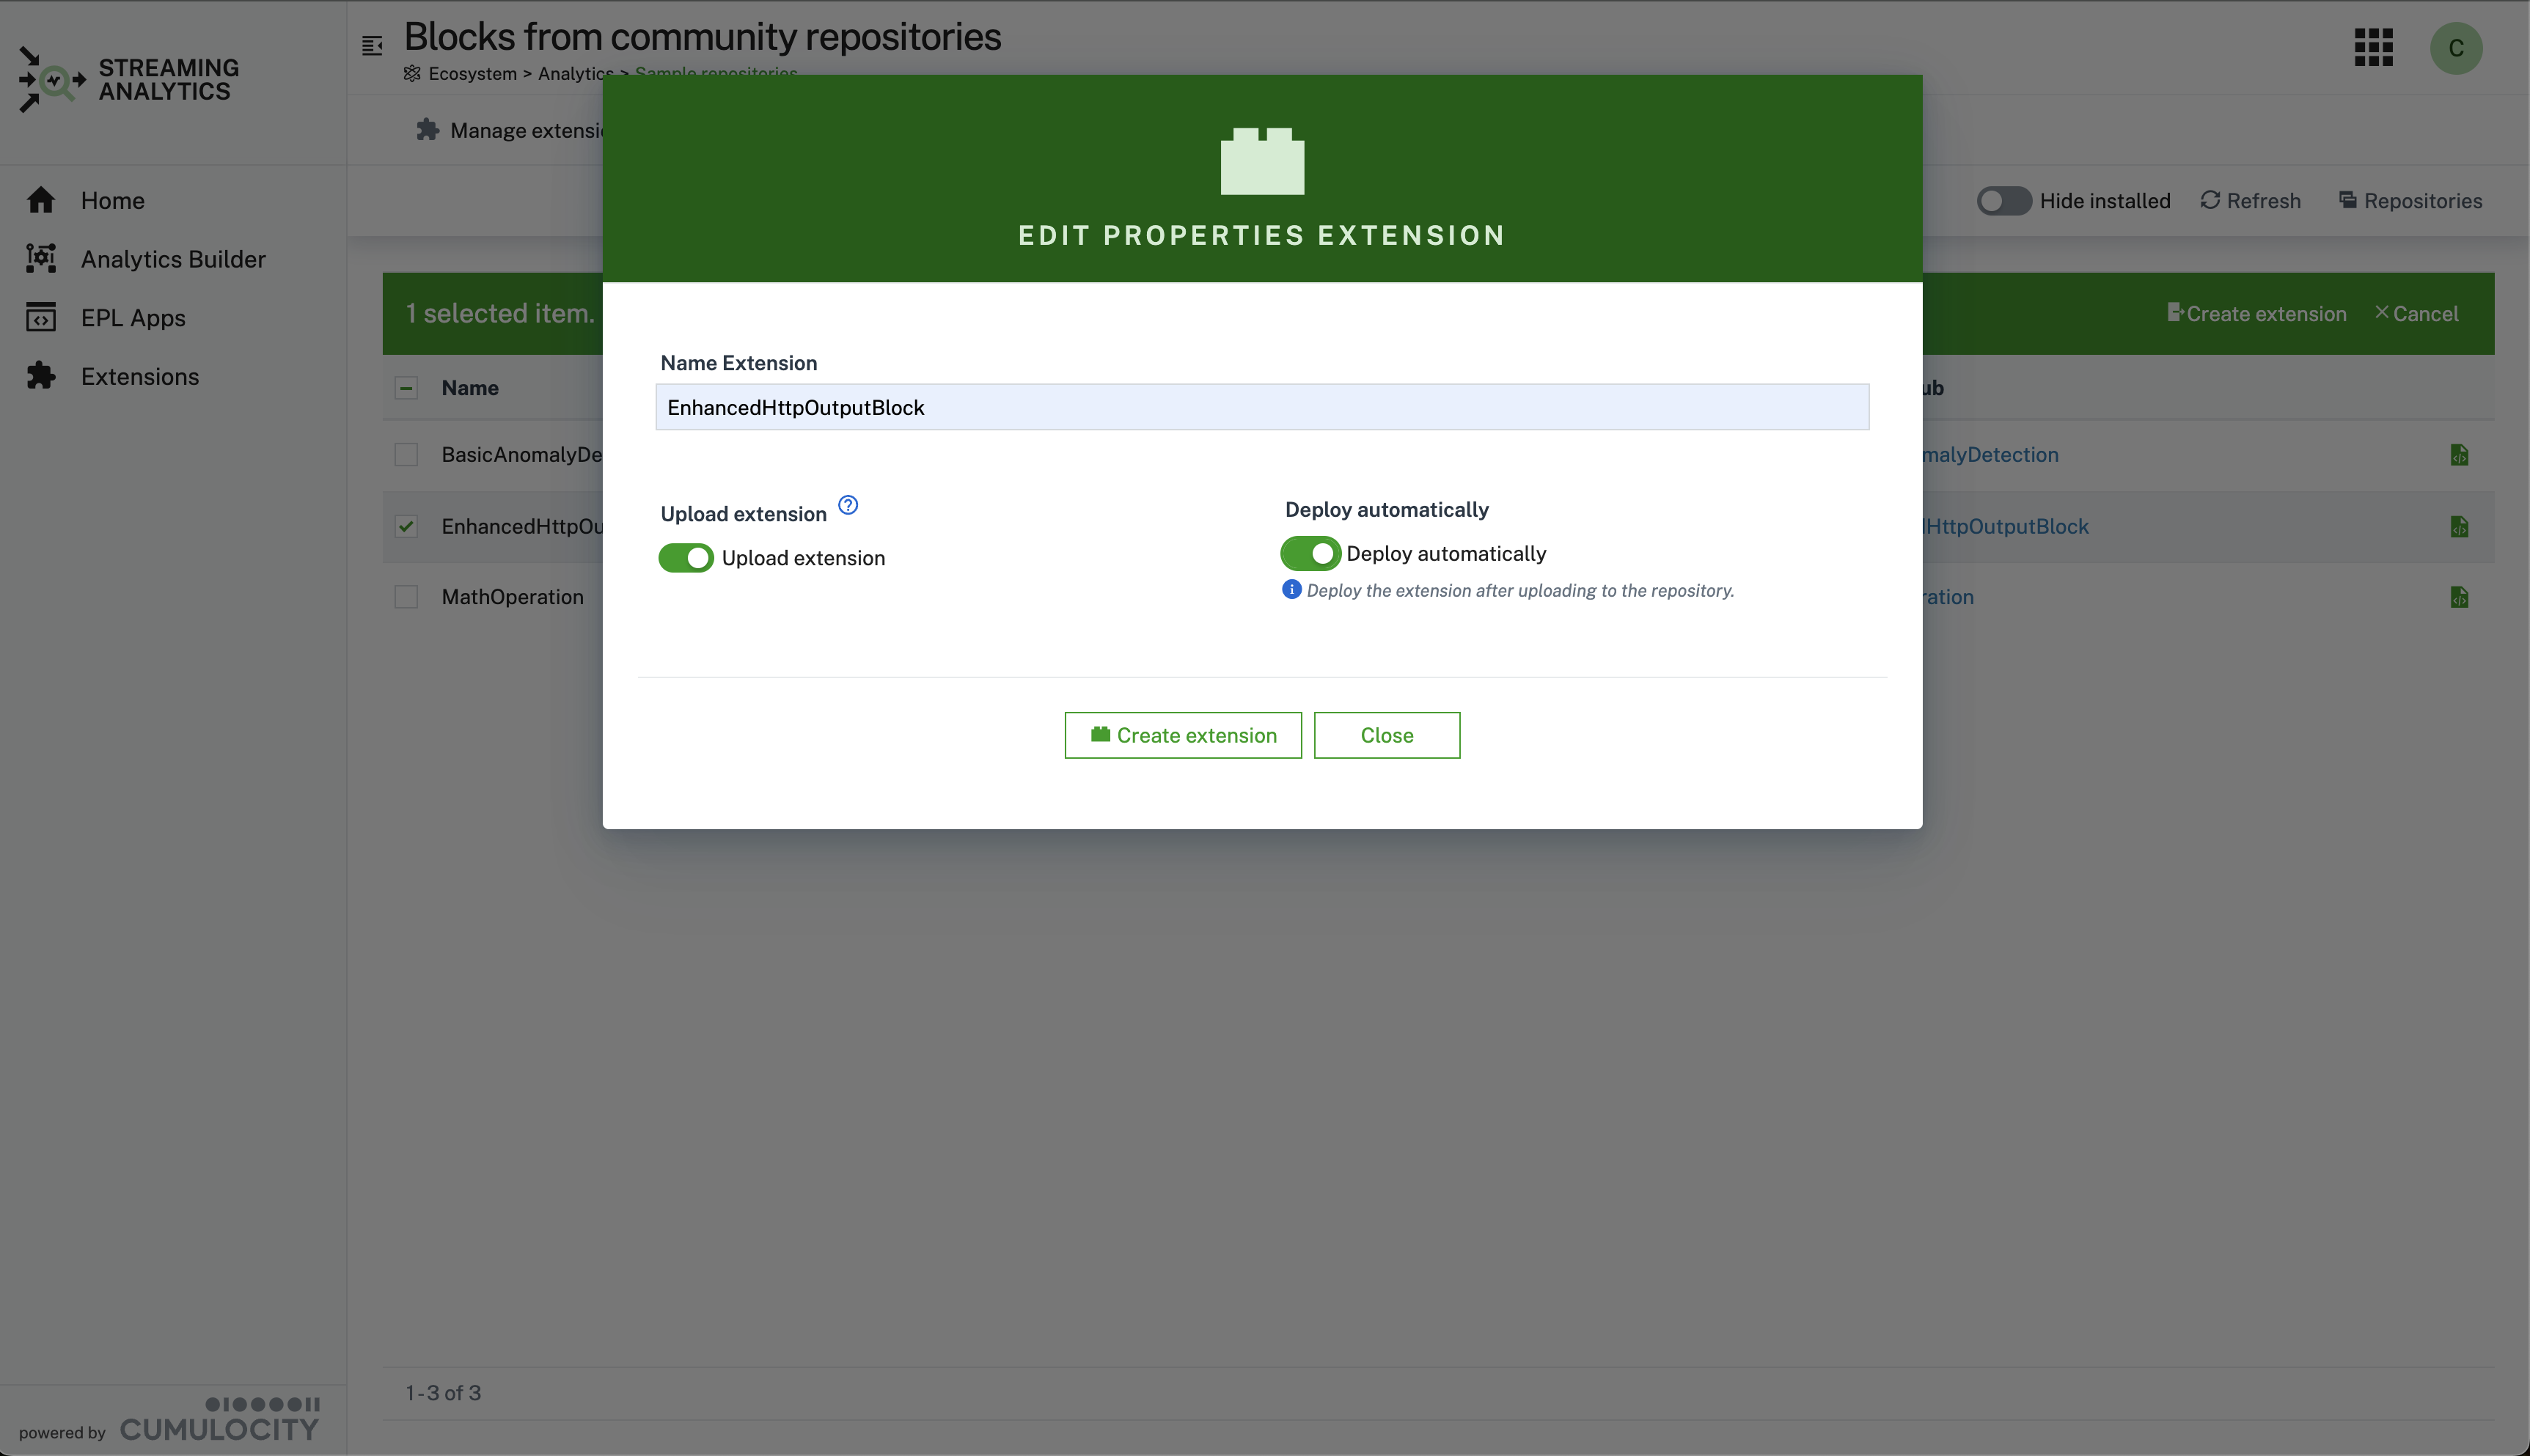
The modal dialog provides the option:
- to name the custom extension
- to upload the extension automatically to the Cumulocity Inventory. The created custom extension is otherwise downloaded to locally. It still requires the restart of the analytics engine.
- to restart the streaming analytics engine to load the created custom extension.
On the monitoring tab you can view the latest alarms and events for the Streaming Analytics Engine. This is especially helpful if after an upload of a new extension no extension is loaded.
The property is_safe_mode is an indication if the engine was started in Safe Mode, i.e. without loading any extension. In this case you have to delete the latest uploaded extension and restart the engine again.
NOTE This solution consists of two parts:
-
the backend as a microservice, which can be found in the release section of the github project: analytics-ext-service.zip
If the microservice is not deployed you can't build customs extensions.
-
the web plugin that is installed using the Cumulocity Administration UI (Administration -> Extensions -> Analytics Extensions), see installation below:
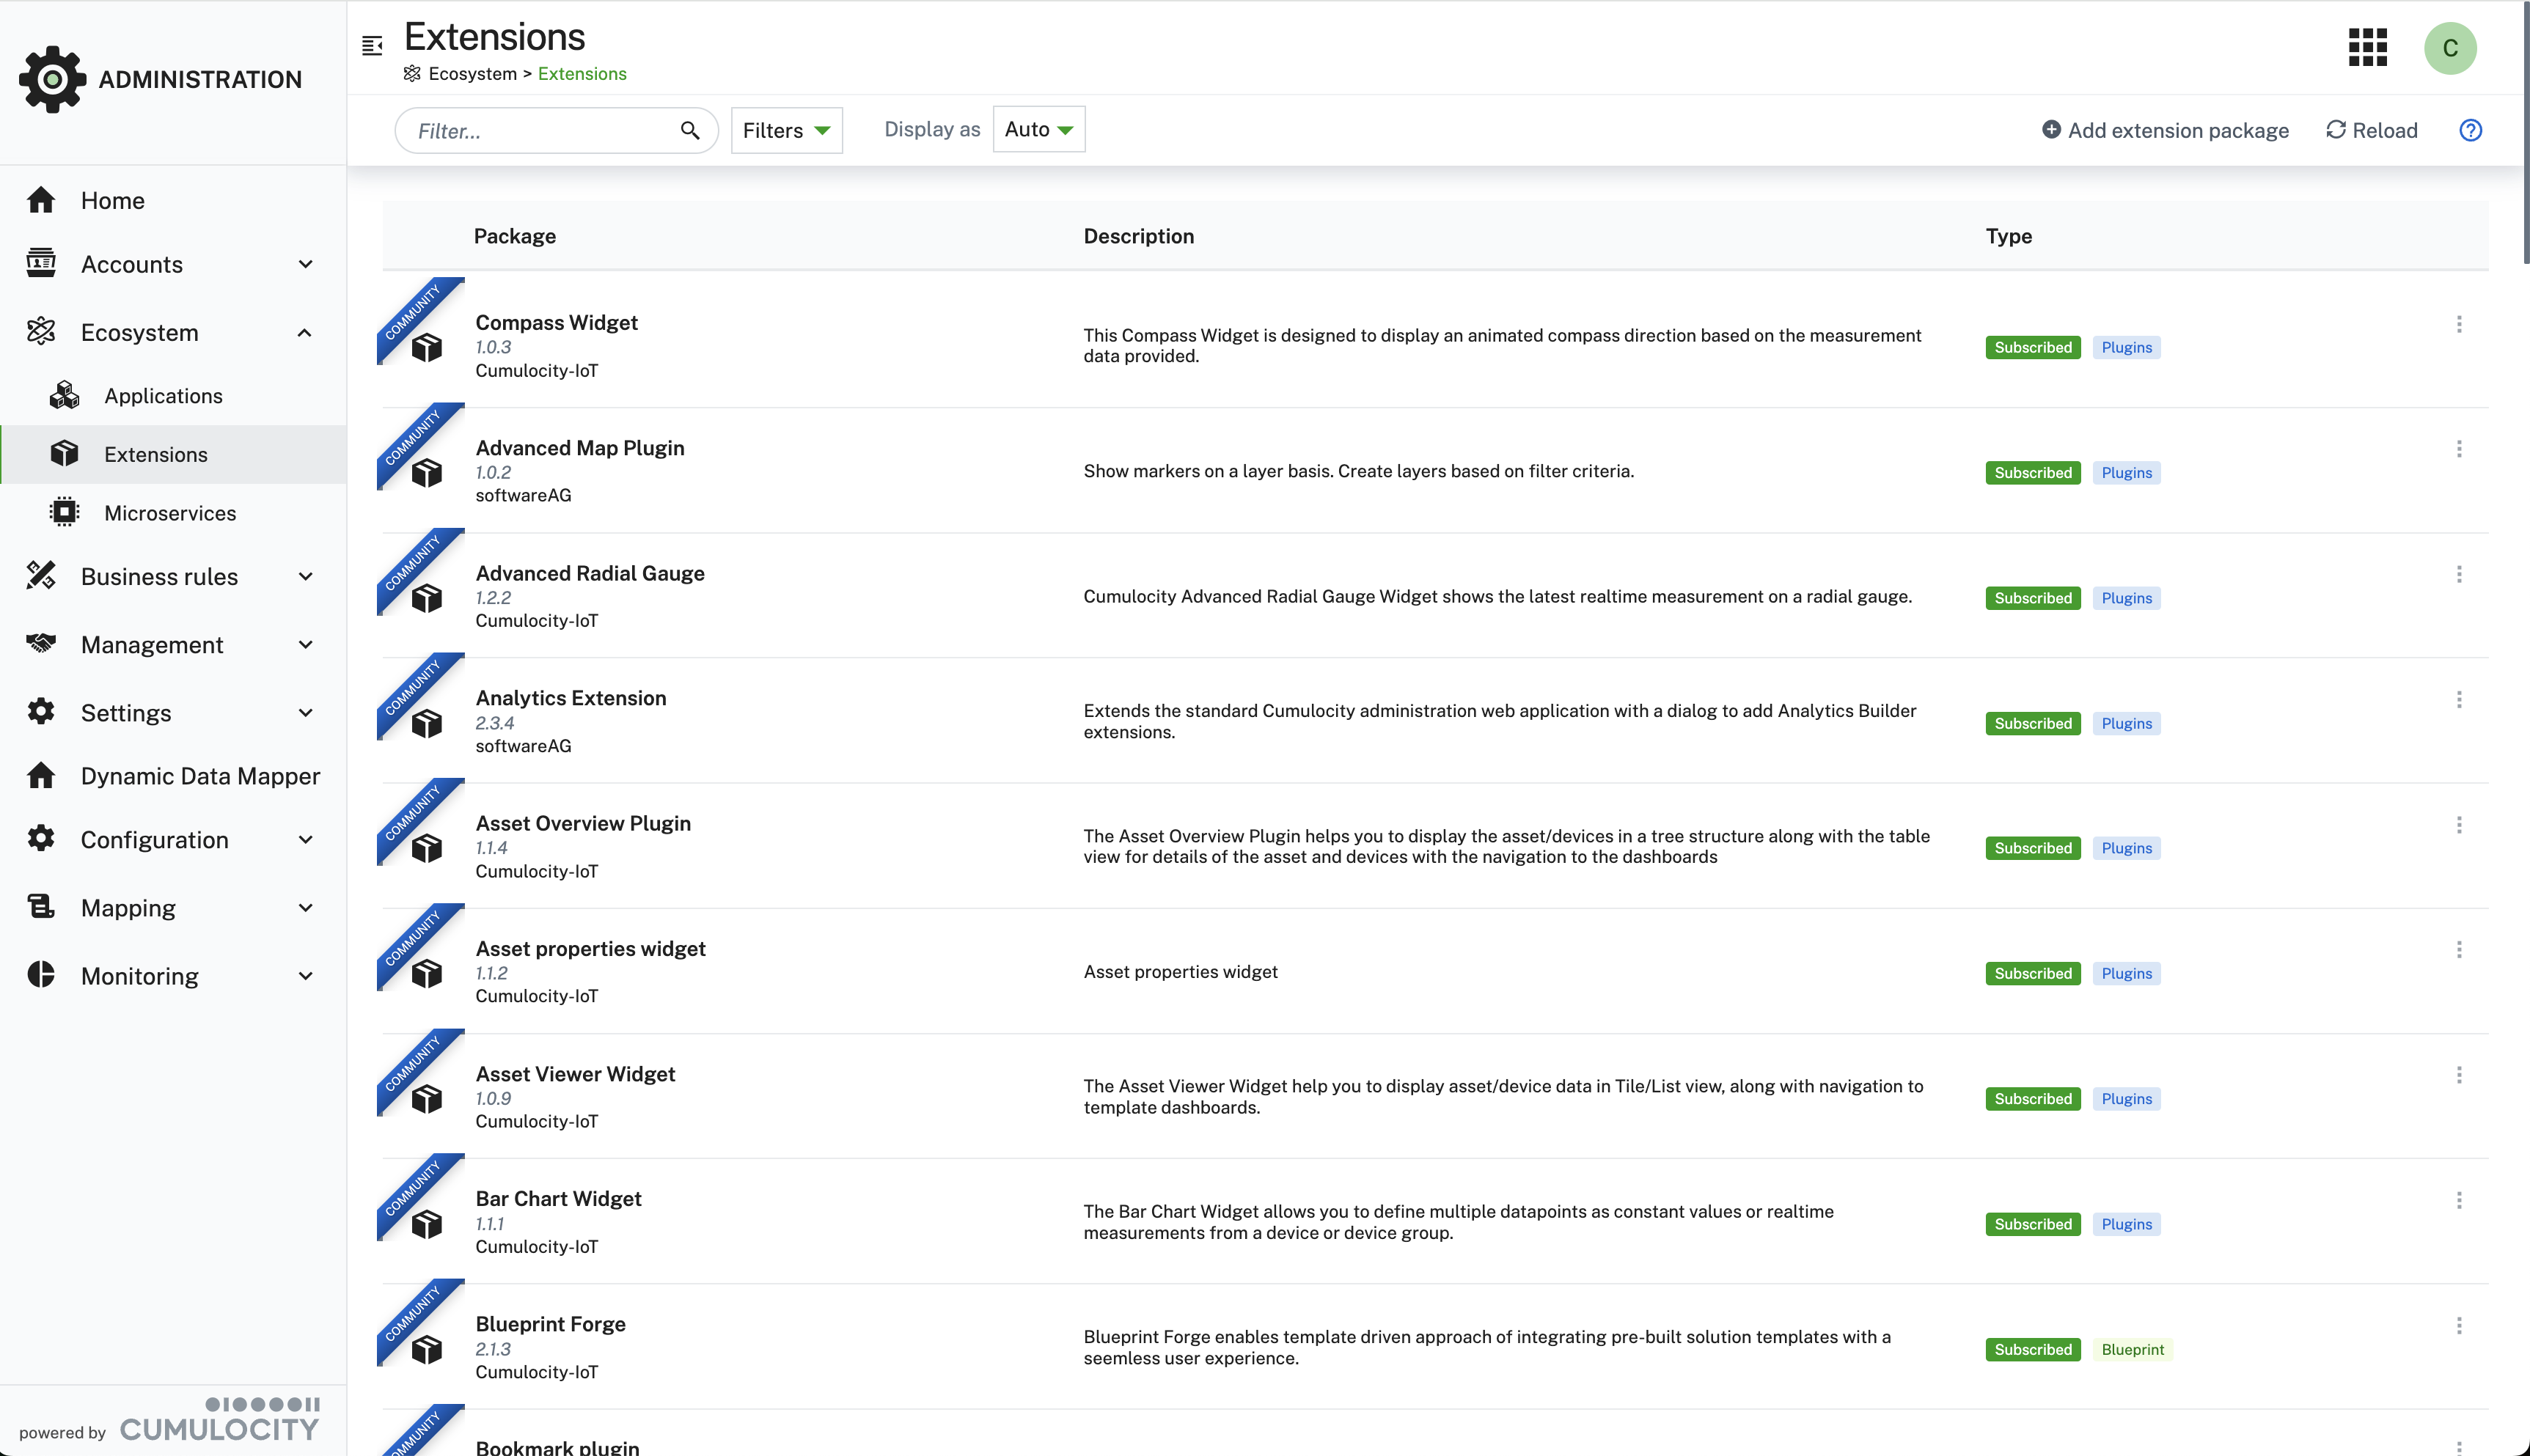
The plugin is available as a community plugin and can be installed from the Administration -> Extensions -> Analytics Extensions:
This guide will teach you how to add the modified Cumulocity standard application, e.g. DeviceManagement, Cockpit, ... to your tenant.
- to upload the latest plugin release into your tenant, just go to the Releases and download the analytics-extension.zip package.
- login to your Cumulocity IoT Tenant, open Administration--Ecosystem--Extensions -> Add extension package
- upload analytics-extension.zip
- login to your Cumulocity IoT Tenant and clone Cumulocity standard application in Administration--Applications--CHOOSE_STANDARD_APPLICATION_TO_CONE -> Clone.
- to add the modified Cumulocity standard application click on Clone application. After that, select Upload web application and drop the pre-downloaded zip-folder into the field.
- install plugin in cloned application
Finally, you should see the new application in your App-Switcher.
Prerequisites to build plugin:
- Git
- NodeJS (release builds are currently built with
v18.19.0) - NPM (Included with NodeJS)
Instructions
Make sure you set the environments url, username, password before starting.
- Clone the repository:
git clone https://github.com/SoftwareAG/cumulocity-analytics-management.git
- Change directory:
cd cumulocity-analytics-management - run npm i command to install all library files specified in source code
npm i - (Optional) Local development server:
npm start - Build the app:
npm run build - Deploy the app:
npm run deploy
The microservice downloads the sample blocks from the configured repositories and builds an analytics extension as a zip file. This this zip file is downloaded locally. In an additional step it needs to be uploaded through UI, see Upload custom extension. You can specify if the extension should be uploaded automatically or it should be downloaded by the browser UI.
The microservice is multi tenant ready.
- Docker host/client
- c8y-go-cli
To run and debug the microservice locally you an use Vscode and the .devcontainer/devcontainer.json configuration. To test with real c8y microservice credentials create an .env-admin (Administrative Credentials to fetch BootStrap Credentials) file in the analytics service directory and start the container (F1 -> Open in Open Folder in container). The get_service_creds.py fetch the credentials and create the .env file containing the bootstrap credentials.
To use your own credentials in the .env file comment the line "postAttachCommand": "python3 .devcontainer/get_service_creds.py", in devcontainer.json and create .env file with credentials of your liking. Env file format is:
- Example .env-admin
C8Y_BASEURL=https://<tenant>.cumulocity.com
C8Y_TENANT=<tenantId>
C8Y_USER=<user>
C8Y_PASSWORD=<password>
- Example .env
C8Y_BASEURL=https://<tenant>.eu-latest.cumulocity.com
C8Y_BOOTSTRAP_TENANT=<tenant_id>
C8Y_BOOTSTRAP_USER=servicebootstrap_analytics-ext-service
C8Y_BOOTSTRAP_PASSWORD=<password>
After the dev container has started you can debug flask-wrapper.py as a python file.
To test the microservice you can issue the following curl command
curl --location 'http://127.0.0.1:<container host port>/extension' \
--header 'Content-Type: application/json' \
--header 'Authorization: Basic <tenant_id>/<username> as base64' \
--data '{
    "extension_name": "Test",
    "upload": true,
    "monitors": ["https://raw.githubusercontent.com/SoftwareAG/apama-analytics-builder-block-sdk/rel/10.18.0.x/samples/blocks/CreateEvent.mon"]
}'
To build the backend as a microservice analytics-ext-service follow these steps:
- run script:
# cd analytics-service
# ./build.sh analytics-ext-service VERSION
- upload created image:
# c8y microservices list --name analytics-ext-service | c8y microservices createBinary --file dist/analytics-ext-service.zip --timeout 360
NOTE For the first deployment you have to use:
# c8y microservices create --file dist/analytics-ext-service.zip --name analytics-ext-service --timeout 360
Custom blocks can be generated via the Analytics Builder block sdk. Find additional information on how blocks can be developed. However in the release section is one example block included that can be used for test purposes.
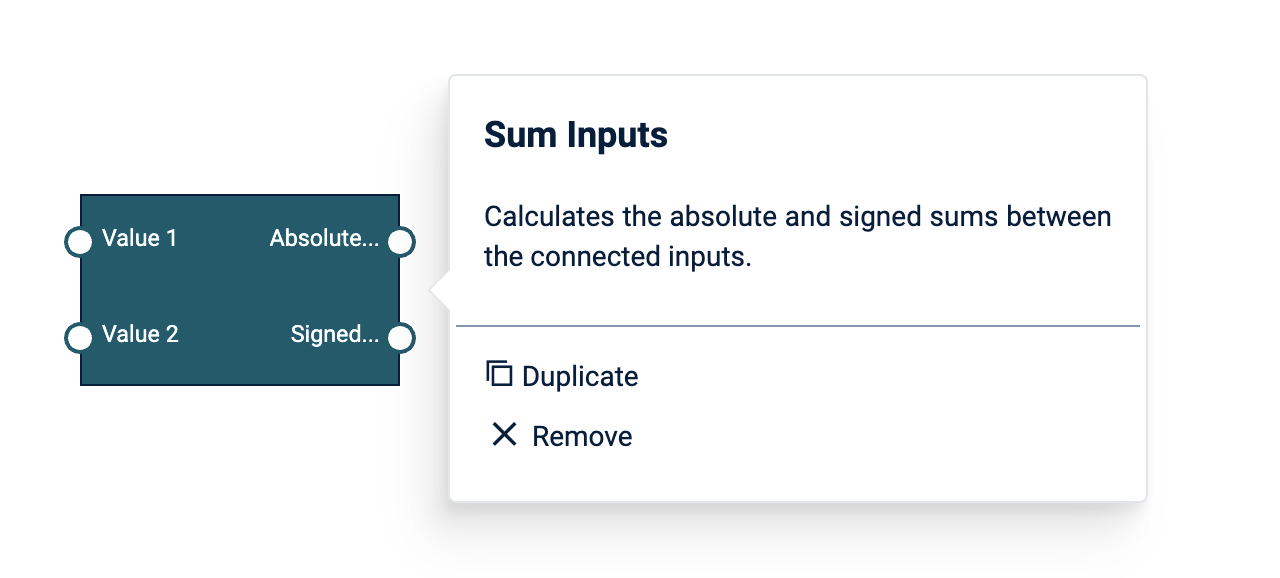
The provided block is an example of the adding the two inputs.
Note In order to check if an extension is deployed look for a relevant message in the log file of the analytics engine:
[correlator] 2023-12-04 12:29:43.752 INFO [139659199286272] - Applying extension "/config/extensions/Sample_AB_Extension.zip"
The log file can be accessed: Administration> Ecosystem>Microservices>apama-ctrl-1c-4g>Logs
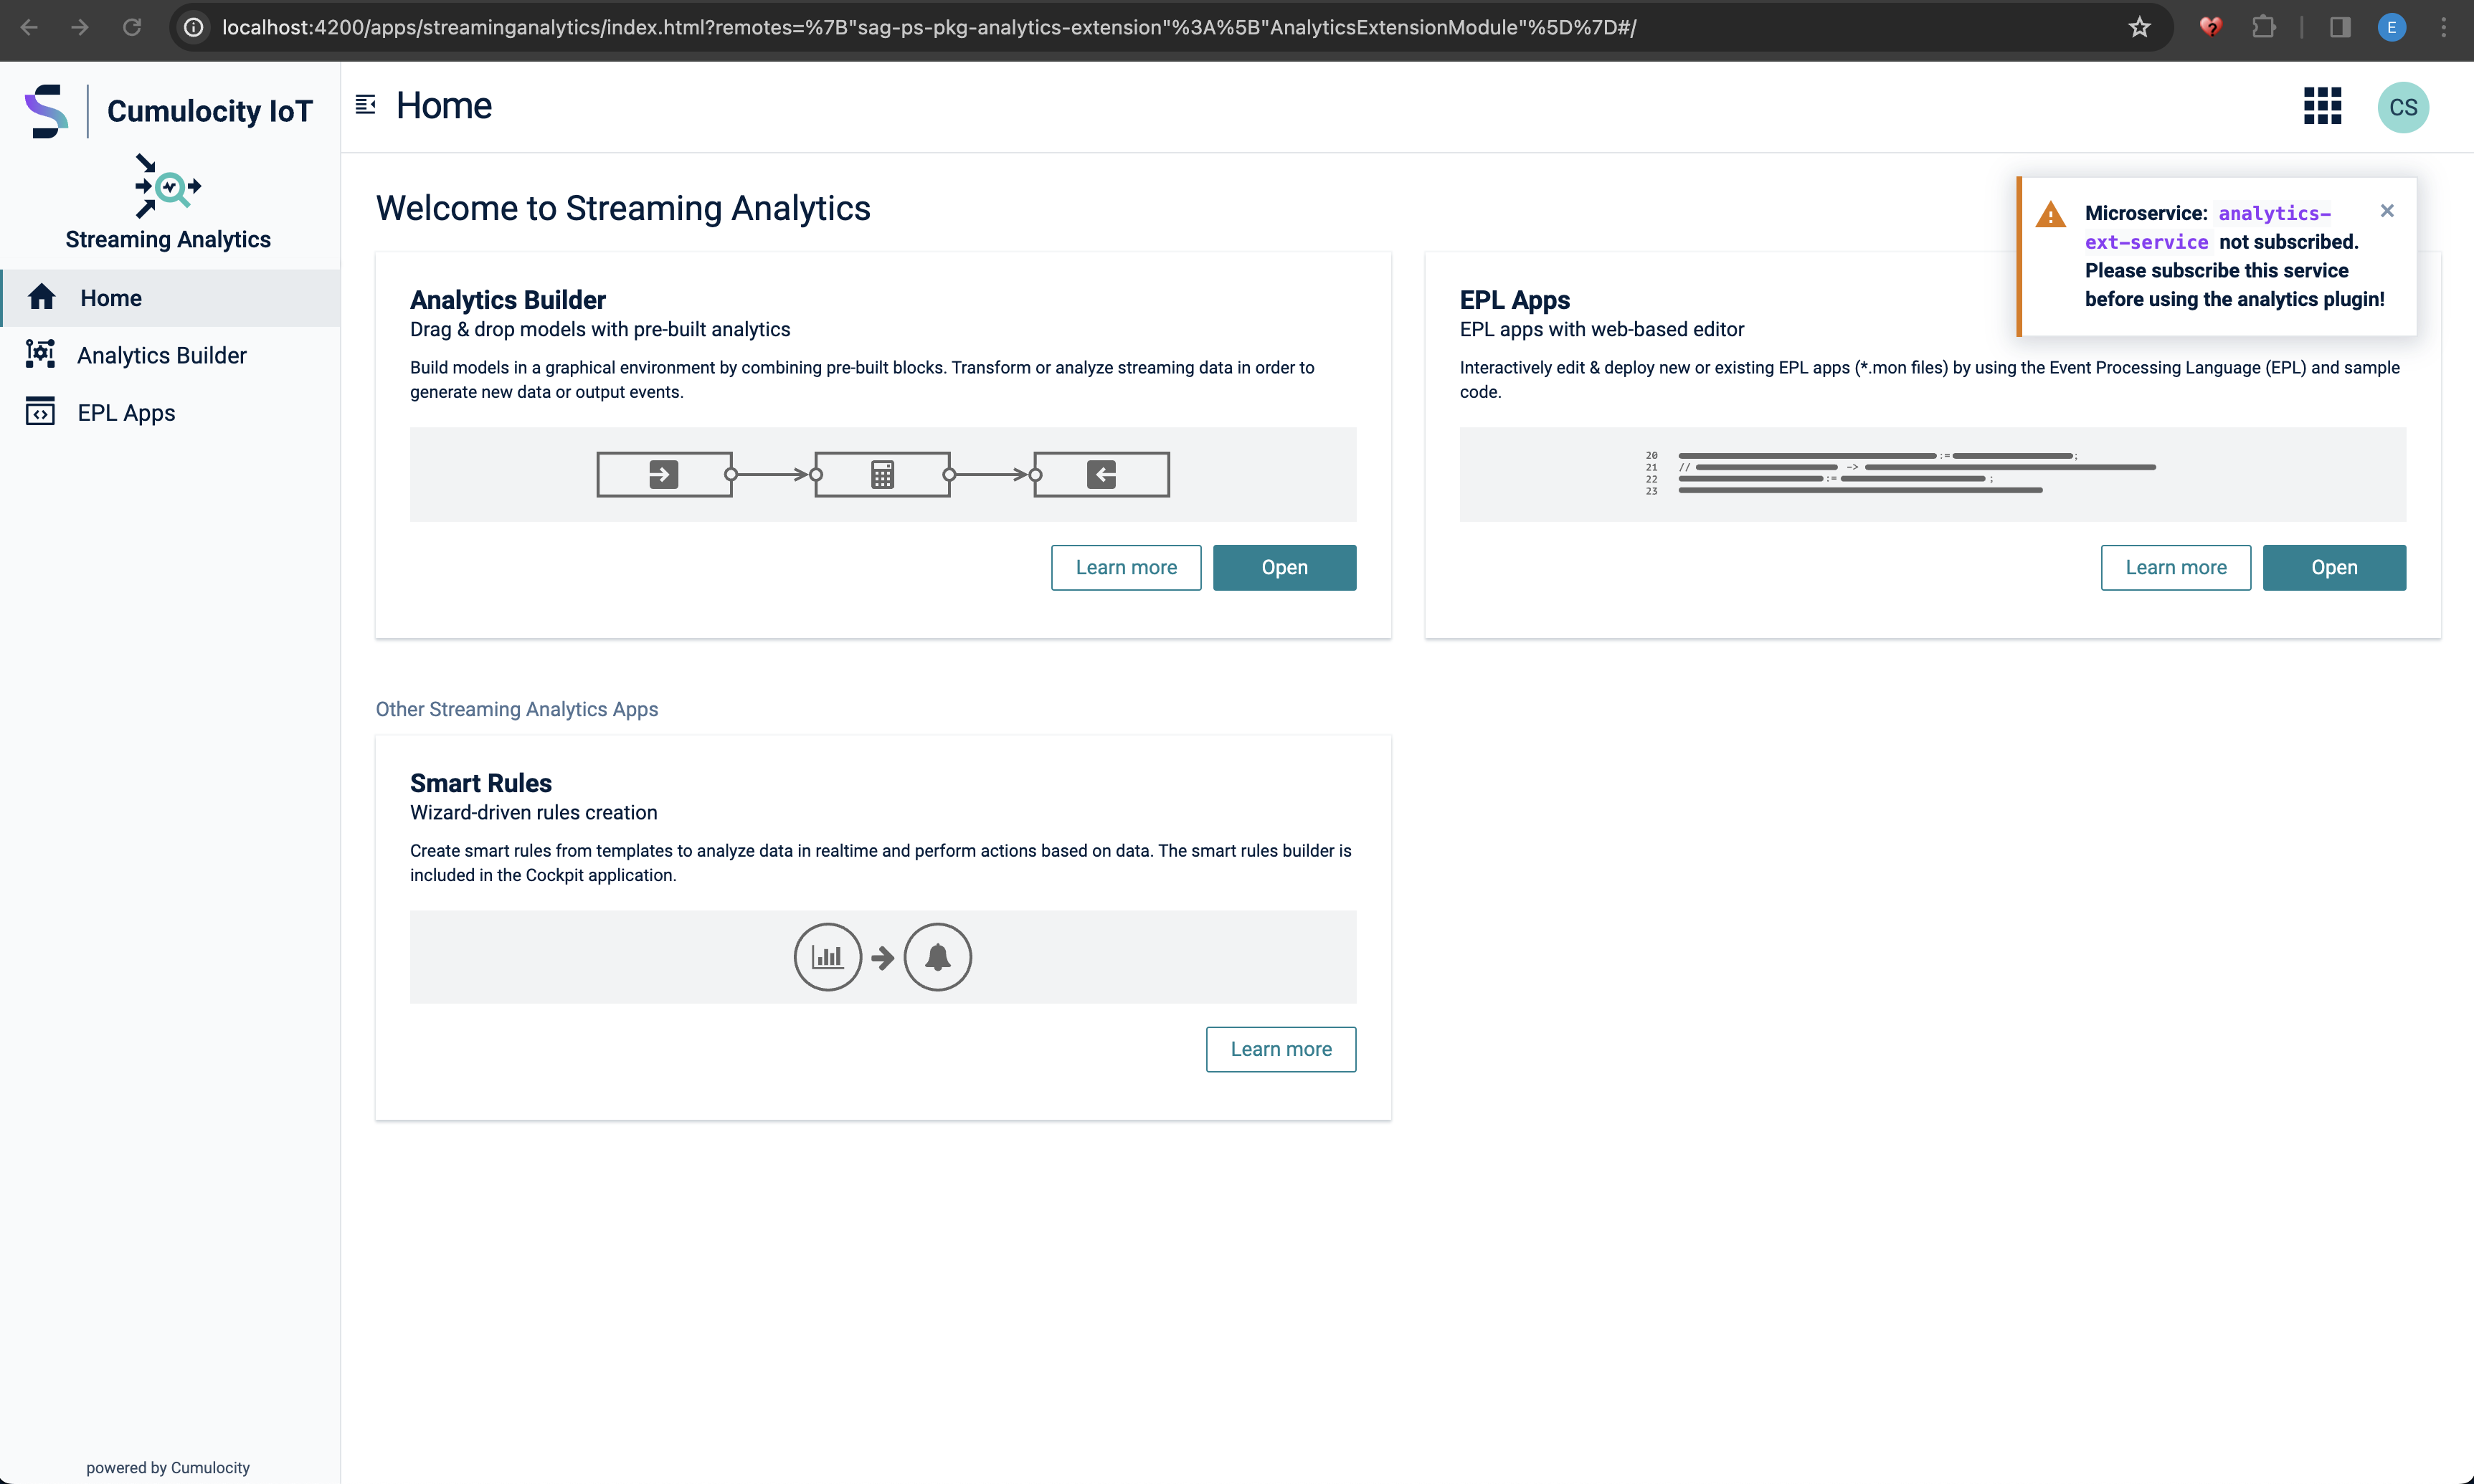
Note When a warning
Microservice: analytics-ext-service not subscribed. Please subscribe this service before using the analytics plugin!appears please deploy the missing backend microservice.
These tools are provided as-is and without warranty or support. They do not constitute part of the Software AG product suite. Users are free to use, fork and modify them, subject to the license agreement. While Software AG welcomes contributions, we cannot guarantee to include every contribution in the master project.
For more information you can Ask a Question in the TECHcommunity Forums.
You can find additional information in the Software AG TECHcommunity.
