PyChristmas is an application that allows you to build and control remotely a Christmas tree using Arduino IoT Cloud.
The main application is written in Python and uses the Arduino IoT Cloud API to control the tree.
The tree is composed by a Raspberry PI, an Arduino MKR WiFi 1010, 3 LED strips, a LED matrix, a motor and a star.
- Control the tree remotely using Arduino IoT Cloud
- Change the tree color anytime and anywhere
- Write a message on the LED matrix
- Turn on/off the star from anywhere
- Turn off/on the tree components altogether or separately
- Arduino IoT Cloud account
- Git
- Arduino IDE
- Python (version 3.9.0 or higher)
- Raspberry PI Imager (or any other software to flash the Raspberry PI)
- Supported web browser (Chrome, Firefox, Edge, Safari, etc.)
- Breadboard
- Jumper wires
- Computer
- Power Supply (that can provide at least 5V and 3A)
- Arduino (We used an Arduino MKR WiFi 1010)
- USB cable to power the Arduino
- Raspberry PI
- LED strips (We used 3 strips of 5m each with 60 LEDs/m)
- Motor (We used a 3V motor)
- Star (plastic or polystyrene)
- LED matrix (We used 2 MAX7219 LED dot matrix display made with 4 8x8 modules each)
- 3 resistors (We used 330 Ohm resistors)
- 1 capacitor (We used a 10nF capacitor)

| Board Pin | Name | Remarks | RPi Pin | RPi Function |
|---|---|---|---|---|
| 1 | VCC | +5V Power | 2 | 5V0 |
| 2 | GND | Ground | 6 | GND |
| 3 | DIN | Data In | 19 | GPIO 10 (MOSI) |
| 4 | CS | Chip Select | 24 | GPIO 8 (SPI CE0) |
| 5 | CLK | Clock | 23 | GPIO 11 (SPI CLK) |
from https://luma-led-matrix.readthedocs.io/en/latest/install.html
| Arduino Board Pin | Via | Destination |
|---|---|---|
| ~D3 | Resistor | 1st LED strip (bottom) |
| ~D4 | Resistor | 2nd LED strip (middle) |
| ~D5 | Resistor | 3rd LED strip (top) |
| GND | - | Ground on breadboard |
| Source | Destination | Alternative Destination |
|---|---|---|
| Positive Pin Motor | GPIO27 (Raspberry PI) | Power Supply with connections on breadboard |
| Negative Pin Motor | Ground on breadboard | - |
| Positive Pin Capacitator | Positive on breadboard | - |
| Negative Pin Capacitator | Ground on breadboard | - |
- Clone the repository
git clone https://github.com/CoccodrillooXDS/PyChristmas
- Connect the Arduino to your computer using the USB cable
- Open the Arduino IDE
- Select the Arduino board you are using from the dropdown menu or from Tools > Board
- If you are using an Arduino MKR WiFi 1010, you may need to install the board first.
- To do so, go to Tools > Board > Boards Manager and search for Arduino SAMD Boards. Click on Install and wait for the installation to complete.
- Select the port your Arduino is connected to from the dropdown menu or from Tools > Port
- Open the arduino.ino file from the Arduino folder
- Press the Upload button to verify and upload the code to Arduino
- Wait for the upload to complete
- Flash the Raspberry PI with the Raspberry PI Imager (this README was written with Raspberry PI OS, formely known as Raspbian, in mind, but you can use any other OS)
- Connect the Raspberry PI to a monitor, a keyboard and a mouse (optional if you want to use the Raspberry PI headless via SSH)
- Connect the Raspberry PI to the internet (you can use an ethernet cable or connect to a WiFi network)
- Open the terminal or connect to the Raspberry PI via SSH
- Install Python 3, pip and git
sudo apt install python3 python3-pip git - Clone the repository
git clone https://github.com/CoccodrillooXDS/PyChristmas - Move to the PyChristmas folder
cd /path/to/PyChristmas - Install the required Python packages
pip3 install -r requirements.txt
-
Open the Arduino IoT Cloud
-
Log in with your Arduino account or create one if you don't have one
-
Go to the IoT Cloud dashboard
-
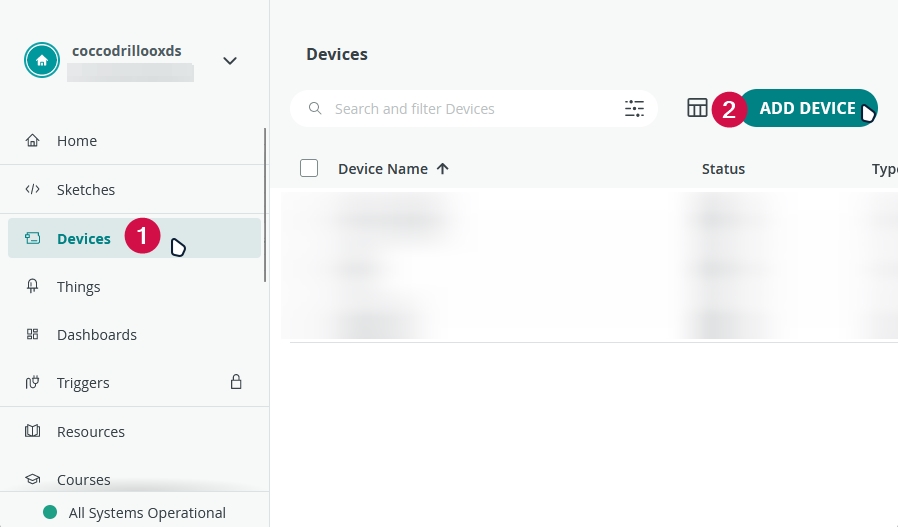
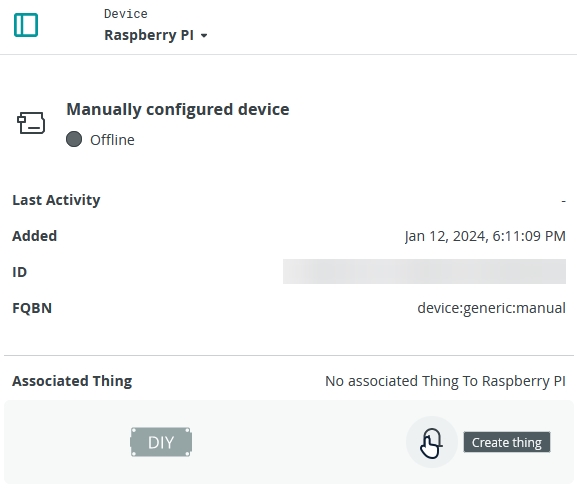
Go to Devices and click on ADD DEVICE
-
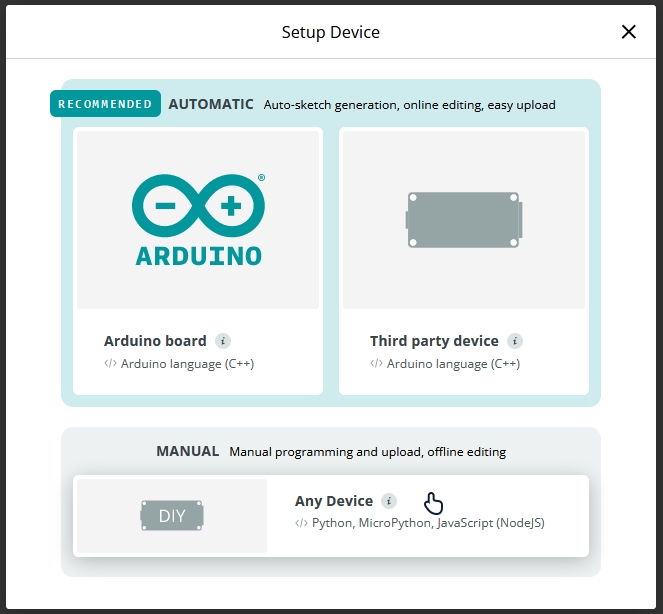
Select "Any Device" under MANUAL and click on CONTINUE
-
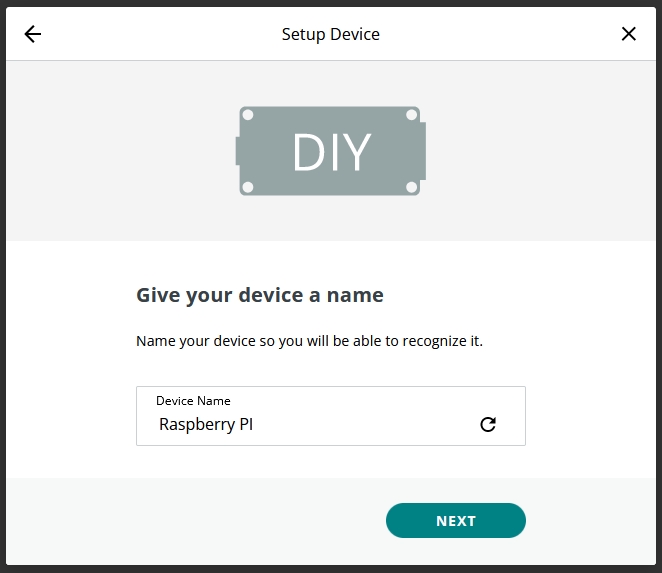
Select a name for your device and click on NEXT
-
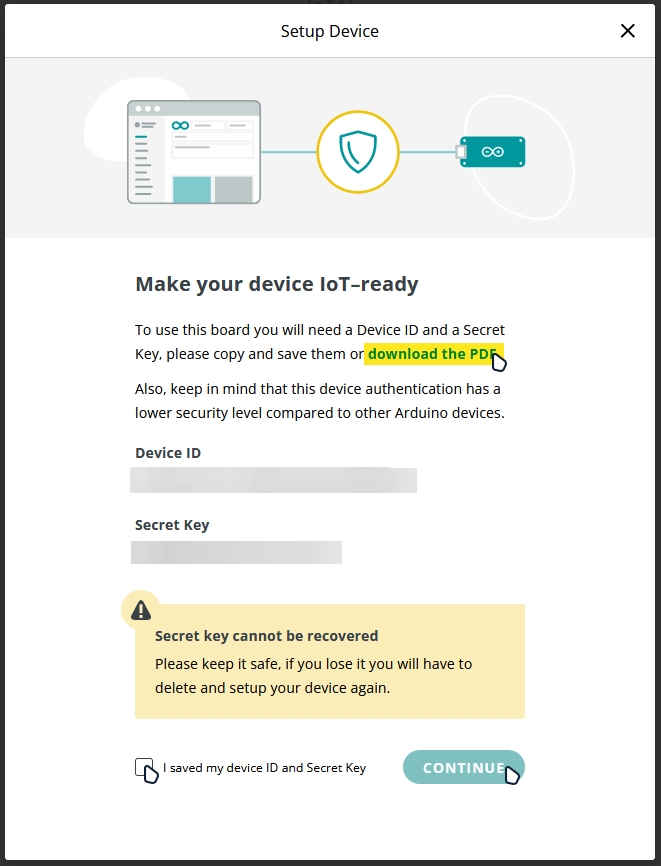
Save the Device ID and the Secret Key somewhere safe (we will need them later)
-
Check the I saved my device ID and Secret Key box and press CONTINUE
-
Click on GOT IT

-
In the new page, click on Create thing
-
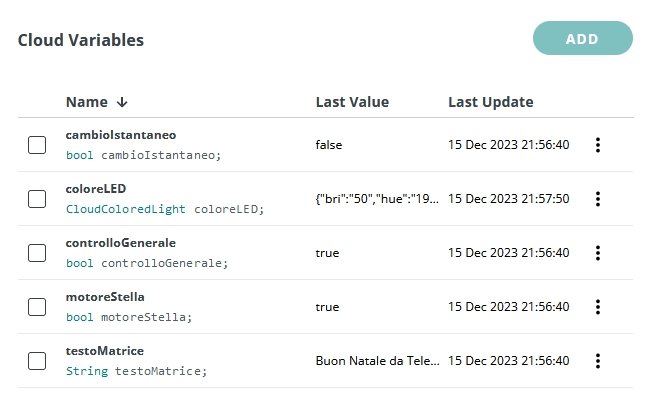
In Cloud Variables, click on ADD and create 5 new Read & Write variables with On change Variable Update Policy:
- cambioIstantaneo (bool)
- coloreLED (CloudColoredLight)
- controlloGenerale (bool)
- motoreStella (bool)
- testoMatrice (String)
-
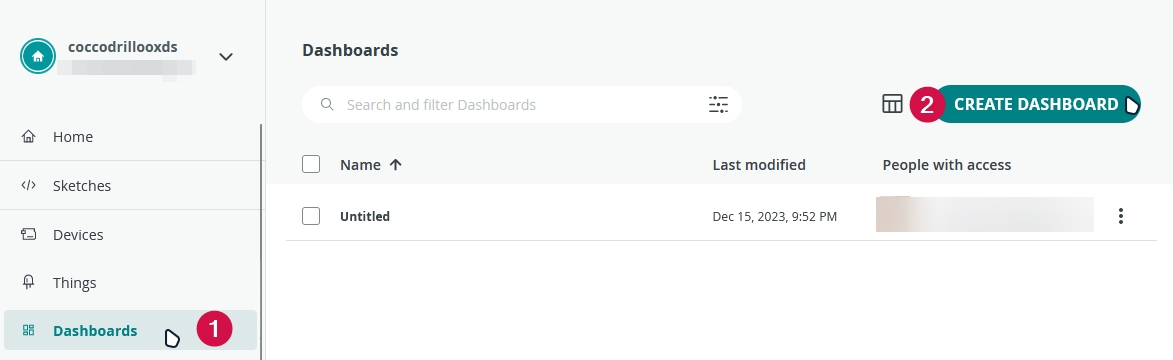
Create a new Dashboard by clicking on CREATE DASHBOARD under Dashboards
-
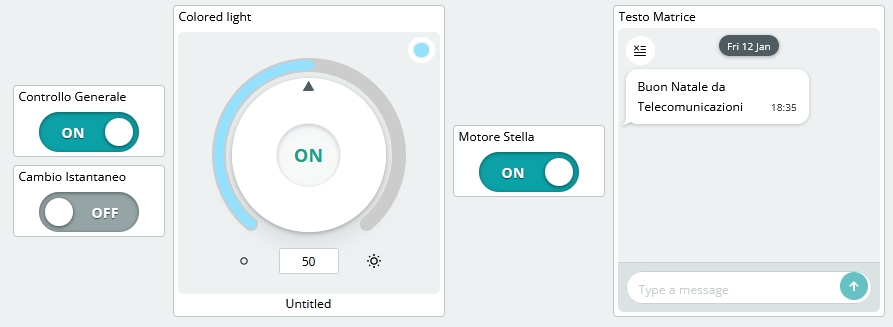
Add three Switch widgets, one Colored light widget and a Messenger widget to the dashboard


- Open the software.py file using a text editor or 'nano' (if you are using the terminal)
nano software.py - Replace the DEVICE_ID and SECRET_KEY variables with the ones you saved earlier (Step 23). DO NOT REMOVE THE "b" BEFORE THE QUOTES
DEVICE_ID = b"REPLACE WITH YOUR DEVICE ID"
SECRET_KEY = b"REPLACE WITH YOUR SECRET KEY"
- Save the file and exit (if you are using 'nano', press CTRL + X, then Y and then ENTER)
- Connect the Arduino to the Raspberry PI using the USB cable
- Connect everything as shown in the circuit section
- Run the application
python3 software.py
NOTE: You can also run the application in the background by adding a & at the end of the command, like this:
python3 software.py &

Unfortunately, the bottom LED strip broke during the assembly.
You can contribute to the project by creating a pull request or an issue.
To contribute, you can fork the repository and after you made your changes, you can create a pull request.
This project is licensed under the MIT License. See the LICENSE file for more information.