THIS REPOSITORY IS WORK IN PROGRESS
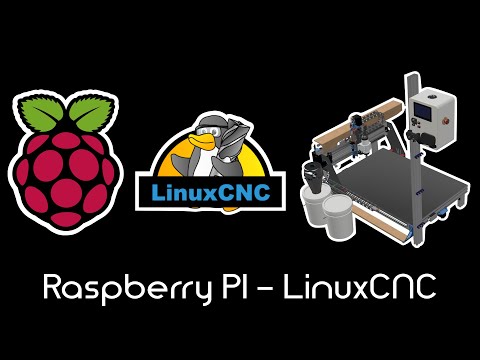
An open source project to use a Raspberry Pi 4 as a CNC controller using LinuxCNC.

You can find further information about the concept in this Youtube video:
It is designed to work combined with the RPI Levelshifter Hat and a CNC Breakout Board with a parallel interface.
RPI 4 <==> RPI Levelshifter Hat <==> PI-LCNC <==> CNC-BOB (=Break out Board)
Concept:

This repository contains the manufacturing data for the PI-LCNC adapter PCB as well as configuration instructions and files for Linux CNC.

Make sure to check the steps given under Usage & Setup
- DC-DC Power Supply for Raspberry Pi (Input Voltage 8-36V)
- Adapter for LPT connector
- Pin header for additional 5V signals from the Raspberry Pi
- 15000 Steps / s max due to Jitter of RPI
Please contact me under chris@chris-design.at if you want to buy a kit containing the PCBs and the hardware.
- 1pcs Raspberry Pi 4 (4GB or 8GB)
- 1pcs RPI Levelshifter Hat
- 2pcs 40 Pin Header Female (20x2 Pins)
- 2pcs 40 Pin Header Male (20x2 Pins) (optionally 1)
- 3pcs screw Terminal P= 5mm (optional)
- 8pcs M2.5 x 12mm Standoffs
- 4pcs M2.5 x 5mm Screws
- optional mounting bracket
- Solder up the RPI Levelshifter Hat as shown here: https://github.com/ChrisWag91/rpi_level_shifter_hat
- Solder up the PI-LCNC board as shown aboth
- Remove the retaining standoffs from the LPT connector on the PI-LCNC board
- Attach Raspberry Pi to RPI Levelshifter Hat using Standoffs
- Attach PI-LCNC on top to RPI Levelshifter Hat as shown here:

Attention Don’t attach the PI-LCNC Board directly to your Raspberry - It will short the 3.3V and 5V rails.
-
Plug the CNC-BOB into the LPT Connector on the PI-LCNC Board
Remove the studs on the female LPT Connector in order to fit the Connector of the BOB directly. Alternatively a LPT Extension cable can be used.

- Wire the 5V output on PI-LCNC into the "PC5V" and "PCGND" on CNC-BOB
- Wire the 8-36V input on PI-LCNC into the power supply of your machine

- Wire the CNC-BOB into your Machine
-
Download a prepared Raspberry Pi 4 Os from here. This image has specific changes for the RPI-Levelshifter and for the PI-LCNC board already applied. It ships with a few 3 axis sample configurations for a cnc router.
-
Flash the image to an sd card
- For Linux users: Write image to SD card using dd
sudo dd if=20XX-XX-XX-raspberry-pi_PI_LCNC.img of=/dev/sdx bs=1M status=progress- For Windows users: Write image to SD card using a tool like Win32DiskImager
-
After the first boot you should end up with a desktop like this (via vnc or display):

-
Make sure that the EN led on the RPI-Levelshifter is on
-
Choose a sample configuration as a starting point. For example: "XYZ-Metric-Sample"
-
Modify the configuration file according to your CNC hardware. The configuration files can be found in one of the folders placed on the desktop:

- Change the [Configuration Name].ini file according to your setup.

Modify at least these Variables for each of your machines axis:
-
MAX_VELOCITY [User unit / s]
-
MAX_ACCELERATION [User unit / s²]
-
MIN_LIMIT [mm]
-
MAX_LIMIT [mm]
-
STEPGEN_MAXACCEL [User unit / s²]
-
SCALE [Steps per user unit]
-
SCALE = Motor steps per rev * Microstepping * Gearbox or pully ratio * Leadscrew pitch [rev/user unit]
-
SCALE = 200 * 2 * 1 * 0,2 (EXAMPLE)
This should make your machine move properly if you start the corresponding sample CNC interface.
- [OPTIONAL] If you need to make changes to the pinout of the CNC controller, edit the [Configuration Name].hal file according to your needs.
-
Flash realtime capable version of Raspberry Os onto an sd card. You can download a precompiled RT-Raspberry Os with Linux CNC already pre installed from this link: http://www.linuxcnc.org/iso/ (use one of the -pi4 variants, tested with 2.8.0)
-
Now we need to automatically enable the RPI Level Shifter Hat on boot:
Copy the script "enable_rpi_logic_level_shifter.py" from here to a local directory on your raspberry and add it to the autostart file as follows:
sudo nano /etc/rc.localAdd the following line before "exit 0":
python /[insert local path to the enable script]/enable_rpi_logic_level_shifter.py & -
Generate a new machine configuration according to your hardware using the Stepconf wizard
Make sure to choose Use Gmoccapy Screen in the tab Options This configuration will not start out of the Box, because it expects the parport hardware to be present. It should run as soon as the next step is done.
-
Change the pinout according to the example hal and ini file found in this repository.
I would advise to copy the files from this repo and change the machine parameters to fit your machine. The files need to be named to [Name of your machine].ini and [Name of your machine].hal. All references to "my-mill" in [Name of your machine].ini need to be changed to [Name of your machine]. Make sure to backup the automatically generated files before replacing them, since you can copy the machine parameters from there to the new files.
-
Launch Linux-CNC
You should end up with something like that:


This design is distributed in the hope that it will be useful, but WITHOUT ANY WARRANTY. Without even the implied warranty of MERCHANTABILITY or FITNESS FOR A PARTICULAR PURPOSE. See the GNU General Public License for more details.
License text: https://creativecommons.org/licenses/by-nc/3.0/