MuPDFSample
MuPDF is a lightweight PDF, XPS, and E-book viewer, and this is a sample for how to use it in iOS project.
Thanks so much to Kevin Delord’s answer here for saving me much time.
Here’s a summary based on his answer and some trial and error when I update it to iOS 10.
CocoaPods
By all means, using CocoaPods or Carthage is the most handy way to manage third-party libraries in iOS-developing. However, I found the version of MuPDF on CocoaPods website is not updated(it's v1.9, 2016-05).
As is mentioned in its updating comments, the newest version v1.10a(2016-11) has fixed iOS build issues in it.
Build static fat library
-
git clone --recursive git://git.ghostscript.com/mupdf.git -
Go to
mupdf/platform/ios -
Open
MuPDF.xcodeprojwith Xcode. -
Configure the scheme of the MuPDF target to Release.
-
Build and run the app on an iPhone simulator.
- This will generate the library for platforms i386 and x86_64.
- You can find the .a files by
Product->Show in Finder, usually it will lead to pathRelease-iphonesimulator/. - You can also confirm the platforms by
$ lipo -info libmupdf.aor$ lipo -info libmupdfthird.a.
-
Build and Run the app on a real iPhone device - use your own bundle id, certificate and provisioning profile.
- This will generate the library for platforms armv7 and arm64.
- You can find the .a files the same way, usually it will lead to path
Release-iphoneos/.
-
Go to
mupdf/build/Product- You will find two folders that contains all built librairies:
Release-iphonesimulatorandRelease-iphoneos.
- You will find two folders that contains all built librairies:
-
Now you need to create fat libraries with all 4 architectures for the mupdf one and all its dependencies.
	$ lipo -create ./*/libmupdf.a -output 'libmupdf.a';
	$ lipo -create ./*/libmupdfthird.a -output 'libmupdfthird.a';
Integrate MuPDF into your project
-
Add/import into your project:
- All header files from
mupdf/include/mupdf - All obj-c classes from
mupdf/platform/ios/classes - The common.[h,m] files from
mupdf/platform/ios
- All header files from
-
Add/import the previously generated fat libraries (2 files)
-
Configure the
Library Search Pathby adding the path to your library files.- For example
$(inherited) $(PROJECT_DIR)/MuPDFSample/Bundles/mupdf/lib
- For example
-
Configure the
User Header Search Pathsby adding the path to your include files.- For example
$(PROJECT_DIR)/MuPDFSample/Bundles/mupdf/include
- For example
-
Add compile flag
-fno-objc-arcfor all obj-c classes you added at step 1.(Target->Build Phases->Compile Sourses)
Now you should be able to build and run your app with the library included.
Here's folder structure for this sample.
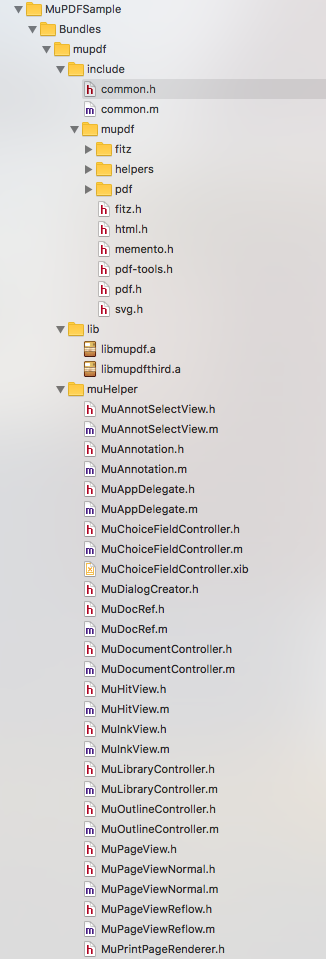
Attention: Since the .a files are too large to upload, you'll have to add it by yourself.
Some other things to mention
1.It seems that some configurations are all set when application just finishes launching. So remember to #include "common.h" add these lines in your -application:didFinishLaunchingWithOptions: of AppDelegate.m.
		queue = dispatch_queue_create("com.calios.mupdfsample.queue", NULL);
	    screenScale = [UIScreen mainScreen].scale;
	    ctx = fz_new_context(NULL, NULL, ResourceCacheMaxSize);
	    fz_register_document_handlers(ctx);
2.Background & foreground & memory warning handlers
	@implementation AppDelegate
	{
	    BOOL _isInBackground;
	}

	- (void)applicationDidEnterBackground:(UIApplication *)application {
	    NSLog(@"applicationDidEnterBackground \n");
	    [[NSUserDefaults standardUserDefaults] synchronize];
	    _isInBackground = YES;
	}

	- (void)applicationWillEnterForeground:(UIApplication *)application {
	    NSLog(@"applicationWillEnterForeground \n");
	    _isInBackground = NO;
	}

	- (void)applicationWillTerminate:(UIApplication *)application {
	    NSLog(@"applicationWillTerminate \n");
	    [[NSUserDefaults standardUserDefaults] synchronize];
	}

	- (void)applicationDidReceiveMemoryWarning:(UIApplication *)application
	{
	    NSLog(@"applicationDidReceiveMemoryWarning \n");
	    int success = fz_shrink_store(ctx, _isInBackground ? 0 : 50);
	    NSLog(@"fz_shrink_store: success = %d", success);
	}
For more detail, please check the samples.