This is my personal configuration as an alternative for using WSL 2 which currently requires Hyper-V to be enabled needless to say that Hyper-V impacts the whole system performance
- WSL1 (mainly cause I use it so I bulid some of the scripts to work with it)
- Install vmware with your favorite distribution (preferably Ubuntu Server 64bit) (guest machine)
- Install sshpass on the host machine (WSL1)
$ sudo apt install sshpass- Install Termnial Preview
After installing the distro and vmware tools:-
- Open VMware and select your virtual machine
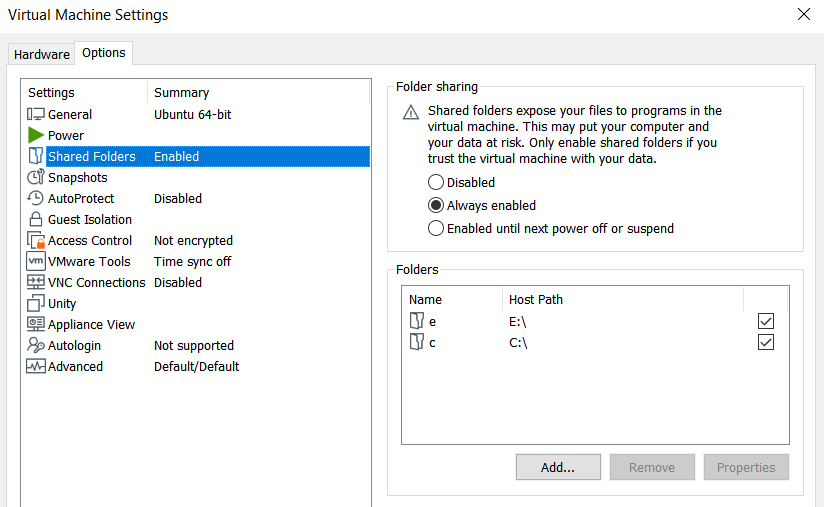
- Navigate to VM > Settings > Options > Shared Folders
- Enable shared folders and click Apply
Login to your guest machine then run:-
$ ifconfigAt my case, the guest IP is 10.10.100.130 (remember it)
- Open Termnial Preview and click on the little arrow
- Open settings and paste my settings.json
- Edit "Ubuntu Server VM" profile data to match yours
"commandline": "bash -c \"sshpass -p Your-Guest-Password-Here ssh bitthebyte@Guest-IP-Here\""

eg.> "commandline": "bash -c \"sshpass -p MyPassword ssh bitthebyte@10.10.100.130\""- Login to your guest
- Run:-
nano .bashrc- At the end of the file paste
echo My-Guest-User-Password | sudo -S vmhgfs-fuse .host:/ /mnt/hgfs/ -o allow_other -o uid=1000 2> /dev/null
export PS1="\[\e[1;31m\]\u\[\e[1;36m\]\[\033[m\]@\[\e[1;36m\]\h\[\033[m\]:\[\e[0m\]\[\e[1;32m\][\W]> \[\e[0m\]"
alias dsk="cd /mnt/hgfs/c/Users/Windows-UserName-Here/Desktop"- Hit CTRL+X then Y
- Using Windows Explorer navigate to install.cmd
- Double click on Install.cmd
Use the following commands to start VMware from WSL1
/mnt/c/Program\ Files\ \(x86\)/VMware/VMware\ Workstation/vmrun.exe start "E:\Programs\VM\UbuntuVM\Ubuntu.vmx" nogui/mnt/c/Program\ Files\ \(x86\)/VMware/VMware\ Workstation/vmrun.exe stop "E:\Programs\VM\UbuntuVM\Ubuntu.vmx"Now you're ready to go you can easily access the VM or WSL1 from the terminal
You can pretty much use it as WSL2 as it could access local drives with the benefit of not using Hyper-V


