A simple distributed application running across multiple Docker containers.
Download Docker Desktop for Mac or Windows. Docker Compose will be automatically installed. On Linux, make sure you have the latest version of Compose.
This solution uses Python, Node.js, .NET, with Redis for messaging and Postgres for storage.
Run in this directory to build and run the app:
docker compose upThe vote app will be running at http://localhost:5000, and the results will be at http://localhost:5001.
Alternately, if you want to run it on a Docker Swarm, first make sure you have a swarm. If you don't, run:
docker swarm initOnce you have your swarm, in this directory run:
docker stack deploy --compose-file docker-stack.yml vote
- A front-end web app in Python which lets you vote between two options
- A Redis which collects new votes
- A .NET worker which consumes votes and stores them in…
- A Postgres database backed by a Docker volume
- A Node.js web app which shows the results of the voting in real time
Note: At any point during the below steps, feel free to look at the instrumented-version branch of this repo here for reference.
Account Setup
- You'll need a New Relic account. The good news is that you can create a free account here (no credit card required).
Python Agent Installation
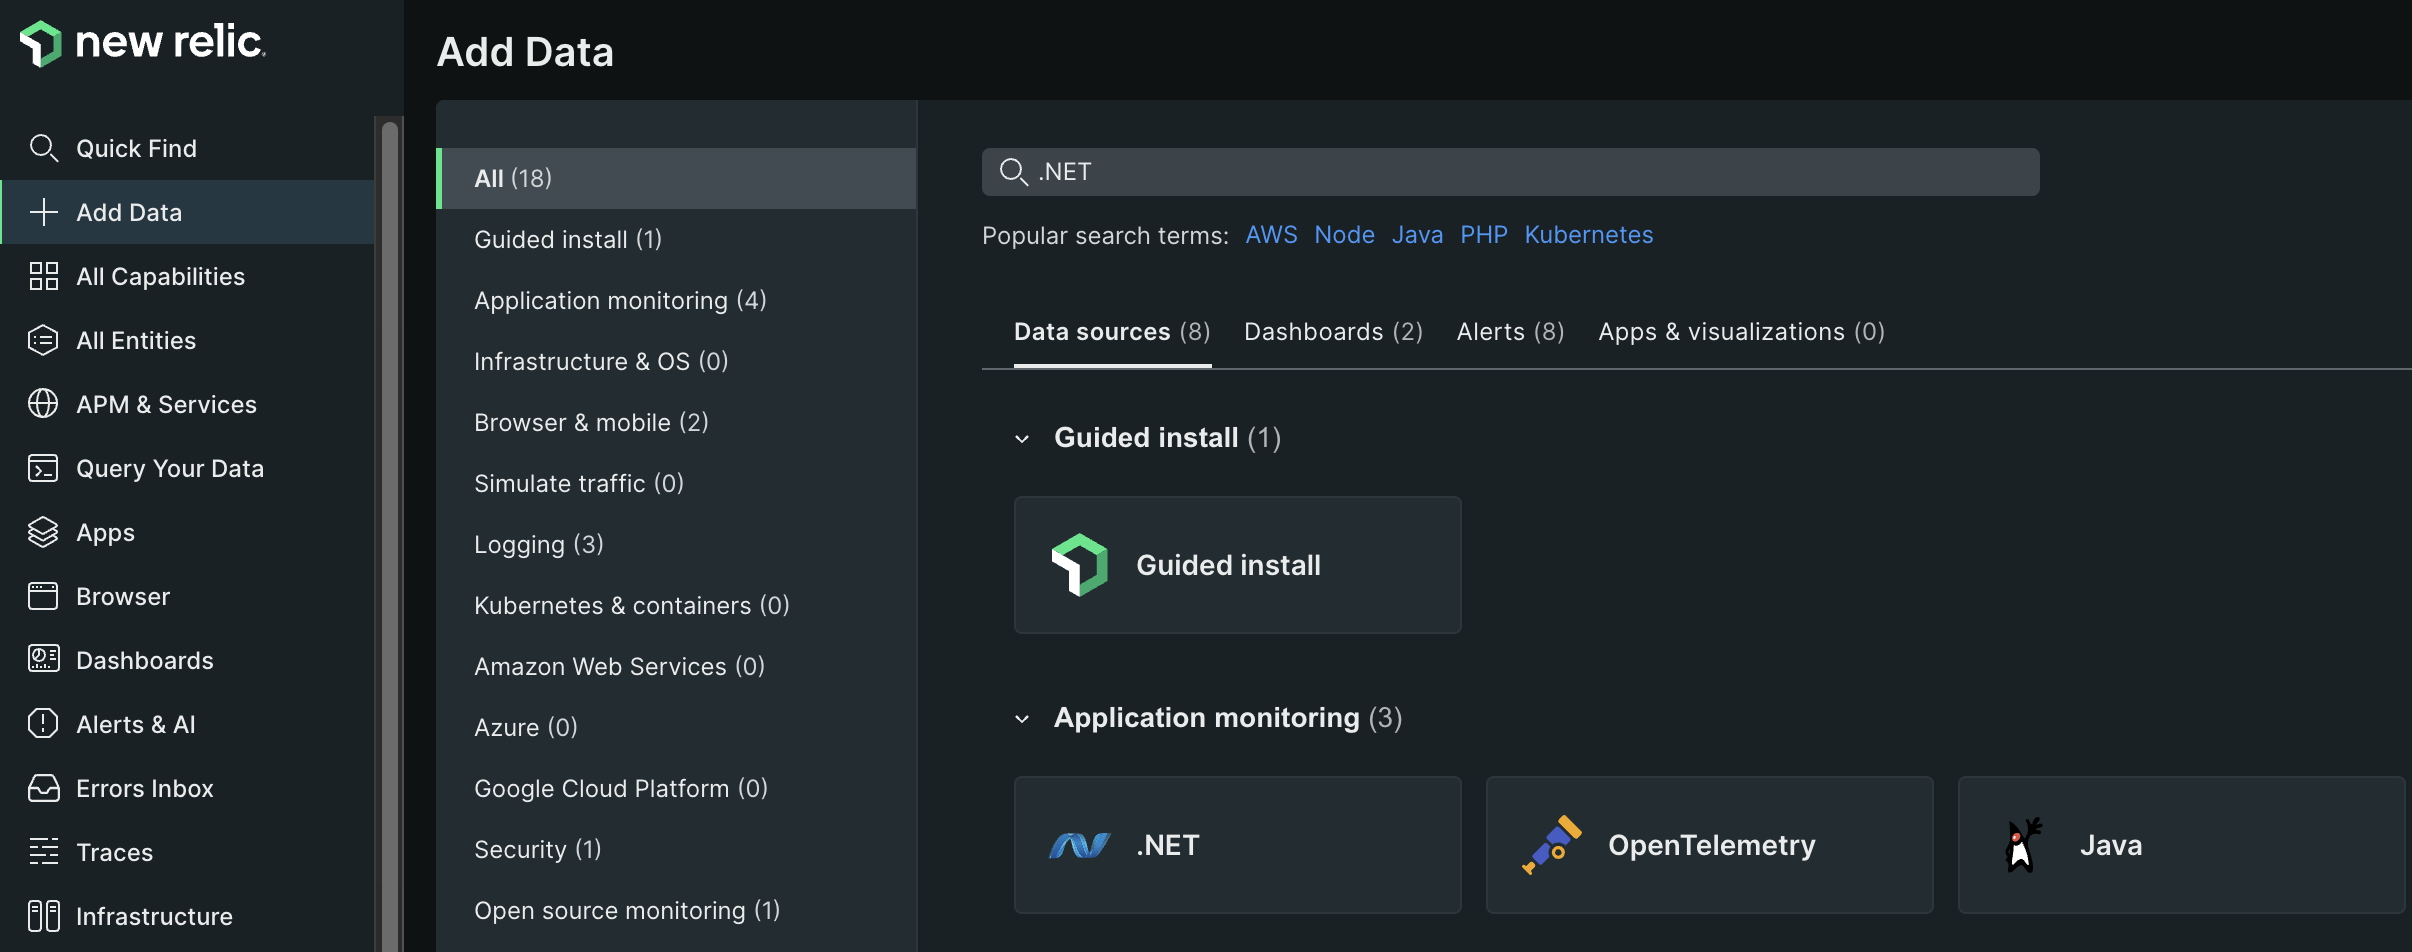
- Once you've created an account, you can begin installing the agent by first clicking the
Add Datatab on the left hand navigation pane, as shown below.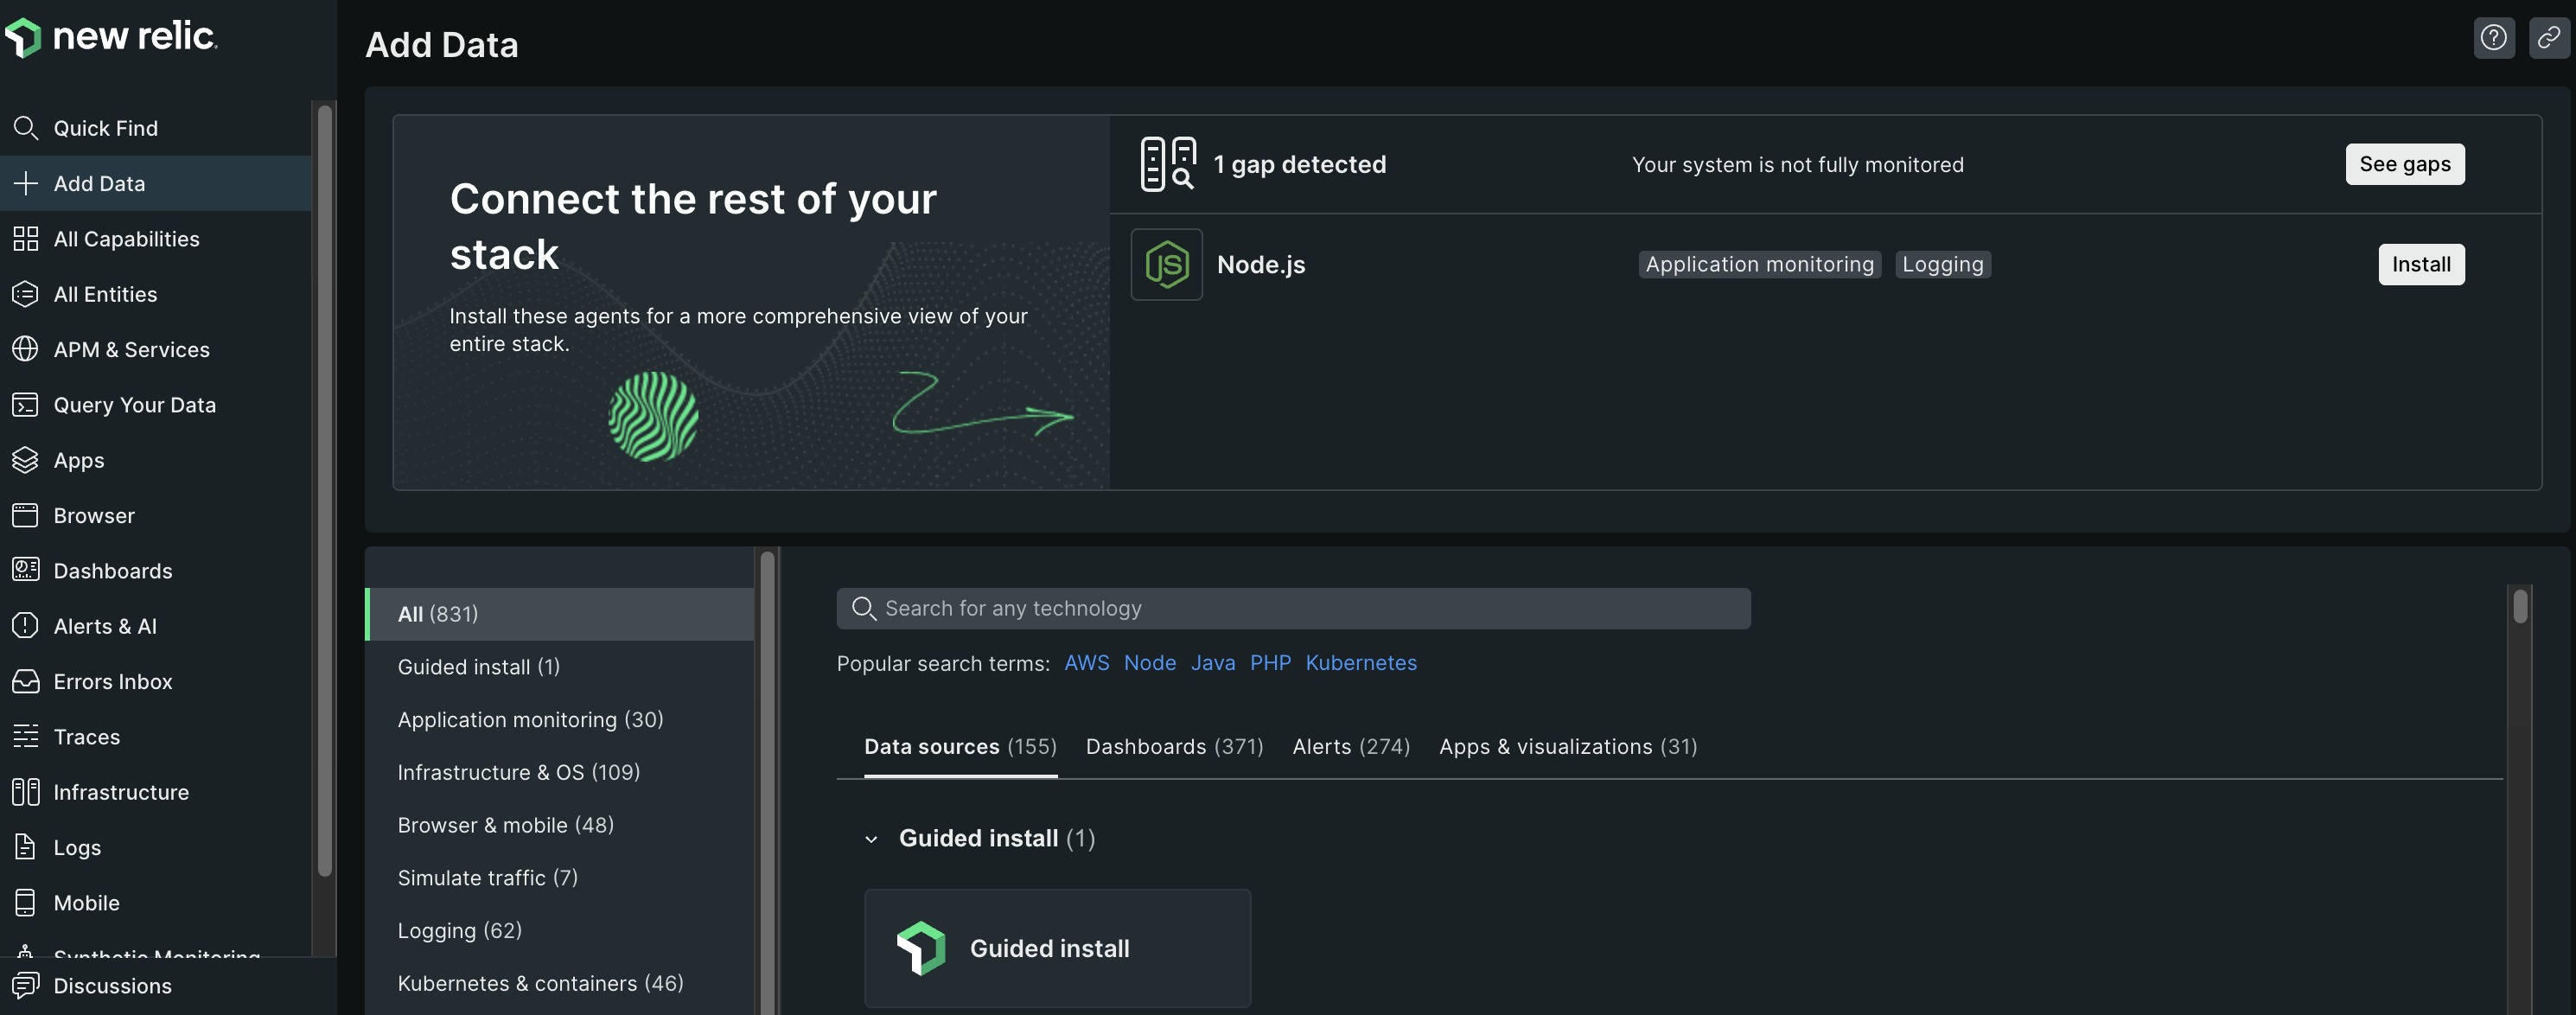
- Search for the Python agent in the
Search for any technologysearch bar and click the Python agent under theApplication monitoringsection as shown below.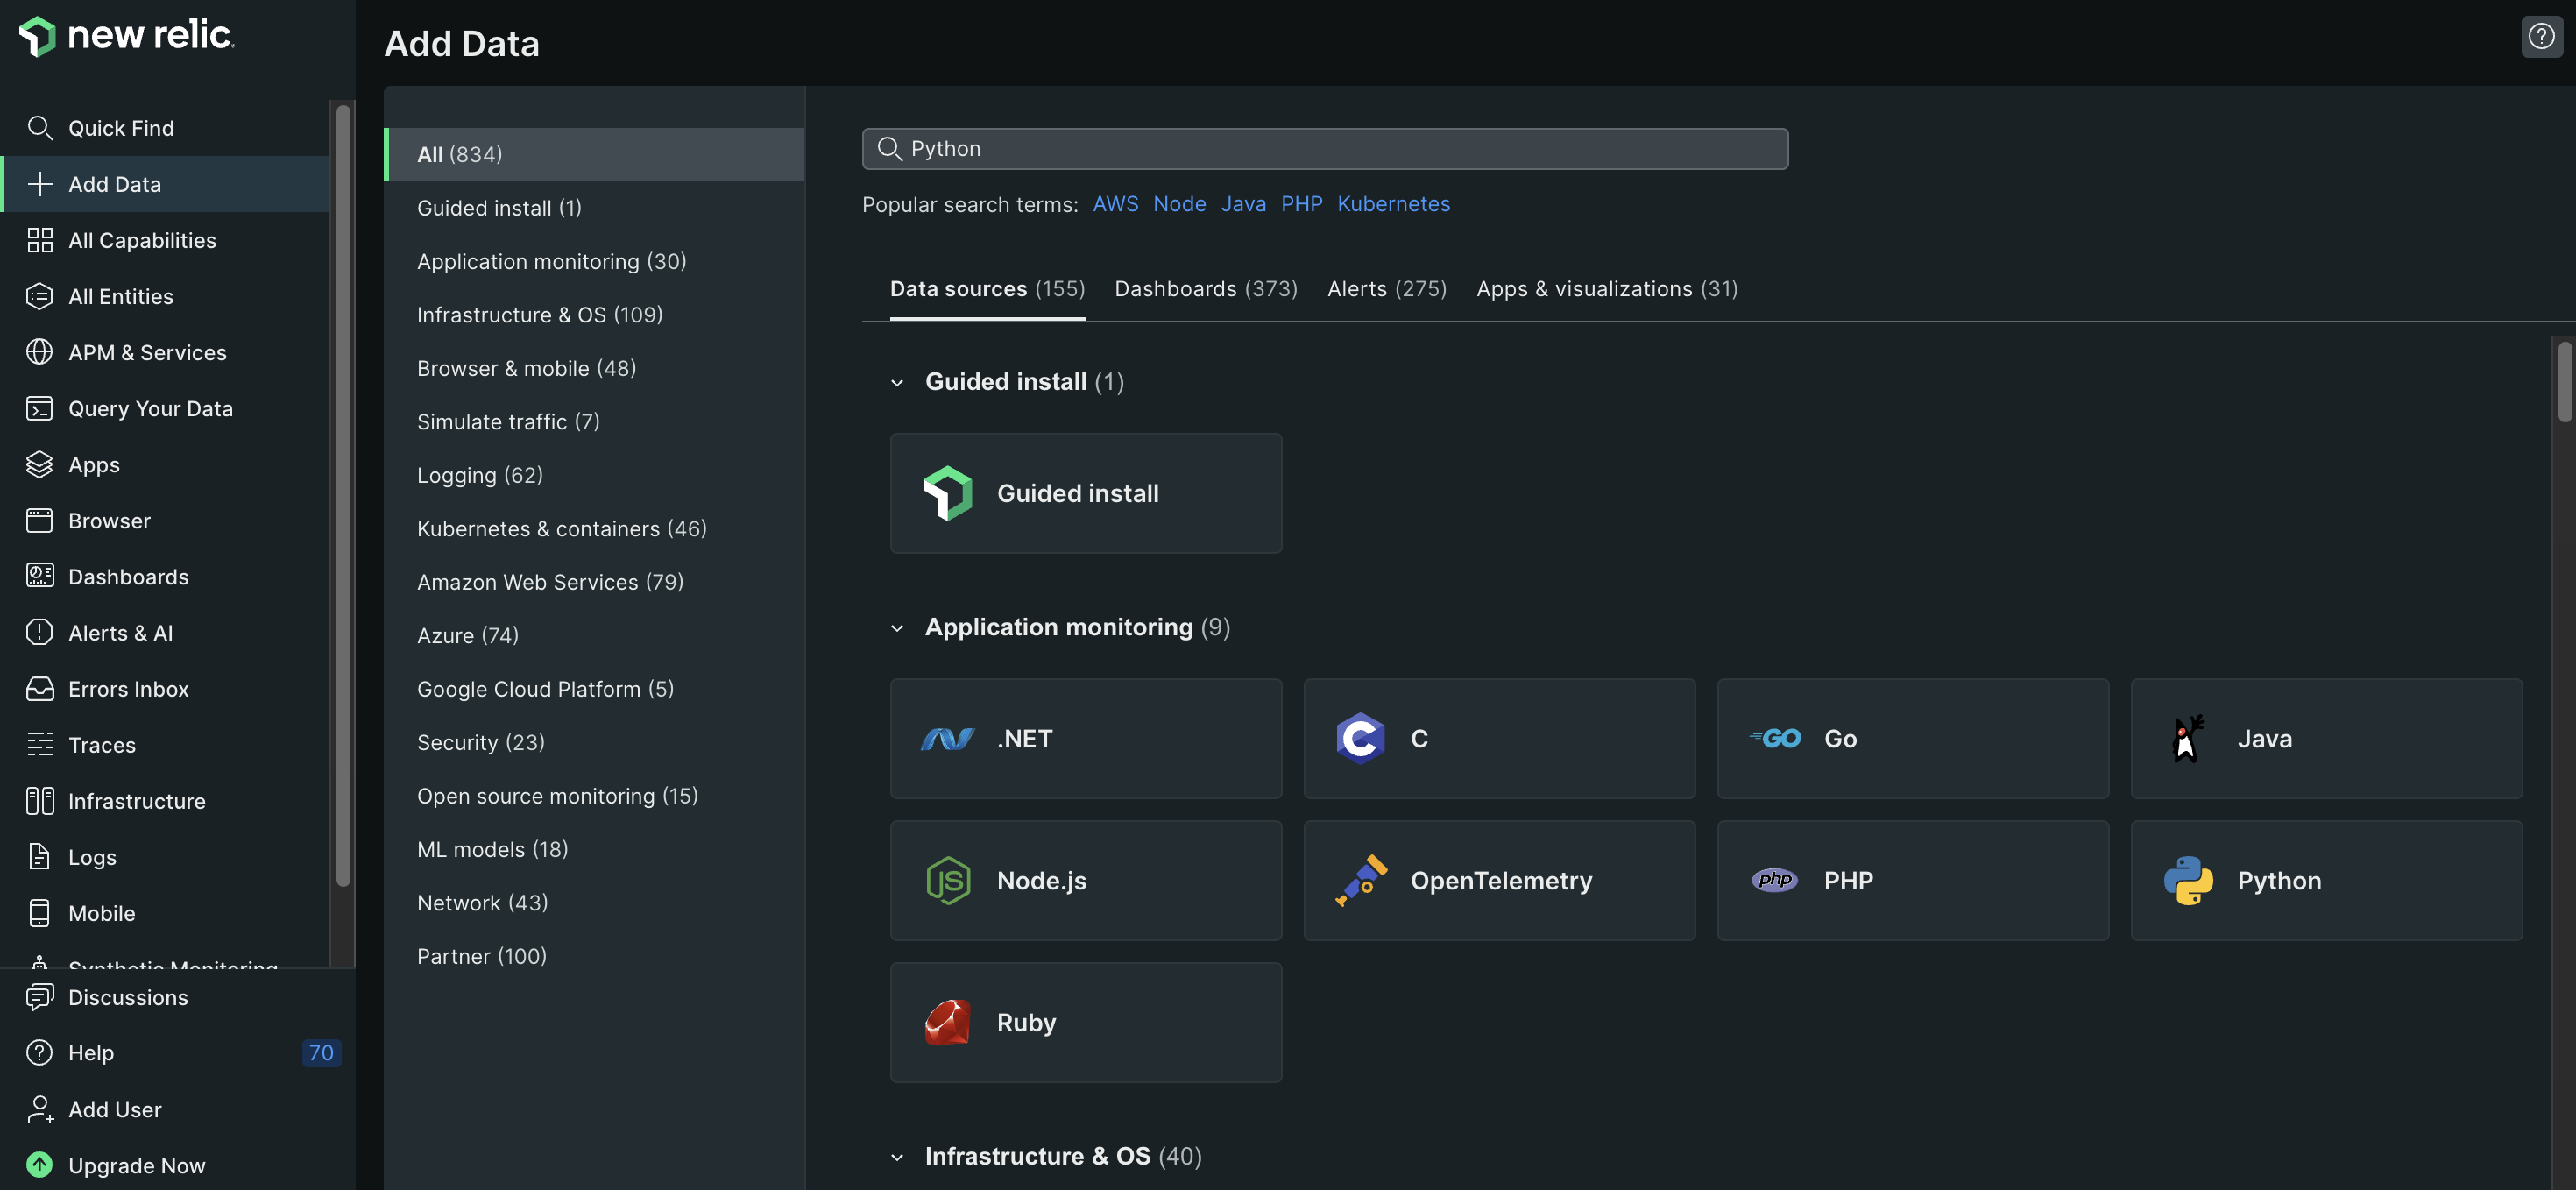
- Next, give your application a name
- Install the New Relic agent into the voting app Docker container by following the below steps
- Add the
newrelicPython module as a dependency in the/vote/requirements.txtfile - Copy the
newrelic.inifile as shown below into the/votedirectory of the project folder.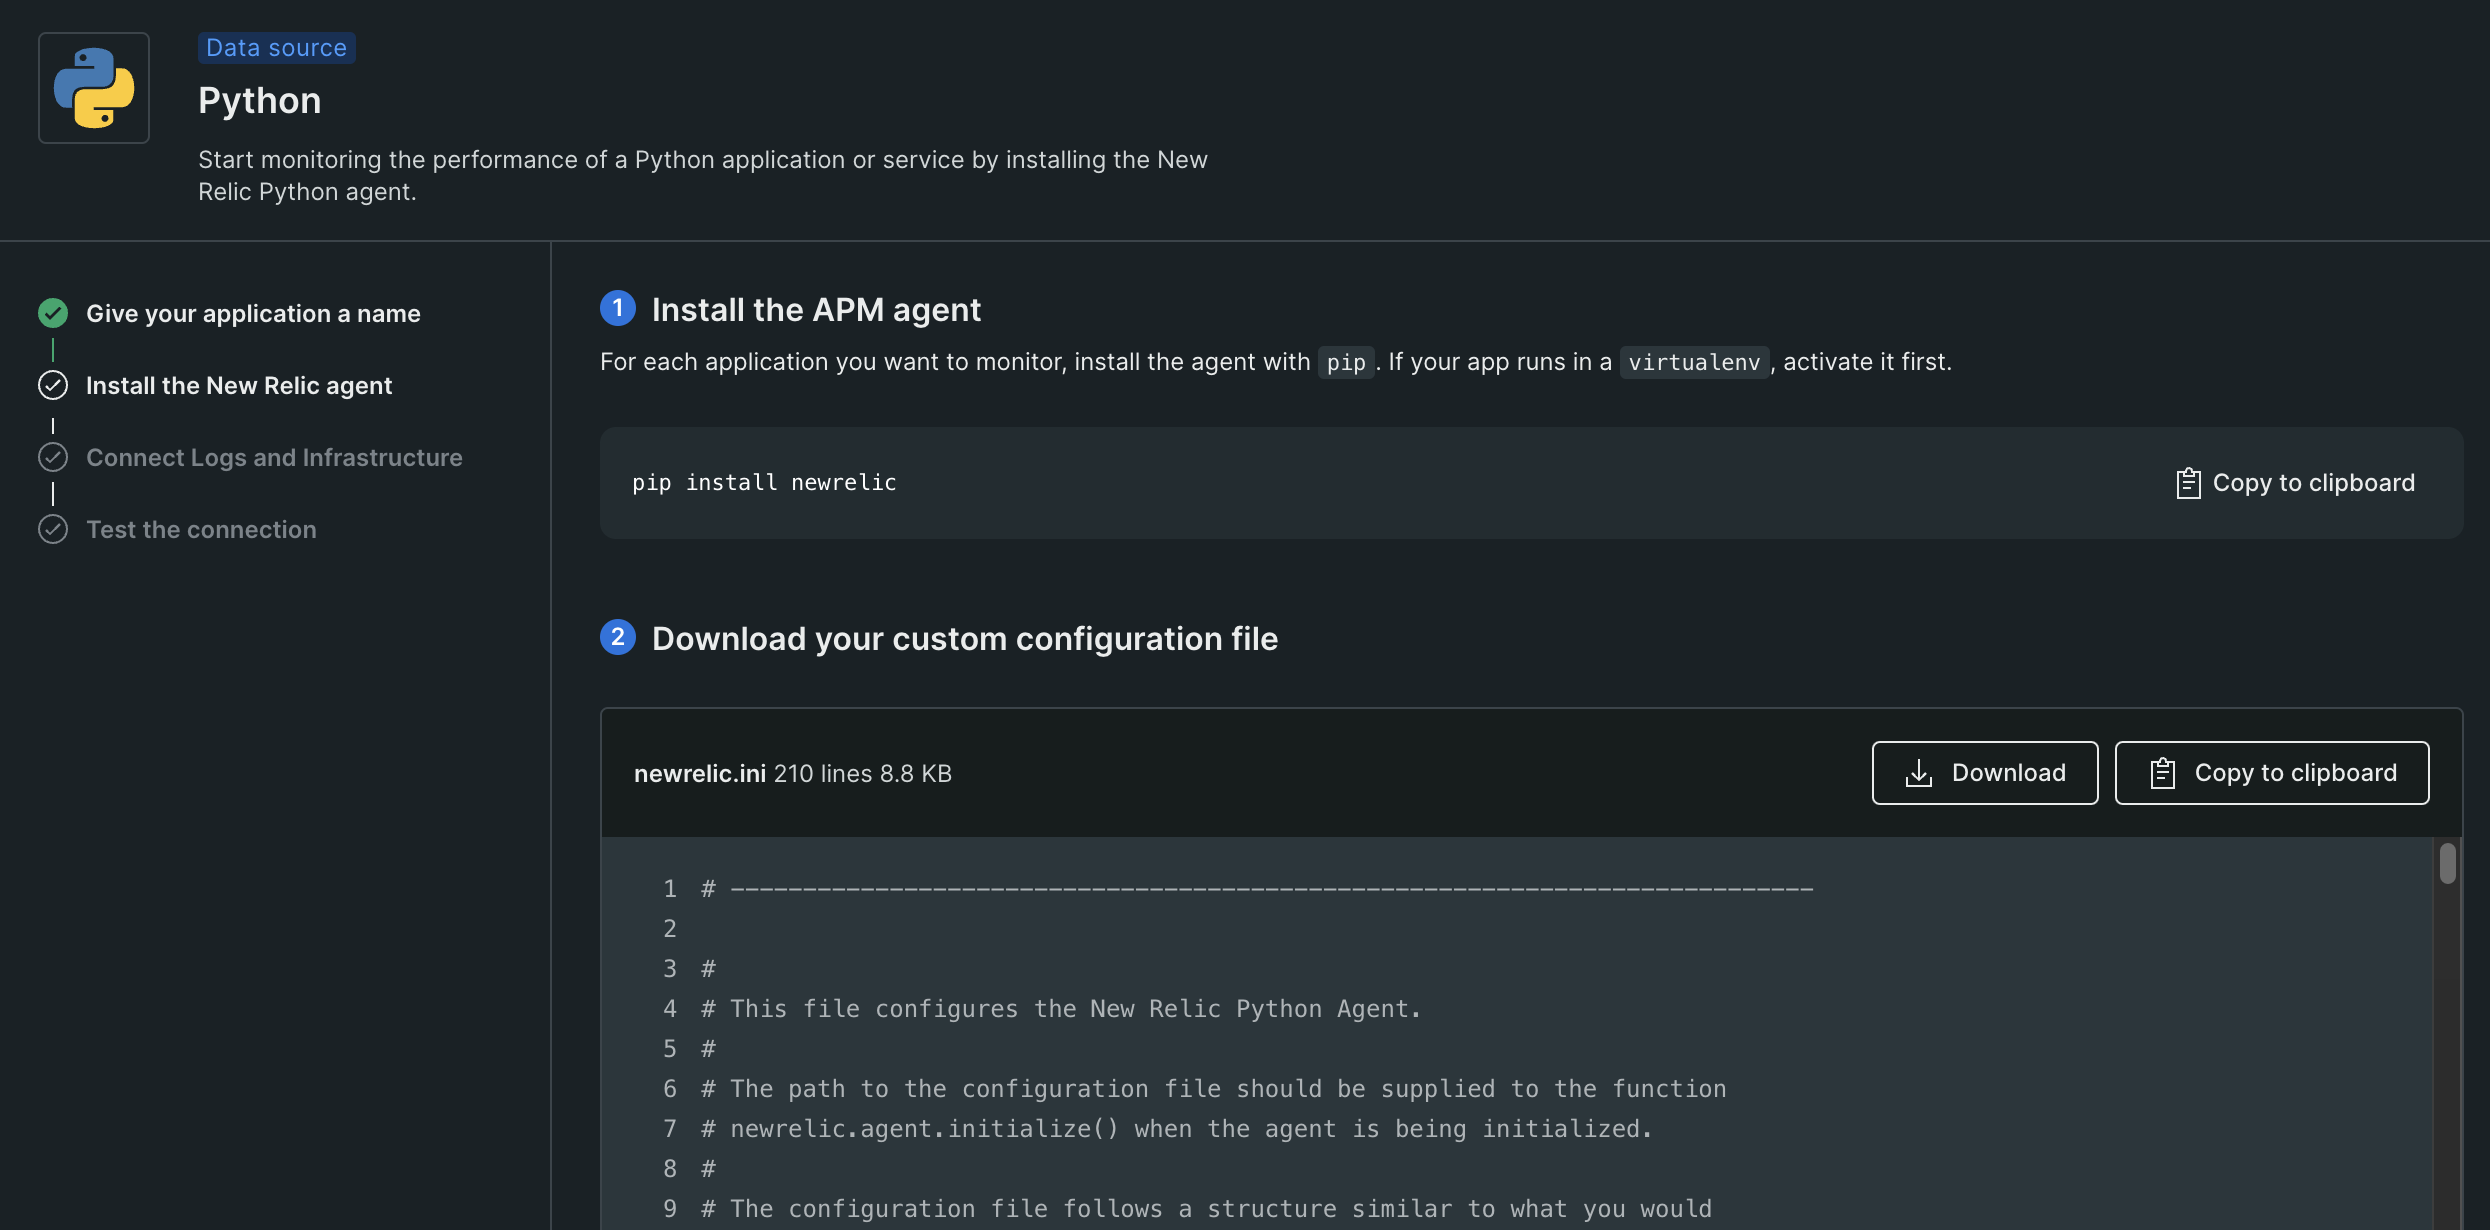
- Add the
NEW_RELIC_CONFIG_FILEas an environment variable in thedocker-compose.ymlfile to point to thenewrelic.inifile. - Add the
newrelic-admin run-programcommands in front of the existingpython app.pycommand for the vote Docker service. - Your
voteservice in yourdocker-compose.ymlfile should look like the code here:
- Add the
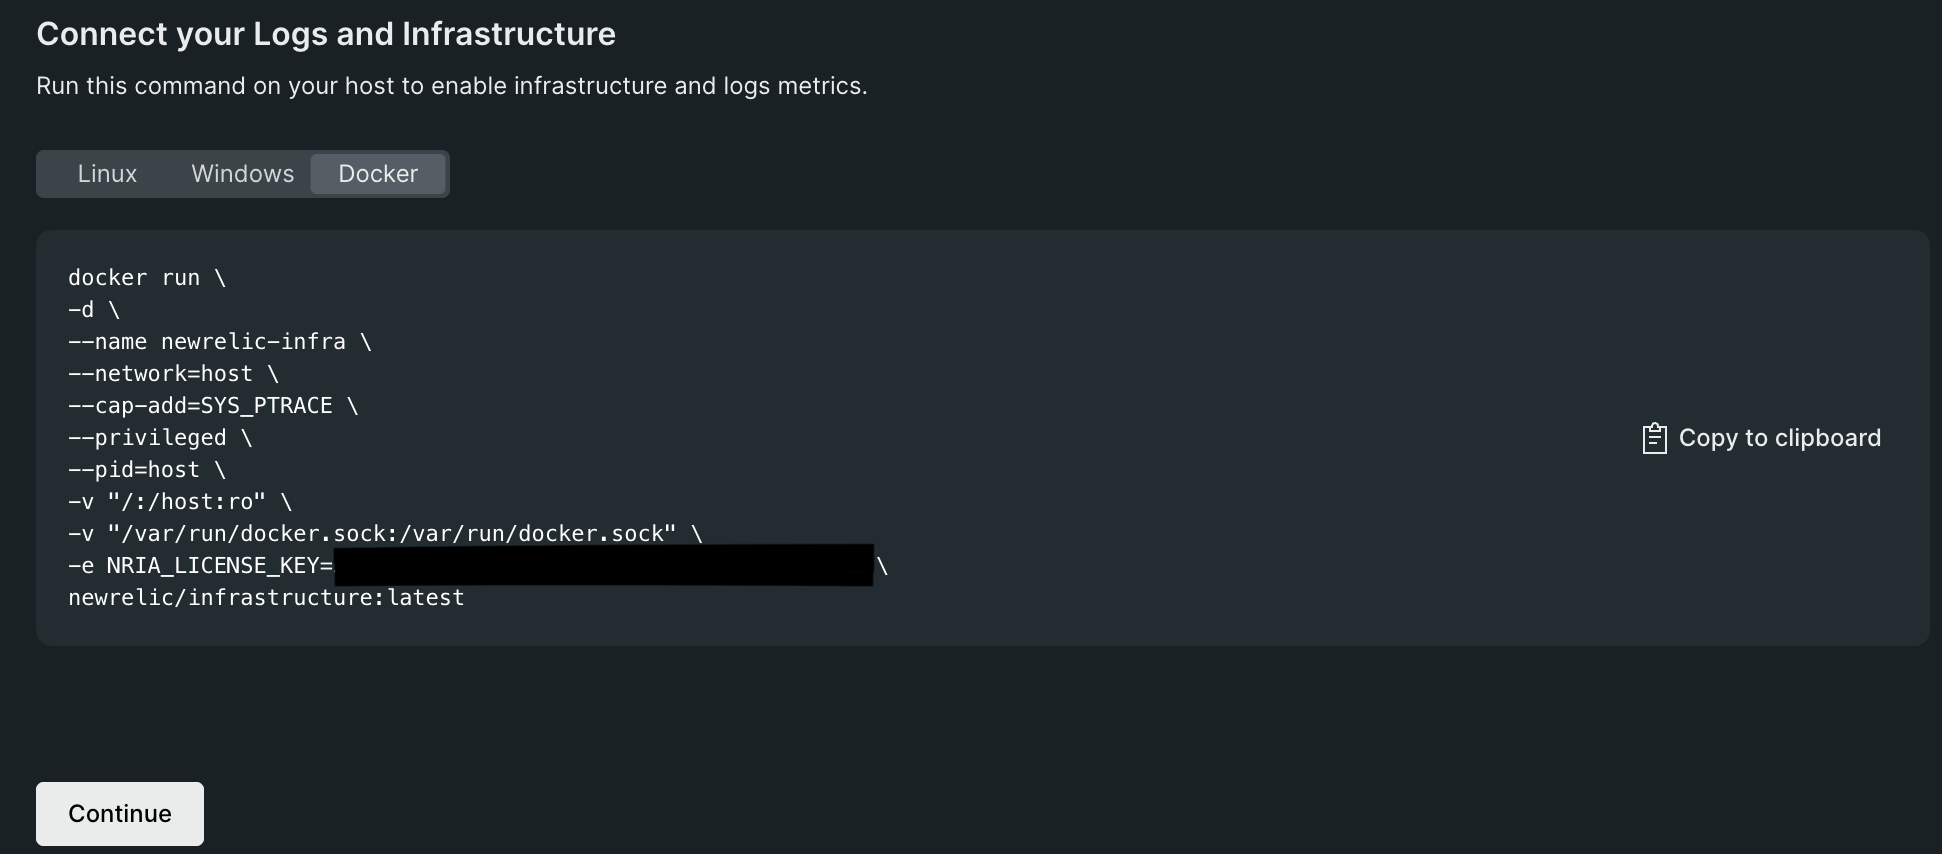
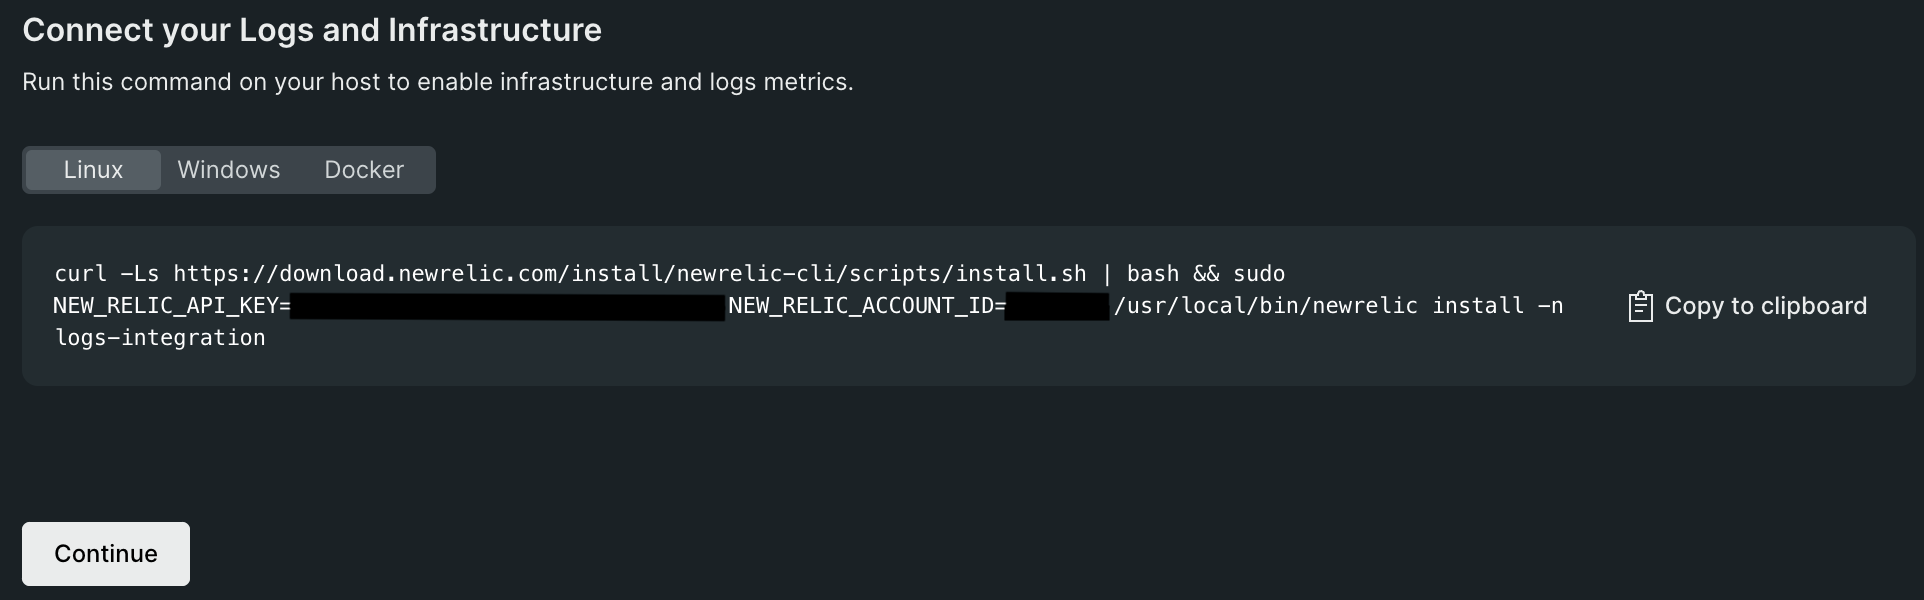
- Next, connect your infrastructure by running the given Docker command as shown below.
- Run your application with
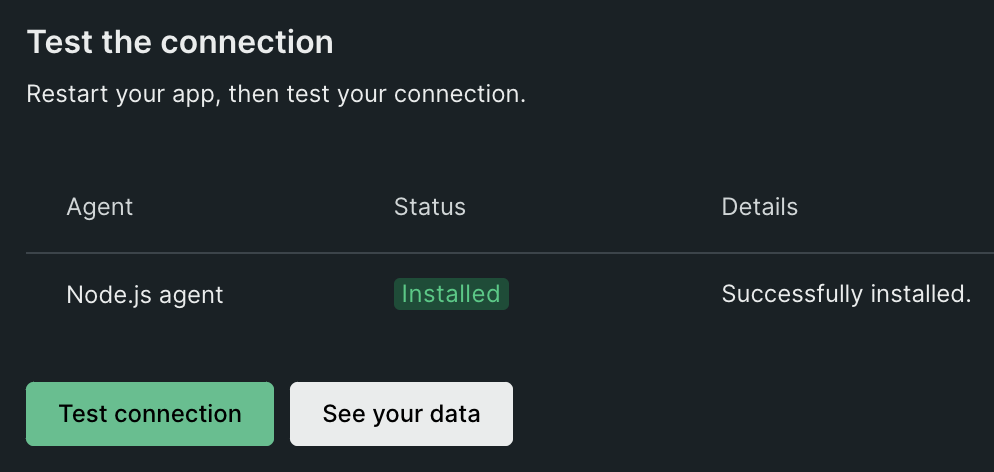
docker compose upin the project directory - Finally, test the connection to the Python agent and your infrastructure. You should see results similar to the screenshot below. It is ok for the
On-host logsconnection to fail.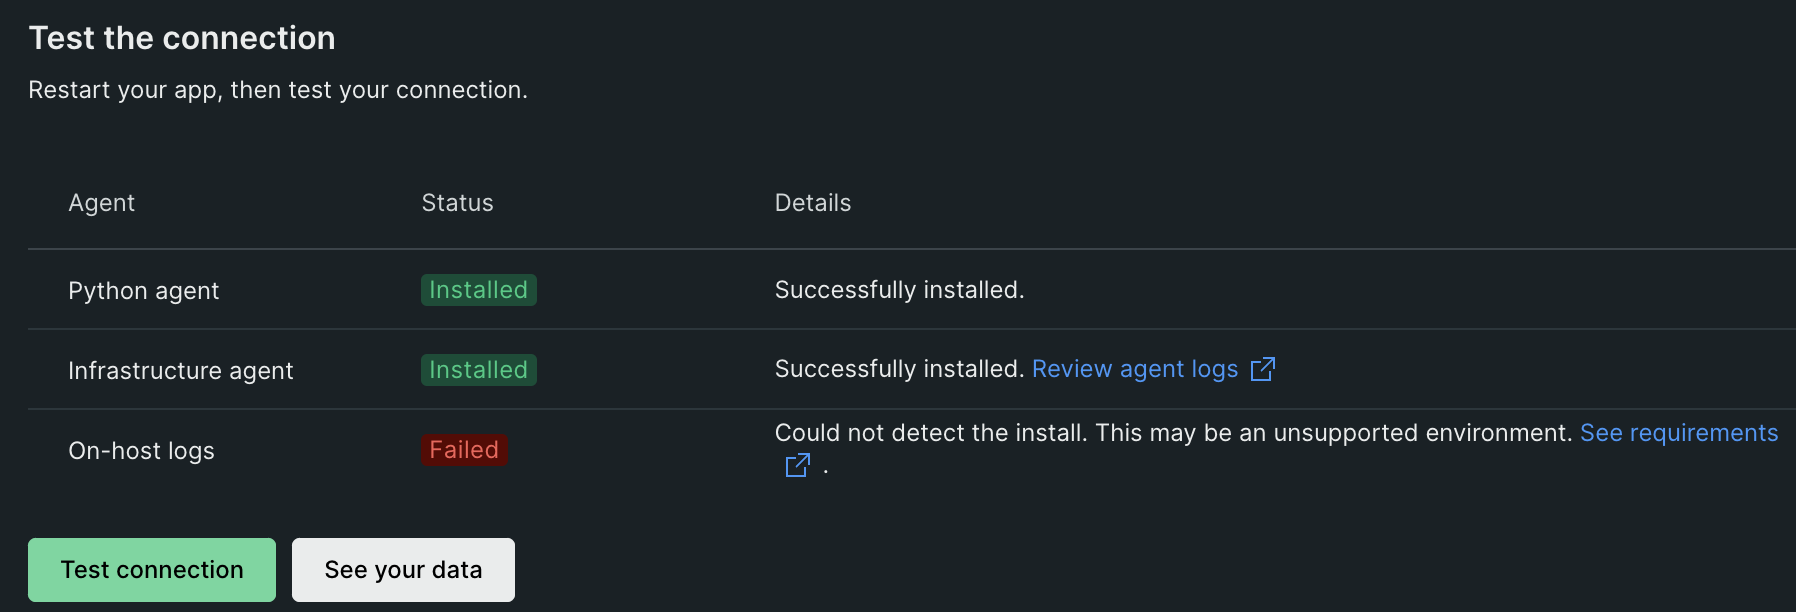


Troubleshooting Python Agent Installation
- If the connection to the Python agent fails in the last step.
- First tear down your Docker containers with
docker compose down - Try running the following command to forcefully rebuild your images:
docker compose build --no-cache - Then try running
docker compose upagain to start your containers
- First tear down your Docker containers with
- If the connection to the Infrastructure agent fails in the last step.
- Try running the Linux install command instead of the Docker command as shown below.
- Try running the Linux install command instead of the Docker command as shown below.

.NET Agent Installation
-
You can begin installing the .NET agent by first clicking the Add Data tab on the left hand navigation pane, as shown below.
-
Search for the .NET agent in the Search for any technology search bar and click the .NET agent under the Application monitoring section as shown below.
-
We will be following the steps linked here to install and enable the .NET agent inside our .NET Docker container.
- Replace the code in your
/worker/Dockerfilefile for your .NET worker to be as shown here. - Make sure to replace
YOUR_LICENSE_KEYandYOUR_APP_NAMEwith your New Relic license key and .NET application name respectively inside theENVcommand at the bottom of the Dockerfile. If you would like to know where to find your license key, you can follow instructions here.
- Replace the code in your

.NET Worker Custom Instrumentation
- If you have installed the .NET agent inside the .NET worker Dockerfile, we can begin adding custom instrumentation to monitor the .NET worker's transactions.
- Let's first make sure we install the
NewRelic.Agent.Apipackage in our project's PackageReference. - Replace your /worker/Worker.csproj file with the code here so we can install the
NewRelic.Agent.Apipackage.
- Let's first make sure we install the
- Let's begin with a simple task of tracking the
UpdateVotetransaction inside the/worker/Program.csfile for the .NET worker.- Place the following line at the top of your
Program.csfile:using NewRelic.Api.Agent;as shown here. - Place a
[Transaction]decorator directly above theUpdateVotefunction as shown here. - The above steps will import the
NewRelic.Api.Agentpackage into our worker's code and will create a custom transaction that can be tracked in New Relic whenever theUpdateVotefunction is called.
- Place the following line at the top of your
- Try interacting with the app so the worker can process some votes and so we can begin seeing data in our New Relic account!
- Navigate to
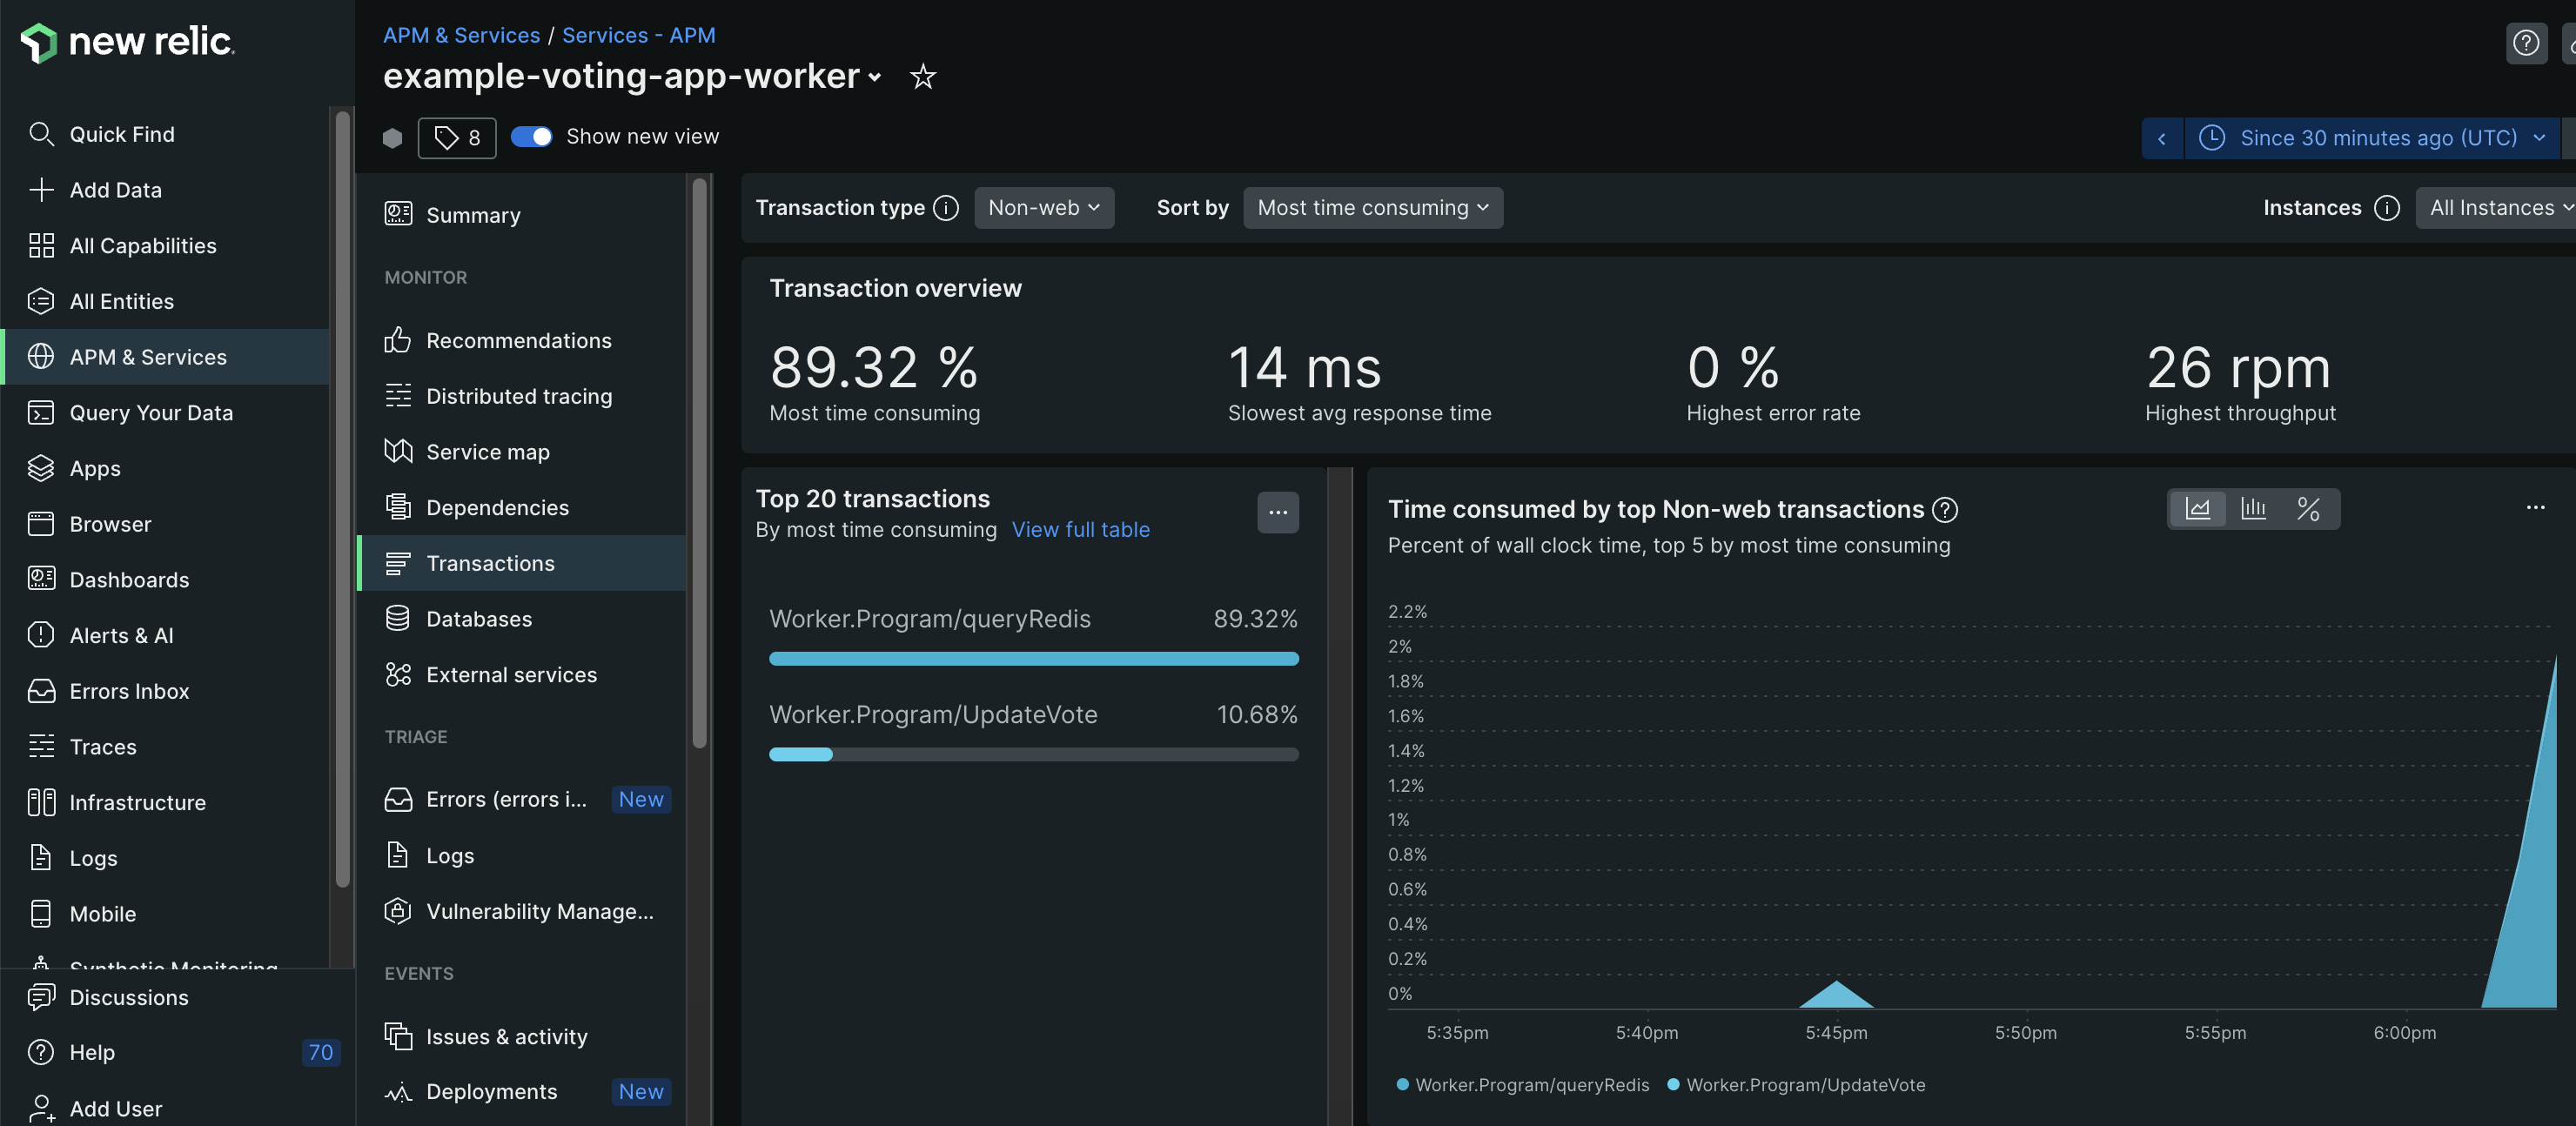
APM & Serviceson the left hand navigation pane and click the application name given to your .NET worker. Click theTransactionssection on the navigation pane.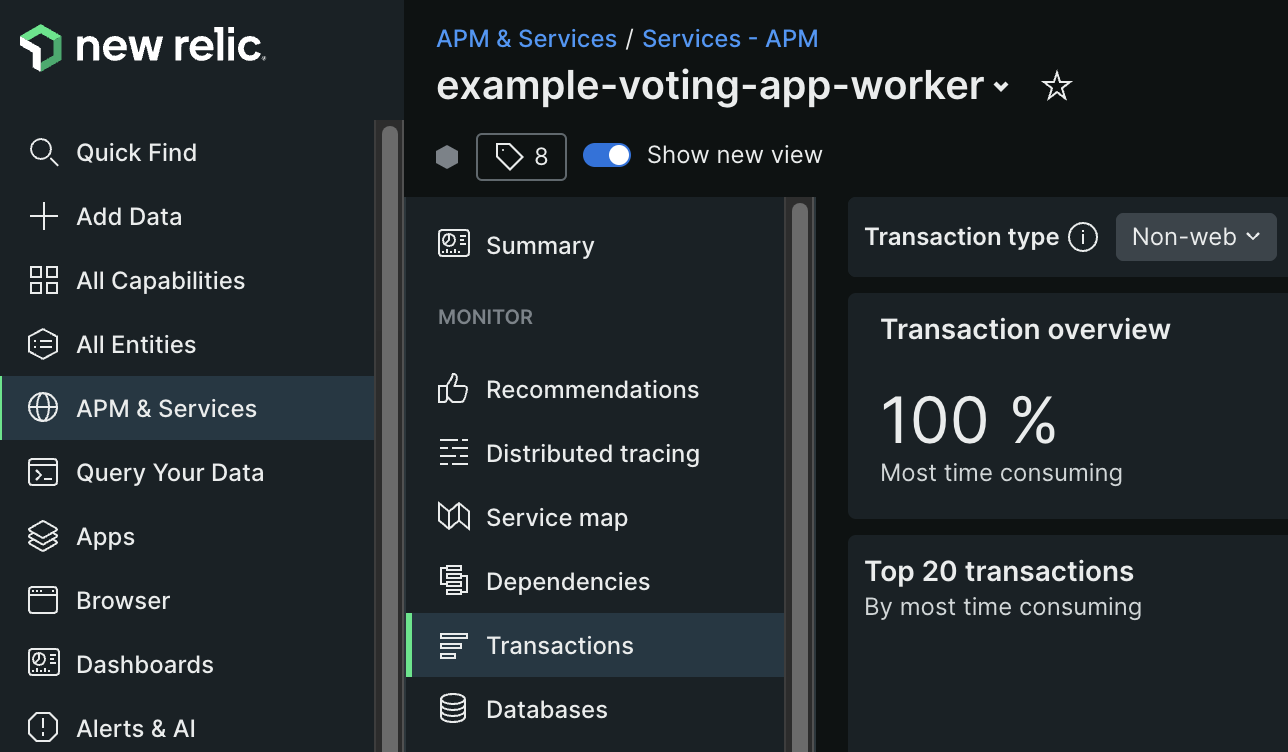
- You should begin to see data showing up in New Relic as shown below:
- Navigate to
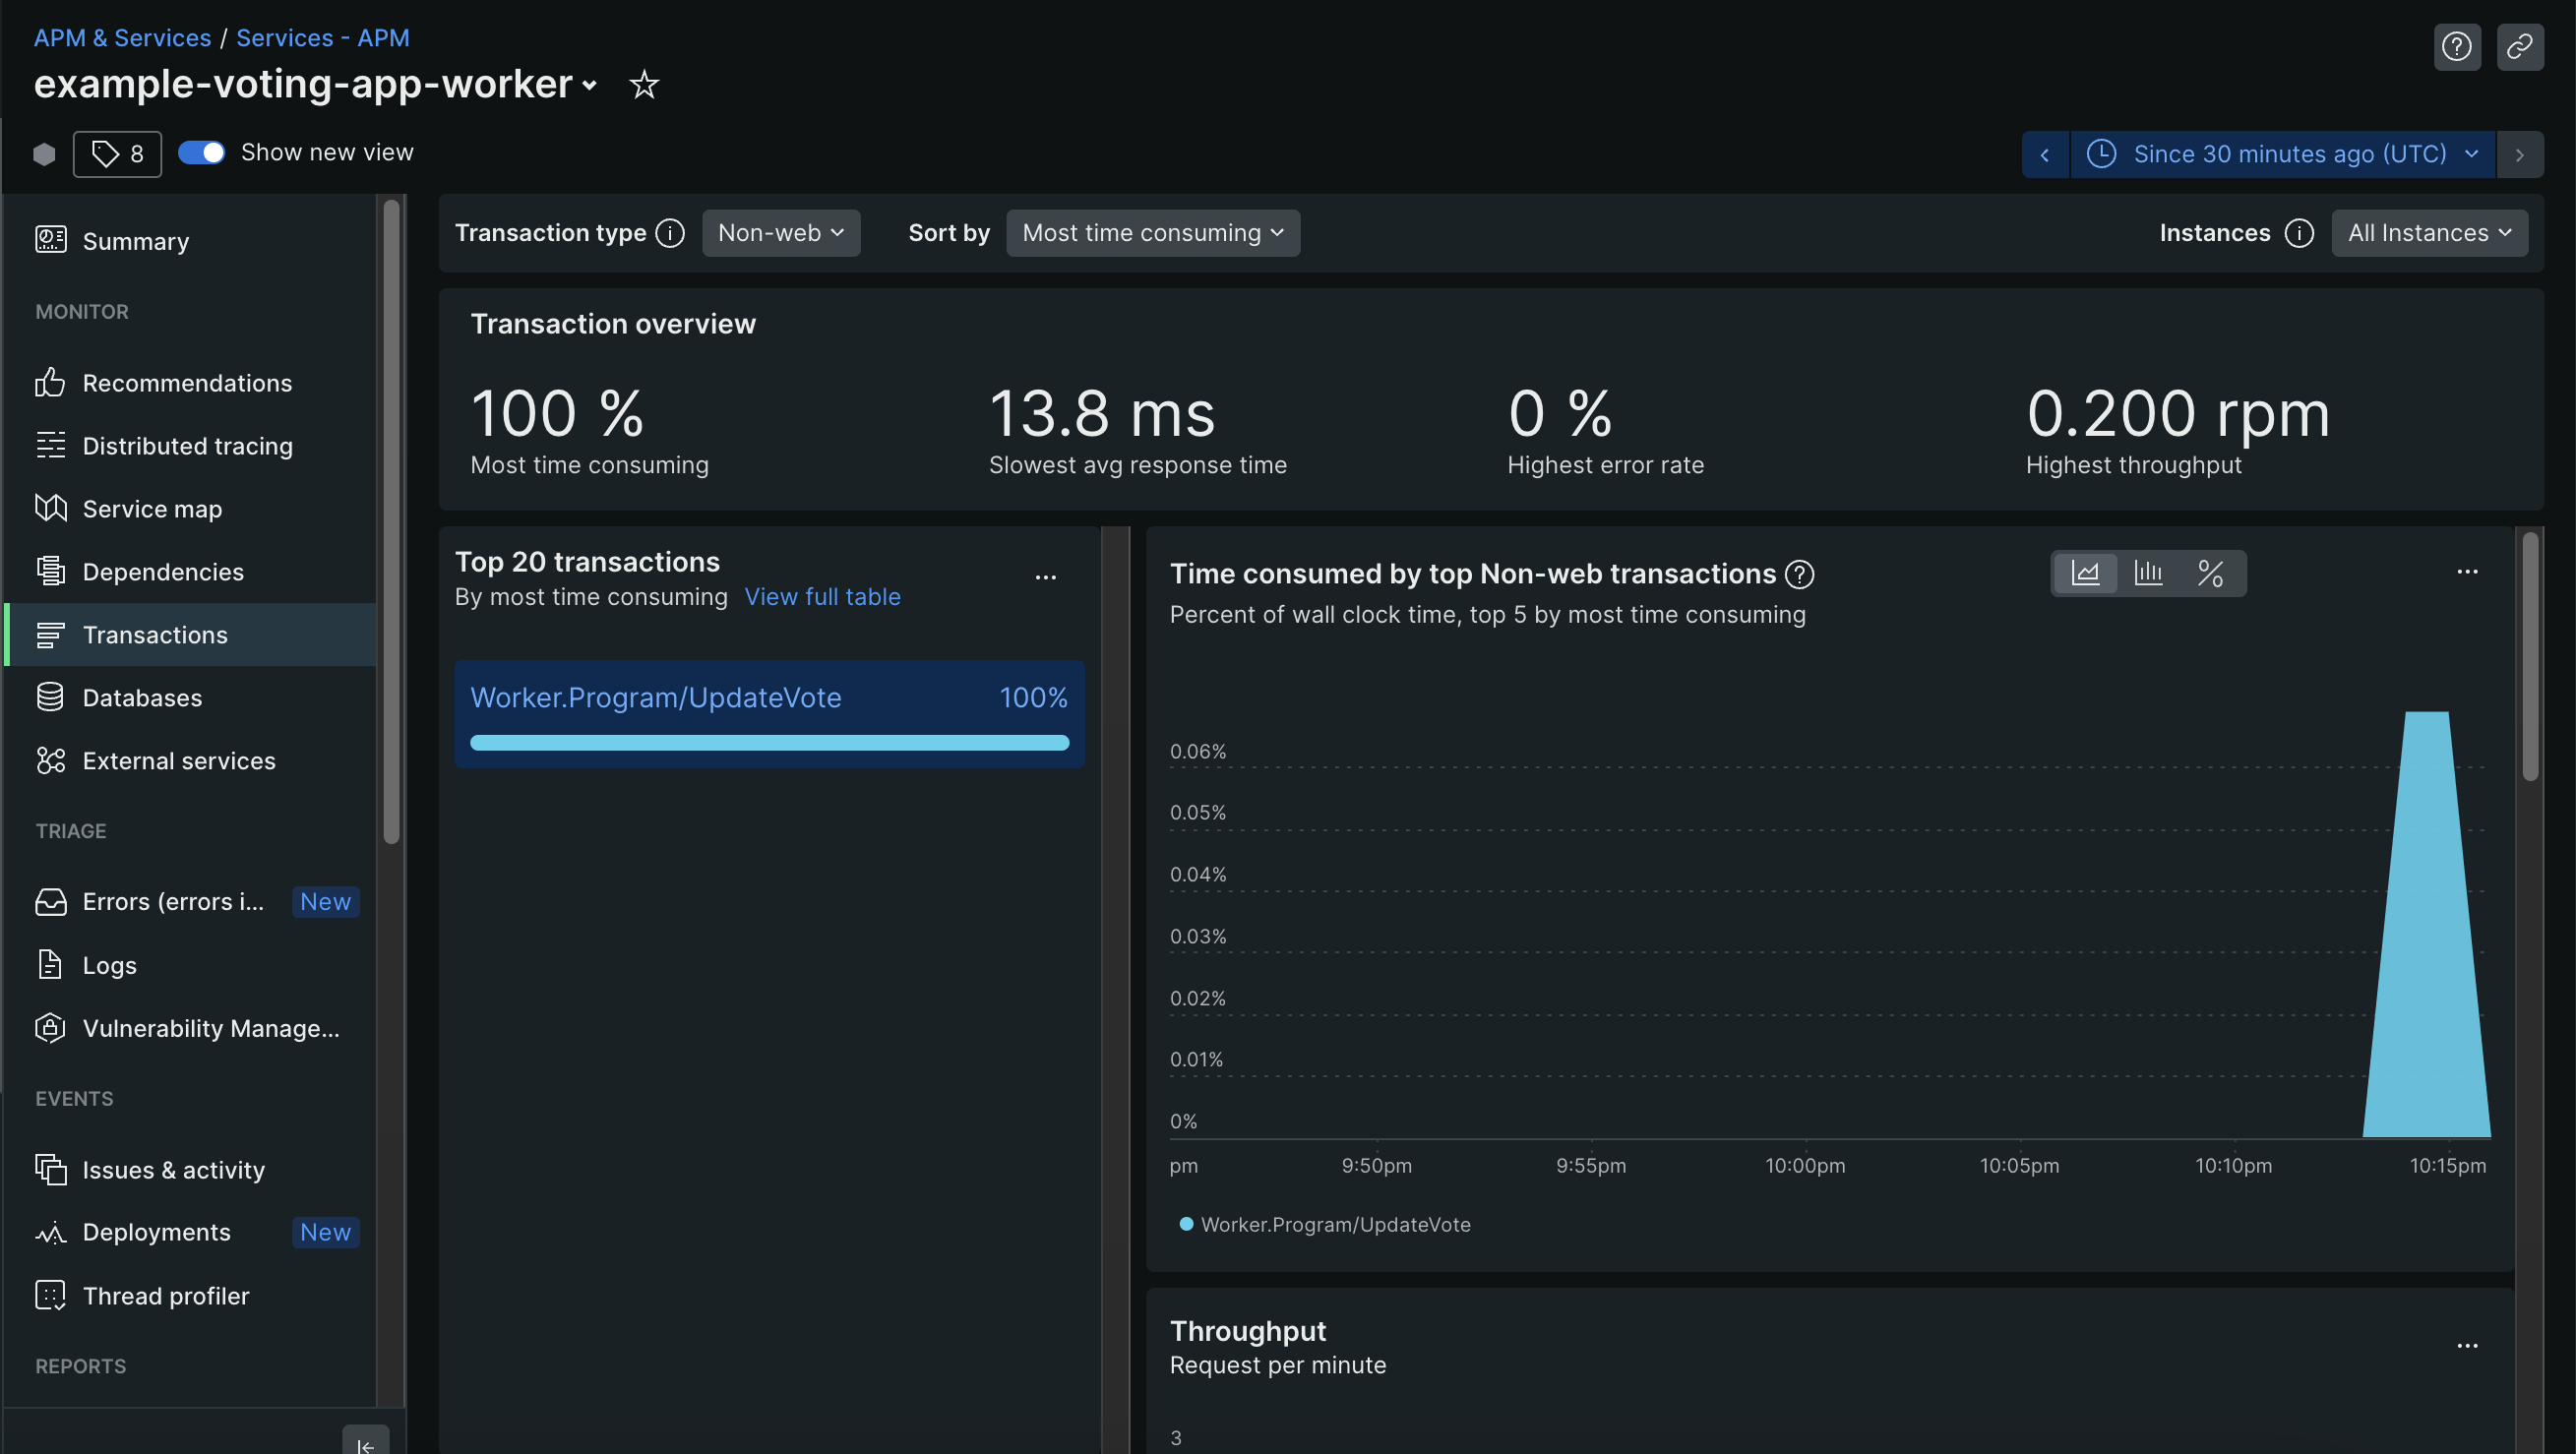
- As of now, we've only added custom instrumentation for tracking the
UpdateVotetransaction. Let's try adding custom instrumentation for tracking our query to the Redis server!- To do this, we'll need to extract our call to the Redis server into its own function rather than being called directly in the
Mainfunction. - Try poking around in the main function in
/worker/Program.csto see if you can find the call being made to Redis. Then, try extracting this call into its own function and decorating it with a[Transaction]. You should have a final result that looks like this. - Let's restart our application and interact with the vote counter to make some calls to the Redis server. You should begin to see data in your New Relic account as shown below.
- This is really cool as we're now adding custom instrumentation to track a couple of important transactions that are being made in our .NET worker! Feel free to add more custom instrumentation as you'd like, and you can also reference documentation here for doing so.
- To do this, we'll need to extract our call to the Redis server into its own function rather than being called directly in the


NodeJS Agent Installation
- Once you've created an account, you can begin installing the agent by first clicking the
Add Datatab on the left hand navigation pane, as shown below.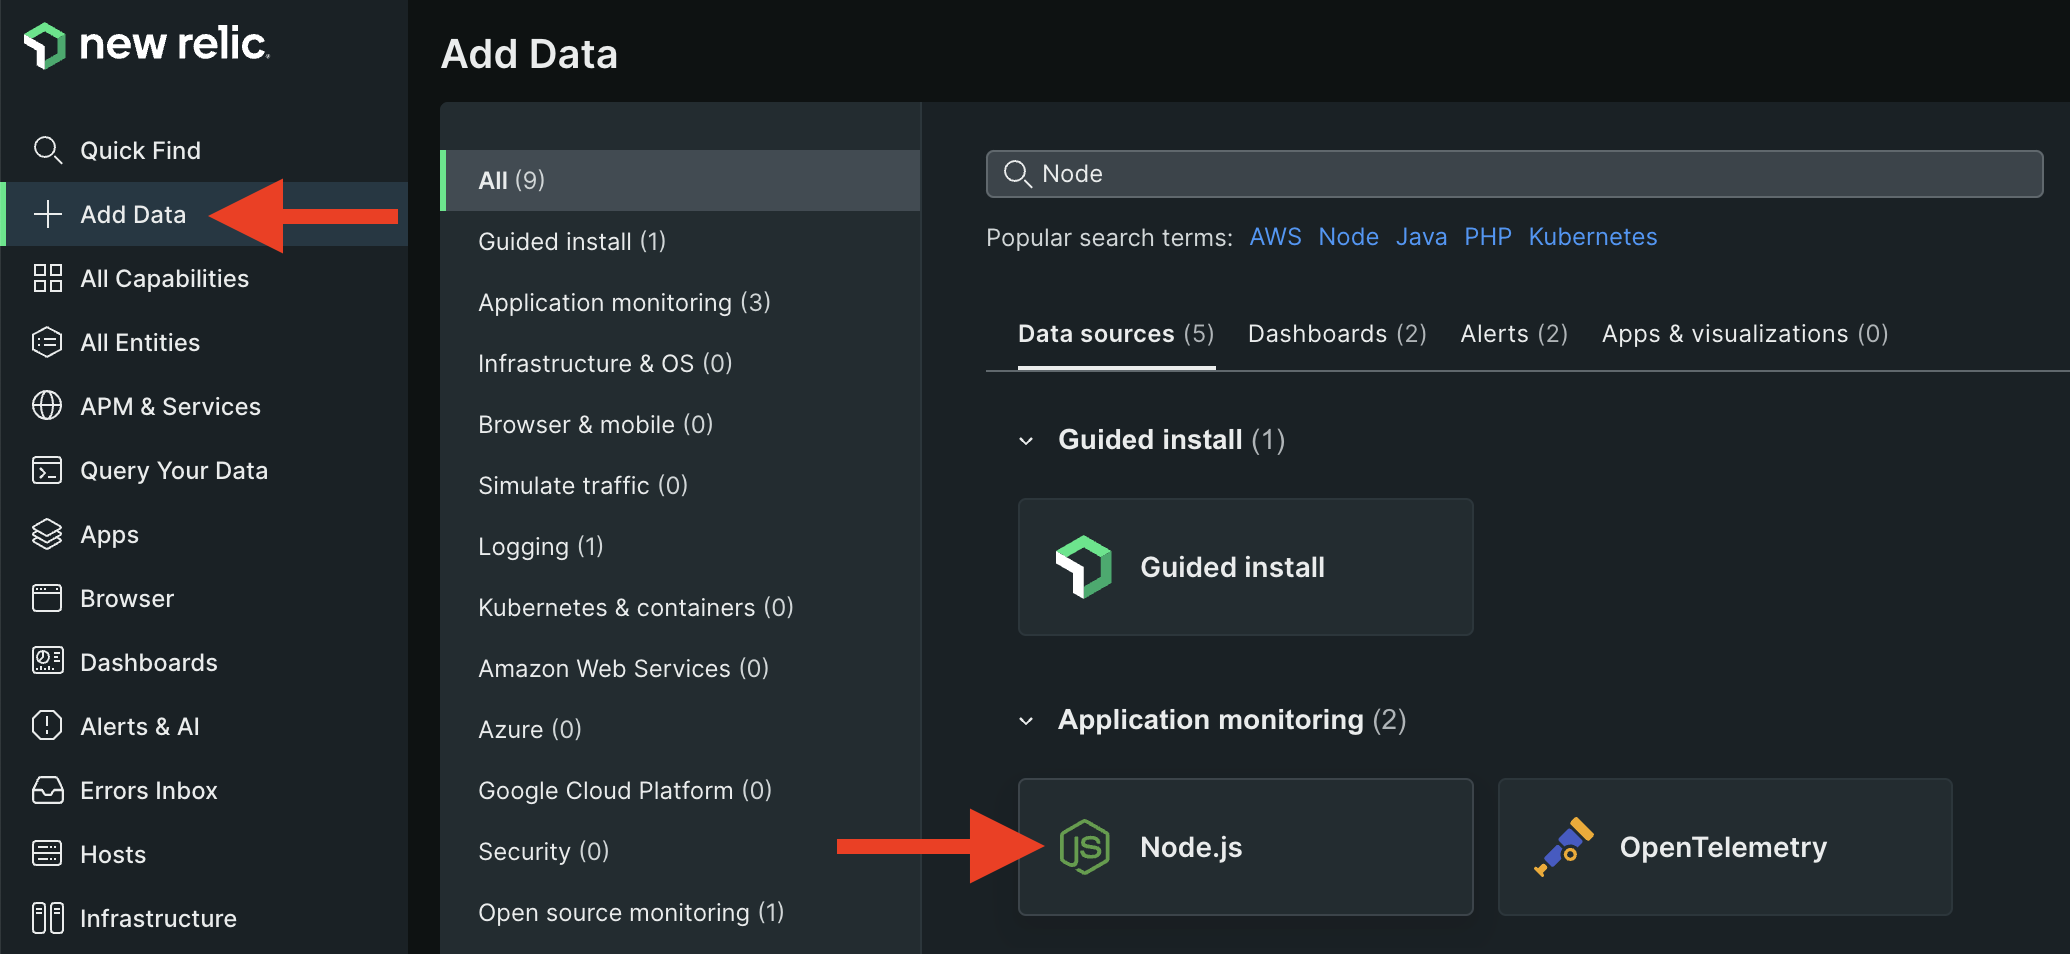
- For Instrumentation Method, select
Docker.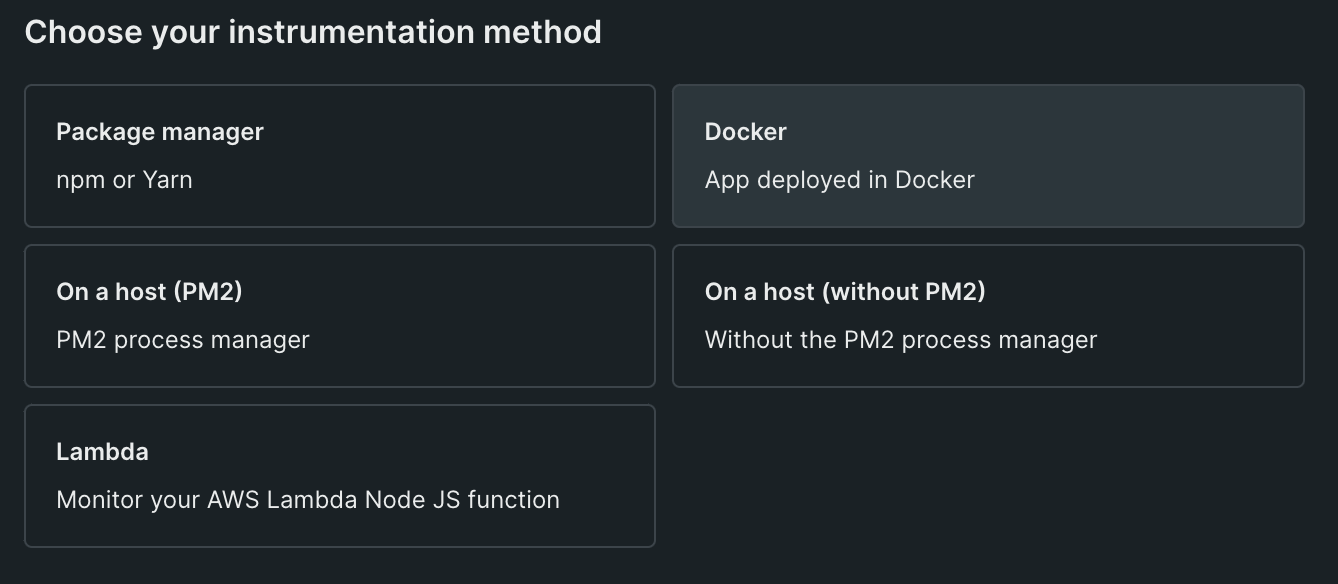
- Give your application a name and click Save.
- Look for the
package.jsonfile in theresultfolder and add"newrelic": "latest"as part of the dependencies.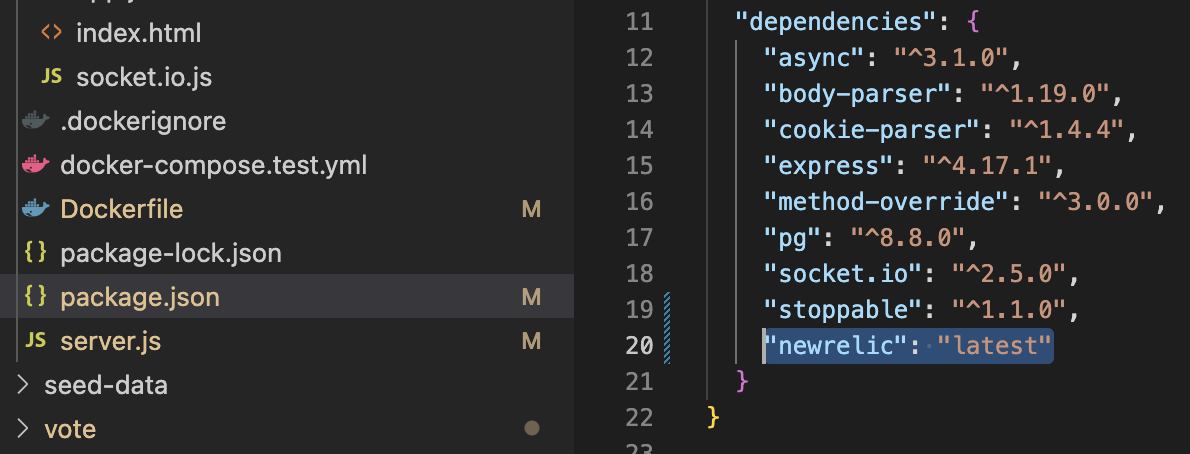
- In the
server.jsfile, add this line to the top:var newrelic = require('newrelic');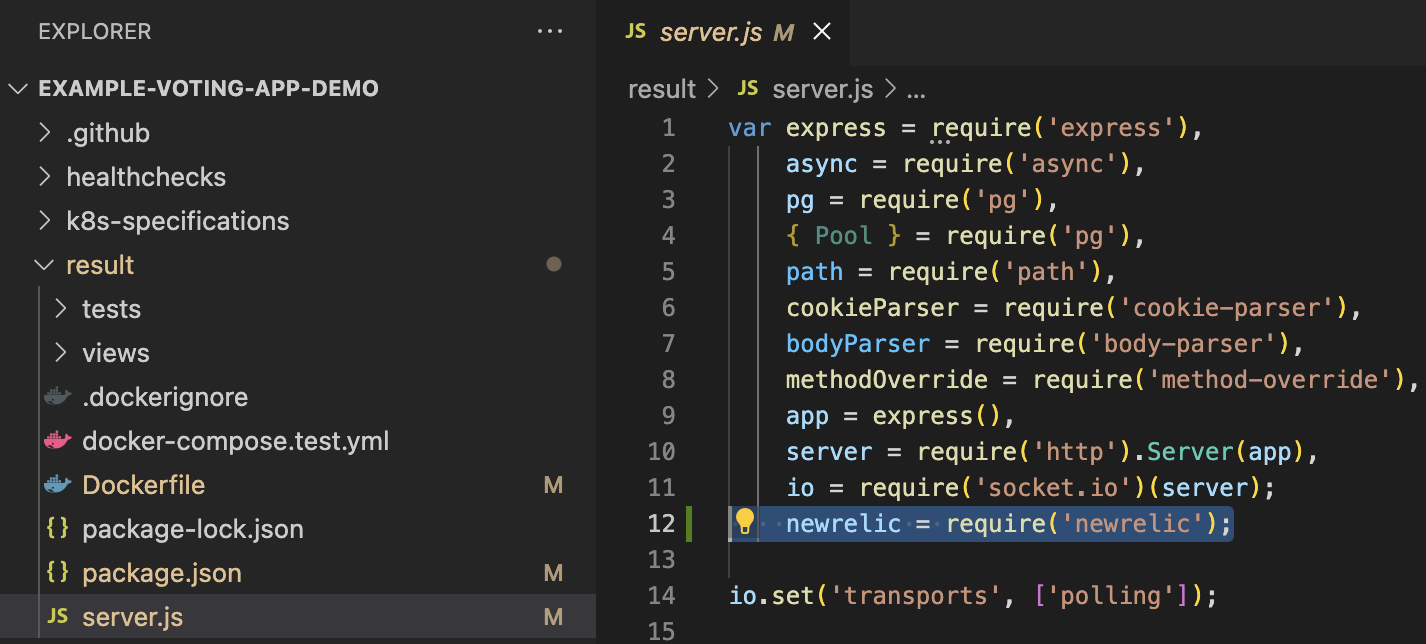
- Change Directory in your Terminal to the results directory and run the following command
npm install newrelic --save - Once install is complete, navigate back to the root directory of the application
- Setting up your ENV variables
- For the Dockerfile in the
resultfolder, we will need to add this ENV variableENV NEW_RELIC_NO_CONFIG_FILE=true - Optionally, you can also add other ENV variables like
ENV NEW_RELIC_DISTRIBUTED_TRACING_ENABLED=true \andNEW_RELIC_LOG=stdout. Please refer to here.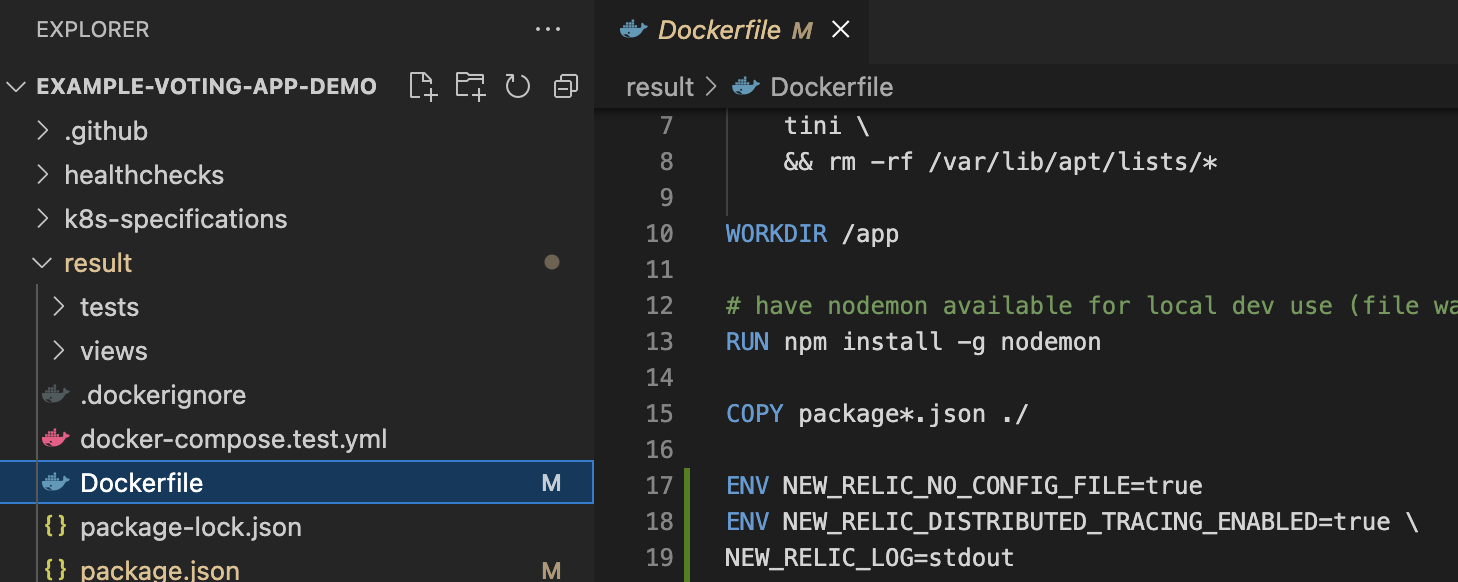
- Since we do not have a newrelic.js file, we will need to setup the ENV variables for our license key and app name. In the same dockerfile, add
ENV NEW_RELIC_APP_NAME=["Insert results services name"]andENV NEW_RELIC_LICENSE_KEY=["Insert Ingest License Key"]. Make sure to use a unique application name that doesn't exist in New Relic One.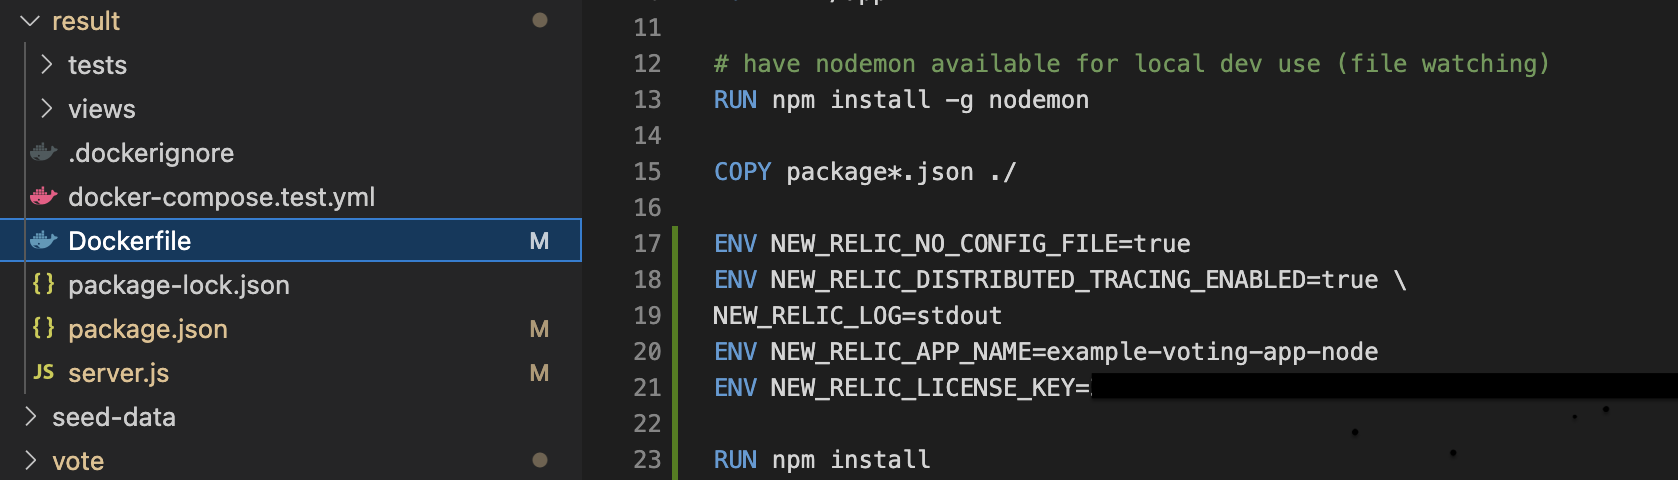
- For the Dockerfile in the
- In your terminal, run this following command to build your Docker containers:
docker compose build --no-cache- Afterwards, we can run the Docker images by executing
docker compose up
- Afterwards, we can run the Docker images by executing
- Continue to the next step in New Relic One to test for a successful connection.


Instructions
-
We will need to send some custom events in order to create a custom dashboard
- In
vote/app.pyadd these 2 lines at the top
import newrelic.agent newrelic.agent.initialize('/app/newrelic.ini')- After line 39, we will add this block of code to customize an event and to send it to New Relic
cats = 0
dogs = 0
params = None
if vote == 'a':
    params = {'cats': 1}
if vote == 'b':
    params = {'dogs': 1}
newrelic.agent.record_custom_event('votes', params,application=newrelic.agent.application())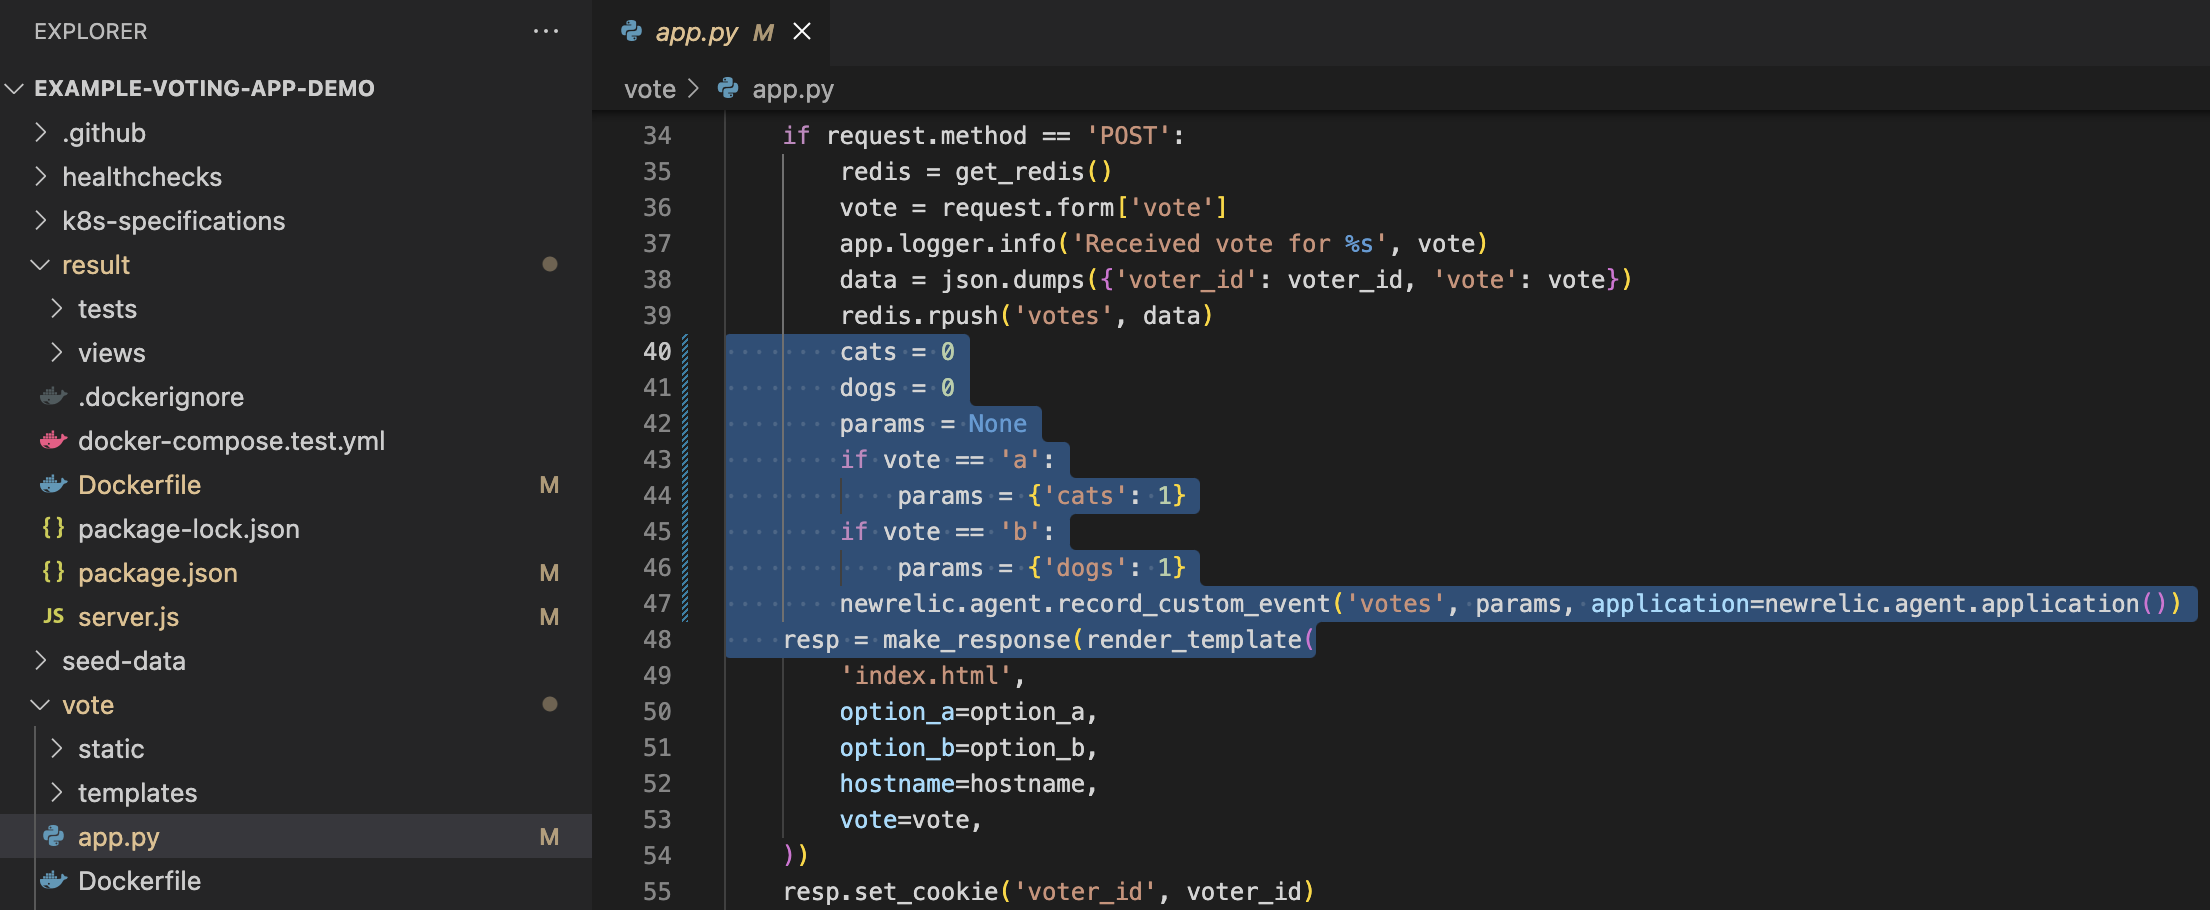
- Run your app and the custom events data should flow into New Relic One
- In
-
In your New Relic One dashboard on the left, click on
Dashboards, then on the top right, click onCreate a dashboard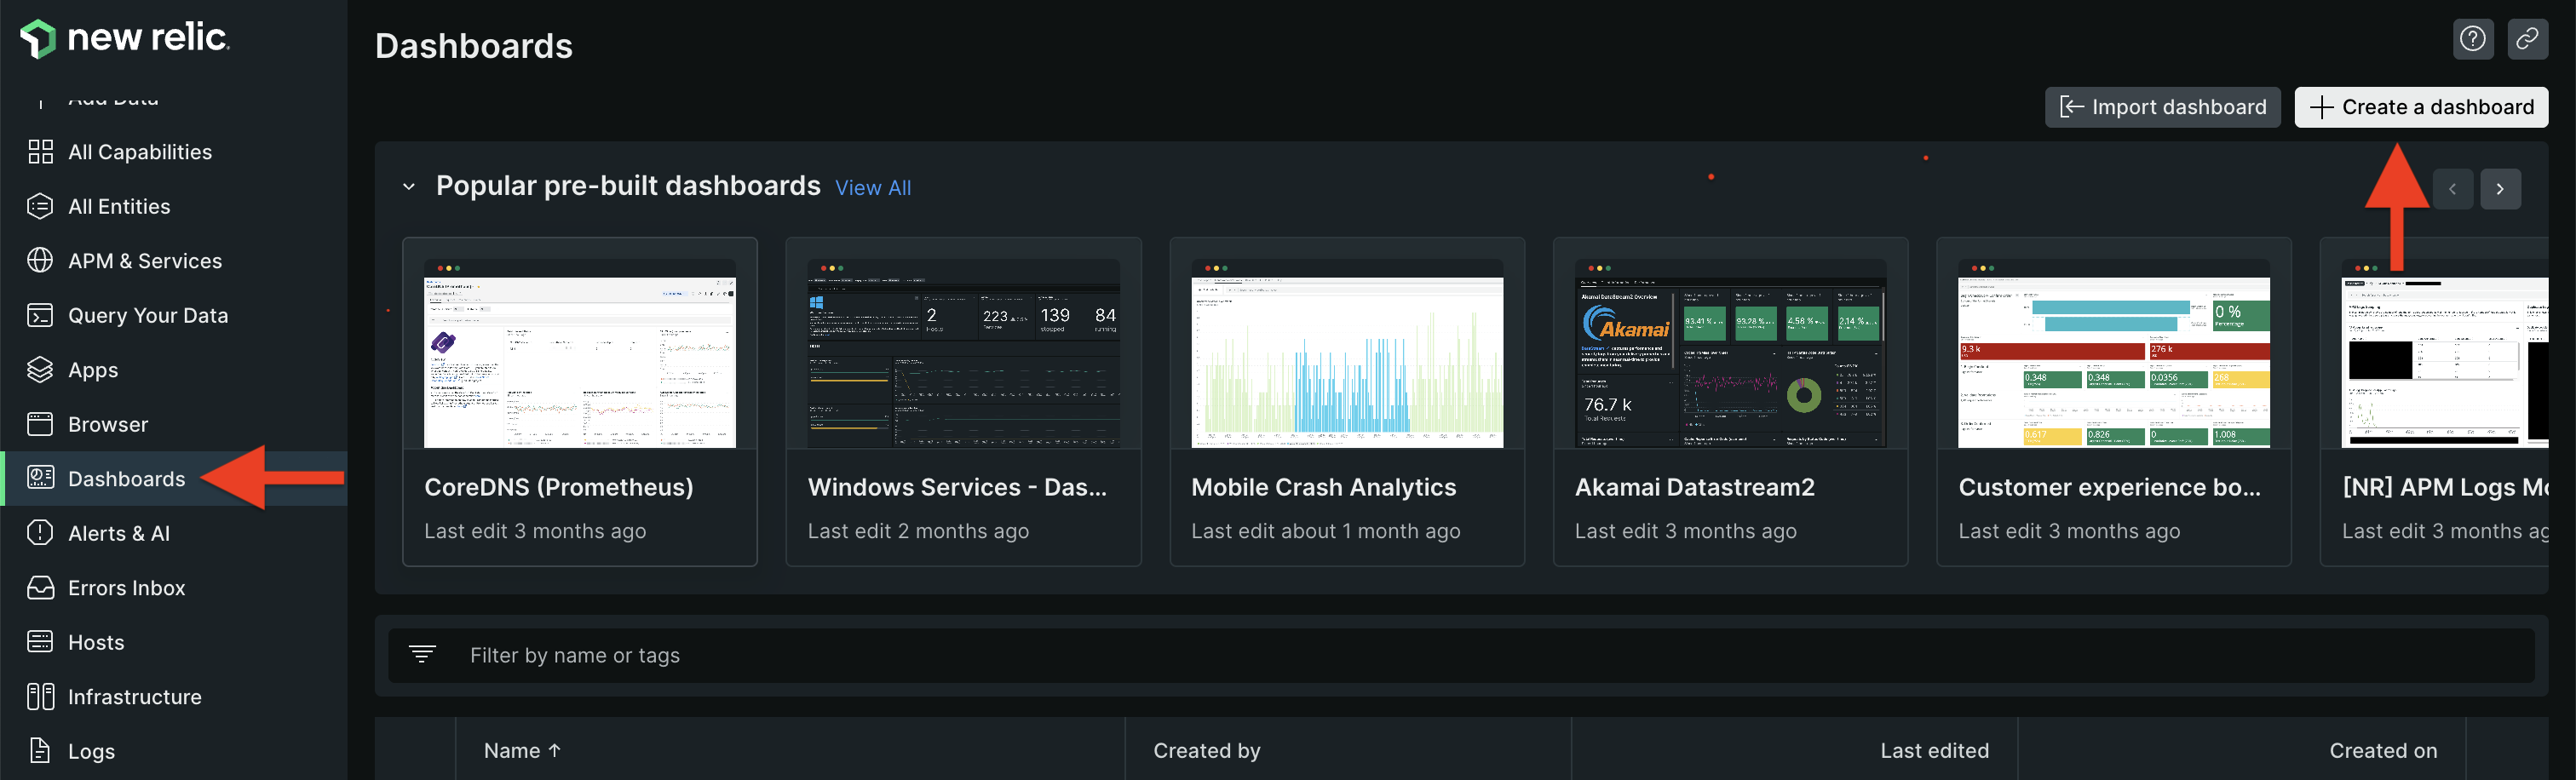
-
Select
Create a new dashboardand on the next page, enter a name before proceeding.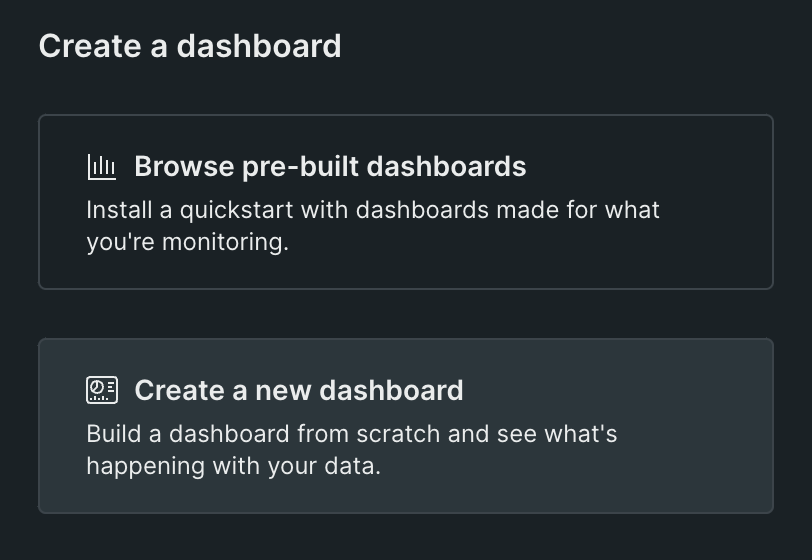

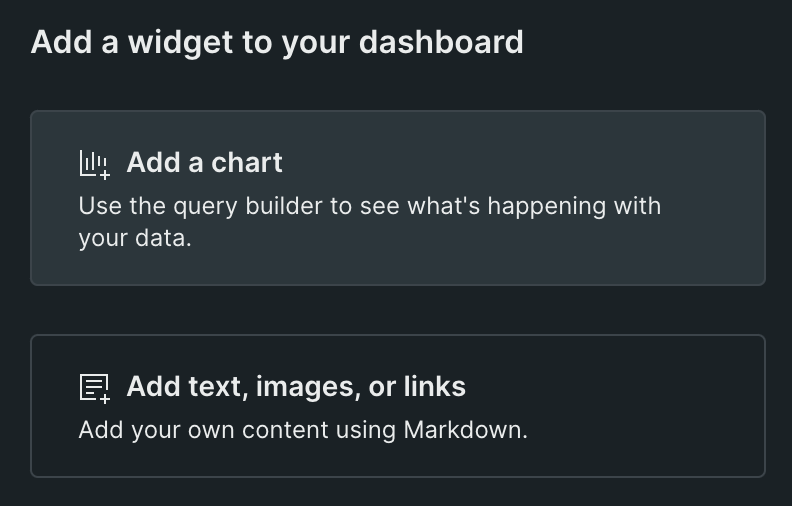
-
Click on any panel to
Add a new chartand in the pop-up on the right, selectAdd a chart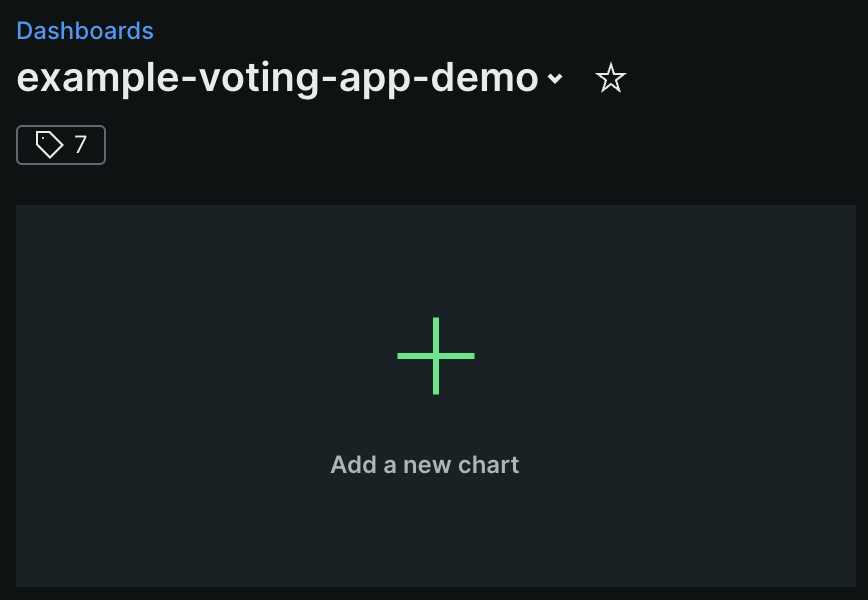
-
Enter the follow query
SELECT count(*) FROM votes FACET appName TIMESERIES SINCE 5 hours agoand hit theRunbutton. You should be able to see a chart of the results being sent from the application. You can also customize how the chart looks, for example, we can change the "Chart Type" -
Changing the "Chart Type" to Stacked Bar will look like this:


Steps
The folder k8s-specifications contains the YAML specifications of the Voting App's services.
Run the following command to create the deployments and services. Note it will create these resources in your current namespace (default if you haven't changed it.)
kubectl create -f k8s-specifications/The vote web app is then available on port 31000 on each host of the cluster, the result web app is available on port 31001.
To remove them, run:
kubectl delete -f k8s-specifications/The voting application only accepts one vote per client browser. It does not register additional votes if a vote has already been submitted from a client.
This isn't an example of a properly architected perfectly designed distributed app... it's just a simple example of the various types of pieces and languages you might see (queues, persistent data, etc), and how to deal with them in Docker at a basic level.