If you like or use this project, please provide feedback to author - Star it ★.
If you want to discover all new features of Zenoss 5, than please use www.zenoss5taster.com. It will provision brand new Zenoss 5 Core instance for testing/developement in ⌚ 10 minutes. Provisioned instance has 8CPU, 30GB RAM and lot of SSD filespace. You will have full access to Control Center/OpenTSDB/HBase/RabbitMQ. No deployment, no config, no DNS configuration. It's just click and play service.
Auto-deployment script for Zenoss 5 on CentOS 7.x / Red Hat Enterprise Linux 7.x / Ubuntu 14. A 64-bit build is required.
The script included in this directory will automatically install Zenoss 5 Core / Resource Manager 5 and Control Center for you. Usage of auto-deployment script:
# cd /tmp
# curl -O https://raw.githubusercontent.com/jangaraj/zenoss5-core-autodeploy/master/core-autodeploy.sh
# chmod +x core-autodeploy.sh
# ./core-autodeploy.sh
The script will take several minutes (around 15-30) to complete. When done, you should be able to visit Control Center in a web browser to start Zenoss 5 application. Easy Zenoss installation.
Script requires mounted filesystems:
/var/lib/docker
/opt/serviced/var
/opt/serviced/var/volumes
/opt/serviced/var/backups
Or you can pass a block device for automatic formatting and mounting of required filesystem(s). Confirmation is needed before formatting. Available options:
# ./core-autodeploy.sh -d </var/lib/docker block device> -s </opt/serviced/var block device>
 -v </opt/serviced/var/volumes block device> -b </opt/serviced/var/backups block device>

# ./core-autodeploy.sh -d /dev/sdb1 -s /dev/sdb2 -v /dev/sdc1 -b /dev/sdd1
For advandced users only (you must be familiar with documentation, so you will be able identify some script warnings/errors, which can be ignored):
# # install Zenoss 5 Core host
# ./core-autodeploy.sh -h '<MASTER IP>'

# # install Resource Manager 5 master, it will fail if your Docker hub account doesn't have access to private Zenoss repositories
# ./core-autodeploy.sh -r resmgr -u <DOCKER HUB USERNAME> -e <DOCKER HUB EMAIL> -p '<DOCKER HUB PASSWORD>'

# # install Resource Manager 5 host, it will fail if your Docker hub account doesn't have access to private Zenoss repositories
# ./core-autodeploy.sh -r resmgr -h '<MASTER IP>' -u <DOCKER HUB USERNAME> -e <DOCKER HUB EMAIL> -p '<DOCKER HUB PASSWORD>'

# # install Resource Manager 5 master + pull Service Impact Docker image, it will fail if your Docker hub account doesn't have access to private Zenoss repositories
# ./core-autodeploy.sh -r resmgr -i impact -u <DOCKER HUB USERNAME> -e <DOCKER HUB EMAIL> -p '<DOCKER HUB PASSWORD>'
See [full installation log] (https://github.com/jangaraj/zenoss5-core-autodeploy/blob/master/doc/installation-log-aws-ec2.txt) of autodeployement on AWS EC2 spot test instance.
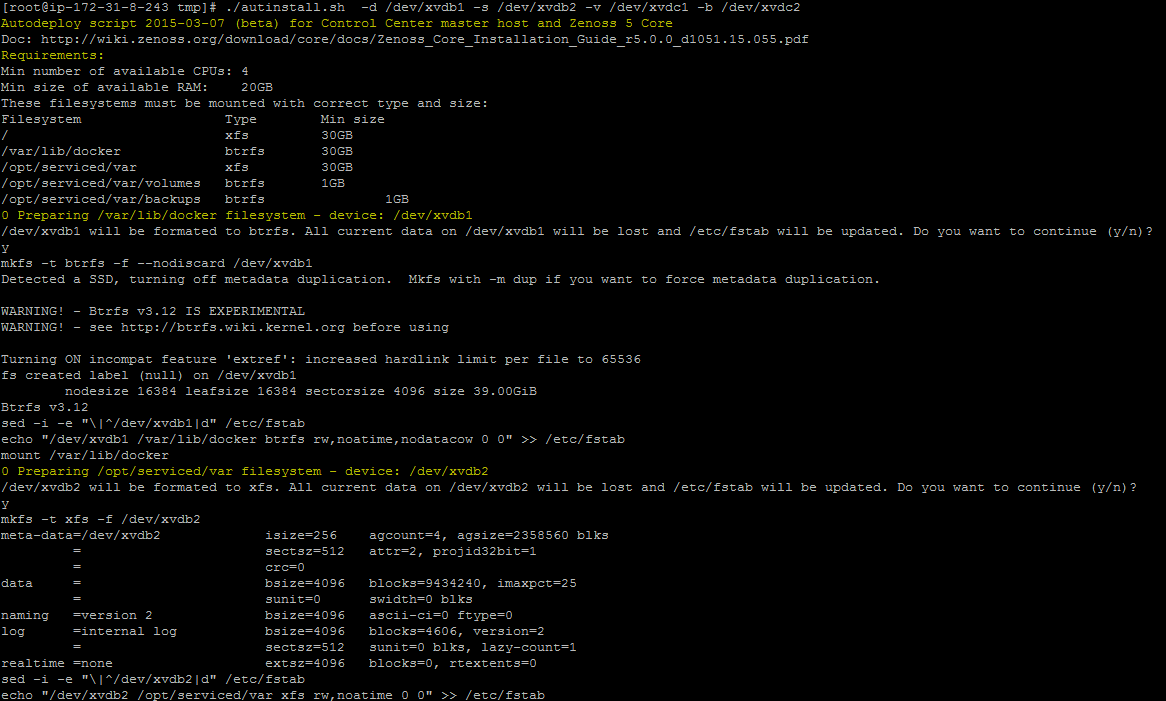
[root@ip-172-31-8-243 tmp]# ./core-autodeploy.sh  -d /dev/xvdb1 -s /dev/xvdb2 -v /dev/xvdc1 -b /dev/xvdc2
Autodeploy script 2015-03-07 for Control Center master host and Zenoss 5 Core
Install guide: http://wiki.zenoss.org/download/core/docs/Zenoss_Core_Installation_Guide_r5.0.0_latest.pdf
Requirements:
Min number of available CPUs: 4
Min size of available RAM:    20GB
These filesystems must be mounted with correct type and size:
Filesystem                  Type        Min size
/                           xfs         30GB
/var/lib/docker             btrfs       30GB
/opt/serviced/var           xfs         30GB
/opt/serviced/var/volumes   btrfs       1GB
/opt/serviced/var/backups   btrfs       1GB
0 Preparing /var/lib/docker filesystem - device: /dev/xvdb1
/dev/xvdb1 will be formated to btrfs. All current data on /dev/xvdb1 will be lost and /etc/fstab will be updated. Do you want to continue (y/n)?
y
mkfs -t btrfs -f --nodiscard /dev/xvdb1
Detected a SSD, turning off metadata duplication.  Mkfs with -m dup if you want to force metadata duplication.

WARNING! - Btrfs v3.12 IS EXPERIMENTAL
WARNING! - see http://btrfs.wiki.kernel.org before using

Turning ON incompat feature 'extref': increased hardlink limit per file to 65536
fs created label (null) on /dev/xvdb1
        nodesize 16384 leafsize 16384 sectorsize 4096 size 39.00GiB
Btrfs v3.12
sed -i -e "\|^/dev/xvdb1|d" /etc/fstab
echo "/dev/xvdb1 /var/lib/docker btrfs rw,noatime,nodatacow 0 0" >> /etc/fstab
mount /var/lib/docker
0 Preparing /opt/serviced/var filesystem - device: /dev/xvdb2
/dev/xvdb2 will be formated to xfs. All current data on /dev/xvdb2 will be lost and /etc/fstab will be updated. Do you want to continue (y/n)?
y
mkfs -t xfs -f /dev/xvdb2
meta-data=/dev/xvdb2             isize=256    agcount=4, agsize=2358560 blks
         =                       sectsz=512   attr=2, projid32bit=1
         =                       crc=0
data     =                       bsize=4096   blocks=9434240, imaxpct=25
         =                       sunit=0      swidth=0 blks
naming   =version 2              bsize=4096   ascii-ci=0 ftype=0
log      =internal log           bsize=4096   blocks=4606, version=2
         =                       sectsz=512   sunit=0 blks, lazy-count=1
realtime =none                   extsz=4096   blocks=0, rtextents=0
sed -i -e "\|^/dev/xvdb2|d" /etc/fstab
echo "/dev/xvdb2 /opt/serviced/var xfs rw,noatime 0 0" >> /etc/fstab
mount /opt/serviced/var
...
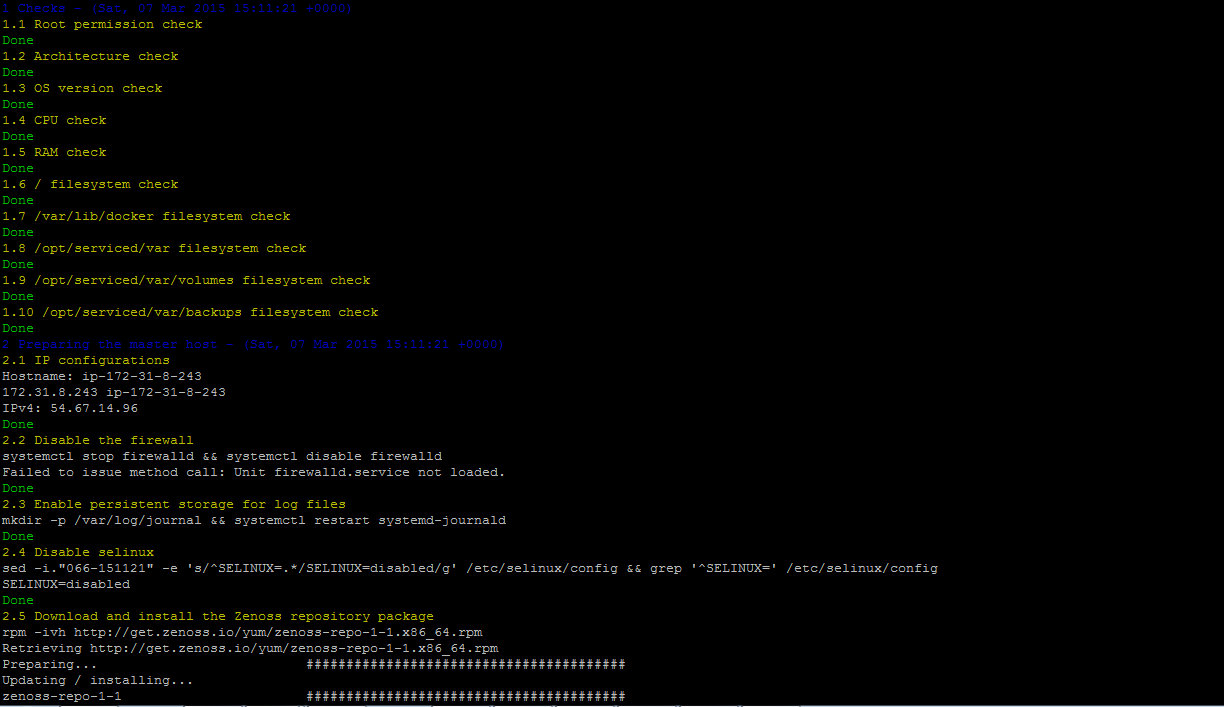
Start of autodeployement:
 Part of autodeployement:
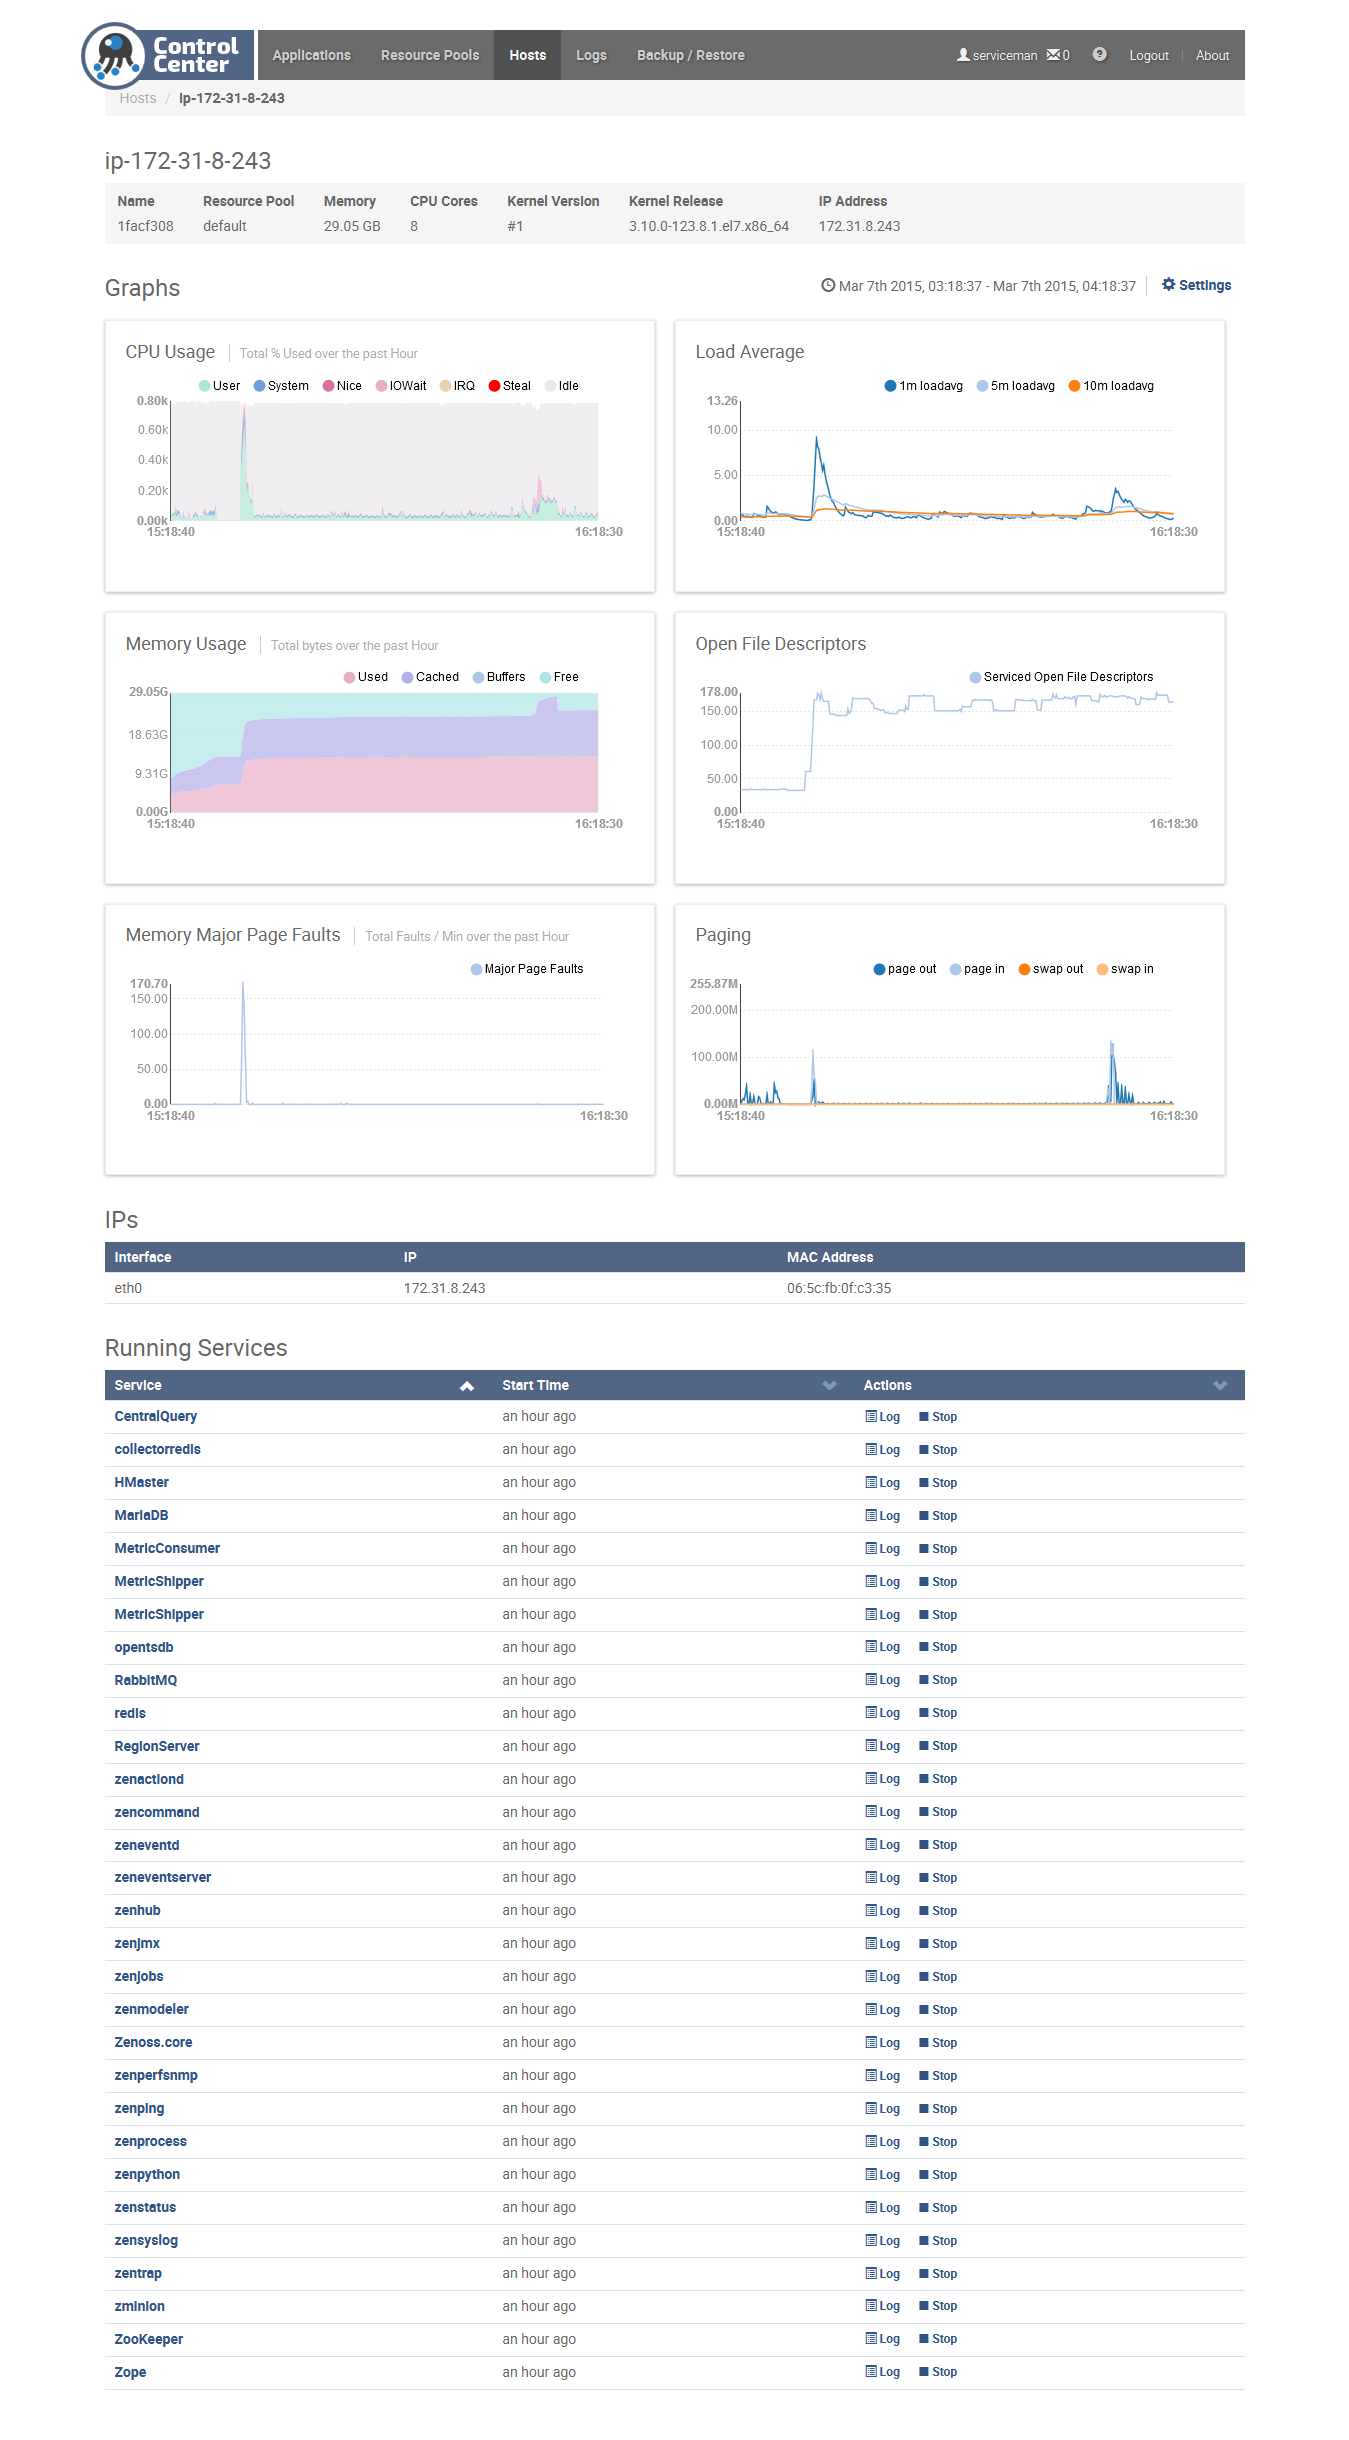
 Host stat in Control Center:
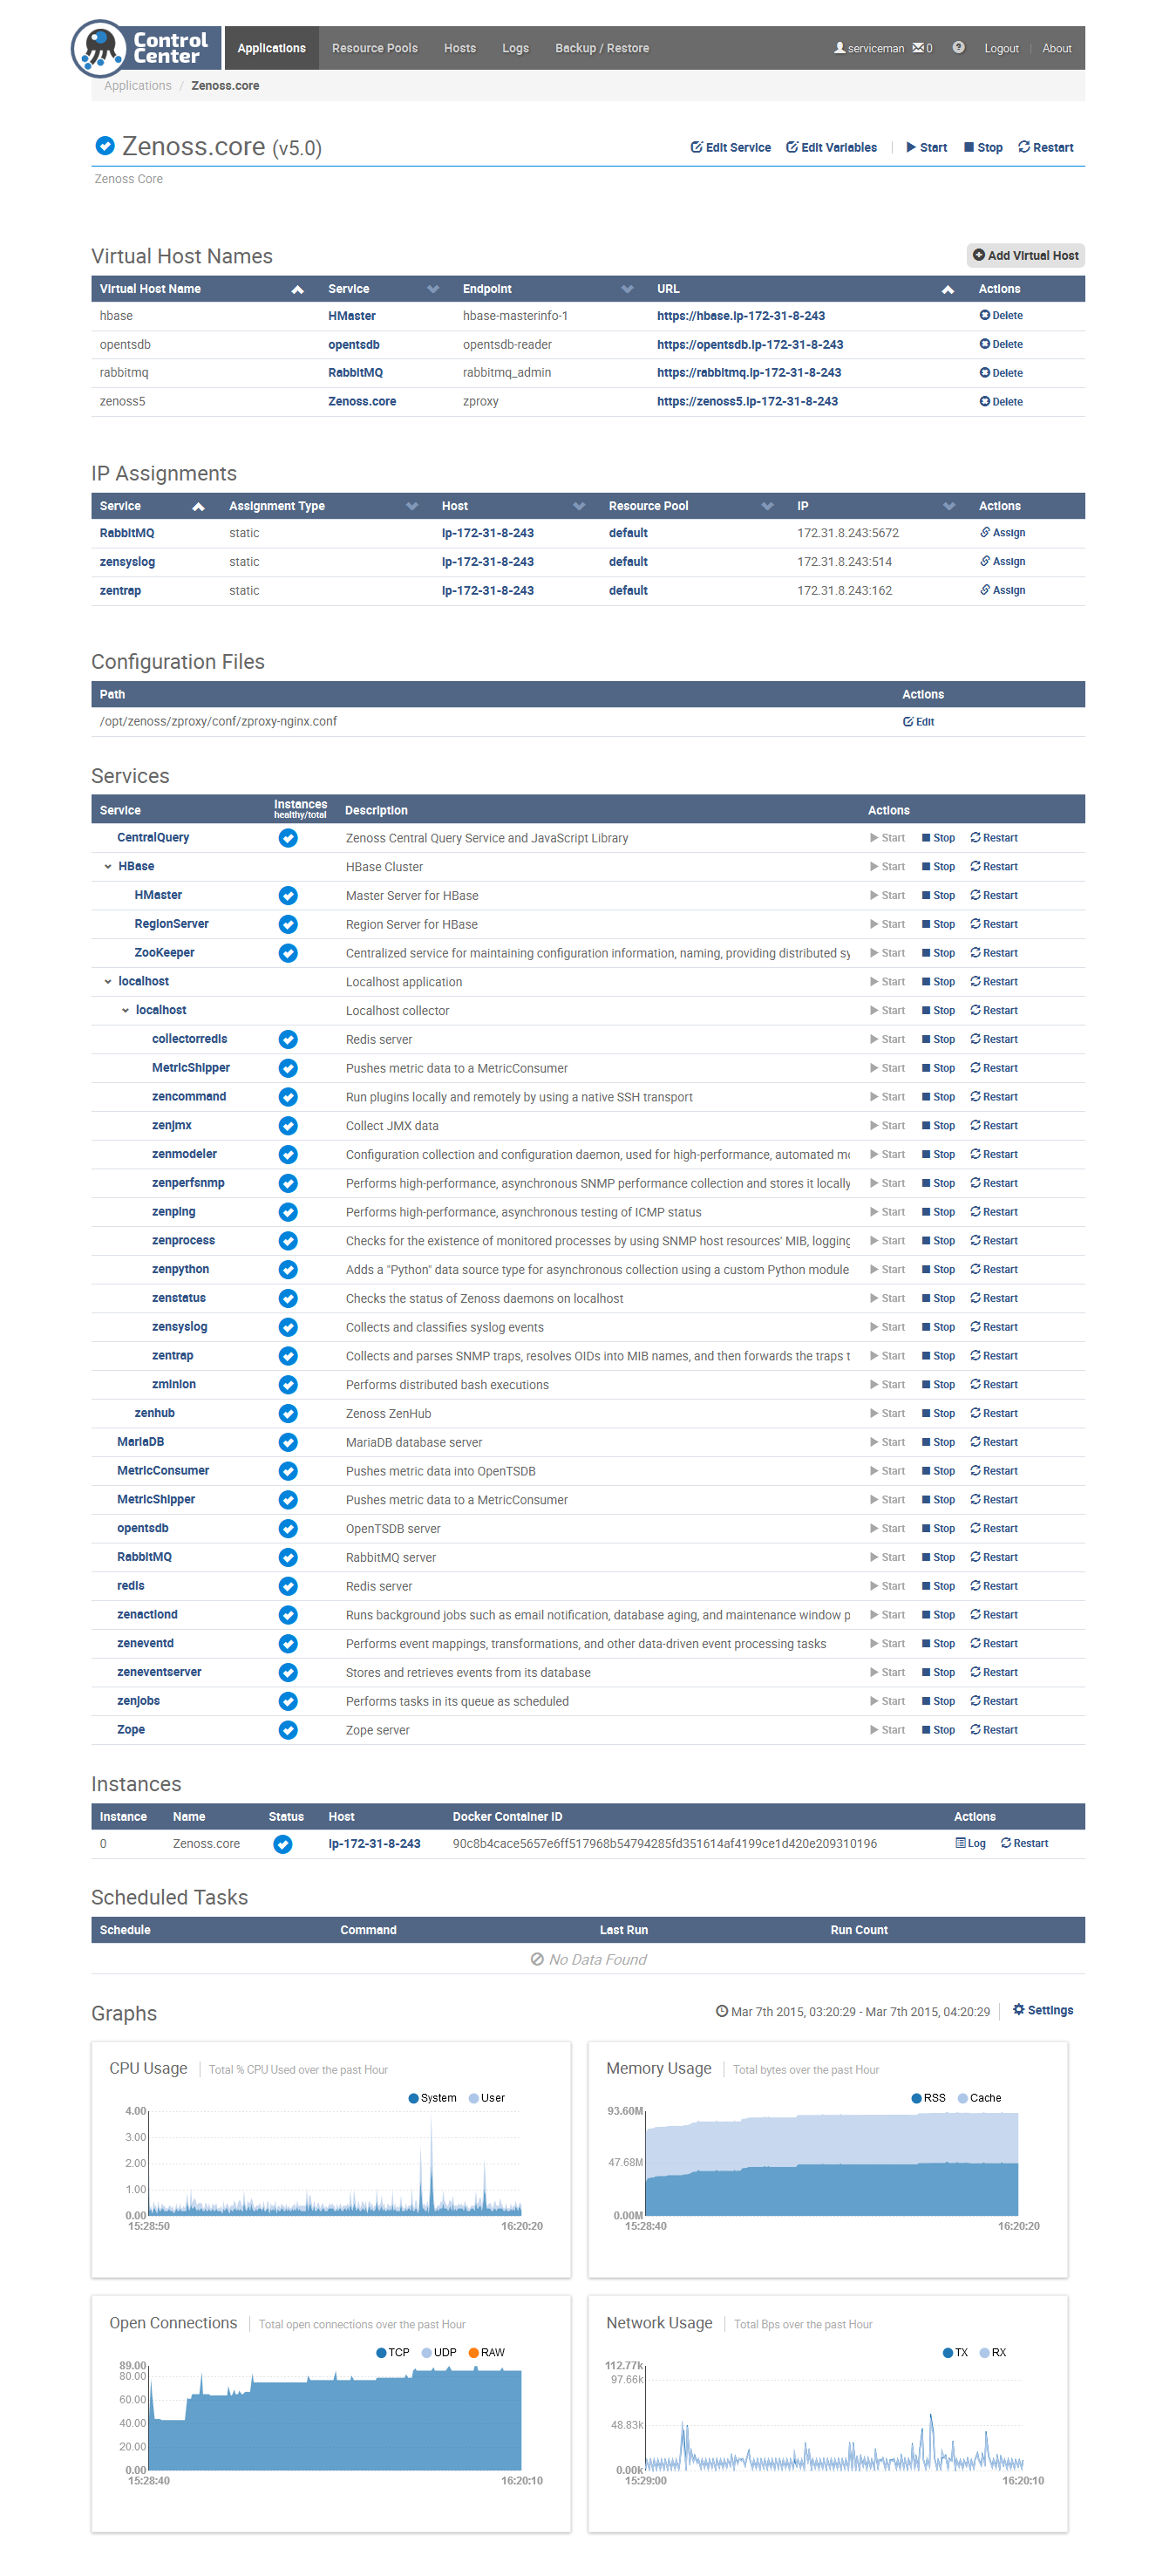
 Zenoss Core 5 application overview in Control Center:
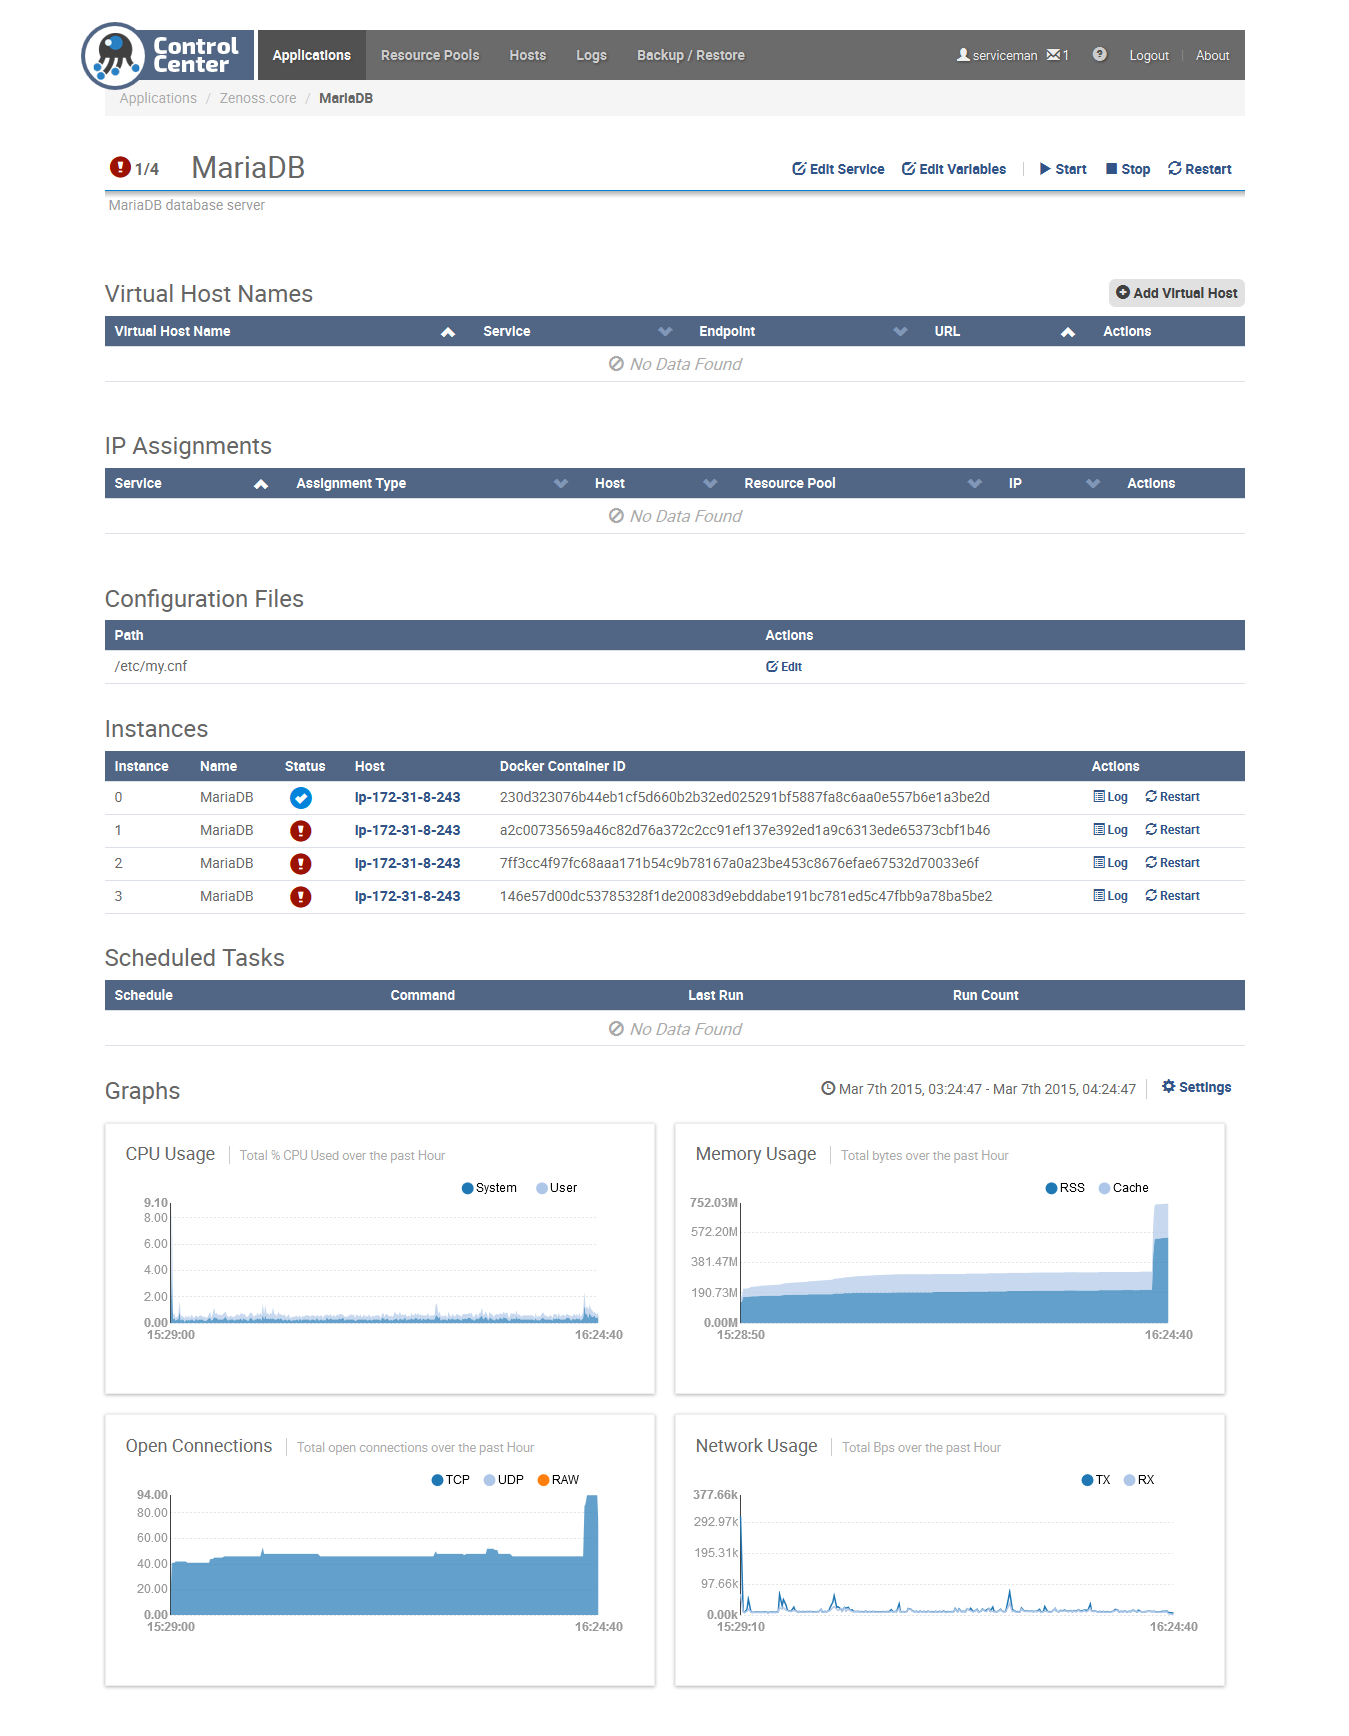
 4 instances of MariaDB in Control Center:
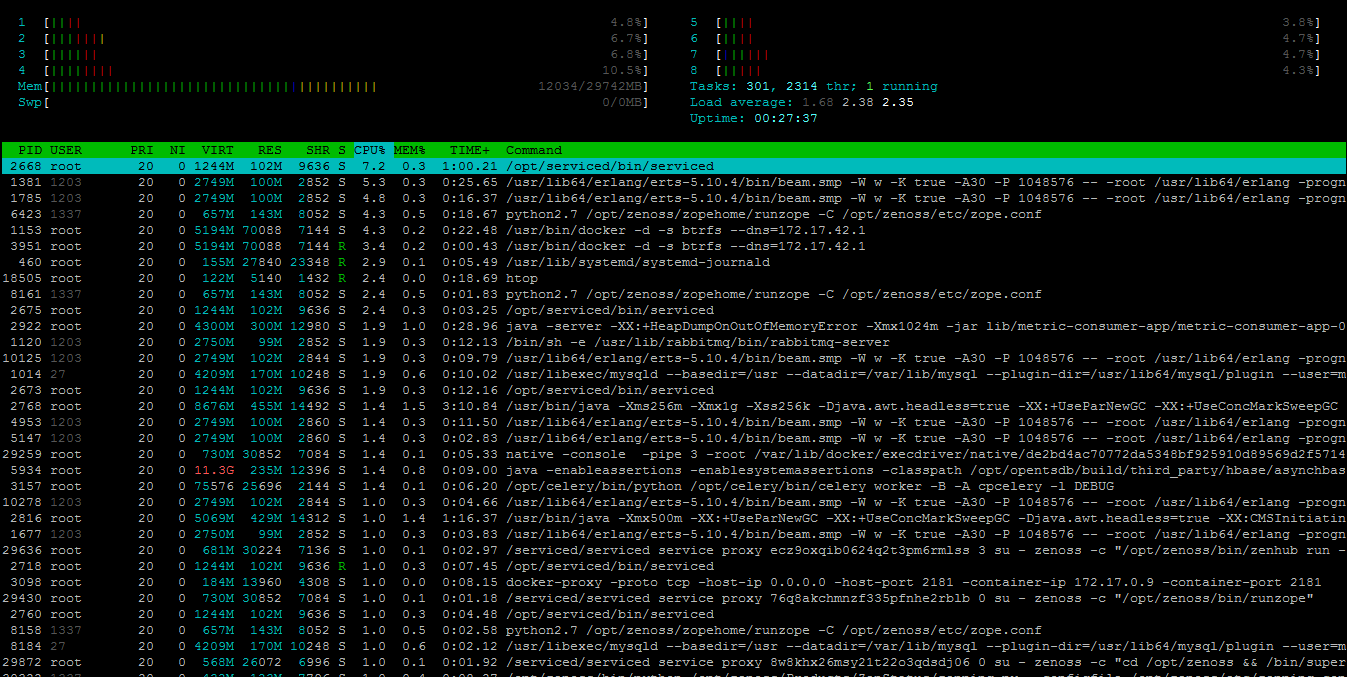
 htop of running Zenoss Core 5 with 0 monitored devices:
If you have any problems, please ask Zenoss community (IRC/forum/Github issue
tracker) for help and provide full output (http://pastebin.com) from auto-deploy script
and journalctl -u systemd -f (RHEL/Centos) / tailf /var/log/upstart/serviced.log (Ubuntu) command please.
Or follow manual installation guide.
Devops Monitoring zExpert, who loves monitoring systems, which start with letter Z. Those are Zabbix and Zenoss. [LinkedIn] (http://uk.linkedin.com/in/jangaraj/).