谷粒商城项目
-
ubuntu安装docker:
curl -fsSL get.docker.com -o get-docker.sh sudo sh get-docker.sh --mirror Aliyun //启动docker systemctl enable docker systemctl start docker -
安装mysql
docker pull --platform linux/amd64 mysql

//启动mysql容器
docker run -p 3306:3306 --name mysql \
-v /mydata/mysql/log:/var/log/mysql \
-v /mydata/mysql/data:/var/lib/mysql \
-v /mydata/mysql/conf:/etc/mysql  \
-e MYSQL_ROOTPASSWORD=root \
-d mysql:5.7
M1 芯片有bug,直接在主机使用docker安装mysql
version: "3.9"
services:
  db:
    container_name: mysql57
    image: mysql/mysql-server:5.7
    environment:
      MYSQL_DATABASE: 'db'
      MYSQL_ROOT_PASSWORD: 'root'
      MYSQL_ROOT_HOST: '%'
    ports:
      - '3306:3306'
    expose:
      - '3306'
    volumes:
      - './mydata/mysql/data:/var/lib/mysql'
      - './initial.sql:/docker-entrypoint-initdb.d/initial.sql'
      - './mysql_5.1.7/SQLDATA:/SQLDATA'
      - './mydata/mysql/conf:/etc/mysql'

  # for WebUI
  adminer:
    image: adminer:4.8.1
    ports:
      - "10010:8080"
-
安装redis
docker pull redis -
配置git
git config --global user.name  ""
git config --global user.email ""

ssh-keygen -t rsa -C "email"
商品服务、仓储服务、订单服务、优惠券服务、用户服务
共同点:
1)web,openfeign
2)每一个服务包名都是com.gulimall.xxx(product/order/ware/coupon/member)
3)模块名 gulimall-xxx

导入数据库文件

git clone https://gitee.com/renrenio/renren-fast.git

将lombok 版本修改为:1.8.20
git clone https://gitee.com/renrenio/renren-fast-vue.git

M1 芯片运行时需要将node版本降级:
解决方法:将node版本降低为14
1.安装版本控制工具: sudo npm install n -g
2.安装14版本:sudo n 14
  ps:安装稳定版本 sudo n stable
     安装最新版本 sudo n latest
3.npm install --ignore-scripts (执行前删除node-modules)
renren-fast-vue 报错:

npm install --save node-sass --unsafe-perm=true --allow-root

安装代码生成器:
git clone https://gitee.com/renrenio/renren-generator.git
springboot2.6及以后的版本要在yml加上
spring:
  main:
    allow-circular-references: true
要不然会报一个循环引用的错误
使用 renren-generator 生成代码 然后放入之前创建的模块

生成代码后将 UndoLogEntity中的Longblob修改为 byte,java无法识别Longblob
这里遇到一个bug:

是因为把renren-generator中的@RequestMapping("${moduleName}/${pathName}")注释掉了。
Spring Cloud Alibaba 致力于提供微服务开发的一站式解决方案。此项目包含开发分布式应用 微服务的必需组件,方便开发者通过 Spring Cloud 编程模型轻松使用这些组件来开发分布 式应用服务。
依托 Spring Cloud Alibaba,您只需要添加一些注解和少量配置,就可以将 Spring Cloud 应用 接入阿里微服务解决方案,通过阿里中间件来迅速搭建分布式应用系统。
SpringCloud 部分组件停止维护和更新,给开发带来不便; SpringCloud 部分环境搭建复杂,没有完善的可视化界面,我们需要大量的二次开发和定制 SpringCloud 配置复杂,难以上手,部分配置差别难以区分和合理应用
结合 SpringCloud Alibaba 最终的技术搭配方案:
SpringCloud Alibaba - Nacos:注册中心(服务发现**/**注册)
SpringCloud Alibaba - Nacos:配置中心(动态配置管理)
SpringCloud - Ribbon:负载均衡
SpringCloud - Feign:声明式
HTTP 客户端(调用远程服务)
SpringCloud Alibaba - Sentinel:服务容错(限流、降级、熔断)
SpringCloud - Gateway:API 网关(webflux 编程模式)
SpringCloud - Sleuth:调用链监控
SpringCloud Alibaba - Seata:原 Fescar,即分布式事务解决方案
在 common 中引入依赖:
 <dependencyManagement>
        <dependencies>
            <dependency>
                <groupId>com.alibaba.cloud</groupId>
                <artifactId>spring-cloud-alibaba-dependencies</artifactId>
                <version>2021.0.4.0</version>
                <type>pom</type>
                <scope>import</scope>
            </dependency>
        </dependencies>
</dependencyManagement>
配置 Nacos Server 地址
spring:
	  cloud:
    nacos:
      discovery:
        server-addr: http://localhost:8848
在springboot启动类使用 @EnableDiscoveryClient 注解开启服务注册与发现功能
这里需要下载nacos客户端 http://127.0.0.1:8848
启动命令:sh startup.sh -m standalone代表以非集群方式启动

这里使用的版本号:
spring-cloud-alibaba-dependencies: 2021.0.1.0
spring-cloud:2021.0.1
springboot:2.6.11
nacos客户端:2.2.0
引入 openfeign依赖,当前服务就可以远程调用其他服务
<dependency>
			<groupId>org.springframework.cloud</groupId>
			<artifactId>spring-cloud-starter-openfeign</artifactId>
</dependency>
然后编写一个接口,告诉SpringCloud这个接口需要调用远程服务。
所有需要远程调用的接口放在feign包中

FeignClient注解表示需要调用的远程服务名,然后声明接口的每一个方法都是调用哪个远程服务的哪个请求。
接口中放需要远程调用的签名,注解中需要其完整的路径。
@RequestMapping("/coupon/coupon/member/list")
public R memberCoupons();
使用@EnableFeignClient开启远程调用的功能.

这里启动时会报一个error:

SpringCloud Feign在Hoxton.M2 RELEASED版本之后不再使用Ribbon而是使用spring-cloud-loadbalancer,所以不引入spring-cloud-loadbalancer会报错(无法获取到验证码的bug 503)
引入依赖:
<dependency>
   <groupId>org.springframework.cloud</groupId>
   <artifactId>spring-cloud-loadbalancer</artifactId>
</dependency>
-
Nacos 配置中心
给common 中引入依赖
<dependency>
    <groupId>com.alibaba.cloud</groupId>
    <artifactId>spring-cloud-starter-alibaba-nacos-config</artifactId>
</dependency>
在应用的 /src/main/resources/bootstrap.properties 配置文件中配置 Nacos Config 元数据
spring.application.name=gulimall-coupon
spring.cloud.nacos.config.server-addr=127.0.0.1:8848
如果需要对 Bean 进行动态刷新,请参照 Spring 和 Spring Cloud 规范。推荐给类添加
@RefreshScope或@ConfigurationProperties注解。这里使用@RefreshScope这里遇到了一个无法引入
bootstrap.properties的问题,可以通过降低springboot版本或者添加依赖解决这个问题<dependency> <groupId>org.springframework.cloud</groupId> <artifactId>spring-cloud-starter-bootstrap</artifactId> <version>3.1.0</version> </dependency>创建配置文件:

这里的
Data id与bootstrap.properties 配置文件中的spring.application.name+“.properties” -
nacos 命名空间与配置分组
在配置中心创建命名空间

在生产环境中创建新的配置
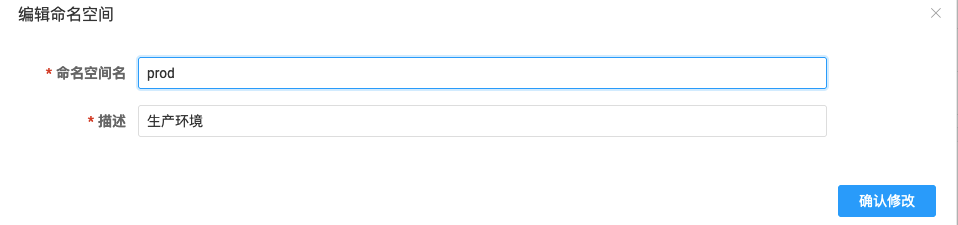
在bootstrap.properties中添加
spring.cloud.nacos.config.namespace可以切换配置文件,利用命名空间可以做环境隔离。可以基于环境或者基于微服务做隔离。
任何文件都可以放在配置中心中,只需要在bootstrap.properties 中说明加载配置中心的哪些配置即可。配置中心中有的优先使用配置中心中的文件。
-
网关服务
1.开启服务注册发现:`@EnableDiscoveryClient,配置nacos的注册中心地址
启动网关服务时,spring-cloud-starter-gateway和spring-boot-starter-web依赖发生冲突,因为gateway依赖包内置spring-boot-starter-webflux依赖,与web包内的spring-boot-starter-webflux依赖起了冲突。在 application.properties中添加配置
spring.main.web-application-type=reactive2.gateway配置
  cloud:
    gateway:
      routes:
        - id: test_route
          uri: http://www.baidu.com
          predicates:
            - Query=url,baidu

        - id: qq_route
          uri: https://www.qq.com
          predicates:
            - Query=url,qq


docker pull rabbitmq:3.9.7-management
镜像安装完成后启动rabbitmq中的插件:rabbitmq-plugins enable rabbitmq_management

-
入门案例


安装vue2:npm install vue@2.7.14
<!DOCTYPE html>
<html lang="en">

<head>
    <meta charset="UTF-8">
    <meta http-equiv="X-UA-Compatible" content="IE=edge">
    <meta name="viewport" content="width=device-width, initial-scale=1.0">
    <title>Document</title>
</head>

<body>
    <div id="app">
        Hello World, {{name}} is handsome
    </div>

</body>

<script src="./node_modules/vue/dist/vue.js"></script>
<script>
    const vm = new Vue({
        el: "#app",
        data: {
            name: "张三"
        }
    })
</script>
</html>数据绑定v-model,模型的变化会引起视图的变化,即实现双向绑定
<!DOCTYPE html>
<html lang="en">

<head>
    <meta charset="UTF-8">
    <meta http-equiv="X-UA-Compatible" content="IE=edge">
    <meta name="viewport" content="width=device-width, initial-scale=1.0">
    <title>Document</title>
</head>

<body>
    <div id="app">
        <input type="text" v-model="num" />
        <h1> Hello World, {{name}} is handsome,有 {{num}} 人为他点赞</h1>
    </div>

</body>

<script src="./node_modules/vue/dist/vue.js"></script>
<script>
    const vm = new Vue({
        el: "#app",
        data: {
            name: "张三",
            num: 0
        }
    })
</script>

</html>
使用v-on绑定事件
<!DOCTYPE html>
<html lang="en">

<head>
    <meta charset="UTF-8">
    <meta http-equiv="X-UA-Compatible" content="IE=edge">
    <meta name="viewport" content="width=device-width, initial-scale=1.0">
    <title>Document</title>
</head>

<body>
    <div id="app">
        <button v-on:click="num++">点赞</button>
        <h1> Hello World, {{name}} is handsome,有 {{num}} 人为他点赞</h1>
    </div>

</body>

<script src="./node_modules/vue/dist/vue.js"></script>
<script>
    const vm = new Vue({
        el: "#app",
        data: {
            name: "张三",
            num: 0
        }
    })
</script>

</html>
v-text与v-html
<!DOCTYPE html>
<html lang="en">

<head>
    <meta charset="UTF-8">
    <meta http-equiv="X-UA-Compatible" content="IE=edge">
    <meta name="viewport" content="width=device-width, initial-scale=1.0">
    <title>Document</title>
</head>

<body>
    <div id="app">
        <span v-html="msg"> {{msg}} <br /></span>
        <span v-text="msg"> {{msg}} <br /></span>
    </div>

</body>
<script src="./node_modules/vue/dist/vue.js"></script>
<script>
    const vm = new Vue({
        el: "#app",
        data: {
            msg: "<h1>Hello World<h1/>",
        },

    })
</script>

</html>
使用v-bind绑定 href
<!DOCTYPE html>
<html lang="en">

<head>
    <meta charset="UTF-8">
    <meta http-equiv="X-UA-Compatible" content="IE=edge">
    <meta name="viewport" content="width=device-width, initial-scale=1.0">
    <title>Document</title>
</head>

<body>
    <div id="app">
        <a v-bind:href="link">gogogo</a>
    </div>
</body>

<script src="./node_modules/vue/dist/vue.js"></script>
<script>
    const vm = new Vue({
        el: "#app",
        data: {
            link: "http://www.baidu.com"
        }
    })
</script>
</html>
<!DOCTYPE html>
<html lang="en">

<head>
    <meta charset="UTF-8">
    <meta http-equiv="X-UA-Compatible" content="IE=edge">
    <meta name="viewport" content="width=device-width, initial-scale=1.0">
    <title>Document</title>
</head>

<body>
    <div id="app">
        <a v-bind:href="link">gogogo</a><br />
        设置颜色:<input v-model="setColor" type="text">
        <span v-bind:class="{active:isActive,'text-danger':hasError}" v-bind:style="{color: setColor}">你好</span>
    </div>
</body>

<script src="./node_modules/vue/dist/vue.js"></script>
<script>
    const vm = new Vue({
        el: "#app",
        data: {
            link: "http://www.baidu.com",
            isActive: true,
            hasError: true,
            setColor: 'red'
        }
    })
</script>

</html>
v-model可以实现双向绑定
vue组件化
<!DOCTYPE html>
<html lang="en">

<head>
    <meta charset="UTF-8">
    <meta http-equiv="X-UA-Compatible" content="IE=edge">
    <meta name="viewport" content="width=device-width, initial-scale=1.0">
    <title>Document</title>
</head>


<body>
    <div id="app">
        <button @click="count++">被点击了 {{count}} 次</button>
        <counter />
    </div>
</body>

<script src="../node_modules/vue/dist/vue.js"></script>

<script>
    //1.全局声明注册一个组件
    Vue.component("counter", {
        template: `<button @click="count++">被点击了 {{count}} 次</button>`,
        data () {
            return {
                count: 1
            }
        }
    })
    const vm = new Vue({
        el: "#app",
        data: {
            count: 0
        }
    })
</script>
</html>
生命周期:
每个Vue实例被创建时都需要经过一系列的初始化过程:创建实例,装载模版等。Vue为生命周期中的每个状态都设置了钩子函数(舰艇函数),每当Vue实例处于不同的生命周期时,对应的函数都会被触发调用。

-
vue模块化开发:
安装webpack:
npm install webpack -g选装vue脚手架:
npm install -g @vue/cli-init初始化 vue 项目:
vue init webpack appname,vue脚手架使用webpack模版初始化一个appname项目
 private List<CategoryEntity> getChildrens(CategoryEntity root, List<CategoryEntity> all) {

        List<CategoryEntity> children = all.stream().filter(categoryEntity -> {
            return categoryEntity.getParentCid().equals(root.getCatId());
        }).map(categoryEntity -> {
            //递归寻找子分类
            categoryEntity.setChildren(getChildrens(categoryEntity,all));
            return categoryEntity;
        }).sorted((menu1,menu2) -> {
            //分类排序
            return (menu1.getSort() == null ? 0 : menu1.getSort()) - (menu2.getSort() == null ? 0 : menu2.getSort());
        }).collect(Collectors.toList());

        return children;

    }
在后台中的彩单管理功能处创建商品系统下的分类维护菜单

在编写相应的前端代码时首先将后台的renren-fast注册到nacos,并将前端所有的请求转发到gateway

在后台gateway模块进行配置,对路由进行重写:
  cloud:
    gateway:
      routes:
        - id: admin_route
          uri: lb://renren-fast
          predicates:
            - Path=/api/**
          filters:
            ##http://localhost:88/api/captcha.jpg => http://localhost:8080/renren-fast/captcha.jpg
            - RewritePath=/api/(?<segment>.*),/renren-fast/$\{segment}
这里可能会遇到一个错误

在网关服务pom文件添加以下依赖
    <dependency>
        <groupId>org.springframework.cloud</groupId>
        <artifactId>spring-cloud-starter-loadbalancer</artifactId>
    </dependency>
SpringCloud Feign在Hoxton.M2 RELEASED版本之后不再使用Ribbon而是使用spring-cloud-loadbalancer
gateway中遇到跨域问题时,添加过滤器
package com.gulimall.gateway.config;

import org.springframework.context.annotation.Bean;
import org.springframework.context.annotation.Configuration;
import org.springframework.web.cors.reactive.CorsWebFilter;
import org.springframework.web.cors.reactive.UrlBasedCorsConfigurationSource;

@Configuration
public class CorsConfiguration {
    @Bean
    public CorsWebFilter corsWebFilter() {
        UrlBasedCorsConfigurationSource source = new UrlBasedCorsConfigurationSource();

        org.springframework.web.cors.CorsConfiguration corsConfiguration = new org.springframework.web.cors.CorsConfiguration();

        //1、配置跨域
        corsConfiguration.addAllowedHeader("*");
        corsConfiguration.addAllowedMethod("*");
        corsConfiguration.addAllowedOriginPattern("*");
        corsConfiguration.setAllowCredentials(true);

        source.registerCorsConfiguration("/**",corsConfiguration);
        return new CorsWebFilter(source);
    }
}
配置路由文件时需要把精确的放在位置靠前
  cloud:
    gateway:
      routes:
        - id: product_route
          uri:  lb://gulimall-product
          predicates:
            - Path=/api/product/**
          filters:
            - RewritePath=/api/(?<segment>.*),/$\{segment}

        - id: admin_route
          uri: lb://renren-fast
          predicates:
            - Path=/api/**
          filters:
            - RewritePath=/api/(?<segment>.*),/renren-fast/$\{segment}
前端代码:
<template>
   <div>
    <el-tree :data="menus" :props="defaultProps" @node-click="handleNodeClick"></el-tree>
   </div>
  </template>

  <script>
    export default {
      created() {
        this.getMenus()
      },
      data() {
      return {
        menus: [],
        defaultProps: {
          children: 'children',
          label: 'name'
        }
      };
    },

    methods: {
      handleNodeClick(data) {
        console.log(data);
      },

      // 获取菜单信息
      getMenus(){
        this.axios({
          method:'get',
          url:  '/api/product/category/list/tree',
        }).then((data) => {
          console.log(data.data.data)
          this.menus = data.data.data

        })

      }
    }
    }
</script>这里使用axios,需要在main.js中加入:
import axios from 'axios'
Vue.prototype.axios = axios
axios.defaults.baseURL = 'http://localhost:88'
实现分类维护页面展示所有分类的信息:

添加新增与删除功能,这里的删除使用逻辑删除。

使用show_status表示逻辑删除位,配置全局逻辑删除规则
mybatis-plus:
  mapper-locations: classpath:/mapper/**/*.xml
  global-config:
    db-config:
      id-type: auto  #主键自增
      logic-delete-value: 1 #表示已删除
      logic-not-delete-value: 0 #表示未删除
并给Bean加上逻辑删除注解@TableLogic
/**
* 是否显示[0-不显示,1显示]
*/
@TableLogic
private Integer showStatus;
-
品牌状态快速开关
对逆向生成的代码进行优化,实现品牌状态快速修改
vue代码:
 <template slot-scope="scope">
          <el-switch
            v-model="scope.row.showStatus"
            active-color="#13ce66"
            :active-value="1"
            :inactive-value="0"
            @change="updateBrandStatus(scope.row)"
          >
          </el-switch>
</template>
用户点击 switch 开关就会调用后台的接口更改对应数据库的字段 ( 决定是否显示),定义了 @change 事件 只要修后就会触发对应方法
// 更新brandStatus 状态
updateBrandStatus (data) {
      console.log(`最新信息:`, data)
      console.log("showStatus:", data.showStatus)
      let { brandId, showStatus } = data
      this.$http({
        url: this.$http.adornUrl('/product/brand/update/status'),
        method: 'post',
        data: this.$http.adornData({ brandId, showStatus: showStatus == 1 ? 1 : 0 }, false)
      }).then(({ data }) => {
        this.$message({
          type: 'success',
          message: '状态修改成功'
        })

      })
    },

-
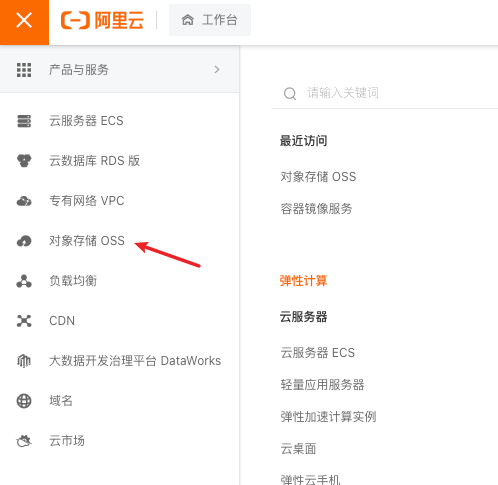
品牌图片上传功能
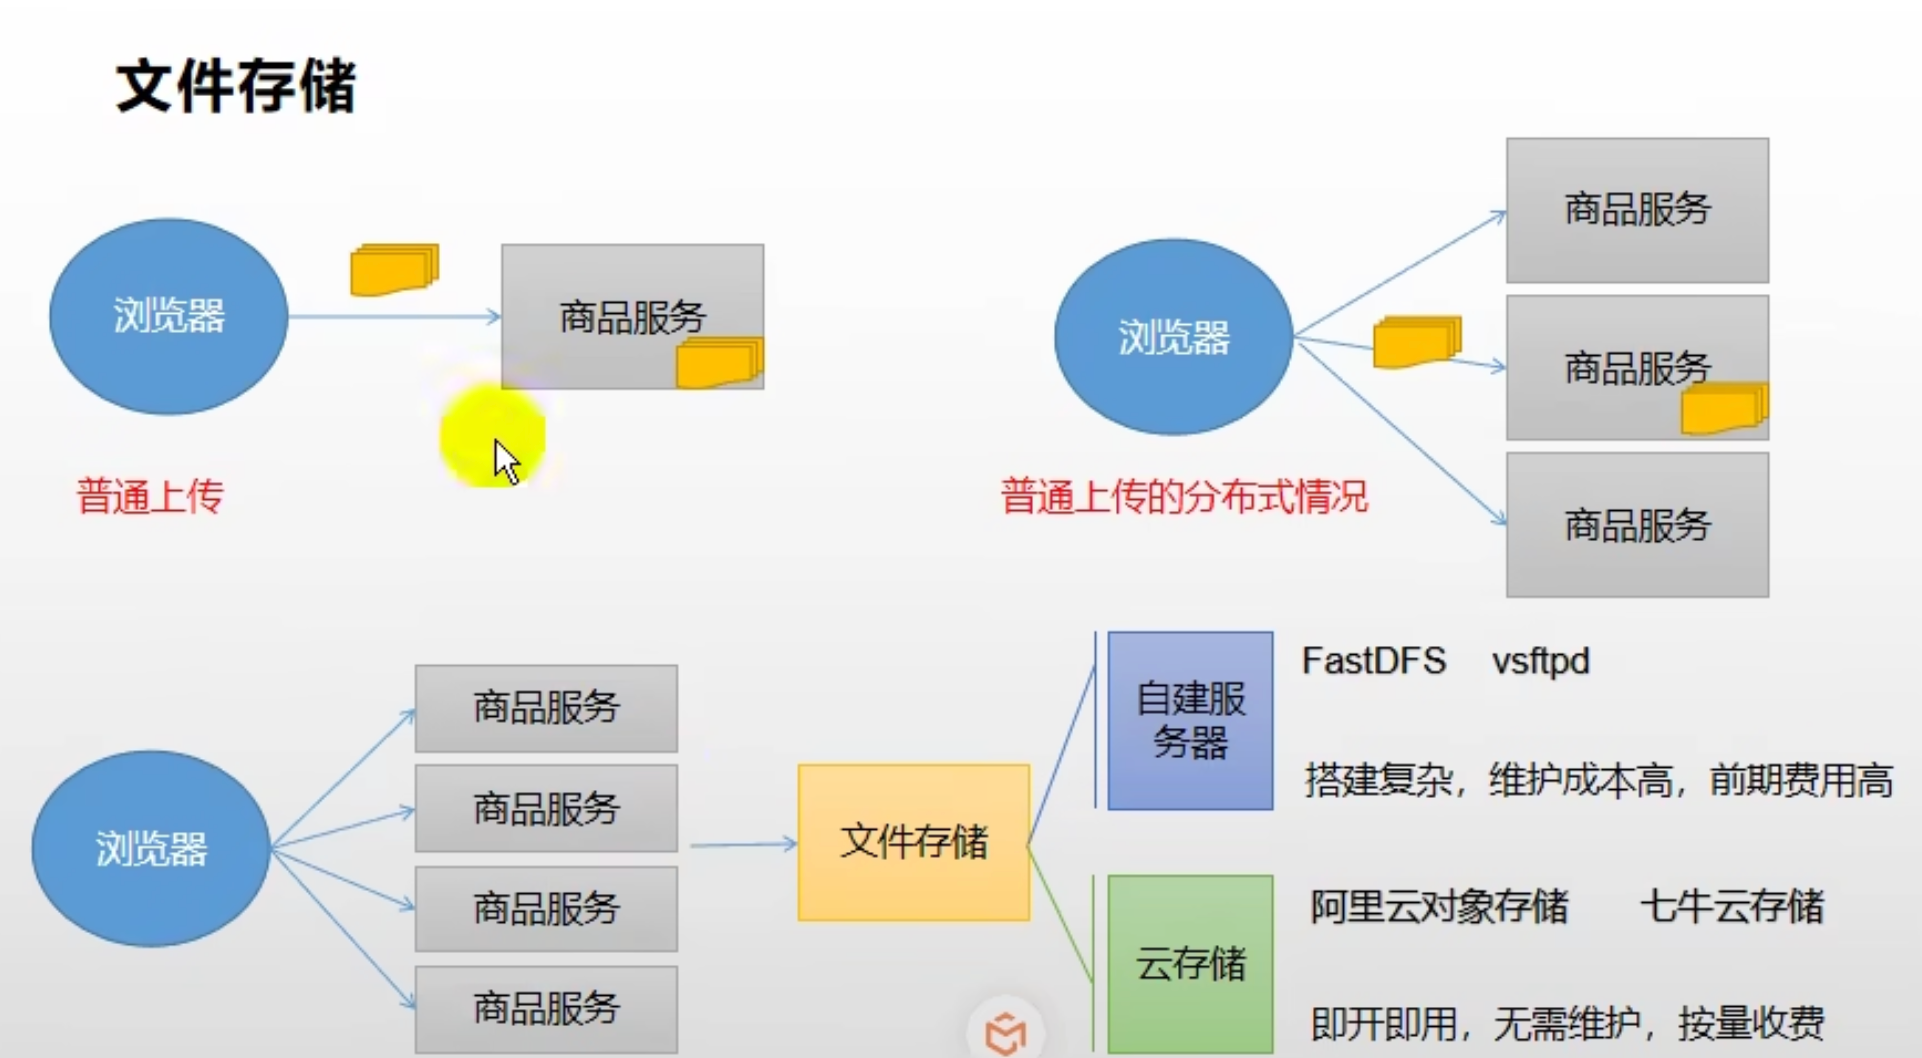
在阿里云开通对象存储服务
创建一个bucket


使用服务端签名后直传的文件上传模式

创建阿里云子账并为其分配权限

导入sdk依赖:
<dependency>
    <groupId>com.aliyun.oss</groupId>
    <artifactId>aliyun-sdk-oss</artifactId>
    <version>3.15.1</version>
</dependency>
测试上传文件流:
@Test
	void uploadFile(){
		// Endpoint以华东1(杭州)为例,其它Region请按实际情况填写。
		String endpoint = "https://oss-cn-hangzhou.aliyuncs.com";
		// 阿里云账号AccessKey拥有所有API的访问权限,风险很高。强烈建议您创建并使用RAM用户进行API访问或日常运维,请登录RAM控制台创建RAM用户。
		String accessKeyId = "xxx";
		String accessKeySecret = "xxx";
		// 填写Bucket名称,例如examplebucket。
		String bucketName = "xxx";
		// 填写Object完整路径,完整路径中不能包含Bucket名称,例如exampledir/exampleobject.txt。
		String objectName = "product/brand/1.jpg";
		// 填写本地文件的完整路径,例如D:\\localpath\\examplefile.txt。
		// 如果未指定本地路径,则默认从示例程序所属项目对应本地路径中上传文件流。
		String filePath= "/Users/null/Downloads/1.jpg";

		// 创建OSSClient实例。
		OSS ossClient = new OSSClientBuilder().build(endpoint, accessKeyId, accessKeySecret);

		try {
			InputStream inputStream = new FileInputStream(filePath);
			// 创建PutObjectRequest对象。
			PutObjectRequest putObjectRequest = new PutObjectRequest(bucketName, objectName, inputStream);
			// 设置该属性可以返回response。如果不设置,则返回的response为空。
			putObjectRequest.setProcess("true");
			// 创建PutObject请求。
			PutObjectResult result = ossClient.putObject(putObjectRequest);
			// 如果上传成功,则返回200。
			System.out.println(result.getResponse().getStatusCode());
			System.out.println("upload success");
		} catch (OSSException oe) {
			System.out.println("Caught an OSSException, which means your request made it to OSS, "
					+ "but was rejected with an error response for some reason.");
			System.out.println("Error Message:" + oe.getErrorMessage());
			System.out.println("Error Code:" + oe.getErrorCode());
			System.out.println("Request ID:" + oe.getRequestId());
			System.out.println("Host ID:" + oe.getHostId());
		} catch (ClientException | FileNotFoundException ce) {
			System.out.println("Caught an ClientException, which means the client encountered "
					+ "a serious internal problem while trying to communicate with OSS, "
					+ "such as not being able to access the network.");
			System.out.println("Error Message:" + ce.getMessage());
		} finally {
			if (ossClient != null) {
				ossClient.shutdown();
			}
		}
}在该项目中使用springcloudAlibaba封装好的starter,向common中的pom文件导入依赖
<dependency>
    <groupId>com.alibaba.cloud</groupId>
    <artifactId>spring-cloud-starter-alicloud-oss</artifactId>
    <version>2.1.0.RELEASE</version>
</dependency>在配置文件中配置相关的信息

获取签名代码:
   @RequestMapping("/oss/policy")
    public Map<String,String> policy(){


        // 填写Host地址,格式为https://bucketname.endpoint。
        String host = "https://" + bucket + "." + endpoint;
        // 设置上传回调URL,即回调服务器地址,用于处理应用服务器与OSS之间的通信。OSS会在文件上传完成后,把文件上传信息通过此回调URL发送给应用服务器。
        //String callbackUrl = "https://192.168.0.0:8888";
        // 设置上传到OSS文件的前缀,可置空此项。置空后,文件将上传至Bucket的根目录下。
        String format = new SimpleDateFormat("yyyy-MM-dd").format(new Date(System.currentTimeMillis()));
        String dir = format + "/";

        // 创建ossClient实例。
        OSS ossClient = new OSSClientBuilder().build(endpoint, accessId, accessKey);

        Map<String, String> respMap = null;
        try {
            long expireTime = 30;
            long expireEndTime = System.currentTimeMillis() + expireTime * 1000;
            Date expiration = new Date(expireEndTime);
            PolicyConditions policyConds = new PolicyConditions();
            policyConds.addConditionItem(PolicyConditions.COND_CONTENT_LENGTH_RANGE, 0, 1048576000);
            policyConds.addConditionItem(MatchMode.StartWith, PolicyConditions.COND_KEY, dir);

            String postPolicy = ossClient.generatePostPolicy(expiration, policyConds);
            byte[] binaryData = postPolicy.getBytes("utf-8");
            String encodedPolicy = BinaryUtil.toBase64String(binaryData);
            String postSignature = ossClient.calculatePostSignature(postPolicy);

            respMap = new LinkedHashMap<String, String>();
            respMap.put("accessId", accessId);
            respMap.put("policy", encodedPolicy);
            respMap.put("signature", postSignature);
            respMap.put("dir", dir);
            respMap.put("host", host);
            respMap.put("expire", String.valueOf(expireEndTime / 1000));


            // respMap.put("expire", formatISO8601Date(expiration));

            //JSONObject jasonCallback = new JSONObject();
            //jasonCallback.put("callbackUrl", callbackUrl);
            //jasonCallback.put("callbackBody",
            //        "filename=${object}&size=${size}&mimeType=${mimeType}&height=${imageInfo.height}&width=${imageInfo.width}");
            //jasonCallback.put("callbackBodyType", "application/x-www-form-urlencoded");
            //String base64CallbackBody = BinaryUtil.toBase64String(jasonCallback.toString().getBytes());
            //respMap.put("callback", base64CallbackBody);

            JSONObject ja1 = JSONObject.fromObject(respMap);
            return respMap;
        } catch (Exception e) {
            // Assert.fail(e.getMessage());
            System.out.println(e.getMessage());
        }
        return respMap;
    }
}
在网关添加配置:
- id: thirdParty_route
  uri: lb://gulimall-thirdParty
  predicates:
    - Path=/api/thirdParty/**
  filters:
    - RewritePath=/api/thirdParty(?<segment>.*),/$\{segment}
这里为了方便获取到返回的数据,在后台controller中将签名返回的对象编写为R
return R.ok().put("data",respMap);在客户端向阿里云上传文件的时候还会遇到跨域的问题

在阿里云中配置跨域规则


这里遇到一个小bug,在配置文件中的spring.cloud.alicloud.oss.endpoint在后台获取其内容时会自动加上https://所以在配置文件中使用spring.cloud.alicloud.oss.endpoints设置值。
-
在前端显示上传的图片
<template slot-scope="scope"> <img :src="scope.row.logo" style="width: 100px; height: 100px" /> </template> -
新增品牌时对填写的字段进行校验
前端的表单校验
<el-form
      :rules="dataRule"
>
firstLetter: [ { validator: (rule, value, callback) => { if (value === '') { callback(new Error('首字母必须填写')) } else if (!/^[a-zA-z]$/.test(value)) { callback(new Error('必须为字母')) } else { callback() } }, trigger: 'blur' } ], sort: [ { validator: (rule, value, callback) => { if (value === '') { callback(new Error('排序字段必须填写')) } else if (!Number.isInteger(value) || value < 0) { callback(new Error('排序字段必须为大于等于0的整数')) } else { callback() } }, trigger: 'blur' } ]后端使用JSR303进行后端校验
先给
Brand实体标注校验注解,然后在controller处标注@Valid表示进行验证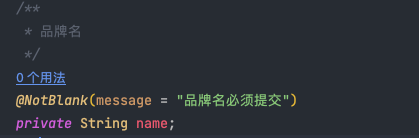


给校验的bean后紧跟一个BindingResult就可以获取到校验的结果
 @RequestMapping("/save")
      public R save(@Valid @RequestBody BrandEntity brand, BindingResult result){
brandService.save(brand);

      return R.ok();
}-
统一异常处理
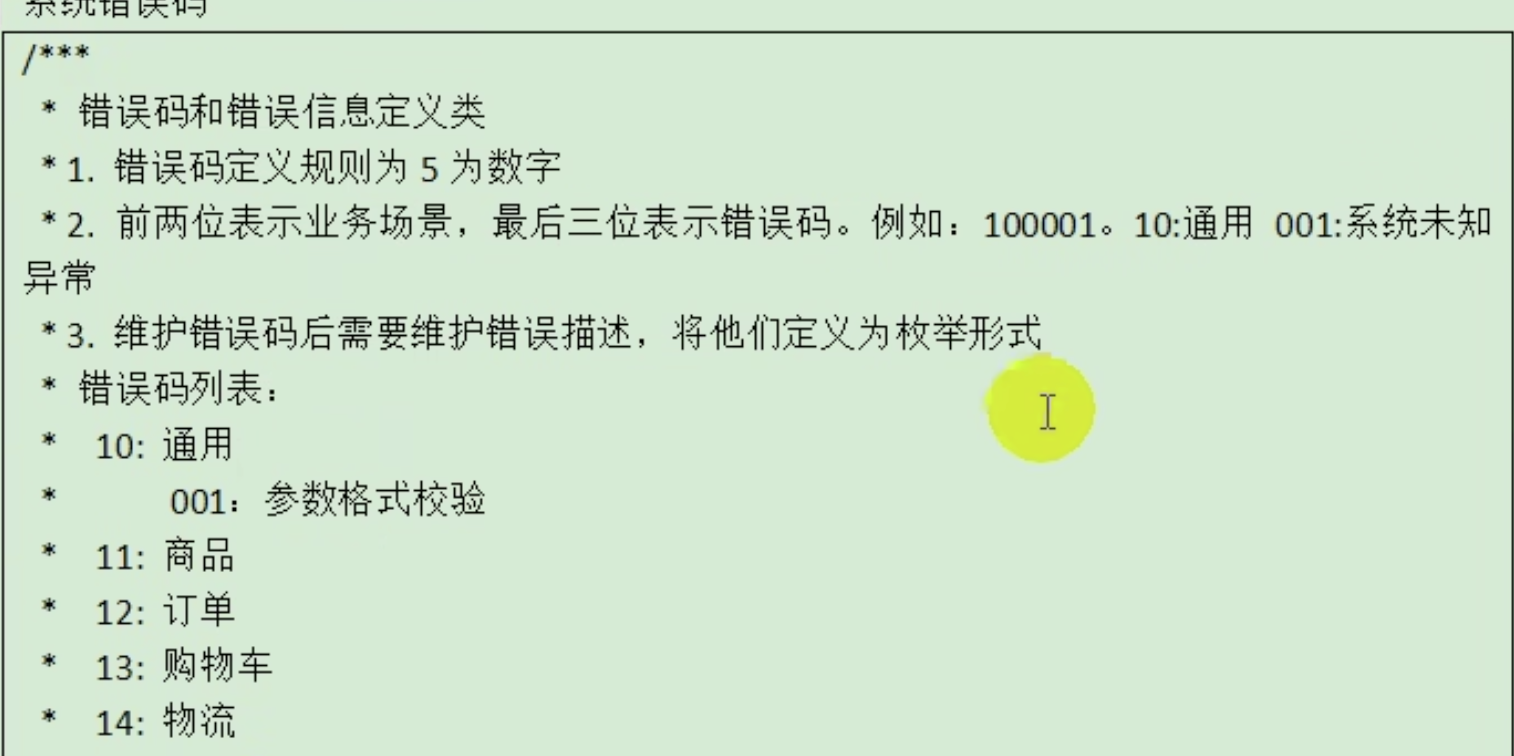
在common中创建一个exction的枚举类来表示相应的错误定义
package com.gulimall.common.exception;

/**
 * 错误码列表
 * 10:通用
 *  001:参数格式化校验
 *  11:商品
 *  12:订单
 *  13:购物车
 *  14:物流
 *
 */
public enum BizCodeEnum {
    /**
     * 系统未知异常
     */
    UNKNOWN_EXCEPTION(10000, "系统未知异常"),
    /**
     * 参数校验错误
     */
    VALID_EXCEPTION(10001, "参数格式校验失败"),
    TO_MANY_REQUEST(10002, "请求流量过大,请稍后再试"),
    SMS_CODE_EXCEPTION(10002, "验证码获取频率太高,请稍后再试"),
    PRODUCT_UP_EXCEPTION(11000, "商品上架异常"),
    USER_EXIST_EXCEPTION(15001, "存在相同的用户"),
    PHONE_EXIST_EXCEPTION(15002, "存在相同的手机号"),
    NO_STOCK_EXCEPTION(21000, "商品库存不足"),
    LOGIN_ACCOUNT_PASSWORD_EXCEPTION(15003, "账号或密码错误"),
            ;


    private int code;
    private String msg;
    BizCodeEnum(int code, String msg) {
        this.code = code;
        this.msg = msg;
    }

    public int getCode() {
        return code;
    }

    public String getMsg() {
        return msg;
    }
}
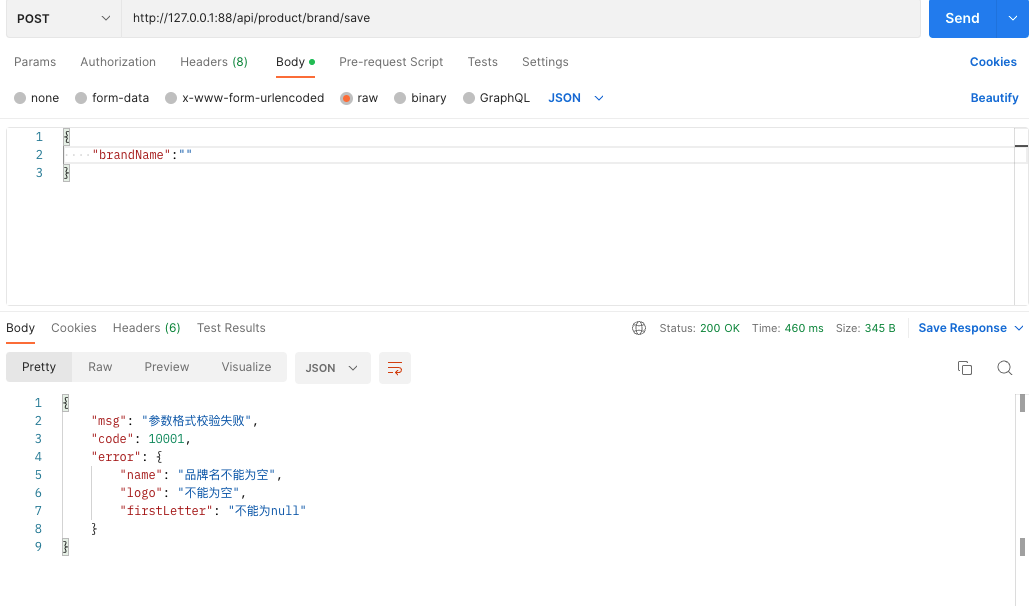
为product模块编写统一异常处理代码
@Slf4j
@RestControllerAdvice(basePackages = "com.gulimall.product.controller") //@ResponseBody + @ControllerAdvice
public class GulimallExceptionControllerAdvice {


    @ExceptionHandler(value= Exception.class)
    public R handleValidException(MethodArgumentNotValidException e){
        //log.error("数据校验出现问题:{},异常类型:{}",e.getMessage(),e.getClass());
        BindingResult result = e.getBindingResult();

        Map<String,String> errorMap = new HashMap<String,String>();
        result.getFieldErrors().forEach((fieldError)->{
            errorMap.put(fieldError.getField(),fieldError.getDefaultMessage());
        });
        return R.error(BizCodeEnum.VALID_EXCEPTION.getCode(),BizCodeEnum.VALID_EXCEPTION.getMsg()).put("error",errorMap);
    }

    @ExceptionHandler(value= Throwable.class)
    public R handleException(Throwable e){
        return R.error(BizCodeEnum.UNKNOWN_EXCEPTION.getCode(),BizCodeEnum.UNKNOWN_EXCEPTION.getMsg());
    }
}
-
分组校验
给校验注解标注什么情况需要进行校验
@TableId
	@NotNull(message = "修改必须指定品牌ID",groups ={UpdateGroup.class} )
	@Null(message = "新增不能指定品牌ID",groups = {AddGroup.class})
	private Long brandId;
使用
@Validated注解标注表示使用分组校验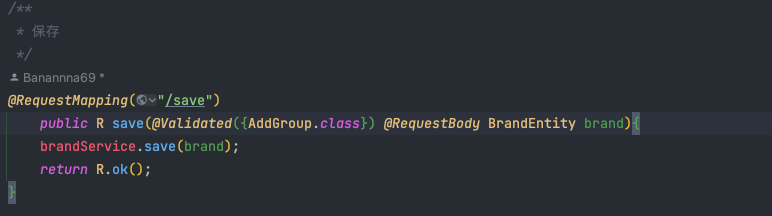
-
编写自定义校验注解
添加依赖:
<dependency>
    <groupId>javax.validation</groupId>
    <artifactId>validation-api</artifactId>
</dependency>


