A Non-Cryptocurrency Public Chain is a transformed public chain framework based on an existing public chain. Gas Credit transfers are not permitted between standard wallets. There are no cryptocurrency incentives for mining or participating in consensus. On Spartan Network, there are three Non-Cryptocurrency Public Chains at launch. We except to add more in the foreseeable future.
As a clear demonstration, all commands in this document are run with root permission. These commands can also be run under normal user permissions, please set the file storage and configure the parameters properly.
This document is a guide to install, configure and run an full node in the Spartan-I Chain, which is powered by NC Ethereum. The Spartan-I Chain is a blockchain compatible with Ethereum that run independently from the public Ethereum blockchain. Full Nodes, which can freely join and exit the Spartan Network, synchronize block information of the entire chain and submit transaction requests to the network.
A Spartan-I full node runs an EVM (Ethereum Virtual Machine) that allows developers to use Solidity programming language to create smart contracts that are compatible with the Ethereum network. Also, all the different tools and wallets available for Ethereum (such as Truffle, HardHat, Metamask, etc…) can be directly used with Spartan-I Chain.
Ethereum-based networks have two identifiers, a network ID and a chain ID. Although they often have the same value, they have different uses. Peer-to-peer communication between nodes uses the network ID, while the transaction signature process uses the chain ID.
Spartan-I Chain Network ID = Chain ID = 9090
Below is the instruction for Linux system.
It is recommended to build Spartan-I Chain full nodes with the following requirements:
- 2 CPU
- Memory: 4GB
- Disk: 100GB SSD
- Bandwidth: 20Mbps
- 4 CPU
- Memory: 16GB
- Disk: 512GB SSD
- Bandwidth: 20Mbps
In this chapter, we will build a node by commands. If you prefer to build the node by Docker Images, please go to chapter 4 Installing Nodes by Docker.
Before building the nodes of Spartan-I Chain, software below should be installed in your system:
| Software | Version |
|---|---|
| Golang | 1.15+ |
| GCC | latest |
| Git | 1.8.3.1+ |
| tree (optional) | 1.6.0 |
Download and untar the installation file
wget https://go.dev/dl/go1.18.5.linux-amd64.tar.gz

tar -C /usr/local -zxvf go1.18.5.linux-amd64.tar.gz
Change environment variables, for example in bash:
vi /etc/profile
Insert the parameter at the bottom of the file:
export PATH=$PATH:/usr/local/go/binThen, save the change and make the /etc/profile file take effect:
source /etc/profile
Now, check whether go has been correctly installed:
go version

Install gcc by the system command
yum install gcc
Check the version
gcc -v

Install gcc by the system command
yum install git
Check the version
git version

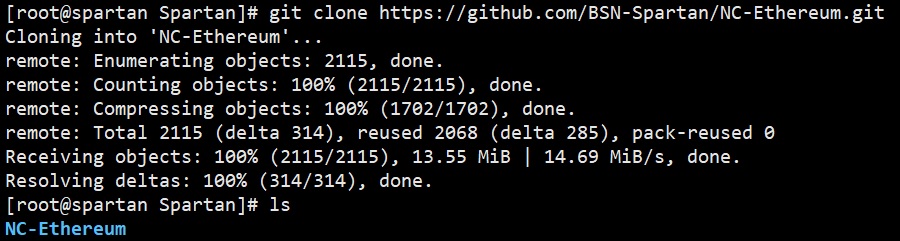
Download the source code of Spartan NC Ethereum from github:
git clone https://github.com/BSN-Spartan/NC-Ethereum.git
Compile the source code in NC-Ethereum directory:
cd NC-Ethereum
make all
cp -r build/bin/* /usr/bin/
Create a new directory node1/:
mkdir node1
Copy genesis.json file from spartan/ directory to node1/ directory:
cp ./spartan/genesis.json node1/
The structure is shown as follows (viewed by tree node1 command):
node1
└── genesis.json

0 directories, 1 file
Initialize genesis.json
geth --datadir node1 init node1/genesis.json
Copy static-nodes.json and trusted-nodes.json files from spartan/ directory to node1/geth/ directory:
cp ./spartan/static-nodes.json ./spartan/trusted-nodes.json node1/geth/
For detailed explanation of the two files, please refer to https://geth.ethereum.org/docs/interface/peer-to-peer
Now, the structure of node1/ directory is like below:
node1
├── genesis.json
├── geth
│   ├── chaindata
│   │   ├── 000001.log
│   │   ├── CURRENT
│   │   ├── LOCK
│   │   ├── LOG
│   │   └── MANIFEST-000000
│   ├── lightchaindata
│   │   ├── 000001.log
│   │   ├── CURRENT
│   │   ├── LOCK
│   │   ├── LOG
│   │   └── MANIFEST-000000
│   ├── LOCK
│   ├── nodekey
│   ├── static-nodes.json
│   └── trusted-nodes.json
└── keystore

4 directories, 15 filesThere are two kinds of full nodes in Spartan-I Chain: Default Node and Regular Node. Default Node: A full node that has administration functions. The first node that Data Center Operators build in Spartan-I Chain must be a default node, and it should be running before starting the Data Center Management System. Regular Node: A full node that has regular functions only, which synchronizes all data on the chain.
Below is the command to start the default node:
geth --networkid 9090 --datadir node1/ --syncmode 'full' --nodiscover --maxpeers 300 --verbosity 6 --ipcdisable --port 30001 --http --http.addr 0.0.0.0 --http.port 8545 --http.api 'eth,net,web3,txpool,admin' --ws --ws.port 8546 --ws.addr 0.0.0.0 --ws.api 'eth,net,web3' --ws.origins '*' --allow-insecure-unlock --censorship.admin.address 0x94109ebFB3d4153a266e7AC08E8C6F868360DEE6
Important Parameters:
--networkidThe network ID of Spartan-I Chain is 9090--datadirThe diretory to store data after the node is started--httpEnable the HTTP-RPC server--http.addrHTTP-RPC server listening interface (default:localhost)--http.portHTTP-RPC server listening port, will be used by Data Center Management System setup and for node registration (default:8545)--http.apiAPI's offered over the HTTP-RPC interface (default:eth,net,web3)--wsEnable the WS-RPC server--ws.addrWS-RPC server listening interface (default:localhost)--ws.portWS-RPC server listening port (default:8546)--ws.apiAPI's offered over the WS-RPC interface (default:eth,net,web3)--ws.originsOrigins from which to accept WebSocket requests
Please keep all other parameters unchanged.
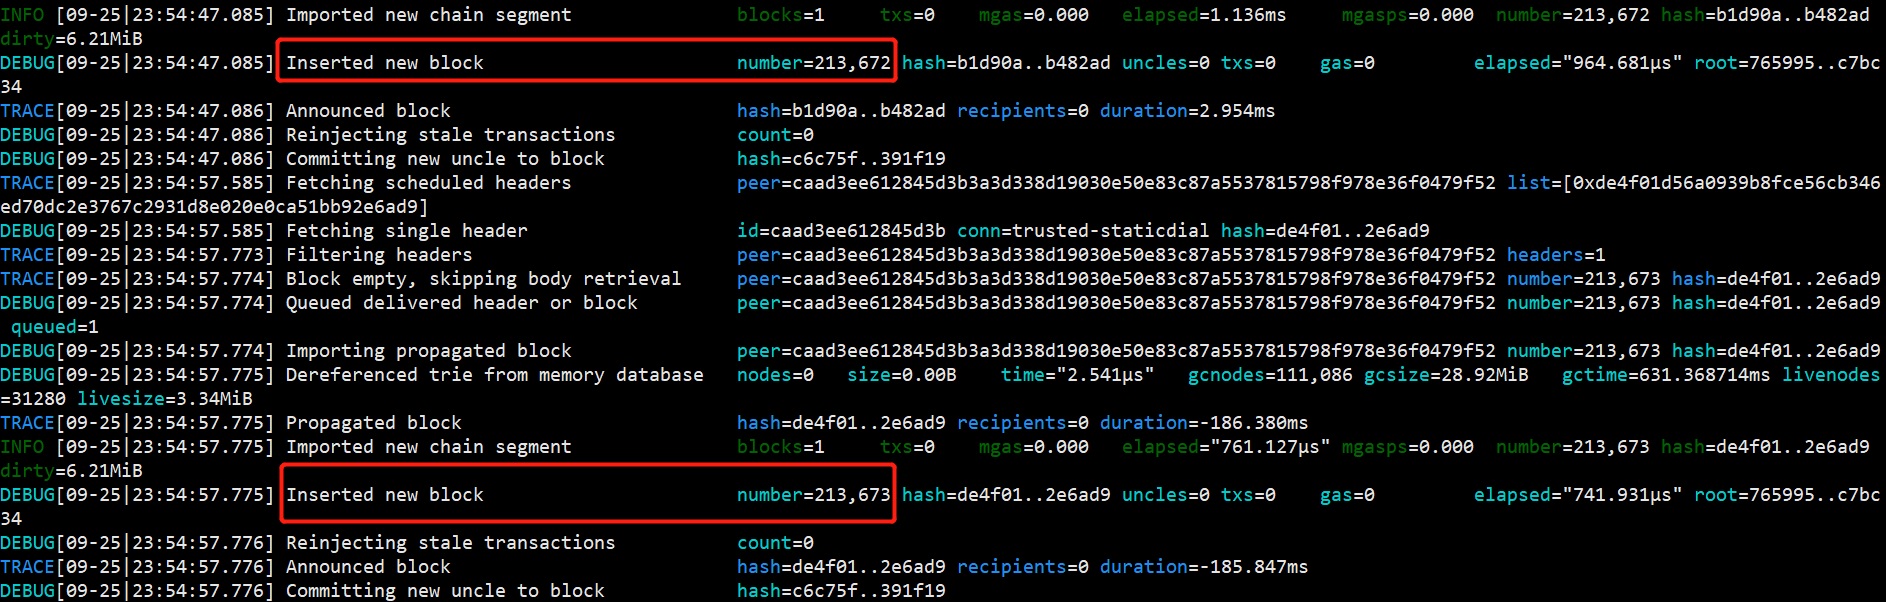
After the node has been started, it will synchronize all blocks from Spartan-I Chain. This process will take time, and you can check it by the block number:
If you would like to run the node in the backend system, you can run nohup command as follow:
nohup geth --networkid 9090 --datadir node1/ --syncmode 'full' --nodiscover --maxpeers 300 --verbosity 6 --ipcdisable --port 30001 --http --http.addr 0.0.0.0 --http.port 8545 --http.api 'eth,net,web3,txpool' --ws --ws.port 8546 --ws.addr 0.0.0.0 --ws.api 'eth,net,web3' --ws.origins '*' --allow-insecure-unlock --censorship.admin.address 0x94109ebFB3d4153a266e7AC08E8C6F868360DEE6 > output.log 2>&1 &
Check the process of block synchronization from the log:
tail -f output.log

| Software | Version |
|---|---|
| docker-ce | 20.10.0+ |
Install the docker in your server:
wget -qO- https://get.docker.com/ | shGrant your user permission to execute Docker commands:
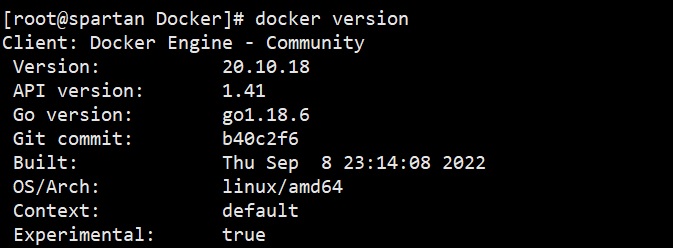
sudo usermod -aG docker your-userNow, check the docker version:
docker version
Start the docker:
systemctl start dockerFollow command below to install geth:
docker pull bsnspartan/nc-eth:latest

Create a new directory node1/:
mkdir node1
Copy genesis.json file from spartan/ directory to node1/ directory:
cp ./spartan/genesis.json node1/
The structure is shown as follows (viewed by tree node1 command):
node1
└── genesis.json

0 directories, 1 file
Initialize genesis.json
docker run --rm -it -v $PWD/node1:/node1 bsnspartan/nc-eth:latest --datadir /node1 init /node1/genesis.json
Copy static-nodes.json and trusted-nodes.json files from spartan/ directory to node1/geth/ directory:
cp ./spartan/static-nodes.json ./spartan/trusted-nodes.json node1/geth/
For detailed explanation of the two files, please refer to https://geth.ethereum.org/docs/interface/peer-to-peer
Now, the structure of node1/ directory is like below:
node1
├── genesis.json
├── geth
│   ├── chaindata
│   │   ├── 000001.log
│   │   ├── CURRENT
│   │   ├── LOCK
│   │   ├── LOG
│   │   └── MANIFEST-000000
│   ├── lightchaindata
│   │   ├── 000001.log
│   │   ├── CURRENT
│   │   ├── LOCK
│   │   ├── LOG
│   │   └── MANIFEST-000000
│   ├── LOCK
│   ├── nodekey
│   ├── static-nodes.json
│   └── trusted-nodes.json
└── keystore

4 directories, 15 filesThere are two kinds of full nodes in Spartan-I Chain: Default Node and Regular Node. Default Node: A full node that has administration functions. The first node that Data Center Operators build in Spartan-I Chain must be a default node, and it should be running before starting the Data Center Management System. Regular Node: A full node that has regular functions only, which synchronizes all data on the chain.
Below is the command to start the default node:
docker run -d -p 30001:30001 -p 8545:8545 -p 8546:8546 -v $PWD/node1:/node1 --restart=always --name spartan-nc-eth bsnspartan/nc-eth:latest --networkid 9090 --datadir /node1/ --syncmode 'full' --nodiscover --maxpeers 300 --verbosity 6 --ipcdisable --port 30001 --http --http.addr 0.0.0.0 --http.port 8545 --http.api 'eth,net,web3,txpool,admin' --ws --ws.port 8546 --ws.addr 0.0.0.0 --ws.api 'eth,net,web3' --ws.origins '*' --allow-insecure-unlock --censorship.admin.address 0x94109ebFB3d4153a266e7AC08E8C6F868360DEE6
Important Parameters:
--networkidThe network ID of Spartan-I Chain is 9090--datadirThe diretory to store data after the node is started--httpEnable the HTTP-RPC server--http.addrHTTP-RPC server listening interface (default:localhost)--http.portHTTP-RPC server listening port, will be used by Data Center Management System setup and for node registration (default:8545)--http.apiAPI's offered over the HTTP-RPC interface (default:eth,net,web3)--wsEnable the WS-RPC server--ws.addrWS-RPC server listening interface (default:localhost)--ws.portWS-RPC server listening port (default:8546)--ws.apiAPI's offered over the WS-RPC interface (default:eth,net,web3)--ws.originsOrigins from which to accept WebSocket requests
Please keep all other parameters unchanged.
Each Data Center can only have one Default Node of Spartan-I Chain that interacts with the Data Center System. If a second Spartan-I full node is installed, this node then is called a regular node. The two types of nodes launch in different ways.
The process of adding new nodes to Spartan-I Chain is the same as building the node above, including initializing the node, configuring the node files, and finally starting the node.
You can start the regular node in either way.
Build a new directory node2 and follow the steps in chapter 3 to configure the node, then start the node with command below:
geth --networkid 9090 --datadir node2/ --syncmode 'full' --nodiscover --maxpeers 300 --verbosity 6 --ipcdisable --port 30002 --http --http.addr 0.0.0.0 --http.port 8547 --http.api 'eth,net,web3' --ws --ws.port 8548 --ws.addr 0.0.0.0 --ws.api 'eth,net,web3' --ws.origins '*' --allow-insecure-unlock --censorship.admin.address 0x94109ebFB3d4153a266e7AC08E8C6F868360DEE6
Follow the steps in chapter 4 to configure the node and remember to use new directory and ports, then run command below to start the node:
docker run -d -p 30002:30002 -p 8547:8547 -p 8548:8548 -v $PWD/node2:/node2 --restart=always --name spartan-nc-eth bsnspartan/nc-eth:latest --networkid 9090 --datadir /node1/ --syncmode 'full' --nodiscover --maxpeers 300 --verbosity 6 --ipcdisable --port 30002 --http --http.addr 0.0.0.0 --http.port 8547 --http.api 'eth,net,web3' --ws --ws.port 8548 --ws.addr 0.0.0.0 --ws.api 'eth,net,web3' --ws.origins '*' --allow-insecure-unlock --censorship.admin.address 0x94109ebFB3d4153a266e7AC08E8C6F868360DEE6
When joining the Spartan Network as a Data Center, the Data Center Operator will be rewarded a certain amount of NTT Incentives based on the quantity of the registered node. To achieve this, the Data Center Operator should firstly provide the signature of the node to verify the node's ownership.
Execute the following command after the node has been started:
geth validate --datadir node1/
datadir is the directory that stores the data of the node.
Execute the following command after the node has been started:
docker exec spartan-nc-eth geth validate --datadir node1/
After executing the above commands, you will get the following information.
{
  "nodeId": "9ddd61e4f29d286228b0e4ea2fa0ab44bea60909f7633ad419a14a80ee7a5aa2",
  "address": "enode://5409333437067eea683b5671c7e846af1e7406e4d1fe18b4a3c9bc24c8fecdb729e1a47c6159dc4d4d99f18ea34250f3071c42d5c28599125a1f8ad758d4f0aa",
  "signature": "0xb5b6911b86cc3dfe8b3564bd6cdd978c80b24aff4487030e32c8678893ab598477286fc1f2c0b29822b3e060f2a8e37a44d95cdb32e52c70cce9b1a877a7cd6f01"
}
Next step, you need to build the Data Center Management System and fill in the signature information when registering the node.
You can use the following command to stop the running node and delete it, and also clear the node data by deleting the datadir directory.
If the node has been registered in the Data Center, you can back up the nodekey file before deleting it, so that you can recover this registered node when needed.
Use the following command to stop the running node:
pkill -INT geth
Use the following command to stop the running container and delete the container and the image file:
docker stop spartan-nc-eth
docker rm spartan-nc-eth
docker rmi bsnspartan/nc-eth:latest
If you need to completely delete all data of the node, you can use the following command to delete the datadir directory.
rm -rf node1/
Below is a list of useful online documentation about Ethereum and Geth:
How to set up Geth and execute some basic tasks using the command line tools:
https://geth.ethereum.org/docs/getting-started
JSON-RPC API methods Interacting with Geth requires sending requests to specific JSON-RPC API methods. Geth supports all standard JSON-RPC API endpoints. You can send RPC requests on the port 8545
https://geth.ethereum.org/docs/rpc/server
Developer Documentation
This documentation is designed to help you build with Ethereum. It covers Ethereum as a concept, explains the Ethereum tech stack, and documents advanced topics for more complex applications and use cases.
https://ethereum.org/en/developers/docs/
Smart Contract tutorials
A list of curated Ethereum tutorials to learn about coding smart contracts and DApps.