This tutorial explains how to deploy the RWKV-World-4 model within the mlc-llm framework, covering CUDA, Mac M2, and Android platforms.
The 1.5B RWKV-World-4 model exhibits a 'nan' phenomenon when deployed using FP16. We recommend deploying with the 3B or 7B model instead.
- RWKV-4-World model URL: RWKV-4-World-3B or RWKV-4-World-7B
- Download the tokenizer from here and extract the tokenizer_model.zip to a file named tokenizer_model. This is the Tokenizer file for the RWKV-4-World series model.
- Clone the repositories https://github.com/mlc-ai/mlc-llm and https://github.com/mlc-ai/relax. Make sure to use the
--recursiveparameter when cloning to include their third-party library dependencies.
You can also choose to use the unity branch of TVM instead of Relax, as the development progress of TVM's unity branch is ahead of Relax.
Compile Relax
git clone --recursive git@github.com:mlc-ai/relax.git
cd relax
mkdir build
cd build
cp ../cmake/config.cmake ./
Next, modify the config.cmake file in the build directory. Since I'm compiling on the A800, I made the following changes:
set(USE_CUDA ON)
set(USE_CUTLASS ON)
set(USE_CUBLAS ON)
set(USE_LLVM ON)
You must choose USE_LLVM option, otherwise the mlc.build model will fail.
This enables CUDA and turns on two acceleration libraries, CUTLASS and CUBLAS. Then, in the build directory, execute cmake .. && make -j32.
Lastly, you might consider adding Relax to the PYTHONPATH environment variable to make it globally accessible. Add the following lines to ~/.bashrc:
export TVM_HOME=/bbuf/relax
export PYTHONPATH=$TVM_HOME/python:${PYTHONPATH}
Then, simply run source ~/.bashrc.
Compiling and Installing MLC-LLM
git clone --recursive git@github.com:mlc-ai/mlc-llm.git
cd mlc-llm/cmake
python3 gen_cmake_config.py
When executing python3 gen_cmake_config.py, you can choose the compilation options you need. For instance, in my case, I chose to enable CUDA, CUBLAS, and CUTLASS. Another thing to note is that the TVM_HOME path should be set to the path where Relax was compiled earlier.
Then, proceed with the following steps to compile:
cd ..
mkdir build
cp cmake/config.cmake build
cd build
cmake ..
make -j32
During the compilation, you'll also need to install Rust. Once the compilation is complete, the chat program mlc_chat_cli provided by mlc-llm will be installed. Additionally, for model conversion and quantization, you should also execute pip install . in the mlc-llm directory to install the mlc_llm package.
Model Conversion For model conversion, we primarily refer to this tutorial: https://mlc.ai/mlc-llm/docs/compilation/compile_models.html.
For instance, by executing python3 -m mlc_llm.build --hf-path StarRing2022/RWKV-4-World-7B --target cuda --quantization q4f16_1, we can quantize the weights of the RWKV-4-World-7B model to 4 bits, while the activation remains stored in FP16 format.

The target specifies the platform we intend to run on. This will compile the entire model graph into a dynamic link library (i.e., TVM's IRModule) for subsequent use by the mlc_chat_cli program (generated during the compilation of mlc-llm).
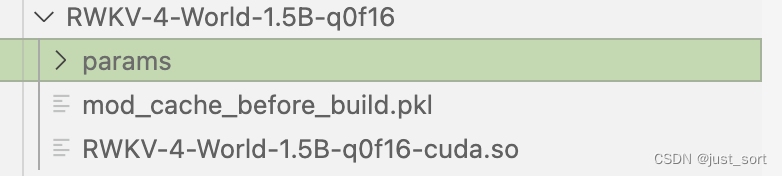
By default, a new dist/models directory will be created in the current directory to store the quantized model, configuration files, and the link library. After conversion and quantization, the model will be stored in the dist subdirectory of the current command directory (which will be created automatically). You can also manually clone the huggingface model into the dist/models directory. The structure of the quantized model is as follows:
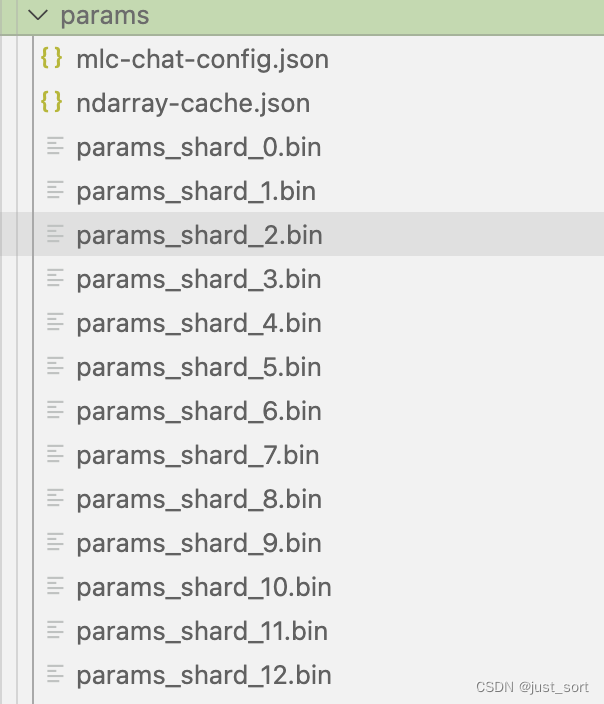
The mlc-chat-config.json specifies some hyperparameters generated for the model, such as top_p, temperature, etc.
Lastly, before inference, we need to copy the tokenizer_model file, which we prepared initially, into this params directory.
Running Inference
Execute the following command in the parent directory of mlc-llm:
./mlc-llm/build/mlc_chat_cli --model RWKV-4-World-7B-q0f16You can replace RWKV-4-World-7B-q0f16 with the name you used during model quantization. After loading and running the system prompt, you can enjoy chatting with the RWKV-4-World model.
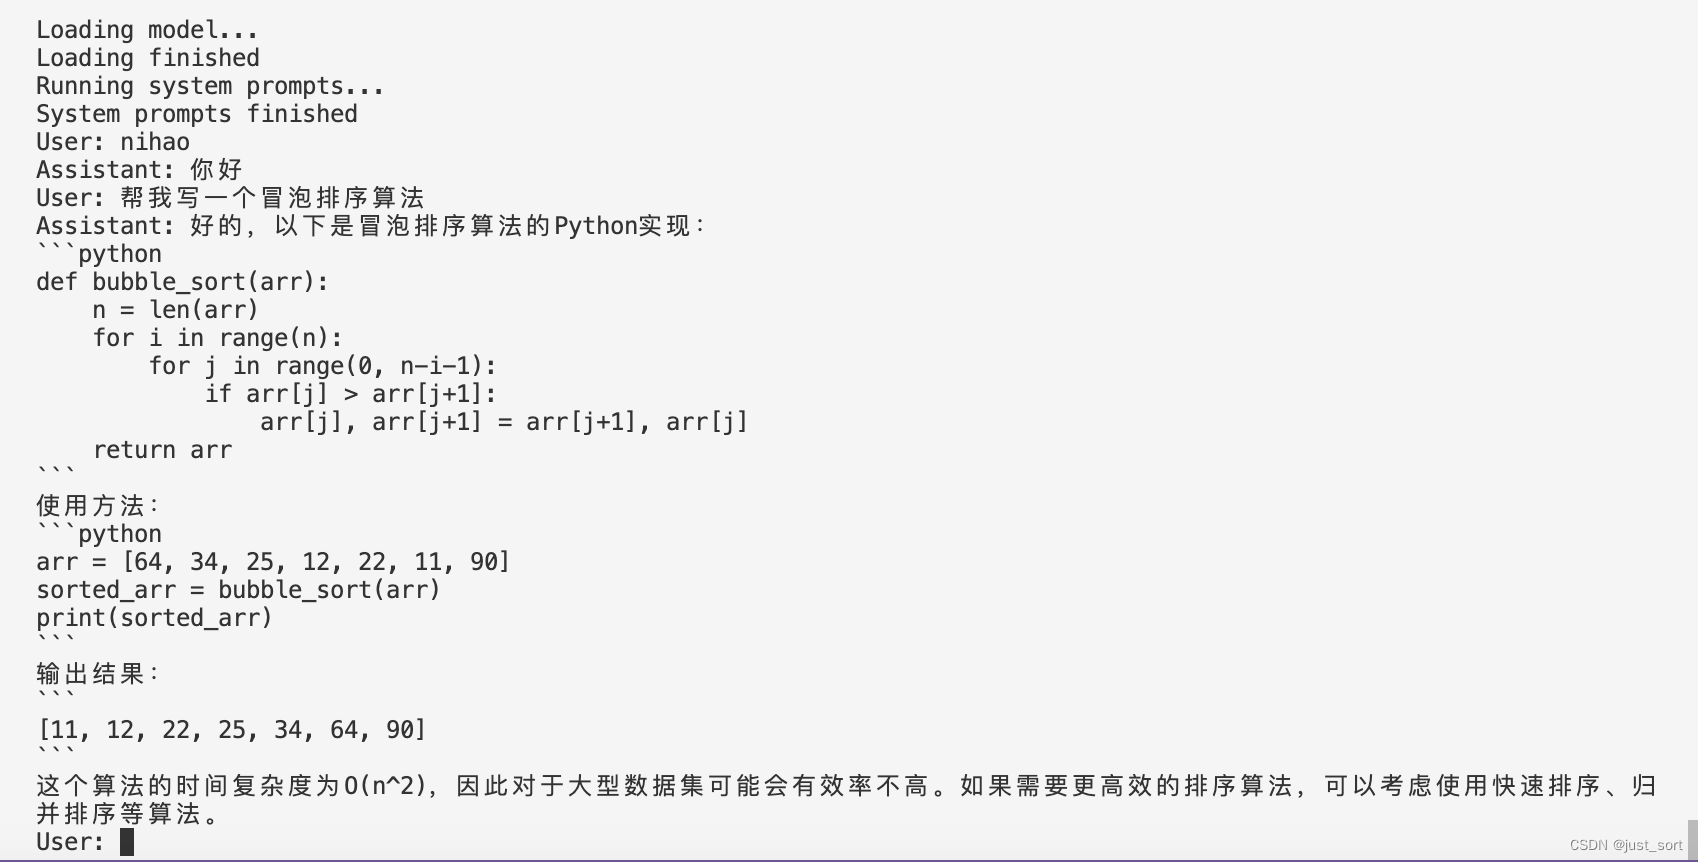
The program has some special commands to exit, check speed, etc.:

Performance Testing
| Hardware | Quantization Method | Speed |
|---|---|---|
| A800 | q0f16 | prefill: 362.7 tok/s, decode: 72.4 tok/s |
| A800 | q4f16_1 | prefill: 1104.7 tok/s, decode: 122.6 tok/s |
Here are two sets of performance data. If you're interested, you can test other configurations.
Layer-by-Layer Debugging Method
While adapting the 1.5B model, we encountered a phenomenon where the inference result was NaN. You can use the mlc-llm/tests/debug/dump_intermediate.py file to align the input and tokenizer results for debugging. This allows for precise simulation of model inference and printing of intermediate values for each layer, making it easy to identify at which layer the NaN occurred.
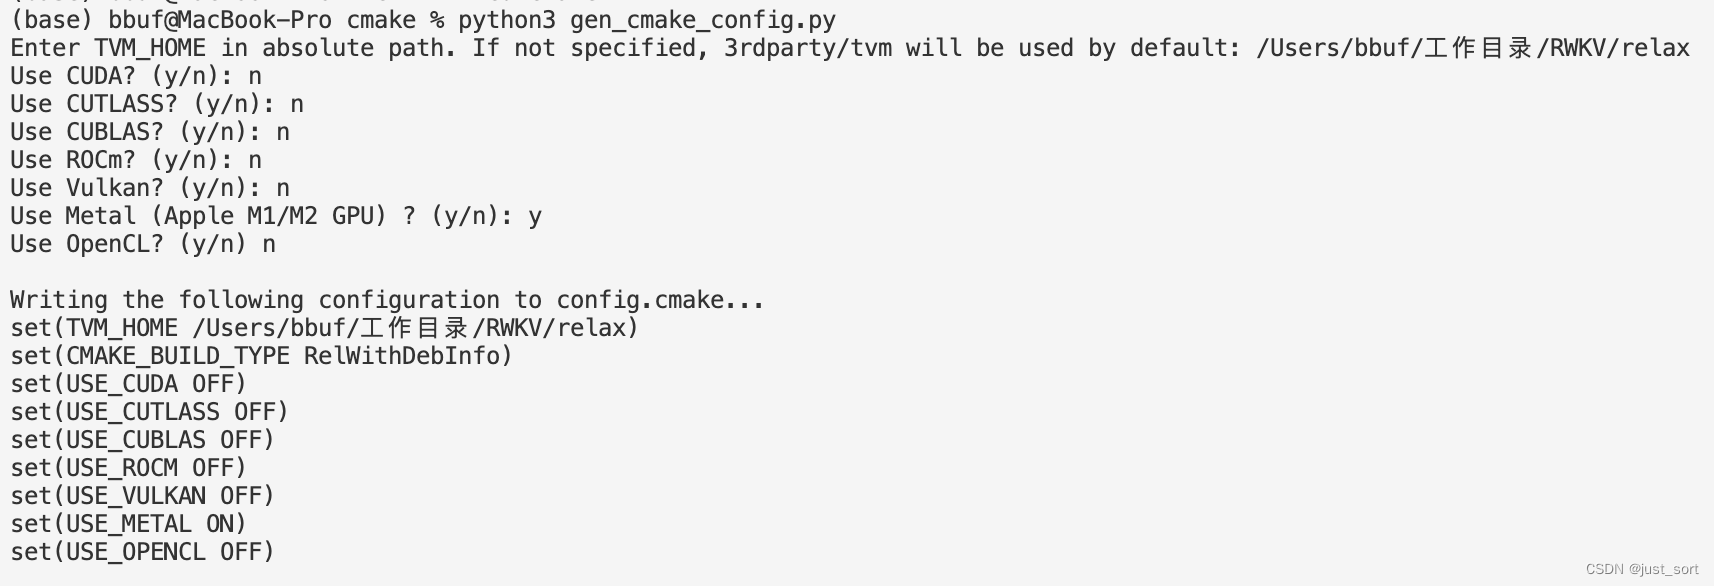
Deploying on Mac and CUDA doesn't have significant differences. The main distinction is that when compiling relax and mlc-llm, you should now choose the Metal option instead of CUDA. I recommend handling the compilation issues within an Anaconda environment, rather than using the system's default Python environment.
When compiling relax, you need to enable both the Metal and LLVM options. If your system doesn't have LLVM, you can install it using Homebrew.
In mlc-llm, when generating the config.cmake, use the following options:
pip install ., use the command below to quantize the model:
python3 -m mlc_llm.build --hf-path StarRing2022/RWKV-4-World-3B --target metal --quantization q4f16_1You also need to copy the tokenizer_model file to the params directory of the quantized model folder. Then, execute the following command to launch the chat program:
./mlc-llm/build/mlc_chat_cli --model RWKV-4-World-3B-q0f16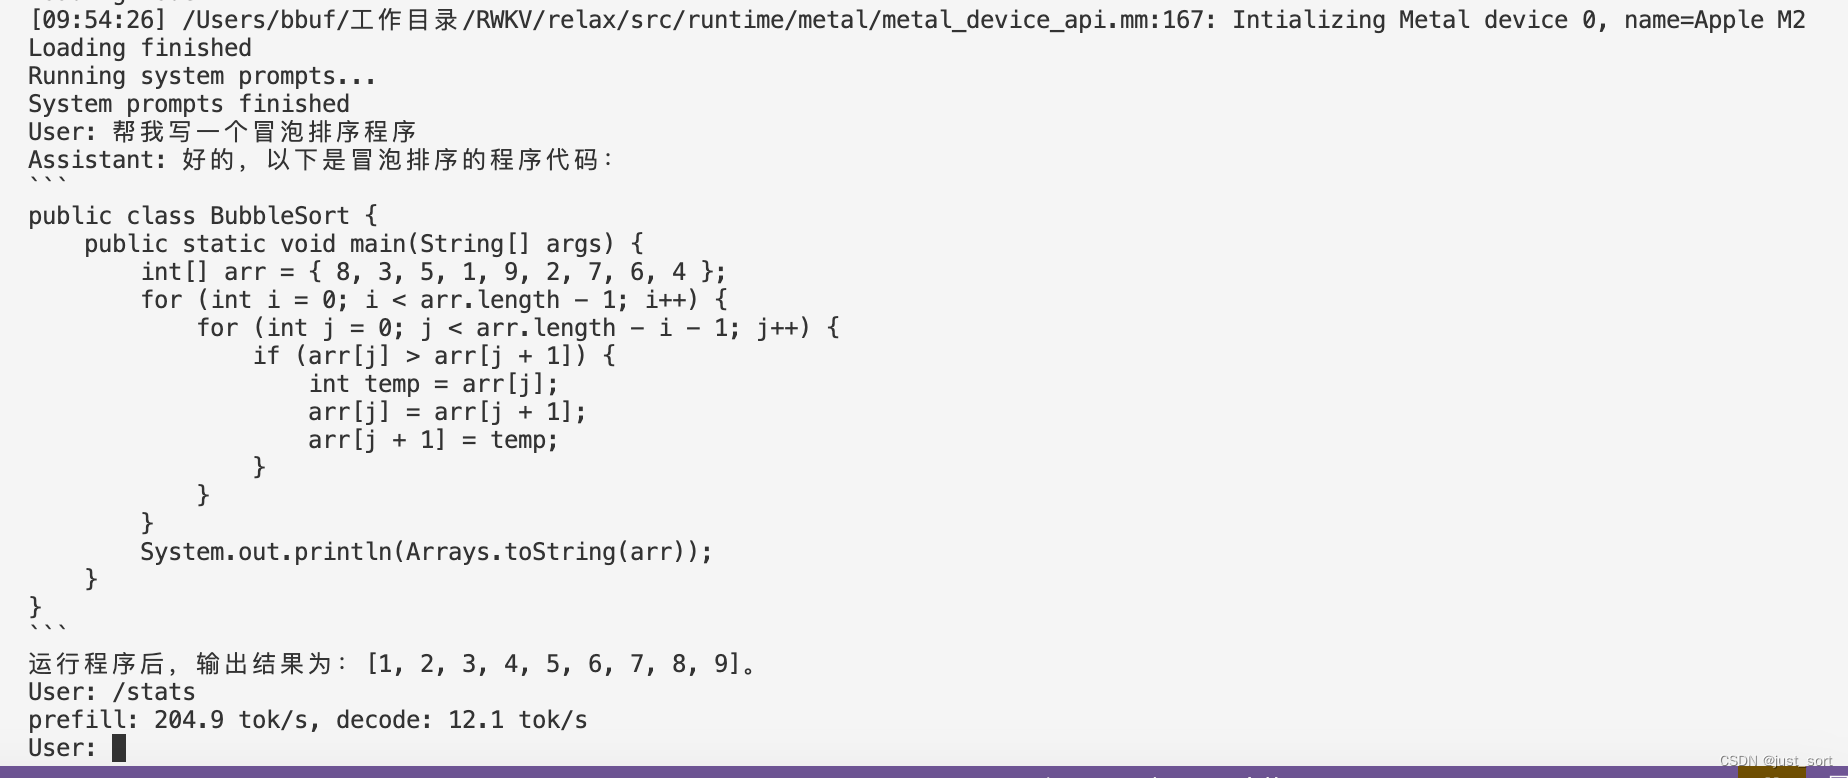
| Hardware | Quantization Method | Speed |
|---|---|---|
| Apple M2 | q0f16 | 204.9 tok/s, decode: 12.1 tok/s |
| Apple M2 | q4f16_1 | prefill: 201.6 tok/s, decode: 26.3 tok/s |
It's recommended to use the q4f16 configuration for faster responses.
For Android, you can follow https://mlc.ai/mlc-llm/docs/deploy/android.html tutorial to compile apk in you phone.
Here are a few points that need to be modified according to the official tutorial:
- Modify this file. The updated content should be:
{
  "model_libs": [
    "RWKV-4-World-3B-q4f16_1"
  ],
  "model_list": [
    {
      "model_url": "https://huggingface.co/BBuf/RWKV-4-World-3B-q4f16_1/",
      "local_id": "RWKV-4-World-3B-q4f16_1"
    }
  ],
  "add_model_samples": []
}- Modify this section of the code to:
compileOptions {
    sourceCompatibility JavaVersion.VERSION_17
    targetCompatibility JavaVersion.VERSION_17
}
kotlinOptions {
    jvmTarget = '17'
}- If you encounter the error: "Android Gradle plugin requires Java 17 to run. You are currently using Java 11", please follow the method provided in this document to clear the cache and recompile.
Once you have completed the APK compilation, you can enable developer mode on your phone and install the APK for use.
Using Xiaomi phones as an example, you can follow the tutorial below to enable developer mode and transfer the APK to your phone.
-
Step One: Enable USB Debugging on the Phone
- First, go to "Settings -> My Device -> All Specifications -> MIUI Version" on your phone and tap on "MIUI Version" seven times consecutively to enter developer mode.
- Next, navigate to "Settings -> Additional Settings -> Developer Options" and turn on both "USB Debugging" and "USB Installation".
-
Step Two: Configure Android Studio
- Open your Android Studio project, go to "Run -> Edit Configurations" as shown in the image below, and select "Open Select Deployment Target Dialog". This will prompt the device selection dialog every time you debug. Note: If you directly choose "USB Device", you might not be able to detect your phone during debugging.
-
Step Three: Online Debugging
- Connect your phone to the computer via USB. It will typically auto-install the necessary drivers. When you run the program, a device selection dialog will appear. Choose your phone, and the APK will automatically install and run.
An compiled apk: https://github.com/BBuf/run-rwkv-world-4-in-mlc-llm/releases/download/v1.0.0/app-debug.apk