
(c) Carsten Haubold, Image Analysis and Learning Lab, HCI/IWR, University of Heidelberg.
This repository contains ImageJ2 plugins that wrap ilastik workflows for usage in ImageJ and KNIME. Data transfer is managed through temporary HDF5 file export/import, which can also be performed individually. The ilastik workflows are invoked by running the ilastik headless mode from the command line.
Currently, three workflows are wrapped: Pixel classification, Object classification and tracking. There is one additional setting showing up in the ImageJ menu, which configures the location of the ilastik binary.
Within ImageJ/Fiji you can install the plugin via the Help -> Update menu and select the ilastik Import Export site.
Note: The plugins need Java 1.8, if you see error messages popping up that might be caused by an older Java version.
The ilastik workflow wrappers, as well as importer and exporter, can be found in ImageJ under Plugins -> ilastik,
or in KNIME in the Community Contributions -> KNIME Image Processing -> ImageJ2 -> Plugins -> ilastik.

All Plugins output status information to log files, so we suggest to keep an eye at the ImageJ Windows -> Console.
All workflow wrappers have the option to produce only the input files, so that you can use those to train an ilastik project. See the Training section for more details.
Found at Plugins -> ilastik -> Import HDF5.
HDF5 files can contain multiple datasets. Thus, when you import an HDF5 file containing more than one dataset, you will have to select which dataset you want to import. Then, you will be presented with the following dialog:

where you should select or enter the correct meaning of the different dimensions of the dataset.
At least x and y must be present, and the number of characters (x,y,z spatial, c channels and t time)
must be equal to the number of dimensions listed in the description above.
If you choose Load and apply LUT, after loading the 3-3-2-RGB lookup table will be applied for you, which is
a sensible option for connected component labellings (e.g. a tracking result) or per-object predictions.
Found at Plugins -> ilastik -> Export HDF5.
If you want to save the currently opened image to a HDF5 file that can be immediately opened in ilastik,
use this export option. Additionally to the location where the file should be saved, you will be asked how much
the dataset should be compressed. Use 0 for raw data because it doesn't compress well, but 9 for segmentations etc,
where many pixel values are equal. See also the tooltip when you hover over Compression Level.

For the workflow wrappers below, it is important that ilastik projects are trained from data that was preprocessed and exported the same way as all further datasets will be. There are two ways how this can be achieved with this plugin:
- You can manually use the export option as described above to export your images from ImageJ to an ilastik-compatible HDF5 dataset with 5 dimensions. Then when you create an ilastik project, read the raw data / probabilities / segmentation from the exported HDF5 files.
- Each workflow wrapper has a
Save temporary file for training only, no predictionoption. If you select this option and run the plugin, the input files -- that would otherwise be passed to ilastik -- are exported to temporary files.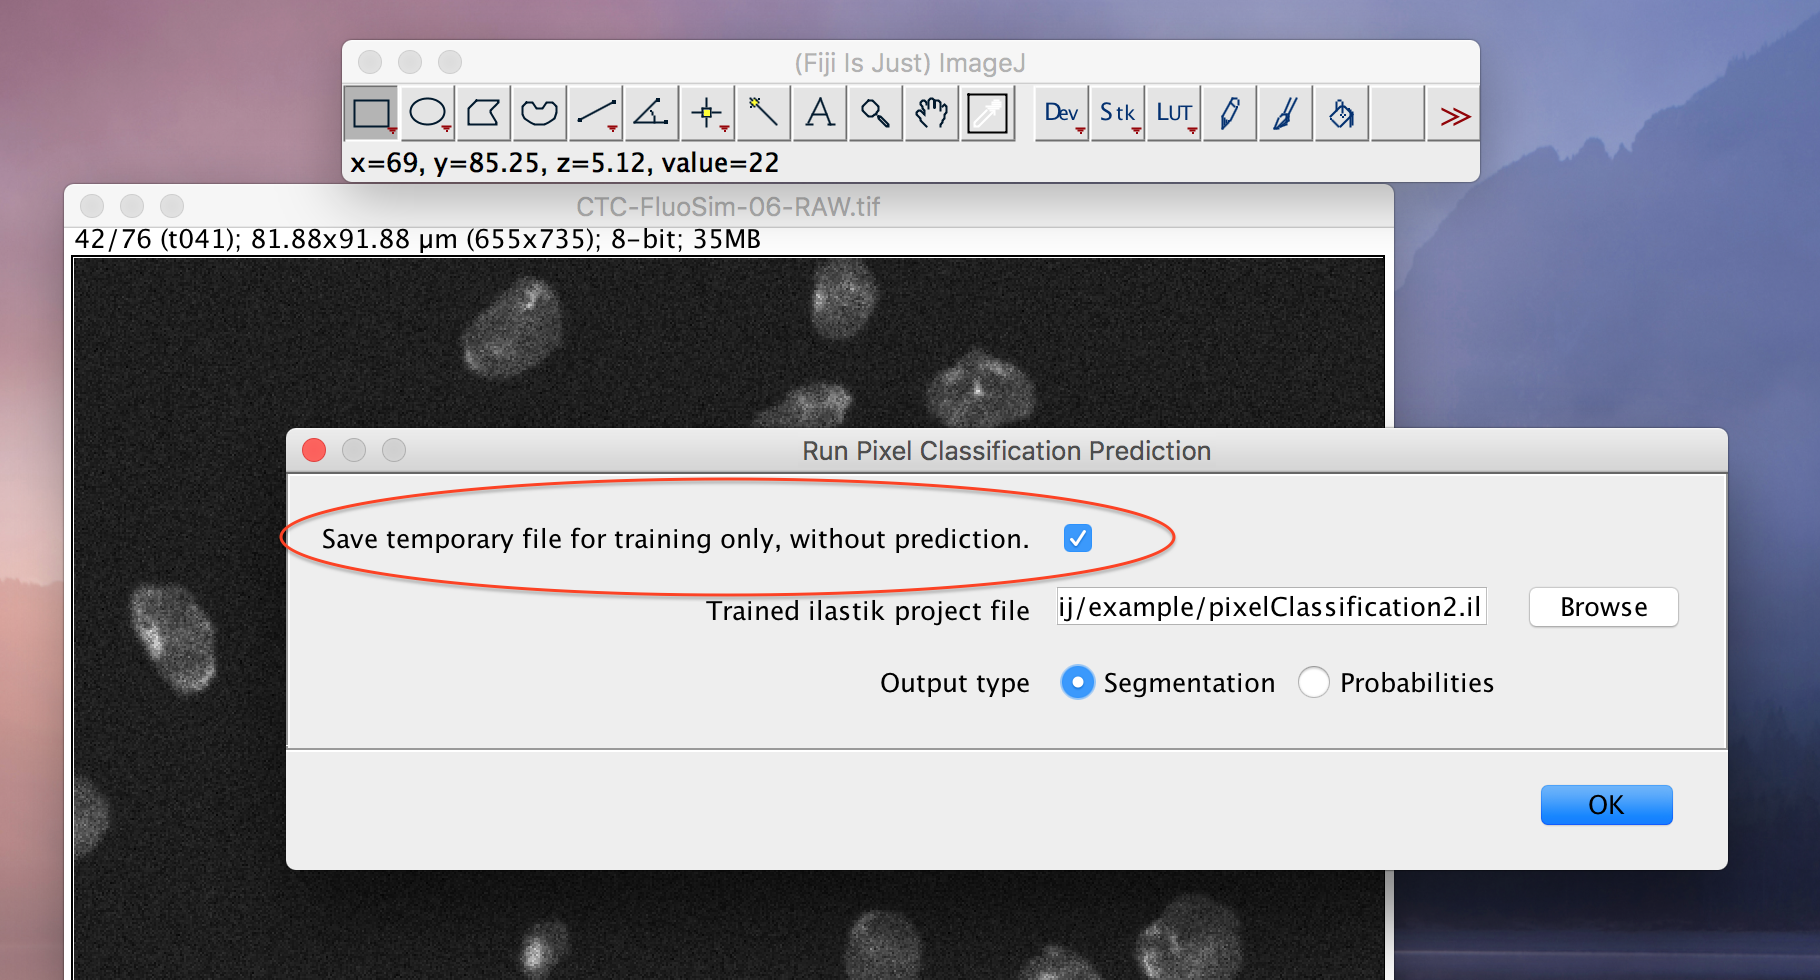 The locations and names of those files are written to ImageJ's console, which you should open using
 Window->Console.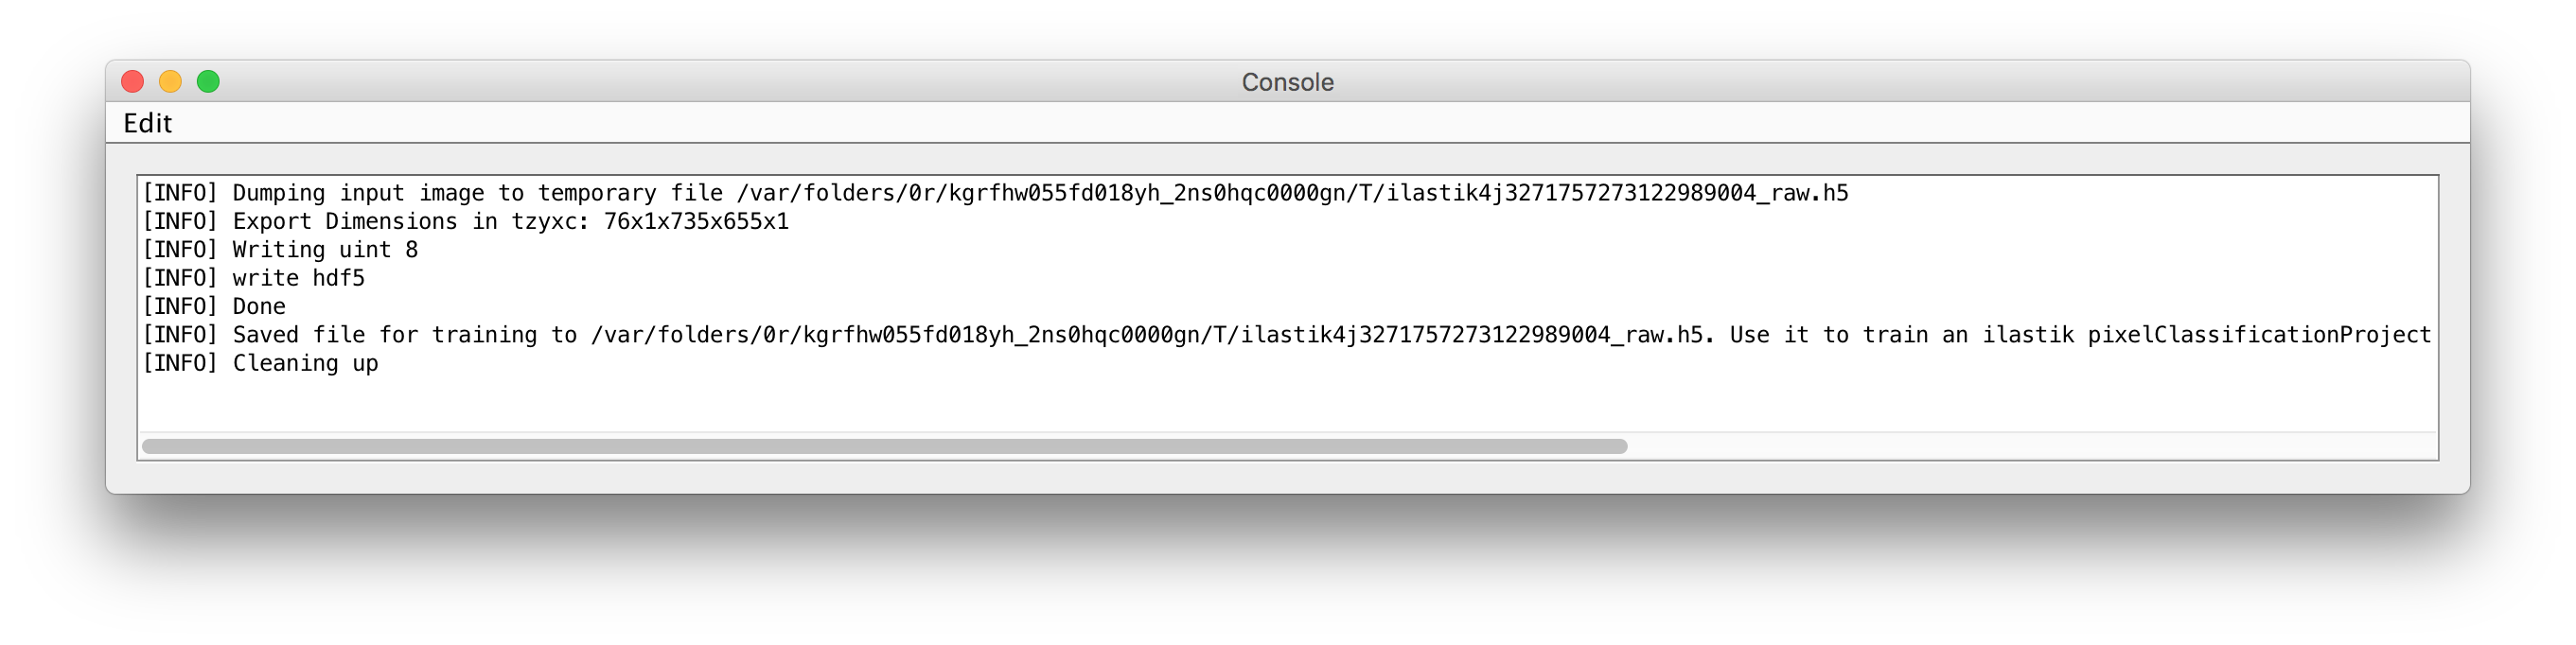 Use this file as input in your ilastik project. Then processing any further files from ImageJ through the ilastik workflow wrappers
should give the desired results.
Use this file as input in your ilastik project. Then processing any further files from ImageJ through the ilastik workflow wrappers
should give the desired results.


Found at Plugins -> ilastik -> Configure ilastik executable location.

- Path to ilastik executable: choose the location of your ilastik binary executable
- Number of threads to use (-1 for no limit)
- Specify an upper bound of RAM that ilastik is allowed to use
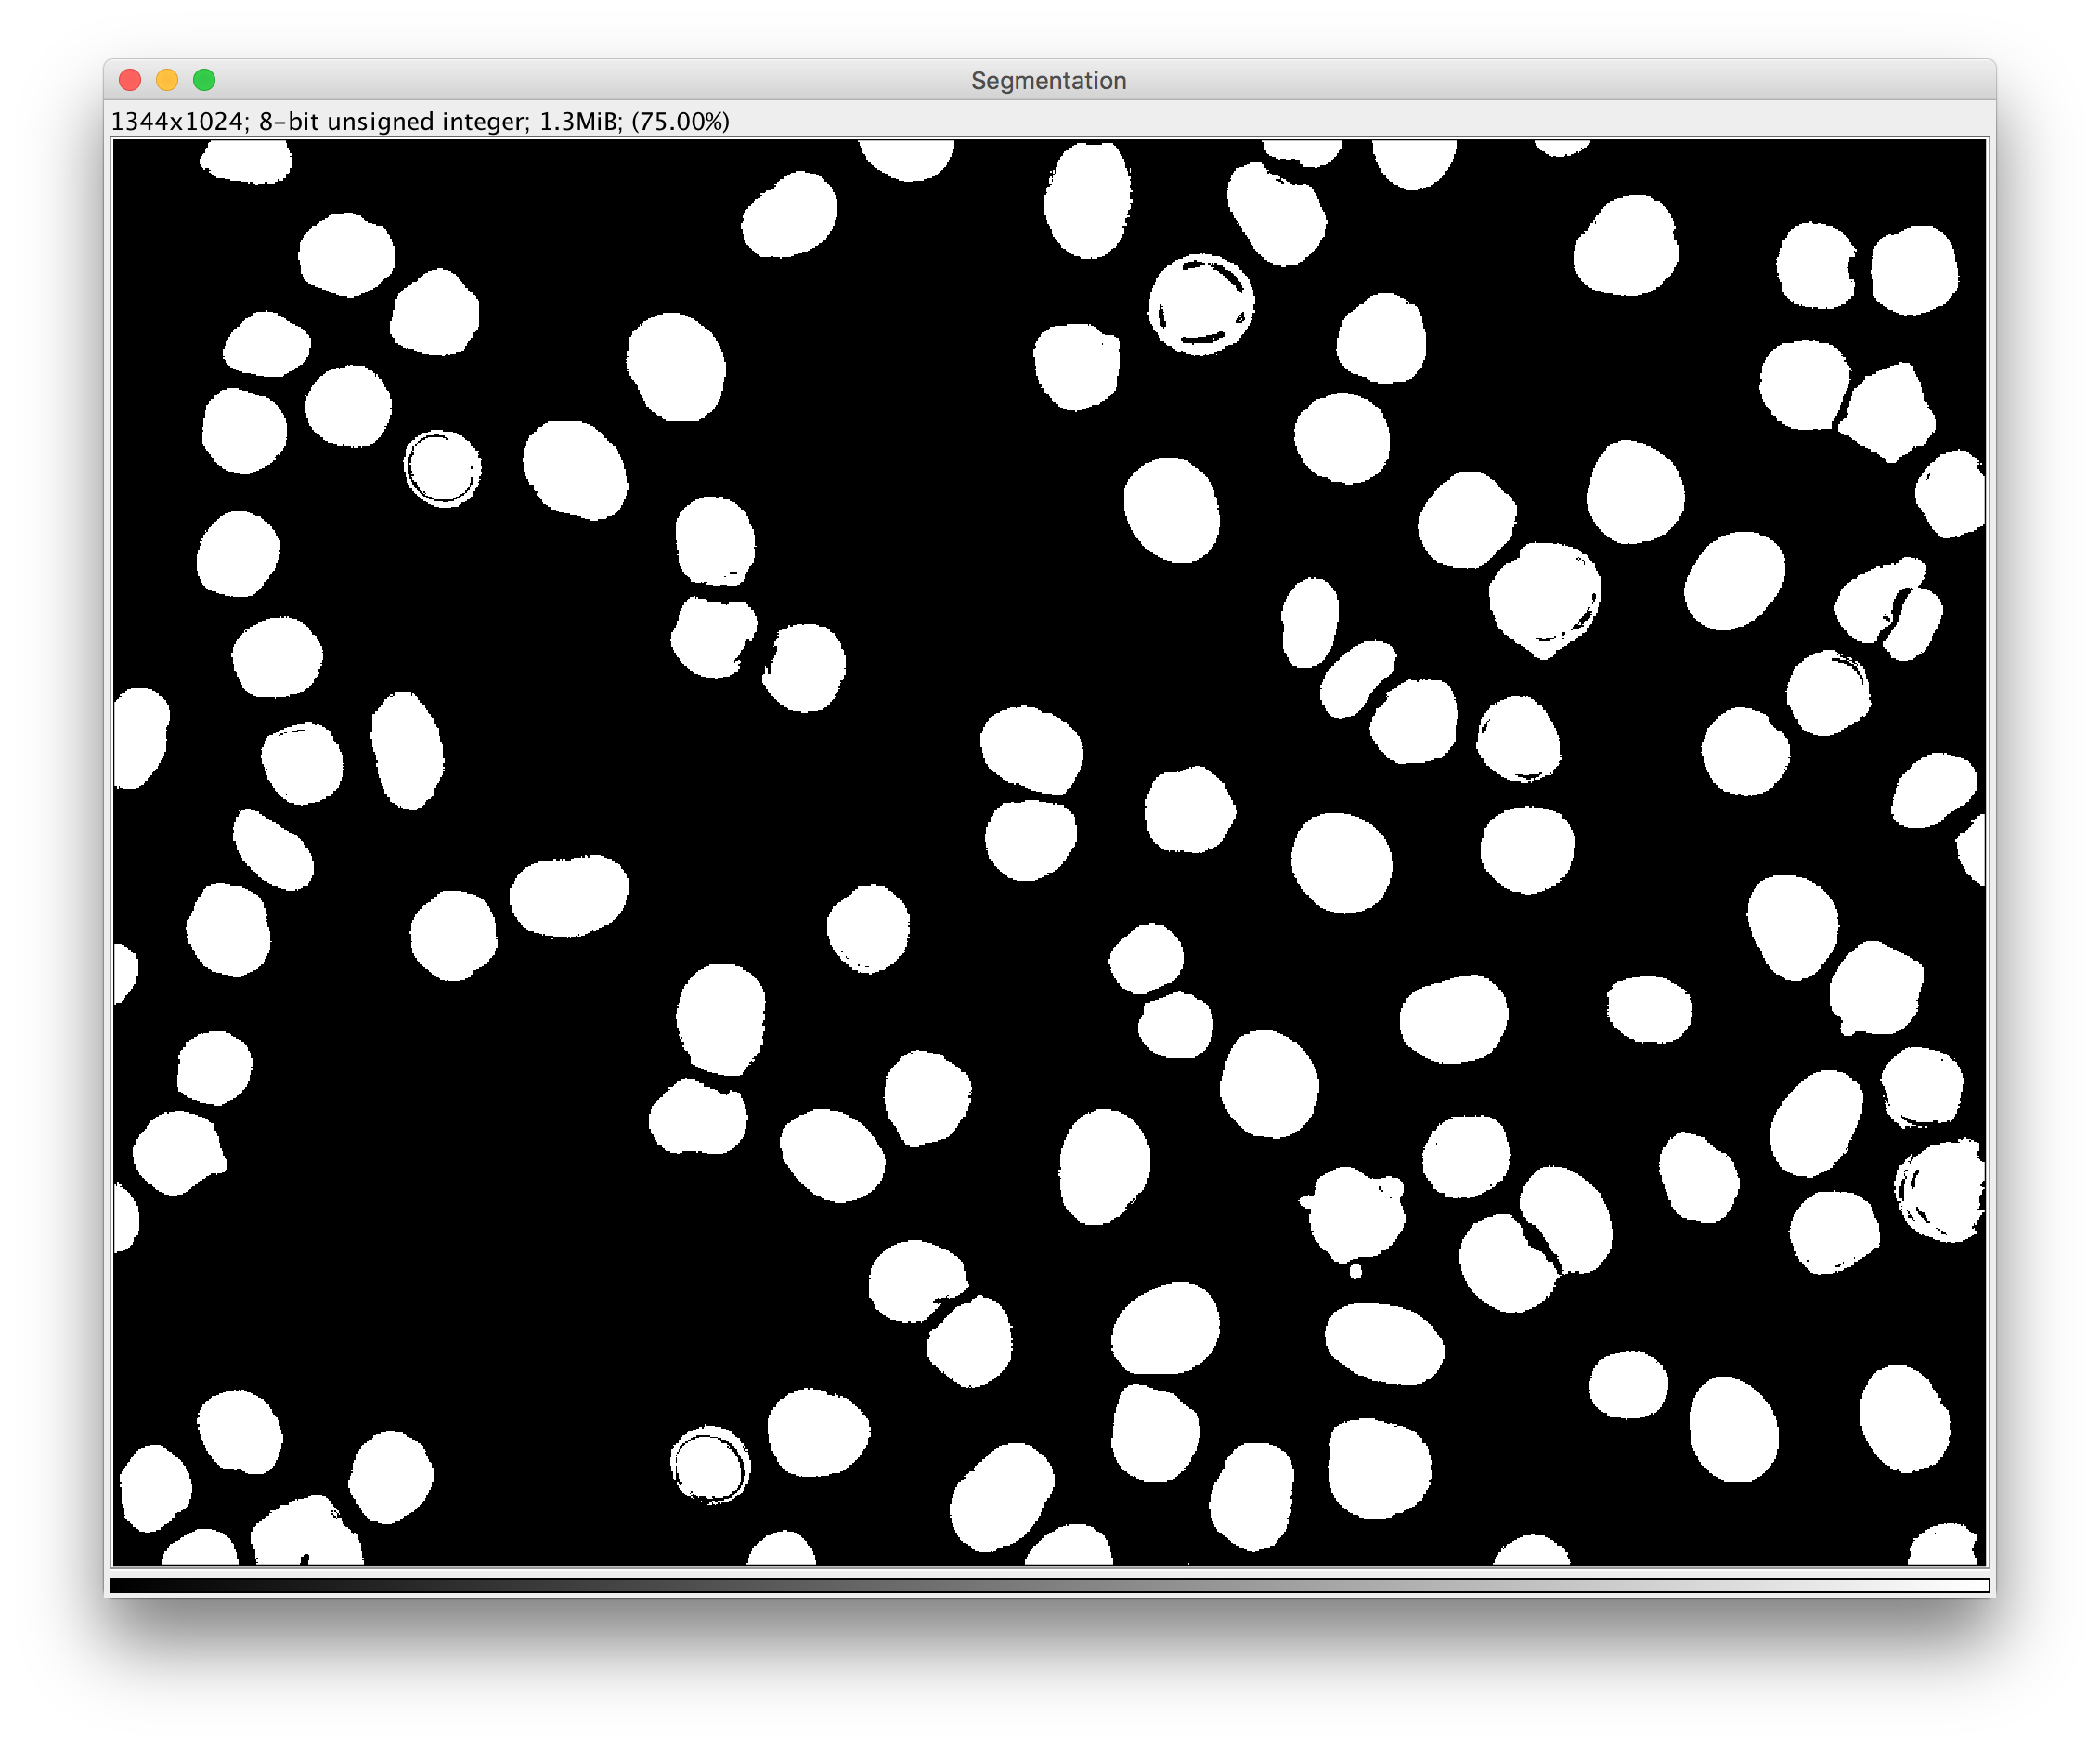
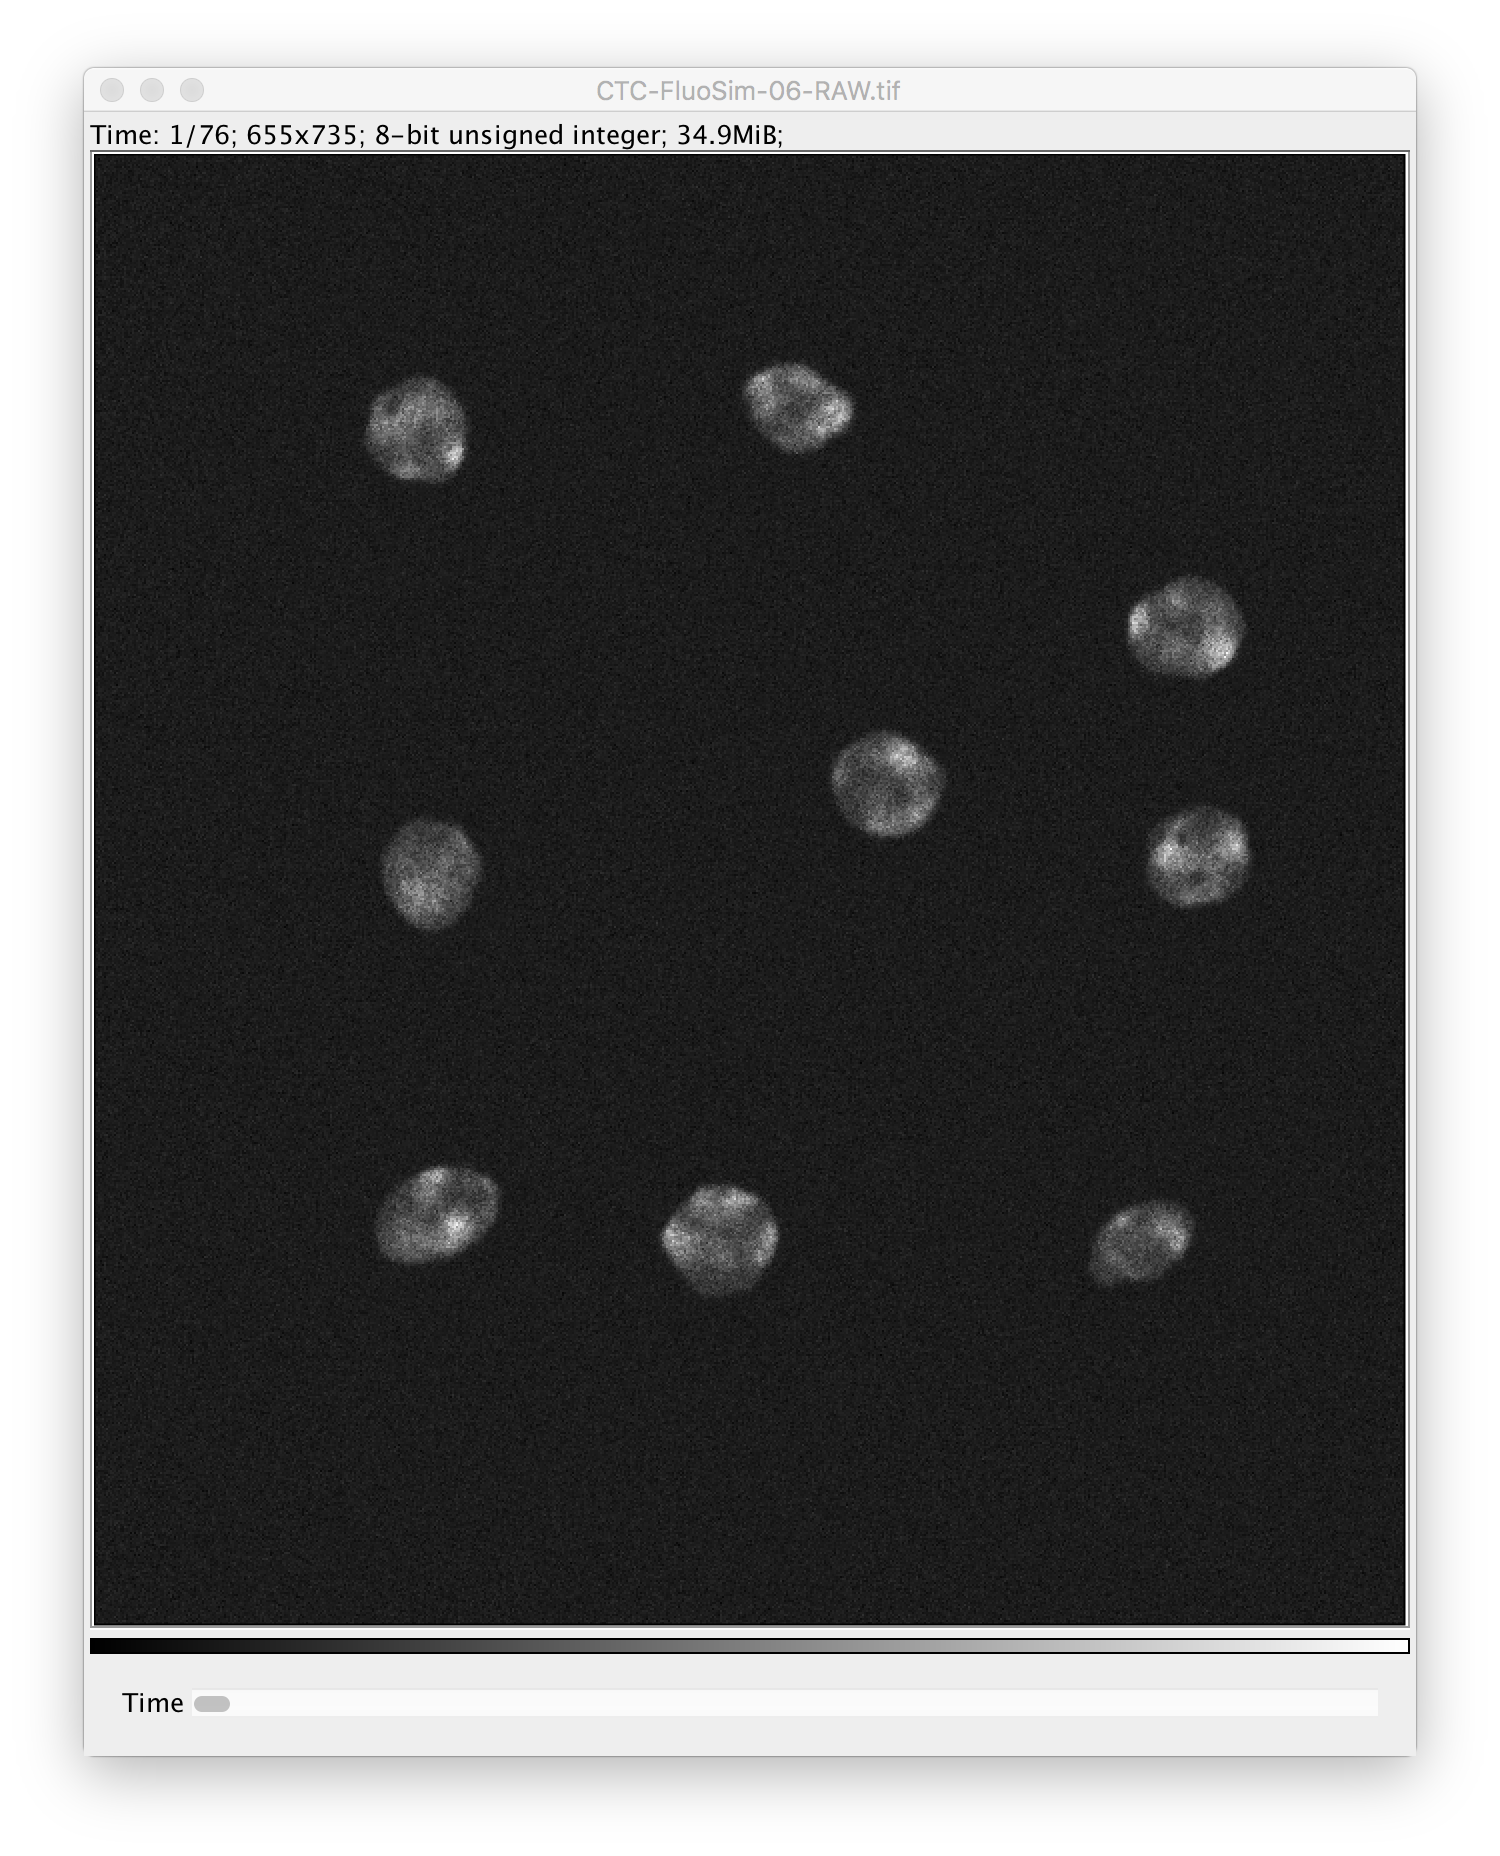
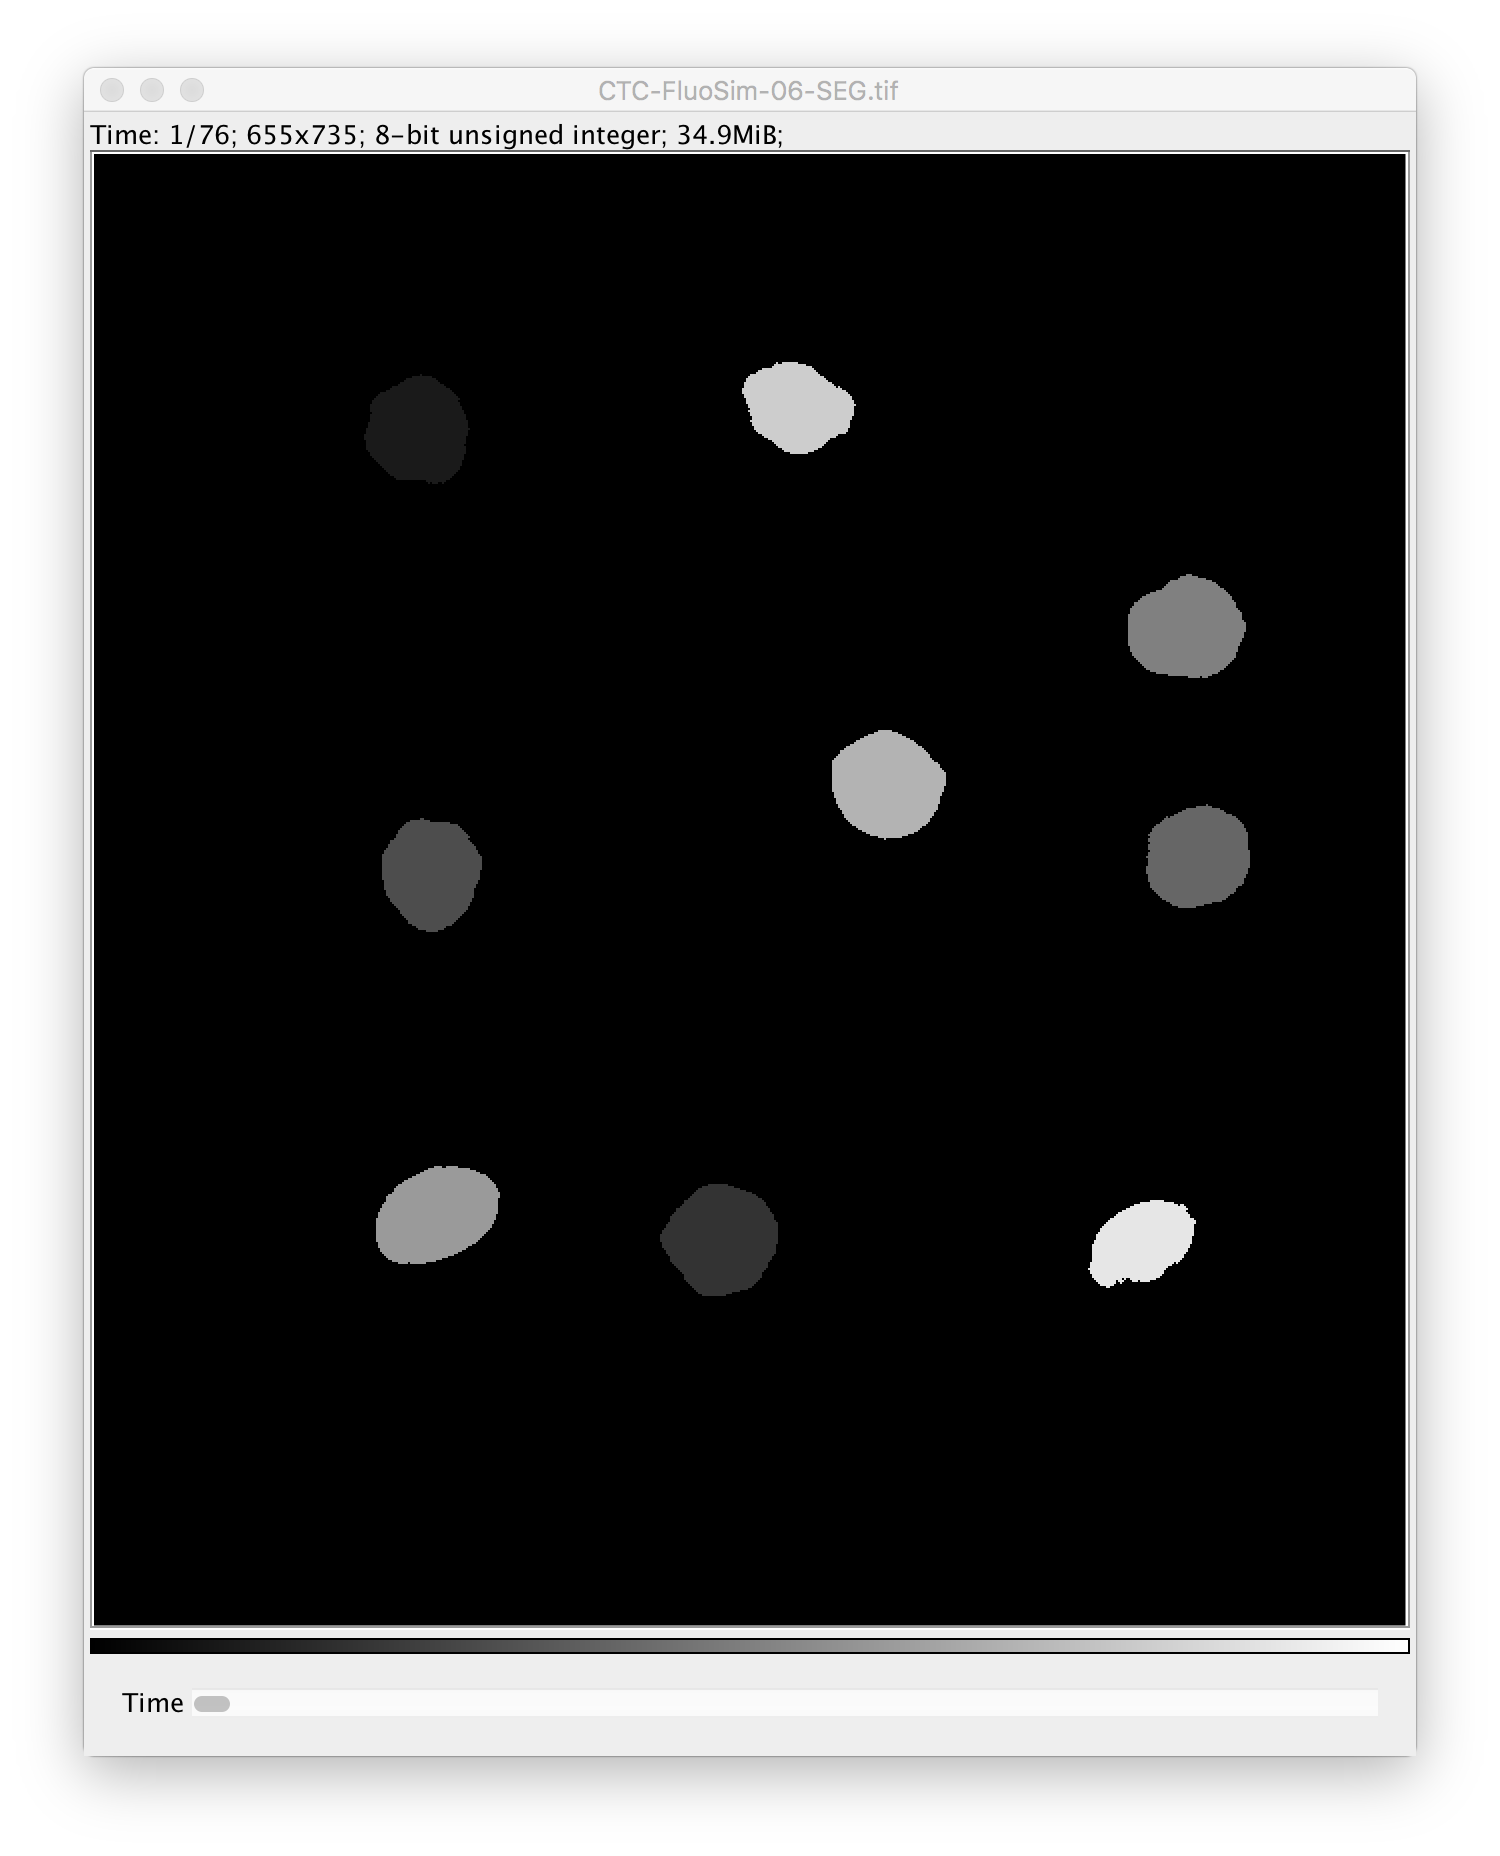
Found at Plugins -> ilastik -> Run Pixel Classification Prediction.

Inputs:
- a raw image on which to run the pixel classification (if only one is opened, there is no selection in the dialog)
- a project file
- whether to produce per-pixel probabilities, or a segmentation

Output:
- if Probabilities was selected: a multi-channel float image that you can e.g. threshold to obtain a
segmentation
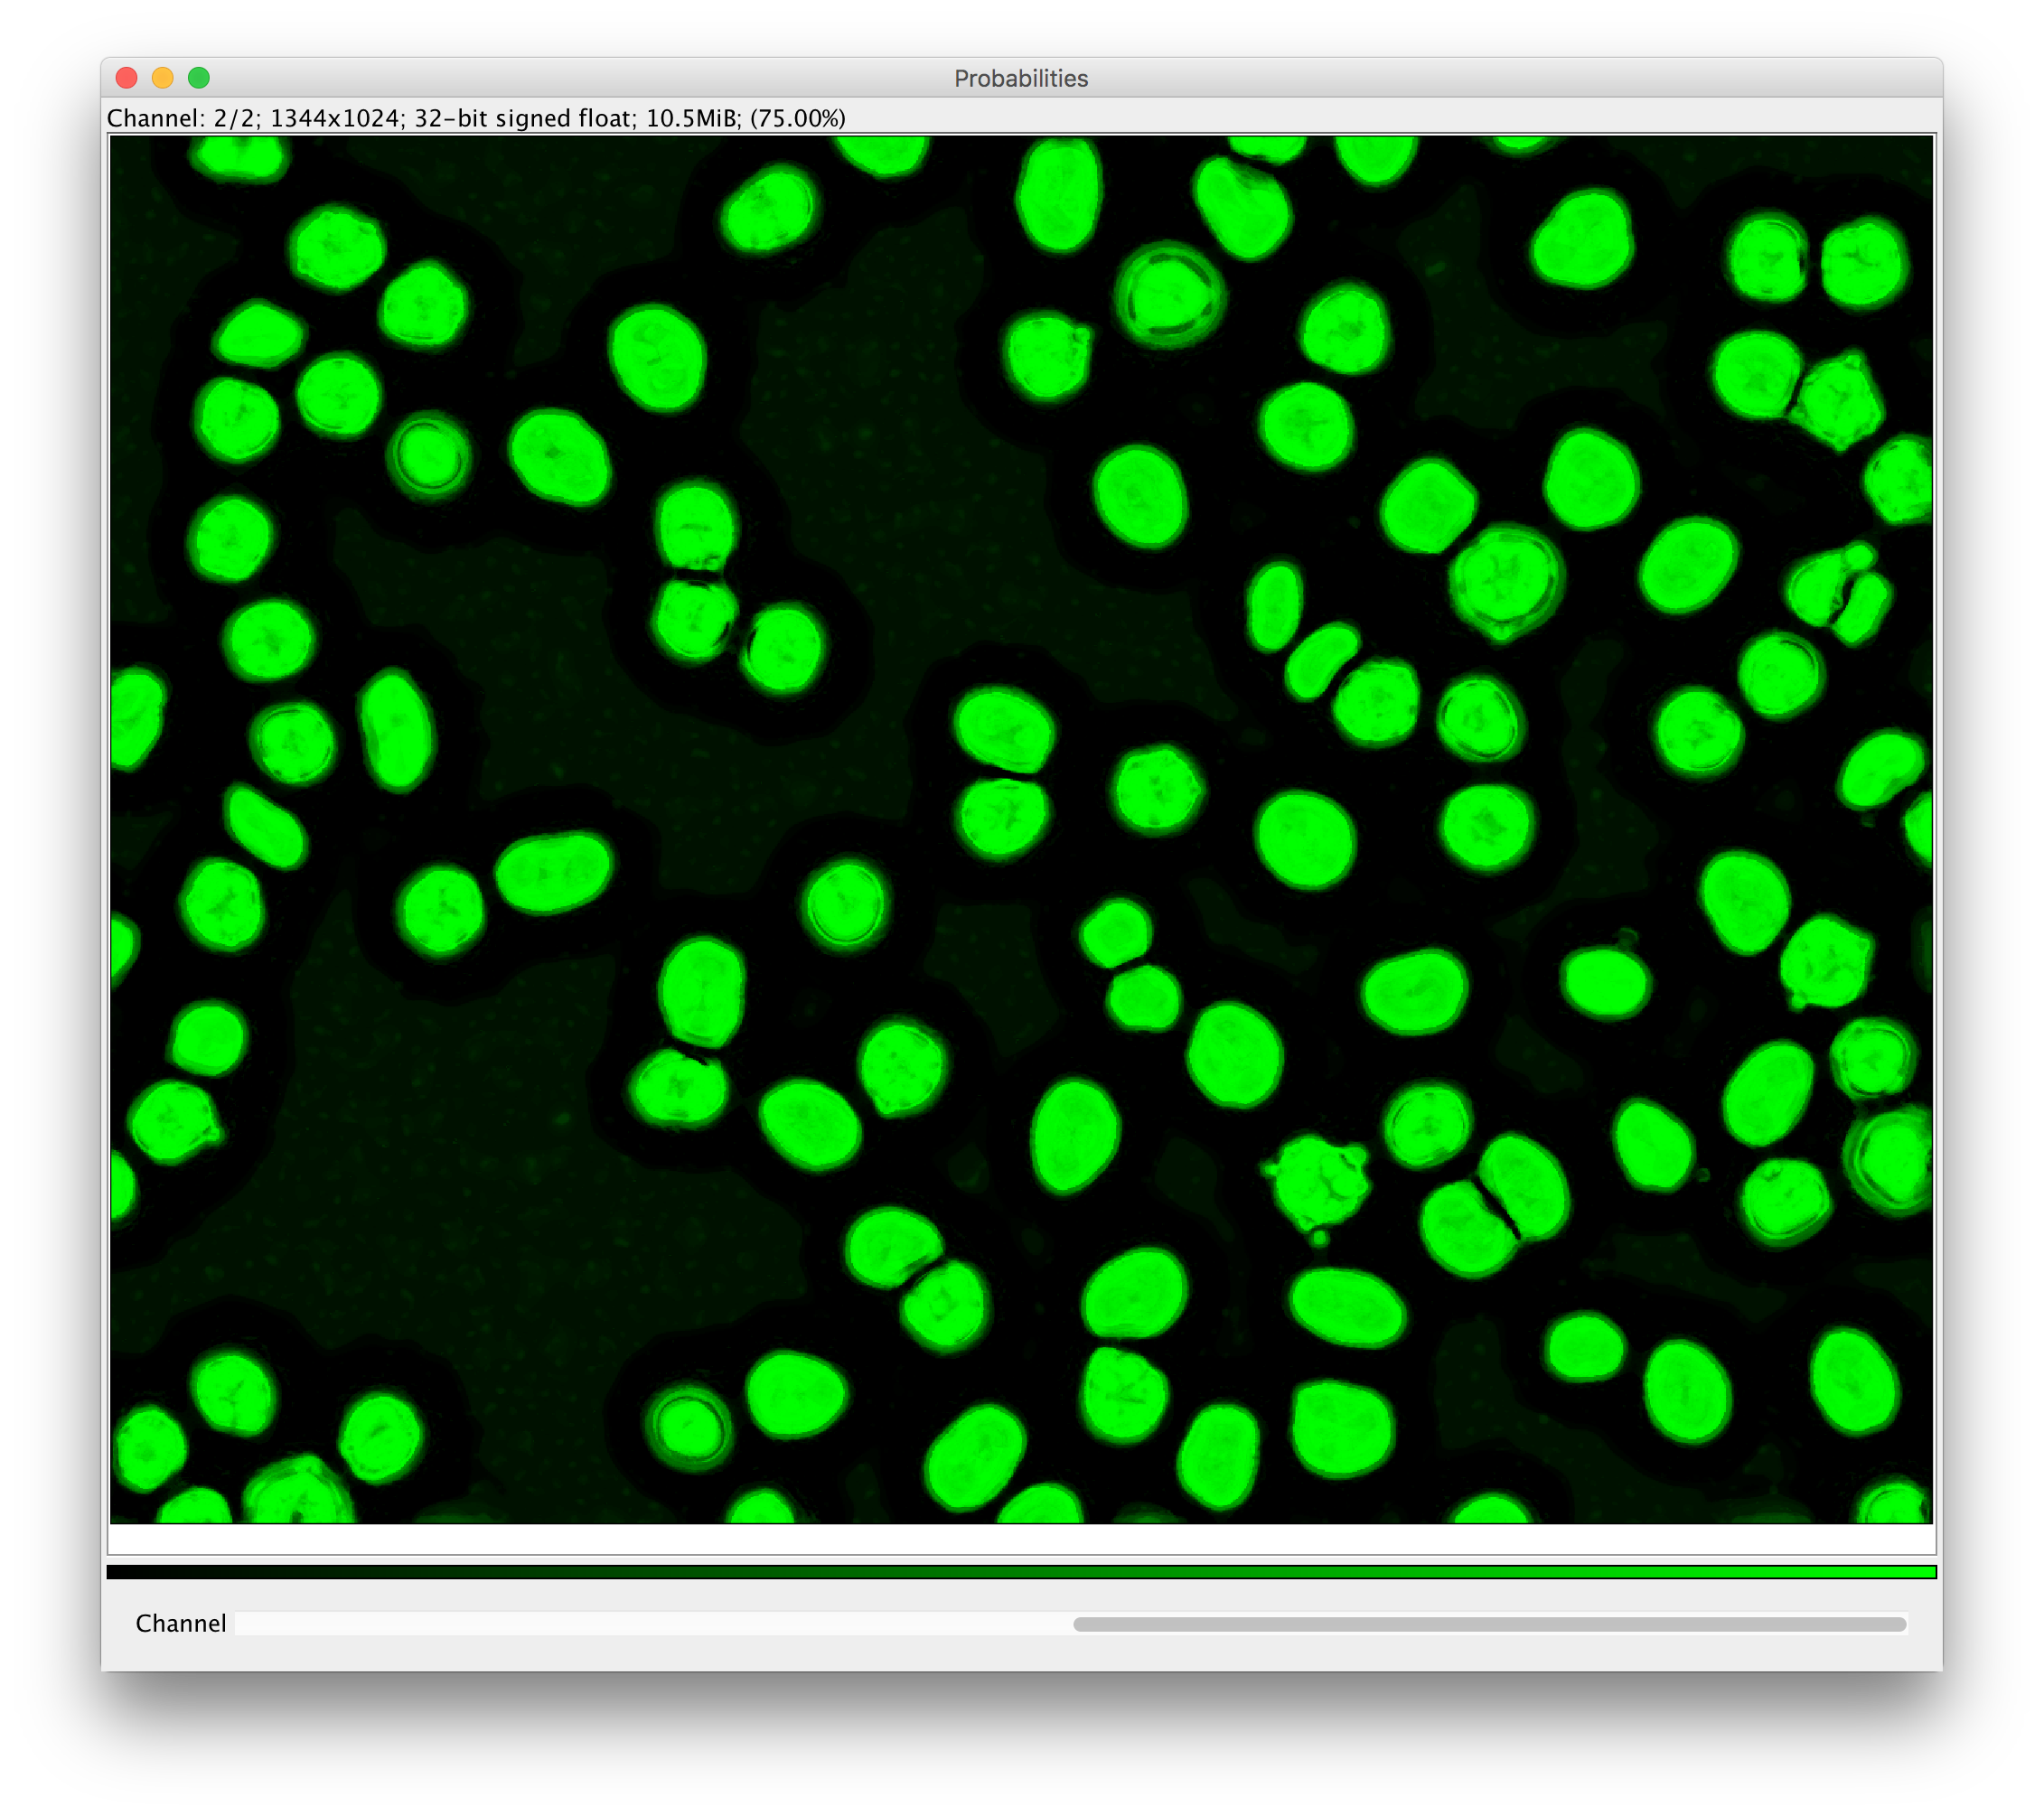
- or a Segmentation:a single-channel image where each pixel gets a value corresponding to an object ID inside a connected component.


Found at Plugins -> ilastik -> Run Object Classification Prediction.

Inputs:
- a project file
- one raw image (select the appropriate one in the dropdown box as shown above)
- one additional image that contains either per-pixel probabilities or a segmentation
- select the appropriate input type (Probabilities or Segmentation)
Output:
- a new image where the pixels of each object get assigned the value that corresponds to the class that was predicted for this object.


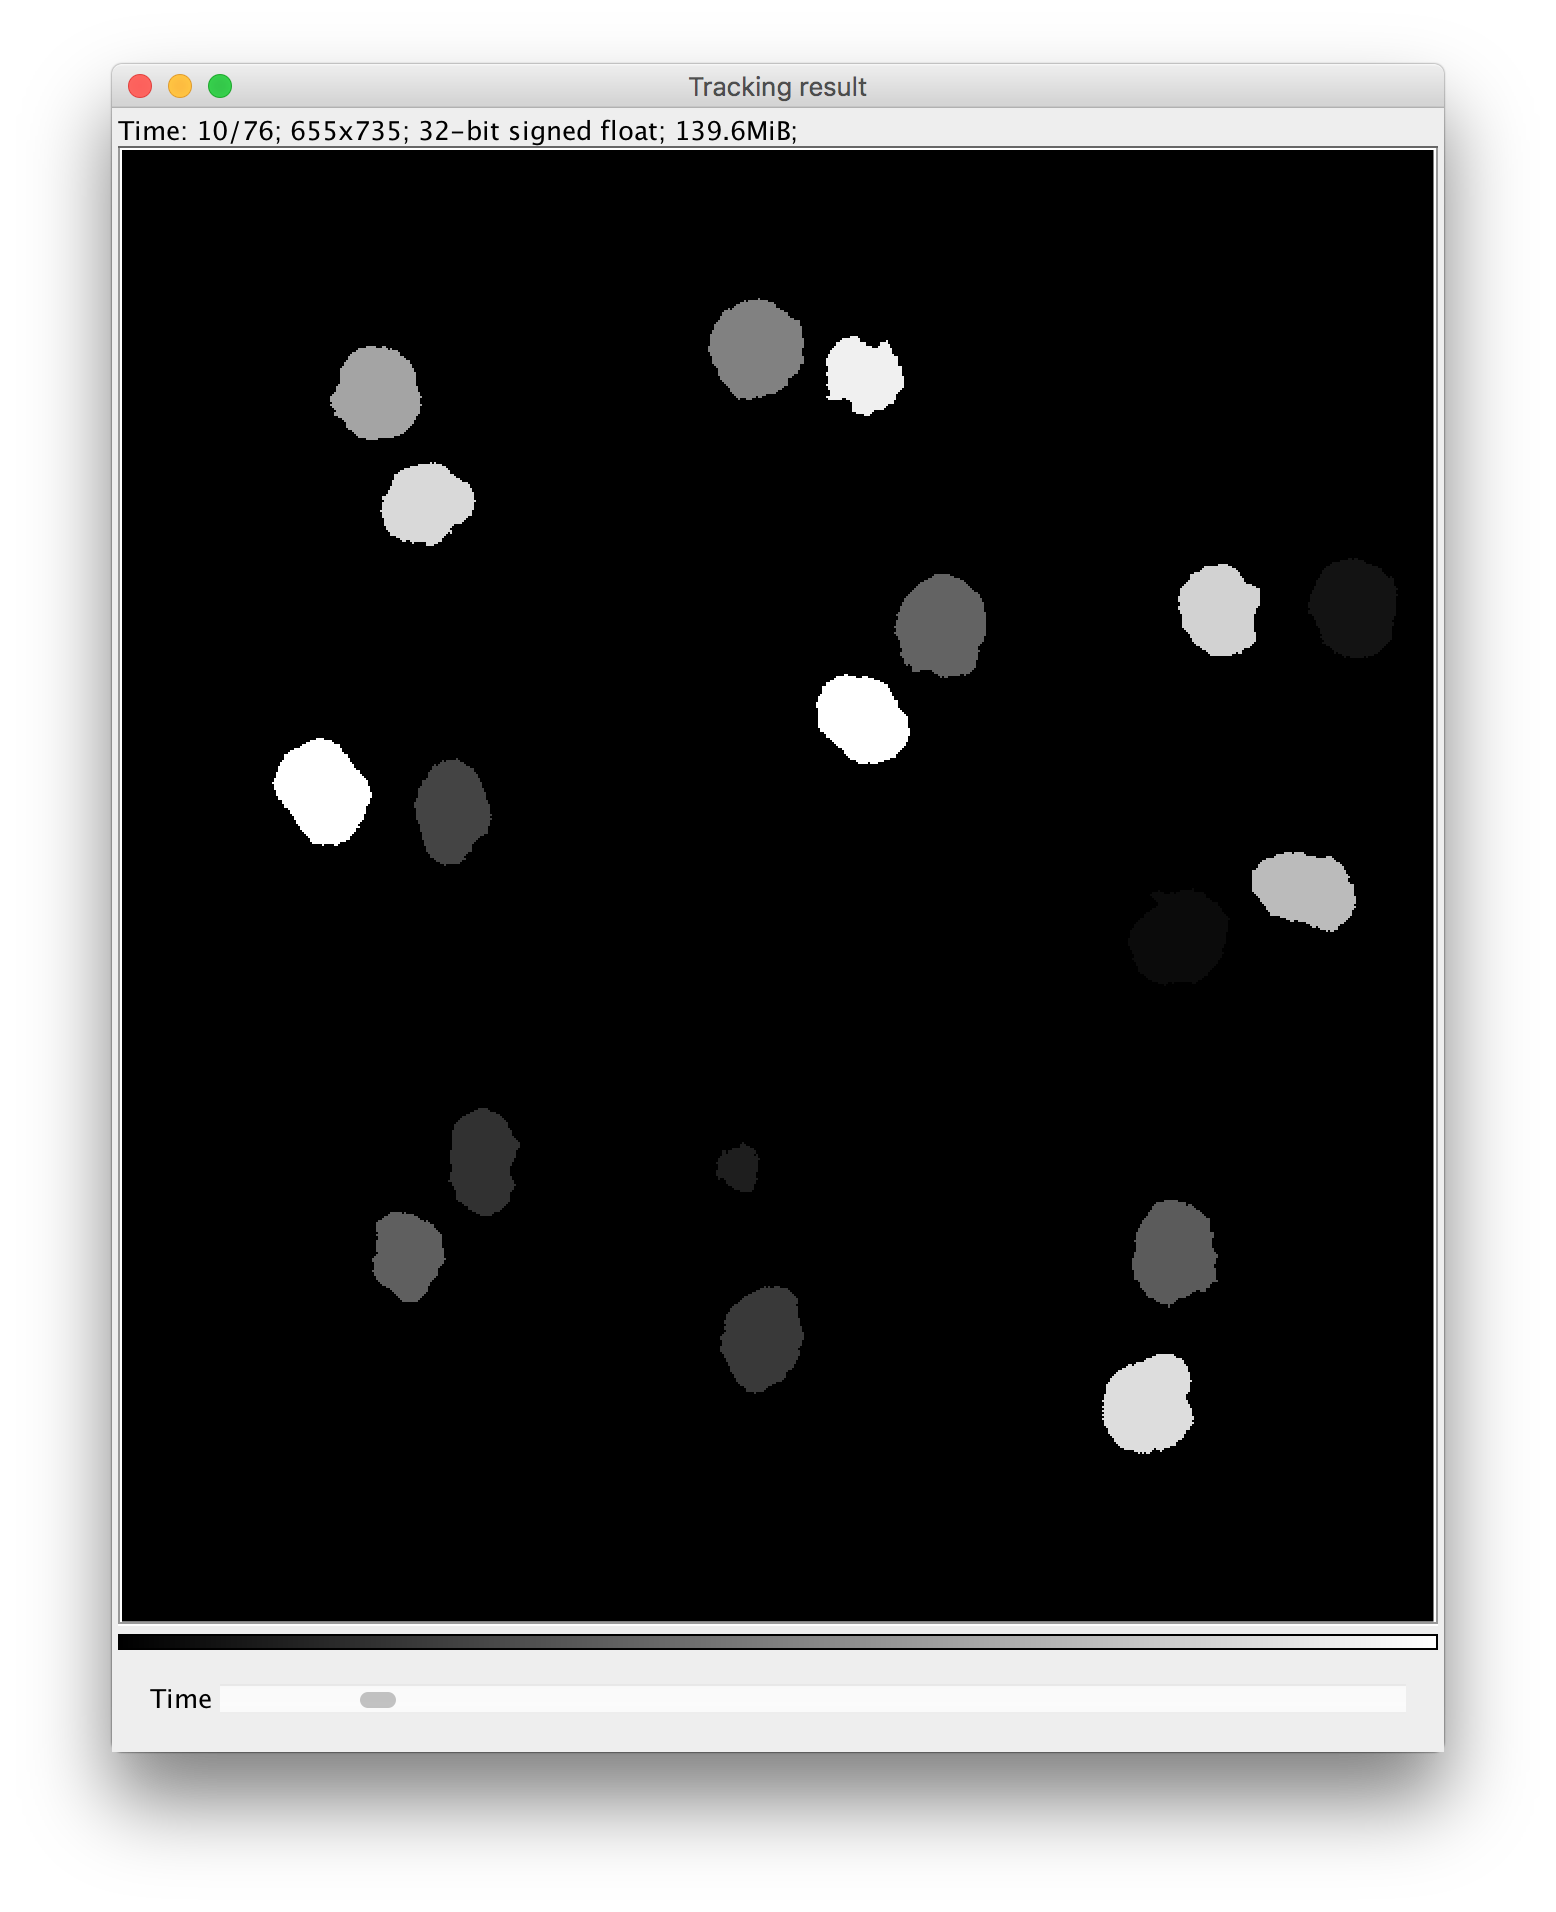
Found at Plugins -> ilastik -> Run Tracking.

Inputs:
- a project file
- one raw image (with a time axis!)
- one additional image that contains either per-pixel probabilities or a segmentation with the same dimensions as the raw image.
- select the appropriate input type (Probabilities or Segmentation)


Output:
- a new image stack where the pixels of each object in each frame get assigned the value that
corresponds to the lineage ID of the tracked object. Whenever an object enters the field of view
it will be assigned a new lineage ID. All descendants of this object will be assigned the same
lineage ID.


The workflow wrappers are ImageJ2 plugins (see https://imagej.net/Writing_plugins), annotated with
@Plugin for automated discovery by the scijava plugin architecture, and derived from Command
to be an executable item. Each command can have multiple @Parameters, which are to be provided by
the user in an auto-generated GUI (see https://imagej.net/Script_Parameters for a list of which
parameters are allowed). One can have multiple Datasets as input parameters, but the output should
be an ImgPlus (an ImageJ2 datastructure wrapping an ImgLib2 Img
with metadata) so that the result pops up as new window. A Dataset is a wrapper around an
ImgPlus.
Attention: there are ImageJ 1 and ImageJ 2 containers for images. In ImageJ 1, images were stored
as ImagePlus, containing ImageProcessors to access the underlying data. We try to use ImageJ 2
containers everywhere which are roughly wrapped as Dataset > ImgPlus > Img > RandomAccessibleInterval.
Testing: no real tests are included right now, but you can run the main method in
WorkflowTests.java which fires up an ImageJ instance for each of the three plugins.
We follow the setup of other scijava modules and use their Travis setup that allows us to
automatically deploy Maven artifacts (built modules) as explained here.
The project configuration, including dependencies, is contained in the pom.xml file. To create a
new release, use the release-version.sh script from https://github.com/scijava/scijava-scripts,
which goes a long way of ensuring that the project is ready to be published. Once it is released,
the nightly build of KNIME Image Processing (KNIP) will pick it up and wrap it as well.