We're gonna go live on GitHub with your very own website!
Table of Contents
- First Website
- Prerequisites
- Overview
- Setup
- Lesson Steps
- Serve Your Website
- Serve Only the index page
-
Students will require a GitHub account and will need to remember their GitHub username and password.
GitHub is a place on the Internet where we can store code! It's a cool social coding platform, kind of like Facebook for coders.
-
Students will require a Cloud9 account - they will login to Cloud9 using their GitHub credentials.
Cloud9, or c9, is a place on the Internet where we can work on code. Cloud9 allows us to create virtual workspaces for our coding projects.
- At the end of the lesson students will have built and designed their own website that is viewable on the web.
- The website will be hosted on GitHub under student's own account, and is something they can build upon on over time.
- The live website is hosted using a service called GitHub Pages: If you want to learn more about GitHub Pages, have a look here...
- The website will be the student's own and will feature a short profile of the student.
- Basic HTML5, including HTML (content) and CSS (style).
- Basic web page navigation
- Using git and GitHub
You'll be creating a whole web page from scratch, from creating the index.html file, to writing all the <html> tags, adding content and style with CSS.
To complete the assignment, below you'll find numbered TODO lesson steps. While reading this lesson, whenever you come across a TODO step, you are expected to do this step, which may require you to create a file, or insert some HTML, CSS or JavaScript in the appropriate place.
Please follow the instructions closely. Sometimes, however, we may be showing you code examples to make a point, so you only need to add code if we're explicitly telling you to do a lesson step, so please be aware of the actual lesson steps.
We are building a website, to be viewed live on the web at your GitHub page, and it will be viewed in a web browser, like Chrome.
- Sign into GitHub: https://github.com/login
- Sign into Cloud9 using GitHub: Always sign into Cloud9 using GitHub - this allows you to pair your code repositories at GitHub with your Cloub9 workspaces. Click this link, then look for the cat-icon on Cloud9, as shown here (screens might look somewhat different - don't panic!):

Once you click on the cat icon to sign in to Cloud9 using GitHub, you will eventually be taken to a temporary webpage on GitHub. On this page, GitHub will ask you to authorize Cloud9 to use your account. Click the green authorize button to move forward. You will then be returned to Cloud9.
Now that you're signed into GitHub and have signed into Cloud9 through GitHub (make sure you're signed into Cloud9 with GitHub), the next step is to create a new repository on GitHub.
GitHub will host a website for each user and organization for free. The feature is called GitHub Pages.
The first thing we need to do is create a new repository on GitHub and name it using the following naming pattern:
yourusername.github.io
Follow these steps and see the screenshot to create a new repository, but NOTE: If you're not signed-in to GitHub, you might see a web page that says 404 (This is not the web page you are looking for). Just sign-in to GitHub on this page and you will be forward to the create new repository page.
Click here to open a new browser tab and create create a new GitHub repository.
- On the Create New Repository page, in the box for **Repository name**, name the repository like `your-github-username.github.io`, replacing `your-github-username` with you actual GitHub username. MAKE SURE your username is spelled correctly, otherwise you'll have problems **(See A)**.
- Enter a description for your repository in the **Description** box, like `My own awesome website!' **(See B)**.
- Select the Public radio button to allow anyone to see this repository **(See C)**.
- Check the "Initialize this repository with a README" box **(See D)**.
- Click the "Add .gitignore" button, and select "Node" from the dropdown. Here, we're just selecting Node because it gives us some default ignore patterns... we'll explain later **(See E)**.
- Click "Create Repository" **(See F)**.
Click to enlarge image

Awesome, you created your repository!
GitHub is where we store and version our code. Cloud9 is where we edit our code. Cloud9 is web-based set of tools for creating software. By working in the cloud, our projects workspace is independent from any one computer. Plus, no matter what operating system you're using, Cloud9 gives us access to Linux, which is preferable for this course.
-
Next step, we need to clone our repository into our Cloud9 workspace, where we will do our work. After creating the repository on GitHub, you'll be brought to the repository's default view. In the top right corner of the screen, you will want to:
A) Click Clone or download (See A). Make sure that "Clone with HTTPS" appears in the top right corner of the dropdown box. PLEASE NOTE: THIS STEP IS IMPORTANT! Make sure Clone with HTTPS is selected! IF it is not, an option to select it should appear in the top right corner of the dropdown box.
B) Click the "Copy URL to clipboard" button (See B).

Nice, you've copied the required URL to clone your repository into Cloud9, which is what we're gonna do next.
-
If you do not have Cloud9 open, open it now in a new browser tab.
-
We need to create a new Cloud9 workspace for our website project. Find the create-new-workspace button in the upper-right-side of the screen, like so:

-
The next screen will ask you to enter more details to create your Cloud9 workspace. You should:
A) Give your Wokspace a name that matches your GitHub repositoy name. Since Cloud9 doesn't allow periods, lets set it as "username-github-io" (See A).
B) Give your Workspace a short description of your choice. It should relate to the project you are building, i.e. "My first Website" (See B).
C) THIS IS IMPORTANT: Make sure "Hosted Workspace" is selected on the next row. This will allow you to paste your HTTPS URL from GitHub (See C).
D) Paste in the URL you copied from your GitHub repository where it says Clone from Git or Mercurial URL (it should still be on your clipboard) (See D).
D) Leave "Choose a template" blank. It may appear that HTML5 is highlighted, but don't change or select any new options.
E) Finally, click the green button "Create Workspace".

When the workspace loads, you'll see something like this:

Awesome, we're ready to create our website!
Right-click in the file system and select New File
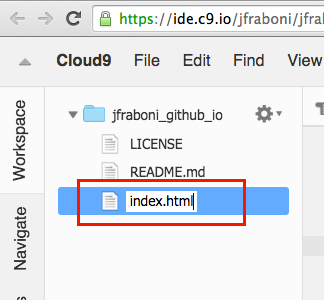
Name the file, index.html, (press return after naming it to save the new name) like so:
Next, double click the index.html file to open it so we can begin editing the file, like so:
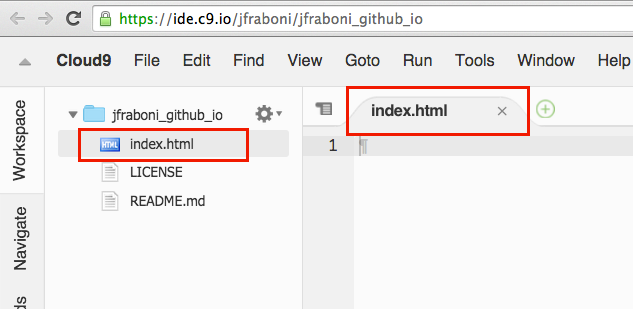
Ok great! We've created our index.html file and opened it in the text editor to start developing our website!
There's really three parts at play in a webpage:
- HTML: Hypertext Markup Language - A set of tags to mark or section-off the structure and content of a webpage.
- CSS: Cascading Style Sheets - A syntax for specifying a set of rules that style web pages. CSS is responsible for how a webpage looks!
- JavaScript: A programming language that allows web pages to respond to user input, to dynamically change the content or appearance of a webpage, or make request to load data into a webpage. Essentially, JavaScript is responsible for the behaviour of a webpage.
Very simply put, HTML is a set of text-tags that tell a web browser how to structure and identify the content of a web page. Developers markup or section off the structure and content of a webpage using HTML tags to section off the parts of the page. Take a look at any webpage, and you'll see things like a header with some type of navigation, maybe a sidebar with more navigation options, and then headings, paragraph text, images and buttons. All of these page elements are marked as such using HTML tags.
Before we start marking-up our webpage, here's a few things to note about HTML Tags:
Try to remember that most HTML tags have both an opening and closing tag. So, when you create a <div> tag, which stands for document division (a way of sectioning off page content), you must also create its closing tag, like so:
<div>
    <!-- All other tags and content in here belong to the <div></div> tag -->
</div>
Some HTML tags, like the <img> tag, do not require a closing tag, because they are not designed to hold content between the opening and closing tag. The image tag specifies the source of the image it should display using what's called a tag attribute, which is a property of the tag, not content of the tag. Check it out:
<img src="path/to/my-image.jpg">Notice, above, that the src attribute is located inside the <img> tag.
Also note that HTML tags are hierarchical, and need to be indented to illustrate their hierarchical relationship! Tags can contain content, like text or images, but can also contain or nest other tags. Have a look:
<div id="content">
    <div id="sidebar">
        <!-- sidebar content goes here -->
    </div>
    <div id="main">
        <!-- main content goes here -->
    </div>
</div>
Above, you'll see this pattern often - notice that we have one <div> tag with an id attribute of content, and inside this tag, we have two other <div> tags, one for a sidebar and one for a main section of the page. The content <div> is the parent of both the sidebar and main <div>, while sidebar and main are siblings. Notice the indentation - this is extremely important as it clearly and visually spells out these hierarchical relationship. Indentation and relationships of tags (and code blocks) are the things newcomers struggle with the most! Be vigilant here!
You need to tell the browser you're writing an HTML page by adding the following at the top:
<!DOCTYPE html>If you're not familiar with the basic tags needed for the structure of an HTML page, you'll want to memorize them: Let's add our <html> tags with <head> and <body> tags nested within.
Like this:
<!DOCTYPE HTML>
<html>
    <head>
    </head>

    <body>
    </body>
</html>
At least for now, every HTML page contains the DOCTYPE, html, head and body tags. The <!DOCTYPE HTML> tag tells the browser you want to render the document using the most recent version of HTML. The opening and closing tags of <html></html> wrap our html page, but are in fact somewhat redundant.
The next two tag sets make up the two sections of any well formed HTML page: The <head></head> tag represents metadata for a webpage, that is, information about the web page used by the browser, providing extra information about the webpage, but is not content. This is similar to the information on the outside of a postal envelope - the to and from address, the stamp, the processing stamp from the post office - information important to the delivery of the letter, but nothing to do with the content of the letter.
Finally, every page has a <body></body> tag, and it is between the body tag that all visible content will be placed. That's right, all content you want to show to the user will be children of the <body>, so pay careful attention to ensure that when you're adding navigation, paragraphs and images tags, you're doing so within the <body> tag.
Ok then, we made the structure of the site so now we need some content! Give your site a title.
The <title> tag of a webpage belongs inside of the <head> tag. So go ahead and add your title <title></title> tag to your <head> tag. This will add your title text to the browser tab. When your done step 4, your whole index.html file should look like this:
<!DOCTYPE HTML>
<html>
    <head>
        <title>Sheba's Amazing Website</title>
    </head>

    <body>
    </body>
</html>Please note: All of the tags used to mark our HTML content will reside between the opening and closing of the <body> tag. So for rest of the HTML tags you create, make sure you place them between <body> and </body> like so:
<body>
    <!-- YOUR HTML TAGS GO HERE  -->
</body>
We're going to create <div> tags to group our content together. The <div> tag stand for document division, and they are special tags that help us divide or group together content on our web page. You can consider them sort of like containers, into which we group content, and those containers can be invisible or styled with visible properties, like a background color, a border, etc.
Go ahead and add the following structure, so that your <body> looks like this:
    <body>
        <div id="all-contents">
            <nav>
            </nav>

            <main>
            </main>
        </div>
    </body>
So, to start grouping together our content in a meaningful way, inside the <body> tag, we created a new document division using the <div> tag. This is going to contain all the site content so we annotated it as such by setting its id attribute to id="all-contents". Attributes are properties that tell us something more specialized about the tag, and you'll come to understand how these work as you work more with HTML.
In particular, the id attribute allows us to uniquely identify an HTML element in our webpage. Technically speaking, when giving an id to an element, this id should be unique within the page - no two elements should share the same id in the same webpage, and this is an important distinction.
Finally, inside our all-contents div, we're going to put the site navigation menu and the main content of our site, so we created opening and closing tags for <nav> and <main>.
Inside the <main> element, create two new <div> elements. These will act as the two columns of our page - the sidebar and the main content, as noted by the class we give each:
            <main>
                <div class="sidebar">
                </div>

                <div class="content">
                </div>
            </main>
Ok, so far, we've sectioned of our webpage, now we need to add some content...
Add the following tags inside of the <div class="content"> tag:
- Create a
<header>element and put your name inside of it. - Below that make a
<p>element and inside it put your position or job title such as "Student at XYZ High."
It's now time to serve your website like a pro, so we can preview it as if looking at it live on the web, only, we won't be live yet, we'll be serving from our Cloud9 workspace. The public won't really be able to see it yet, not really - we'll push our website live to GitHub in a later step so the public can see it, but for now, we're serving in development mode.
With the index.html tab selected in the editor (see A), you can simply press the green Run button (see B).
This will start an Apache web server in a new tab of the Console View, the bottom window pane of the Cloud9 IDE. Once Apache has booted, you can click the URL `https://myusername-github-io-myusername.c9.io/index.html (see C) - this will open a new tab with the appliation running.

Once this tab opens, we recommend popping out the tab into Chrome, into a separate browser tab. To do so, click on the popout button on the right side of the preview tab (see A), like so:

This will give you the website running in a separate Chrome browser tab, like this:
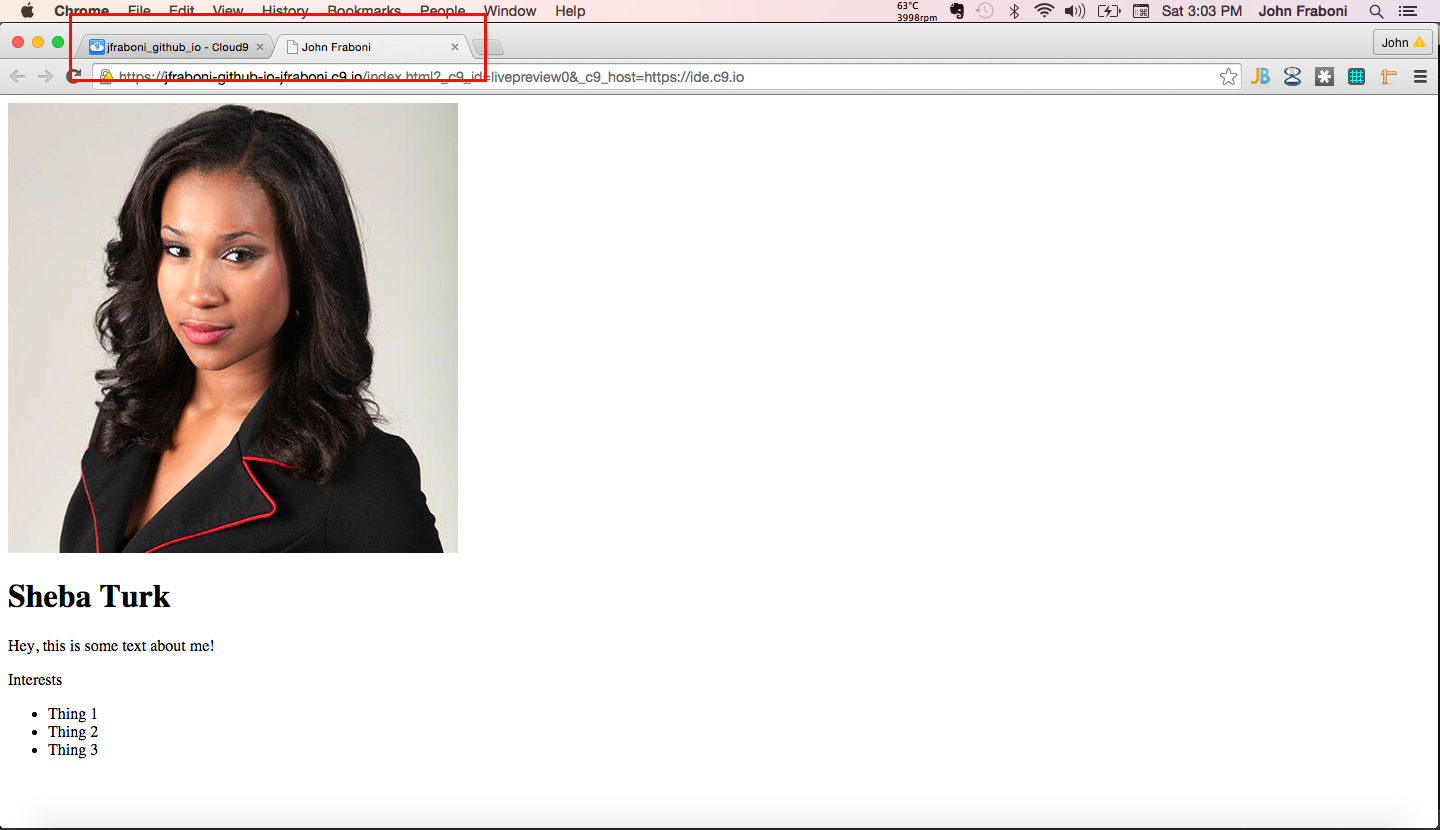
You'll notice above, we have two tabs open in Chrome now - one running your website (the tab that current has focus), and the other tab, (the one with the blue Cloud9 icon) is your Cloud9 workspace. So to continue working, switch to your workspace tab, code a little, save your changes, then switch back to the website tab, and refresh.
As you save your future work, changes to your code will be reflected in your website - you don't have to press "Run" again, and shouldn't - as long as the Apache web server is still running - you need only to switch back to the tab running your website, and only press the refresh button on the Chrome tab with the running in it.
Be careful not to open too many processes in Cloud9. Cloud9 is a powerful set of tools, and it's easy to feel a little overwhelmed by all the menus and buttons. We want you to start using industrial tools, and it will benefit you to watch some YouTube videos on "getting started with Cloud9" to learn more about how to use Cloud9.
For our purposes, and in the short term, you need only follow the above steps to serve the index.html file of your website, once. Doing so will open up a process in its own tab in the Console View. This process is an Apache web server that is serving up your index.html.
index.html is the default web page returned when we ask a web browser to fetch a URL that does not explicit request a particular file. So a URL like "www.google.com" will fetch "www.google.com/index.html".
Again, once your Apache webserver is running and serving up your index.html file, your Console View should include only a maximum of three tabs, your bash terminal, perhaps an immediate JavaScript tab, and Apache serving up your index.html file. In other words, the Console View should look like this:

Sometimes, while students are working in other files, they might accidentally press Run again, and Cloud9 will start another process, run another instance of an Apache web server, and serve that file. This is unnecessary, and undesirable. You should only need to be running one web server, that is, one instance of Apache serving your index.html file.
If you find yourself with more than 3 tabs open, stop the extra processes by selecting their tab, pressing the red Stop button, then click the x to close the unnecessary tab. Here's a shot of too many files being served:

Above, you're serving both the index.html file in tab 3 and serving the portfolio.html file in tab 4. Here, you'd want to stop serving in tab 4, and close it.
You need only serve index.html - from there, you can get to any part of your website.
Finally, if for some reason your Apache web server stops, which might happen if you do not revisit your workspace for several days, you need only press the green Run button on the Console View tab where Apache has stopped, like so:
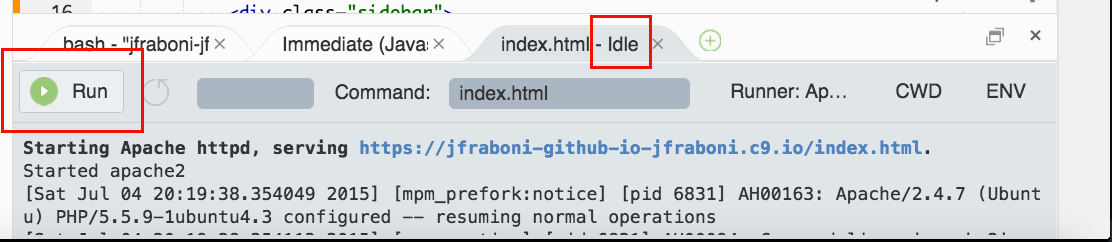
In the above image, notice the tab says "index.html - Idle" - this means the process, Apache is idle and not running. So here, you'd just press the green Run button to restart your Apache server.
Don't worry if this feels very new to you - it is, but you'll get use to it.
- Inside of the
<div class="sidebar">tag, add an<img>tag. More on image tags here. - We need to add the URL of an actual image with the src attribute. Find an image you would like on your page, you can find an image of yourself from Facebook, or anything else using a Google image search. Right-click on the image, and choose 'Copy Image URL.'
- Paste that URL into the src attribute.
So, your full image tag should look this this:
                <div class="sidebar">

                    <img src="http://www.adweek.com/tvspy/files/2013/08/turk2_cropped.jpg">
                </div>
Save your page and preview it. You should see the image now. If you don't, go back and double check that there are no
errors in your <img> tag.
Let's create a section for your interests below the <p> tag (inside of the '[class=content]' div) with a list.
- Create a section element with a
class="interests" - Give the list a title with the
<header>tag and called it 'Interests' - Below that create an unordered list with the
<ul>tag and three sets of<li>tags nested inside
                    <section class="interests">
                        <header>Interests</header>
                        <ul>
                            <li>Thing 1</li>
                            <li>Thing 2</li>
                            <li>Thing 3</li>
                        </ul>
                    </section>
Use your own interests! Save and view your changes.
Should look something like this:

We're going to make a menu. Linking to other pages forms the foundation of the web. Early on, the web was nothing but a bunch of HTML pages linked to one another. That's still true today although there's a lot more going on as well. We're going to link to a portfolio page and create it in the next lesson.
- Inside of the
<nav>tag we created earlier create an unordered list using the<ul>tag. Inside it create two<li>tags to contain your list items - Create a link inside of each list item using the
<a>tag. - Finally give each menu item a name by inserting Home and Portfolio between the opening and closing tags. See the example below.
            <nav>
                <ul>
                    <li><a href="index.html">Home</a></li>
                    <li><a href="portfolio.html">Portfolio</a></li>
                </ul>
            </nav>
Save and view your work. You now have some menu items! The Home link even works since it simply links to the page we are currently working on. The other link is for our portfolio page which we'll build out in the next lesson.
Your site needs a title! Inside of the <nav> before the <ul> tag add an <header> and type your site's title in there.
Like this:
            <nav>
                <header>Sheba's Glorious Website</header>
                <ul>
                    <li><a href="index.html">Home</a></li>
                    <li><a href="portfolio.html">Portfolio</a></li>
                </ul>
            </nav>
Save and view your work. You should see your title inside of the navbar to the left.
We now have a fairly plain website but it's a website! Let's add some style. Here's where CSS comes in!
Copy the entire below section and place it inside the <head> below the <title> tag.
        <style>
            body {
                background: rgb(125, 198, 205);
                color: rgb(45, 45, 45);
                padding: 10px;
                font-family: arial;
            }
            header {
                font-size: 1.5em;
                font-weight: bold;
            }
            #all-contents {
                max-width: 800px;
                margin: auto;
            }

            /* navigation menu */
            nav {
                background: rgb(239, 80, 41);
                margin: 0 auto;
                display: flex;
                padding: 10px;
            }
            nav header {
                display: flex;
                align-items: center;
                color: rgb(255, 255, 255);
                flex: 1;
            }
            nav ul {
                list-style-image: none;
            }
            nav li {
                display: inline-block;
                padding: 0 10px;
            }
            nav a {
                text-decoration: none;
                color: #fff;
            }

            /* main container area beneath menu */
            main {
                background: rgb(245, 238, 219);
                display: flex;
            }
            .sidebar {
                margin-right: 25px;
                padding: 10px;
            }
            .sidebar img {
                width: 200px;
            }
            .content {
                flex: 1;
                padding: 15px;
            }
            .interests header {
                font-size: 1.25em;
            }
        </style>
Ok, we've pasted-in a bunch of style rules between the <style></style> tag, and if we save your work and reload your website, you should see that your page is now styled with some colors and some positioning.
CSS allows us to specify styling rules for our HTML elements. When we say elements, we're talking about all the HTML tags within a webpage. In best practice, we separate the content of an HTML document from the style or presentation of the content. This allows us to change appearence without modifying content, allows styles to be better managed across multiple pages, and creates a cleaner code base.
In order to style HTML elements, we need a way to select the elements.
When we create HTML elements, we can assign them an id or a class. In our HTML so far, we've given one element an id of all-contents and another a class of sidebar. We did this by using the id and class attributes of the <div>. For example:
<div id="all-contents">
    <div class="sidebar"></div>
</div>
By more concretely describing HTML elements by id or class, we can then select those elements by their id or class, and style them the way we like, and for this reason, the rules we specify in CSS are called selectors. We can also select elements by their tag type, as in, body, p, h1, nav.
Selectors and their styling rules tell the web browser which elements to select, and how to style them. In a moment, we are going to add some more style to our <nav> element, and by doing so using the nav selector, we are creating a style rule that will be applied to all nav tags on our webpage.
Selecting an element by id should only return one element, if your web page is well formed, so applying a style rule by id should only style one element on the page.
Selecting an element by its tag type or by its class will style all tags of that type, or all tags of that class.
Finally, in our CSS, we've also shown you two ways to specify selectors, the long form, which is more explicit, and the short form. This is the long form of for an id selector:
[id=all-contents] {
    max-width: 800px;
    margin: auto;
}
However, the same selector can be spelled using the number symbol #, for id, like this:
#all-contents {
    max-width: 800px;
    margin: auto;
}
The short form to specify a CSS selector by class is the dot ., as in:
.sidebar {
    margin-right: 25px;
    padding: 10px;
}
The long form of sidebar class selector is:
[class=sidebar] {
    margin-right: 25px;
    padding: 10px;
}| Type | Long form | Short form |
|---|---|---|
| class | [class=all-contents] { ... } | .all-contents { ... } |
| id | [id=portfolio] { ... } | #portfolio { ... } |
Check it out! We have some style but not much and some elements are too close together. Let's fix that.
Find the nav CSS selector within the <style> you just pasted in place, it looks like this:
nav {
        background: rgb(239, 80, 41);
        margin: 0 auto;
        display: flex;
        padding: 10px;
}- Under the style rule:
margin: 0 auto;addmargin-bottom: 20px; - Save and view the changes. The menu now has some space underneath it!
- Do you like these colors? Remember that all colors can be represented as a combination of red, green, and blue numbers 0-255. See the
rgb(...)functions above? Play around with the values in thergb(...)function calls to use your own colors.
- Google
border-radiusand add it to the<nav>element. - Add a border around the image
We need to do some cleanup before putting your site onto the internet. This step will make working with our site easier in the future by making our site ignore files generated by Cloud 9 and other special directories that we don't need.
- Click on the gear icon at the top left above the project folders and select "Show Hidden Files."
- At the bottom of the
.gitignorefile, on a blank line add.* - Then, on delete lines 26 and 27 which contain
bower_components - Save the
.gitignorefile, and close it. We've asked git to ignore the Cloud9 IDE configuration files - there's no need for us to manage these in our git version control.
Let's put our site on the Internet so that anyone can look at it!
With GitHub Pages, once you push your changes from your Cloud9 workspace up to your GitHub repository, your page will be live on the Internet.
To do so, you'll need to enter the following git commands into your bash terminal. Select the bash terminal in the Console View - the bottom window pane in Cloud9.
Enter the following commands, and be careful to place your spaces correctly and press ENTER after each one. Read the results of each command and check for errors.
First, add all the files we worked into git so that they can be archived in our source control:
-
First, add all the files we worked into git so that they can be archived into a set of changes in our source control:
git add -A -
Then commit everything that has been added to the set of changes:
git commit -m 'A basic website' -
Finally, sync the repository in cloud9 with the one on github by pushing your set of changes. If you are prompted, just type 'yes' to proceed, but you may not be asked.
git push
If asked, enter your Github username and password. Note: While entering your password, the cursor will not move as you type. This is an intentional security feature so that if someone is looking at your screen, they can not see the what you're typing.
You just sent your code to github where it will be backed up and made into a website anyone can see. You should be able to see your code should now appear on the github page from the Setup step above.
Give it a couple minutes and you should be able to view your website live on the web at http://username.github.io! (Where 'username' is your own GitHub username.)
Congratulations! You are LIVE ON THE INTERNET!