Microsoft Entra ID for Customers, Custom Claim Provider Sample for ASP.NET Core.
Why this sample?
The guide "Get started with custom claims providers (preview)" describes how to configure and set up a custom claims provider with Microsoft Entra ID for Customer, using the token issuer start event with Azure Functions.
This project demonstrates how to configure a custom claim provider for token issuance events using ASP.NET Core and Identity.Web. It's ideal for developers looking to extend authentication in ASP.NET Core applications with custom claims, providing detailed guidance and sample code.
Prerequisites
To effectively use this sample, you'll need:
- ASP.NET Core 8: For building the core application.
- Microsoft Visual Studio 2022: Preferably version 17.8 or later, although Visual Studio Code is also compatible.
- ngrok: Essential for creating a public endpoint accessible to the Microsoft Entra ID for Customers Identity Provider.
Note that ngrok has a free service offering that unfortunately cannot be used here. Microsoft Entra ID for customer custom authentication extension require a TLS endpoint. The free version of ngrok offers only http and not https.
If you're don't have an a ngrok account and do not want to invest in one, you're have other choices, for instance:
- You can use another service similar to ngrok. Please search the web for ngrok alternatives.
- You can deploy the API to an Azure App Services. To debug in this scenario, you're can leverage Azure App Service remote debugging.
Step 1: Setting up
-
To run the sample; start by making a fork of the repo for your own GitHub account.
-
Then clone the repo from your GitHub account to your local dev machine.
-
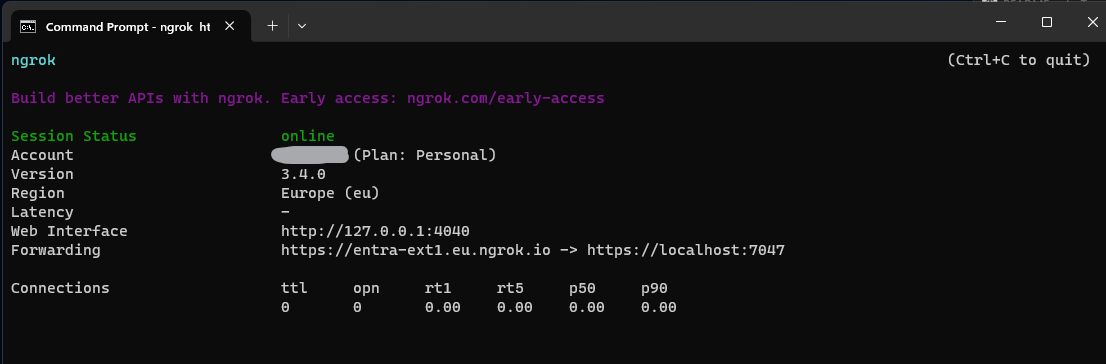
To run the sample on your local dev machine, you're going to need a public end-point for the API that the Microsoft Entra ID for customers Identity Provider can access. For this we're using the 3rd party tool ngrok. Assuming that you've installed and configured ngrok already, you're can fire up a public endpoint with this command from a command prompt:
ngrok http --region=eu --domain=entra-ext1.eu.ngrok.io https://localhost:7047
The result looks something like this:
Optional: you can also add your public end-point to your
ngrok.yml:authtoken: <your auth token> #don't change your auth token. Go to dashboard.ngrok.com if it's missing. region: eu #change this to your region. tunnels: #... existing tunnels migth be here. entra: proto: http hostname: entra-ext1.eu.ngrok.io #pick your dns name. Must end on .<region>.ngrok.io. addr: https://localhost:7047 #the url for the API running on your local developer machine. schemes: - https version: "2"
Note: For more see the ngrok documentation.

Step 2: Create an Entra ID for Customers Tenant
The steps for creating a dedicated tenant are outlined here in the documentation for Microsoft Entra ID for customers: Overview - Customer identity access management (CIAM) | Microsoft Learn. Please follow these steps, in this guide, to set up a dedicated tenant for this sample.
Step 3: Configure Entra ID for Customers
Note: The following steps are a slightly revised version of this guide: Get started with custom claims providers (preview) - Step 2: Register a customer authentication extension.
3.1: Register customer authentication extension
- Sign in to the Microsoft Entra admin center as at least an Application Administrator and Authentication Administrator.
- Browse to Identity > External Identities > Customer authentication extensions.
- Select + Create a custom authentication extension.
- In Basics, select the TokenIssuanceStart event and select Next.
- In Endpoint Configuration, fill in the following properties:
- Name - A name for your custom authentication extension. For example, Token issuance event.
- Target Url - The
{hostname}of your ngrok endpoint - Use the ngrok endpoint you specified in step 1.2 - e.g., https://entra-ext1.eu.ngrok.io/api/CustomClaim. - Description (optional) - A description for your custom authentication extensions.
- Select Next.
- In API Authentication, select the Create new app registration option to create an app registration that represents your function app.
- Give the app a name, for example ASP.NET API authentication events API.
- Select Next.
- In Claims, enter the attributes that you're expect your custom authentication extension to parse from your REST API and will be merged into the token. Add the following claims:
dateOfBirthcustomRolesapiVersioncorrelationId
- Select Next and Create, which registers the custom authentication extension and the associated application registration.
3.2: Grant Admin Consent
-
After your custom authentication extension has been created, open the Overview tab of the new custom authentication extension a wait a few seconds for the setup of the extension to complete.
-
When the extension set has completed, select the Grant permission button to give admin consent to the registered app, which allows the custom authentication extension to authenticate to your API. The custom authentication extension uses
client_credentialsto authenticate to the Azure Function App using theReceive custom authentication extension HTTP requestspermission.Note: during the preview the grant permission flow sometimes get stuck with
redirecting.... You can wait a few seconds and ignore this
The following screenshot shows how to grant permissions.

3.3: Note Down the App Id for the Extension
From the API Authentication page look to the summary section and note down value of App ID:

Step 4: Add Configuration to appsettings.json
You'll be using appsettings.json to hold the necessary configuration for the API.
First you'll need two key values to continue:
- The
App ID, is the value you just noted down in step 3.3. - The
Tenant ID(aka. Directory ID) of your Microsoft Entra ID for customers tenant. To obtain theTenant IDfollow the next step 4.1.
4.1 Getting the App ID and Tenant ID
To get the Tenant ID follow these steps:
-
Sign in to the Microsoft Entra admin center as at least an Application Administrator.
-
Browse to Identity > Applications > Application registrations.
-
Click View all applications in the directory
-
Choose the display name of the extension you're just created. For example ASP.NET API authentication events API.
-
You'll find the
Tenant IDhere: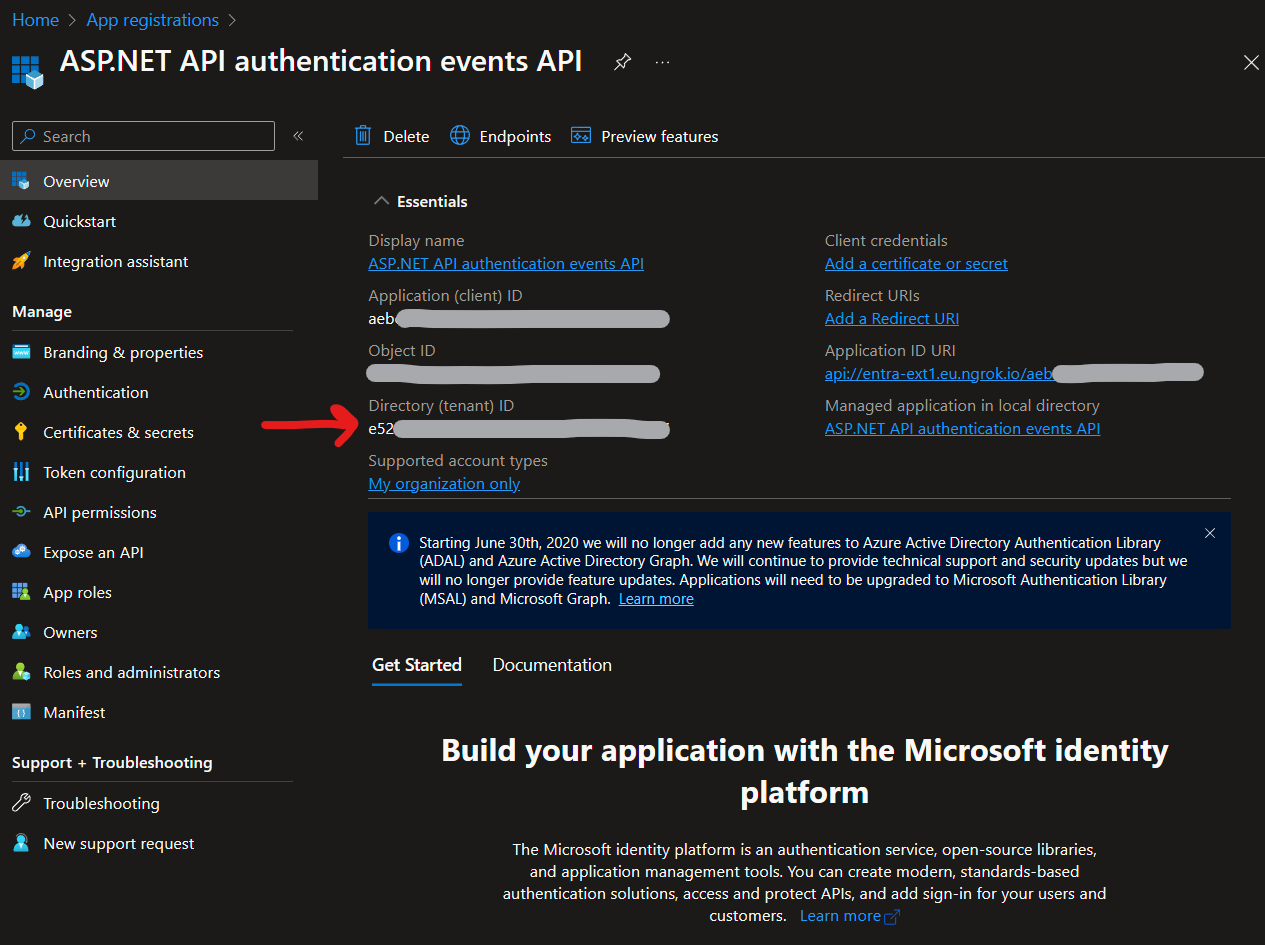

4.2: Configuring appsettings.json
Before we can run the sample, we need to add the configuration to the appsettings.jsonfile (*)
- Rename the file
appsettings.temp.jsontoappsettings.json. It now looks like this.
{
  "Logging": {
    "LogLevel": {
      "Default": "Information",
      "Microsoft.AspNetCore": "Warning"
    }
  },
  "Entra": {
    "AuthorizedParty": [
      "99045fe1-7639-4a75-9d4a-577b6ca3810f"
    ],
    "Authority": "https://login.microsoftonline.com/{{Entra ID tenant id}}/v2.0", //<-- add here
    "Instance": "https://login.microsoftonline.com/",
    "TenantId": "{{Entra ID tenant id}}", //<-- add here
    "Audience": "{{App ID of custom autentication app}}" //<-- add here
  },
  "AllowedHosts": "*"
}- After adding the missing values
App IDandTenant IDto the app settings file, the result should now look something like this:
{
  "Logging": {
    "LogLevel": {
      "Default": "Information",
      "Microsoft.AspNetCore": "Warning"
    }
  },
  "Entra": {
    "AuthorizedParty": [
      "99045fe1-7639-4a75-9d4a-577b6ca3810f"
    ],
    "Authority": "https://login.microsoftonline.com/e524444-bbbb-5555-cccc-777777777777/v2.0",
    "Instance": "https://login.microsoftonline.com/",
    "TenantId": "e524444-bbbb-5555-cccc-777777777777",
    "Audience": "aeb1111-aaaa-bbbb-2222-333333333333"
  },
  "AllowedHosts": "*"
}
Step 5: Configure an OpenID Connect App to Receive Enriched Tokens
To get a token and test the custom authentication extension API, you can use the https://jwt.ms app. It's a Microsoft-owned web application that displays the decoded contents of a token (the contents of the token never leave your browser).
Follow these steps to register the jwt.ms web application:
5.1 Register a test web application
- Sign in to the Microsoft Entra admin center as at least an Application Administrator.
- Browse to Identity > Applications > Application registrations.
- Select New registration.
- Enter a Name for the application. For example, My Test application.
- Under Supported account types, select Accounts in this organizational directory only.
- In the Select a platform dropdown in Redirect URI, select Web and then enter
https://jwt.msin the URL text box. - Select Register to complete the app registration.
The following screenshot shows how to register the My Test application.

5.2 Get the application ID
In your app registration, under Overview, copy the Application (client) ID. The app ID is referred to as the {the_jwt_app_id} in later steps.

5.3 Enable implicit flow
The jwt.ms test application uses the implicit flow. Enable implicit flow in your My Test application registration:
- Under Manage, select Authentication.
- Under Implicit grant and hybrid flows, select the ID tokens (used for implicit and hybrid flows) checkbox.
- Select Save.
Note: Implicit flow is used here for testing and illustration purposes. Avoid using the implicit flow in production: Microsoft identity platform and OAuth 2.0 implicit grant flow | Microsoft Learn.
5.4 Enable your App for claims mapping policy
A claims mapping policy is used to select which attributes returned from the custom authentication extension are mapped into the token. To allow tokens to be augmented, you're must explicitly enable the application registration to accept mapped claims:
- In your My Test application registration, under Manage, select Manifest.
- In the manifest, locate the
acceptMappedClaimsattribute, and set the value totrue. - Set the
accessTokenAcceptedVersionto2. - Select Save to save the changes.
The following JSON snippet demonstrates how to configure these properties.
{
  "acceptMappedClaims": true,
  "accessTokenAcceptedVersion": 2,
  "appId": "ac022222-0000-0000-0000-000000000000",
}Warning: Do not set
acceptMappedClaimsproperty totruefor multi-tenant apps, which can allow malicious actors to create claims-mapping policies for your app. Instead configure a custom signing key.
Step 6: Assign a Custom Claims Provider to Your App
For tokens to be issued with claims incoming from the custom authentication extension, you're must assign a custom claims provider to your application. This is based on the token audience, so the provider must be assigned to the client application to receive claims in an ID token, and to the resource application to receive claims in an access token. The custom claims provider relies on the custom authentication extension configured with the token issuance start event listener. You can choose whether all, or a subset of claims, from the custom claims provider are mapped into the token.
Follow these steps to connect the My Test application with your custom authentication extension:
6.1 Configure custom claims provider
First assign the custom authentication extension as a custom claims provider source:
- Sign in to the Microsoft Entra admin center as at least an Application Administrator.
- Browse to Identity > Applications > Enterprise applications.
- In the Overview page, under Managed application in local directory, select My Test application.
- Under Manage, select Single sign-on.
- Under Attributes & Claims, select Edit.
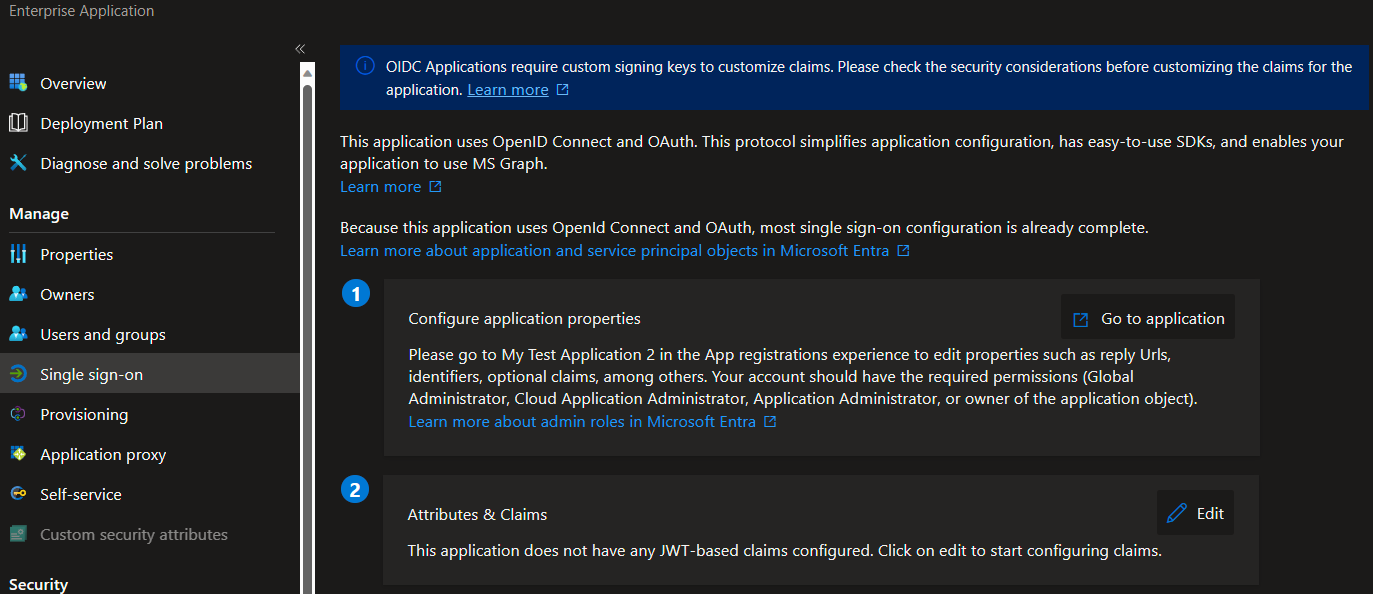
- Expand the Advanced settings menu.
- Select Configure against Custom claims provider.
- Expand the Custom claims provider drop-down box, and select the Token issuance event you're created earlier.
- Select Save.

6.2 Add new claims
Next, assign the attributes from the custom claims provider, which should be issued into the token as claims:
- Select Add new claim to add a new claim. Provide a name to the claim you're want to be issued, for example dateOfBirth.
- Under Source, select
Attribute, and choosecustomClaimsProvider.DateOfBirthfrom the Source attribute drop-down box.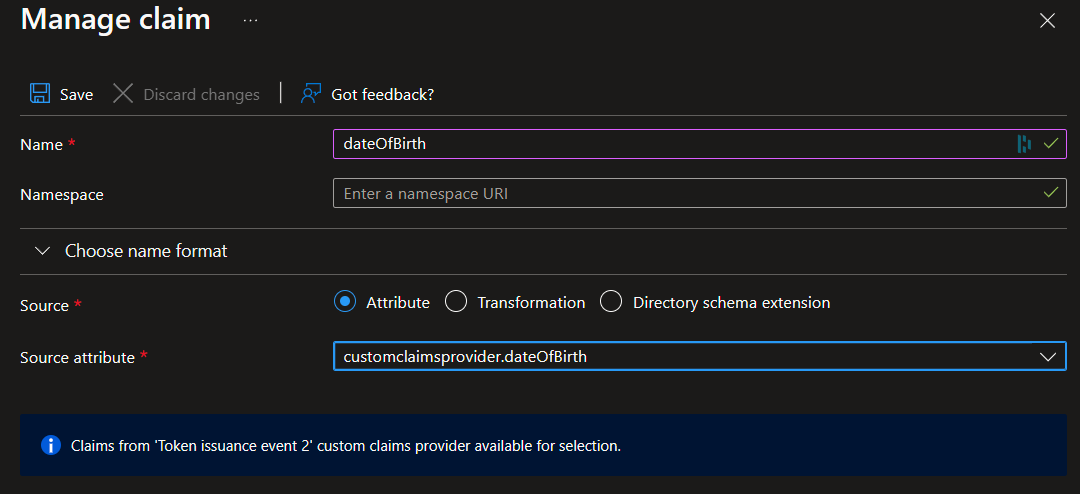
- Select Save.
- You can repeat this process to add the other three attributes:
customClaimsProvider.customRolescustomClaimsProvider.apiVersioncustomClaimsProvider.correlationId

Step 7: Test the application (jwt.ms)
To test your custom claim provider, follow these steps:
-
Open a new private browser and navigate and sign-in through the following URL.
https://login.microsoftonline.com/{tenant_id}/oauth2/v2.0/authorize?client_id={the_jwt_app_id}&response_type=id_token&redirect_uri=https://jwt.ms&scope=openid&state=12345&nonce=12345 -
Replace
{tenant_id}with your tenant ID, tenant name, or one of your verified domain names. For example,contoso.onmicrosoft.com. -
Replace
{the_jwt_app_id}with the My Test application registration ID. -
After logging in, you'll be presented with your decoded token at
https://jwt.ms. Validate that the claims from the Azure Function are presented in the decoded token, for example,dateOfBirth.
Step 8 (optional): Local Debugging of the Custom Extensions API
If you've set a debugging breakpoints in the API code the process described in step 7 above will fail, as you're running the http request - i.e., the Entra ID identity provider will detect the delay in the response and the authentication will be rejected.
For more details see: Troubleshoot a custom claims provider - Microsoft identity platform | Microsoft Learn
To attach a debugger to the API, we need a way to test the API without involving Entra ID identity provider in the flow.
To accommodate testing and debugging the appsettings.json in the sample code defines AuthorizedPartyas an array, which allows you to specify additional authorized parties:
...
  },
  "Entra": {
    "AuthorizedParty": [
      "99045fe1-7639-4a75-9d4a-577b6ca3810f", // <- this is all we need for production
      "{{2nd authorized party for testing (GUID)}}" // <- this is for testing/debugging purposes only.
    ],
...
By adding a second authorized party, we can obtain a valid access token for this authorized party and then use it to test the API.
8.1 Setting up for debugging
-
Let's specify the
My Test Applicationas an additional authorized party by adding the client ID (i.e,{the_jwt_app_id}) to theAuthorizedPartyarray:"AuthorizedParty": [ "99045fe1-7639-4a75-9d4a-577b6ca3810f", // <- this is all we need for production "ac022222-0000-0000-0000-000000000000" // <- replace with the {the_jwt_app_id} guid ],
-
Let's use a .http file to run http requests. In your Visual Studio project rename the file
test.temp.httptotest.httpin theHttpdirectory in: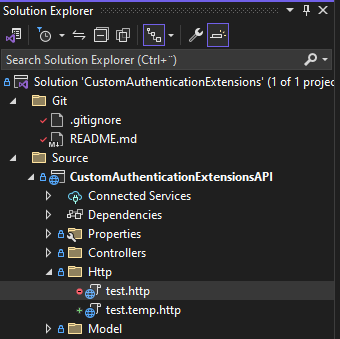
-
The .http file include some variable that we need to specify. We will do this in the following steps.

Note: For more about using the .http file this short video by Mads Kristensen can be highly recommended: New .http file support in Visual Studio 2022.
8.2 Obtaining an access token for My test application
Your API is protected by a Microsoft Entra access token. You can test your API by obtaining an access token. After you've acquired an access token, pass it in the HTTP Authorization header.
To obtain an access token, follow these steps
-
Sign in to the Microsoft Entra admin center as at least an Cloud Application Administrator.
-
Browse to Identity > Applications > Application registrations.
-
Click View all applications in the directory
-
Select the My Test Application 2 app registration you created previously for jwt.ms.
-
If you're haven't created an app secret, follow these steps:
- Select Certificates & secrets > Client secrets > New client secret.
- Add a description for your client secret.
- Select an expiration for the secret or specify a custom lifetime.
- Select Add.
- Record the secret's value for use in your client application code. This secret value is never displayed again after you're leave this page.
-
Fill out the first set of variables in the .http file you're renamed in 8.1:
# For more info on HTTP files go to https://aka.ms/vs/httpfile

### Get bearer token for app
@tenantId=<Tenant Id>
@clientId=<Client Id | {the_jwt_app_id} >
@clientSecret=<Secret's value>
@audience=<Client id of the extension api>
@api_host=<api host name>
@scope=api://{{api_host}}/{{audience}}/.default
The result should now look something like this:

-
Click Send request above the
GET https://login.microsoftonline.com/...command. -
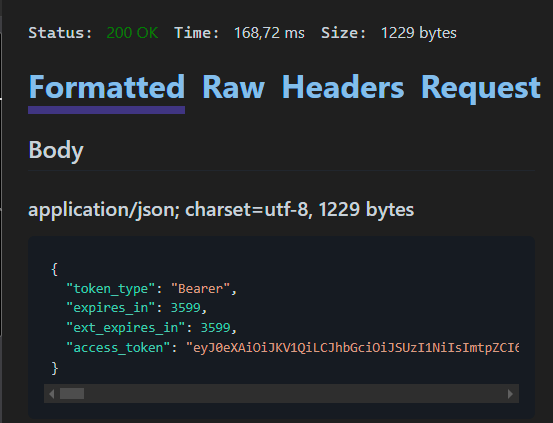
If send request is successful you're should now see a result like this:
-
You'll need the value of
access_tokenin the next step. Copy the value without the quotes - e.g., :eyj0eXAiOiJKV1QiLCJ....'


8.4 Call extension authorization API with the access token
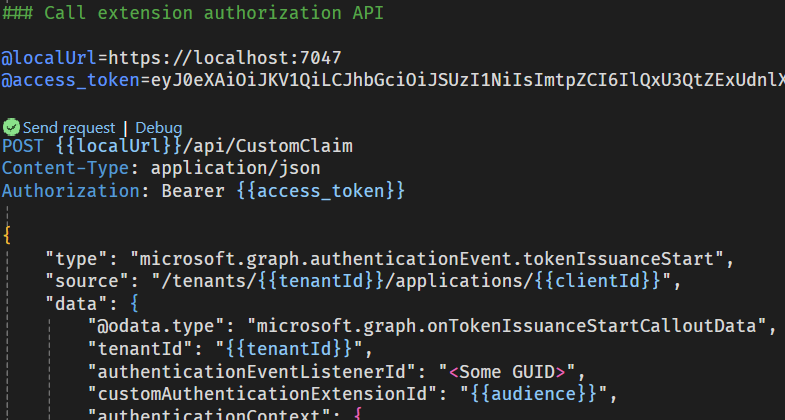
- Add the access token string to the
@access_tokenvariable for thePOST {{localUrl}}/api/CustomClaimhttp request. - The result should now look like this:
- To run the http send request for
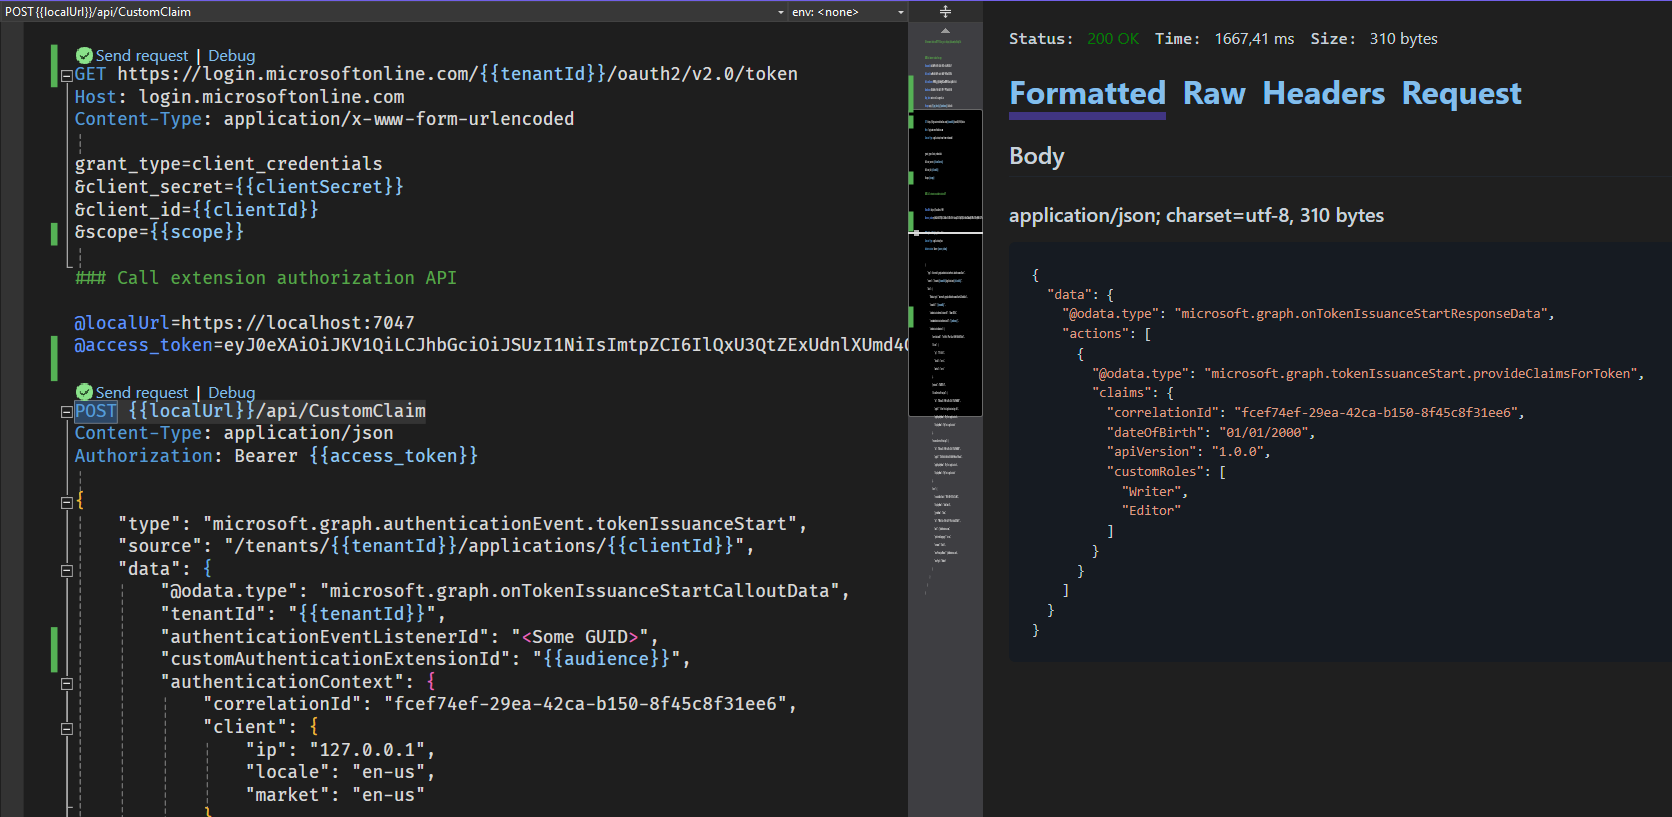
POST {{localUrl}}/api/CustomClaim:- Run the Visual Studio project (F5)
- When the project is running, press Send request.
- The result should now look like this:


Note: For more details about the json payload see here: Custom claims provider reference - Microsoft identity platform | Microsoft Learn
Notes
(*) In a production environment the app setting values in appsettings.json should likely be defined as environment values in Azure App Services, or even better stored in Azure App Configuration, for proper configurations management.