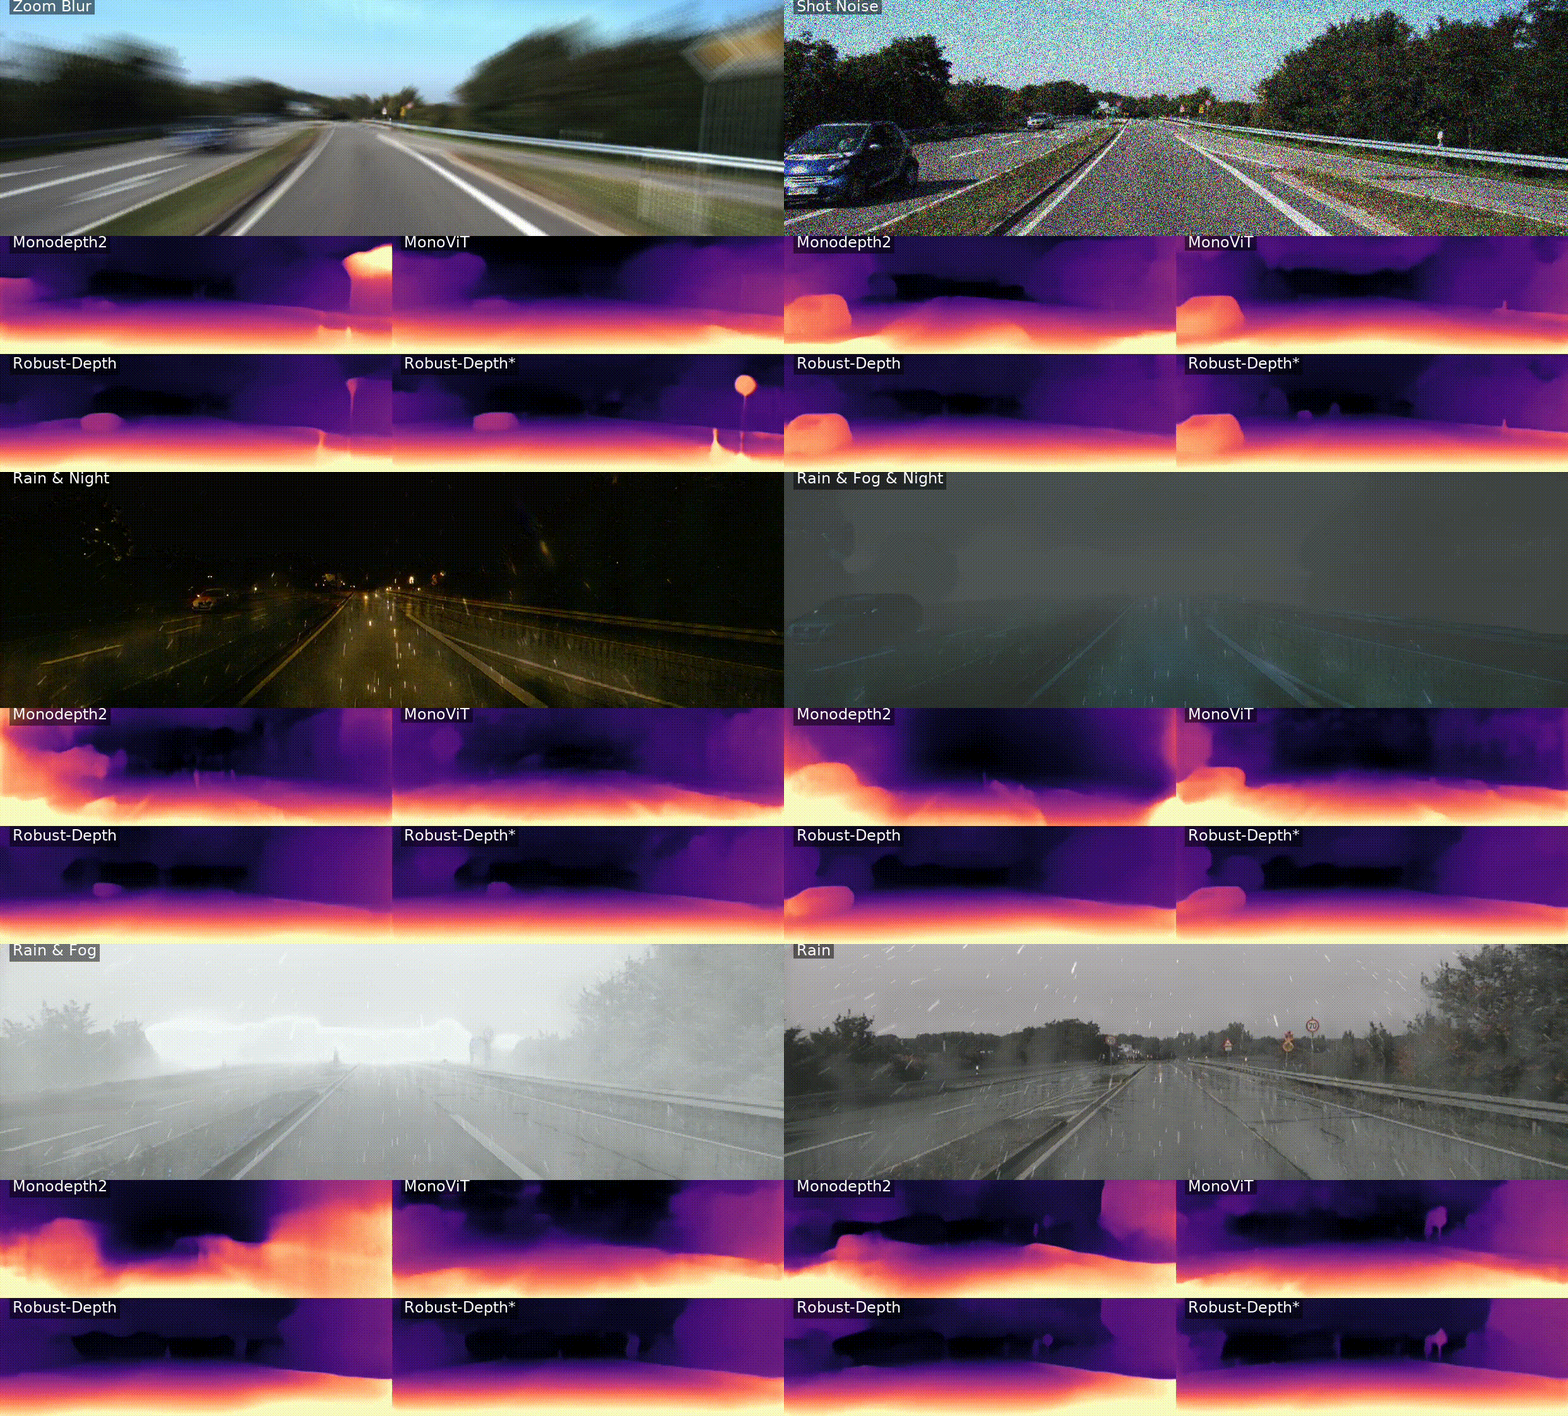
**Self-supervised Monocular Depth Estimation: Let's Talk About The Weather
[Arxiv] [Project Page]
If you find our work useful in your research, kindly consider citing our paper:
@InProceedings{Saunders_2023_ICCV,
    author    = {Saunders, Kieran and Vogiatzis, George and Manso, Luis J.},
    title     = {Self-supervised Monocular Depth Estimation: Let's Talk About The Weather},
    booktitle = {Proceedings of the IEEE/CVF International Conference on Computer Vision (ICCV)},
    month     = {October},
    year      = {2023},
    pages     = {8907-8917}
}
The models were trained using CUDA 11.1, Python 3.7.4 (conda environment), and PyTorch 1.8.0.
Create a conda environment with the PyTorch library:
conda env create --file environment.yml
conda activate robustdepthWe use the KITTI dataset and follow the downloading/preprocessing instructions set out by Monodepth2. Download from scripts;
wget -i scripts/kitti_archives_to_download.txt -P data/KITTI_RAW/
Then unzip the downloaded files;
cd data/KITTI_RAW
unzip "*.zip"
cd ..
cd ..
Then convert all images to jpg;
find data/KITTI_RAW/ -name '*.png' | parallel 'convert -quality 92 -sampling-factor 2x2,1x1,1x1 {.}.png {.}.jpg && rm {}'
Here, we have the flexibility to create any augmentations we desire before commencing the training process. Once we have generated the augmented data using the steps outlined below, we can proceed to train using only those augmented images.
Creating augmentations can be extremely time-consuming, each augmentation section has an approximated time for the processes. Certain augmentations can be skipped to save time. However, these arguments must be removed in Robust-Depth/experiments/train_all.sh. For example, if you choose not to create the rain augmentation, --do_rain must be removed from Robust-Depth/experiments/train_all.sh
├── KITTI_RAW
    ├── 2011_09_26
    ├── 2011_09_28
    │   ├── 2011_09_28_drive_0001_sync
    │   ├── 2011_09_28_drive_0002_sync
    |   │   ├── image_00
    |   │   ├── image_01
    |   │   ├── image_02
    |   │   |   ├── B
    |   │   |   ├── blur
    |   │   |   ├── data
    |   │   |   ├── dawn
    |   │   |   ├── dawn+fog
    |   │   |   ├── dawn+rain
    |   │   |   ├── dawn+rain+fog
    |   │   |   ├── defocus_blur
    |   │   |   ├── depth
    |   │   |   ├── dusk
    |   │   |   ├── dusk+fog
    |   │   |   ├── dusk+rain
    |   │   |   ├── dusk+rain+fog
    |   │   |   ├── elastic_transform
    |   │   |   ├── fog
    |   │   |   ├── fog+night
    |   │   |   ├── frost
    |   │   |   ├── G
    |   │   |   ├── gaussian_noise
    |   │   |   ├── glass_blur
    |   │   |   ├── greyscale
    |   │   |   ├── ground_snow
    |   │   |   ├── impulse_noise
    |   │   |   ├── jpeg_compression
    |   │   |   ├── night
    |   │   |   ├── pixelate
    |   │   |   ├── R
    |   │   |   ├── rain
    |   │   |   ├── rain+fog
    |   │   |   ├── rain+fog+night
    |   │   |   ├── rain_gan
    |   │   |   ├── rain+night
    |   │   |   ├── shot_noise
    |   │   |   ├── snow
    |   │   |   ├── zoom_blur
    |   │   |   ├── timestamps.txt
    |   |   ├── image_03
    |   │   ├── oxts
    |   │   ├── velodyne_points
    │   ├── calib_cam_to_cam.txt
    │   ├── calib_imu_to_velo.txt
    │   ├── calib_velo_to_cam.txt
    ├── 2011_09_29
    ├── 2011_09_30
    └── 2011_10_03
| Model Name | Sunny Abs_Rel | Bad Weather Abs_Rel | Model resolution | Model |
|---|---|---|---|---|
ViT |
0.100 | 0.114 | 640 x 192 | ViT |
Resnet18 |
0.115 | 0.133 | 640 x 192 | Resnet18 |
We must prepare ground truth files for validation and training.
python Robust-Depth/export_gt_depth.py --data_path data/KITTI_RAW --split eigen
python Robust-Depth/export_gt_depth.py --data_path KITTI_RAW --split eigen_zhou
python Robust-Depth/export_gt_depth.py --data_path KITTI_RAW --split eigen_benchmark
The models can be trained on the KITTI dataset by running:
bash Robust-Depth/experiments/train_all.sh
The hyperparameters are defined in the script file and set at their defaults as stated in the paper.
To train with the vision transformer please add --ViT to train_all.sh and see MonoViT's repository for any issues.
Feel free to vary which augmentations are used.
Finally, as Robust-Depth can have many further applications, we provide a simple step-by-step solution to train with one's own augmentations. Here we will add a near-infrared augmentation as an example.
- First create the augmentation on the entire KITTI dataset in the same format as above (in this case called NIR)
- Enter Robust-Depth/options.py and add self.parser.add_argument("--do_NIR", help="NIR augmentation", action="store_true")
- Inside Robust-Depth/trainer.py, add do_NIR_aug = self.opt.NIR to line 155 and line 181. Then add NIR:{self.opt.NIR} to line 233
- Inside Robust-Depth/datasets/mono_dataset.py, add do_NIR_aug=False to line 70 and self.do_NIR_aug = do_NIR_aug to line 110
- Inside Robust-Depth/datasets/mono_dataset.py, add 'NIR':self.do_NIR_aug to line 303 (where 'NIR' is the augmented images folder name)
- Now inside the Robust-Depth/experiments/train_all.sh split add --do_NIR (removing other augmentations if you wish) and proceed with training
We provide the evaluation for the KITTI dataset. If a ViT model is used as the weights, please use --ViT when evaluating below.
python Robust-Depth/evaluate_depth.py --load_weights_folder {weights_directory} --eval_mono --data_path data/KITTI_RAW --eval_split eigen
python Robust-Depth/evaluate_depth.py --load_weights_folder {weights_directory} --eval_mono --data_path data/KITTI_RAW --eval_split eigen_benchmark
python Robust-Depth/evaluate_depth.py --load_weights_folder {weights_directory} --eval_mono --data_path data/KITTI_RAW --eval_split eigen --robust_test
python Robust-Depth/evaluate_depth.py --load_weights_folder {weights_directory} --eval_mono --data_path data/KITTI_RAW --eval_split eigen_benchmark --robust_test
python Robust-Depth/evaluate_depth.py --load_weights_folder {weights_directory} --eval_mono --data_path data/KITTI_RAW --eval_split eigen --robust_test --robust_augment blur
python Robust-Depth/evaluate_depth.py --load_weights_folder {weights_directory} --eval_mono --data_path data/KITTI_RAW --eval_split eigen_benchmark --robust_test --robust_augment blur
Download the "Different weathers" from the DrivingStereo into a folder called DrivingStereo. Specifically, download the depth-map-full-size and left-image-full-size. These extracted files should be placed inside of the weather condition folder, e.g. sunny.
Next, we create ground truth depth data for the sunny weather conditions (there are four choices sunny, rainy, cloudy and foggy):
python Robust-Depth/export_gt_depth.py --data_path data/DrivingStereo --split sunny
Now we can run the evaluation:
python Robust-Depth/evaluate_depth.py --eval_mono --load_weights_folder {weights_directory} --data_path data/DrivingStereo --eval_split sunny
Evaluation for Cityscape Foggy and NuScenes-Night coming soon.
- Monodepth2 (ICCV 2019)
- MonoViT
- Rain-Rendering
- CoMoGAN
- CycleGAN
- robustness
- AutoMold
