Cloud9 Environment For Online Processing of TozStore Data
This Repository includes instructions for easily setting up a cloud based command line environment/unix console and IDE to process large files that are securely stored using TozStore. This document is designed to be usable by people that have never interacted with Amazon AWS previously. In many cases the official documentation will be linked too, and then screenshots will be included as additional support.
Upon following all of the steps, you will have an AWS account containing an AWS Cloud9 instance, a cloud based integrated development environment. The Cloud9 instance will contain Python scripts to help download large files from TozStore, move them to an AWS S3 bucket on your AWS account and store meta data in an AWS RDS database running Postgresql 10, which is also hosted on your account.
Things you will need
- An E3DB client (If you are part of an institution you may have been provided one, otherwise a new one can be created. at Tozny.com)
- A form of payment for an AWS account, as of February 2019 all of the default values for this project fell into the AWS Free tier for new customers.
Setting up an Amazon AWS Root Account
The first step is to create a new Amazon AWS Account.
Begin by going to the AWS Home page and click on the Signup button in the upper right hand
corner (you may also see a button that says sign up for free, that works as well). You should now be on a page that resembles

Fill out this page and press continue (as always it is highly recommended to use a new secure password, as this account will be linked to a credit card). Continue through the rest of the signup flow, including entering a credit card and verifying your identity. Additional instructions are available here.
On the Support Plan page you can select no support plan needed, as it is not needed for this setup.

Once completed click on Sign in to the Console

Enter the email address and password that you created during the signup flow and you are in!
This is the time to remind you, if you haven't already, to secure your root account password somewhere safe. We recommend 1Password, alternatively Lastpass is also another option.
Enabling Multi-Factor Authentication (MFA, 2FA) for this account is also recommended, instructions are available here
Creating an administrative user
To follow AWS best practices , the next step is to create a new IAM user with full permissions that is not the root account.
Steps
-
Allow IAM users access to the billing dashboard. The instructions can be found here, AWS Instructions.
-
Click on your account name in the upper right corner (example-account in the screenshot) and then
My Account. you should now be on a page withAccount SettingsandContact Informationsections (and others).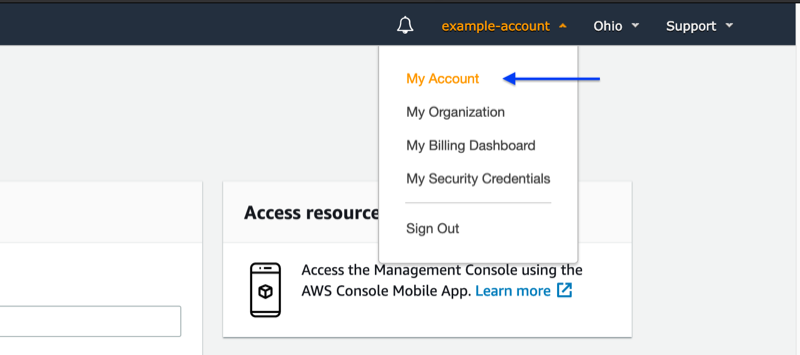
-
You should now be on a page with
Account SettingsandContact Informationsections (and others). While at the top copy down the Account Id (it is a twelve digit number that you will need later).
-
Halfway down the page should be a section called
IAM User and Role Access to Billing, depending on your screen size, some of that may be truncated. To the right side of that is aneditbutton, click that.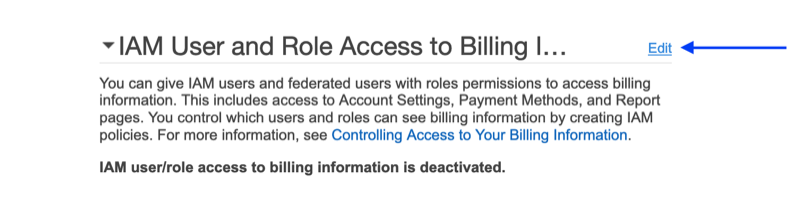
-
Select the
Activate IAM Accesscheckbox that is now visible and press update. Once clicked that checkbox should disappear and a message saying "IAM user/role access to billing information is activated." should be visible. -
Return to the main console page by clicking on the
AWSlogo in the top left corner of the page.
-
-
From the Main page click on
Servicesto open the service selector.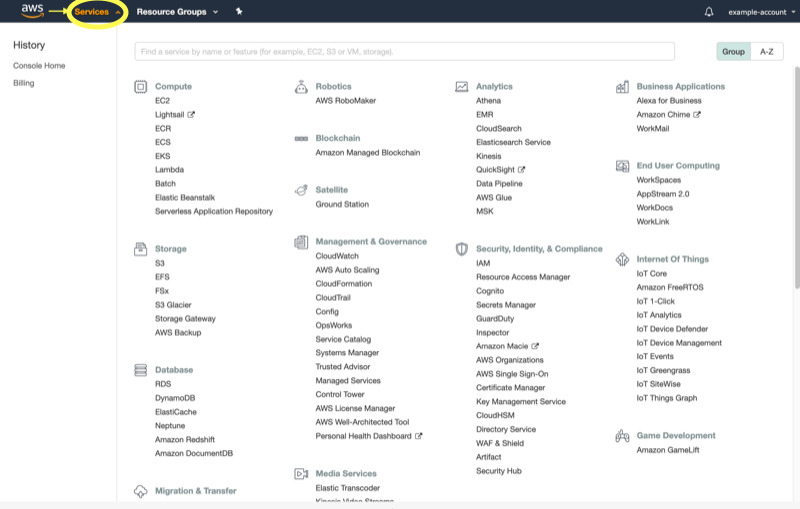
-
In the upper right corner of the page between the account name and
Supportwill be the name of a geographic phrase, such asOhio,Oregon, orUS West. Click on that to open the region selector. For later stages of this tutorial you must selectUS West (Oregon). You will now see that the browser url has becomeus-west-2.console.aws, and the location selector will now sayOregon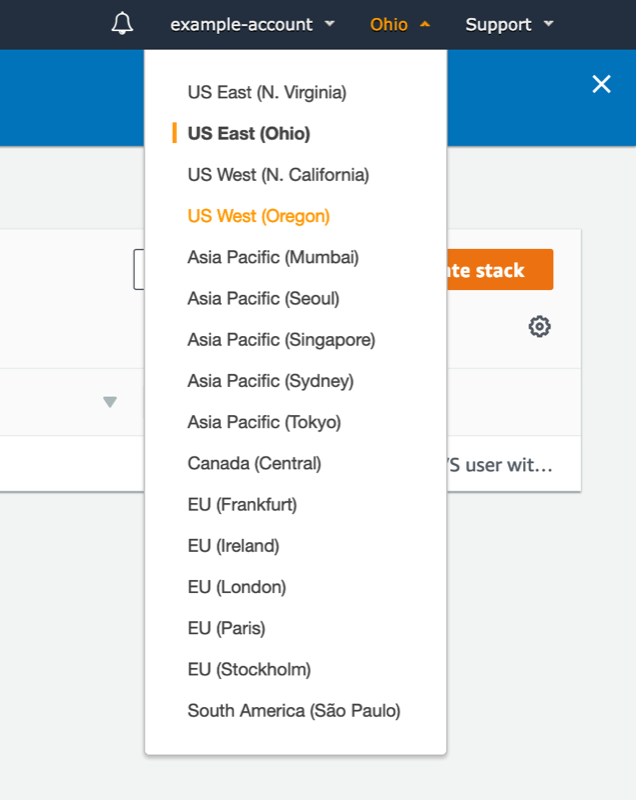

-
Return to the
Servicesdrop down. Listed in theManagement & Governancesections isCloudFormationclick that. (Alternatively in the find a service text field, begin typingCloudFormationand the result that appears can be clicked on).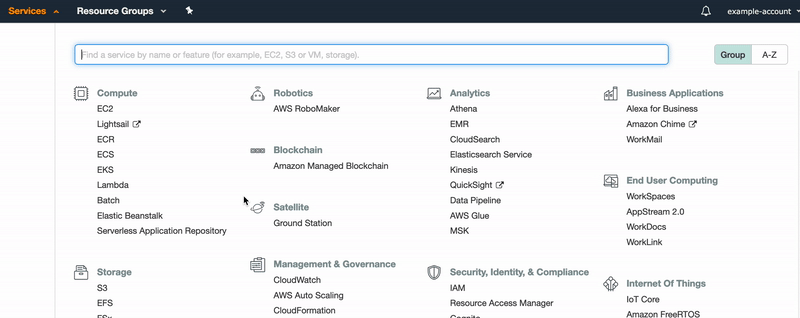
-
On this page there should be a button that says
Create new stack. Click that. Note there are 2 different cloud formation UIs at the moment, if the screenshots don't look right in this section the ones in the next section may be a better visual representation, but the text is very similar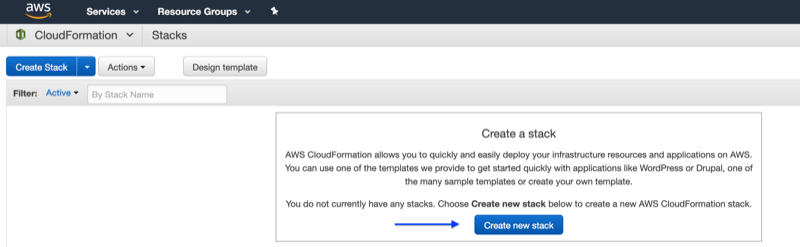
-
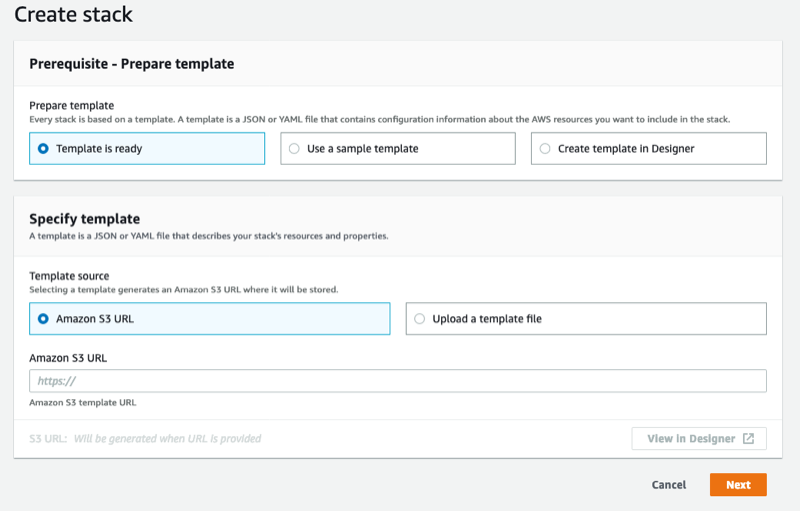
On the next page select the
Specify an Amazon S3 template URLand paste in.https://s3.us-west-2.amazonaws.com/tozny-fedramp-cloudformation/v1/cloud-formation-user.jsonand then press next. A copy of that CloudFormation file also lives in this repository at user-cloud-formation for reference.
-
The next page has 3 parameters that need to be filled out. Once filled press next.
- Stack name: This can be anything you like, but descriptive. Something like
administrative-user-creationis a good choice. - UserName: this is the username that you will use to log in with, I like first initial last name (this value must be 3-41 characters).
- UserPassword: this is the password to log in with that user. Notice that this password is only entered once so make sure it is correctly entered. This account will be able to spend money so make sure the password is unique and strong both password managers mentioned previously can automatically generate a strong password for you.
- Stack name: This can be anything you like, but descriptive. Something like
-
On the next page scroll to the bottom and press next again.
-
You are now on the
Reviewpage. Scroll to the bottom. You will see a blue alert. Activate the I acknowledge check mark and then press create.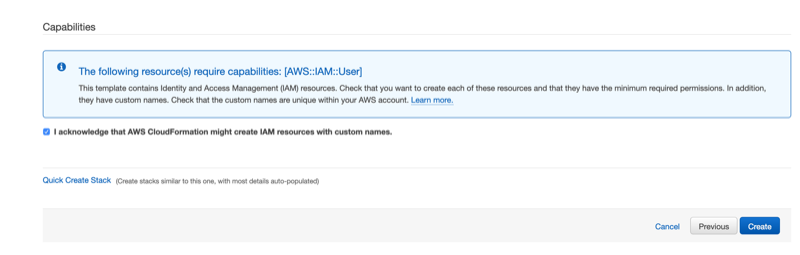
-
This is the stack creation page, you will see that the stack creation process is in progress. This process should not take more than a minute or two. If you refresh the page it will change to
CREATE_COMPLETE.Before

After

-
After this new user has been created, log out of the root user account. (Make sure you have the account id, you will need it to login as the new user).


Logging in as the New IAM User
Now that your new IAM user has been created you can log in as that user.
-
From the main AWS Page hover over
My Account, and then clickAWS Management Console. This will bring you to the root user account login page. -
Press the
Sign in to a different accountlink. -
On that next form enter your 12 digit account number that was written down in the last section and press
next. -
On the next page the account id should be prefilled, and match what was just entered (if not retype the account id). Then enter the username and password of the newly created user and press
Sign In.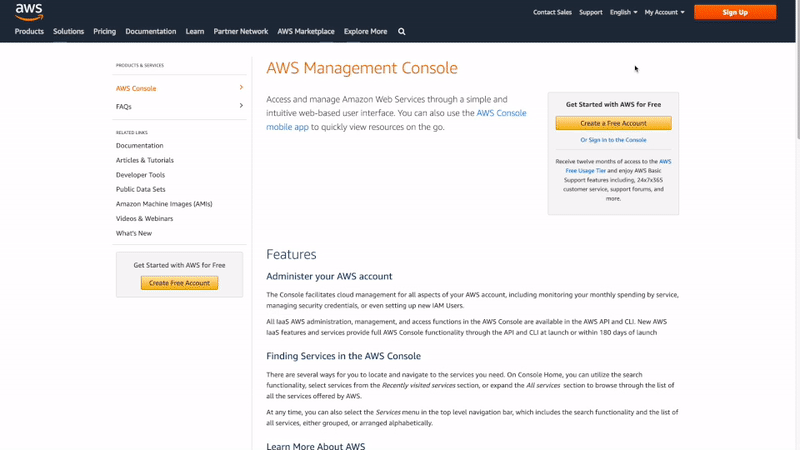
-
You are now logged in and should see in the upper right corner
<Your-user-name@your-account-id>. -
It is recommended at this time that you setup MFA for this account as well. AWS Instructions.
-
From the
Servicesdropdown selectIAMfrom theSecurity, Identity & Compliancesection, or you can search forIAMand select it. -
In the
IAM ResourcesSection clickUsers: 1(This number could potentially be different but should be 1 at this point if only one IAM user has been created).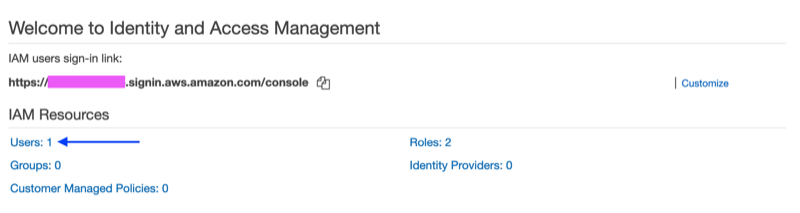
-
Click on the username that you just logged in as.

-
Click on
Security credentials.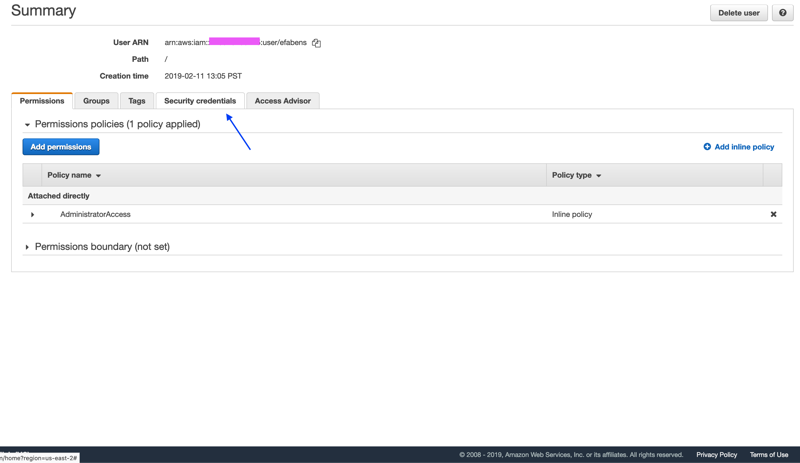
-
Click on
Managenext toAssigned MFA Devices.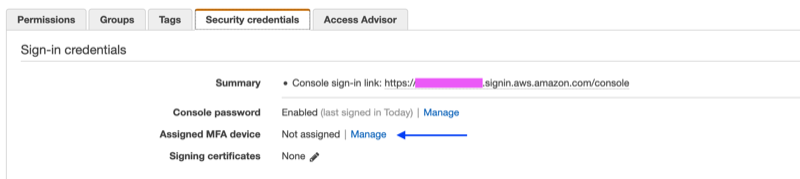
-
Select the type of MFA you want to use, most people will use a virtual MFA such as Google Authenticator, or Authy. If you have a hardware device (such as a Yubi-Key) that will work as well.
-
Follow the instructions on the prompt (For virtual MFA it will look similar to the below screen grab).

-


If you followed this readme as a way to setup a new AWS account and register a single new administrative user you have completed that and AWS is now yours to explore! The next sections will setup an infrastructure that can download and store large files from TozStore for cloud native secure data processing.
Creating an S3 and Cloud9 Stack using CloudFormation
We are going to once again use cloud formation to create this stack.
Make sure that the region has been set to US-West Oregon before beginning this process
If you are not seeing the orange buttons on CloudFormation page there may be a banner, asking if you want to try the new look select in the affirmative and it should match the screenshots
-
From the AWS console page you are going to open the
Servicesdrop down. Then openCloudFormation, either fromManagement & Governanceor by searching. Tip: On the left side of the Services drop down is the history, which lists the four most recently visited services -
Click
create stack.
-
Under Specify Template,
Template sourceselectAmazon S3 URL, and paste inhttps://s3.us-west-2.amazonaws.com/tozny-fedramp-cloudformation/v2/cloud-formation-resources.jsonand click
Next. Most of theNextbuttons in the stack creator requires two clicks to work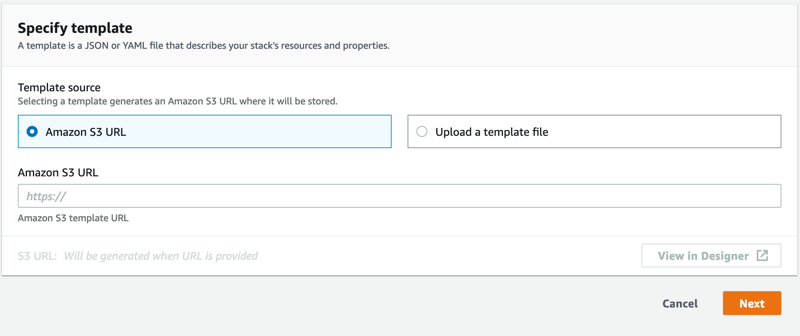
-
On the next page fill in a stack name, the example images use
tozstore-cloud9.The other fields can be left as is. If the default parameters do not suit your needs, other options for cloud9 are here Note: Other options may not fall in the free tier and some options are very expensive
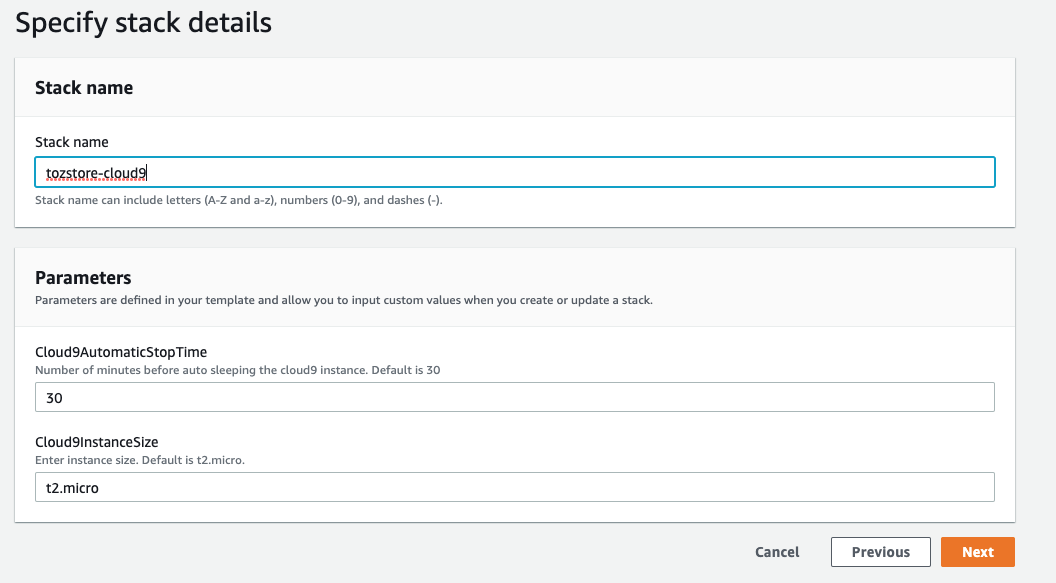
click next
-
The next page is to configure options, in this case no additional configuration is needed, scroll to the bottom and press next.
-
On the review page scroll down to the bottom and press
Create stack.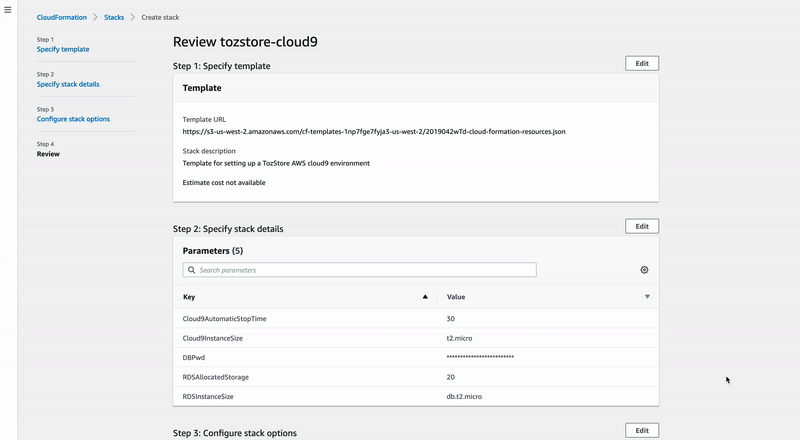
-
This will bring you to the events page for the stack. The building of this stack will take 10-30 minutes.
-
After some time on the main CloudFormation page you should see a list of two new stacks (if following this tutorial on a new AWS account, there should be two total stacks). The stack you named in a previous step and an
aws-cloud9...stack, this is a sub stack that was created by the main stack.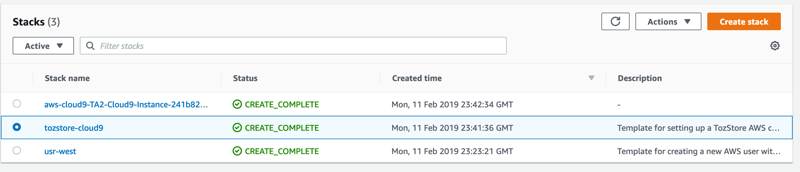


The infrastructure is now setup, all that is left is bootstrapping and configuration
Pieces of information you will need for the next step
-
Now that the stack is built, click on the main stack, in the images this is called
tozstore-cloud9. -
On this page there is an
outputstab, click on that.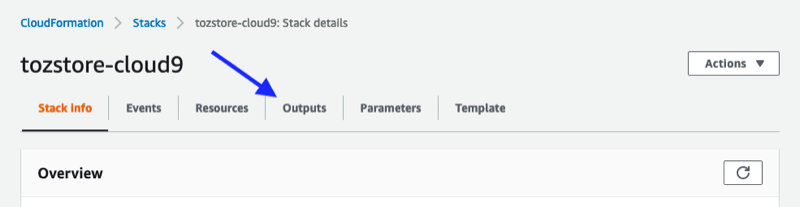
-
On the output page there should be one row with the key,
S3Bucket. Record the value, for the next step.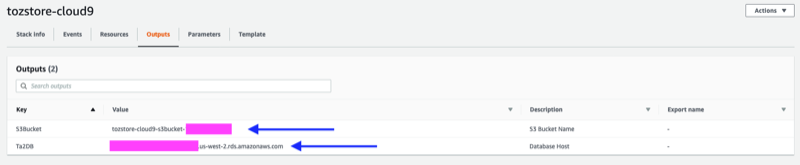


Bootstrapping
-
Open up the
Servicesdrop down and selectCloud9from underDeveloper Tools, as always you can find this by typing in the search field as well. -
On this page you should see an environment names
TA2 Cloud9 Instance, go ahead and clickOpen IDE.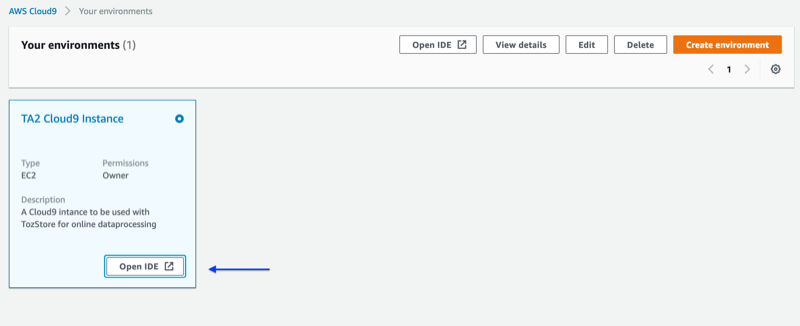
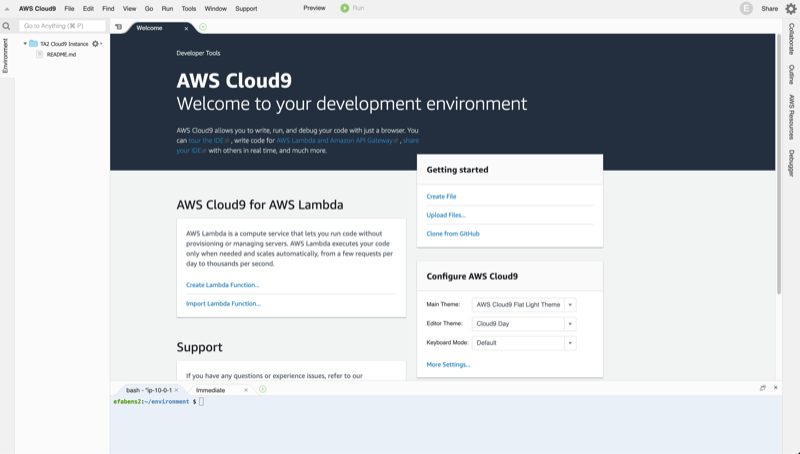
-
It may take a minute to load and then you will see something like this.
-
You need to clone the git repository this README is in, into the cloud 9 instance. To do that type
git clone https://github.com/tozny/tozstore-cloud9-integration.gitinto the terminal at the bottom.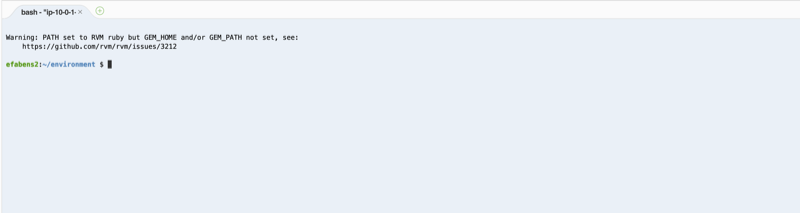
-
There will now be a new folder on the left hand side called
tozstore-cloud9-integration. -
type
cd tozstore-cloud9-integration. You will now be in thetozstore-cloud9-integrationfolder. -
Install the
AWS CLI. This tool will allow you to upload files from cloud9 to the s3 bucket you created, in a previous step. Typemake aws. There will be many lines of output. When complete if you typeawsyou should seeusage: aws [options] <command> <subcommand> [<subcommand> ...] [parameters] To see help text, you can run: aws help aws <command> help aws <command> <subcommand> help aws: error: the following arguments are required: command -
Now you will need to download the Wash Helper Folder, Found in the WASH Portal under the Support Page.
-
Once you have Downloaded the File locally, you can drag and drop into your Cloud9 instance or use File > Upload Local Files. For further details on how to run the script, look at the ReadMe.md found in the Wash Helper Folder.
-
Using the WASH helper scripts you may download any files that you need. Those files will be placed into a directory called
downloads, if the above instructions were followed exactly it will likely be at~/environment/wash-helpers-0.6/downloads. -
The cloud9 instance has a limited amount of hard drive space, in addition this hard drive is not easily accessible to download data from at a later date. To solve these two issues, we will move downloaded data from cloud9 to the S3 bucket that was created. After it has been transferred we will remove the local downloads, to free up space for more data to be downloaded
-
Navigate to the downloads folder
cd ~/environment/wash-helpers-0.6/downloads -
Transfer the directory to S3
aws s3 cp --recursive ./ s3://<BUCKET-NAME-FROM-OUTPUT>/wash-datathe previous command uses the AWS CLI S3 tool to copy, recursively, the current directory to your S3 bucket in thewash-datadirectory. -
In the AWS console you can navigate to the S3 resource and see the bucket that you have created. Clicking into it you will see all of the files that have been transferred to it.
-
Once transferred, the files can be removed from the cloud9 local disk. To accomplish this, in the file viewer find the
downloadsdirectory. Right click it and selectdelete. Clickyeson the confirmation box. The wash helper scripts track all downloaded files so even if they have been deleted locally they will not be downloaded again.


Downloading data
This environment is now all setup and ready to go. You can close the Cloud9 instance and reopen it by clicking launch ide.
If the environment is closed for an extended period of time (by default configured to 30 minutes) the instance will shut down,
all this means is that the next time you launch the instance it will take a little while longer. But it will come back just the way you left it.
Advanced searching
The search system is backed by an elastic search like system, that can run a very broad type of search queries. For full class documentation see here and for some simple examples see here